10
Interior Design Starter Pack Professional Diploma in
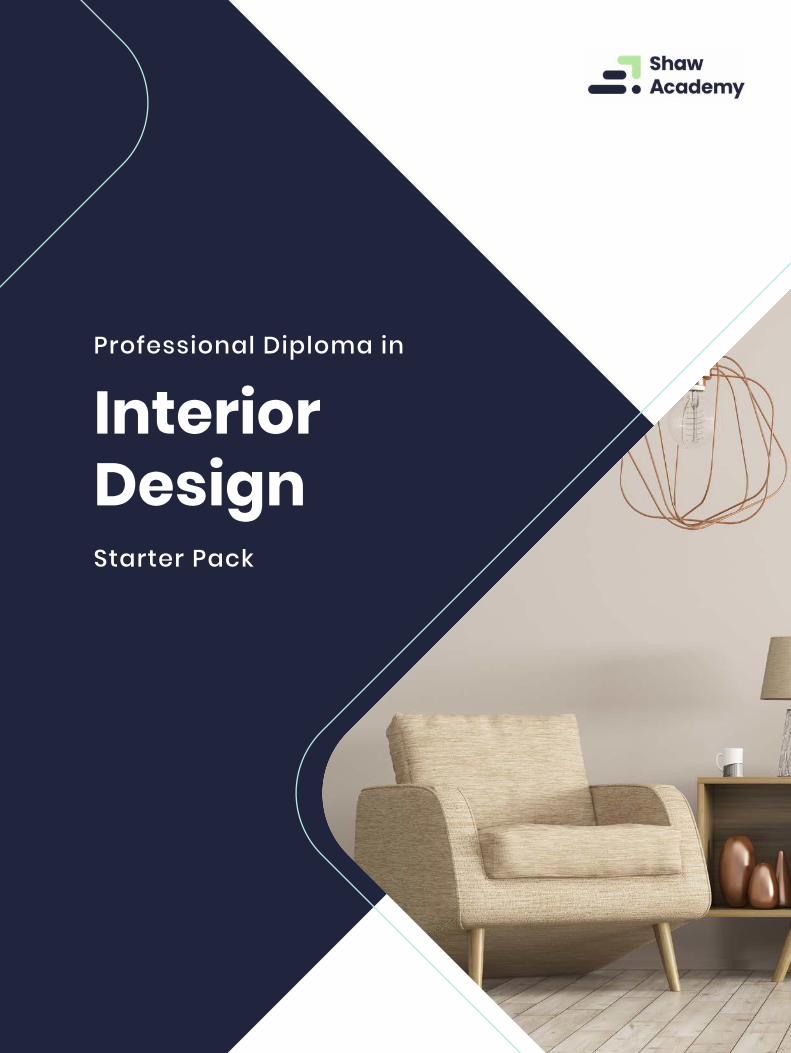
InteriorDesignStarter Pack
Professional Diploma in
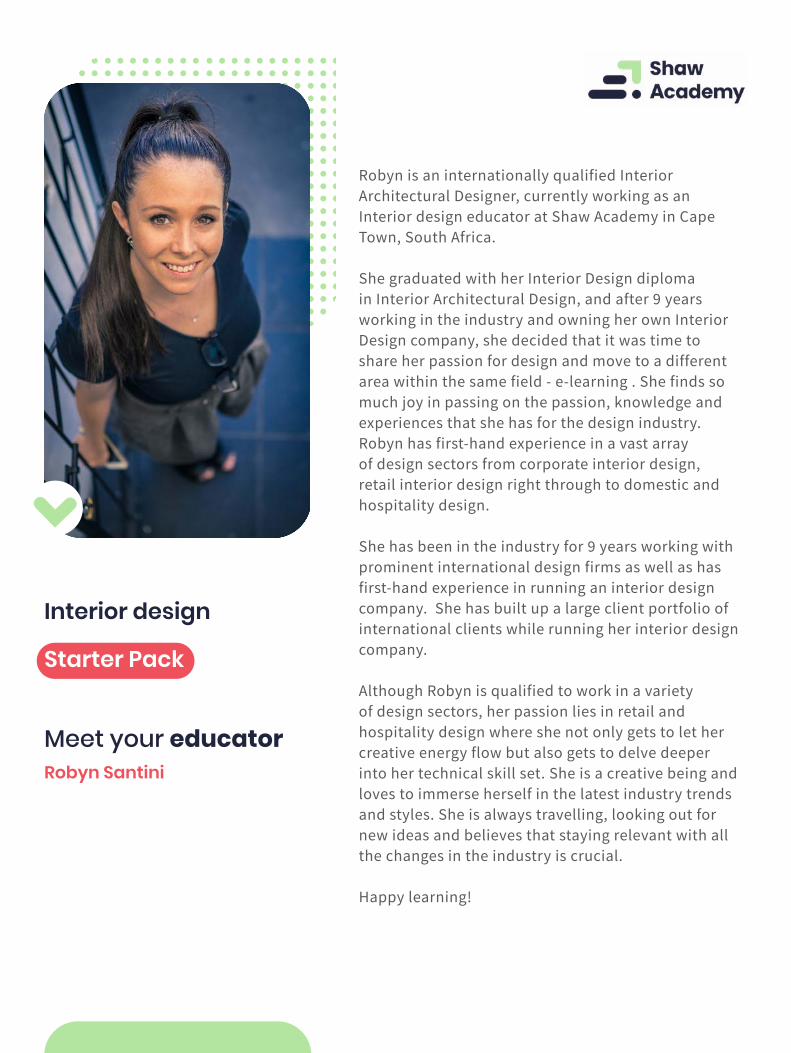
Robyn is an internationally qualified Interior Architectural Designer, currently working as an Interior design educator at Shaw Academy in Cape Town, South Africa.
She graduated with her Interior Design diploma in Interior Architectural Design, and after 9 years working in the industry and owning her own Interior Design company, she decided that it was time to share her passion for design and move to a different area within the same field - e-learning . She finds so much joy in passing on the passion, knowledge and experiences that she has for the design industry. Robyn has first-hand experience in a vast array of design sectors from corporate interior design, retail interior design right through to domestic and hospitality design.
She has been in the industry for 9 years working with prominent international design firms as well as has first-hand experience in running an interior design company. She has built up a large client portfolio of international clients while running her interior design company.
Although Robyn is qualified to work in a variety of design sectors, her passion lies in retail and hospitality design where she not only gets to let her creative energy flow but also gets to delve deeper into her technical skill set. She is a creative being and loves to immerse herself in the latest industry trends and styles. She is always travelling, looking out for new ideas and believes that staying relevant with all the changes in the industry is crucial.
Happy learning!
Robyn Santini
Interior design
Starter Pack
Meet your educator
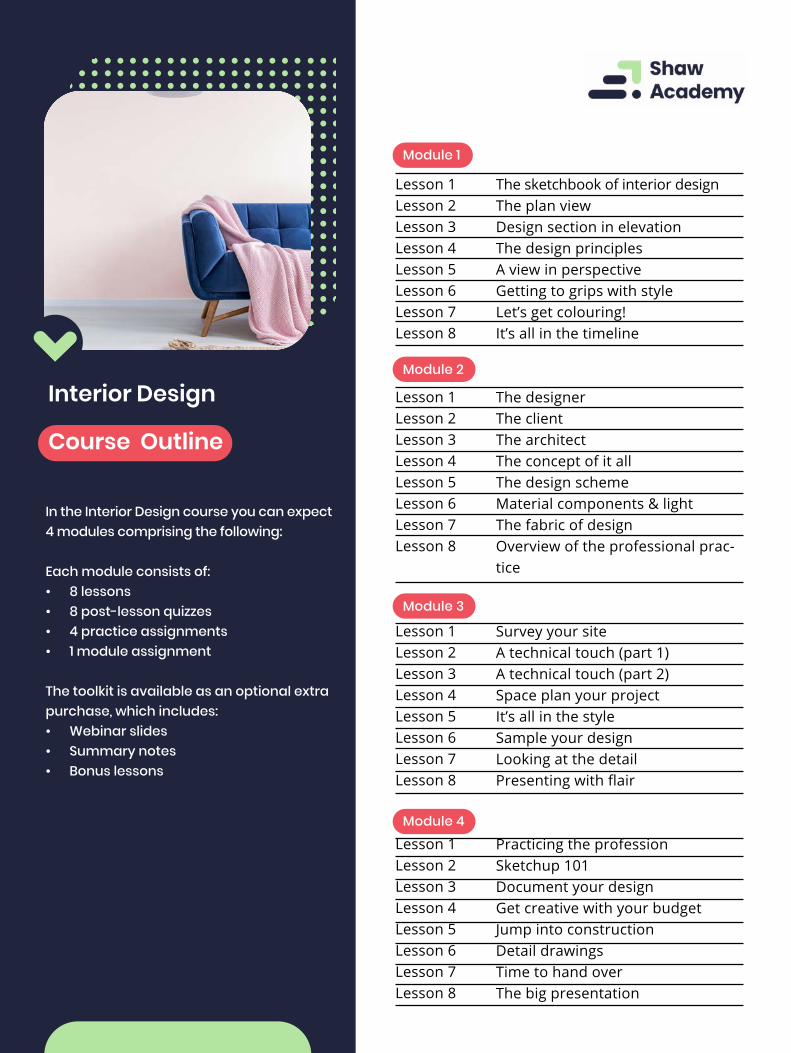
In the Interior Design course you can expect 4 modules comprising the following:
Each module consists of: • 8 lessons • 8 post-lesson quizzes • 4 practice assignments • 1 module assignment
The toolkit is available as an optional extra purchase, which includes: • Webinar slides • Summary notes • Bonus lessons
Interior Design
Course Outline
Lesson 1Lesson 2Lesson 3Lesson 4Lesson 5Lesson 6Lesson 7Lesson 8
Lesson 1Lesson 2Lesson 3Lesson 4Lesson 5Lesson 6Lesson 7Lesson 8
Lesson 1Lesson 2Lesson 3Lesson 4Lesson 5Lesson 6Lesson 7Lesson 8
Lesson 1Lesson 2Lesson 3Lesson 4Lesson 5Lesson 6Lesson 7Lesson 8
The sketchbook of interior designThe plan viewDesign section in elevationThe design principlesA view in perspectiveGetting to grips with styleLet’s get colouring!It’s all in the timeline
The designerThe clientThe architectThe concept of it allThe design schemeMaterial components & lightThe fabric of designOverview of the professional prac-tice
Survey your siteA technical touch (part 1)A technical touch (part 2)Space plan your projectIt’s all in the styleSample your designLooking at the detailPresenting with flair
Practicing the professionSketchup 101Document your designGet creative with your budgetJump into constructionDetail drawingsTime to hand overThe big presentation
Module 1
Module 2
Module 3
Module 4
Interior Design
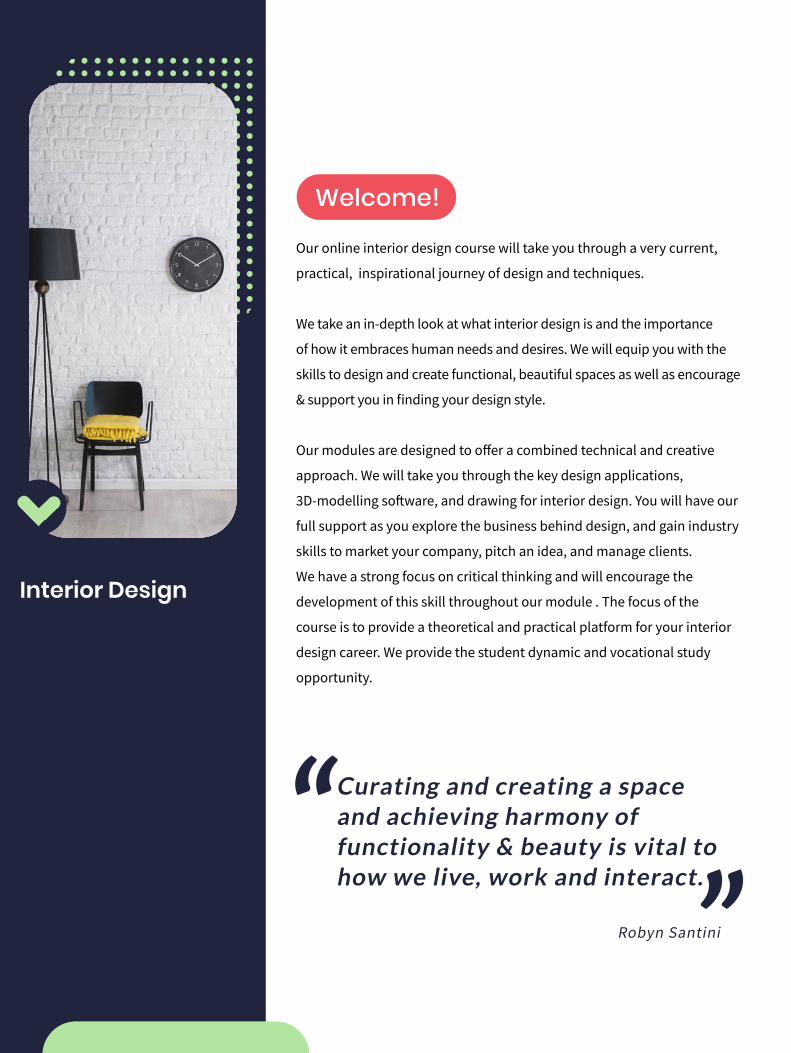
Our online interior design course will take you through a very current,
practical, inspirational journey of design and techniques.
We take an in-depth look at what interior design is and the importance
of how it embraces human needs and desires. We will equip you with the
skills to design and create functional, beautiful spaces as well as encourage
& support you in finding your design style.
Our modules are designed to offer a combined technical and creative
approach. We will take you through the key design applications,
3D-modelling software, and drawing for interior design. You will have our
full support as you explore the business behind design, and gain industry
skills to market your company, pitch an idea, and manage clients.
We have a strong focus on critical thinking and will encourage the
development of this skill throughout our module . The focus of the
course is to provide a theoretical and practical platform for your interior
design career. We provide the student dynamic and vocational study
opportunity.
Robyn Santini
Curating and creating a space and achieving harmony of functionality & beauty is vital to how we live, work and interact.
Welcome!
Interior Design
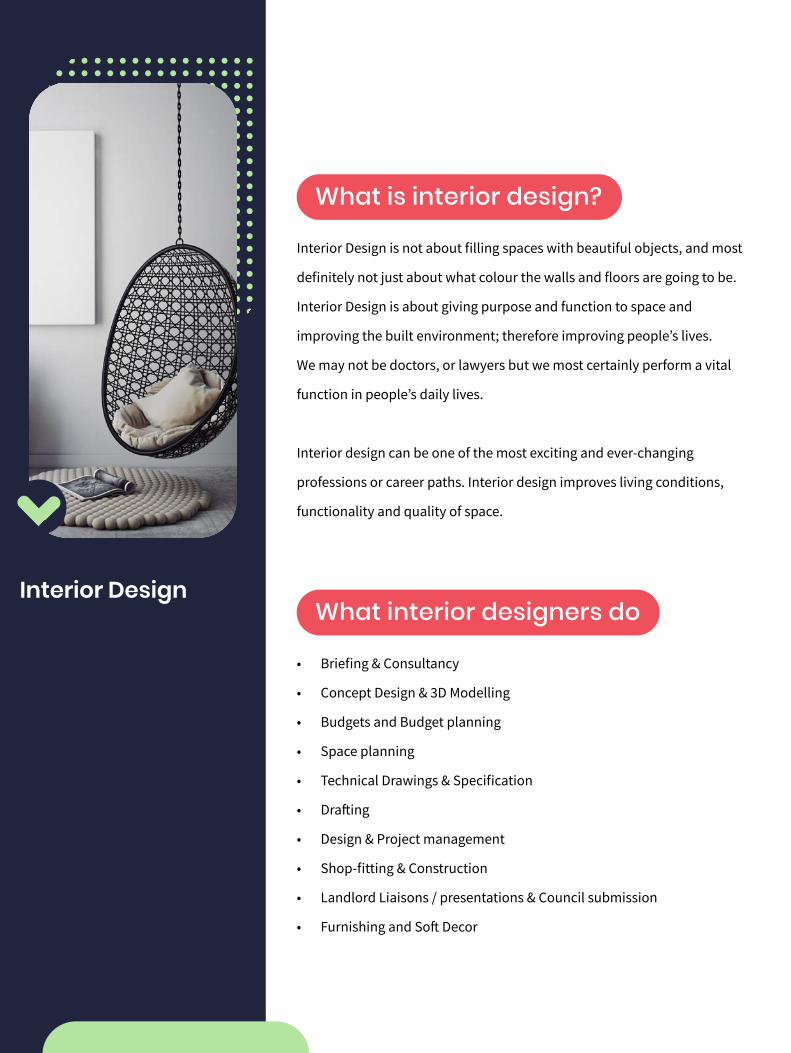
• Briefing & Consultancy
• Concept Design & 3D Modelling
• Budgets and Budget planning
• Space planning
• Technical Drawings & Specification
• Drafting
• Design & Project management
• Shop-fitting & Construction
• Landlord Liaisons / presentations & Council submission
• Furnishing and Soft Decor
Interior Design is not about filling spaces with beautiful objects, and most
definitely not just about what colour the walls and floors are going to be.
Interior Design is about giving purpose and function to space and
improving the built environment; therefore improving people’s lives.
We may not be doctors, or lawyers but we most certainly perform a vital
function in people’s daily lives.
Interior design can be one of the most exciting and ever-changing
professions or career paths. Interior design improves living conditions,
functionality and quality of space.
What is interior design?
What interior designers do
Interior Design
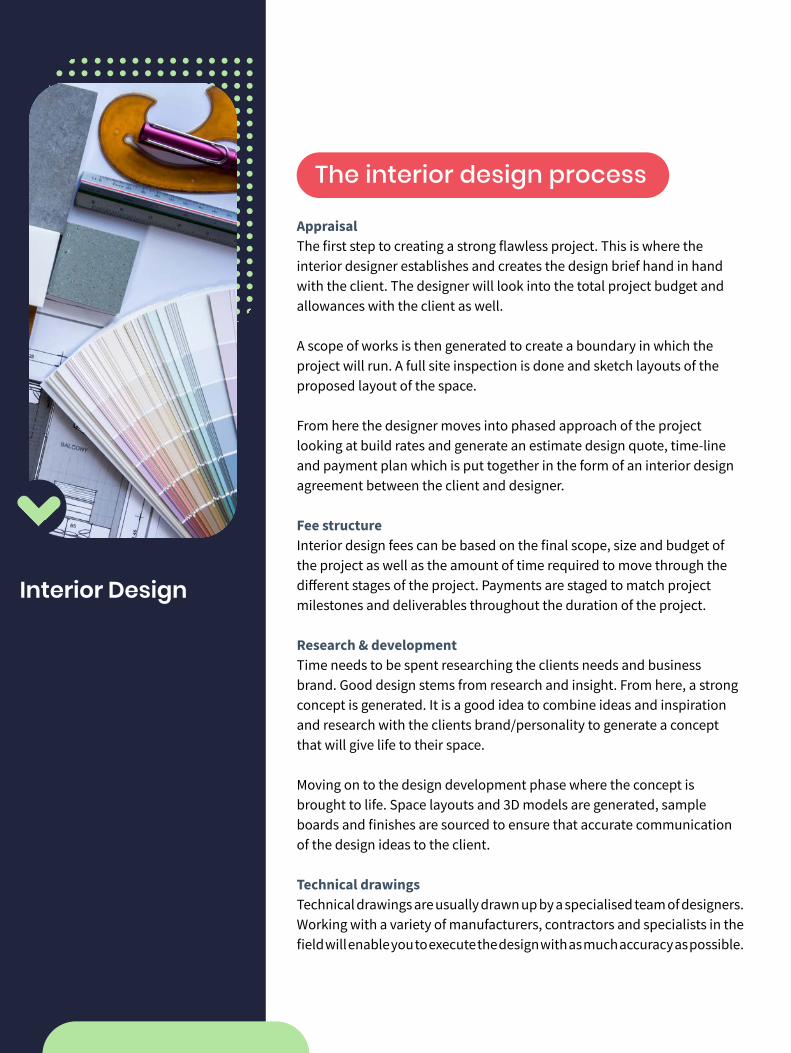
AppraisalThe first step to creating a strong flawless project. This is where the interior designer establishes and creates the design brief hand in hand with the client. The designer will look into the total project budget and allowances with the client as well.
A scope of works is then generated to create a boundary in which the project will run. A full site inspection is done and sketch layouts of the proposed layout of the space.
From here the designer moves into phased approach of the project looking at build rates and generate an estimate design quote, time-line and payment plan which is put together in the form of an interior design agreement between the client and designer.
Fee structureInterior design fees can be based on the final scope, size and budget of the project as well as the amount of time required to move through the different stages of the project. Payments are staged to match project milestones and deliverables throughout the duration of the project.
Research & developmentTime needs to be spent researching the clients needs and business brand. Good design stems from research and insight. From here, a strong concept is generated. It is a good idea to combine ideas and inspiration and research with the clients brand/personality to generate a concept that will give life to their space.
Moving on to the design development phase where the concept is brought to life. Space layouts and 3D models are generated, sample boards and finishes are sourced to ensure that accurate communication of the design ideas to the client.
Technical drawingsTechnical drawings are usually drawn up by a specialised team of designers. Working with a variety of manufacturers, contractors and specialists in the field will enable you to execute the design with as much accuracy as possible.
The interior design process
Interior Design
© 2020 Trimble
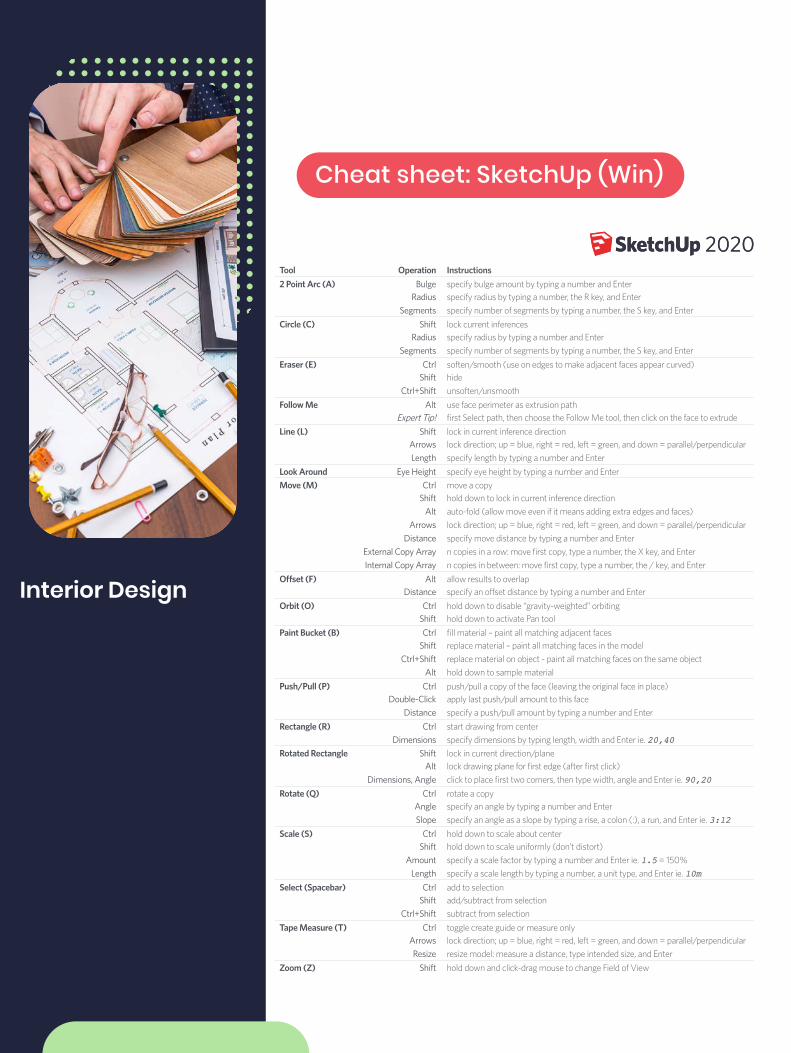
Middle Button (Wheel) Scroll ZoomClick-Drag Orbit
Shift+Click-Drag PanDouble-Click re-center view
L R L R
Tool Operation Instructions2 Point Arc (A) Bulge specify bulge amount by typing a number and Enter
Radius specify radius by typing a number, the R key, and EnterSegments specify number of segments by typing a number, the S key, and Enter
Circle (C) Shift lock current inferencesRadius specify radius by typing a number and Enter
Segments specify number of segments by typing a number, the S key, and EnterEraser (E) Ctrl soften/smooth (use on edges to make adjacent faces appear curved)
Shift hideCtrl+Shift unsoften/unsmooth
Follow Me Alt use face perimeter as extrusion pathExpert Tip! first Select path, then choose the Follow Me tool, then click on the face to extrude
Line (L) Shift lock in current inference directionArrows lock direction; up = blue, right = red, left = green, and down = parallel/perpendicularLength specify length by typing a number and Enter
Look Around Eye Height specify eye height by typing a number and EnterMove (M) Ctrl move a copy
Shift hold down to lock in current inference directionAlt auto-fold (allow move even if it means adding extra edges and faces)
Arrows lock direction; up = blue, right = red, left = green, and down = parallel/perpendicularDistance specify move distance by typing a number and Enter
External Copy Array n copies in a row: move first copy, type a number, the X key, and EnterInternal Copy Array n copies in between: move first copy, type a number, the / key, and Enter
Offset (F) Alt allow results to overlapDistance specify an offset distance by typing a number and Enter
Orbit (O) Ctrl hold down to disable “gravity-weighted” orbitingShift hold down to activate Pan tool
Paint Bucket (B) Ctrl fill material – paint all matching adjacent facesShift replace material – paint all matching faces in the model
Ctrl+Shift replace material on object - paint all matching faces on the same objectAlt hold down to sample material
Push/Pull (P) Ctrl push/pull a copy of the face (leaving the original face in place)Double-Click apply last push/pull amount to this face
Distance specify a push/pull amount by typing a number and EnterRectangle (R) Ctrl start drawing from center
Dimensions specify dimensions by typing length, width and Enter ie. 20,40Rotated Rectangle Shift lock in current direction/plane
Alt lock drawing plane for first edge (after first click)Dimensions, Angle click to place first two corners, then type width, angle and Enter ie. 90,20
Rotate (Q) Ctrl rotate a copyAngle specify an angle by typing a number and EnterSlope specify an angle as a slope by typing a rise, a colon (:), a run, and Enter ie. 3:12
Scale (S) Ctrl hold down to scale about centerShift hold down to scale uniformly (don’t distort)
Amount specify a scale factor by typing a number and Enter ie. 1.5 = 150%Length specify a scale length by typing a number, a unit type, and Enter ie. 10m
Select (Spacebar) Ctrl add to selectionShift add/subtract from selection
Ctrl+Shift subtract from selectionTape Measure (T) Ctrl toggle create guide or measure only
Arrows lock direction; up = blue, right = red, left = green, and down = parallel/perpendicularResize resize model: measure a distance, type intended size, and Enter
Zoom (Z) Shift hold down and click-drag mouse to change Field of View
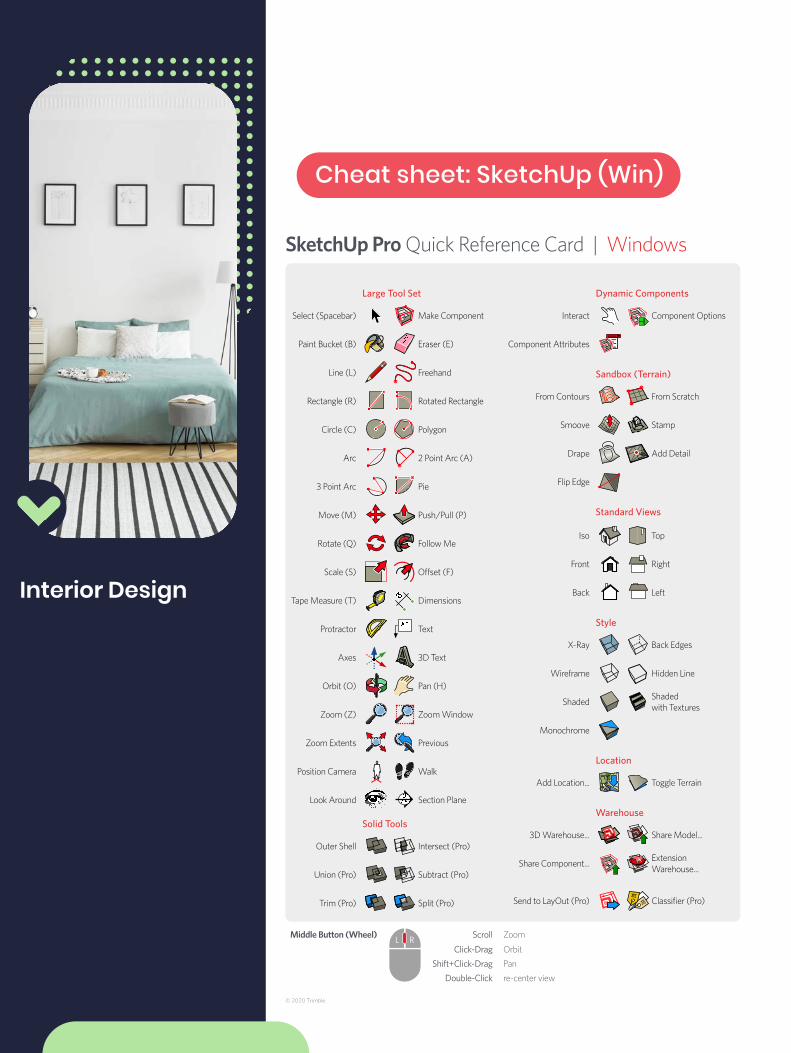
SketchUp Pro Quick Reference Card | Windows
Make Component
Dimensions
Rotated Rectangle
Zoom Window
Freehand
3D Text
Follow Me
Walk
Eraser (E)
Text
Push/Pull (P)
2 Point Arc (A)
Previous
Polygon
Pan (H)
Offset (F)
Section Plane
Select (Spacebar)
Tape Measure (T)
Circle (C)
Zoom (Z)
Line (L)
Axes
Rotate (Q)
Position Camera
Paint Bucket (B)
Protractor
Move (M)
Arc
Zoom Extents
Rectangle (R)
Orbit (O)
Scale (S)
Look Around
Large Tool Set
Intersect (Pro)
Split (Pro)
Subtract (Pro)
Outer Shell
Trim (Pro)
Union (Pro)
Solid Tools
3 Point Arc Pie
From Contours
Drape
Smoove
Flip Edge
From Scratch
Add Detail
Stamp
Sandbox (Terrain)
Iso
Front Right
Top
LeftBack
Standard Views
Interact
Component Attributes
Component Options
Dynamic Components
Add Location... Toggle Terrain
Location
Shaded with Textures
Back Edges
Hidden Line
X-Ray
Wireframe
Shaded
Style
Monochrome
3D Warehouse...
Share Component... Extension Warehouse...
Share Model...
Warehouse
Send to LayOut (Pro) Classifier (Pro)
Cheat sheet: SketchUp (Win)
Interior Design
© 2020 Trimble
Middle Button (Wheel) Scroll ZoomClick-Drag Orbit
Shift+Click-Drag PanDouble-Click re-center view
L R L R
Tool Operation Instructions2 Point Arc (A) Bulge specify bulge amount by typing a number and Enter
Radius specify radius by typing a number, the R key, and EnterSegments specify number of segments by typing a number, the S key, and Enter
Circle (C) Shift lock current inferencesRadius specify radius by typing a number and Enter
Segments specify number of segments by typing a number, the S key, and EnterEraser (E) Ctrl soften/smooth (use on edges to make adjacent faces appear curved)
Shift hideCtrl+Shift unsoften/unsmooth
Follow Me Alt use face perimeter as extrusion pathExpert Tip! first Select path, then choose the Follow Me tool, then click on the face to extrude
Line (L) Shift lock in current inference directionArrows lock direction; up = blue, right = red, left = green, and down = parallel/perpendicularLength specify length by typing a number and Enter
Look Around Eye Height specify eye height by typing a number and EnterMove (M) Ctrl move a copy
Shift hold down to lock in current inference directionAlt auto-fold (allow move even if it means adding extra edges and faces)
Arrows lock direction; up = blue, right = red, left = green, and down = parallel/perpendicularDistance specify move distance by typing a number and Enter
External Copy Array n copies in a row: move first copy, type a number, the X key, and EnterInternal Copy Array n copies in between: move first copy, type a number, the / key, and Enter
Offset (F) Alt allow results to overlapDistance specify an offset distance by typing a number and Enter
Orbit (O) Ctrl hold down to disable “gravity-weighted” orbitingShift hold down to activate Pan tool
Paint Bucket (B) Ctrl fill material – paint all matching adjacent facesShift replace material – paint all matching faces in the model
Ctrl+Shift replace material on object - paint all matching faces on the same objectAlt hold down to sample material
Push/Pull (P) Ctrl push/pull a copy of the face (leaving the original face in place)Double-Click apply last push/pull amount to this face
Distance specify a push/pull amount by typing a number and EnterRectangle (R) Ctrl start drawing from center
Dimensions specify dimensions by typing length, width and Enter ie. 20,40Rotated Rectangle Shift lock in current direction/plane
Alt lock drawing plane for first edge (after first click)Dimensions, Angle click to place first two corners, then type width, angle and Enter ie. 90,20
Rotate (Q) Ctrl rotate a copyAngle specify an angle by typing a number and EnterSlope specify an angle as a slope by typing a rise, a colon (:), a run, and Enter ie. 3:12
Scale (S) Ctrl hold down to scale about centerShift hold down to scale uniformly (don’t distort)
Amount specify a scale factor by typing a number and Enter ie. 1.5 = 150%Length specify a scale length by typing a number, a unit type, and Enter ie. 10m
Select (Spacebar) Ctrl add to selectionShift add/subtract from selection
Ctrl+Shift subtract from selectionTape Measure (T) Ctrl toggle create guide or measure only
Arrows lock direction; up = blue, right = red, left = green, and down = parallel/perpendicularResize resize model: measure a distance, type intended size, and Enter
Zoom (Z) Shift hold down and click-drag mouse to change Field of View
SketchUp Pro Quick Reference Card | Windows
Make Component
Dimensions
Rotated Rectangle
Zoom Window
Freehand
3D Text
Follow Me
Walk
Eraser (E)
Text
Push/Pull (P)
2 Point Arc (A)
Previous
Polygon
Pan (H)
Offset (F)
Section Plane
Select (Spacebar)
Tape Measure (T)
Circle (C)
Zoom (Z)
Line (L)
Axes
Rotate (Q)
Position Camera
Paint Bucket (B)
Protractor
Move (M)
Arc
Zoom Extents
Rectangle (R)
Orbit (O)
Scale (S)
Look Around
Large Tool Set
Intersect (Pro)
Split (Pro)
Subtract (Pro)
Outer Shell
Trim (Pro)
Union (Pro)
Solid Tools
3 Point Arc Pie
From Contours
Drape
Smoove
Flip Edge
From Scratch
Add Detail
Stamp
Sandbox (Terrain)
Iso
Front Right
Top
LeftBack
Standard Views
Interact
Component Attributes
Component Options
Dynamic Components
Add Location... Toggle Terrain
Location
Shaded with Textures
Back Edges
Hidden Line
X-Ray
Wireframe
Shaded
Style
Monochrome
3D Warehouse...
Share Component... Extension Warehouse...
Share Model...
Warehouse
Send to LayOut (Pro) Classifier (Pro)
Cheat sheet: SketchUp (Win)

Interior Design
© 2020 Trimble
Middle Button (Wheel) Scroll ZoomClick-Drag Orbit
Shift+Click-Drag PanDouble-Click re-center view
L R L R
Tool Operation Instructions2 Point Arc (A) Bulge specify bulge amount by typing a number and Enter
Radius specify radius by typing a number, the R key, and EnterSegments specify number of segments by typing a number, the S key, and Enter
Circle (C) Shift lock current inferencesRadius specify radius by typing a number and Enter
Segments specify number of segments by typing a number, the S key, and EnterEraser (E) Option soften/smooth (use on edges to make adjacent faces appear curved)
Shift hideOption+Shift unsoften/unsmooth
Follow Me Command use face perimeter as extrusion pathExpert Tip! first Select path, then choose the Follow Me tool, then click on the face to extrude
Line (L) Shift lock in current inference directionArrows lock direction; up = blue, right = red, left = green, and down = parallel/perpendicularLength specify length by typing a number and Enter
Look Around Eye Height specify eye height by typing a number and EnterMove (M) Option move a copy
Shift hold down to lock in current inference directionCommand auto-fold (allow move even if it means adding extra edges and faces)
Arrows lock direction; up = blue, right = red, left = green, and down = parallel/perpendicularDistance specify move distance by typing a number and Enter
External Copy Array n copies in a row: move first copy, type a number, the X key, and EnterInternal Copy Array n copies in between: move first copy, type a number, the / key, and Enter
Offset (F) Command allow results to overlapDistance specify an offset distance by typing a number and Enter
Orbit (O) Option hold down to disable “gravity-weighted” orbitingShift hold down to activate Pan tool
Paint Bucket (B) Option fill material – paint all matching adjacent facesShift replace material – paint all matching faces in the model
Option+Shift replace material on object – paint all matching faces on the same objectCommand hold down to sample material
Push/Pull (P) Option push/pull a copy of the face (leaving the original face in place)Double-Click apply last push/pull amount to this face
Distance specify a push/pull amount by typing a number and EnterRectangle (R) Option start drawing from center
Dimensions specify dimensions by typing length, width and Enter ie. 20,40Rotated Rectangle Shift lock in current direction/plane
Command lock drawing plane for first edge (after first click)Dimensions, Angle click to place first two corners, then type width, angle and Enter ie. 90,20
Rotate (Q) Option rotate a copyAngle specify an angle by typing a number and EnterSlope specify an angle as a slope by typing a rise, a colon (:), a run, and Enter ie. 3:12
Scale (S) Option hold down to scale about centerShift hold down to scale uniformly (don’t distort)
Amount specify a scale factor by typing a number and Enter ie. 1.5 = 150%Length specify a scale length by typing a number, a unit type, and Enter ie. 10m
Select (Spacebar) Option add to selectionShift add/subtract from selection
Option+Shift subtract from selectionTape Measure (T) Option toggle create guide or measure only
Arrows lock direction; up = blue, right = red, left = green, and down = parallel/perpendicularResize resize model: measure a distance, type intended size, and Enter
Zoom (Z) Shift hold down and click-drag mouse to change Field of View
SketchUp Pro Quick Reference Card | Mac
Make Component
Dimensions
Rotated Rectangle
Zoom Window
Freehand
3D Text
Follow Me
Walk
Eraser (E)
Text
Push/Pull (P)
2 Point Arc (A)
Previous
Polygon
Pan (H)
Offset (F)
Section Plane
Select (Spacebar)
Tape Measure (T)
Circle (C)
Zoom (Z)
Line (L)
Axes
Rotate (Q)
Position Camera
Paint Bucket (B)
Protractor
Move (M)
Arc
Zoom Extents
Rectangle (R)
Orbit (O)
Scale (S)
Look Around
Large Tool Set
Intersect (Pro)
Split (Pro)
Subtract (Pro)
Outer Shell
Trim (Pro)
Union (Pro)
Solid Tools
3 Point Arc Pie
From Contours
Drape
Smoove
Flip Edge
From Scratch
Add Detail
Stamp
Sandbox (Terrain)
Iso
Front Right
Top
LeftBack
Standard Views
Interact
Component Attributes
Component Options
Dynamic Components
Add Location... Toggle Terrain
Location
Shaded with Textures
Back Edges
Hidden Line
X-Ray
Wireframe
Shaded
Style
Monochrome
3D Warehouse...
Share Component... Extension Warehouse...
Share Model...
Warehouse
Send to LayOut (Pro) Classifier (Pro)
Cheat sheet: SketchUp (Mac)
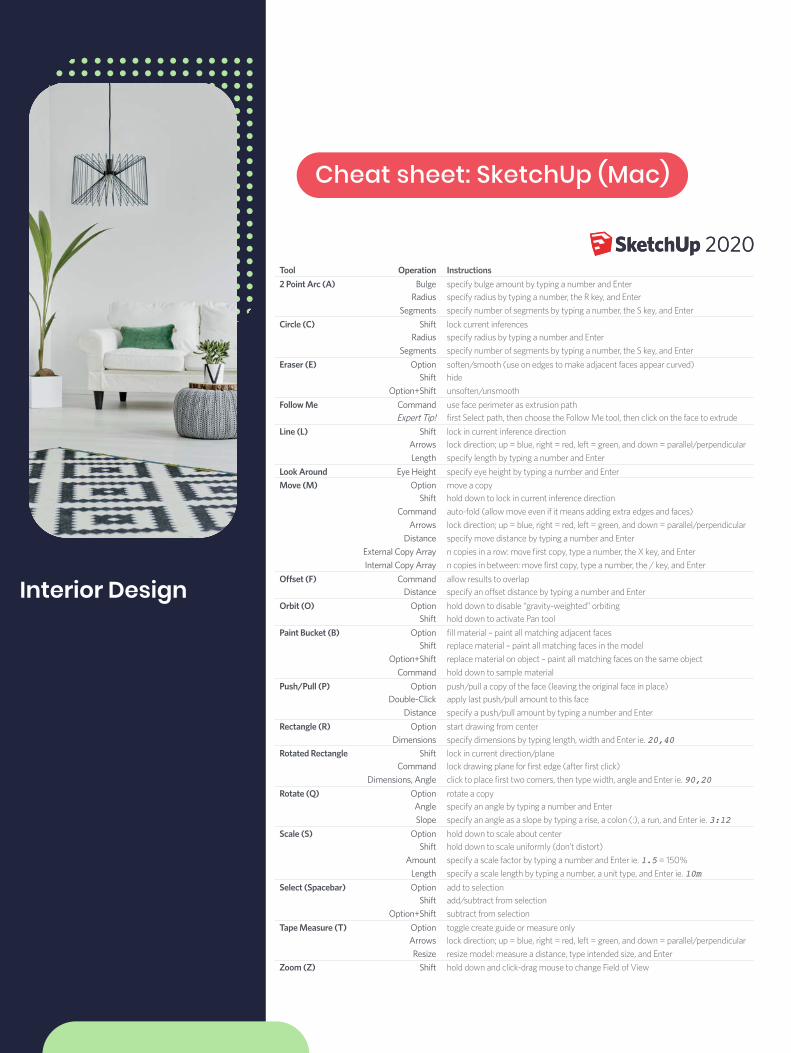


