19
Presented by: Tom Bickford & Ben Goff Maine Robotics Friday, 10/16/2015 9:15-12:00 © 2015 May be used for any non-fee educational program PROGRAMMING ROBOTS USING LEGO® MINDSTORMS – EV3

Presented by:
Tom Bickford & Ben Goff Maine Robotics
Friday, 10/16/2015 9:15-12:00
© 2015
May be used for any non-fee educational program
PROGRAMMING ROBOTS USING LEGO® MINDSTORMS – EV3

• Using pre-built LEGO robots, learn some basic tools of programming to turn a bunch of plastic parts into a sensing, moving robot. No experience is needed to start off your career as a programmer or roboticist. You'll see why this can be a powerful tool for engaging logic and planning into your student's experiences.
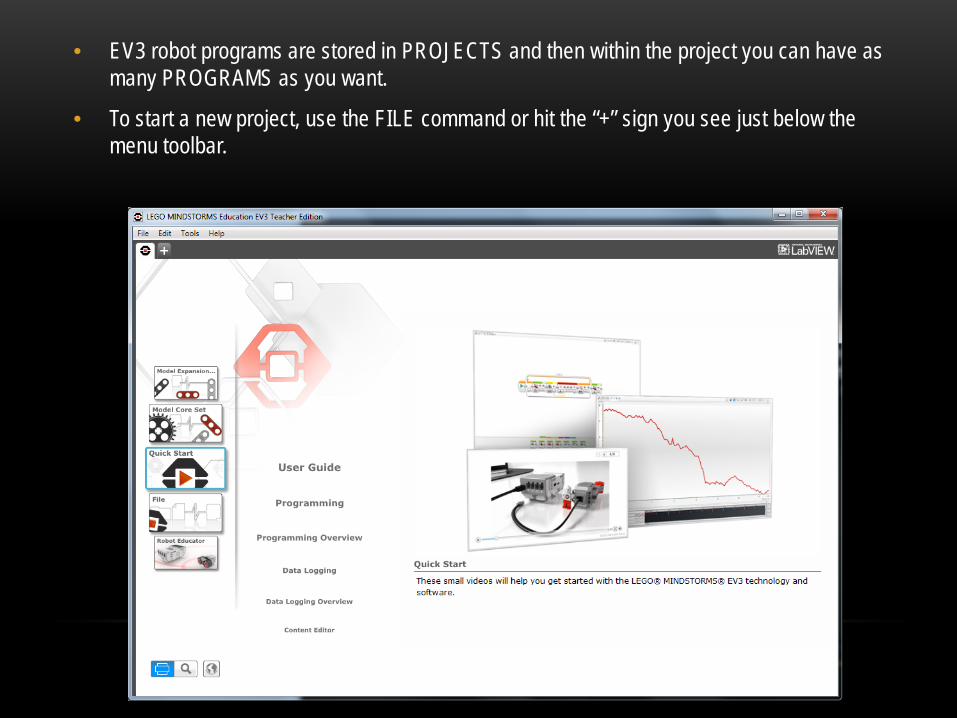
• EV3 robot programs are stored in PROJECTS and then within the project you can have as many PROGRAMS as you want.
• To start a new project, use the FILE command or hit the “+” sign you see just below the menu toolbar.

• Projects are auto-named “Project”, “Project2”, Project3”, etc
• To rename a project you must go into the File menu and “Save Project As…” this will effectively allow you to rename your project.
• Using a person’s name or a project name are much better. For Instance if Frank is doing a weather station, try naming the project “Frank” or “Weather”
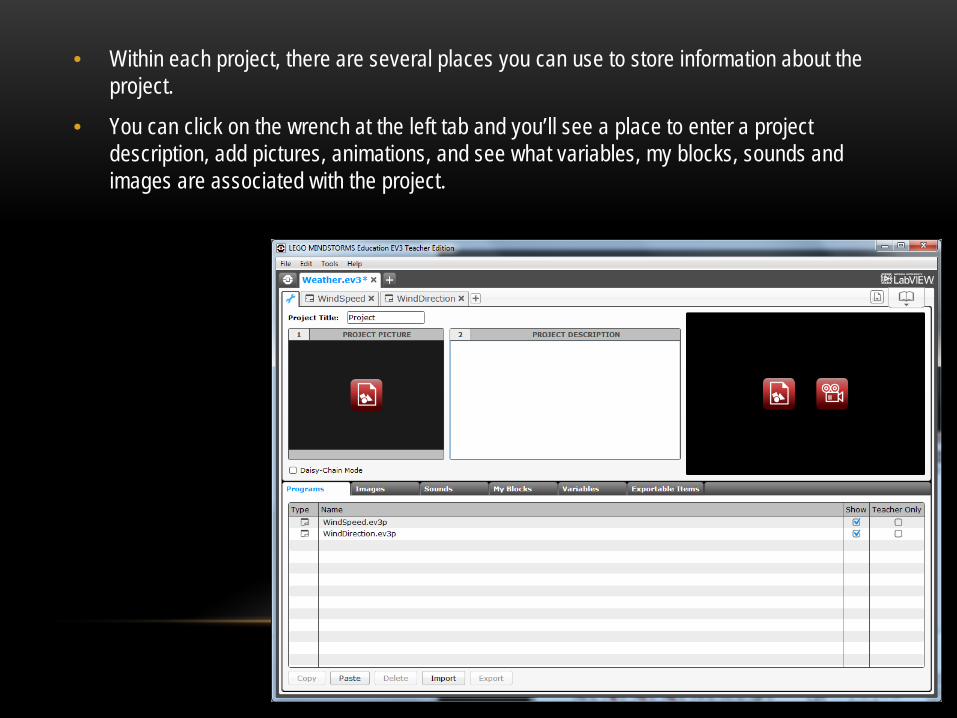
• Within each project, there are several places you can use to store information about the project.
• You can click on the wrench at the left tab and you’ll see a place to enter a project description, add pictures, animations, and see what variables, my blocks, sounds and images are associated with the project.
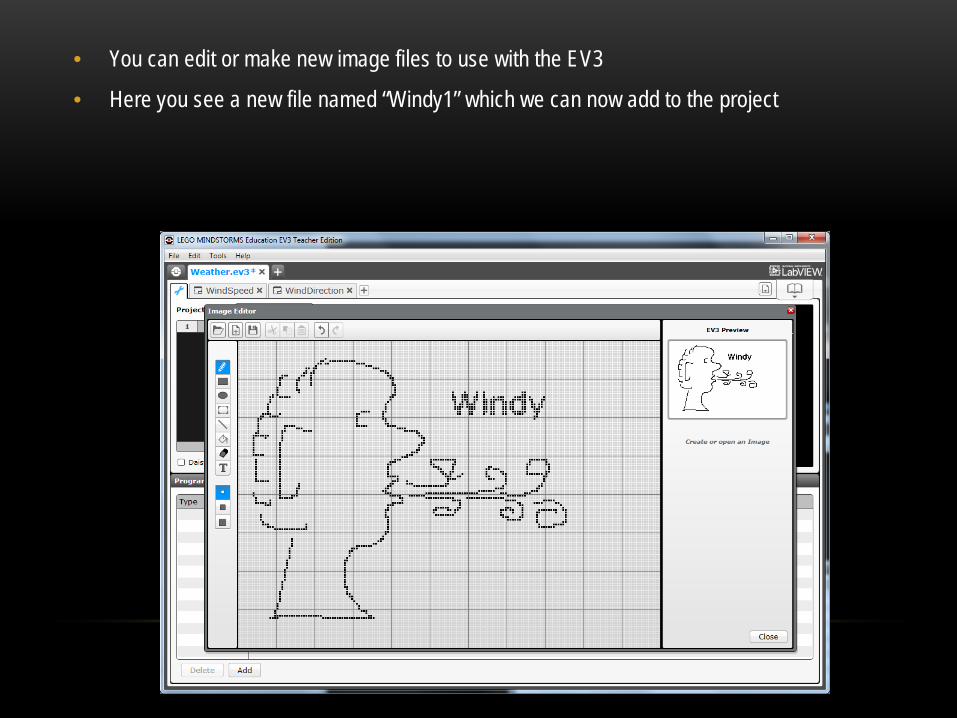
• You can edit or make new image files to use with the EV3
• Here you see a new file named “Windy1” which we can now add to the project
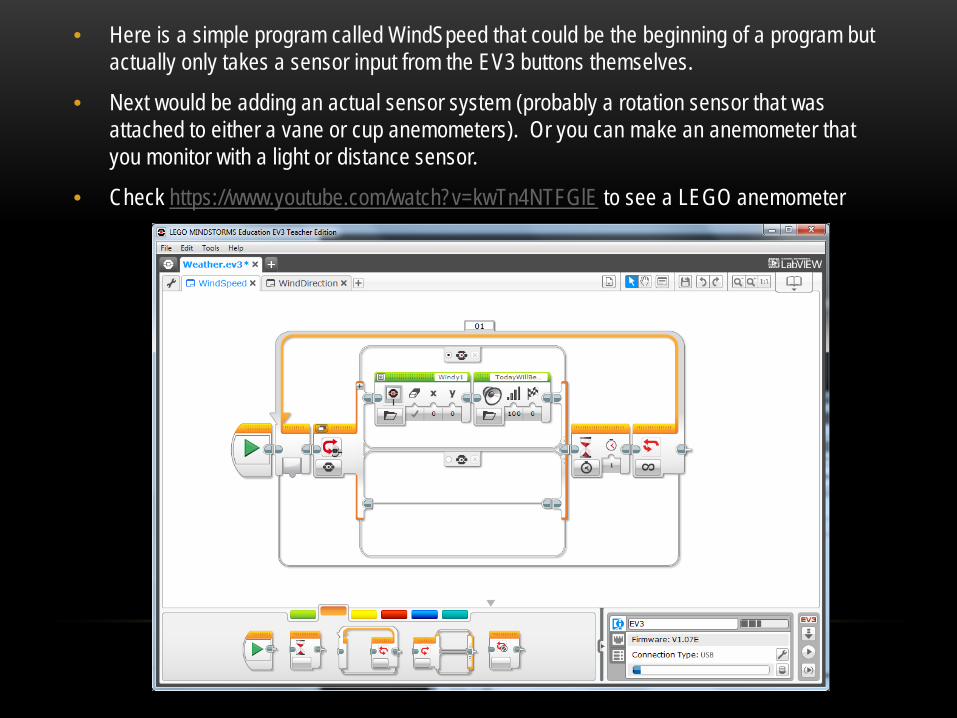
• Here is a simple program called WindSpeed that could be the beginning of a program but actually only takes a sensor input from the EV3 buttons themselves.
• Next would be adding an actual sensor system (probably a rotation sensor that was attached to either a vane or cup anemometers). Or you can make an anemometer that you monitor with a light or distance sensor.
• Check https://www.youtube.com/watch?v=kwTn4NTFGlE to see a LEGO anemometer

• Medium motor control
• Large motor control
• Steering motor control
• Tank drive motor control
• Display control
• Sound control
• EV3 light control
THE ACTION MENU

• Program Start block
• Wait block
• Loop block
• Switch block
• Loop Interrupt Control
THE FLOW MENU
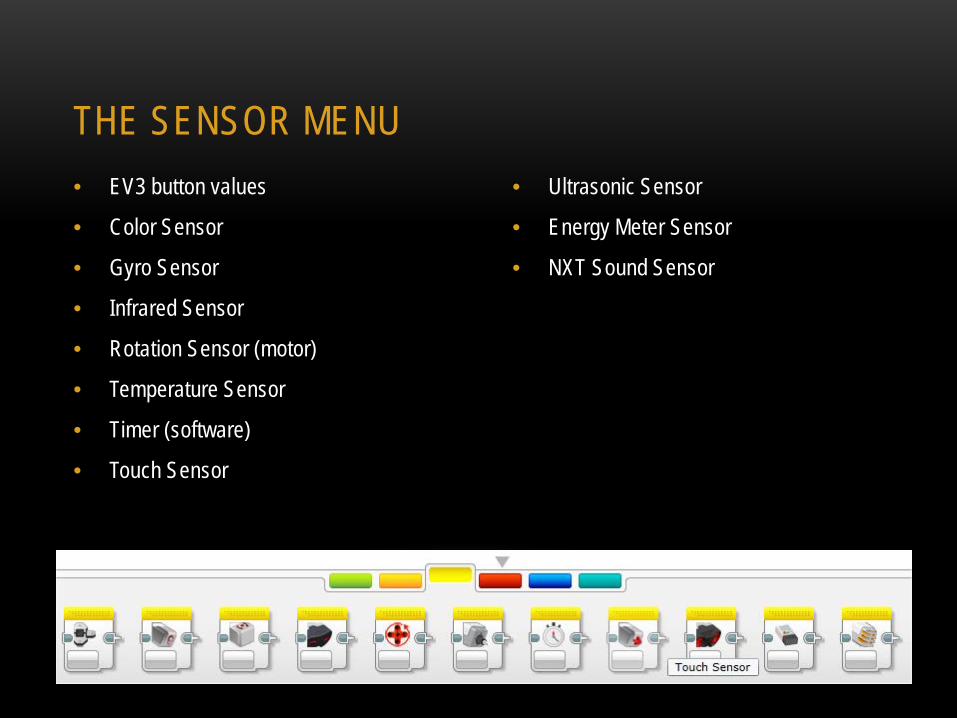
• EV3 button values
• Color Sensor
• Gyro Sensor
• Infrared Sensor
• Rotation Sensor (motor)
• Temperature Sensor
• Timer (software)
• Touch Sensor
THE SENSOR MENU • Ultrasonic Sensor
• Energy Meter Sensor
• NXT Sound Sensor

• Variable
• Constant
• Array
• Logic (outputs 0 or 1)
• Math Block
• Add, Subtract, Multiply, Divide
• Square root, Absolute value
• Exponent and
• Advanced (more functions avail.)
THE MATH MENU • Rounding Block
• Comparator Block (outputs 0 or 1)
• Range Block (outputs 0 or 1)
• Text Block (concatenates strings)
• Random number generator

• ADD
• SUBTRACT
• MULTIPLY
• DIVIDE
• MODULO
• EXPONENT
• NEGATE
• FLOOR
• CEIL
• ROUND
THE ADVANCED MATH MENU • ABSOLUTE
• LOG
• LN
• SIN
• COS
• TAN
• ASIN
• ACOS
• ATAN
• SQUARE ROOT
• Up to 4 numbers
• 20 functions to pick from
• Outputs the answer
• Numbers can be input by data wire or by direct entry into the block
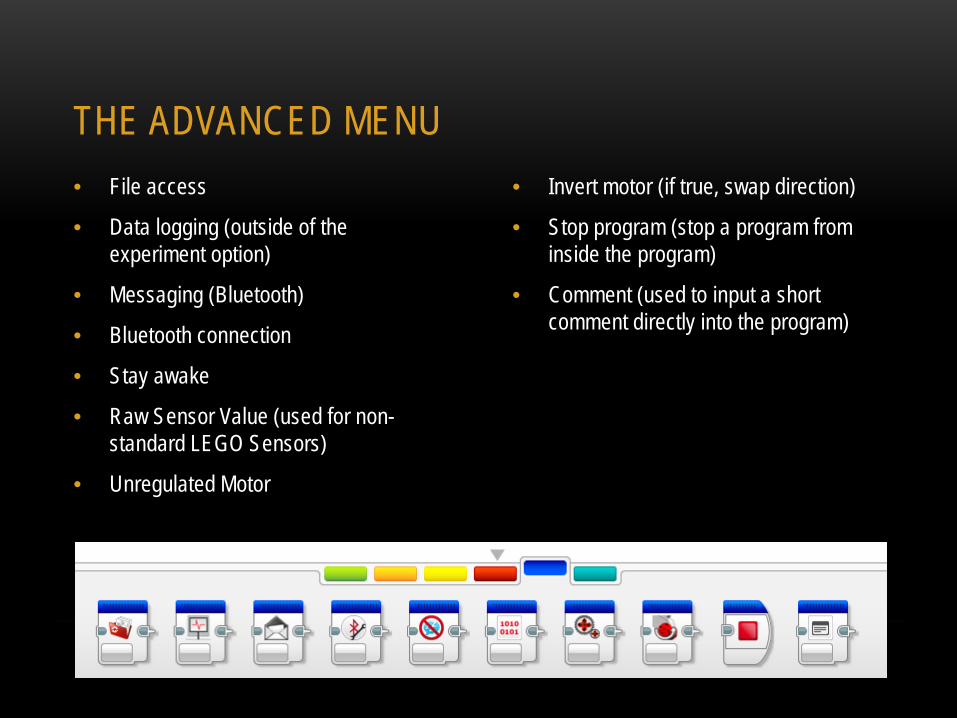
• File access
• Data logging (outside of the experiment option)
• Messaging (Bluetooth)
• Bluetooth connection
• Stay awake
• Raw Sensor Value (used for non-standard LEGO Sensors)
• Unregulated Motor
THE ADVANCED MENU • Invert motor (if true, swap direction)
• Stop program (stop a program from inside the program)
• Comment (used to input a short comment directly into the program)

• My Blocks allow users to take large segments of code (or small) and put them in a consolidated fashion.
• Suppose you had code to follow a line by using a color sensor but wanted to use that several times over?
• You would make the line follower, then create a My Block out of it, giving it a name you recognize, like LINEFOLLOW
• Now you can just grab that from the My Block menu.
THE MY BLOCK MENU

• When you create the My Block, you also have the option of adding inputs, such as how long the line follower will work, or maybe what the cutoff threshold will be.
• Here you can see that the variable “a” is being used to set the timer length of the LOOP in the My Block
• And when used in the program below, you’ll see that same variable “a” as an input to the My Block
A MY BLOCK WITH AN INPUT
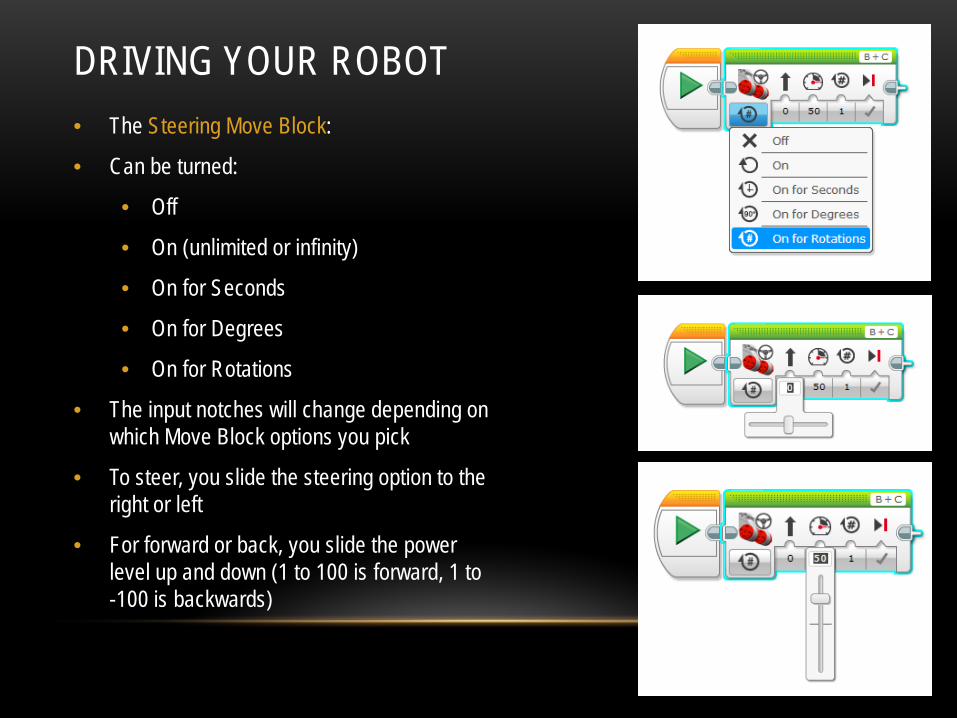
• The Steering Move Block:
• Can be turned:
• Off
• On (unlimited or infinity)
• On for Seconds
• On for Degrees
• On for Rotations
• The input notches will change depending on which Move Block options you pick
• To steer, you slide the steering option to the right or left
• For forward or back, you slide the power level up and down (1 to 100 is forward, 1 to -100 is backwards)
DRIVING YOUR ROBOT

• The Tank Move Block: • Can be turned:
• Off • On (unlimited or infinity) • On for Seconds • On for Degrees • On for Rotations
• The input notches will change depending on which Move Block options you pick
• To steer you adjust the right and left motor speed levels independently • Both forward to go forwards • Both backwards to go backwards • One forward and the other back to turn • Or one stopped and one running to turn
DRIVING YOUR ROBOT

• The WAIT Block allows us to run the program along until a condition changes.
• This can be:
• The Brick Buttons
• Any of the sensors
• A timer reaching a value
• A Bluetooth Message
• Or the passage of time (measured in seconds)
THE WAIT BLOCK

• Here we turn the motors ON (unlimited)
• Then we wait 5 seconds
• Then we turn the motors OFF
SIMPLE MOVE PROGRAM WITH A WAIT BLOCK


