27
Blue Coat Security First Steps Solution for Integrating Authentication using IWA Direct SGOS 6.5

Blue Coat Security First StepsSolution for Integrating Authenticationusing IWA Direct
SGOS 6.5
Third Party Copyright Notices© 2014 Blue Coat Systems, Inc. All rights reserved. BLUE COAT, PROXYSG, PACKETSHAPER, CACHEFLOW,INTELLIGENCECENTER, CACHEOS, CACHEPULSE, CROSSBEAM, K9, DRTR, MACH5, PACKETWISE,POLICYCENTER, PROXYAV, PROXYCLIENT, SGOS, WEBPULSE, SOLERA NETWORKS, DEEPSEE, DSAPPLIANCE, SEE EVERYTHING. KNOW EVERYTHING., SECURITY EMPOWERS BUSINESS, BLUETOUCH, the BlueCoat shield, K9, and Solera Networks logos and other Blue Coat logos are registered trademarks or trademarks of Blue CoatSystems, Inc. or its affiliates in the U.S. and certain other countries. This list may not be complete, and the absence of a trade-mark from this list does not mean it is not a trademark of Blue Coat or that Blue Coat has stopped using the trademark. All othertrademarks mentioned in this document owned by third parties are the property of their respective owners. This document is forinformational purposes only.
BLUE COATMAKES NOWARRANTIES, EXPRESS, IMPLIED, OR STATUTORY, AS TO THE INFORMATION IN THISDOCUMENT. BLUE COAT PRODUCTS, TECHNICAL SERVICES, AND ANY OTHER TECHNICALDATAREFERENCED IN THIS DOCUMENT ARE SUBJECT TOU.S. EXPORT CONTROLAND SANCTIONS LAWS,REGULATIONS AND REQUIREMENTS, AND MAY BE SUBJECT TOEXPORTOR IMPORT REGULATIONS IN OTHERCOUNTRIES. YOU AGREE TOCOMPLY STRICTLY WITH THESE LAWS, REGULATIONS AND REQUIREMENTS, ANDACKNOWLEDGE THAT YOU HAVE THE RESPONSIBILITY TOOBTAIN ANY LICENSES, PERMITS OR OTHERAPPROVALS THATMAY BE REQUIRED IN ORDER TOEXPORT, RE-EXPORT, TRANSFER IN COUNTRY ORIMPORT AFTER DELIVERY TOYOU.
Americas:
Blue Coat Systems, Inc.
420 N. Mary Ave.
Sunnyvale, CA 94085
Rest of theWorld:
Blue Coat Systems International SARL
3a Route des Arsenaux
1700 Fribourg, Switzerland

Blue Coat Security First Steps
Contents
Third Party Copyright Notices 2
Configure IWA Direct 4
Integrate the ProxySG Appliance With Your Windows Domain 4
Enable Kerberos in an IWA Direct Deployment 6
Create an IWA Direct Realm 7
Using IWA Direct in an Explicit Kerberos Load Balancing/Failover Scenario 11
Validate the IWA Realm Configuration 12
Configure the Web Browser to Use the Explicit Proxy 13
Create a DNS Entry for the Authentication Domain 14
Configure the Web Browser for IWA 14
Configure Client Web Browsers for Explicit Proxy 16
Configure theWeb Browser to Use the Explicit Proxy 16
Set Up the Explicit Proxy to Use a PAC File 17
Create an IWA Authentication Policy 18
Create an IWA Authorization Policy 20
Create an IWA Guest Authentication Policy 21
Verify Kerberos Authentication 22
Enable IWA Authentication for SSL Traffic in a Transparent Deployment 23
Authentication Troubleshooting 26
Why don't my reports show user names for blocked requests? 26
Why are users being prompted to authenticate? 27
3

Integrate Authentication Using IWA Direct
Configure IWA DirectTo configure IWA Direct authentication, youmust complete the following tasks:
1. Join the ProxySG appliance to theWindows domain. See Integrate the ProxySGApplianceWith YourWindowsDomain.
2. (Kerberos only) If you plan to use Kerberos authentication, youmust make sure that authentication requests aredirected to the DNS name of the appliance’s Active Directory machine account name. See Enable Kerberos in anIWA Direct Deployment.
3. Configure the ProxySG appliance for IWA. See Create an IWA Direct Realm.4. Verify that the appliance can successfully authenticate an Active Directory user using the IWA realm you created.
See Validate the IWA Realm Configuration5. Create a DNS entry for the ProxySG authentication URL. See Create a DNS Entry for the Authentication Domain.6. Configure the client browsers for single sign-on. See Configure theWeb Browser for IWA.7. Create the policy rules that will enforce authentication and, optionally, authorization. See Create an IWA
Authentication Policy.8. (Kerberos only) Verify that Kerberos is configured properly. See Verify Kerberos Authentication.9. (optional) Enable authentication for HTTPS traffic. This step is only required if you want to authenticate
HTTPS traffic in a transparent deployment. Explicit deployments can authenticate HTTPS traffic without anyadditional configuration provided that you have a valid SSL license installed. See Enable IWA Authentication forSSL Traffic in a Transparent Deployment.
Tip Download the IWA Direct solution for Authentication (PDF).
Integrate the ProxySG Appliance With Your Windows Domain
To integrate the ProxySG appliance into yourWindows domain, youmust complete the following tasks:
Synchronize the ProxySGAppliances and DC Clocks
The ProxySG cannot join aWindows domain unless its internal clock is in sync with the Domain Controller. To ensure thatthe ProxySG clocks are synchronized with the Domain Controller clock, use either of the following techniques:
Specify the sameNTP servers for the ProxySG appliances and the Domain Controller.
Configure the ProxySG appliances to use the Domain Controller as the NTP source server.
The ProxySGNTP configuration options are located on the Configuration > General > Clock tab.
Join the ProxySG to theWindows Domain
After you have synchronized the ProxySG appliance’s internal clock with the Domain Controller, you can join the appli-ance to theWindows Domain as follows:
1. From the ProxySGManagement Console, select Configuration > Authentication > Windows Domain >Windows Domain.
2. Click New; the AddWindows Domain dialog displays.
3. Enter a Domain name alias and then click OK.
4

Blue Coat Security First Steps
4. Click Apply and then click OK.
5. Select the domain Name you created. When you select it, the Details fields become active.
6. In the DNS domain name field, enter the DNS name for theWindows Active Directory domain. This is not the fullyqualified domain name of the ProxySG.
Note: The ProxySG appliancemust be able to resolve the DNS domain name you supply for the ActiveDirectory domain or the appliance will not be able to join the domain. If DNS resolution fails, check yourDNS configuration.
7. In the SG host name field, enter the hostname to use for this ProxySG appliance. Blue Coat recommends theappliance name or any name helpful for your recognition. The name you enter must be unique in your ActiveDirectory.
5
Integrate Authentication Using IWA Direct
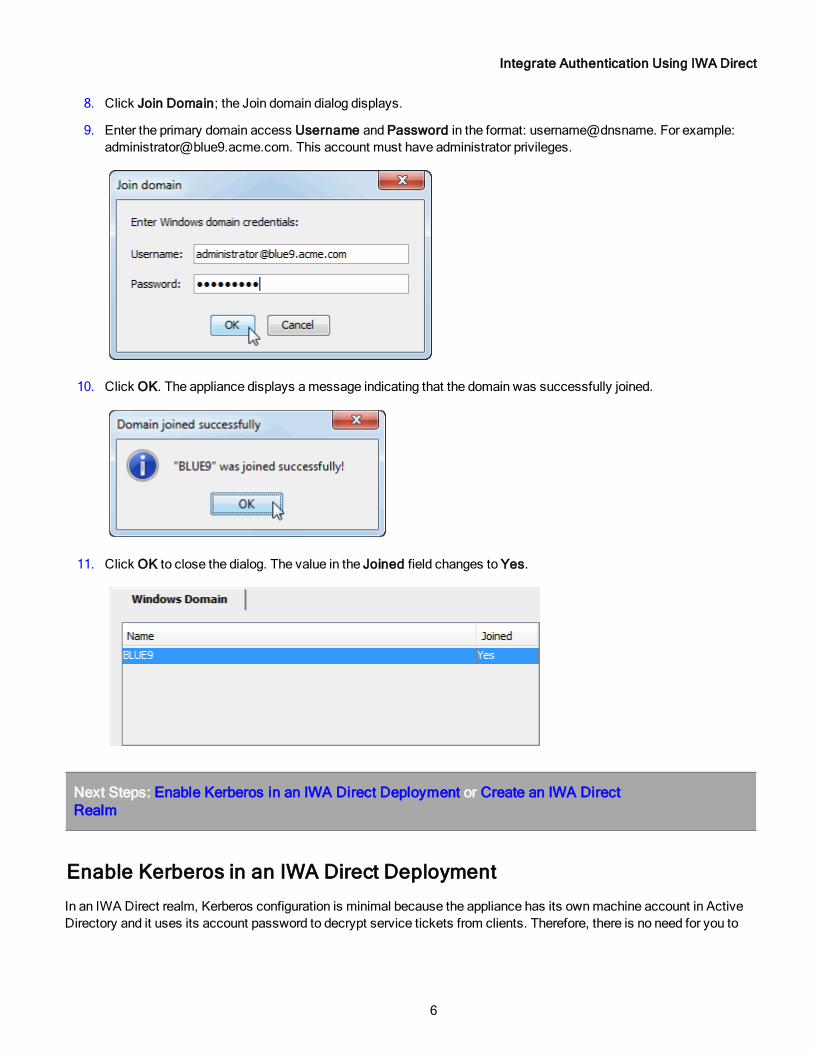
8. Click Join Domain; the Join domain dialog displays.
9. Enter the primary domain access Username and Password in the format: username@dnsname. For example:[email protected]. This account must have administrator privileges.
10. Click OK. The appliance displays amessage indicating that the domain was successfully joined.
11. Click OK to close the dialog. The value in the Joined field changes to Yes.
Next Steps: Enable Kerberos in an IWA Direct Deployment or Create an IWA DirectRealm
Enable Kerberos in an IWA Direct Deployment
In an IWA Direct realm, Kerberos configuration is minimal because the appliance has its ownmachine account in ActiveDirectory and it uses its account password to decrypt service tickets from clients. Therefore, there is no need for you to
6

Blue Coat Security First Steps
create a privileged Active Directory account or generate a service principal name (SPN) for the appliance (as is requiredwith an IWA BCAAA realm).
To ensure that IWA uses the Kerberos protocol rather then downgrading to NTLM, you need tomake sure that authen-tication requests are directed to the DNS name of the appliance’s Active Directory machine account name as follows:
1. Create a DNS “A” record for the ProxySG that resolves to the DNS name of the appliance’s Active Directorymachine account name. For example, if you have an appliance named ProxySG1with IP address 1.2.3.4 in theblue9 Active Directory domain at acme.com, you would create the following DNSrecord:ProxySG1.blue9.acme.com Host(A) 1.2.3.4
2. Ensure that client requests are directed to the DNS name for the ProxySG appliance’s Active Directory machineaccount:
Explicit deployments—Configure the explicit proxy settings on the client browser to point to this DNSname.
Transparent deployments—Set the Virtual URL in the realm configuration (on the IWA General tab) to thisDNS name. In addition, make sure that the DNS name for the ProxySG appliance's Active Directorydomain is either included in the workstation's list of imputing DNS suffixes or explicitly specified as part ofIE's local intranet zone. For example, if your AD domain DNS name is blue9.acme.com, then you wouldadd *.blue9.acme.com to IE's local intranet zone. See Create an IWA Direct Realm for details.
Next Step: Create an IWA Direct Realm
Create an IWA Direct Realm
The IWA realm contains the configuration settings that the ProxySG appliance needs to be able to perform IWA authen-tication, including how to connect to the Active Directory, which authentication protocols to support, how long to waitbefore timing out, and where to redirect transparent requests, if applicable. After you join the ProxySG appliance to theWindows domain, you can create the IWA Direct realm as follows:
1. Create the realm:a. Select Configuration > Authentication > IWA > IWA Realms.
b. Click New.
c. Enter a Realm name. The name can be 32 characters long and composed of alphanumeric characters andunderscores. The namemust start with a letter.
d. In the Active Directory Connection field, select Direct.
Note: This option will be grayed out if you have not yet joined the appliance to aWindows domain.
e. Click OK to close the dialog.
f. To save your settings, click Apply.
2. Select the IWA Servers tab:
7
Integrate Authentication Using IWA Direct
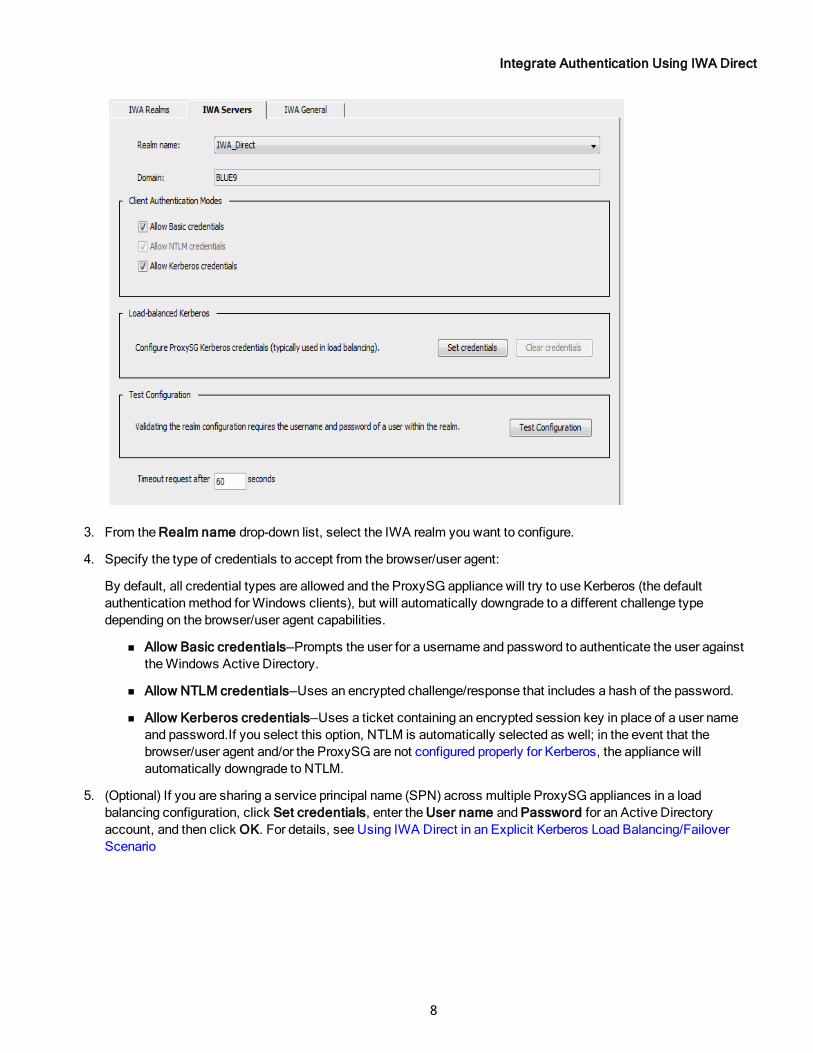
3. From the Realm name drop-down list, select the IWA realm you want to configure.
4. Specify the type of credentials to accept from the browser/user agent:
By default, all credential types are allowed and the ProxySG appliance will try to use Kerberos (the defaultauthenticationmethod forWindows clients), but will automatically downgrade to a different challenge typedepending on the browser/user agent capabilities.
Allow Basic credentials—Prompts the user for a username and password to authenticate the user againsttheWindows Active Directory.
Allow NTLM credentials—Uses an encrypted challenge/response that includes a hash of the password.
Allow Kerberos credentials—Uses a ticket containing an encrypted session key in place of a user nameand password.If you select this option, NTLM is automatically selected as well; in the event that thebrowser/user agent and/or the ProxySG are not configured properly for Kerberos, the appliance willautomatically downgrade to NTLM.
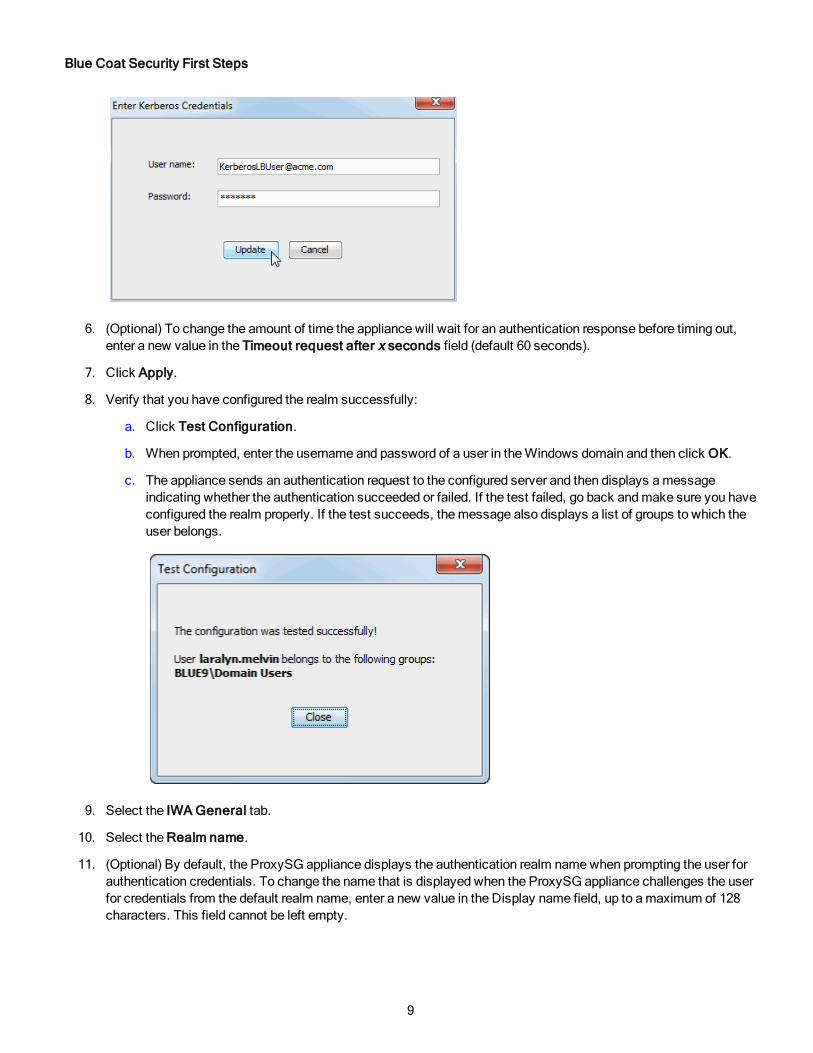
5. (Optional) If you are sharing a service principal name (SPN) across multiple ProxySG appliances in a loadbalancing configuration, click Set credentials, enter the User name and Password for an Active Directoryaccount, and then click OK. For details, see Using IWA Direct in an Explicit Kerberos Load Balancing/FailoverScenario
8
Blue Coat Security First Steps
6. (Optional) To change the amount of time the appliance will wait for an authentication response before timing out,enter a new value in the Timeout request after x seconds field (default 60 seconds).
7. Click Apply.
8. Verify that you have configured the realm successfully:
a. Click Test Configuration.
b. When prompted, enter the username and password of a user in theWindows domain and then click OK.
c. The appliance sends an authentication request to the configured server and then displays amessageindicating whether the authentication succeeded or failed. If the test failed, go back andmake sure you haveconfigured the realm properly. If the test succeeds, themessage also displays a list of groups to which theuser belongs.
9. Select the IWA General tab.
10. Select the Realm name.
11. (Optional) By default, the ProxySG appliance displays the authentication realm namewhen prompting the user forauthentication credentials. To change the name that is displayed when the ProxySG appliance challenges the userfor credentials from the default realm name, enter a new value in the Display name field, up to amaximum of 128characters. This field cannot be left empty.
9
Integrate Authentication Using IWA Direct
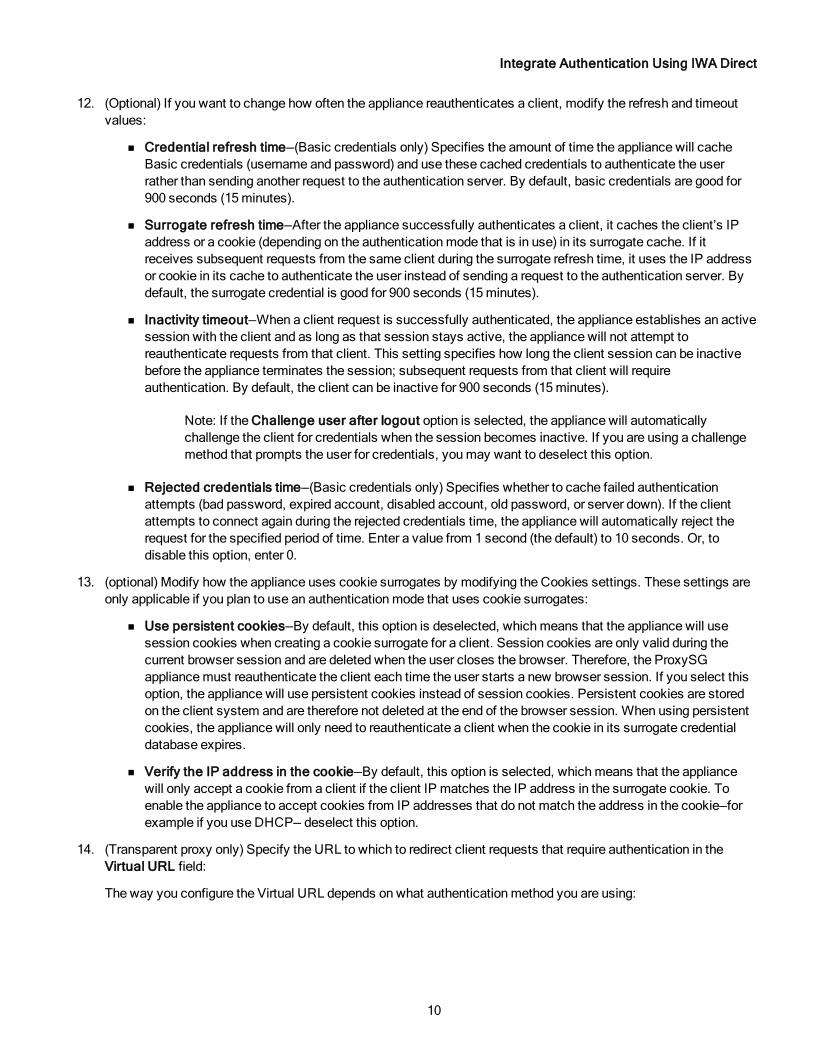
12. (Optional) If you want to change how often the appliance reauthenticates a client, modify the refresh and timeoutvalues:
Credential refresh time—(Basic credentials only) Specifies the amount of time the appliance will cacheBasic credentials (username and password) and use these cached credentials to authenticate the userrather than sending another request to the authentication server. By default, basic credentials are good for900 seconds (15minutes).
Surrogate refresh time—After the appliance successfully authenticates a client, it caches the client’s IPaddress or a cookie (depending on the authenticationmode that is in use) in its surrogate cache. If itreceives subsequent requests from the same client during the surrogate refresh time, it uses the IP addressor cookie in its cache to authenticate the user instead of sending a request to the authentication server. Bydefault, the surrogate credential is good for 900 seconds (15minutes).
Inactivity timeout—When a client request is successfully authenticated, the appliance establishes an activesession with the client and as long as that session stays active, the appliance will not attempt toreauthenticate requests from that client. This setting specifies how long the client session can be inactivebefore the appliance terminates the session; subsequent requests from that client will requireauthentication. By default, the client can be inactive for 900 seconds (15minutes).
Note: If the Challenge user after logout option is selected, the appliance will automaticallychallenge the client for credentials when the session becomes inactive. If you are using a challengemethod that prompts the user for credentials, youmay want to deselect this option.
Rejected credentials time—(Basic credentials only) Specifies whether to cache failed authenticationattempts (bad password, expired account, disabled account, old password, or server down). If the clientattempts to connect again during the rejected credentials time, the appliance will automatically reject therequest for the specified period of time. Enter a value from 1 second (the default) to 10 seconds. Or, todisable this option, enter 0.
13. (optional) Modify how the appliance uses cookie surrogates by modifying the Cookies settings. These settings areonly applicable if you plan to use an authenticationmode that uses cookie surrogates:
Use persistent cookies—By default, this option is deselected, whichmeans that the appliance will usesession cookies when creating a cookie surrogate for a client. Session cookies are only valid during thecurrent browser session and are deleted when the user closes the browser. Therefore, the ProxySGappliancemust reauthenticate the client each time the user starts a new browser session. If you select thisoption, the appliance will use persistent cookies instead of session cookies. Persistent cookies are storedon the client system and are therefore not deleted at the end of the browser session. When using persistentcookies, the appliance will only need to reauthenticate a client when the cookie in its surrogate credentialdatabase expires.
Verify the IP address in the cookie—By default, this option is selected, whichmeans that the appliancewill only accept a cookie from a client if the client IP matches the IP address in the surrogate cookie. Toenable the appliance to accept cookies from IP addresses that do not match the address in the cookie—forexample if you use DHCP— deselect this option.
14. (Transparent proxy only) Specify the URL to which to redirect client requests that require authentication in theVirtual URL field:
The way you configure the Virtual URL depends on what authenticationmethod you are using:
10

Blue Coat Security First Steps
NTLM—The Virtual URL must contain a simple hostname that does not contain any dots (for example, usehttp://myproxy rather than http://myproxy.acme.com. This allows IE to recognize the URL aspart of the Intranet zone rather than the Internet zone so that the browser will automatically returncredentials when challenged rather than prompting the user.
In addition, the Virtual URL must resolve to the IP address of the ProxySG appliance. To accomplish this,youmust add an "A" record to your internal DNS server that associates the Virtual URLwith the IP addressof the ProxySG appliance.
Kerberos—If you’re using Kerberos in a non-load balancing IWA Direct realm, the Virtual URLmust be theDNS name of the ProxySG appliance in the Active Directory domain. Typically this will be the DNS name ofthe Active Directory domain prefixed with the ProxySG appliancemachine account name. For example,sg.blue9.local. If you do not use the Active Directory DNS name of the ProxySG as the Virtual URL,all authentication transactions will be downgraded to NTLM.
15. (Optional) If you want to prompt the client for authentication credentials whenever the inactivity timeout expires,select the Challenge user after logout check box.
16. To save the realm configuration, click Apply.
Next Step: Validate the IWA Realm Configuration
Using IWA Direct in an Explicit Kerberos Load Balancing/Failover Scenario
In a standard IWA Direct Kerberos deployment, the Kerberos service principal name (SPN) of the appliance is the appli-ance’s own Active Directory machine account name. However, in a load balancing configuration, multiple ProxySG appli-ances must be able to decrypt the service tickets from the clients. For this reason, all ProxySG appliances in a loadbalancing groupmust share the same SPN. This will not work if each appliance uses its ownmachine account to processKerberos authentication requests. In this case, youmust create a new Active Directory account and use it to create aSPN that can be used by all appliances in the group. To deploy Kerberos in this configuration youmust:
1. Set up a load balancing device in front of your appliances and designate a virtual IP address to use for all explicitproxy request. The load balancing device will then forward the requests to the ProxySG appliances in the groupbased on the load balancing rules you have defined.
2. Create a DNS entry for the device that resolves to this IP address. Note that the DNS name that you usemust notmap to an existingmachine account name in Active Directory or the ProxySG appliance will not be able toauthenticate Kerberos service tickets and authentication will fail.
3. Create an Active Directory account for the Kerberos load balancing user. This account does not need any specialprivileges. You will create the SPN using this account and the ProxySG appliances will use the account credentialsto decrypt the service tickets from clients.
4. Use the Active Directory account you just created to create an SPN for the load balancing group as follows:
a. Open a command prompt as administrator on the Domain Controller.
b. Enter the following command:
setspn –A HTTP/<Load_Balancer_FQDN> <AD_Account_Name>
11

Integrate Authentication Using IWA Direct
where <Load_Balancer_FQDN> is the fully qualified domain name (FQDN) of the load balancing deviceand <AD_Account_Name> is the name of the Active Directory user you created for the load balancinggroup. Note that this command is case-sensitive.
For example, if the FQDN of the load balancing device is lb.acme.com and the Active Directory accountname you created is KerberosLBUser, you would enter the following command:
setspn –A HTTP/lb.acme.com KerberosLBUser
Note: Do not assign the same SPN tomultiple Active Directory accounts or the browser will fall backto NTLM without providing any warning or explanation. To list all SPNs that are currently registeredon an account, use the setspn -L <AD Account Name> command. If you find a duplicate,remove the extraneous SPN using the setspn -D <SPN> command.
5. On each ProxySG, create an IWA Direct realm. When configuring the realm on each appliance, youmust providethe credentials for the AD Kerberos load balancing user you created. On the IWA Servers tab click Setcredentials, enter the AD account User name and Password, and then click Update. Note that the user nameyou providemust be in the User Principal Name (UPN) format, for example [email protected].
6. Configure the client browser explicit proxy settings to point to the FQDN of the load balancing device.
Validate the IWA Realm Configuration
After you configure an authentication realm on the ProxySG, youmust verify that the ProxySG appliance can successfullyconnect to the authentication server and successfully authenticate a user as follows:
1. In theManagement Console, select Configuration > Authentication > IWA > IWA Servers.
2. Click Test Configuration.
3. When prompted, enter the username and password of a user in theWindows domain and then click OK.
4. The appliance sends an authentication request to the configured server and then displays amessage indicatingwhether the authentication succeeded or failed.
If the test fails, go back andmake sure you have configured the realm properly.
If the test succeeds, themessage also displays a list of groups to which the user belongs (IWA Direct) or a
12

Blue Coat Security First Steps
list of groups of interest to which the user belongs (IWA BCAAA). A group of interest is a group that isreferenced in ProxySG policy.
Next Step: Create a DNS Entry for the Authentication Domain
Configure the Web Browser to Use the Explicit Proxy
If you do not use PAC files to automatically configure network access information for clients in your network, youmustmanually configure theWeb browser to sendWeb requests to the ProxySG appliance.
Typically, the browser proxy configuration requires the IP address or hostname of the ProxySG appliance and the port onwhich the ProxySG appliance will listen for traffic. The default port is 8080. The required hostname format (that is, whetheryoumust provide a fully qualified DNS hostname or a short hostname) depends on the DNS configuration on your clientsystems.
The procedure for manual configuration varies by yourWeb browser version. Select the appropriate set of instructionsfrom the list below:
Internet Explorer
1. Select Tools > Internet Options.2. Select the Connections tab.3. If you are using a LAN, click LAN Settings. If you are using a Dial-up or Virtual Private Network connection,
click Add to set up the connection wizard.4. Make sure the Automatically detect proxy settings and Use automatic configuration script options are
not checked.5. Select Use a proxy server for your LAN.6. Select Advanced. The Proxy Settings dialog displays.7. For HTTP, enter the IP address of the ProxySG appliance, and add the port number; 8080 is the default.8. Select Use the same proxy server for all protocols.
9. (Optional for non-administrative users, best practice, recommended when setting up theWeb browser forProxySG appliance administrators) Enter the ProxySG appliance IP address for Do not use the proxyserver for addresses beginning with:
13
Integrate Authentication Using IWA Direct
This setting ensures that administrators are never locked out from access to theManagement Console;requests that match the entries above are not intercepted by the ProxySG appliance.
10. (Optional) If you do not want to intercept your local or internal Web servers, enable Bypass proxy serverfor local addresses and enter the IP addresses.
11. Click OK to save your settings and close all open dialogs.
Firefox
1. Select Tools > Options.2. Select Advanced icon.3. Select the Network tab.4. Click Settings under the Connection panel.5. Select Manual proxy configuration.6. In the HTTP Proxy field, enter the ProxySG appliance's IP address and port number; 8080 by default.7. Select Use this proxy server for all protocols.8. (Optional for non-administrative users, Best practice, recommended when setting up theWeb browser for
ProxySG appliance administrators) Enter the IP address of the ProxySG or the subnet to exclude in the Noproxy for field.
9. Click OK to save your settings and close all open dialogs.
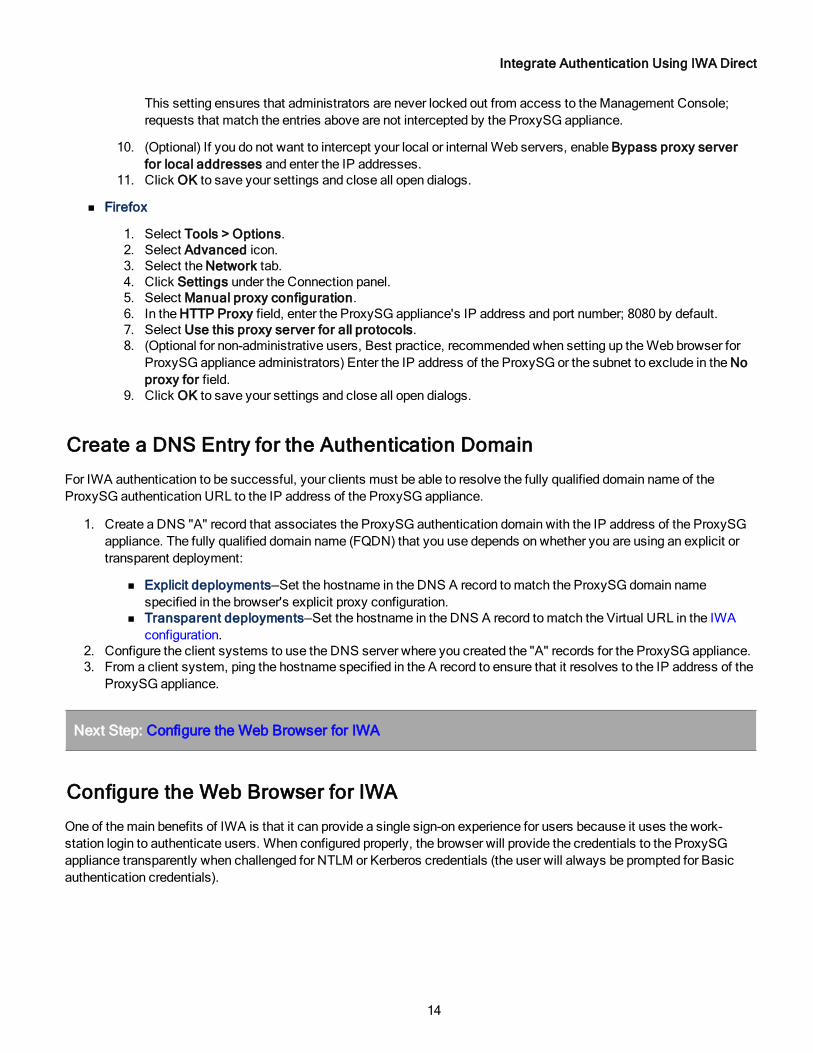
Create a DNS Entry for the Authentication Domain
For IWA authentication to be successful, your clients must be able to resolve the fully qualified domain name of theProxySG authentication URL to the IP address of the ProxySG appliance.
1. Create a DNS "A" record that associates the ProxySG authentication domain with the IP address of the ProxySGappliance. The fully qualified domain name (FQDN) that you use depends on whether you are using an explicit ortransparent deployment:
Explicit deployments—Set the hostname in the DNS A record tomatch the ProxySG domain namespecified in the browser's explicit proxy configuration.
Transparent deployments—Set the hostname in the DNS A record tomatch the Virtual URL in the IWAconfiguration.
2. Configure the client systems to use the DNS server where you created the "A" records for the ProxySG appliance.3. From a client system, ping the hostname specified in the A record to ensure that it resolves to the IP address of the
ProxySG appliance.
Next Step: Configure the Web Browser for IWA
Configure the Web Browser for IWA
One of themain benefits of IWA is that it can provide a single sign-on experience for users because it uses the work-station login to authenticate users. When configured properly, the browser will provide the credentials to the ProxySGappliance transparently when challenged for NTLM or Kerberos credentials (the user will always be prompted for Basicauthentication credentials).
14
Blue Coat Security First Steps
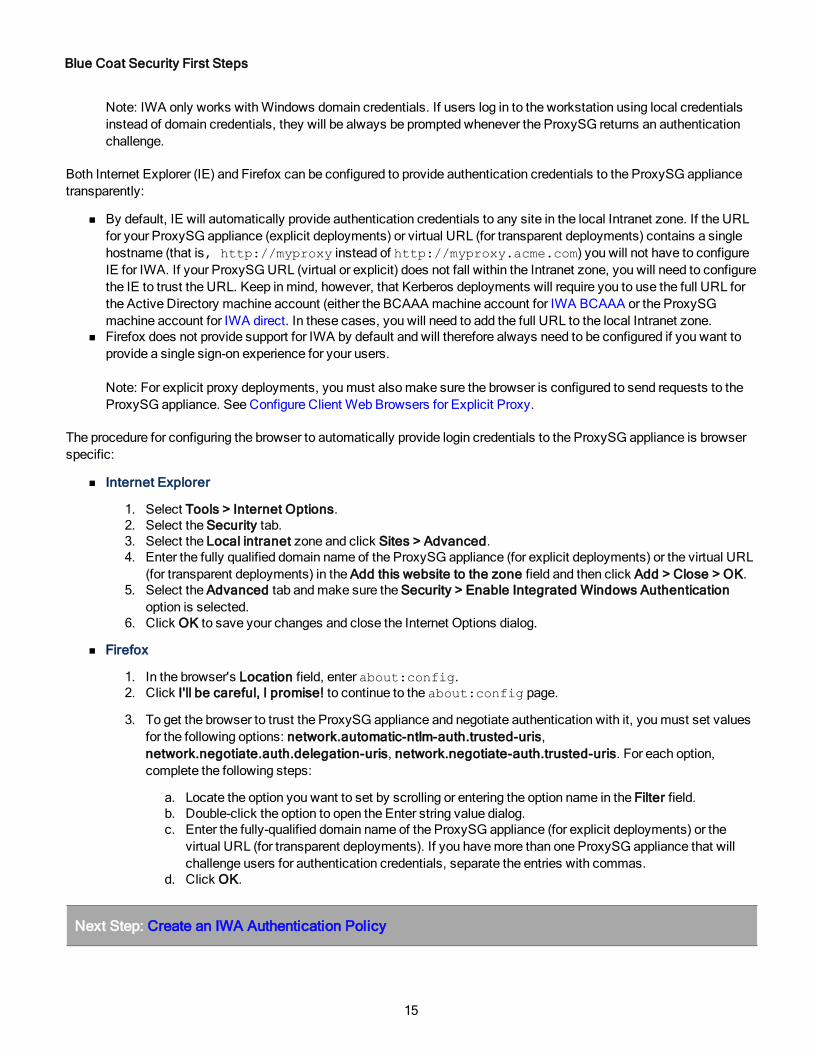
Note: IWA only works withWindows domain credentials. If users log in to the workstation using local credentialsinstead of domain credentials, they will be always be prompted whenever the ProxySG returns an authenticationchallenge.
Both Internet Explorer (IE) and Firefox can be configured to provide authentication credentials to the ProxySG appliancetransparently:
By default, IE will automatically provide authentication credentials to any site in the local Intranet zone. If the URLfor your ProxySG appliance (explicit deployments) or virtual URL (for transparent deployments) contains a singlehostname (that is, http://myproxy instead of http://myproxy.acme.com) you will not have to configureIE for IWA. If your ProxySGURL (virtual or explicit) does not fall within the Intranet zone, you will need to configurethe IE to trust the URL. Keep inmind, however, that Kerberos deployments will require you to use the full URL forthe Active Directory machine account (either the BCAAA machine account for IWA BCAAA or the ProxySGmachine account for IWA direct. In these cases, you will need to add the full URL to the local Intranet zone.
Firefox does not provide support for IWA by default and will therefore always need to be configured if you want toprovide a single sign-on experience for your users.
Note: For explicit proxy deployments, youmust alsomake sure the browser is configured to send requests to theProxySG appliance. See Configure Client Web Browsers for Explicit Proxy.
The procedure for configuring the browser to automatically provide login credentials to the ProxySG appliance is browserspecific:
Internet Explorer
1. Select Tools > Internet Options.2. Select the Security tab.3. Select the Local intranet zone and click Sites > Advanced.4. Enter the fully qualified domain name of the ProxySG appliance (for explicit deployments) or the virtual URL
(for transparent deployments) in the Add this website to the zone field and then click Add > Close > OK.5. Select the Advanced tab andmake sure the Security > Enable Integrated Windows Authentication
option is selected.6. Click OK to save your changes and close the Internet Options dialog.
Firefox
1. In the browser's Location field, enter about:config.2. Click I'll be careful, I promise! to continue to the about:config page.
3. To get the browser to trust the ProxySG appliance and negotiate authentication with it, youmust set valuesfor the following options: network.automatic-ntlm-auth.trusted-uris,network.negotiate.auth.delegation-uris, network.negotiate-auth.trusted-uris. For each option,complete the following steps:
a. Locate the option you want to set by scrolling or entering the option name in the Filter field.b. Double-click the option to open the Enter string value dialog.c. Enter the fully-qualified domain name of the ProxySG appliance (for explicit deployments) or the
virtual URL (for transparent deployments). If you havemore than one ProxySG appliance that willchallenge users for authentication credentials, separate the entries with commas.
d. Click OK.
Next Step: Create an IWA Authentication Policy
15
Integrate Authentication Using IWA Direct
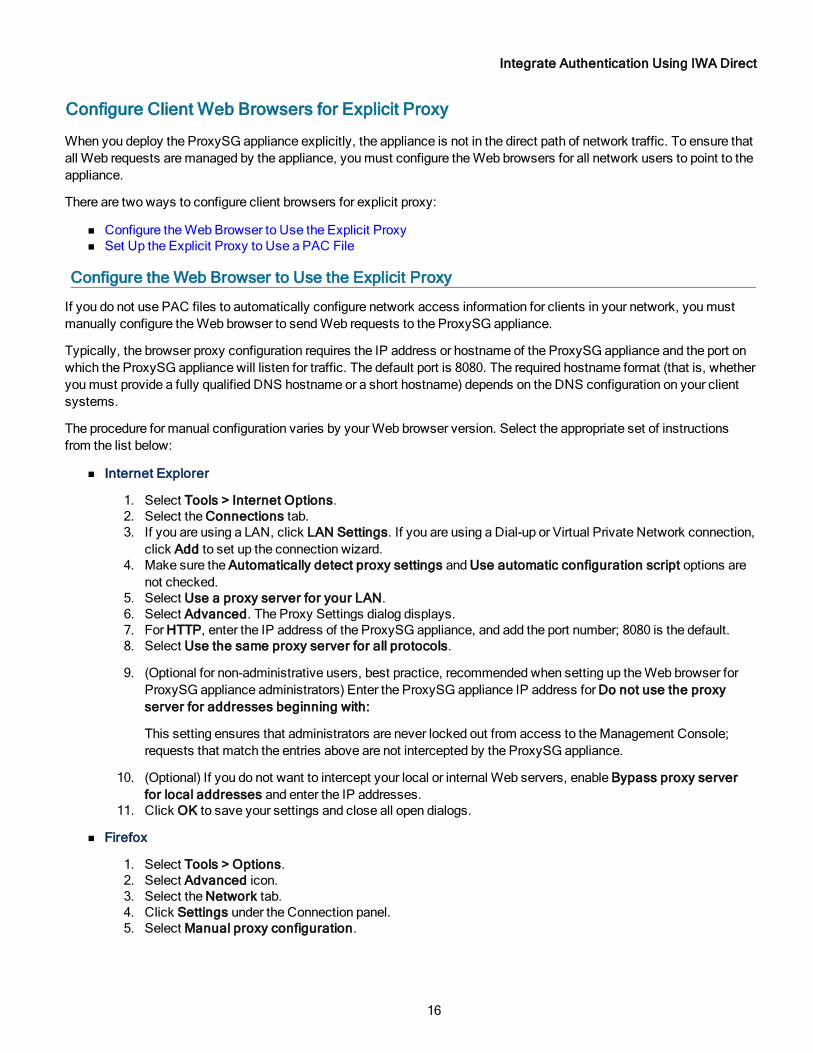
Configure Client Web Browsers for Explicit Proxy
When you deploy the ProxySG appliance explicitly, the appliance is not in the direct path of network traffic. To ensure thatall Web requests aremanaged by the appliance, youmust configure theWeb browsers for all network users to point to theappliance.
There are two ways to configure client browsers for explicit proxy:
Configure theWeb Browser to Use the Explicit Proxy Set Up the Explicit Proxy to Use a PAC File
Configure the Web Browser to Use the Explicit Proxy
If you do not use PAC files to automatically configure network access information for clients in your network, youmustmanually configure theWeb browser to sendWeb requests to the ProxySG appliance.
Typically, the browser proxy configuration requires the IP address or hostname of the ProxySG appliance and the port onwhich the ProxySG appliance will listen for traffic. The default port is 8080. The required hostname format (that is, whetheryoumust provide a fully qualified DNS hostname or a short hostname) depends on the DNS configuration on your clientsystems.
The procedure for manual configuration varies by yourWeb browser version. Select the appropriate set of instructionsfrom the list below:
Internet Explorer
1. Select Tools > Internet Options.2. Select the Connections tab.3. If you are using a LAN, click LAN Settings. If you are using a Dial-up or Virtual Private Network connection,
click Add to set up the connection wizard.4. Make sure the Automatically detect proxy settings and Use automatic configuration script options are
not checked.5. Select Use a proxy server for your LAN.6. Select Advanced. The Proxy Settings dialog displays.7. For HTTP, enter the IP address of the ProxySG appliance, and add the port number; 8080 is the default.8. Select Use the same proxy server for all protocols.
9. (Optional for non-administrative users, best practice, recommended when setting up theWeb browser forProxySG appliance administrators) Enter the ProxySG appliance IP address for Do not use the proxyserver for addresses beginning with:
This setting ensures that administrators are never locked out from access to theManagement Console;requests that match the entries above are not intercepted by the ProxySG appliance.
10. (Optional) If you do not want to intercept your local or internal Web servers, enable Bypass proxy serverfor local addresses and enter the IP addresses.
11. Click OK to save your settings and close all open dialogs.
Firefox
1. Select Tools > Options.2. Select Advanced icon.3. Select the Network tab.4. Click Settings under the Connection panel.5. Select Manual proxy configuration.
16

Blue Coat Security First Steps
6. In the HTTP Proxy field, enter the ProxySG appliance's IP address and port number; 8080 by default.7. Select Use this proxy server for all protocols.8. (Optional for non-administrative users, Best practice, recommended when setting up theWeb browser for
ProxySG appliance administrators) Enter the IP address of the ProxySG or the subnet to exclude in the Noproxy for field.
9. Click OK to save your settings and close all open dialogs.
Set Up the Explicit Proxy to Use a PAC File
The Proxy Auto Configuration (PAC) file is ameans of controlling user access to the Internet or the intranet. A PAC file isa JavaScript file with a .pac extension that contains instructions on when and whether theWeb browser should use theProxySG appliance for retrieving requested content. Network administrators like to use PAC files because they are cent-rally administered, and easy to update.
If you already have a PAC file on aWeb server in your network, add the URL for this file to theWeb browser configurationfor all clients in your network. Defining the location of the PAC file enables theWeb browser to discover and download theproxy configuration instructions for handlingWeb requests.
To define the location of the PAC file on theWeb browser and test the configuration:
1. Launch theWeb browser.2. Add the URL for the PAC file in theWeb browser. Follow the instructions for yourWeb browser:
Internet Explorer
a. Select Tools > Internet Options > Connections > LAN Settings.
If you are using a Dial-up or Virtual Private Network connection, select the necessary connection and clickthe Settings button.
b. Select the Use automatic configuration script option and add the URL in the Address field.c. Click OK to save your changes.
Firefox
a. Select Tools > Options > Advanced > Network > Connection Settings.b. Select Automatic proxy configuration URL and add the URL in the corresponding input field.
c. Click OK to save your changes.
Note: Web browsers typically cache the PAC file. To test modifications to your PAC file settings,youmust:
Reload the PAC file in Firefox.Close all browser sessions and clear the cache in IE.
Safari on Macintosh
a. Select Apple menu > System Preferences.b. Select Internet & Wireless > Network.c. Select Advanced > Proxies.d. Select Automatic Proxy Configuration and add the URL for the location of the PAC file in the input field.e. Click Apply Now.
17

Integrate Authentication Using IWA Direct
3. Verify that yourWeb requests are being intercepted by the ProxySG.a. Enter a URL and click through a few links on theWeb page. For example, go to www.bluecoat.com and
navigate through the website.
b. Launch the ProxySGManagement Console.
c. Select Statistics > Summary > Efficiency.
d. Verify that the ProxySG appliance displays Explicit HTTP traffic in the Savings panel.
Create an IWA Authentication Policy
After you verify that BCAAA and the ProxySG appliance can successfully authenticate users against your Active Dir-ectory (AD), youmust create the policy that enables authentication on the appliance. You can create a basic authen-tication policy that simply requires all requests to be authenticated and allows or denies access upon successfulauthentication. Or you can definemore complex policies with rules that apply to a specific source address, subnet, port,user agent, or request header. Or, you can define different rules for different destinations. You can also create policies thatallow access to guest users.
You can additionally create authorization policies that restrict access by user or groupmembership.
Note: This topic shows how to create a policy using the Visual Policy Manager (VPM). You can also create policyusing the Content Policy Language (CPL). Refer to the Content Policy Language Reference for details.
Note that youmust create an IWA realm before you can define the corresponding authentication policy.
1. Go to Configuration->Policy->Visual Policy Manager->Launch
2. Create the policy rule that enables the ProxySG appliance to authenticate client requests:
a. Select Policy > Add Web Authentication Layer.b. Enter a Layer Name or accept the default name and then click OK. The first policy rule displays with
default settings.
3. Configure the authentication policy settings:
a. In the Action column of the first row, right-click and then select Set. The Set Action Object dialog displays.
b. Click New and then select one of the following authentication objects:
Authenticate—Use this option if you do not need to log user IDs for denied requests. With thisoption, if policy causes a request to be denied before the user is authenticated, the user IDassociated with the request will not be available for access logging.
Force Authenticate—Use this option to force the appliance to authenticate requests even if they aredenied before authentication would normally occur. This ensures that user IDs are available foraccess logging.
Tip If you plan to create a guest authentication policy, create a combined object that containsthe Authenticate object and a Permit Authentication Error object (be sure to select AllExcept User Credentials Required).
c. (optional) Specify a Name for the authentication object.d. Select the IWA Realm from the drop-down list.
18

Blue Coat Security First Steps
e. Select the authenticationmode from theMode drop-down list. Although you can select Auto to have theProxySG appliance automatically choose an authenticationmode, it is usually better to make a selectionthat is appropriate for your deployment as follows:
Explicit deployments—Select Proxy or Proxy IP. The Proxy IP mode reduces the load on thenetwork because it uses an IP surrogate to reauthenticate clients that have already successfullyauthenticated.
Transparent deployments—Select Origin Cookie Redirect. This mode redirects the client to thevirtual URL for authentication and uses a cookie surrogate to reauthenticate clients that have already successfully authenticated.
f. Click OK to close the Add Authenticate Object or Add Force Authenticate object dialog.g. Click OK to close the Set Action Object dialog.
4. (optional) Restrict authentication to a subset of client requests, based on source or destination request attributes:
The default settings in the policy rule will cause the ProxySG appliance to authenticate all client requests. You canset the Source and/or Destination columns to restrict authentication to a specified subset of requests. Forexample,
a. In the Source or Destination column of the first row, right-click and then select Set. The Set Source Objector Set Destination object dialog displays.
b. Click New and then select an object that represents the subset of requests you want to authenticate. Afteryou select an object, you will be prompted to provide details. For example, if you choose the ClientIP Address/Subnet object, you will be prompted for an IP address and subnet mask/prefix to which this rulewill apply.
TipWhen you first deploy your authentication policy, youmay want to limit authentication to thesource address of a test workstation or subnet. This allows you to identify and troubleshoot anyconfiguration issues before rolling the policy out into production.
5. (optional) Add additional policy rules to refine your authentication policy:
A singleWeb Authentication Layer rule with the authenticate action is all you need to enable authentication.However, theremay be some cases where you want to bypass authentication for certain requests and enable it forothers. For example, youmay have a certain client, subnet, or URL on which you do not require authentication oryoumay have some custom applications that do not know how to handle authentication requests. In this case, youwould add an additional rule to yourWeb Authentication Layer policy to instruct the ProxySG appliance how tohandle the exceptions.
a. Click Add Rule. A new row appears in theWeb Authentication Layer.b. Specify which client requests this rule applies to by setting the Source or Destination columns.
c. Specify what the ProxySG appliance should do with requests that match the source and/or destinationsetting you have defined by right-clicking in the Action column of the row, and selecting Set.
If you want to authenticate requests that match the specified source and/or destination requestsettings you have defined, click New and select Authenticate and click OK.
If you want to bypass authentication for thematching requests, select Do Not Authenticate andclick OK.
d. Prioritize the order in which you want the ProxySG appliance to enforce the rules by selecting the rule youwant to move and clickingMove up or Move down.The ProxySG appliance evaluates the rules in the order
19

Integrate Authentication Using IWA Direct
in which they appear in the policy layer. As soon as it finds a rule that matches the request, it will enforce thespecified action (in this case, either to authenticate or not authenticate the request). Therefore, you shouldput more specific rules above general rules. For example, if you have a two rules in your policy—one that isset to authenticate requests from any source or destination and one that is set to not authenticate requestsfrom a specific subnet—you would put the one that bypasses authentication in front of the general rule thatmatches all requests.
6. Install the authentication policy:
a. Click Install policy.b. Click OK to acknowledge that the policy was successfully installed.
Next Step: Verify Kerberos Authentication or Enable IWA Authentication for SSL Trafficin a Transparent Deployment
Create an IWA Authorization Policy
One of the benefits of IWA is that it automatically returns authorization information for a user in response to an authen-tication request. You do not have to perform any additional configuration to get authorization to work. After successfullyauthenticating a user, the appliance receives a list of all groups (IWA Direct) or groups of interest (IWA BCAAA) to whichthe user belongs.
Note: This topic shows how to create a policy using the Visual Policy Manager (VPM). You can also create policyusing the Content Policy Language (CPL). Refer to the Content Policy Language Reference for details.
1. Go to Configuration->Policy->Visual Policy Manager->Launch
2. Create aWeb Access Layer:
a. Select Policy > Add Web Access Layer.b. Enter a Layer Name or accept the default name and then click OK.
3. Specify the user or group to authorize (the source):
a. In the Source column of the first row, right-click and then select Set. The Set Source Object dialogdisplays.
b. Click New and then select the type of Active Directory object this rule will authorize:
To create a rule for authorizing a group,select Group. The AddGroupObject dialog displays. To create rule for authorizing a user, select User. The Add User Object dialog displays.
c. Select the IWA realm from the Authentication Realm drop-down list.
d. Specify the name of the Active Directory user or group that rule will authorize:
If you know the name of the Active Directory user or group, enter it in the Group or User field. If you don't know the Active Directory name of the user or group, click Browse and select the group
from the IWA Browser.e. Click OK to close the AddGroupObject or Add User Object dialog.f. Click OK to close the Set Source Object dialog.
4. Specify the content filtering rules which allow or deny requests from the specified user or group.
20

Blue Coat Security First Steps
5. (optional) Define any additional parameters that you want this rule to enforce.6. To create additional authorization rules, repeat Steps 3 through 5.
7. Install the policy:
a. Click Install policy.b. Click OK to acknowledge that the policy was successfully installed.
Create an IWA Guest Authentication Policy
A guest authentication policy enables users who do not have aWindows domain account on your network to access Inter-net resources.
To create an IWA guest authentication policy:
1. Go to Configuration->Policy->Visual Policy Manager->Launch
2. Create aWeb Authentication Layer for authenticating client requests for your domain users:
See Create an IWA Authentication Policy for instructions.
3. Create a secondWeb Authentication Layer to provide guest access:
a. Select Policy > Add Web Authentication Layer.
b. Enter a Layer Name to distinguish this layer from the previous layer (for example, Guest Authentication)and then click OK. The first policy rule displays with default settings.
4. Configure the source:
a. In the Source column of the first row, right-click and then select Set. The Set Source Object dialogdisplays.
b. Click New and then select User Authentication Error. The Add User Authentication Error Object dialogdisplays.
c. Select Any errors and click OK twice to save the source object and close the dialogs.
5. Configure the action:
a. Right-click the Action column and then select Set. The Set Action Object dialog displays.
b. Click New and then select the Authenticate Guest object. The Add Authenticate Guest object dialogdisplays.
c. Select Use realm and then select your IWA realm from the drop-down list.
d. Enter a Guest Username. This will be the name that appears in your access log whenever guest access isgranted; it does not correlate to an Active Directory user account.
e. Click OK twice to save the Action object and close the dialogs.
6. Make sure that theWeb Authentication Layer for your guest policy is positioned after the your mainWebAuthentication Layer:
To re-order the layers, select Edit > Reorder Layers.
7. Install the authentication policy:
21
Integrate Authentication Using IWA Direct
a. Click Install policy.
b. Click OK to acknowledge that the policy was successfully installed.
Verify Kerberos Authentication
Even if you configure IWA to allow Kerberos, Kerberos will only be used if configured properly. If the ProxySG appliancecannot successfully negotiate Kerberos with a client, it will silently downgrade to use NTLM authentication. Because thishappens behind the scenes, youmay not know whether you are using Kerberos or NTLM.
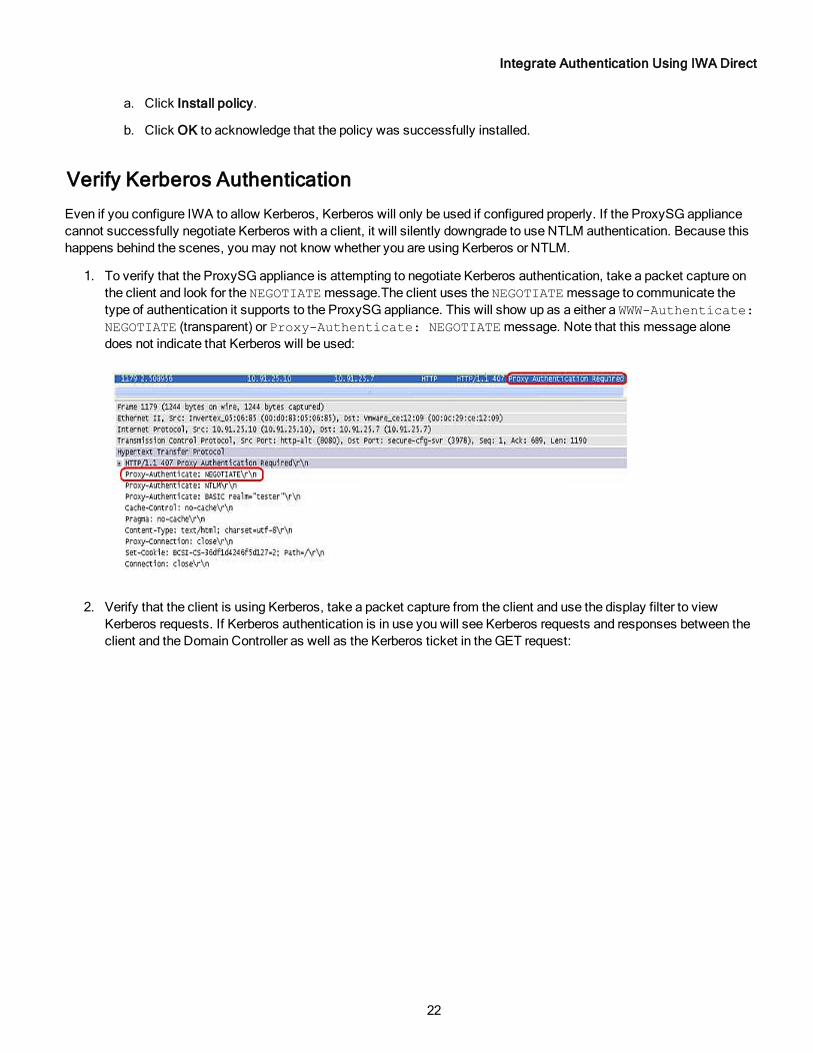
1. To verify that the ProxySG appliance is attempting to negotiate Kerberos authentication, take a packet capture onthe client and look for the NEGOTIATEmessage.The client uses the NEGOTIATEmessage to communicate thetype of authentication it supports to the ProxySG appliance. This will show up as a either a WWW-Authenticate:NEGOTIATE (transparent) or Proxy-Authenticate: NEGOTIATEmessage. Note that this message alonedoes not indicate that Kerberos will be used:
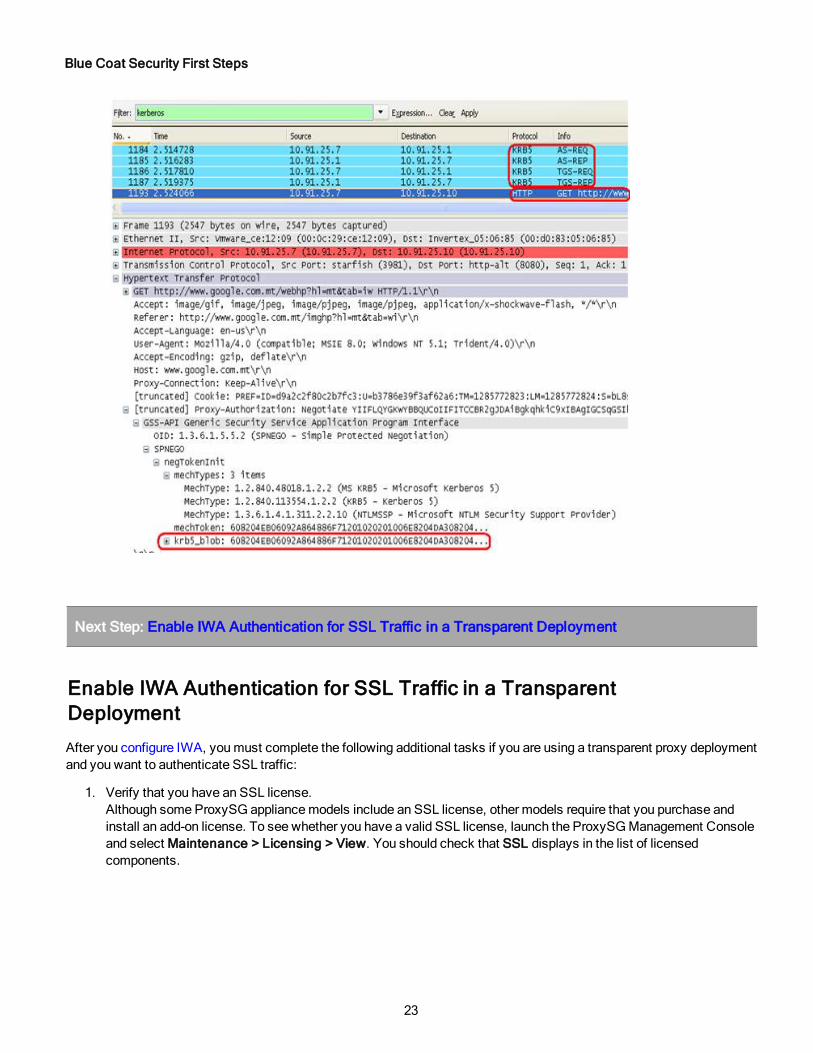
2. Verify that the client is using Kerberos, take a packet capture from the client and use the display filter to viewKerberos requests. If Kerberos authentication is in use you will see Kerberos requests and responses between theclient and the Domain Controller as well as the Kerberos ticket in the GET request:
22
Blue Coat Security First Steps
Next Step: Enable IWA Authentication for SSL Traffic in a Transparent Deployment
Enable IWA Authentication for SSL Traffic in a TransparentDeployment
After you configure IWA, youmust complete the following additional tasks if you are using a transparent proxy deploymentand you want to authenticate SSL traffic:
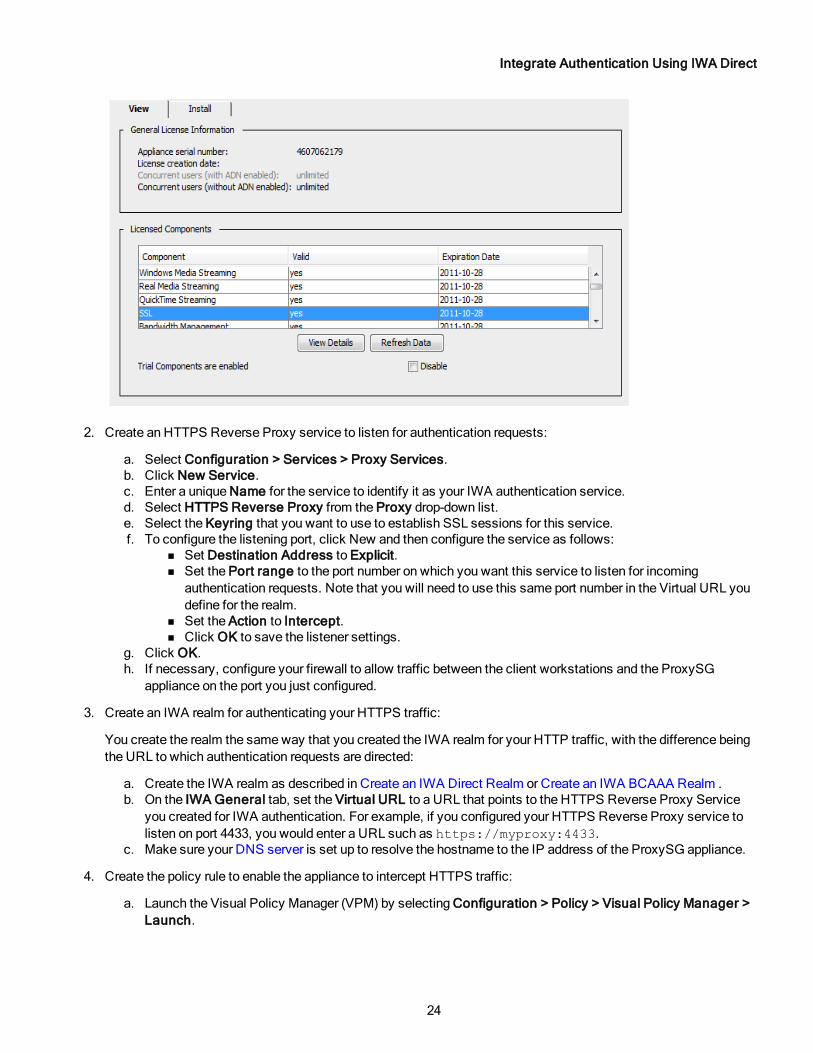
1. Verify that you have an SSL license.Although some ProxySG appliancemodels include an SSL license, other models require that you purchase andinstall an add-on license. To see whether you have a valid SSL license, launch the ProxySGManagement Consoleand select Maintenance > Licensing > View. You should check that SSL displays in the list of licensedcomponents.
23
Integrate Authentication Using IWA Direct
2. Create an HTTPS Reverse Proxy service to listen for authentication requests:
a. Select Configuration > Services > Proxy Services.b. Click New Service.c. Enter a unique Name for the service to identify it as your IWA authentication service.d. Select HTTPS Reverse Proxy from the Proxy drop-down list.e. Select the Keyring that you want to use to establish SSL sessions for this service.f. To configure the listening port, click New and then configure the service as follows:
Set Destination Address to Explicit. Set the Port range to the port number on which you want this service to listen for incoming
authentication requests. Note that you will need to use this same port number in the Virtual URL youdefine for the realm.
Set the Action to Intercept. Click OK to save the listener settings.
g. Click OK.h. If necessary, configure your firewall to allow traffic between the client workstations and the ProxySG
appliance on the port you just configured.
3. Create an IWA realm for authenticating your HTTPS traffic:
You create the realm the sameway that you created the IWA realm for your HTTP traffic, with the difference beingthe URL to which authentication requests are directed:
a. Create the IWA realm as described in Create an IWA Direct Realm or Create an IWA BCAAA Realm .b. On the IWA General tab, set the Virtual URL to a URL that points to the HTTPS Reverse Proxy Service
you created for IWA authentication. For example, if you configured your HTTPS Reverse Proxy service tolisten on port 4433, you would enter a URL such as https://myproxy:4433.
c. Make sure your DNS server is set up to resolve the hostname to the IP address of the ProxySG appliance.
4. Create the policy rule to enable the appliance to intercept HTTPS traffic:
a. Launch the Visual Policy Manager (VPM) by selecting Configuration > Policy > Visual Policy Manager >Launch.
24

Blue Coat Security First Steps
b. Select Policy > Add SSL Intercept Layer.c. Enter a Layer Name or accept the default name and then click OK. The first policy rule displays with
default settings.d. Right-click the Action column and select Set.e. Click New and select Enable SSL Interception.f. Select Enable HTTPS interception.g. Check the Issuer Keyring check box and select the keyring you have specified to work with SSL
interception, which should use a certificate that is trusted by the users' browser to avoid browser warnings.h. Click OK.
5. Create the policy rule that enables the ProxySG appliance to authenticate client HTTPS requests:
a. Select Policy > Add Web Authentication Layer.b. Enter a Layer Name or accept the default name and then click OK. The first policy rule displays with
default settings.c. In the Action column of the first row, right-click and then select Set. The Set Action Object dialog displays.d. Click Newand then select Authenticate.e. Select the IWA Realm from the drop-down list. Make sure you select the realm you created for your
HTTPS traffic.f. Select the authenticationmode from theMode drop-down list. For transparent authentication, you will
usually want to select Origin Cookie Redirect. This mode redirects the client to the virtual URL for authentication and uses a cookie surrogate to reauthenticate clients that have already successfully authenticated.
g. Click OK to close the Add Authenticate Object or Add Force Authenticate object dialog.
h. Click OK to close the Set Action Object dialog.
6. Install the policy rules you created:
a. Click Install policy.b. Click OK to acknowledge that the policy was successfully installed.
25

Integrate Authentication Using IWA Direct
Authentication Troubleshooting
Why don't my reports show user names for blocked requests? 26
Why are users being prompted to authenticate? 27
Why don't my reports show user names for blocked requests?
Whether or not your reports show user names for blocked requests depends on the order in which denial and authen-tication occur in the policies you have defined. When the ProxySG intercepts a client request, it uses the URL to determ-ine the content category and, if the category is blocked based on your content filtering policies, the request will be deniedbefore the user has been authenticated and the user name is therefore not available for logging. This is because Deny hasprecedence over authentication.
To force requests to be authenticated even in the case where the request is denied, youmust include the authen-ticate.force(yes) property in the Proxy layer of your policy. For example, in the following example, requests forgambling websites will be denied before authentication occurs:
define subnet corporate_subnet
10.10.12.0/24
end
<Proxy>
client.address= ! corporate_subnet deny ; filter out strangers
authenticate (MyRealm) ; this has lower precedence than deny
<Proxy>
category=Gambling exception (content_filter_denied)
However, by adding the authenticate.force(yes) property, you can ensure that authentication will occur before therequest is denied, allowing you to log the user names of the users who attempt to access gambling sites:
define subnet corporate_subnet
10.10.12.0/24
end
<Proxy>
client.address= ! corporate_subnet deny ; filter out strangers
authenticate(MyRealm) authenticate.force(yes); this has higher precedence thandeny
<Proxy>
category=Gambling exception (content_filter_denied)
26

Blue Coat Security First Steps
Why are users being prompted to authenticate?
One of themain benefits of IWA is that it can provide a single sign-on experience for users. When configured properly, theuser agent or browser will automatically provide the client's domain credentials when challenged by the ProxySG appli-ance. Although you cannot guarantee that single sign-on will work in all situations, make sure you have taken the followingsteps to enable single sign-on:
Configure the IWA realm to allow Kerberos and/or NTLM credentials. When using Basic credentials, the user willalways be prompted to authenticate.
Ensure that users are logging in to their workstations using domain credentials rather than local credentials. TheProxySG appliance can only use domain credentials to authenticate users.
Ensure that the client browsers support IWA single sign-on. At this time only Internet Explorer (IE) and Firefoxsupport single sign-on.
Make sure the client browsers are configured to automatically provide credentials to the ProxySG appliance. Create a DNS "A" record that maps the ProxySG appliance fully qualified domain name (FQDN) with its
IP address. In explicit deployments, the DNS A record shouldmap the FQDN in the browser explicit proxyconfiguration; in transparent deployments, the DNS A record shouldmap the Virtual URL in the IWA realmconfiguration to the IP address of the ProxySG appliance.
Ensure that clients are using the DNS server you configured. To test this, ping the FQDN you specified in the DNSconfiguration from a client system and ensure that it resolves to the correct IP address.
27


