31
QSS QSS User Guide Document Version: 1 01/12/2020

QSSQSS User Guide
Document Version: 101/12/2020
Contents
1. OverviewAbout QSS....................................................................................................................................................3Switch Access...............................................................................................................................................3
Accessing the Switch Using a Browser.................................................................................................... 3Accessing the Switch Using Qfinder Pro..................................................................................................4
Getting Started..............................................................................................................................................4
2. QSS NavigationTask Bar........................................................................................................................................................5Overview.......................................................................................................................................................5
3. Network ConfigurationPort Management......................................................................................................................................... 7
Port Status................................................................................................................................................8Port Statistics............................................................................................................................................8Configuring Port Settings..........................................................................................................................8
VLAN.............................................................................................................................................................9Adding a VLAN.........................................................................................................................................9Editing a VLAN....................................................................................................................................... 10Deleting a VLAN.....................................................................................................................................10
Configuring a Link Aggregation Group (LAG).............................................................................................10Rapid Spanning Tree Protocol (RSTP)....................................................................................................... 11
Enabling RSTP.......................................................................................................................................12Setting Bridge Priority.............................................................................................................................12Disabling RSTP...................................................................................................................................... 13
LLDP...........................................................................................................................................................13Enabling LLDP........................................................................................................................................13Disabling LLDP.......................................................................................................................................13LLDP Remote Devices........................................................................................................................... 14MAC Address Table................................................................................................................................14
IGMP Snooping.......................................................................................................................................... 16Enabling IGMP Snooping....................................................................................................................... 16Configuring IGMP Snooping...................................................................................................................16Disabling IGMP Snooping...................................................................................................................... 17IGMP Snooping Statistics.......................................................................................................................17
Access Control Lists (ACLs)....................................................................................................................... 17IP Address-based ACL...........................................................................................................................18MAC Address-based ACL...................................................................................................................... 19
QoS.............................................................................................................................................................20Configuring DSCP Priority for QoS.........................................................................................................21Configuring CoS Priority for QoS............................................................................................................21
4. SystemSystem Settings..........................................................................................................................................23
Configuring the Switch Name.................................................................................................................23Configuring the Switch IP Information.................................................................................................... 23Configuring Password Settings.............................................................................................................. 23Configuring Time Settings...................................................................................................................... 24Backup/Restore......................................................................................................................................24Restarting the Switch..............................................................................................................................25Resetting the Switch Password..............................................................................................................25
QSS User Guide
1

Resetting the Switch...............................................................................................................................25Firmware Update........................................................................................................................................ 25
Firmware Requirements......................................................................................................................... 26Checking for Live Updates..................................................................................................................... 27Updating the Firmware Manually............................................................................................................27Updating the Firmware Using Qfinder Pro..............................................................................................28
2
1. Overview
About QSS
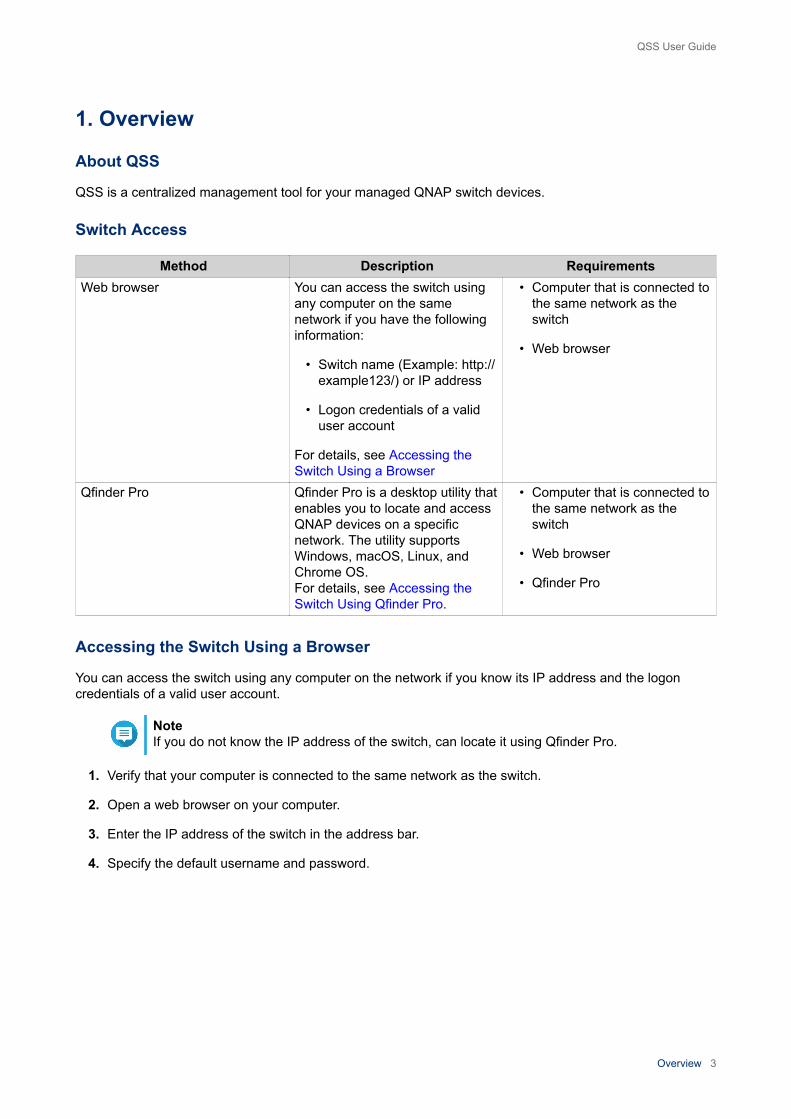
QSS is a centralized management tool for your managed QNAP switch devices.
Switch Access
Method Description RequirementsWeb browser You can access the switch using
any computer on the samenetwork if you have the followinginformation:
• Switch name (Example: http://example123/) or IP address
• Logon credentials of a validuser account
For details, see Accessing theSwitch Using a Browser
• Computer that is connected tothe same network as theswitch
• Web browser
Qfinder Pro Qfinder Pro is a desktop utility thatenables you to locate and accessQNAP devices on a specificnetwork. The utility supportsWindows, macOS, Linux, andChrome OS.For details, see Accessing theSwitch Using Qfinder Pro.
• Computer that is connected tothe same network as theswitch
• Web browser
• Qfinder Pro
Accessing the Switch Using a Browser
You can access the switch using any computer on the network if you know its IP address and the logoncredentials of a valid user account.
NoteIf you do not know the IP address of the switch, can locate it using Qfinder Pro.
1. Verify that your computer is connected to the same network as the switch.
2. Open a web browser on your computer.
3. Enter the IP address of the switch in the address bar.
4. Specify the default username and password.
QSS User Guide
Overview 3
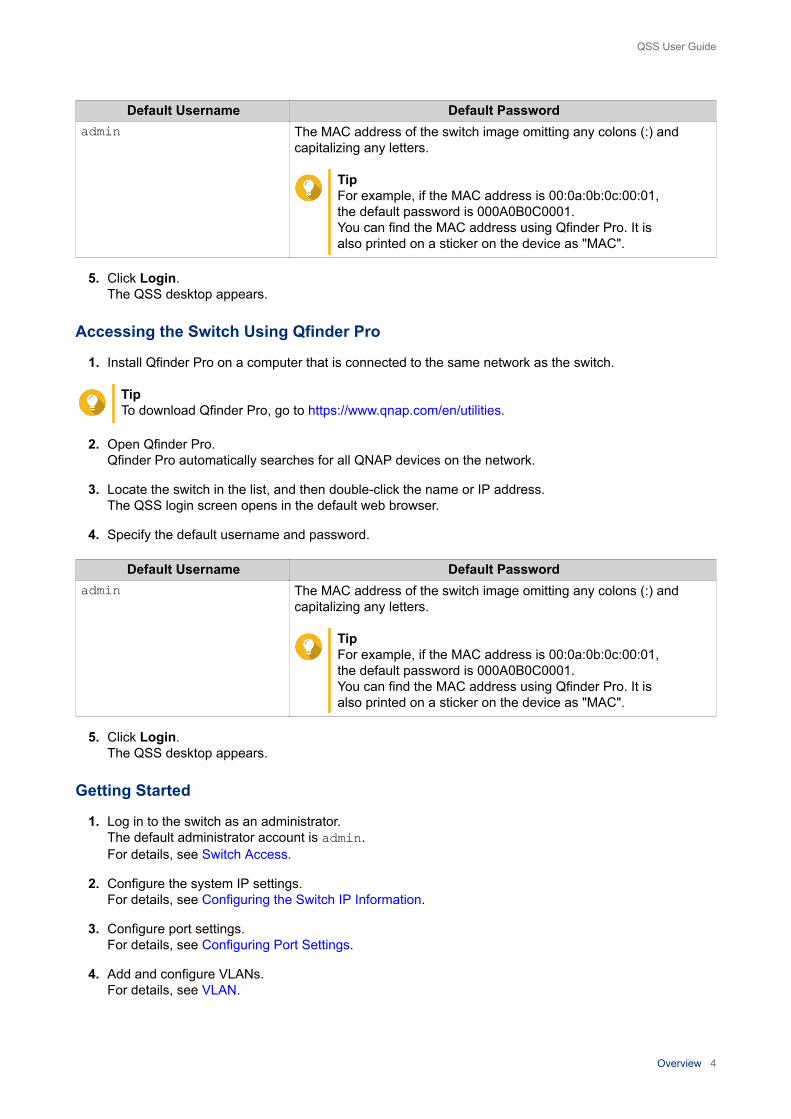
Default Username Default Passwordadmin The MAC address of the switch image omitting any colons (:) and
capitalizing any letters.
TipFor example, if the MAC address is 00:0a:0b:0c:00:01,the default password is 000A0B0C0001.You can find the MAC address using Qfinder Pro. It isalso printed on a sticker on the device as "MAC".
5. Click Login. The QSS desktop appears.
Accessing the Switch Using Qfinder Pro
1. Install Qfinder Pro on a computer that is connected to the same network as the switch.
TipTo download Qfinder Pro, go to https://www.qnap.com/en/utilities.
2. Open Qfinder Pro. Qfinder Pro automatically searches for all QNAP devices on the network.
3. Locate the switch in the list, and then double-click the name or IP address. The QSS login screen opens in the default web browser.
4. Specify the default username and password.
Default Username Default Passwordadmin The MAC address of the switch image omitting any colons (:) and
capitalizing any letters.
TipFor example, if the MAC address is 00:0a:0b:0c:00:01,the default password is 000A0B0C0001.You can find the MAC address using Qfinder Pro. It isalso printed on a sticker on the device as "MAC".
5. Click Login. The QSS desktop appears.
Getting Started
1. Log in to the switch as an administrator. The default administrator account is admin.For details, see Switch Access.
2. Configure the system IP settings. For details, see Configuring the Switch IP Information.
3. Configure port settings. For details, see Configuring Port Settings.
4. Add and configure VLANs. For details, see VLAN.
QSS User Guide
Overview 4
2. QSS Navigation
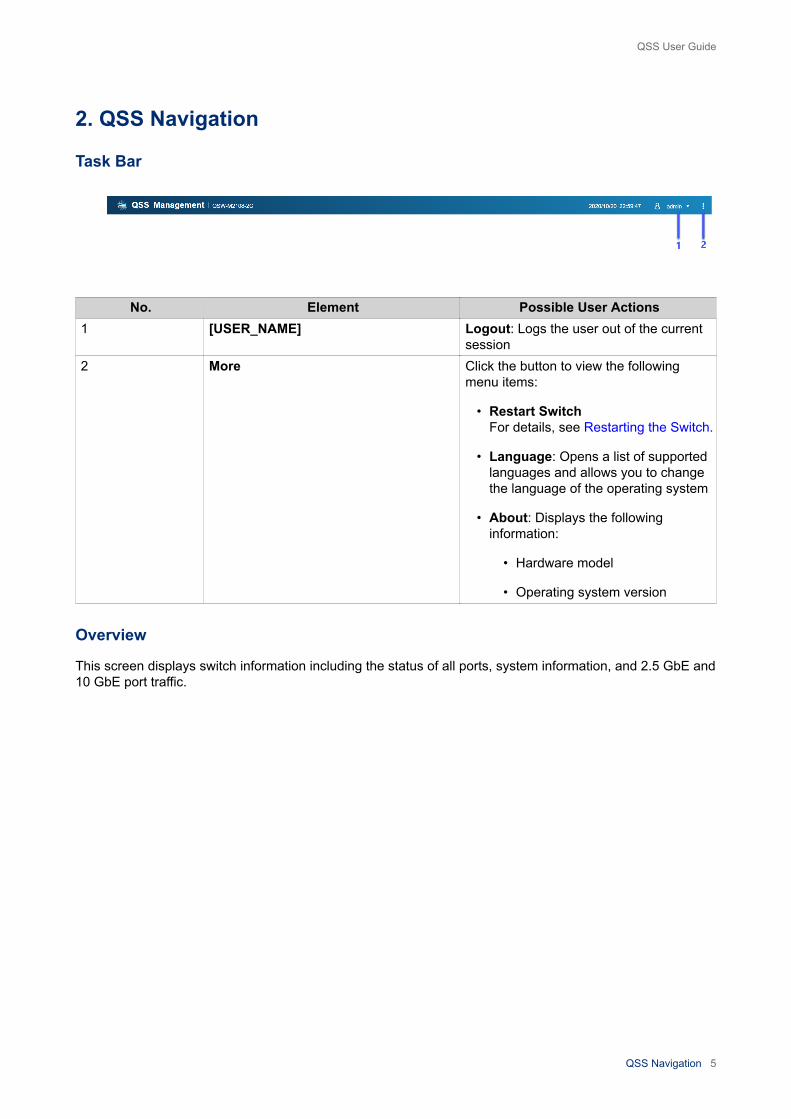
Task Bar
No. Element Possible User Actions1 [USER_NAME] Logout: Logs the user out of the current
session2 More Click the button to view the following
menu items:
• Restart SwitchFor details, see Restarting the Switch.
• Language: Opens a list of supportedlanguages and allows you to changethe language of the operating system
• About: Displays the followinginformation:
• Hardware model
• Operating system version
Overview
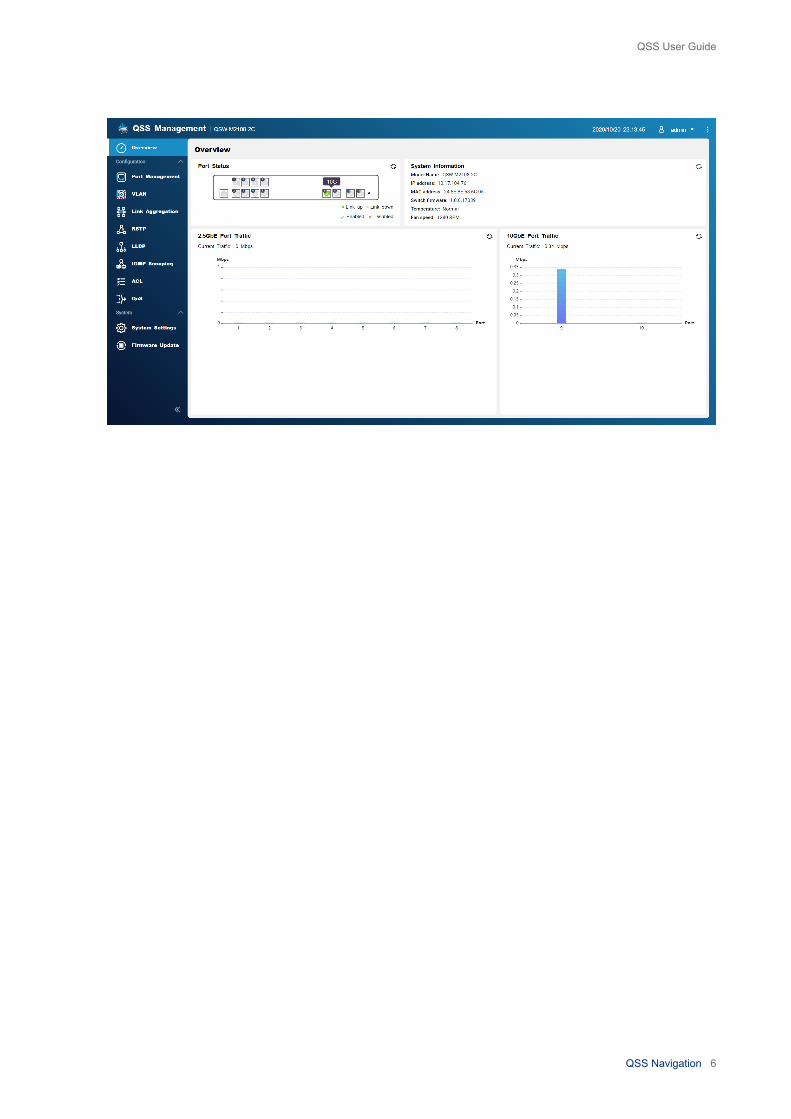
This screen displays switch information including the status of all ports, system information, and 2.5 GbE and10 GbE port traffic.
QSS User Guide
QSS Navigation 5
QSS User Guide
QSS Navigation 6

3. Network ConfigurationThis section describes how to use the QSS network settings to set up the basic configuration of the switch.Basic configuration of the switch includes port management, VLAN configuration, configuration of variousprotocols, and traffic management via Quality of Service (QoS) and Access Control Lists (ACLs).
Dashboard
The dashboard opens in the configuration section of QSS. Click the drop-down menu in the dashboard toview port status, VLAN status, link aggregation status, and port traffic on 2.5 GbE and 10 GbE ports.
Port Management
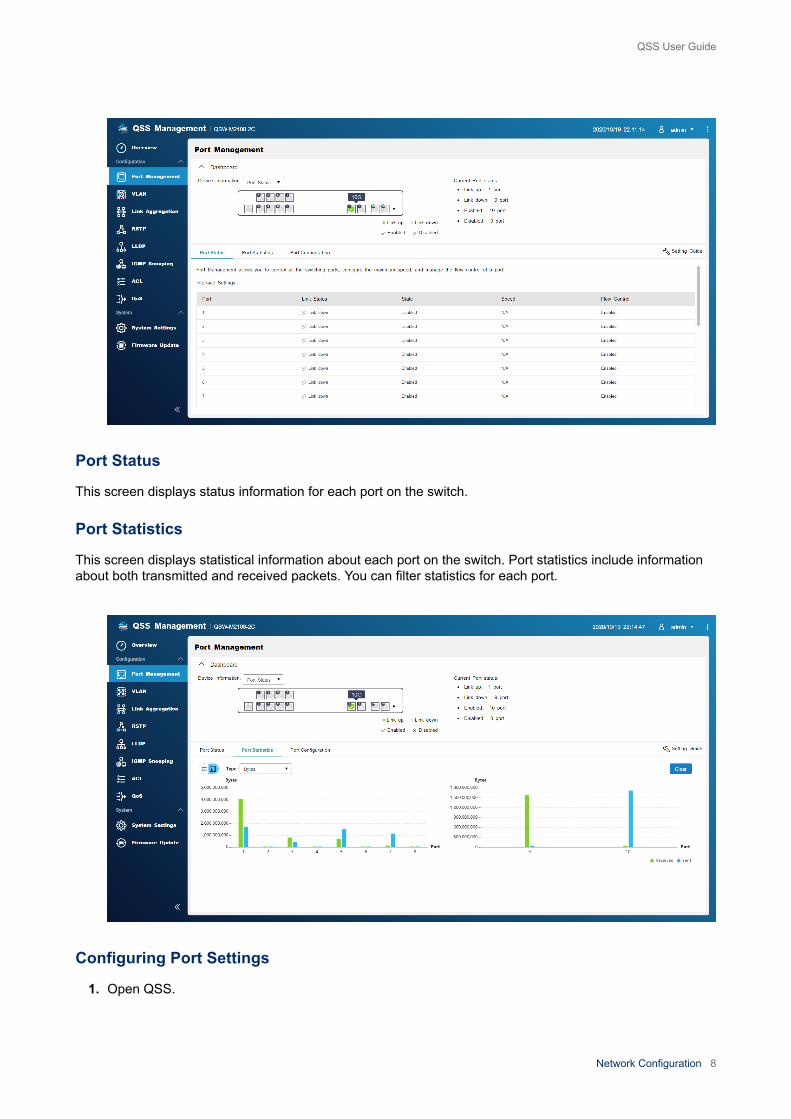
This screen displays port and link aggregation group (LAG) status information and transmission statisticsand provides access to port configuration options.
QSS User Guide
Network Configuration 7
Port Status
This screen displays status information for each port on the switch.
Port Statistics
This screen displays statistical information about each port on the switch. Port statistics include informationabout both transmitted and received packets. You can filter statistics for each port.
Configuring Port Settings
1. Open QSS.
QSS User Guide
Network Configuration 8
2. Go to Configuration > Port Management .
3. Go to Port Configuration.
4. Identify a port.
5. Configure the settings.
Setting DescriptionState Controls the status of the portSpeed Controls the maximum speed that the port can useFlow Control Controls the status of flow control on the port
ImportantFlow Control is not supported when the port speed isset to HDX.
6. Click Save.
QSS saves the settings.
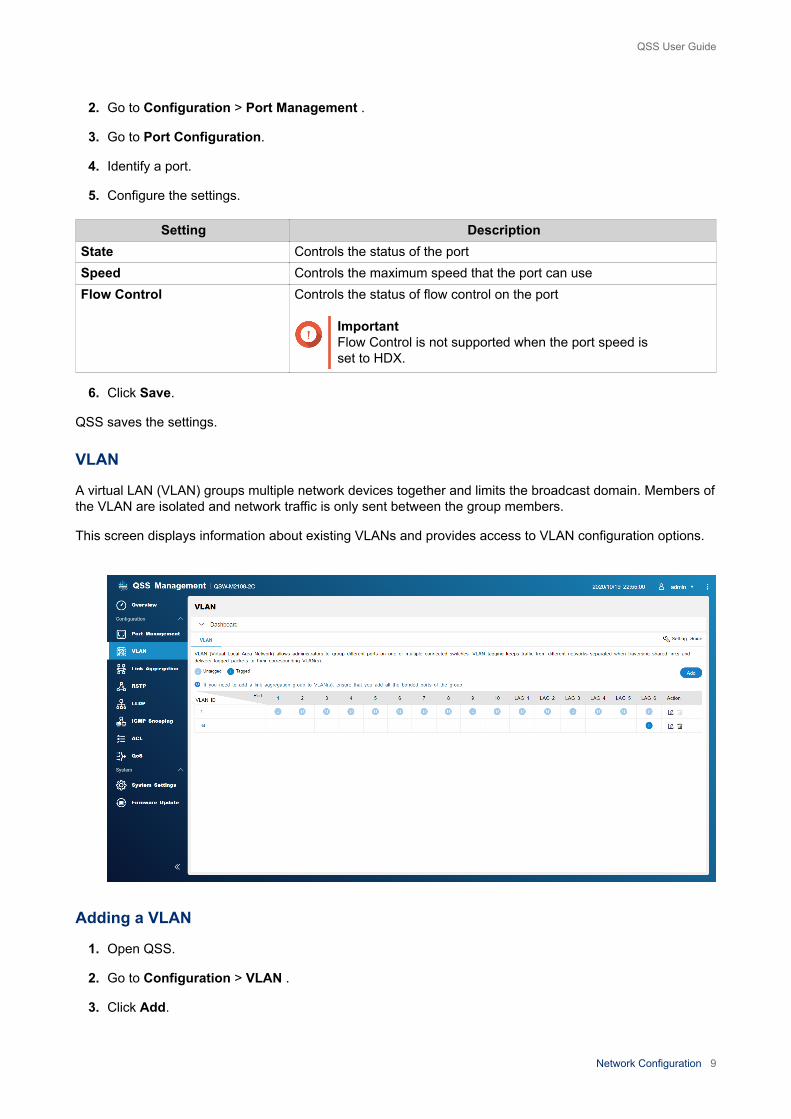
VLAN
A virtual LAN (VLAN) groups multiple network devices together and limits the broadcast domain. Members ofthe VLAN are isolated and network traffic is only sent between the group members.
This screen displays information about existing VLANs and provides access to VLAN configuration options.
Adding a VLAN
1. Open QSS.
2. Go to Configuration > VLAN .
3. Click Add.
QSS User Guide
Network Configuration 9

The Add VLAN window opens.
4. Specify a VLAN ID.
5. Select ports to include in the VLAN. Only tagged ports can belong to multiple VLANs.
6. Click Save.
QSS adds the VLAN.
Editing a VLAN
1. Open QSS.
2. Go to Configuration > VLAN .
3. Identify a VLAN.
4. Click . The Edit VLAN window opens.
5. Select ports to include in the VLAN.
6. Click Save.
QSS updates the VLAN.
Deleting a VLAN
1. Open QSS.
2. Go to Configuration > VLAN .
3. Identify a VLAN.
4. Click . A dialog box opens.
5. Click Delete.
QSS deletes the VLAN.
Configuring a Link Aggregation Group (LAG)
Link aggregation combines multiple network adapters to increase port flexibility and link redundancy.
This screen displays information about existing link aggregation groups and provides access to configurationoptions.
QSS User Guide
Network Configuration 10

1. Open QSS.
2. Go to Configuration > Link Aggregation .
3. Identify a group.
4. Click . The Edit Group window opens.
5. Configure the group settings.
6. Click Save.
QSS updates the group settings.
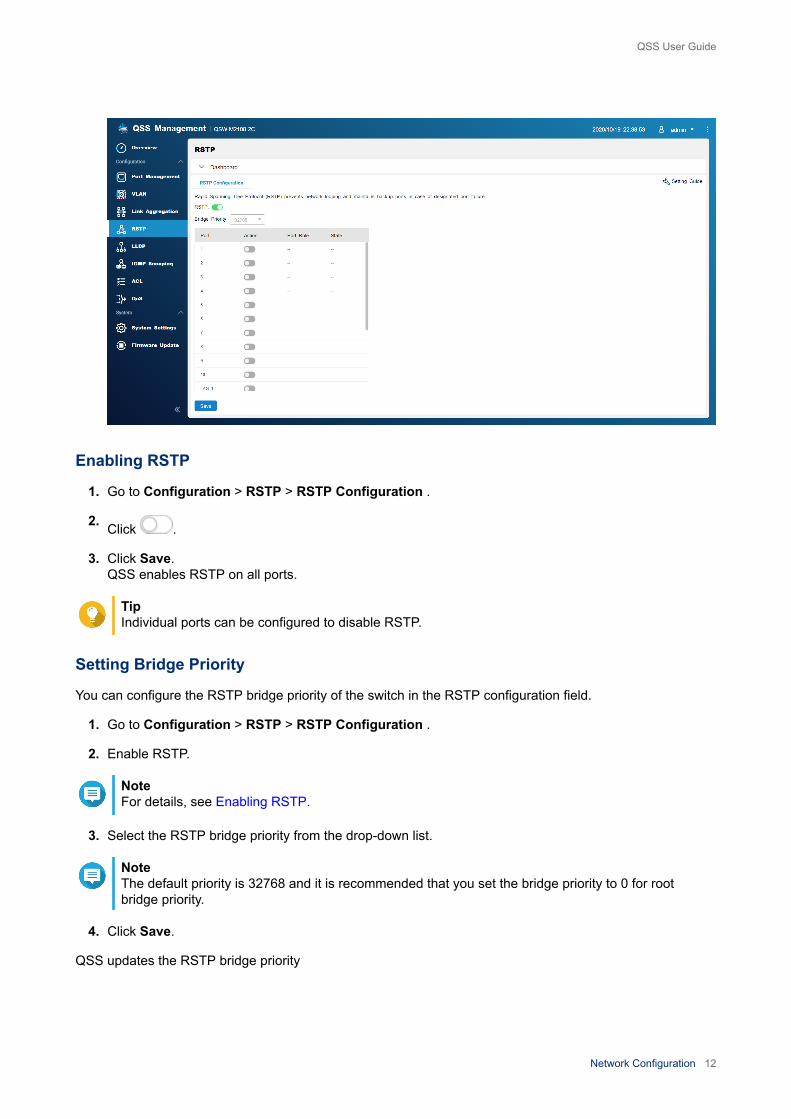
Rapid Spanning Tree Protocol (RSTP)
RSTP provides rapid convergence of the spanning tree and builds a loop-free topology for the switchnetwork. RSTP allows you to enable backup links in case an active link fails.
Note
• RSTP is disabled by default.
• The default bridge priority for the switch is 32768.
QSS User Guide
Network Configuration 11
Enabling RSTP
1. Go to Configuration > RSTP > RSTP Configuration .
2. Click .
3. Click Save. QSS enables RSTP on all ports.
TipIndividual ports can be configured to disable RSTP.
Setting Bridge Priority
You can configure the RSTP bridge priority of the switch in the RSTP configuration field.
1. Go to Configuration > RSTP > RSTP Configuration .
2. Enable RSTP.
NoteFor details, see Enabling RSTP.
3. Select the RSTP bridge priority from the drop-down list.
NoteThe default priority is 32768 and it is recommended that you set the bridge priority to 0 for rootbridge priority.
4. Click Save.
QSS updates the RSTP bridge priority
QSS User Guide
Network Configuration 12
Disabling RSTP
1. Go to Configuration > RSTP > RSTP Configuration .
2. Click to disable RSTP.
3. Click Save. QSS disables RSTP.
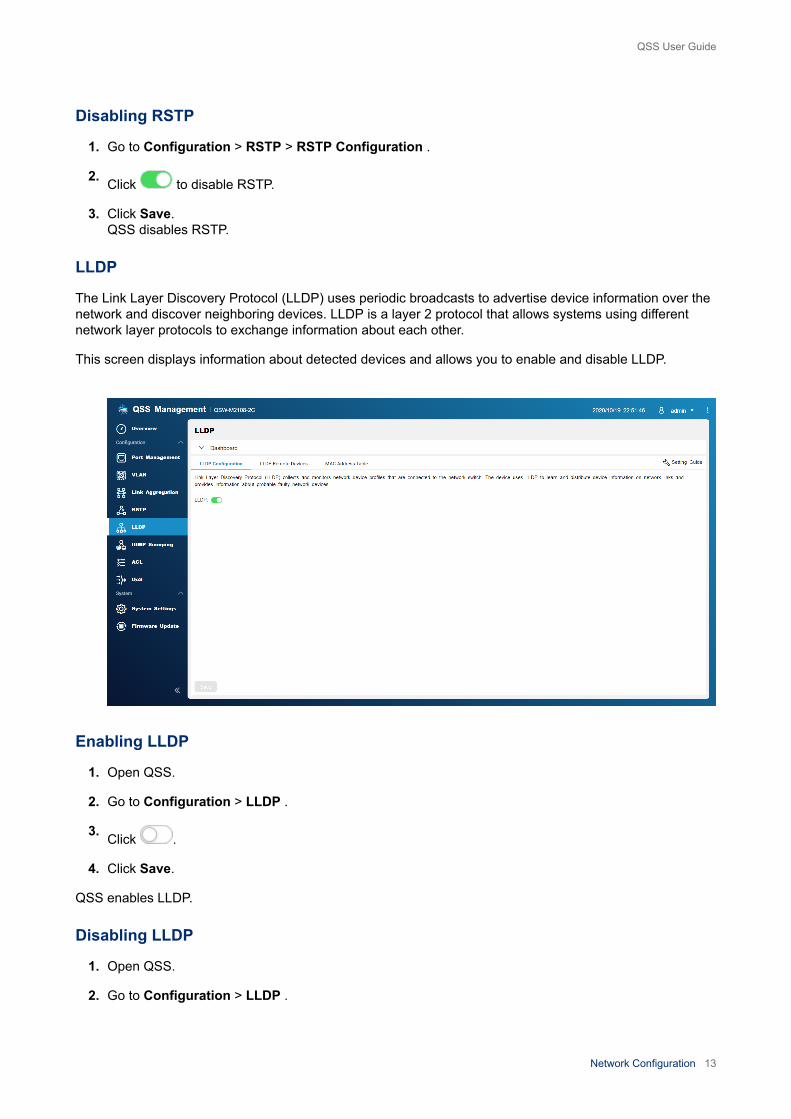
LLDP
The Link Layer Discovery Protocol (LLDP) uses periodic broadcasts to advertise device information over thenetwork and discover neighboring devices. LLDP is a layer 2 protocol that allows systems using differentnetwork layer protocols to exchange information about each other.
This screen displays information about detected devices and allows you to enable and disable LLDP.
Enabling LLDP
1. Open QSS.
2. Go to Configuration > LLDP .
3. Click .
4. Click Save.
QSS enables LLDP.
Disabling LLDP
1. Open QSS.
2. Go to Configuration > LLDP .
QSS User Guide
Network Configuration 13
3. Click .
4. Click Save.
QSS disables LLDP.
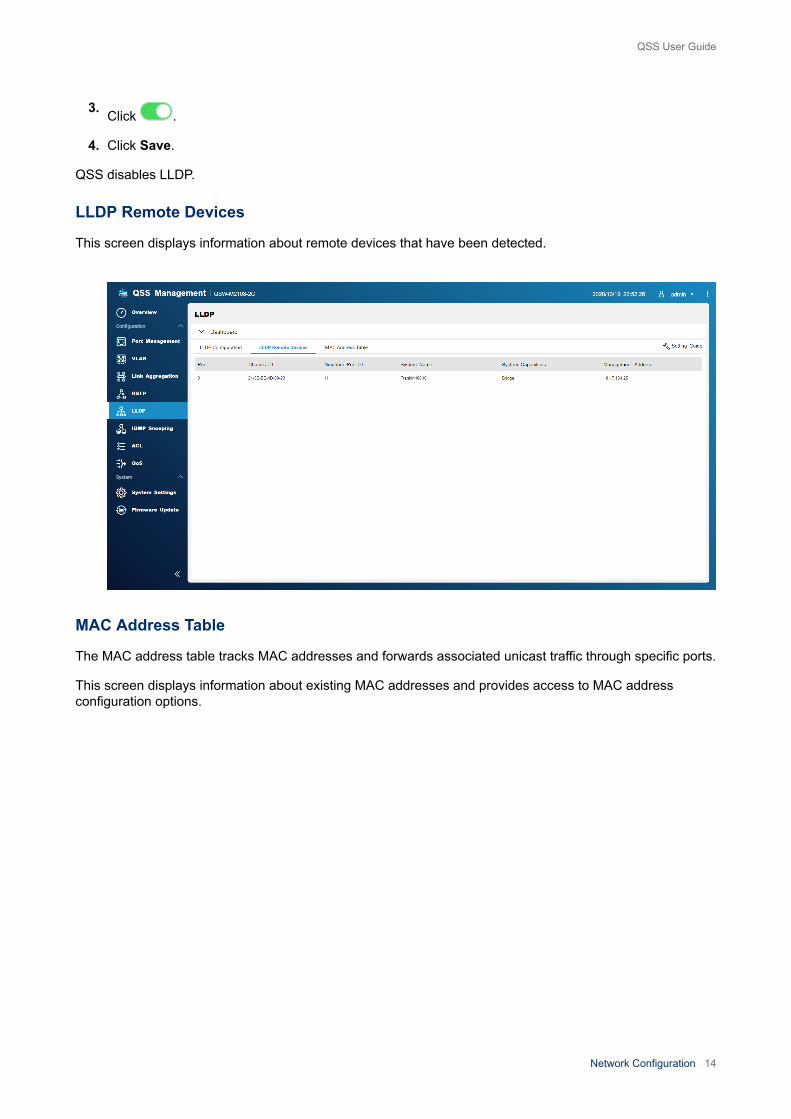
LLDP Remote Devices
This screen displays information about remote devices that have been detected.
MAC Address Table
The MAC address table tracks MAC addresses and forwards associated unicast traffic through specific ports.
This screen displays information about existing MAC addresses and provides access to MAC addressconfiguration options.
QSS User Guide
Network Configuration 14
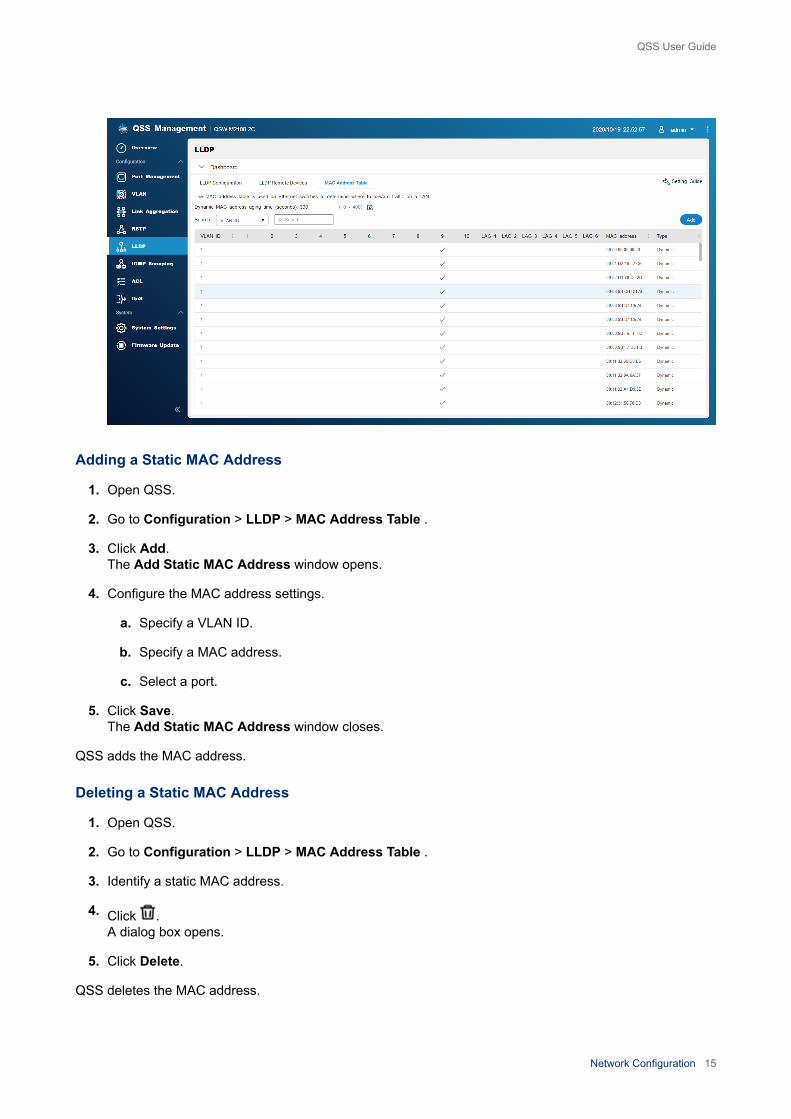
Adding a Static MAC Address
1. Open QSS.
2. Go to Configuration > LLDP > MAC Address Table .
3. Click Add. The Add Static MAC Address window opens.
4. Configure the MAC address settings.
a. Specify a VLAN ID.
b. Specify a MAC address.
c. Select a port.
5. Click Save. The Add Static MAC Address window closes.
QSS adds the MAC address.
Deleting a Static MAC Address
1. Open QSS.
2. Go to Configuration > LLDP > MAC Address Table .
3. Identify a static MAC address.
4. Click . A dialog box opens.
5. Click Delete.
QSS deletes the MAC address.
QSS User Guide
Network Configuration 15
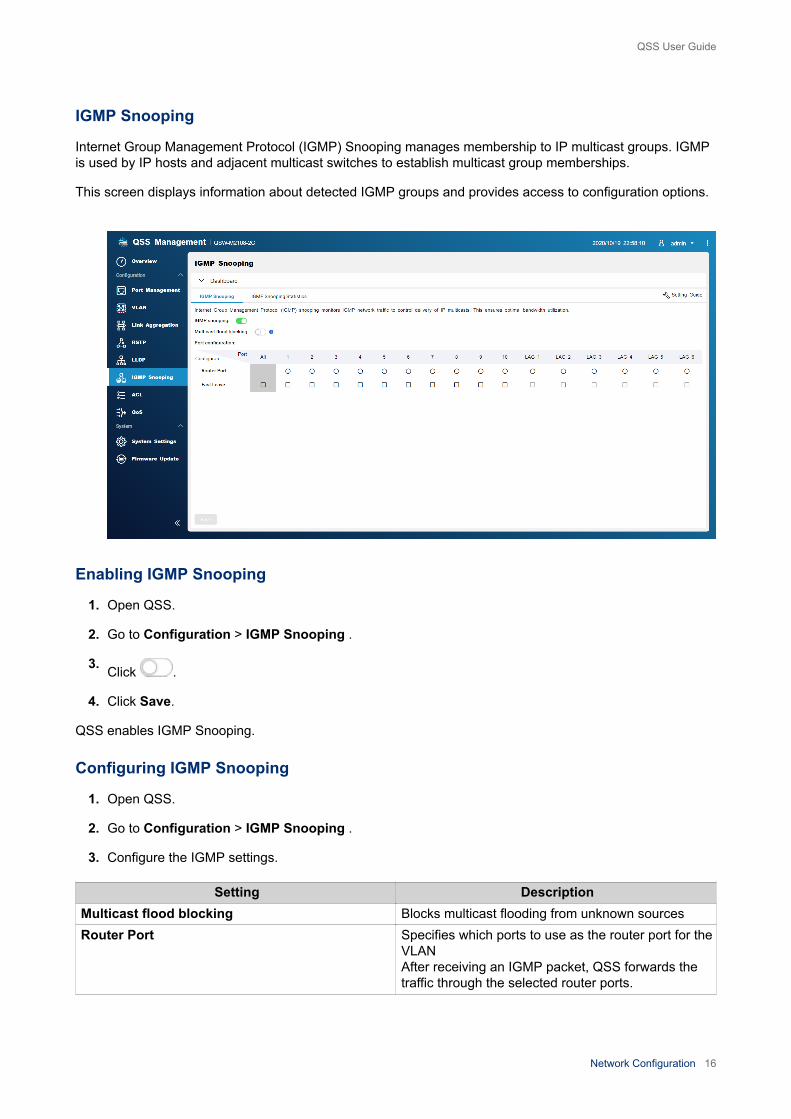
IGMP Snooping
Internet Group Management Protocol (IGMP) Snooping manages membership to IP multicast groups. IGMPis used by IP hosts and adjacent multicast switches to establish multicast group memberships.
This screen displays information about detected IGMP groups and provides access to configuration options.
Enabling IGMP Snooping
1. Open QSS.
2. Go to Configuration > IGMP Snooping .
3. Click .
4. Click Save.
QSS enables IGMP Snooping.
Configuring IGMP Snooping
1. Open QSS.
2. Go to Configuration > IGMP Snooping .
3. Configure the IGMP settings.
Setting DescriptionMulticast flood blocking Blocks multicast flooding from unknown sourcesRouter Port Specifies which ports to use as the router port for the
VLANAfter receiving an IGMP packet, QSS forwards thetraffic through the selected router ports.
QSS User Guide
Network Configuration 16
Setting DescriptionFast Leave Specifies the ports that support the IGMP v2 Fast
Leave featureAfter receiving an IGMP leave message, QSS stopsforwarding multicast traffic to the selected FastLeave ports.
4. Click Save.
QSS saves the settings.
Disabling IGMP Snooping
1. Open QSS.
2. Go to Configuration > IGMP Snooping .
3. Click .
4. Click Save.
QSS disables IGMP Snooping.
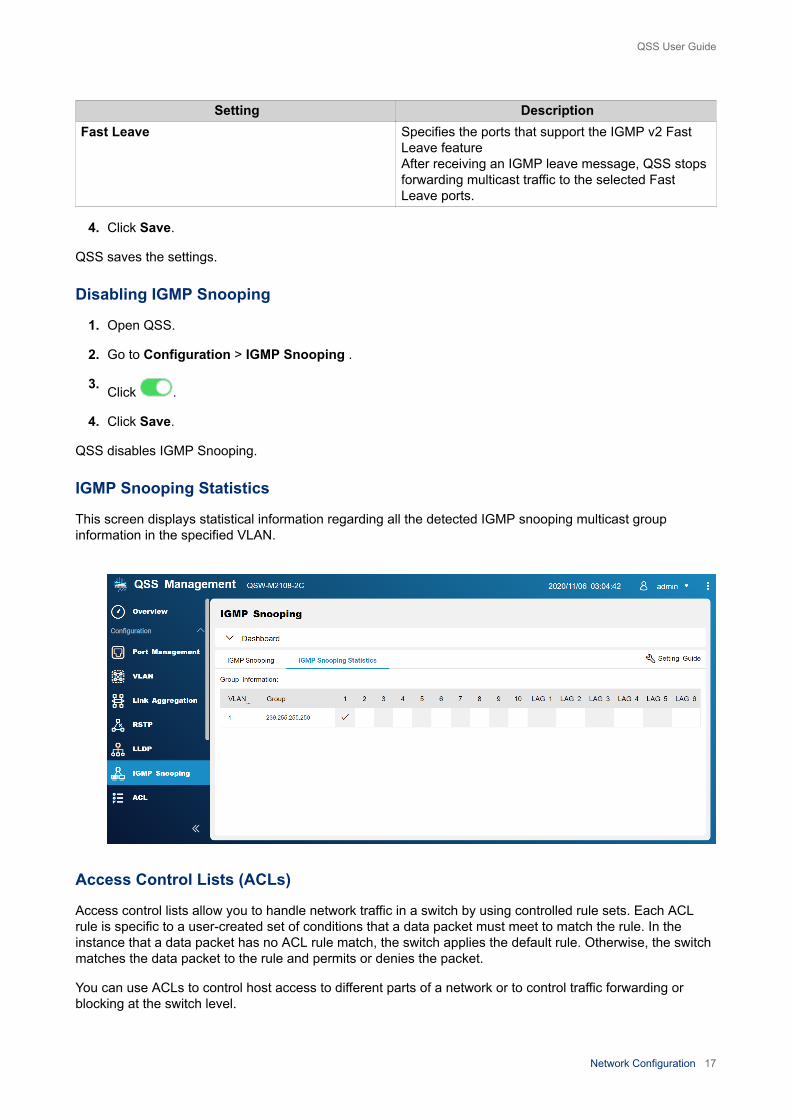
IGMP Snooping Statistics
This screen displays statistical information regarding all the detected IGMP snooping multicast groupinformation in the specified VLAN.
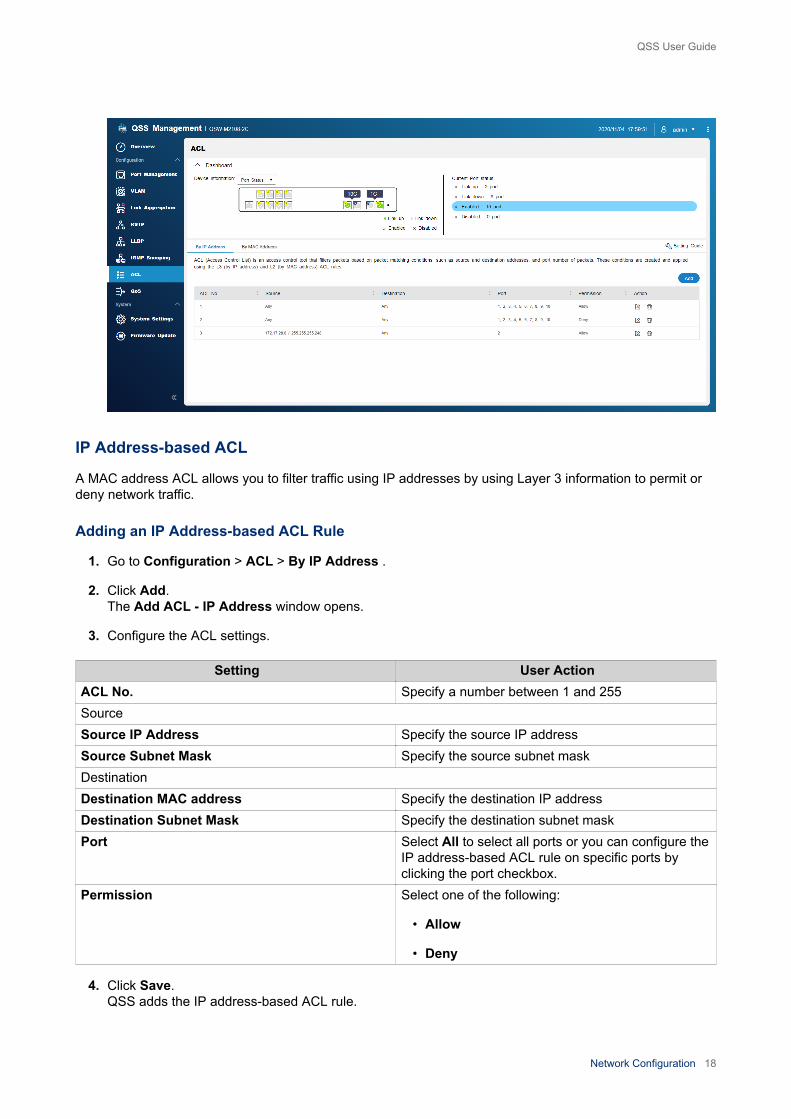
Access Control Lists (ACLs)
Access control lists allow you to handle network traffic in a switch by using controlled rule sets. Each ACLrule is specific to a user-created set of conditions that a data packet must meet to match the rule. In theinstance that a data packet has no ACL rule match, the switch applies the default rule. Otherwise, the switchmatches the data packet to the rule and permits or denies the packet.
You can use ACLs to control host access to different parts of a network or to control traffic forwarding orblocking at the switch level.
QSS User Guide
Network Configuration 17
IP Address-based ACL
A MAC address ACL allows you to filter traffic using IP addresses by using Layer 3 information to permit ordeny network traffic.
Adding an IP Address-based ACL Rule
1. Go to Configuration > ACL > By IP Address .
2. Click Add. The Add ACL - IP Address window opens.
3. Configure the ACL settings.
Setting User ActionACL No. Specify a number between 1 and 255SourceSource IP Address Specify the source IP addressSource Subnet Mask Specify the source subnet maskDestinationDestination MAC address Specify the destination IP addressDestination Subnet Mask Specify the destination subnet maskPort Select All to select all ports or you can configure the
IP address-based ACL rule on specific ports byclicking the port checkbox.
Permission Select one of the following:
• Allow
• Deny
4. Click Save. QSS adds the IP address-based ACL rule.
QSS User Guide
Network Configuration 18
Configuring an IP Address-based ACL Rule
1. Go to Configuration > ACL > By IP Address .
2. Identify a rule.
3. Click . The Edit ACL - IP Address window appears.
4. Configure the rule settings. For details, see Adding an IP Address-based ACL Rule.
5. Click Save. QSS updates the IP address-based ACL rule.
Deleting an IP Address-based ACL Rule
1. Go to Configuration > ACL > By IP Address .
2. Identify a rule.
3. Click . A confirmation message appears.
4. Click Delete. QSS deletes the IP address-based ACL rule.
MAC Address-based ACL
A MAC address ACL allows you to filter traffic using MAC addresses by using Layer 2 header information ofeach packet.
Adding a MAC Address-based ACL Rule
1. Go to Configuration > ACL > By MAC Address .
2. Click Add. The Add ACL - MAC Address window opens.
3. Configure the ACL settings.
Setting User ActionACL No. Specify a number between 1 and 255Source MAC address Specify the source MAC addressDestination MAC address Specify the destination MAC addressPort Select All to select all ports or you can configure the
MAC-based ACL rule on specific ports by clickingthe port checkbox.
Permission Select one of the following:
• Allow
• Deny
4. Click Save.
QSS User Guide
Network Configuration 19

QSS adds the MAC address-based ACL rule.
Configuring a MAC Address-based ACL Rule
1. Go to Configuration > ACL > By MAC Address .
2. Identify a rule.
3. Click . The Edit ACL - MAC Address window appears.
4. Configure the rule settings. For details, see Adding a MAC Address-based ACL Rule.
5. Click Save. QSS updates the MAC address-based ACL rule.
Deleting a MAC Address-based ACL Rule
1. Go to Configuration > ACL > By MAC Address .
2. Identify a rule.
3. Click . A confirmation message appears.
4. Click Delete. QSS deletes the MAC address-based ACL rule.
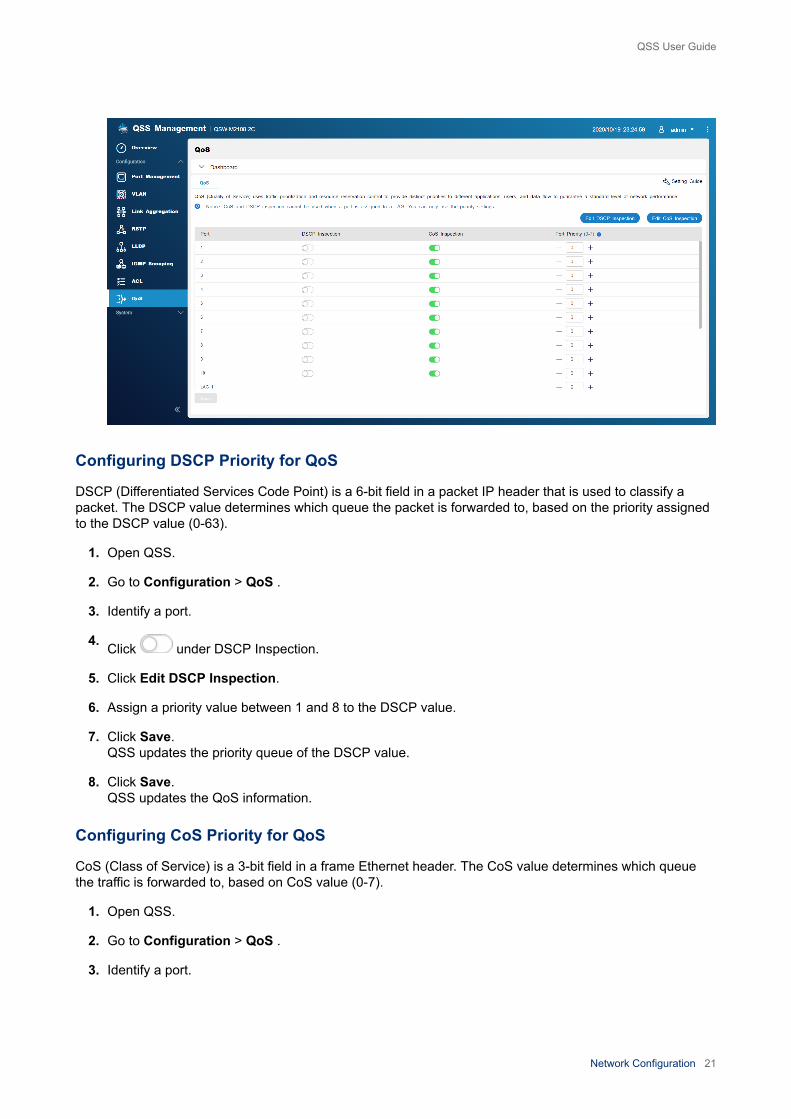
QoS
Quality of service (QoS) improves network traffic shaping by classifying and prioritizing different networkdevices and packets.
This screen provides access to QoS configuration options.
QSS User Guide
Network Configuration 20
Configuring DSCP Priority for QoS
DSCP (Differentiated Services Code Point) is a 6-bit field in a packet IP header that is used to classify apacket. The DSCP value determines which queue the packet is forwarded to, based on the priority assignedto the DSCP value (0-63).
1. Open QSS.
2. Go to Configuration > QoS .
3. Identify a port.
4. Click under DSCP Inspection.
5. Click Edit DSCP Inspection.
6. Assign a priority value between 1 and 8 to the DSCP value.
7. Click Save. QSS updates the priority queue of the DSCP value.
8. Click Save. QSS updates the QoS information.
Configuring CoS Priority for QoS
CoS (Class of Service) is a 3-bit field in a frame Ethernet header. The CoS value determines which queuethe traffic is forwarded to, based on CoS value (0-7).
1. Open QSS.
2. Go to Configuration > QoS .
3. Identify a port.
QSS User Guide
Network Configuration 21

4. Click under CoS Inspection.
5. Click Edit CoS Inspection.
6. Assign a priority value between 1 and 8 to the CoS value.
7. Click Save. QSS updates the priority queue of the CoS value.
8. Click Save. QSS updates the QoS information.
QSS User Guide
Network Configuration 22

4. System
System Settings
This screen contains system configuration options such as system information, IP information, passwordsettings, time settings, and backup and restore settings for the switch.
Configuring the Switch Name
1. Go to System > System Settings > System Information .
2. Click .
3. Specify the device name: Requirements:
• Length: 1–14characters
• Valid characters: A–Z, a–z, 0–9
• Valid special characters: Hyphen (-), Underscore (_), Period (.)
4.Click to confirm the device name. QSS updates the switch name.
Configuring the Switch IP Information
1. Go to System > System Settings > IP .
2. Select a network configuration setting.
Setting DescriptionAutomatically obtain IP & DNS If the network supports DHCP, the adapter
automatically obtains the IP address and networksettings.
Manually set the IP & DNS Manually assign a static IP address. You mustspecify the following information:
• Fixed IP Address
• Subnet Mask
• Default Gateway
3. Click Save.
Configuring Password Settings
1. Go to System > System Settings > Password .
2. Configure the password settings.
Tip
QSS User Guide
System 23

Click to make the password visible.
Setting User ActionCurrent password Specify the current password of the deviceNew password Specify a password that contains 8 to 20 ASCII
charactersConfirm new password Reenter the new password
3. Click Save. QSS logs you out of the switch interface. You can log on to QSS with the username and new password.
Configuring Time Settings
NoteYou must configure the system time correctly to avoid the following issues.
• When using a web browser to connect to the device or save a file, the displayed timeof the action is incorrect.
• Event logs do not reflect the exact time that events occurred.
• Scheduled tasks run at the wrong time.
1. Go to System > System Settings > Time .
2. Select a time zone.
3. Specify the date and time format.
4. Select the time setting.
Option User ActionManual configuration Specify the date and time.Synchronize with internet time server Ensure that your device is connected to the Internet
and specify the time server name.Server: Name of the Network Time Protocol (NTP)serverExamples: time.nist.gov, time.windows.com
TipClick to refresh the time server.
5. Click Save.
Backup/Restore
QSS provides system backup and restore features to help protect your switch data in the event of systemfailure.
Backing Up System Settings
1. Go to System > System Settings > Backup & Restore .
2. Click Backup.
QSS User Guide
System 24
This device exports the system settings as a BIN file and downloads the file to your computer.
Restoring System Settings
WarningIf the selected backup file contains user or user group information that already exists onthe device, the system will overwrite the existing information.
1. Go to System > System Settings > Backup & Restore . A file explorer window opens.
2. Click Browse.
3. Select a valid BIN file that contains the device system settings.
4. Click Restore.
QSS restores the switch settings.
Restarting the Switch
1. Open QSS.
2.Click located on the upper-right corner of the page.
3. Click Restart Switch. QSS restarts the switch.
Resetting the Switch Password
1. Go to System > System Settings > Backup & Restore .
2. Click Password Reset.
QSS resets the password to the MAC address of the switch.
Resetting the Switch
Resetting the switch deletes the data stored on the device and restores the switch to the default factorysettings.
1. Go to System > System Settings > Backup & Restore .
2. Click Factory Reset.
QSS resets the switch.
Firmware Update
QNAP recommends keeping your device firmware up to date. This ensures that your device can benefit fromnew QSS software features, security updates, enhancements, and bug fixes.
You can update the firmware using one of the following methods:
QSS User Guide
System 25

Update Method DescriptionUsing Live Update Firmware updates are automatically detected by
QSS and installed onto your device.For details, see Checking for Live Updates.
Using Firmware Update You can check for latest device firmware updates onthe QNAP website, download the firmware update toa computer, and manually install the firmware updateonto your device.For details, see Updating the Firmware Manually.
Using QFinder Pro If your device is connected to the local area network,you can use QFinder Pro to check and install thelatest firmware updates.For details, see Updating the Firmware UsingQfinder Pro.
Firmware Requirements
Your device must meet the following requirements to perform a firmware update:
Settings RequirementsHardware settings • A computer
NoteA computer is required for updating thefirmware manually or through QfinderPro.
Ethernet cables
NoteQNAP recommends updating thefirmware using wired Ethernetconnections to ensure your networkconnection is reliable during firmwareupdates.
Backup system settings QNAP recommends backing up the system settingsto your computer before updating the firmware.For details, see Backing Up System Settings.
Administrator privileges You must be a switch administrator or have adminprivileges to update the firmware.
Stop switch operations QNAP recommends stopping all other switchoperations before the firmware update. The switchmust be restarted for the firmware update to takeeffect and may disrupt ongoing switch services oroperations.
Device model name Ensure you have the correct switch model name.You can find the switch model name using thefollowing methods:
• Locate the model name on a sticker on thebottom or rear of your device.
• Log on to your device to find the model name.
QSS User Guide
System 26

Settings RequirementsFirmware version If you are updating the firmware using Firmware
Update or Qfinder Pro, ensure the selected firmwareversion is correct for your device model.
Checking for Live Updates
Warning
• To prevent data loss, QNAP recommends backing up all data on your device beforeupdating the firmware. For details about data backup, see Backup/Restore.
• Do not power off your device during the firmware update process.
Important
• Make sure you review through the Firmware Requirements before updating thefirmware.
• The update may require several minutes or longer, depending on your hardwareconfiguration and network connection.
1. Go to System > Firmware Update > Live Update .
2. Click Check for Update. QSS checks for available firmware updates. You can choose to update QSS if there is an availableupdate.
3. Click Update System. A confirmation message appears.
4. Click Update.
QSS updates the firmware.
Updating the Firmware Manually
Warning
• To prevent data loss, QNAP recommends backing up all data on your device beforeupdating the firmware. For details about data backup, see Backup/Restore.
• Do not power off your device during the firmware update process.
Important
• Make sure you review through the Firmware Requirements before updating thefirmware.
• The update may require several minutes or longer, depending on your hardwareconfiguration and network connection.
1. Download the device firmware.
a. Go to http://www.qnap.com/download.
b. Select the product type.
QSS User Guide
System 27
c. Select your device model.
d. Read the release notes and confirm the following:
• The device model matches the firmware version.
• Updating the firmware is necessary.
• Check for any additional firmware update setup instructions.
2. Ensure that the product model and firmware are correct.
3. Select the download server based on your location.
4. Download the firmware package.
5. Click Browse.
6. Select a folder.
7. Save the downloaded firmware package.
8. Extract the firmware image file.
9. Go to System > Firmware Update > Firmware Update .
10. Click Browse and then select the extracted firmware image file.
11. Click Update System. A confirmation message window appears.
12. Click Update.
The device is immediately restarted.
Updating the Firmware Using Qfinder Pro
Warning
• To prevent data loss, QNAP recommends backing up all data on your device beforeupdating the firmware. For details about data backup, see Backup/Restore.
• Do not power off your device during the firmware update process.
Important
• Make sure you review through the Firmware Requirements before updating thefirmware.
• The update may require several minutes or longer, depending on your hardwareconfiguration and network connection.
1. Download the device firmware.
a. Go to http://www.qnap.com/download.
b. Select the product type.
c. Select your device model.
QSS User Guide
System 28
d. Read the release notes and confirm the following:
• The NAS model matches the firmware version.
• Updating the firmware is necessary.
• Check for any additional firmware update setup instructions.
2. Ensure that the product model and firmware are correct.
3. Select the download server based on your location.
4. Download the firmware package.
5. Click Browse.
6. Select a folder.
7. Save the downloaded firmware package.
8. Extract the firmware image file.
9. Open Qfinder Pro. Qfinder Pro displays a list of QNAP devices on your network.
10. Select the switch from the device list.
11. Go to Tools > Update Firmware .
TipYou can also right-click the NAS model on the list and then select Update Firmware.
The Firmware Update window appears.
12. Specify your QSS username and password. Qfinder Pro displays the Update Firmware screen.
13. Select one of the following firmware update methods:
Methods StepsUpdate firmware manually a. Click Path of system firmware image file.
b. Click Browse.
c. Locate the downloaded firmware update image file.
d. Click OK.Update firmware automatically a. Click Automatically update the firmware to the latest version.
b. Qfinder Pro searches for the latest firmware update.
c. Click Update.
The firmware update image file is listed in the table below.
14. Perform one of the following actions:
Action StepsUpdate a single NAS device Select the device that you want to update.
QSS User Guide
System 29

Action StepsUpdate multiple NAS devices of the samemodel
a. Select a device model from the list.
b. Select Update all the devices with the same modelnumber within the network.
c. Select the devices that you want to update.
15. Click Start.
QSS updates the firmware.
QSS User Guide
System 30


