6/22/2012 1 QUANTITIES AND SUMMARY SHEET PRODUCTION Florida Department of Transportation State Kit for Civil 3D 2012 Contact Information: Email: [email protected]Phone: 850-245-1623 W-F Mary Ann Peterman FDOT ENGINEERING / CADD SYSTEMS OFFICE CADD Applications Development Specialist
Transcript
6/22/2012
1
QUANTITIES AND SUMMARY SHEET PRODUCTION
Florida Department of Transportation State Kit for Civil 3D 2012
Mary Ann Peterman FDOT ENGINEERING / CADD SYSTEMS OFFICE CADD Applications Development Specialist
6/22/2012
2
Essentials
1. Assign Pay Items with FDOT Entity Manager
2. Open Autodesk QTO Manager and verify Pay Item database is loaded.
3. Launch QTO Takeoff Reports
QTO pay item rules:
QTO Takeoffs can read the following pay items:
Pay Items in the active file assigned to AutoCAD entities and Civil 3D objects
Pay Items assigned to AutoCAD and C3D entities in a XREF.
NOTES:
oData References with Pay Items assigned to source geometry will only list the type. (no quantity)
oData References cannot be assigned directly pay items
6/22/2012
3
WORKING WITH FILES
•Use External References
•Data reference in Alignment
Pay item summary from Trns*port
1. Create CESSFile
2. Launch FDOT TRNS*port Utility from Ribbon
3. Browse to Folder containing sample
4. Choose Layout Tab
5. Delete Extra Layout Tabs
6. Save Drawing
7. Open FDOT.DST
8. Import Summary Sheet Layout
FDOT Quantity Takeoff
Mary Ann Peterman Florida Department of Transportation [email protected] 850-245-1623
FDOT State Kit for AutoCAD Civil 3D 2012
2
Workflow:
Step 1: Assign Pay Items with Entity Manager
Step 2: Launch QTO Manager
Load FDOT Pay Item database and categorization file.
Step 3: Run Quantity Take Off Report
Ribbon Analyze tab > QTO panel > Takeoff
The Compute Takeoff Dialog is used to define the report type, extents, and output content to be included in the quantity takeoff report.
The Report Type needs to be set to Detailed. The Report Extents will be set to Drawing so that all the information in the drawing is included. Limit extents to alignment station range needs to be checked. This will allow the user to limit the
area that Takeoff will be evaluating. Select the Alignment used for the Takeoff process. This is typically the Main alignment of the
drawing. The Beginning and Ending stationing can be typed in or can be selected using the button on the
right.
3
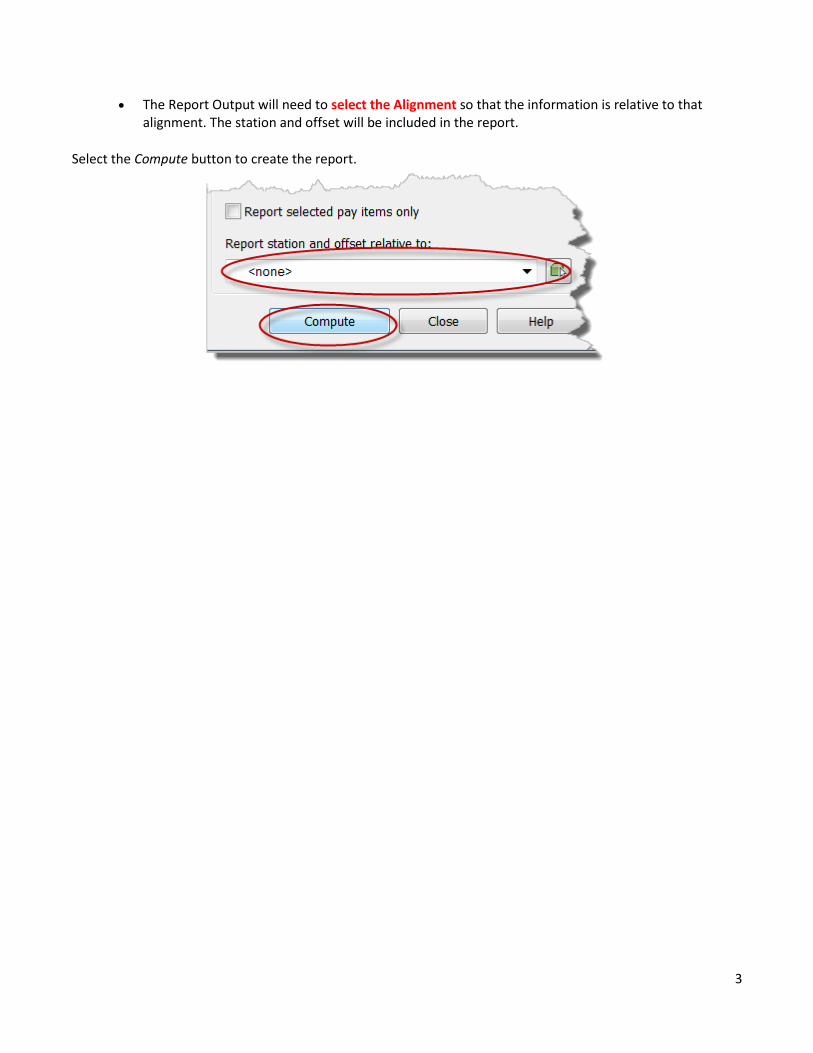
The Report Output will need to select the Alignment so that the information is relative to that alignment. The station and offset will be included in the report.
Select the Compute button to create the report.
4
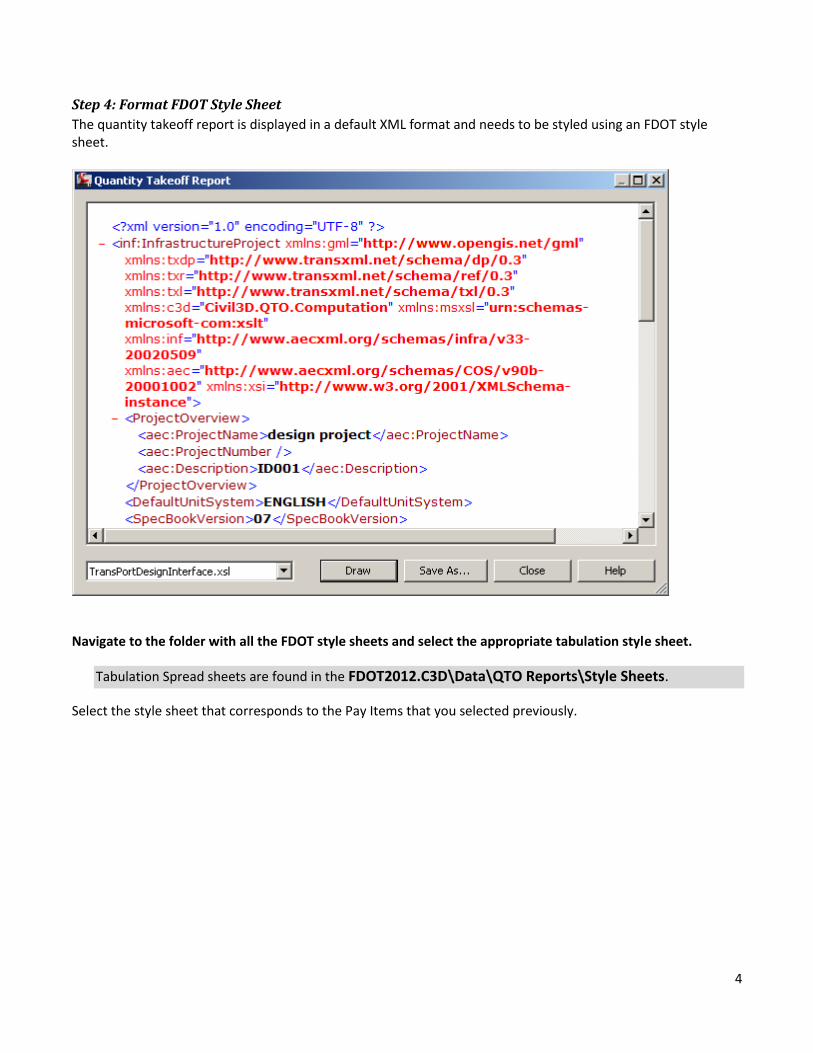
Step 4: Format FDOT Style Sheet
The quantity takeoff report is displayed in a default XML format and needs to be styled using an FDOT style sheet.
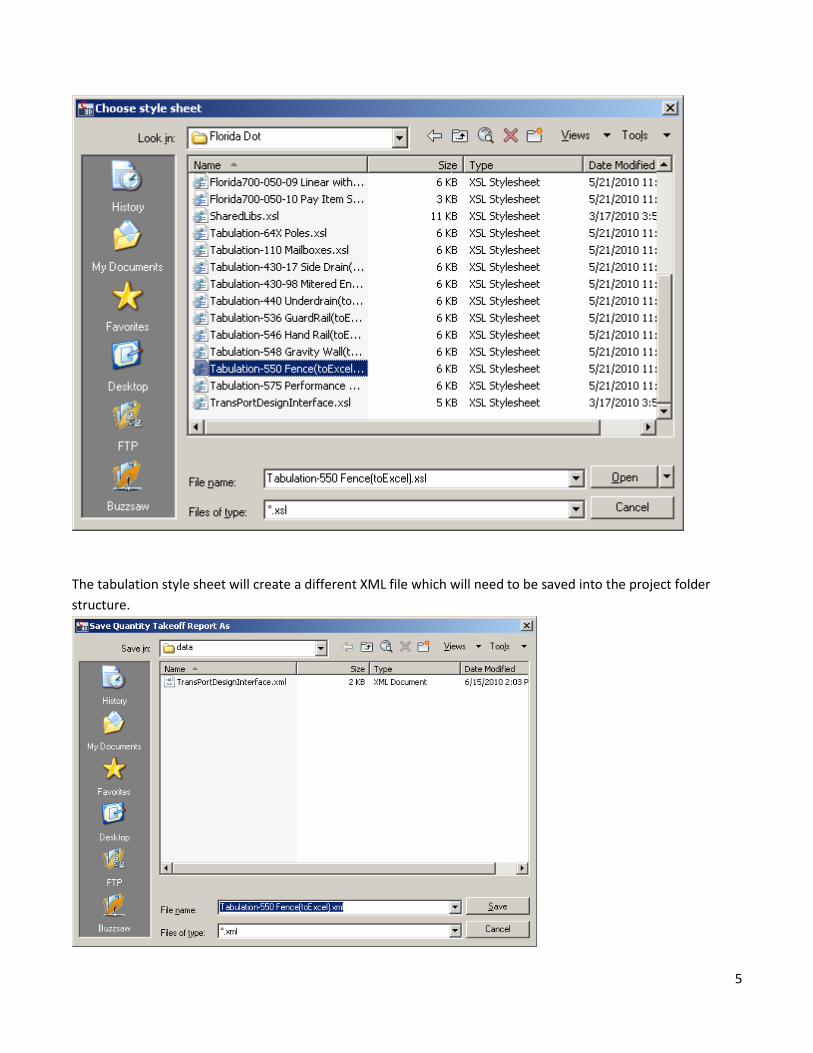
Navigate to the folder with all the FDOT style sheets and select the appropriate tabulation style sheet.
Tabulation Spread sheets are found in the FDOT2012.C3D\Data\QTO Reports\Style Sheets.
Select the style sheet that corresponds to the Pay Items that you selected previously.
5
The tabulation style sheet will create a different XML file which will need to be saved into the project folder
structure.
6
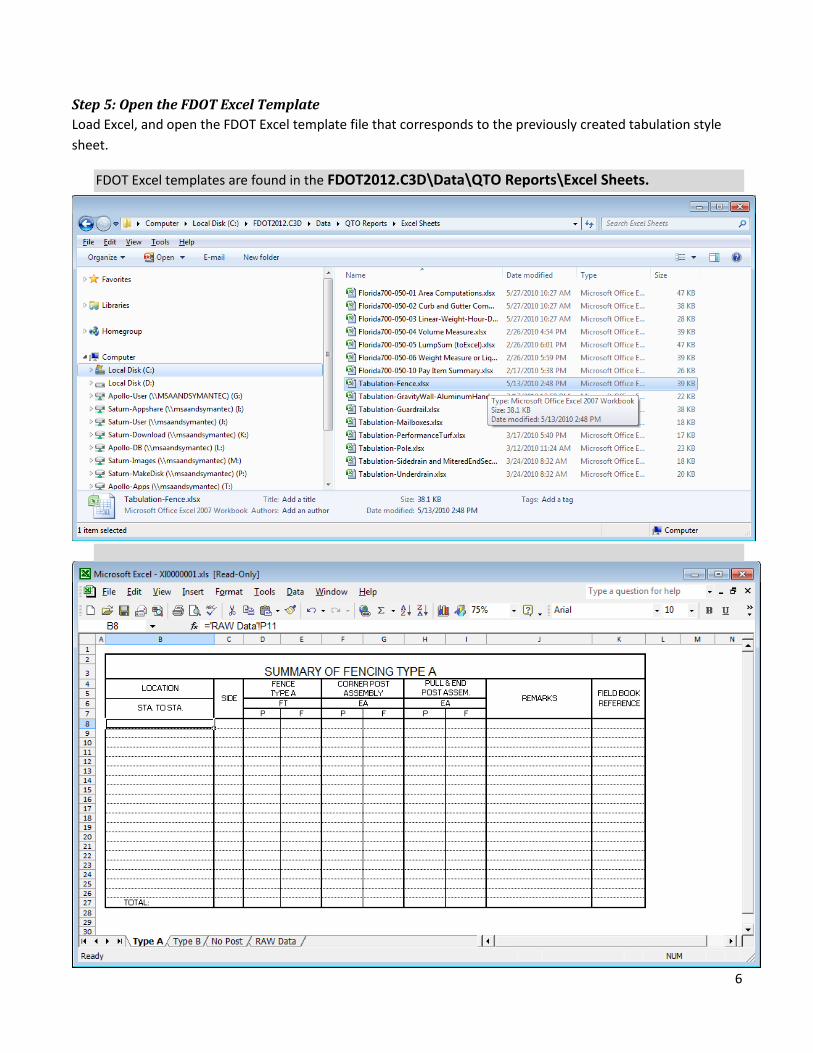
Step 5: Open the FDOT Excel Template
Load Excel, and open the FDOT Excel template file that corresponds to the previously created tabulation style
sheet.
FDOT Excel templates are found in the FDOT2012.C3D\Data\QTO Reports\Excel Sheets.
7
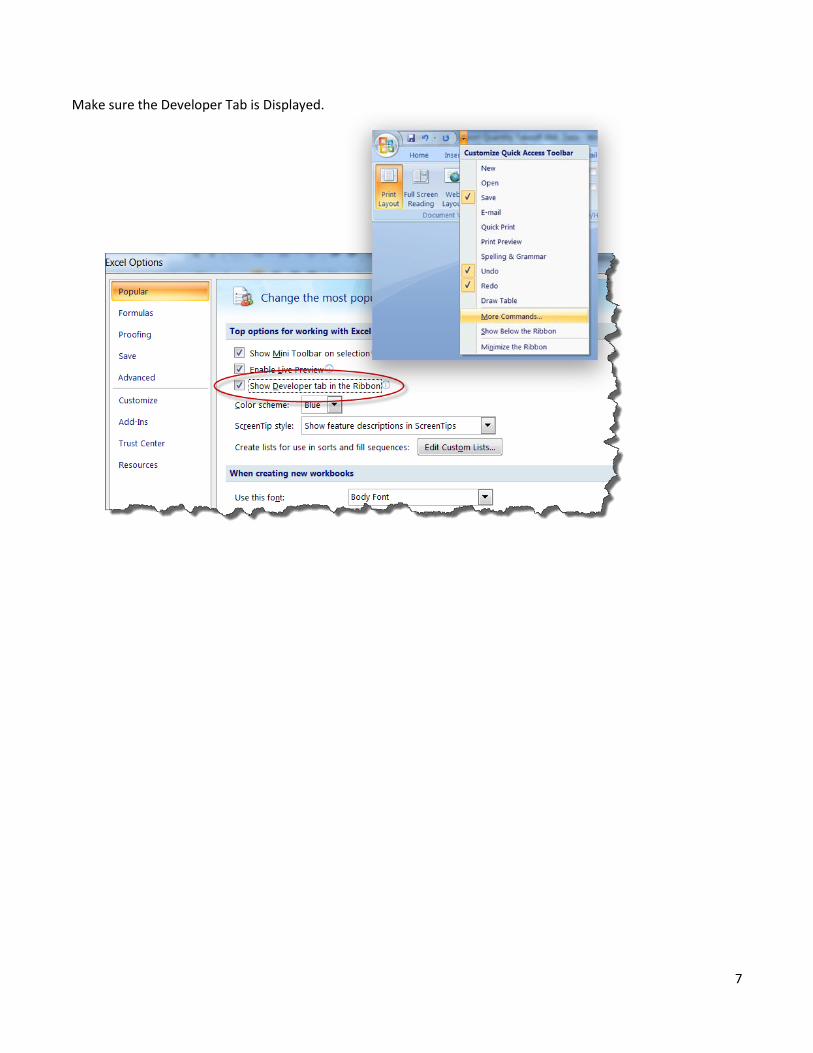
Make sure the Developer Tab is Displayed.
8
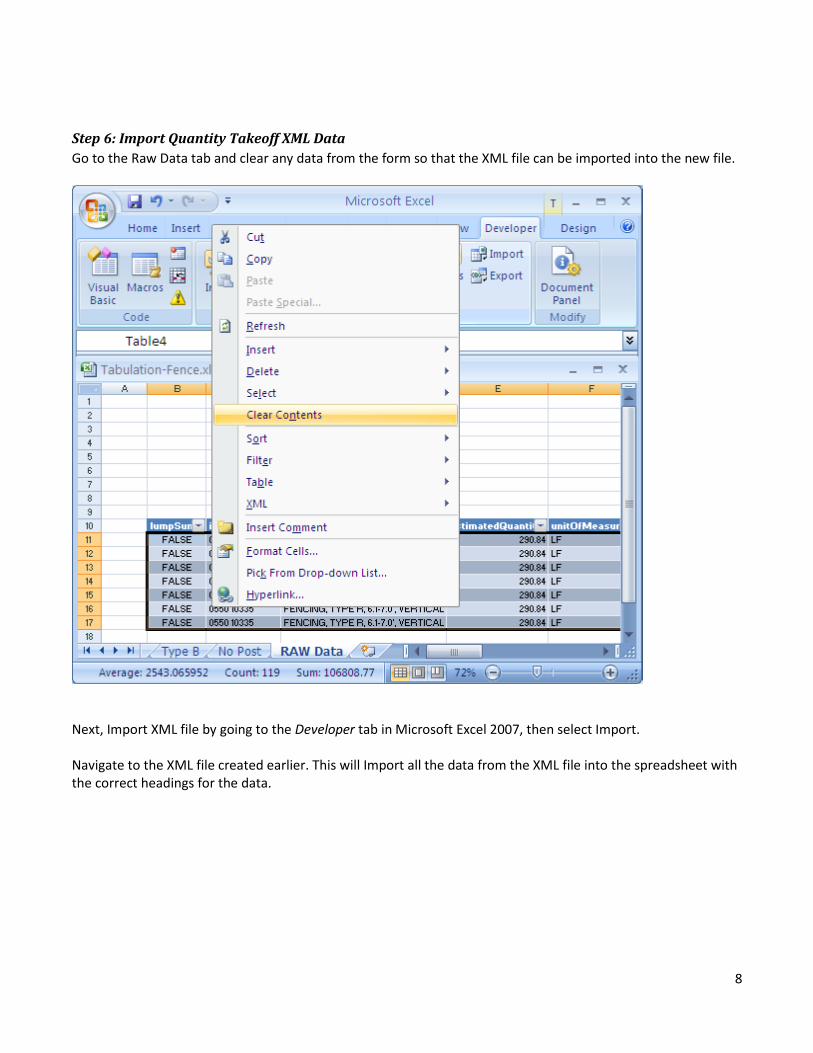
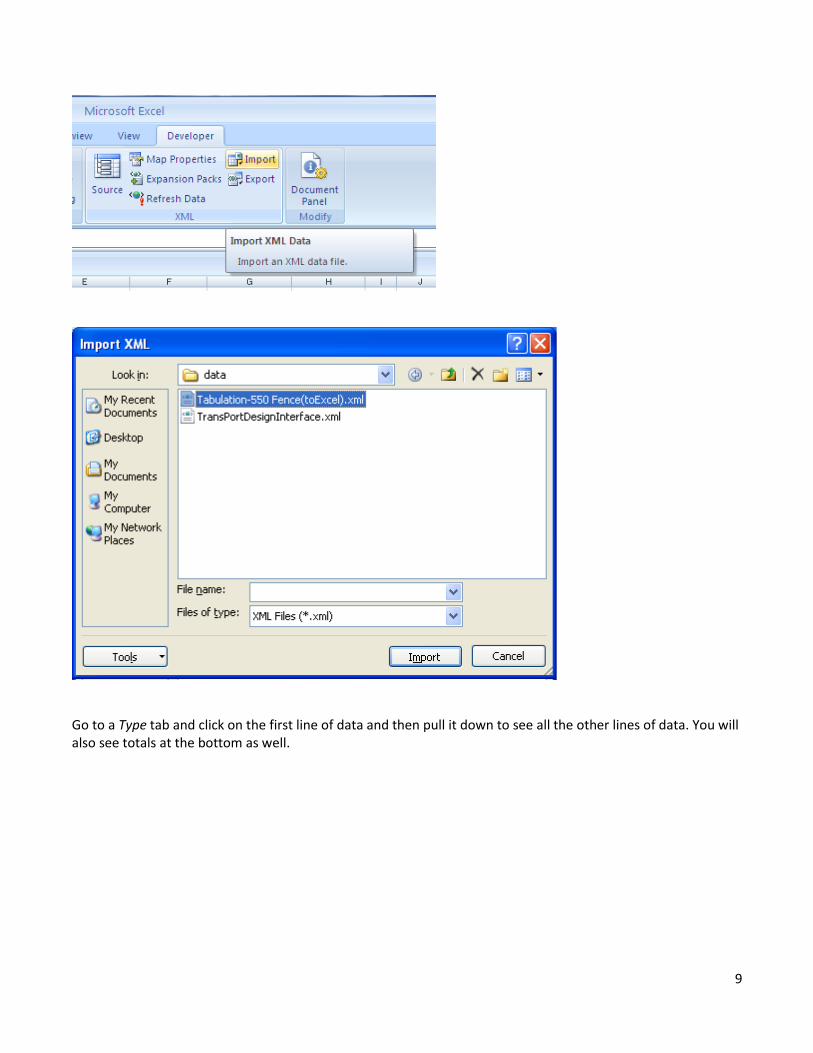
Step 6: Import Quantity Takeoff XML Data
Go to the Raw Data tab and clear any data from the form so that the XML file can be imported into the new file.
Next, Import XML file by going to the Developer tab in Microsoft Excel 2007, then select Import. Navigate to the XML file created earlier. This will Import all the data from the XML file into the spreadsheet with the correct headings for the data.
9
Go to a Type tab and click on the first line of data and then pull it down to see all the other lines of data. You will also see totals at the bottom as well.
10
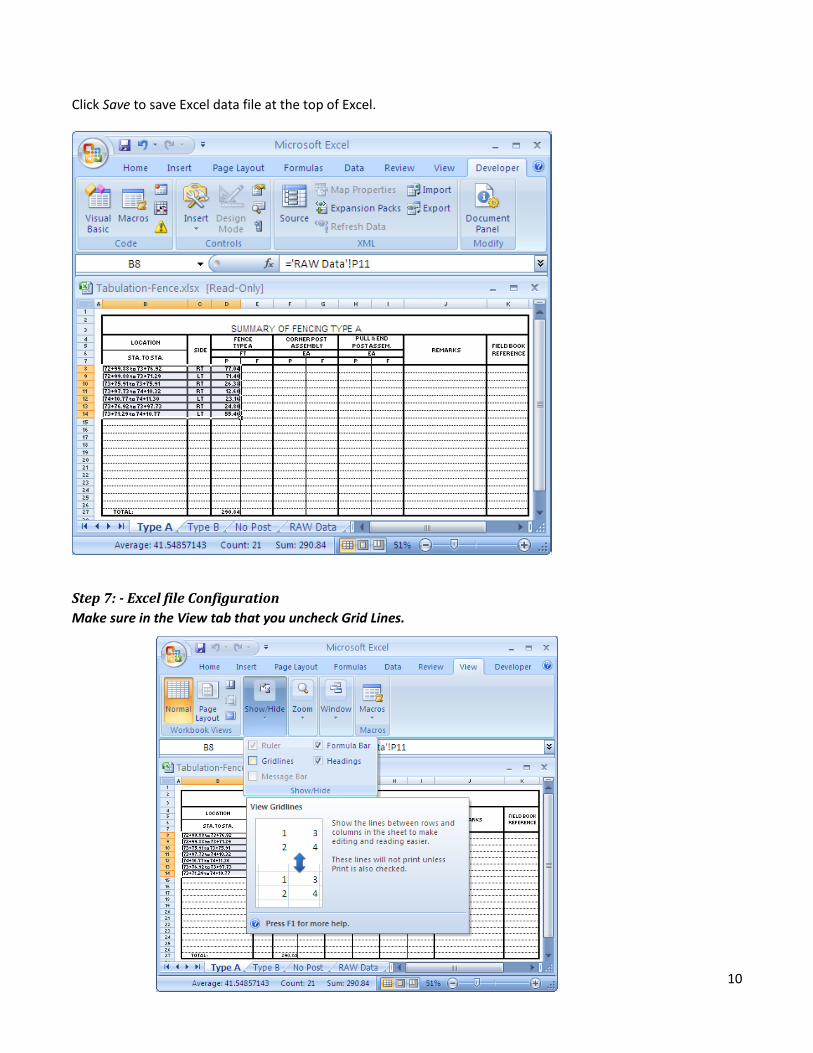
Click Save to save Excel data file at the top of Excel.
Step 7: - Excel file Configuration
Make sure in the View tab that you uncheck Grid Lines.
11
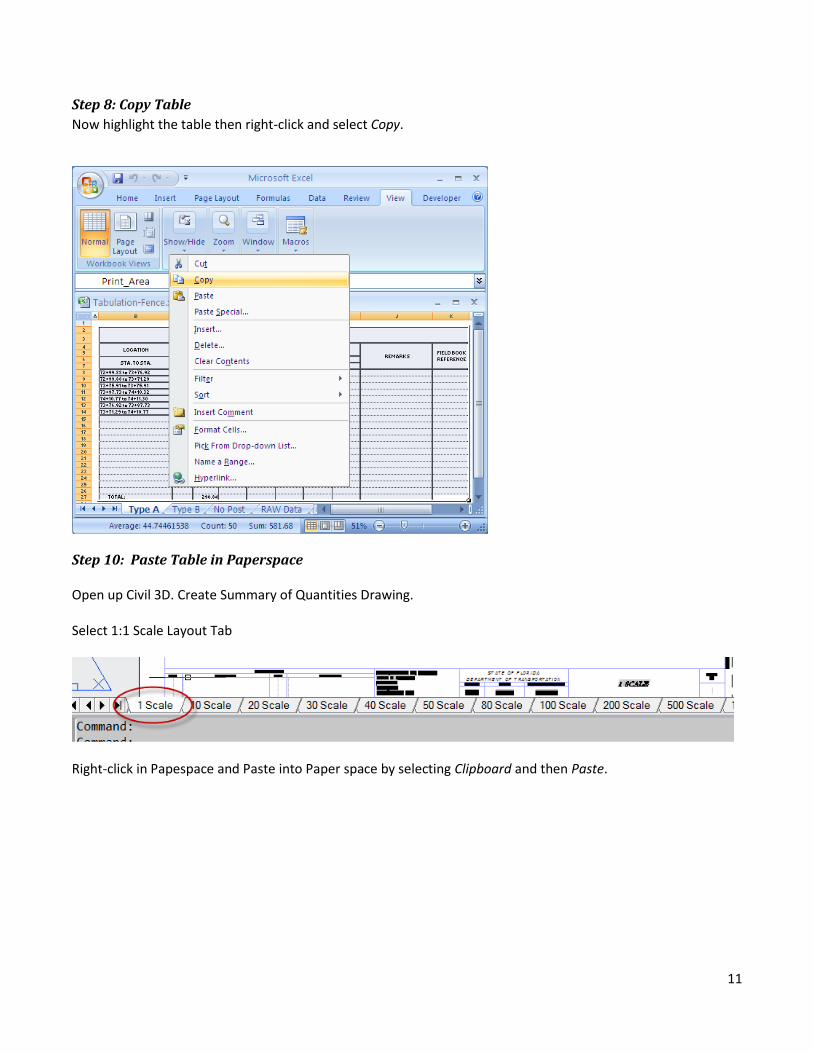
Step 8: Copy Table
Now highlight the table then right-click and select Copy.
Step 10: Paste Table in Paperspace
Open up Civil 3D. Create Summary of Quantities Drawing. Select 1:1 Scale Layout Tab
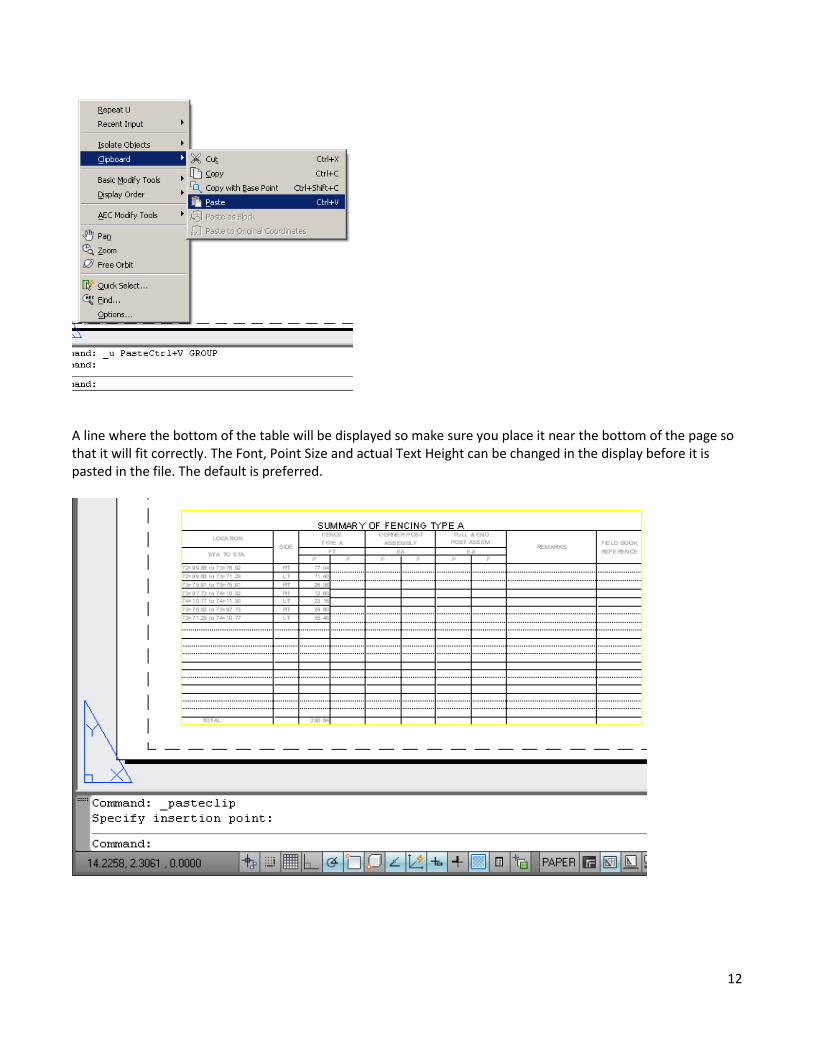
Right-click in Papespace and Paste into Paper space by selecting Clipboard and then Paste.
12
A line where the bottom of the table will be displayed so make sure you place it near the bottom of the page so that it will fit correctly. The Font, Point Size and actual Text Height can be changed in the display before it is pasted in the file. The default is preferred.
FDOT Quantity Takeoff
Mary Ann Peterman Florida Department of Transportation [email protected] 850-245-1623
FDOT State Kit for AutoCAD Civil 3D 2012
2
Workflow:
Step 1: Assign Pay Items with Entity Manager
Step 2: Launch QTO Manager
Load FDOT Pay Item database and categorization file.
Step 3: Run Quantity Take Off Report
Ribbon Analyze tab > QTO panel > Takeoff
The Compute Takeoff Dialog is used to define the report type, extents, and output content to be included in the quantity takeoff report.
The Report Type needs to be set to Detailed. The Report Extents will be set to Drawing so that all the information in the drawing is included. Limit extents to alignment station range needs to be checked. This will allow the user to limit the
area that Takeoff will be evaluating. Select the Alignment used for the Takeoff process. This is typically the Main alignment of the
drawing. The Beginning and Ending stationing can be typed in or can be selected using the button on the
right.
3
The Report Output will need to select the Alignment so that the information is relative to that alignment. The station and offset will be included in the report.
Select the Compute button to create the report.
4
Step 4: Format FDOT Style Sheet
The quantity takeoff report is displayed in a default XML format and needs to be styled using an FDOT style sheet.
Navigate to the folder with all the FDOT style sheets and select the appropriate tabulation style sheet.
Tabulation Spread sheets are found in the FDOT2012.C3D\Data\QTO Reports\Style Sheets.
Select the style sheet that corresponds to the Pay Items that you selected previously.
5
The tabulation style sheet will create a different XML file which will need to be saved into the project folder
structure.
6
Step 5: Open the FDOT Excel Template
Load Excel, and open the FDOT Excel template file that corresponds to the previously created tabulation style
sheet.
FDOT Excel templates are found in the FDOT2012.C3D\Data\QTO Reports\Excel Sheets.
7
Make sure the Developer Tab is Displayed.
8
Step 6: Import Quantity Takeoff XML Data
Go to the Raw Data tab and clear any data from the form so that the XML file can be imported into the new file.
Next, Import XML file by going to the Developer tab in Microsoft Excel 2007, then select Import. Navigate to the XML file created earlier. This will Import all the data from the XML file into the spreadsheet with the correct headings for the data.
9
Go to a Type tab and click on the first line of data and then pull it down to see all the other lines of data. You will also see totals at the bottom as well.
10
Click Save to save Excel data file at the top of Excel.
Step 7: - Excel file Configuration
Make sure in the View tab that you uncheck Grid Lines.
11
Step 8: Copy Table
Now highlight the table then right-click and select Copy.
Step 10: Paste Table in Paperspace
Open up Civil 3D. Create Summary of Quantities Drawing. Select 1:1 Scale Layout Tab
Right-click in Papespace and Paste into Paper space by selecting Clipboard and then Paste.
12
A line where the bottom of the table will be displayed so make sure you place it near the bottom of the page so that it will fit correctly. The Font, Point Size and actual Text Height can be changed in the display before it is pasted in the file. The default is preferred.