Quick Install Guide Supports UV 19 and UV 39 A USB VGA Display Port ® Adaptateur d’écran USB_Guide d’installation rapide • Un Dispositivo USB de Monitor VGA_Guía de Instalación Rápida • Ein USB-VGA-Monitoradapter_Schnellstart-Anleitung • USB VGA ディスプレイポート_クイックインストールガイド • USB VGA 顯示埠_快速安裝說明 • USB VGA 显示埠_快速安装说明 • Pour UV 19 et UV 39 • Soporta UV19 y UV39 • Für UV-19 und UV-39 • UV 19 と UV 39 サポート • 支援 UV19 及 UV39 • 支持 UV19 及 UV39 •
Transcript
Quick Install Guide
Supports UV 19 and UV 39
A USB VGA Display Port
®
Adaptateur d’écran USB_Guide d’installation rapide • Un Dispositivo USB de Monitor VGA_Guía de Instalación Rápida •
Ein USB-VGA-Monitoradapter_Schnellstart-Anleitung •USB VGA ディスプレイポート_クイックインストールガイド •
USB VGA 顯示埠_快速安裝說明 • USB VGA 显示埠_快速安装说明 •
Pour UV 19 et UV 39 • Soporta UV19 y UV39 • Für UV-19 und UV-39 •
IntroductionEVGA’s UV Plus+ gives you the ability to use multiple displays by utilizing a USB 2.0 or 3.0 port on your laptop or PC. Each monitor up to 6 will require a separate UV 19. The UV 39 supports 2 monitors per device for a maximum of 6 monitors. Our UV Plus+ devices allow you to add an additional 6 LCD, CRT, or Projectors without the need for additional add in graphics adapters. With the ability to Mirror or Extend your desktop up, down, left, or right, EVGA’s UV Plus+ gives you full freedom to move about your virtual work space.
System Requirements: • An available USB 2.0 or 3.0 port • Windows® 2000, XP 32-Bit, Vista or 7 • CD-ROM or DVD-ROM if using the provided installation CD • 30 MB of free disk space • 1.2 GHz or higher processor • 512 MB of system memory (1 GB or more is recommended)
Package Contents:Your EVGA UV Plus+ device will have the following optional items included in this package: 1 x DVI to VGA Adapter 1 x USB Cable 1 x Installation CD for Drivers and Software
UVPlus+ Supports:Windows Aero32-Bit Color DepthWidescreen Aspect RatioAbility to Clone or ExtendHDMI, VGA, DVI, and FPI Display ConnectionsHigh-Definition Displays
UV 39
UV 19
English
DVI to VGA Adapter
HDMI connection
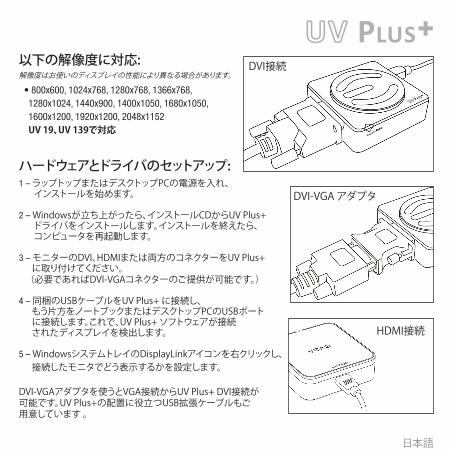
DVI connectionThe Following Resolutionsare Supported:Resolutions may vary depending on your displays capabilities.
• 800x600, 1024x768, 1280x768, 1366x768, 1280x1024, 1440x900, 1400x1050, 1680x1050, 1600x1200, 1920x1200, 2048x1152 Supported on UV 19 and UV 39
Hardware and Driver Setup:1 – Power on your Laptop or your monitor and PC to begin the installation. 2 – Once in Windows, install the UV Plus+ drivers from the provided installation CD. After the installation process has finished reboot your computer.3 – Attach your monitor’s DVI, HDMI or both connectors to UV Plus+ (a DVI to VGA connector is provided if needed).4 – Plug in the provided USB cable to UV Plus+ and the other end to your Notebook or PC’s USB port. The UV Plus+ software will now detect your attached display.5 – Right-click the DisplayLink icon in the Windows System Tray to configure how the attached monitor should display.
A DVI to VGA Adapter is provided to allow a VGA connection to the UV Plus+ DVI connection. A USB Extension cable is also provided to allow for optimum placement of your UV Plus+.
English
FAQ:Question: Will the UV Plus+ attached monitor render full 3D hardware rendered graphics when in Mirror or Extended Modes?
Answer: Yes, full 3D hardware rendered graphics can be displayed while in Mirror or Extended Modes, however running in such a configuration is limited as the application in use may become slower or not as responsive.
Question: Discoloration and constant flickering occurs through the UV Plus+ attached monitor.
Answer: Check that your monitor’s cable is properly attached and check for loose or faulty cables. If the problem continues, please contact EVGA Support at (888)-880-EVGA (3842)
Question: Why do I experience lag and delay when watching a HD video in either Mirrored or Extended mode through the USB 2.0?
Answer: If using the UV plus+ on a 2.0 port it will be limited to a 480Mbps transfer speed. Due to this limitation only so much data can be passed at any given moment. This will causes a delay when watching a HD video through the UV Plus+. We recommend you use a USB 3.0 port if available.
Question: How many monitors are supported when using UV Plus+?
Answer: The maximum amount of monitors supported is 6.
Question: How can I stay updated with the latest UV Plus+ software releases?
Answer: The UV Plus+ software that installs on to your computer has a built in Auto Update feature which will automatically check for any updates and then prompt you accordingly. You can right click the UV Plus+ icon in the Windows System Tray and select Updates to either configure how your computer updates or to manually check for an update.
Question: How do I uninstall UV Plus+ software?
Answer: In Vista/7 click Start Control Panel Uninstall a program Select EVGA UV Plus+ and select Uninstall. In XP or 2000 click Start Settings Control Panel Add or Remove Programs Select EVGA UV Plus+ and select Uninstall.
Question: Why does my UV Plus+ attached monitor not display anything when my computer is booting up or in a DOS based environment?
Answer: UV Plus+ will only activate in a Windows based environment. Signal will be passed to your UV Plus+ attached monitor when the UV Plus+ software has fully loaded as part of the Windows startup process.
English
IntroductionUV Plus+ d’EVGA vous donnent la possibilité d’utiliser plusieurs écrans via un port USB 2.0 ou 3.0 sur votre laptop ou PC. Chaque écran, jusqu’à 6 max., a besoin d’un UV 19. L’UV 39 support 2 écrans par appareil pour un maximum de 6 écrans. Nos produits UV Plus+ vous donnent la capacité d’ajouter jusqu’à 6 écrans LCD, CRT, ou projecteurs additionnels sans avoir besoin de carte graphique supplémentaire. Grâce au mode Clone, ou au Bureau Etendu en haut/bas/gauche ou droite, l’UV Plus+ d’EVGA vous offrent la liberté d’espace pour votre place de travail virtuelle.
Configuration minimum: • Un port USB 2.0 libre • Windows® 2000, XP 32-Bit, Vista ou 7 • CD-ROM ou DVD-ROM si vous utilisez le CD d’installation fourni • 30 MB d’espace libre dur le disque dur • Processeur 1.2 GHz ou + • 512 MB de mémoire système (1 GB ou + recommandé)
Contenu:Votre boîtier EVGA UV Plus+ est accompagné des accessoires suivants: 1 x adaptateur DVI vers VGA 1 x câble USB 1 x CD d’installation pour les pilotes & logiciel
UVPlus+ Supporte:Windows AeroProfondeur des couleurs: 32-BitFormat large / panoramique / widescreenPeut cloner ou étendre votre bureauBranchement d’écran via HDMI, VGA, DVI, et FPI Ecrans Haute-Définition
UV 39
UV 19
Français
Les résolutions suivantes sont supportées:Les résolutions peuvent varier en fonction de votre moniteur.
• 800x600, 1024x768, 1280x768, 1366x768, 1280x1024, 1440x900, 1400x1050, 1680x1050, 1600x1200, 1920x1200, 2048x1152 supportées par les modèles UV 19 et UV 39
Installation du matériel et des pilotes:1 – Allumer votre ordinateur portable ou votre moniteur et votre ordinateur pour commencer l’installation. 2 – Dans Windows, installer les pilotes de l’UV Plus+ se trouvant sur le CD d’installation. Après l’installation, veuillez réinitialiser votre ordinateur.3 – Connecter le DVI, HDMI, ou les deux connecteurs du moniteur à l’UV Plus + (un adaptateur DVI vers VGA est inclus)4 – Connecter un côté du câble USB fourni à l’UV Plus+ et l’autre côté au port USB de votre ordinateur portable ou de bureau. Le logiciel de l’UV Plus+ détectera le moniteur connecté.5 – Clic droit sur l’icône DisplayLink dans la barre des tâches de Windows pour configurer l’affichage du moniteur connecté.
Un adaptateur DVI vers VGA est inclu afin de permettre le branchement d’un connecteur VGA au connecteur DVI de l’UV Plus+. Un câble d’extension USB est également fourni pour faciliter le placement de votre UV Plus+.
Adaptateur DVI vers VGA
Connexion DVI
Connexion HDMI
Français
FAQ:Question: Le moniteur branché à l’UV Plus+ offrira-t-il un rendu matériel de scènes graphiques 3D en mode clone ou étendu?
Réponse: Oui, néanmoins l’application utilisée peut devenir lente ou peu répondante.
Question: Le moniteur branché à l’UV Plus+ présente des changements de couleurs et une image tremblant constamment.
Réponse: Vérifiez que le câble de votre moniteur soit relié correctement et qu’il n’y ait pas de câbles mal branchés voir défectueux. Si le problème persiste, veuillez contacter le support technique d’EVGA au +49 89 189 049 11.
Question: Pourquoi est-ce que j’ai des lags lorsque je regarde une vidéo en HD, soit en mode Miroir, soit en mode étendu, via l’USB 2.0?
Réponse: Utiliser l’UV plus+ sur un port USB 2.0, limite la vitesse de transfer de données à 480Mbps. A cause de cette limitation, seules un nombre de données peuvent passer a un moment donné. Ceci provoquera un délai lorsque vousregarder une video en HD via l’USB 2.0. Nous recommandons d’utiliser un port USB 3.0 si disponible.
Question: Combien de moniteurs peuvent être supportés lors de l’utilisation d’UV Plus+?
Réponse: Le nombre maximum de moniteurs supportés est de 6.
Question: Comment être informé du dernier logiciel disponible pour mon UV Plus+?
Réponse: Le logiciel initial d’UV Plus+ installé sur votre ordinateur possède une fonction de vérification de mise-à-jour automatique et vous informera d’une mise-à-jour existante le cas échéant. Vous pouvez également effectuer un clic droit sur l’icône UV Plus+ dans la barre des tâches de Windows et sélectionner “Updates” pour configurer manuellement la mise-à-jour ou vérifier manuellement si une mise-à-jour est disponible.
Question: Comment puis-je désinstaller le logiciel UV Plus+?
Réponse: Dans Vista/7, cliquer sur Commencer Panneau de configuration Désinstaller un programme Sélectionner EVGA UV Plus+ puis sélectionner Désinstaller.
Dans XP ou 2000 cliquer sur Commencer Paramètres Panneau de configuration Ajouter ou retirer des programmes Sélectionner EVGA UV Plus+ et sélectionner Désinstaller.
Question: Pourquoi le moniteur rattaché à mon UV Plus+ n’affiche rien lorsque mon ordinateur s’initialise ou dans un environnement DOS?
Réponse: L’UV Plus+ ne fonctionne que dans Windows. Le signal sera passé au moniteur relié à votre UV Plus+ lorsque votre logiciel UV Plus+ aura complètement chargé dans le processus de chargement initial de Windows.
Français
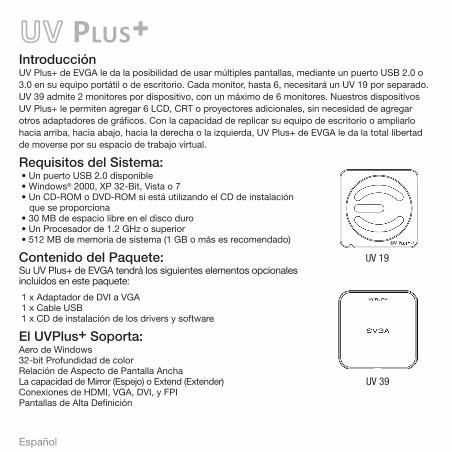
IntroducciónUV Plus+ de EVGA le da la posibilidad de usar múltiples pantallas, mediante un puerto USB 2.0 o 3.0 en su equipo portátil o de escritorio. Cada monitor, hasta 6, necesitará un UV 19 por separado. UV 39 admite 2 monitores por dispositivo, con un máximo de 6 monitores. Nuestros dispositivos UV Plus+ le permiten agregar 6 LCD, CRT o proyectores adicionales, sin necesidad de agregar otros adaptadores de gráficos. Con la capacidad de replicar su equipo de escritorio o ampliarlo hacia arriba, hacia abajo, hacia la derecha o la izquierda, UV Plus+ de EVGA le da la total libertad de moverse por su espacio de trabajo virtual.
Requisitos del Sistema: • Un puerto USB 2.0 disponible • Windows® 2000, XP 32-Bit, Vista o 7 • Un CD-ROM o DVD-ROM si está utilizando el CD de instalación que se proporciona • 30 MB de espacio libre en el disco duro • Un Procesador de 1.2 GHz o superior • 512 MB de memoria de sistema (1 GB o más es recomendado)
Contenido del Paquete:Su UV Plus+ de EVGA tendrá los siguientes elementos opcionales incluidos en este paquete:
1 x Adaptador de DVI a VGA 1 x Cable USB 1 x CD de instalación de los drivers y software
El UVPlus+ Soporta:Aero de Windows32-bit Profundidad de colorRelación de Aspecto de Pantalla AnchaLa capacidad de Mirror (Espejo) o Extend (Extender)Conexiones de HDMI, VGA, DVI, y FPI Pantallas de Alta Definición
UV 39
UV 19
Español
Las Siguientes Resoluciones de Pantalla son Compatibles:Resoluciones de pantalla pueden variar dependiendo de la capacidad de las pantallas.
• 800x600, 1024x768, 1280x768, 1366x768, 1280x1024, 1440x900, 1400x1050, 1680x1050, 1600x1200, 1920x1200, 2048x1152 Soportado por UV19 y UV39
Configuración del Hardware y del Driver:1 – Prenda su computadora portátil o la PC y también el monitor para comenzar la instalación.2 – Una vez en Windows, instale los drivers que van incluidos en el CD de instalación de UV Plus+. Después de que el proceso de instalación se halla terminado, por favor de reiniciar la computadora.3 – Enchufe los conectores DVI, HDMI de su monitor, o ambos, a UV Plus+ (se proporciona un conector de DVI a VGA, si es necesario)4 – Conecte el cable USB que se suministra al UV Plus+ y el otro lado a la Computadora portátil o a un puerto USB del PC. El software de UV Plus+ ahora detectará el monitor adjunto.5 – Haga clic derecho en el icono de DisplayLink en la barra de tareas de Windows para configurar como debe mostrar el monitor conectado.
Un adaptador DVI a VGA se proporciona para permitir una conexión VGA a la conexión DVI del UV Plus+. Un cable de extensión USB también se proporciona para permitir la colocación óptima del UV Plus+.
Adaptador de DVI a VGA
Conexión DVI
Conexión HDMI
Español
Preguntas Más Frecuentes:Pregunta: ¿El monitor adjuntado con el UV Plus+ puede reproducir completamente los gráficos 3D reproducidos por el hardware cuando esta en los modos de espejo o extendido?Respuesta: Sí, los gráficos 3D reproducidos por el hardware se pueden mostrar al mismo tiempo en los modos de espejo o extendido, sin embargo al operar en cualquiera de estos modos se puede limitar por las aplicaciones en uso que pueden volverse mas lentas o menos responsivas.Pregunta: La decoloración y el parpadeo constante se producen a través del monitor conectado al UV Plus+.Respuesta: Compruebe que el cable del monitor este correctamente conectado y comprobar si hay cables sueltos o defectuosos. Si el problema persiste, póngase en contacto con el Soporte de EVGA al (888)-880-EVGA (3842)Pregunta: ¿Por qué experimento un desfasaje y una demora cuando veo un video en HD ya sea en modo En espejo o Extendido a través del puerto USB 2.0?Respuesta: Si utiliza el UV plus+ en un puerto 2.0 se limitará a una velocidad de transferencia de 480 Mbps. Debido a esta limitación solo tantos datos pueden pasarse en un momento dado. Esto ocasionará una demora cuando vea un video en HD a través del UV Plus+. Le recomendamos que utilice un puerto USB 3.0, si se encuentra disponible.Pregunta: ¿Cuántos monitores se puede utilizar con el UV Plus+?Respuesta: La cantidad máxima de monitores que se pueden utilizar son 6.Pregunta: ¿Cómo puedo mantenerme actualizado con las últimas versiones del software de UV Plus+?Respuesta: El software de UV Plus+ que se instala en su computadora se ha construido en función de actualización automática que comprueba automáticamente si hay actualizaciones y luego le pide en consecuencia. Puede hacer clic derecho en el icono de UV Plus+ en la barra de tareas de Windows y seleccionar Updates (actualizaciones) para configurar como su computadora hace actualizaciones o para revisar manualmente una actualización. Pregunta: ¿Cómo puedo desinstalar el software de UV Plus+?Respuesta: En Vista/7 haga clic en Start Control Panel Uninstall a program Seleccione EVGA UV Plus+ y seleccione Uninstall. En XP o 2000 haga clic en Start Settings Control Panel Add or Remove Programs Seleccione EVGA UV Plus+ y seleccione Uninstall.Pregunta: ¿Por qué mi monitor conectado al UV Plus+ no muestra nada cuando mi computadora está arrancando o en un entorno basado en DOS?Respuesta: UV Plus+ sólo se activa en un entorno basado en Windows. La señal se pasa al monitor conectado al UV Plus+ cuando el software de UV Plus+ este corriendo como parte del proceso de inicio de Windows.
Español
EinführungEVGA´s UV Plus+ gibt Ihnen die Möglichkeit, mit nur einem USB 2.0 oder 3.0 Port, mehrere Monitore zu betreiben. Jeder von den 6 möglichen Monitoren benötigt eine separate UV 19. Die UV 39 unterstützt 2 Monitore pro Einheit bis zu einem Maximun von 6 Monitoren. Unsere UV Plus+ Einheiten ermöglichen das Hinzufügen von bis zu 6 LCD, CRT oder Projektoren, ohne das ein weiterer Grafikadapter eingebaut werden muss. Mit EVGA`s UV Plus+ haben Sie alle Möglichkeiten der Spiegelung oder der Erweiterung ihres Desktops nach allen Seiten.
Mindestsystemvoraussetzungen: • Einen verfügbaren USB-2.0-Anschluss • Windows® 2000, XP (nur 32-Bit), Vista oder 7 • CD-ROM- oder DVD-ROM-Laufwerk zur Nutzung der Installations-CD • 30 MB freien Festplattenspeicherplatz • Hauptprozessor mit 1.2 GHz oder schneller • 512 MB Arbeitsspeicher (1 GB oder mehr wird empfohlen)
Packungsinhalt:Ihrem EVGA UV-Plus+-Gerät liegen folgende optional verwendbare Zubehörteile bei: 1 x DVI-auf-VGA-Adapter 1 x USB-Kabel 1 x Installations-CD mit Treibern und Software
UVPlus+ unterstützt:Windows Aero32-Bit-FarbtiefeBreitbildauflösungenBildschirm-Klon- oder -Erweiterungs-ModusHDMI-, VGA-, DVI-, und FPI-MonitoranschlüsseHochauflösende (High-Definition) Monitore
UV 39
UV 19
Deutsch
Die folgenden Auflösungen werden unterstützt:Die Auflösungen können entsprechend den Eigenschaften Ihres Monitors variieren
• 800x600, 1024x768, 1280x768, 1366x768, 1280x1024, 1440x900, 1400x1050, 1680x1050, 1600x1200, 1920x1200, 2048x1152 unterstützt auf UV-19- und UV-39-Modellen
Hardware- und Treiber-Einrichtung:1 – Schalten Sie Ihren Mobil-Computer oder Ihren Desktop-Computer und den Monitor ein um die Installation zu beginnen. 2 – Wenn das Windows-Betriebssystem läuft, installieren Sie die UV-Plus+-Treiber von der mitgelieferten Installations-CD. Nach dem der Installationsprozess beendet ist, starten Sie Ihren Computer neu.3 – Schließen Sie Ihren Monitor über DVI oder HDMI am UV Plus+ an (Ein DVI zu VGA Adapter wird bei Bedarf angeboten).4 – Verbinden Sie mit dem beiliegenden USB-Kabel das UV-Plus+-Gerät mit Ihrem Mobil- oder Desktop-Computer. Die UV-Plus+-Software wird nun den angeschlossenen Monitor erkennen.5 – Rechtsklicken Sie auf das DisplayLink-Symbol im Infobereich der Taskleiste um die Darstellung auf dem angeschlossenen Monitor zu konfigurieren.
Ein DVI-auf-VGA-Adapter liegt bei um einen VGA-Anschluss am Monitor mit dem DVI-Anschluss am UV-Plus+ zu verbinden. Zur optimalen Geräteaufstellung liegt ebenfalls ein USB-Verlängerungskabel bei.
DVI-auf-VGA-Adapter
DVI-Anschluss
HDMI-Anschluss
Deutsch
Häufig gestellte Fragen:Frage: Können auf dem über das UV-Plus+-Gerät angeschlossenen Monitor im Bildschirm-Klon- oder -Erweiterungs-Modus 3D-Hardware-gerenderte Inhalte wiedergegeben werden?Antwort: Ja, komplett 3D-Hardware-gerenderte Inhalte können im Bildschirm-Klon- oder -Erweiterungs-Modus wiedergegeben werden, wobei allerdings die Anwendung langsamer werden kann oder träger reagiert.Frage: Warum kommt es zu Farbveränderungen oder konstantem Flackern auf dem über das UV-Plus+-Gerät angeschlossenen Monitor?Antwort: Stellen Sie sicher, dass das Monitorkabel korrekt angeschlossen ist und dass die Kabelverbindungen nicht gelockert sind oder Kabeldefekte vorliegen. Falls das Problem auch weiterhin besteht, kontaktieren Sie den Technischen Kundendienst von EVGA unter: +49/0-89-189049-11.Frage: Warum kann es passieren, dass ich Bildverzögerungen bekomme, wenn ich über USB 2.0 ein HD Video im gespiegelten oder erweiterten Modus betrachte?Antwort: Die Datentransfergeschwindigkeit wird auf 480Mbps begrenzt, wenn Sie die UV plus+ an einem USB 2.0 Port betreiben. Aufgrund dieser Einschränkung, kann nur diese Datenmenge verarbeitet werden. Und das führt zu Bildverzögerungen, wenn Sie ein HD Video über den UV plus+ betrachten. Wir empfehlen den Gebrauch über einen freien USB 3.0 Port.Frage: Wie viele Monitore werden unterstützt bei Verwendung von UV-Plus+?Antwort: Es werden maximal sechs Monitore unterstützt. Frage: Wie halte ich die Software meines UV-Plus+ aktuell?Antwort: Die UV-Plus+-Software hat eine integrierte Auto-Aktualisierungsfunktion, die automatisch nach verfügbaren Aktualisierungen sucht und Sie entsprechend benachrichtigt. Sie können Rechtsklicken auf das UV-Plus+-Symbol im Infobereich der Taskleiste und ‚Update’ anklicken um entweder einzustellen, wie die automatische Überprüfung auf Aktualisierungen ablaufen soll auf Ihrem Rechner, oder um manuell zu überprüfen, ob Aktualisierungen verfügbar sind.Frage: Wie deinstalliere ich die UV-Plus+-Software?Antwort: Unter Vista / 7 klicken Sie auf ‚Start’ auf ‚Systemsteuerung’ auf ‚Programm deinstallieren’ wählen Sie ‚EVGA UV Plus+’ klicken Sie auf ‚Deinstallieren’. Unter XP / 2000 klicken Sie auf ‚Start’ auf ‚Systemsteuerung’ auf ‚Software’ auf ‚Programme ändern oder entfernen’ wählen Sie ‚EVGA UV Plus+’ klicken Sie auf ‚Entfernen’.Frage: Warum wird auf dem über das UV-Plus+-Gerät angeschlossenen Monitor nichts angezeigt während mein Computer startet oder im DOS-Modus läuft? Antwort: UV-Plus+ läuft nur in einer Windows-Umgebung. Ein Bildsignal wird an den über das UV-Plus+-Gerät angeschlossenen Monitor weitergeleitet, sobald die UV-Plus+-Software als Teil des Windows-Startvorgangs komplett geladen wurde.