Quick Start Guide VRInsight’s V1000Pit/Pro for X-Plane/FTS1000 CONTENTS 1. Installation Procedure 1.1 Before start, “System locale” 1.2 Driver software installation 1.3 Video connection and Screen Set-up 1.4 USB connection 2. Do it Work 2.1 Run “X-Plane” 2.2 Run “SimAVIO2” 2.3 V1000Pit/Pro Hardware Connections 2.4 Load FTS1000 layout for V1000Pit/Pro 2.5 Display correctly 2.6 Useful Hot-Key command; “Ctrl-M” and “Ctrl-L” Supplements: This document is supplied with additional files. QS_V1KPro_FTS1000.pdf : This file Drivers\CDM20814_Setup.exe: Driver software installer SimAVIO\Layouts\Cessna_172-S_FTS1000_BATD_V1KPro.lfts: FTS1000 Layout SimAVIO\Library\keys.xml: Key mapping file
Transcript
Quick Start Guide
VRInsight’s V1000Pit/Pro for X-Plane/FTS1000
CONTENTS
1. Installation Procedure 1.1 Before start, “System locale” 1.2 Driver software installation 1.3 Video connection and Screen Set-up 1.4 USB connection
2. Do it Work 2.1 Run “X-Plane” 2.2 Run “SimAVIO2” 2.3 V1000Pit/Pro Hardware Connections 2.4 Load FTS1000 layout for V1000Pit/Pro 2.5 Display correctly 2.6 Useful Hot-Key command; “Ctrl-M” and “Ctrl-L”
Supplements: This document is supplied with additional files. QS_V1KPro_FTS1000.pdf : This file Drivers\CDM20814_Setup.exe: Driver software installer SimAVIO\Layouts\Cessna_172-S_FTS1000_BATD_V1KPro.lfts: FTS1000 Layout SimAVIO\Library\keys.xml: Key mapping file
Run “X-Plane” and select aircraft, “Cessna G1000 172” of “FTS Aircraft”.
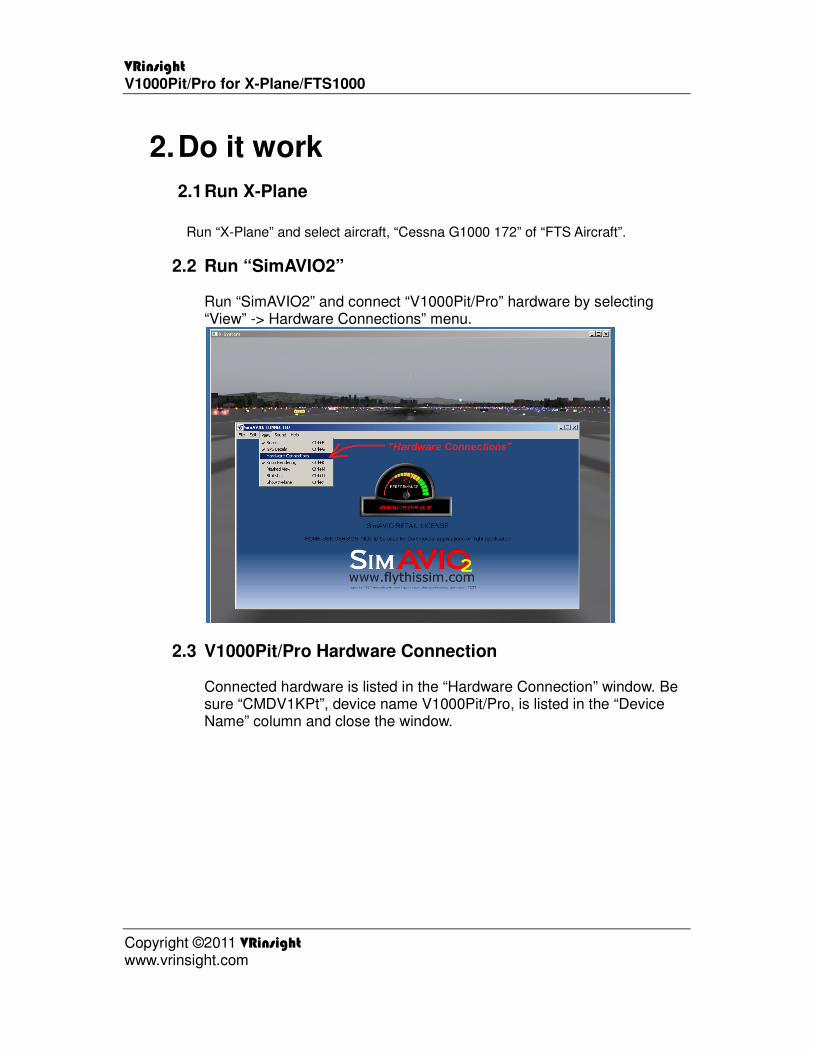
2.2 Run “SimAVIO2” Run “SimAVIO2” and connect “V1000Pit/Pro” hardware by selecting “View” -> Hardware Connections” menu.
2.3 V1000Pit/Pro Hardware Connection
Connected hardware is listed in the “Hardware Connection” window. Be sure “CMDV1KPt”, device name V1000Pit/Pro, is listed in the “Device Name” column and close the window.
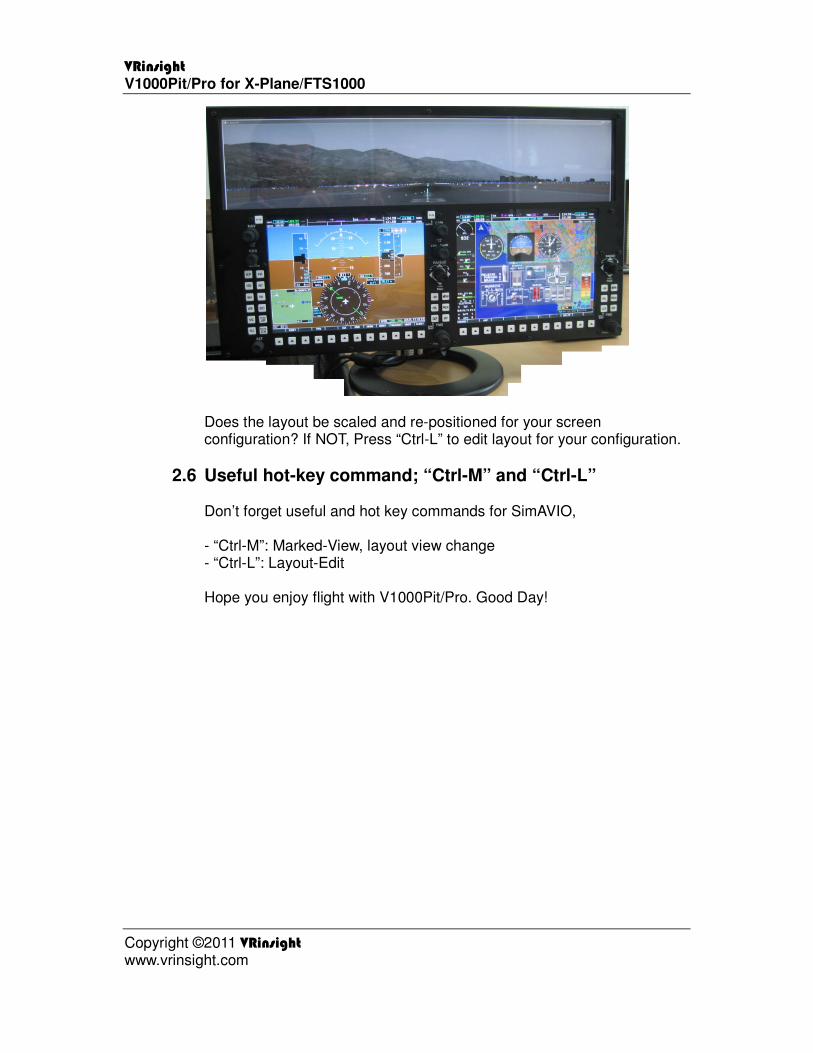
Does the layout be scaled and re-positioned for your screen configuration? If NOT, Press “Ctrl-L” to edit layout for your configuration.
2.6 Useful hot-key command; “Ctrl-M” and “Ctrl-L”
Don’t forget useful and hot key commands for SimAVIO, - “Ctrl-M”: Marked-View, layout view change - “Ctrl-L”: Layout-Edit Hope you enjoy flight with V1000Pit/Pro. Good Day!