12
Quickstart Guide to Operating Instructions Fiat Ducato 1-Way Tipper Nov 2014 on
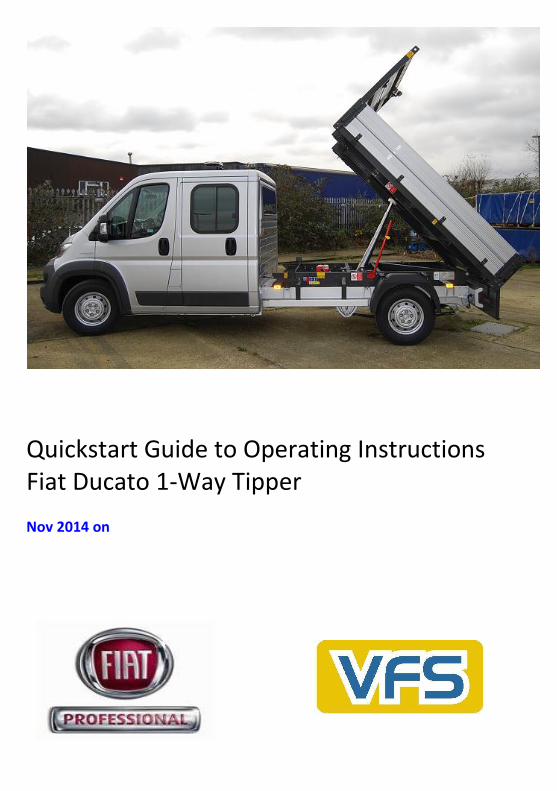
Quickstart Guide to Operating Instructions Fiat Ducato 1-Way Tipper Nov 2014 on

VFS (Southampton) Ltd.
Unit 8, Barton Park Industrial Estate Chickenhall Lane Eastleigh Hants SO50 6RR Tel: 023 8065 1704 Fax: 023 8062 0999 Email: [email protected]
The illustrations, technical information, data and descriptions contained in this publication, were correct at the time of going to print. VFS (Southampton) Ltd reserve the right to make any changes necessary in line with continuous development and improvement. No liability can be accepted for any inaccuracies or omissions in this publication, although due care has been taken to make it as complete and accurate as possible. The publication may not be duplicated, reprinted, stored in a data processing system or transmitted by electronic, mechanical, photographic or other means, or recorded, translated, edited, abridged or expanded without the prior written consent of VFS (Southampton) Ltd. The same also applies for parts of this manual and their use in other publications. © Copyright 2013, Issued by VFS (Southampton) Ltd. Part No: VFS10-86-0036
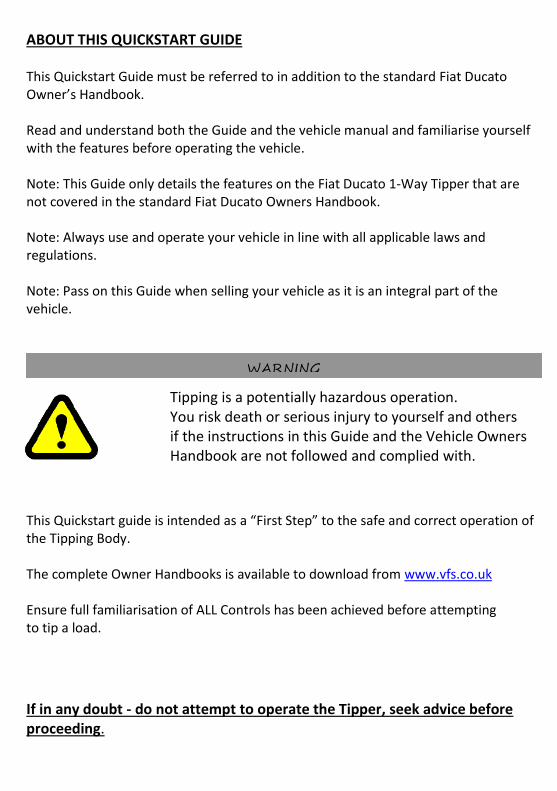
ABOUT THIS QUICKSTART GUIDE
This Quickstart Guide must be referred to in addition to the standard Fiat Ducato Owner’s Handbook. Read and understand both the Guide and the vehicle manual and familiarise yourself with the features before operating the vehicle. Note: This Guide only details the features on the Fiat Ducato 1-Way Tipper that are not covered in the standard Fiat Ducato Owners Handbook. Note: Always use and operate your vehicle in line with all applicable laws and regulations. Note: Pass on this Guide when selling your vehicle as it is an integral part of the vehicle.
Tipping is a potentially hazardous operation. You risk death or serious injury to yourself and others
if the instructions in this Guide and the Vehicle Owners Handbook are not followed and complied with.ck Start
This Quickstart guide is intended as a “First Step” to the safe and correct operation of the Tipping Body. The complete Owner Handbooks is available to download from www.vfs.co.uk Ensure full familiarisation of ALL Controls has been achieved before attempting to tip a load.
If in any doubt - do not attempt to operate the Tipper, seek advice before proceeding.
WARNING
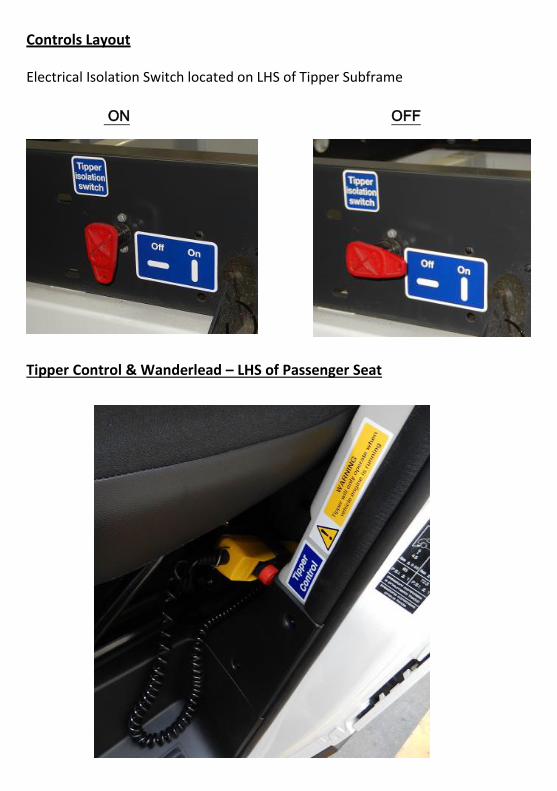
Controls Layout
Electrical Isolation Switch located on LHS of Tipper Subframe
ON OFF
Tipper Control & Wanderlead – LHS of Passenger Seat
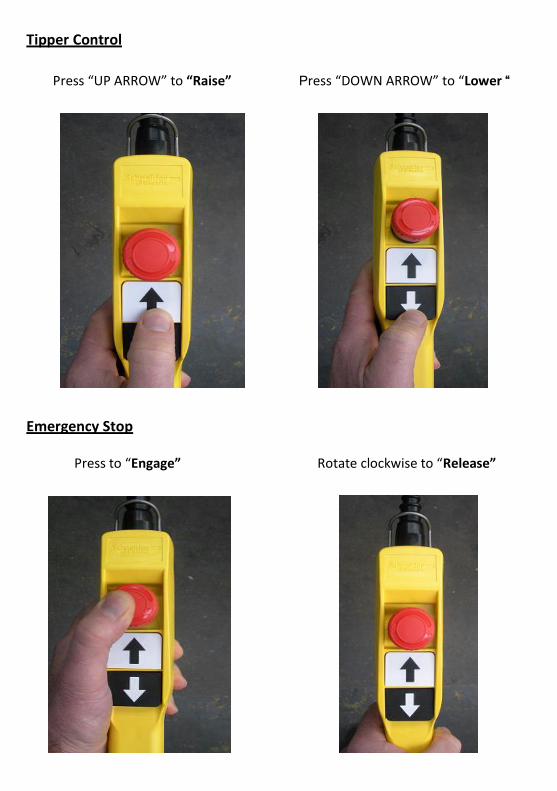
Tipper Control
Press “UP ARROW” to “Raise” Press “DOWN ARROW” to “Lower “
Emergency Stop
Press to “Engage” Rotate clockwise to “Release”
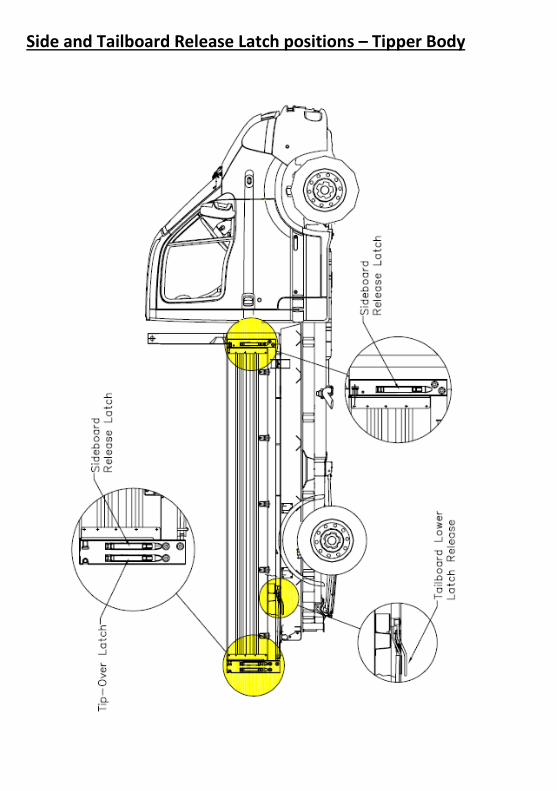
Side and Tailboard Release Latch positions – Tipper Body
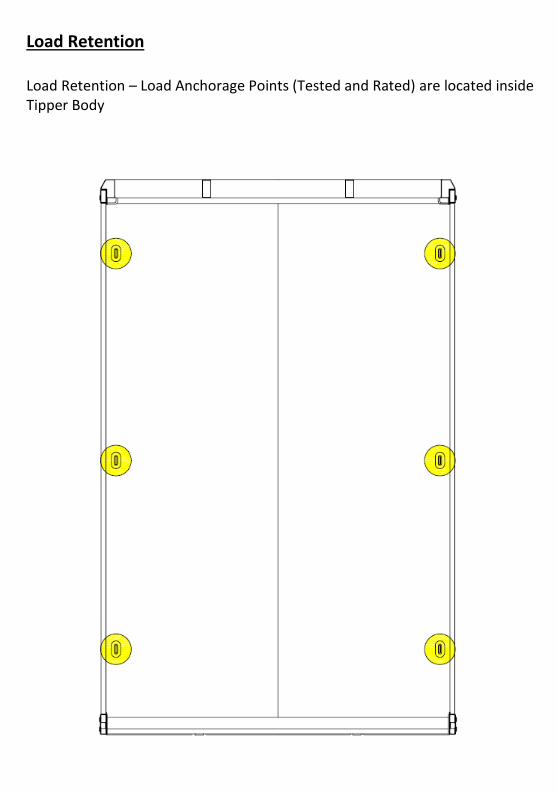
Load Retention
Load Retention – Load Anchorage Points (Tested and Rated) are located inside Tipper Body
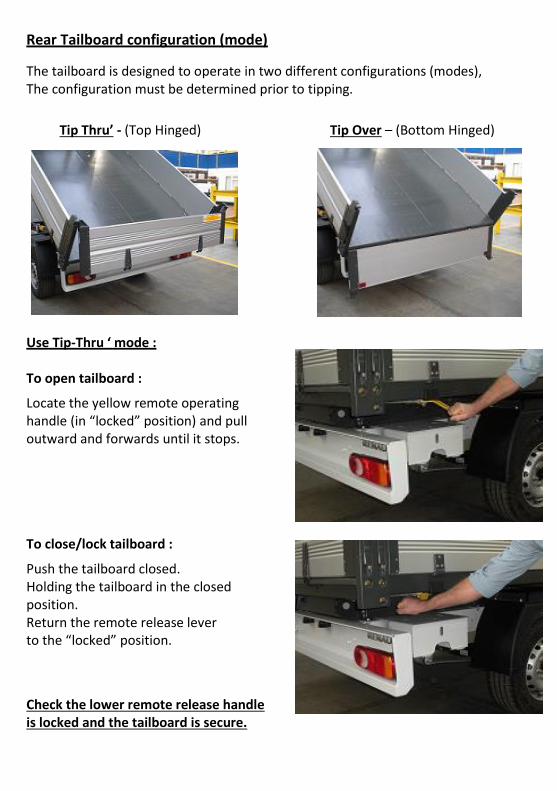
Rear Tailboard configuration (mode)
The tailboard is designed to operate in two different configurations (modes), The configuration must be determined prior to tipping.
Tip Thru’ - (Top Hinged) Tip Over – (Bottom Hinged)
k Start
Use Tip-Thru ‘ mode : To open tailboard :
Locate the yellow remote operating handle (in “locked” position) and pull outward and forwards until it stops.
To close/lock tailboard :
Push the tailboard closed. Holding the tailboard in the closed position. Return the remote release lever to the “locked” position.
Check the lower remote release handle is locked and the tailboard is secure.
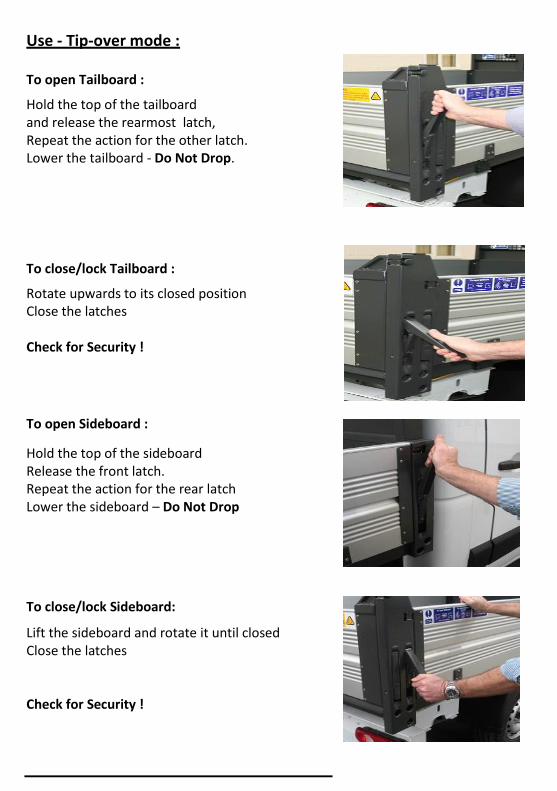
Use - Tip-over mode :
To open Tailboard :
Hold the top of the tailboard and release the rearmost latch, Repeat the action for the other latch. Lower the tailboard - Do Not Drop.
To close/lock Tailboard :
Rotate upwards to its closed position Close the latches Check for Security !
To open Sideboard :
Hold the top of the sideboard Release the front latch. Repeat the action for the rear latch Lower the sideboard – Do Not Drop
To close/lock Sideboard:
Lift the sideboard and rotate it until closed Close the latches Check for Security !

Tipping Operation:
To “RAISE” the Tipper body :
Check there are no overhead obstructions i.e. cables etc. Choose Tip mode and Open the tailboard. Locate the Tipper Isolation Switch Select the ‘ON’ position. Control the tip using the Controller Press the “RAISE” button Raise the body to the required height. The body will automatically stop tipping when the ram is fully extended. The tipping can be stopped at any time by releasing the “RAISE” button. A buzzer will sound when the “RAISE” button is pressed.
To “LOWER” the Tipper Body :
Ensure no obstruction around the Tipper Press the LOWER button to lower the body. Keep depressed until the warning sounder ceases Close the tailboard ensuring that it is securely locked.
Switch the Tipper Isolation Switch to the ‘OFF’ position.
Stuck Load !!
Never “Jolt” the Tipper to release stuck loads
Lower the Tipper and manually release the load
Raise Tipper to release residual load

Body Prop
Never Stand or Work underneath an Un-propped body.
Deployment of the Body Prop :
Park the vehicle on a firm and level surface, and apply the handbrake.
Raise the Tipper bed.
Raise the body prop by pulling up on the handle.
Rotate the body prop until it stops.
Lower the body until it rests on the prop.
Turn the Isolation Switch to the 'OFF' position.
Remove the keys from the vehicle ignition.
Stowing the Body Prop
Stowing the Prop is a reversal of the deployment procedure
WARNING

Parts and Accessories
Spare parts and Accessories are available from: VFS (Southampton) Ltd, Unit 8, Barton Park Industrial Estate, Chickenhall Lane, Eastleigh SO50 6RR Tel: 023 8065 1704 Fax: 023 8062 0999 Email: [email protected] Comprehensive Operators Handbook/Spare Parts and Accessories can be found and downloaded, in the relevant section on-line at www.vfs.co.uk
European Whole Vehicle Type Approval (WVTA)
VFS installed Tipper Body and Accessories i.e. Towing Equipment, Tail-lifts etc. have full EC WVTA approval. Position of the “2nd Stage Approval” Decal.
Warranty
Full warranty exists on all parts and workmanship associated with the Tipper body conversion for 3-years/100,000 miles. Warranty is only valid if the Tipper is operated in accordance with the Owner’s Handbook and current Road Traffic Act Legislation. Warranty claims for parts associated with the Tipper body conversion should be made direct to VFS (Southampton) Ltd.


