45
Randolph Baseball Minor League Manual, Drills and Practice Plans Commissioner: Jason Halper 201-213-8579 [email protected]

Randolph Baseball
Minor League Manual,
Drills and Practice Plans
Commissioner: Jason Halper
201-213-8579

Introduction.......................................................................................................................................
You play like you practice ………………………………………………………………………
Preparation ....................................................................................................................................
Coaching Tips ...................................................................................................................................
Minor League rules and gameplay guidelines……………………………………………………
Fundamentals - Apply and attention to detail in all drills and gameplay …………………………
Practice Plans
Practice Plan I...........................................................................................................................
Practice Plan II .........................................................................................................................
Practice Plan III ........................................................................................................................
Practice Plan IV ………………………………………………………………………………
Practice Plan V..........................................................................................................................
Practice Plan VI .........................................................................................................................
Practice Plan VII………………………………………………………………………
Practice Drills Summary ...................................................................................................................
Throwing Drills.............................................................................................................................
Flick drill...................................................................................................................................
Arm drag drill ...........................................................................................................................
One-knee drill ...........................................................................................................................
Two-knee drill...........................................................................................................................
Play catch – hit the target ..........................................................................................................
Back ‘em up three .....................................................................................................................
Throwing relay drill ..................................................................................................................
Long toss ...................................................................................................................................
Infield Drills..................................................................................................................................
First Base drill ……………………………………………………………………………….
Backhand drill………………………………………………………………………………..
Angle and dive drill………………………………………………………………..…………
Shuffle.......................................................................................................................................
Scoop Drill……………………………………………………………………………………
Roll back and forth....................................................................................................................
Rapid fire ..................................................................................................................................
Four square................................................................................................................................
Middle infield............................................................................................................................
Outfield /Pop Fly Drills.................................................................................................................
Pop flies ....................................................................................................................................
Left and right fly balls...............................................................................................................
Football drill..............................................................................................................................
Ground balls..............................................................................................................................
Do or die ...................................................................................................................................
Base Running Drills ......................................................................................................................
Straight through first .................................................................................................................
The question mark.....................................................................................................................
The banana ................................................................................................................................
First to third...............................................................................................................................
Second to home.........................................................................................................................
Diamond relay...........................................................................................................................
Hitting and Situations ...................................................................................................................
Soft toss.....................................................................................................................................
Tee practice ...............................................................................................................................
Four, four and four ....................................................................................................................
Catching drills ……………………………………………………………………………………
Cutoff Supplemental ……………………………………………………………………………….
Gameplay Scrimmage ……………………………………………………………………………..
Manager’s Evaluation .......................................................................................................................
Player Evaluation ..............................................................................................................................
Lineup Sheet ………………………………………………………………………………………

Introduction
The Randolph Youth Baseball Minor League Manual was developed with three main objectives in
mind. One, to assist managers and coaches prepare for and run effective practices. Two, to promote
and instill a more consistent coaching methodology throughout all levels, one that we’re confident
will keep the players engaged and interested in the game of baseball, and one that is designed
develop and enhance the players’ skills as they progress thru each level. Lastly to include league
and gameplay guidelines
The rules and guidelines for Minor League play are in the first section. The practice plans included
are intended to be used as is. You may find that some teams thrive and enjoy certain drills more than
others. A brief description of each drill may be found in the “Practice Drills Summary” section at
the end of the manual. The scrimmage format can be found here as well. Please focus on the
implementation of the fundamentals noted herein. These remain the same at each level of Randolph
Little League and we have video support via the website to visually aid in the application of the
mechanics of hitting, throwing, pitching, catching, fielding and baserunning. We have also added
detailed cutoff information which players should understand at this level.
At the conclusion of the manual you also find a manager and player evaluation form. We feel it is
important and necessary for each manager to assess each player’s performance; then share this
valuable feedback with the player so he has something to work on during the off-season.
Specifically, the first evaluation form is to be submitted to your league coordinator at seasons end
and the second can be shared with the player and or parent at seasons so there is a clear
understanding where they have improved and also where they need more work. Instructions for
using the manager’s evaluation are included on the form.
You play like you practice
The adage you play like you practice applies. Structured productive practices will yield better game
performance. Baseball players are indeed creatures of habit. These habits and routines are shaped at
an early age and reinforced by repetition and thru practice. These habits we want to be the result of
proper mechanics throwing, fielding, pitching, hitting and baserunning. Through repetition and
practice, players are better positioned to execute in game-time situations. Repetition alone, however,
does not ensure success. The players must be taught the proper way to execute a drill or play. This is
vitally important, especially for younger players or those more challenged.
Recognize too that not all players develop their skills or understanding of the game at the same
pace. If you see that a player is not fully grasping the concept of drill or play, take the time to work
with the player individually. Its is our job to teach, to the best of our ability, the specifics of what
is being asked of the player.
Preparation
Take the time to prepare and review your practice plan in advance. Try to get to practice early and
bring copies of and review your practice plan with coaches and volunteers. Be when implementing
Practice Plans, break players up into groups of 3 or 4 with a coach to keep the drill and players
moving. When you have a plan, the players will remain engaged, the parents will appreciate that
you are prepared, and you will find that your coaching experience is rewarding.

Coaching Tips
• Prepare for your practice in advance, start on time, and stick to your timeline (refer to sample practice plans).
• Set expectations for the practice and the season – we encourage managers at all levels to conduct a “parents meeting” at the beginning of the season and to set ground rules for the players. Inform parents
of the importance of practice attendance. Should a player not be able to attend be sure you are notified via email or Teamsnap.
• Ask for help (the more volunteers the better), but don’t be afraid to tell coaches and volunteers how
you want drills organized and executed – this is still your practice.
• Keep the kids moving, for example, run stations and limit the amount of time at each. If necessary, break the kids up into smaller groups to maintain their attention and increase their repetitions.
• Reinforce practice routines, for example, start each practice the same way (running and stretching, throwing mechanics, etc), and have a designated place to play catch (e.g., right or left field foul lines).
• Be patient but firm. Young kids will be kids. Be sure to set guidelines for conduct. Explain the expectations of respect for the game, teammates, umpires and opponents as well as good sportsmanship
• Keep it fun by incorporating contests…even the youngest players enjoy competition (refer to sample practice plans).
• Focus on the basics and skills development. Baseball is about muscle memory caused by repetition of
good mechanics. Proper arm slot and step when throwing; proper hand, foot placement and a level finished swing when hitting; proper approach when fielding…bend at knees, glove out front and on the
ground, shuffle to center ball on body. Apply and reinforce fundamentals section
• Try to incorporate “situations” at each practice to teach the kids the game. Reinforce positional locations and responsibility
• Be sure to incorporate scrimmages where able. Break up team in half and play against one another. Be sure to use this time to work with pitchers and catchers as well. You can have a coach in the outfield throwing flyballs to keep the players engaged
• Where applicable incorporate game play tips such as a ball at or over the batters head, drop the bat and turn face toward the backstop (for safety) and the importance of sliding as opposed to going into a base standing up on a close play or running over an opposing player (slide and avoid)
If you have any questions regarding the practice plans or drills, please contact Michael Paladino
[email protected], Peter Torres [email protected], Jason Halper
[email protected], or the commissioner Marc Laqui [email protected]
Good luck and have fun!

2018 MINOR LEAGUE BASEBALL RULES
RULES APPLICABLE FOR MINOR LEAGUE ONLY
1. All rules shall be as set forth in the 2018 Little League Baseball Rule Book except as may be modified below.
2. All Managers and Coaches must hand in an executed Volunteer Form with a copy of a government issued
photo ID (i.e. license or passport). A team is not permitted have any practices or meetings until a volunteer form
is submitted by the manager and two coaches to the League Coordinator. Any violation of this rule will
result in a complete cessation of all practices by the team . The team can resume its practice activities upon
achievement of full compliance. It is the manager's obligation to achieve compliance with this rule.
3. Home team will have the field to practice a half hour before game time. Visiting team will have the field to
practice 15 minutes before game time. Week-night games at Heisteins should start by 5:45 pm up through
May 1, 2018. Freedom Park night games shall start by 7:00 p.m. and no inning shall start after 9:20, as the lights
are set to turn off by 10:00 p.m.
4. No inning may start in a regular season game (other than at Freedom Park) after: Time Periods
7:30 in a game played from Opening Day through May 1st 7:45 in a game played from May 2 through May 15
8:00 in a game played from May 16 to the end of the regular season
The Umpire in his discretion may still call the game due to darkness before these
time Periods commence or at any time thereafter.
5. The batter is out on a third strike even if the catcher drops the ball. If the third strike is a foul tip the catcher
must catch the ball for the batter to be out.
6. Every player on a minor league team roster will participate in each game for a minimum of three (3) innings. No
kid can sit two innings in a row. Think of the kids. Try to play them more than the minimum. Penalty for not
following this rule is: The player(s) involved shall start the next scheduled game, play any previous
requirement not completed and the required minimum for the new game before being removed. The manager
may receive a suspension for the next scheduled game for failing to follow this rule or suspension for several
games for a second offense. If the violation is determined to have been intentional, a more severe penalty
may be assessed including a possible forfeiture of the game.
The Minor League will use a continuous batting order. See rule 4.04 . Note that if a player comes late, he /she
shall be inserted at the end of the order as provided in Rule
4.04 , subject to the provision of Rule 4.01.
7. a. The New Pitch Count Rules can be found in your rule book under Regulation VI –Pitchers. They are
applicable to Minor League and must be followed. The pitch count rules and other selected pitching rules have
been summarized below, but you are required to Check and follow the Rule Book for the full scope of the
rules.

Summary of Pitch Count Rule in the Little League Rule Book
Maximum Pitches in a Day
League age 11 -12 . Pitcher must be removed from pitching after 85 pitches per day League age 9-10 Pitcher must
be removed from pitching after 75 pitches per day League age 7- 8 . Pitcher must be removed from pitching after
50 pitches per day (See Rule VI ( c ) for continuation rule for the one batter once the maximum amount of pitches
are thrown.
See Rule VI (d) for the rest requirement for all pitchers
Note: In addition to the Pitch Count Rules, our league has added a rule below for maximum innings to be pitched
in a week. See also Rule 7b below pertaining to the application of the pitch count rule in the field.
Limitation on Pitcher Taking Over as Catcher
A pitcher who delivers 41 pitches or more in a game cannot play the position of catcher for the remainder of that
day.
Rest Requirement for Next Pitching Assignment
• If a player pitches 66 or more pitches in a day, four (4) calendar days of rest must be observed.
• If a player pitches 51 to 65 pitches in a day, three (3) calendar days of rest must be observed.
• If a player pitches 36 to 50 pitches in a day, two (2) calendar days of rest must be observed.
• If a player pitches 21 – 35 pitches in a day, one (1) calendar day of rest must be observed.
• If a player pitches 1 to 20 pitches in a day, no (0) calendar days of rest must be observed.
Weekly Limitation for Pitchers
In addition to all other rules pertaining to pitching in the Rule Book, including the pitch count rule, the League
has adopted a local rule that no pitcher may pitch in more than 6 innings in a week. A week is defined from
Monday through Sunday. An inning has been pitched if a pitcher throws one pitch to a batter during the inning.
(warm –up pitches do not count in determining if a pitch has been thrown.) In addition, a pitcher can not throw a
single pitch in 3 consecutive days or pitch more then 3 consecutive ininngs
b. Application of the Pitch Count Rule on the Field
i. Home Team Manager will be responsible to assign one person (the
“Pitch Count Recorder”), other than himself, to keep the Pitch Count
for all pitchers for both teams. The Pitch Count Recorder may be one
of the two Coaches on the team.
ii. The Pitch Count Recorder should stay in the dugout or if the
Recorder is not a coach he./ she may stay in the scoring tower, if
possible.
iii. At the end of each half inning, the Pitch Count Recorder shall notify

each manager of the pitch count for each player that pitched in the
half inning. The Pitch Count shall be given as a cumulative number
for all innings pitched up to that point in the game.
iv The Pitch Count Recorder shall provide a manager with the pitch
count at any time during the game upon request.
v The Pitch Count Recorder shall notify the Managers and Umpire
when a pitcher has delivered his/her maximum number of pitches
in the game. Even if the Pitch Count Recorder fails to give such
notification , it is still the responsibility of the manager to remove
the pitcher when he/she has delivered the maximum number of
pitches for the game.
vi. If there are any disputes over the pitch count, the pitch count
kept by the Pitch Count Recorder shall be the official pitch
count utilized for the game and for entry into the manager’s
scorebook.
vii. At the end of the game, the managers shall write down in
their scorebook (or in such other official document the league is
utilizing) the date of the game and the pitch count and number of
innings for each pitcher on both teams. The opposing manager shall
sign the other manager’s scorebook . The manager’s scorebook may
be reviewed by an opposing manager for pitch counts at any time
before, during or after a game.
viii. There is no limit on the number of 12 year olds in the majors
that may pitch in a week.
ix.. A pitcher may not pitch in two games in one day , no
matter how few pitches or inning the player pitched in
the first game. No pitcher can throw a single pitch in 3 consecutive days
8. A runner must slide or attempt to avoid contact with the fielder on a play at any base. No intentional contact is
permitted. See also Rule 7.08 (a) (4) prohibiting a runner from sliding head-first into a base while moving
forward. The Rule does not apply when a runner is returning to a base.
9. It has been emphasized to the umpires to make the appropriate call if a runner leaves the base too soon. See
applicable Rule 7.13.
10. HOME TEAM RESPONSIBILITY: Make sure all equipment, including bases and the difibulator (if there
is one at the field) are put away and the box is locked and that the score board electronic remote panel is
locked up and the scorer’s tower is cleaned up and locked up. It is the Home Team's responsibility to
make sure that this is done. No excuses. If the lock is missing or broken, take the equipment with you and call
your league coordinator. On Field 2A , the home team must clean up and lock up the scorer’s tower.

11. Practices will be scheduled during the season on days when no games are scheduled. If a rainout game is
subsequently scheduled on your practice date, your practice will be canceled and will not be rescheduled.
12. If a weekday Minor League game is rained out or suspended, the Manager shall advise their League
Coordinator the night that the rainout or suspension occurs. The League Coordinator shall reschedule the game
on the next available open weekday date subject to the following guidelines:
A. The coordinator will try to reschedule the game on the same field, but that is not a requirement.
B. The game shall be rescheduled on the next available weekday despite the following occurrences:
i. Both teams or only one team will have to play two games on two successive days.
ii.. Both teams or only one team will have to play three games in the week (Monday through Sunday).
iii. Both teams or only one team claim to have no available pitchers.
iv. The field on which the game was originally scheduled is not available, but another field is available.
v. The manager and/or coach on one or both teams cannot make the rescheduled date.
C. The game will not be rescheduled on the next available date in the week if any of the following will occur:
i. One team or both teams will be scheduled to play 4 games in the week (Monday through Sunday).
ii. One team or both teams will be scheduled to play 3 games on 3 successive days.
iii. If "a" or "b" occur then the game will be scheduled the next available date in the following week.
D. If reasonably possible, the first game rained out will be rescheduled before a game rained out on a
subsequent day.
E. The same make-up rules will apply if a team loses more than 3 players for a chorus or band recital for a
Randolph elementary school.
IMPORTANT: Each League Coordinator may alter these rain-out / suspended game guidelines as
he/she in their sole discretion deems appropriate.
If a Saturday Minor League game is rained out or suspended, it will be rescheduled as follows:
If the 9:30 am game does not start by 10:15 am, it is automatically rescheduled for the 2:00 pm or 4:30 pm
slot (whichever is available first regardless of the field) that Saturday afternoon. If the field is playable after
9:45 am, the 11:30 a.m. / 12:00 p.m. and 2:00 p.m. games will proceed as scheduled.

If the 9:30 a.m. game or the 11:30 / 12:00 or the 2:00 pm Saturday games are rained out or suspended, they
will automatically be rescheduled on Sunday, the next day (except for Memorial weekend Sunday) starting at
12:00 noon, 2:00 pm and 4:00 pm. The games will be played in the same order that they were originally
scheduled on Saturday. The 6:00 pm slot will also be available for the league coordinators to reschedule
games. If the games rescheduled for Sunday are also rained out or suspended, the game will be rescheduled on
the weekday following the rules for weekday rainouts.
Each League Coordinator may alter these rain-out/ suspended guidelines as he/she in their sole discretion
deems appropriate.
F. If a team has only 7 or 8 players at gametime…..that team is to borrow 1 to 2 players from the
opponent to get an even 9. The opponent shall rotate the loaned players during the game and they
are only to play the field. Should players arrive during the game the manger loaning the players will
take back the loaned players as applicable. These games must be played rather than rescheduled
13. A team is permitted to start and continue to play a game if that team has at least 8 players (including loaned
players). If a team is reduced down to 7 players (including those loaned) at any time during the game, that
team will be considered to have forfeited that game. The game can still be played at the discretion of the
coaches but it will be recorded as a forfeit. A team that does not show up for a scheduled or rescheduled Minor
League weekday or weekend game shall be considered to have forfeited the game.
14. In the Minor Leagues, the two base coaches may be a manager and coach or two coaches. They no longer
need to be an adult and a player. (See new rule 4.05). But in order to put two adults on the baselines, there
must be another coach that remains in the dugout.
15. See Rule 4.07 pertaining to the ejection of a manager or coach from a game. See Rule 7.14 relating to the use of a
pinch runner in the Minor Leagues.
16. Each team shall provide the umpire with one new ball before each game.
17. Rule 1.08 provides that the on-deck position is no longer permitted. ALL PLAYERS, INCLUDING THE ON-
DECK HITTER, SHALL REMAIN IN THE DUGOUT WITHOUT A BAT. THE UMPIRE WILL STOP
PLAY IF THIS RULE IS VIOLATED AND INFORM THE MANAGER AND COACHES TO CORRECT
THIS VIOLATION BEFORE PLAY IS RESUMED.
18. A game is considered over if a team is leading by 15 runs at the end of 3 innings or 10 runs after 4 innings (Mercy
Rule)
19. A batter cannot run on a 3rd strike under any circumstances in the Minor League. No balks are called.
Bunting is allowed. The infield fly rule IS in effect. No stealing home. A runner advancing from 3rd base to
home must be hit in or walked or hit by pitch with the bases loaded unless it is a continuous play in the field
(example when stealing 3rd base and the catcher over throws and the ball goes into left field the runner
cannot advance to home; this includes an overthrow pickoff attempt at first or an overthrow on a steal of
pickoff at 2nd base the runner cannot advance PAST 3rd base.) Obviously an overthrow on a play that was
the result of a batted ball there is no limitation of advancing home (a continuous play). All other balls in
play are live and the runner can advance at their discretion. When stealing the baserunner cannot leave the
base until the ball cross home plate. If they are deemed to have left early the umpire will call the player out.

20. All protests properly made during the game must be communicated to the league coordinator within 48 hours of
the end of the game. The protest will be decided by the protest committee made up by the league Coordinator
and two members of the Committee that the Coordinator selects.
If a Protest is made, the game should be stopped. The manager protesting must advise the Umpire and the
opposing Manager of the nature of his protest. Both managers should advise the umpire of their positions on the
protest, including any applicable Rule and interpretation of said rule. The Umpire should consult with his base
umpires and, if applicable he may ask any coach for his understanding of any facts which have occurred. The
goal is to allow the umpire an opportunity to gather a full understanding of the applicable rule and the events
which have transpired and then to make a ruling. After said ruling the game shall continue as directed by the
Umpire. A protest shall not be upheld, because an Umpire does not follow the guidelines in this rule.
Any untimely protest shall not be upheld, regardless of the merits of same.
21. For each game the home team shall take the dugout (or bench area) along the first base side of the field.
22. Replacement of Players: If a minor league team loses a player before May 19, 2018, the manager will have 3
days to replace the player. If the player is not replaced within the 3 day period, the Coordinator shall select a
player for replacement from AAA. Specific rules for selection of replacement players :
a. A minor league team that loses a player may pick a player from AAA that is 9 or 10 years old. A Minor
team may not lose more than two players to a major league team.
23. Ties in League Standings after counting all Games played by a team against both Divisions shall be broken
as follows:
Head to Head, if still tied then,
Best Record in Division, if still tied then,
Fewest runs allowed against another team in the tiebreaker, if still tied then, By the flip of a coin.
Once a three (or more) way tie is broken , the rules are then reapplied to break the tie among the remaining
teams.
24. As the season comes to a close in the second half of May and in June, and in addition to the discretion
afforded a League Coordinator in Rules 12 and 13 above, a League Coordinator has the discretion to
schedule or not schedule rainout or incomplete games between some teams and not others despite the fact
that as of the end of the season, the teams may have played an unequal number of games or have played
different opponents in their division or the other division. The final league standings including tie-breakers
shall be decided on the total number of games played, despite being unequal or unbalanced between the
teams.
25. Each team may have only one Manager and two Coaches.
26. A Team may have only one manager and two Coaches in the Dugout. All other Adults and (and children
who are not players) may not be in the dugout and may not be in the fenced in areas around the dugout.

27. TROPHIES – Applicable for Minor League…. Trophies will be given out to the two teams that play in the
Championship game at the end of the playoffs. (winner and loser of the championship game.).
NOTE: New rules for bats have been established by Little League. These rules are
posted on our Little League website. Each manager must print out the rules and discuss
them with your team (players and parents). Each manager must have a set of the rules
at each game. Before each game, the players will line up on the field with their bats and
the manager of the opposing team will check the bats to ensure that they are Little
League approved bats. Any bats that are not approved, may not be used for any
purpose and must be removed from the field and may not be put back into the bat rack.
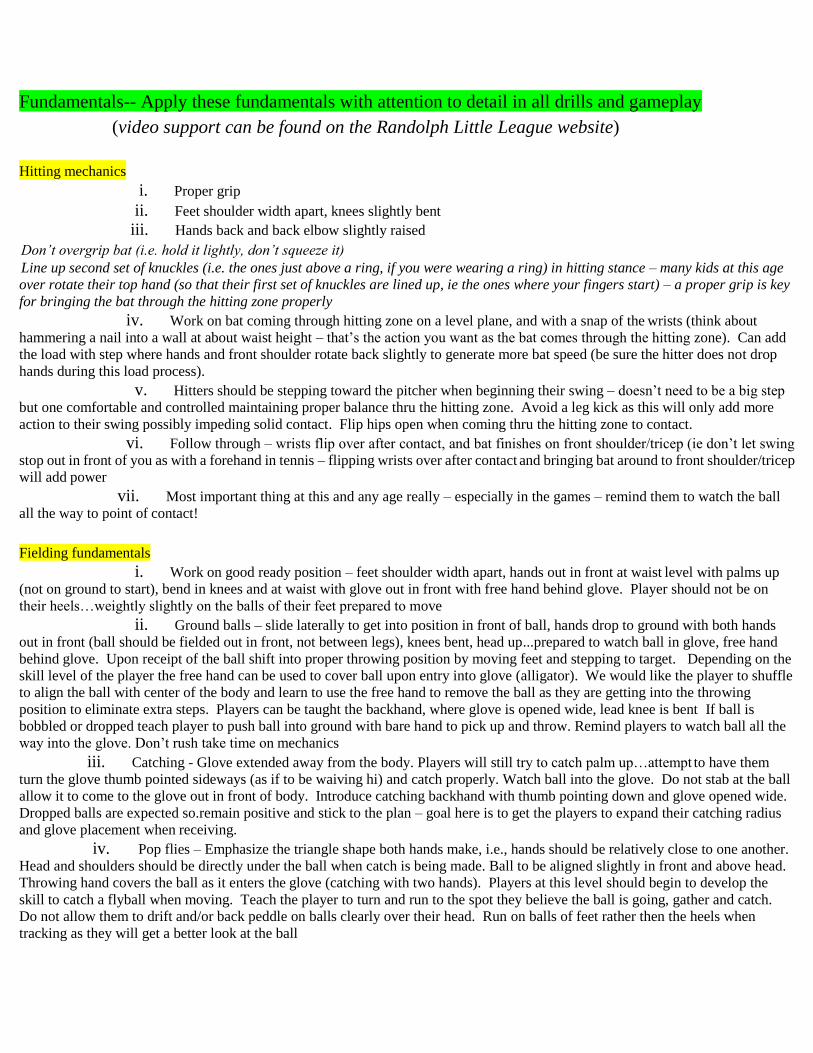
Fundamentals-- Apply these fundamentals with attention to detail in all drills and gameplay
(video support can be found on the Randolph Little League website)
Hitting mechanics
i. Proper grip
ii. Feet shoulder width apart, knees slightly bent
iii. Hands back and back elbow slightly raised
Don’t overgrip bat (i.e. hold it lightly, don’t squeeze it)
Line up second set of knuckles (i.e. the ones just above a ring, if you were wearing a ring) in hitting stance – many kids at this age
over rotate their top hand (so that their first set of knuckles are lined up, ie the ones where your fingers start) – a proper grip is key
for bringing the bat through the hitting zone properly
iv. Work on bat coming through hitting zone on a level plane, and with a snap of the wrists (think about
hammering a nail into a wall at about waist height – that’s the action you want as the bat comes through the hitting zone). Can add
the load with step where hands and front shoulder rotate back slightly to generate more bat speed (be sure the hitter does not drop
hands during this load process).
v. Hitters should be stepping toward the pitcher when beginning their swing – doesn’t need to be a big step
but one comfortable and controlled maintaining proper balance thru the hitting zone. Avoid a leg kick as this will only add more
action to their swing possibly impeding solid contact. Flip hips open when coming thru the hitting zone to contact.
vi. Follow through – wrists flip over after contact, and bat finishes on front shoulder/tricep (ie don’t let swing
stop out in front of you as with a forehand in tennis – flipping wrists over after contact and bringing bat around to front shoulder/tricep
will add power
vii. Most important thing at this and any age really – especially in the games – remind them to watch the ball
all the way to point of contact!
Fielding fundamentals
i. Work on good ready position – feet shoulder width apart, hands out in front at waist level with palms up
(not on ground to start), bend in knees and at waist with glove out in front with free hand behind glove. Player should not be on
their heels…weightly slightly on the balls of their feet prepared to move
ii. Ground balls – slide laterally to get into position in front of ball, hands drop to ground with both hands
out in front (ball should be fielded out in front, not between legs), knees bent, head up...prepared to watch ball in glove, free hand
behind glove. Upon receipt of the ball shift into proper throwing position by moving feet and stepping to target. Depending on the
skill level of the player the free hand can be used to cover ball upon entry into glove (alligator). We would like the player to shuffle
to align the ball with center of the body and learn to use the free hand to remove the ball as they are getting into the throwing
position to eliminate extra steps. Players can be taught the backhand, where glove is opened wide, lead knee is bent If ball is
bobbled or dropped teach player to push ball into ground with bare hand to pick up and throw. Remind players to watch ball all the
way into the glove. Don’t rush take time on mechanics
iii. Catching - Glove extended away from the body. Players will still try to catch palm up…attempt to have them
turn the glove thumb pointed sideways (as if to be waiving hi) and catch properly. Watch ball into the glove. Do not stab at the ball
allow it to come to the glove out in front of body. Introduce catching backhand with thumb pointing down and glove opened wide.
Dropped balls are expected so.remain positive and stick to the plan – goal here is to get the players to expand their catching radius
and glove placement when receiving.
iv. Pop flies – Emphasize the triangle shape both hands make, i.e., hands should be relatively close to one another.
Head and shoulders should be directly under the ball when catch is being made. Ball to be aligned slightly in front and above head.
Throwing hand covers the ball as it enters the glove (catching with two hands). Players at this level should begin to develop the
skill to catch a flyball when moving. Teach the player to turn and run to the spot they believe the ball is going, gather and catch.
Do not allow them to drift and/or back peddle on balls clearly over their head. Run on balls of feet rather then the heels when
tracking as they will get a better look at the ball

Throwing Mechanics
i. Start facing sideways with throwing hand away from target, and with hands in ready position, feet shoulder width apart, front hip pointing at target (ball in throwing hand with proper grip ready to throw, throwing hand in glove) At this level its recommend kids grip with two fingers across the seams (if possible) and not holding the whole ball in their hands
ii. Break hands from ready position - throwing hand comes up and back with ball facing away from target
with arm in L postion and extend glove hand simultaneously toward target.
iii. Step toward target and throw ball, extending throwing arm overhand, elbow up and
release out front finish down in front of thrower and extend to follow through…finish with bringing around throwing leg. Be sure
the player is pushing off the back leg
iv. Emphasize throwing only when the receiver is ready, giving a proper target, and ready to catch the throw
Outline the importance of using the legs and core to help take pressure off the arm and increase velocity. Throw to a spot.
Pitching Mechanics
Stretch Motion
The stretch motion is broken down into four simple steps that are easy to teach and easy to follow. For simplicity purposes we will
not introduce the windup delivery at this level. Communicate the, stance, leg lift, power position and finish.
i. Stance. The stretch stance is formed by placing the back foot directly next to the pitcher’s rubber (back of foot resting against
the rubber on the dirt). The front foot is positioned about 6 inches away, toe slightly aligned in front of the back foot (looks like
a pair of skis). The hands are held high in front of the chest, and the eyes are locked in on the catcher.
ii. Leg lift. The first thing the athlete does is lift the front leg. There is no step back, no load or twist, just a simple leg lift. At the
peak of the leg lift is the balance point, which is the position where the lift leg forms a right angle or L position. This requires
balance and stability to keep the body posture tall, the foot out, and the toe pointing down.
iii. Power position. From the leg lift position, the glove, throwing hand, and lift leg move together to the power position. An
important key here is that a majority of the athlete’s weight should remain over the back leg as the limbs move. Once the
athlete is in the power position, the glove arm is extended toward home plate, the throwing hand points back toward second
base with arm in the L position, and the front foot has reached out toward home plate (with the side of the shoe pointing toward
home plate). It looks like a big X, and the goal is for the pitcher to be in a comfortable, athletic position. This is called a loaded
throwing position because the body’s weight has been held back. If the athletes do this correctly, you are sure to hear some
groans about burning leg and shoulder muscles.
iv. Finish. Once an athlete has reached the loaded power position, the next move is an explosion toward home plate and an
aggressive delivery. Release point should be above the head and slightly out in front of the body… we want this to be physical
and aggressive. To be technical, the body is supposed to finish with
- the front foot pointing directly to home plate after a long healthy stride (if the players cannot remain balanced they are likely
striding too far)
- the trail leg even with the front foot, with the knee in and the toe pointing down;
- the glove arm folded in front of the chest; and
- the throwing arm down by the opposite knee.
The upper body should follow through so that the back is just about flat, parallel to the ground. Again, the goal is to teach a
comfortable and athletic position where the body has supported the throwing arm and has left the athlete in a position to field any
ground balls or line drives.
Baserunning
i. Outline proper fundamentals in running out of the box to first base. Run hard, without looking at the ball, thru the first base bag, touching the toe and front part of the foot on the front portion of first base bag and finishing slightly toward foul territory.
ii. When taking multiple bases reinforce the importance of looking at first and third base coaches as to whether to
advance or round and retreat. When rounding bases players are to hit the corners of field bases with inside foot (left foot) with as
little stride break as possible. Banana and question mark drills applicable here.
iii. Show proper way to slide, one leg out other tucked under body, don’t slide to early or too late. No sliding into first
base and no head first sliding at any time at this level. Emphasize players must slide and not go it standing up on close plays in the
field and cannot run over a fielder or catcher (slide and avoid)

Practice Plans
Practice Plan I
1 hour, 30 minutes
Warm Up (10 minutes) • Orientation and arm stretch Jog around bases or to fence and back
Throwing (10 minutes) • One-knee drill (5 minutes)
• Play catch – hit the target (5 minutes)
Fielding – infield
(20 minutes)
• Roll back and forth (5 minutes)
• Shuffle (5 minutes)
• First Base Drill (10 minutes)
Fielding – outfield
(10 minutes)
• Pop flies (5 minutes)
• Left and right fly balls (5 minutes) Game
Base running (10 minutes) • Run through first • The banana
• The question mark
Hitting (30 minutes) Players rotate amongst stations • Station A: Soft toss • Station B: In the field (fielding BP)
• Station C: Batting practice
Roster
Notes

Practice Plan II
1 hour, 30 minutes
Warm Up (5 minutes) • Arm stretch Jog around bases or to fence and back
Throwing (20 minutes) • Flick drill (5 minutes) • Two-knee drill (5 minutes) • Play catch – hit the target (5 minutes)
• Back ‘em up three (5 minutes) Game
Fielding – infield
(15 minutes)
• Roll back and forth (5 minutes) • Shuffle (5 minutes)
• Backhand Drill (5 minutes)
Fielding – outfield
(10 minutes)
• Pop flies (5 minutes)
• Football drill (5 minutes)
Hittting (10 minutes) • Live Tee (10 minutes) Game
Hitting & Pitching
(30 minutes)
Players rotate amongst stations • Station A: Soft toss • Station B: Pitching (on the side) • Station C: Batting practice
• Station D: In the field (fielding BP)
Roster
Notes

Practice Plan III
1 hour, 30 minutes
Warm Up (5 minutes) • Arm stretch and jog around bases or to fence and back
Throwing (15 minutes) • One-knee drill (5 minutes)
• Throwing relay drill (10 minutes) Game
Fielding – infield
(15 minutes)
• Ground balls – throw to first, rotate positions (7 minutes)
• Scoop Drill (8 minutes)
Fielding – outfield
(10 minutes)
• Pop flies – in groups (5 minutes)
• Ground balls – in groups (5 minutes)
Base running (10 minutes) • Diamond relay (10 minutes) Game
Scrimmage (35 minutes)
• Scrimmage
Break up team in half and play against one another. Be sure to rotate and work pitchers in the bullpens during the scrimmage. Scrimmage rules apply. Have a coach in the infield and outfield throwing grounders and flyballs during instruction
Roster
Notes

Practice Plan IV
1 hour, 30 minutes
Warm Up (5 minutes) • Arm stretch and jog around bases or to fence and back
Throwing (15 minutes) • One-knee drill (5 minutes)
• Short to Long Toss (5 minutes)
• Throwing relay drill (5 minutes) Game
Fielding – infield
(15 minutes)
• Ground balls – throw to first, rotate positions (7 minutes)
• Middle infield drill (8 minutes)
Fielding – outfield
(10 minutes)
• Pop flies – in groups (5 minutes)
• Ground balls – in groups (5 minutes)
Hittting (10 minutes) • Live Tee (10 minutes) Game
Scrimmage (35 minutes)
• Scrimmage
Break up team in half and play against one another. Be sure to rotate and work pitchers in the bullpens during the scrimmage. Scrimmage rules apply. Have a coach in the infield and outfield throwing grounders and flyballs during instruction
Roster
Notes

Practice Plan V
1 hour, 30 minutes
Warm Up (5 minutes) • Arm stretch and jog around bases or to fence and back
Throwing (15 minutes) • Flick drill (5 minutes) • One-knee drill (5 minutes)
• Throwing relay drill (5 minutes) Game
Fielding – infield (15 minutes)
• Scoop Drill (5 minutes) • Four square – rotate positions (10 minutes)
Coaches note: Pull 2-3 players aside to work on catcher’s drills • Stance
• Blocking balls
• Framing pitches (start with tennis balls/bare hands) • Stealing – footwork and throwing
• Fielding pop flies
Base running (10 minutes) • Diamond relay (10 minutes) Game
Hitting & Situations (35 minutes)
Stations – rotate players (20 minutes) • Soft toss, in the field, use pitching screen (5minutes) • Hitting off tee (5 minutes) • Fielding soft toss (5 minutes)
• Pitching, on the side (5 minutes)
Situations (15 minutes) • Four, four and four (or three, three and three)
Roster
Notes

Practice Plan VI
1 hour, 30 minutes
Warm Up (5 minutes) • Arm stretch and jog around bases or to fence and back
•
Throwing (10 minutes) • Play catch – hit the target (5 minutes)
• Long toss (5 minutes)
Fielding – infield
(10 minutes)
• Backhand Drill (5 minutes)
• Angle Drill (5 minutes)
Hitting & Situations (30 Batting practice (15 minutes) minutes) • Use live catcher
• On-deck batter does soft toss
Situations (15 minutes) • Players at positions • Use live runners
Scrimmage (35 minutes)
• Scrimmage
Break up team in half and play against one another. Be sure to rotate and work pitchers in the bullpens during the scrimmage. Scrimmage rules apply. Have a coach in the infield and outfield throwing grounders and flyballs during instruction
Roster
Notes

Practice Plan V11
1 hour, 30 minutes
Warm Up (5 minutes) • Arm stretch and jog around bases or to fence and back
•
Throwing (10 minutes) • Play catch – hit the target (5 minutes)
• Throwing relay drill (5 minutes) Game
Fielding – three groups
(15 minutes)
Infielders
• Ground
balls/four square • Double plays
Outfielders • Fly balls
• Football drill
Catchers • Blocking balls • Framing • Footwork • Fielding pop flies
Hitting (10 minutes) • Tee Drill (10 minutes) Game
Infield and outfield pre
game routine (20
minutes)
Infield • Throw to first • Double play • Progressive • Throw to home • Slow roller – throw to first • Fly/Pop fly ball priorities
Outfield • Throw to second • Throw to third • Throw to home • Do or die – throw to home • Follow the throw home • Fly/Pop fly ball priorities
Scrimmage (30 minutes)
• Scrimmage
Break up team in half and play against one another. Be sure to rotate and work pitchers in the bullpens during the scrimmage. Scrimmage rules apply.
Roster
Notes

Practice Drills Summary
Throwing Drills
Flick drill
Elbow in glove, use wrist only to throw ball to partner. Elbow height equal to shoulder.
Emphasize wrist snap at release to improve velocity, carry and accuracy.
Arm drag drill
Players sit with legs crossed holding ball on ground next to them. Drag ball back on ground as
far as possible and then up to the throwing position. Throwing elbow height should be even
with shoulder and elbow should be bent at 90 degree angle. At the throwing position (the “T”)
the ball should be facing away from the player (seams out) and the glove pointed at target.
Player throws ball to partner, emphasizing follow through and glove tuck.
One-knee drill
Throwing side knee is on ground. Glove side leg is out front at 45 degree angle and in line with
throwing side knee, pointed at partner. Foot is closed to 45 degree angle. Glove arm is up and
pointing at target with a slight bend in the elbow. Throwing arm is in ready position with elbow
equal to shoulder, at 90 degree angle and ball pointed away. As player throws, glove is tucked
into chest/armpit, and after ball is released, throwing hand/arm crosses front side leg.
Two-knee drill
Both knees are on the ground and player is facing partner. Glove arm is up and pointing at target
with a slight bend in the elbow. Throwing arm is in ready position with elbow equal to shoulder,
at 90 degree angle and ball pointed away. As player throws, glove is tucked into chest/armpit,
and after ball is released, throwing hand/arm crosses front side leg (”taking candy out of the
pocket”).
Play catch – hit the target
Play catch. If player hits partner in face/head area they get 2 points. If player hits partner
above belt in the upper torso area, he gets one point. First person to ten wins.
Back ‘em up three
Form two lines with players facing one another in pairs. Players play catch. If the ball is caught,
one partner backs up three steps. Continue with one partner backing up three steps each time ball
is caught. A partner team is out if the ball is dropped. Winner is last team standing.

Throwing relay drill
Line players up in groups of three or four players, approximately 20-30 yards apart. Player “A”
throws to player “B”, who in turn throws to player “C” (the “relay”), and so. If ball is dropped, it
must be returned to the thrower before it can be advanced to the next player. First team to return
the ball to Player A wins. Emphasize throwing to a target and giving the “cutoff man” a throw he
can handle. Receiving player should provide a target and position himself (moving forward or
backwards if necessary, i.e., to avoid short hops) to receive the ball and make the proper turn and
throw to the next player.
Long toss
Form two lines with players facing one another in pairs. Players should be separated enough
such that it is difficult to reach one another with a line drive throw. Emphasize the line drive
throw – a throw that bounces once or twice is acceptable. This drill builds arm strength and
improves the accuracy of longer throws.
Infield Drills
First Base Drill
You can start with the players just in a couple of single file line in the infield, or you can put
them at positions. You may want to start them in lines and have them closer to first base to
build confidence. Have a coach or parent at first base to start. This is a basic fielding drill for
beginning players. The coach will softly hit grounders to the players and they need to scoop
the ball, set, and then make an accurate throw to the coach. Coaches should focus on making
sure the player gains good control of the ball, faces their target and then goes through a good
throwing motion to get the ball to the coach or parent on first base. You can make the drill
more challenging by putting players at the infield positions.
Backhand Drill: Break into 3 groups spread across infield. Coach drills backhand. You
must make sure player is bending at the knees, instead of straight down at the waist. You want
to keep your eyes as close to the glove as you can. Can be contest
Angle and Dive Drill: Players start in single file line, each with a ball. The first player in line
will give their ball to the coach. Coach then points in a direction. Player uses proper footwork
(drop step, crossover) to initiate pursuit. The player should not look for the ball until coach
yells “ball”. The player locates the ball and continues to sprint to the spot of landing for the
catch. This drill can be used for practicing ground balls, line drives or even integrated into
outfield drills.
Shuffle
Break the team up into groups of three or four. Player assumes proper fielding position. Roll
balls to the left or right of the player. Player shuffles once or twice to field the ball and tosses
back to coach while maintaining the proper fielding position. Coach receives the ball and rolls
again forcing the player to shuffle in the opposite direction. Repeat 4-6 times for each player.
Emphasize moving feet quickly so player can field the ball in front of him. Introduce rolls at
greater distance from the player so he is required to pivot, cross over and run a few steps to
ensure ball is fielded in front of him.
Scoop Drill
Make 3 groups of 4 players. The first group lines up arm length apart between 3rd base and 2nd
Base (slightly closer to 3rd) The second group is fanned around the front of the 2nd base bag and the third group lineup up arm length apart between 2nd base and 1st base. All players should be in the dirt fanned across the infield. One coach per group will throw short hops to the players. Ensure they are in proper fielding position, knee bend, glove down and out in front. Balls will be rapid fire from left to right and the player in each group that catches the most cleanly wins. If two or three players tie, have a final scoop off in front of the team to determine winner. Also stress the importance of keeping head down as players will tend to lift their chin and eyes to the sky on this drill

Roll back and forth
Line players up so they are facing each, approximately 2-3 yards apart. Players proceed to roll
ball to another. Players should remain in fielding position throughout the drill and employ
proper fielding mechanics (hands out front, head down, bring ball into belly). Perform drill for
20-30 seconds, give players a brief break, then start drill again.
Rapid fire
Empty a bucket of balls. Line up players in single file, or separate into small groups. Put empty
bucket next to the players. Coach rolls balls to the players rapidly. As the player is catching the
ball, the next ball is rolled so the players are forced to move quickly. Fielded the balls are
placed in the bucket. You can use this format for the shuffle drill as well.
Four square
You will need at least four coaches/volunteers to perform this drill. Place players at infield
positions (2-3 players at each position). Two coaches stand on third base line and hit balls to first
and second baseman. Two coaches stand on first base line and hit balls to shortstop and third
baseman. Hit ground balls and instruct players to make good throws back to the coach. Rotate
players amongst positions every 3-4 minutes. Make a game of it. Player must field the ball
cleanly and make good throw back to the coach, otherwise, they are eliminated. Last player
standing wins.
Middle infield force out
Break players up into two groups, one at the shortstop position and one at the second base
position. A player or coach can play first. Explain the responsibilities associated with each
position to the group.
2nd Base force from second baseman
• Hit or roll balls at directly at the second baseman, emphasizing a pivot move and making
accurate throw to the shortstop covering second base.
• If player is close enough they can run to 2nd after fielding for the force out on the runner
2nd Base forceout from shortstop:
• Hit or roll balls directly at the shortstop, emphasizing pivot move or drop step, and making
an accurate throw to the second baseman covering the bag.
• If player is close enough they can run to 2nd after fielding for the force out on the runner
Stress the importance of first making an out. If fielded ball is bobbled or dropped, play is to
first. Tell players covering second base to always give a good target (hold glove up and in front
of chest) and to expect a bad throw (players should take short choppy steps as the approach
second base so they can react to off- target throws). Demonstrate foot placement for receiver of
the ball as well as proper stretch on the force play

Middle infield / Double play drills
Break players up into two groups, one at the shortstop position and one at the second base
position. A player or coach can play first.
4-6-3 double play:
• Hit or roll balls at directly at the second baseman, emphasizing a pivot move and making
accurate throw to the shortstop covering second base.
• Hit or roll balls to left of the second baseman so he is required to run or shuffle a few steps
to field the ball. Instruct player to make a spin move (turning body so back is facing home
plate) and accurate throw to second base (shortstop covering).
• Hit or roll balls to right of the second baseman so he is required to shuffle feet to field the
ball. This play should result in a flip throw or toss to the shortstop covering the bag. Instruct
players to say “flip” so the shortstop knows it will be an underhand throw or soft toss.
Second baseman should “follow the toss” to ensure an accurate delivery.
6-4-3 double play:
• Hit or roll balls directly at the shortstop, emphasizing pivot move or drop step, and making
an accurate throw to the second baseman covering the bag.
• Hit or roll balls to right of the shortstop so he is required to run a few steps to field ball.
Instruct player to make drop step and an accurate throw to second baseman.
• Hit or roll balls to the left of the shortstop so he is required to shuffle feet to field the ball.
This play should result in a flip throw or toss to the second baseman covering the bag.
Instruct players to say “flip” so the second baseman knows it will be an underhand throw or
soft toss.
Stress the importance of first making an out (“make sure of one”) – the double play is the bonus.
If fielded ball is bobbled or dropped, play is to first. Tell players covering second base to always
give a target (hold hands up together in upper torso area) and to expect a bad throw (players
should take short choppy steps as the approach second base so they can react to off- target
throws). Demonstrate pivot moves at the second base bag (e.g., the straddle, cross over, step-
back). For balls hit far to the left of second baseman/right of shortstop, the player covering
second becomes a first baseman (i.e., stretches when receiving the ball). Tell players covering
second base to hold ball if there is no reasonable chance of turning the double play (avoid errant
throws).

Hot corner situations
Break players up into three groups - third basemen, first basemen, runners.
Man on first, less than two outs:
• Hit or roll baseballs to third baseman. Hard hit balls at or to the left or right of third
baseman, play is to second base. If ball is hit softly to the third baseman (i.e., a slow
roller), play is to first base.
Man on first and second, less than two outs:
• Hit or roll baseballs to third baseman. Hard hit balls to the left of third baseman, play is to
second base. Hard hit balls at or to the right of the third baseman, player steps on third and
throws to second or first base, assuming there is a play to be made. If ball is hit softly to the
third baseman (i.e., a slow roller), play is to first base.
Again, stress the importance of making an out. If ball is bobbled or dropped, play is to first
base. If no play can be made, hold the ball.

Outfield /Pop Fly Drills
Pop flies
Break players up into two or three groups. Hit fly balls to players.. Demonstrate the proper
technique, for example, both hands should be held out high with palms facing up. Head and
shoulders should be directly under the ball when catch is being made. Throwing hand covers the
ball as it enters the glove. Teach the player to run to the spot
Left and right fly balls
Break players up into two or three groups. Player stands facing coach. Throw the ball over the
left or right shoulder of the player. Stress the importance of the drop step with the foot closest to
the ball (i.e., if ball is hit over left shoulder, the player should drop step with left foot). Teach the
players to run to the spot where they think the catch will be made, turning their back, if
necessary. Discourage back-pedaling.
Football drill
Break players up into two groups. Player stands facing coach. Explain to players that you will
either raise your right or left arm. If right arm is raised, player drop steps with his left foot and
sprints to his left at a 45 degree angle from starting point. If left arm is raised, player drop steps
with his right foot and sprints to his right at a 45 degree angle from starting point. Lead the
player with a throw as you would a football to a receiver. This drill teaches players how to
maintain focus on the ball and catch while in a full sprint. Have some fun with this drill and
break out the football! Run on balls of the feet
Ground balls
Break players up into two or three groups in the outfield. Throw or bat ground balls. For slower
hit balls, instruct players to charge ball then break down as they would when fielding a ground
ball in the infield. For harder hit balls, show players how to drop to one knee to ensure ball does
not get past them. After fielding the ball, players should pop up and throw ball to coach or cut
off man.
Do or die
This drill is designed to teach players how to charge and field balls hit into the outfield and
throw players out (“do or die”) or prevent them from advancing a base. Break players up into
two groups. Throw or bat ground balls to the players. Instruct players to charge the ball and
field it while maintaining a stride. Players should position themselves such that they field the
ball on their glove hand side. After fielding the ball the player takes crow hop and throws to
coach or cut off man.

Base Running Drills
Straight through first
The objective is to teach players the proper way to run to first base on a groundball to the
infield. Line the players up a home base. Simulate a ground ball hit in the infield. Instruct
players to find the ball within the first few strides towards first base then keep head down as
they run through the base (looking for the ball slows them down). Discourage sliding into or
lunging towards first base bag. Players should practice stepping on the home-plate side of first
base (i.e., not the middle or back portion of the bag) to improve speed to bag and reduce injury.
The question mark
The objective is to teach players to identify when a batted ground ball makes it through the
infield and to make the proper turn towards and through first base. Line the players up a home
base. Simulate a ground ball hit in the infield. Instruct players to find the ball within the first
few strides towards first base (they are still on the first base line at this point). When they see
the ball has made it through the infield, they initiate a turn and proceed to and through first base.
The resulting running path should resemble a question mark. Emphasize stepping on the corner
of the bag facing the inner-diamond and taking short choppy steps after they pass the bag.
Players should keep their feet moving so if the outfielder bobbles the ball, they are prepared to
take the extra base. If ball is fielded cleanly, instruct players to quickly return to first base.
The banana
The objective is to teach players how to exit the batter’s box properly on a clean base hit (or fly
ball to the outfield), and to make the proper turn towards and through first base. Line the players
up a home base. Simulate a base hit to the outfield. Instruct players to exit the batter’s box at a 45
degree angle in foul territory then begin making turn towards inner part of the first base bag. The
resulting running path should resemble the shape of a banana. Emphasize stepping on the corner
of the bag facing the inner-diamond and taking short choppy steps after they pass the bag. Players
should keep their feet moving so if the outfielder bobbles the ball, they are prepared to take the
extra base. If ball is fielded cleanly, instruct players to quickly return to first base.
First to third
This drill teaches players running from first base how to “pick up” the third base coach on a
base hit to the outfield, and to make the proper turn around second base. Line the players up at
first base and place a coach in the third base coach’s box. Simulate a base hit. Instruct players to
run hard and pick up the third base coach approximately half to two-thirds of the way to second
base. The third base coach either waves (windmill motion) the player to third or holds (both
arms up, palms facing out) the player at second. If the player sees that he is being waved to
third, he should begin making a slight turn and step on the corner of the bag facing the inner-
diamond.

Second to home
This drill teaches players running from second to home how to pick up the third base coach on a
base hit to the outfield, and to make the proper turn around third base. Line the players up at
second base and place a coach in the third base coach’s box. Simulate a base hit. Instruct players
to run hard and pick up the third base immediately. The third base coach either waves (windmill
motion) the player home or holds (both arms up, palms facing out, player makes the turn around
third; or pointing to the bag, indicating player should stop on the bag) the player at third. Again,
player should make the proper turn and step on the corner of the bag facing the inner-diamond.
Note to third base coaches: If you want the player to advance home or at least make the turn,
leave the coach’s box and position yourself a one-third or halfway to home (in foul territory). If
you want the player to stop on third base, remain in coach’s box and point to the bag with one
hand and with the other, hold up indicating player should stop. Also, never touch the player as he
is rounding the bag.
Diamond relay
This is a fun drill but it also teaches players how to make the proper turns around the bases,
including stepping on the right part of the bag (see drills above). Split the players up into teams
of two. Half of the players go to second base, and the other half remains at home plate. At “go”
players begin to sprint around the bases. After they’ve completed their tour around the bases,
they tag the next player in line, relay style. First team to complete the relay wins.

Hitting and Situations
Soft toss
Position player perpendicular to and approximately 2-3 yards away from fence or batting cage
screen. If possible, use a portable home plate so the player knows where to stand in relation to
the plate. The coach takes a knee and positions himself approximately 2-3 yards from the player
and at a 45 degree angle from the player’s mid-section. The coach proceeds to underhand (“soft
toss”) t-balls or baseballs towards the player’s mid-section. The player hits the ball into the fence
or screen. Reinforce all the basic hitting fundamentals during this drill, for example, proper
stance, hand positioning, weight shift, stride, swing plane, and hitting the top half of ball. Teach
the players how to time the toss. For example, lowering your hand before the toss is similar to a
pitcher breaking his hands before a pitch, in which case the player should begin his weight shift
and stride. For older or more advanced players, toss the ball higher (player must still wait for ball
to drop down to mid-section) so the player learns to keep hands and weight back, or with more
velocity towards his mid-section so he is forced to make a quicker swing (“throw your hands”).
Be sure players hitting into a fence or backstop are wearing helmets
Tee practice
Arrange players in one to two groups with tees facing a fence or backstop Continue to focus on
mechanics (proper stance, hand positioning, weight shift, stride, swing plane, and hitting the top
half of ball) and introduce concepts of timing and tempo for more advanced players (e.g., they
begin stride as you bring arm back in throwing motion). Players should be in “ready” position
while waiting (no swinging!). Allow for three to four balls to one player then move on to the
next. Players collect balls and keep kids separated.
Four, four and four
This drill is a combination of batting practice and situations. Break teams up into three teams of
four, or three, if necessary. Also, attempt to evenly distribute your skilled players amongst the
teams. One team takes batting practice while the other two teams take positions in the field.
Throw five to six pitches to each player and on the last one, have the player “run it out” and the
fielders make the play. Rotate after one time thru the batting order. Team with most recorded
fielding out wins.
Live Tee
Split team in half, be sure to break up via skill level. One team in the field other at back. No
live pitching. Coach tees the ball on tee at home plate. Fielders are spread in fielding positions
(no catcher) and all balls hit are live without baserunners. Each hitter gets one ball in play then
rotates. Hitters rotate twice thru the order. Hitting team gets a point for clean hits and fielding
team gets a point for each clean out recorded (If a fielder fields cleanly and makes a bad throw
or receipt is not clean…no point is given. Team with most points win. Focus in hitting and
fielding mechanics. Can call situations for fielder or use runners if preferred.

Catching Drills
Fundamentals at all levels. (video support found at Randolph Little League website)
- Catch with glove extended from body
- Do not turn the head on pitched ball…ever or lift chin exposing throat on balls in dirt
- Keep throwing hand behind the back until receipt of the ball (more advanced catchers can begin the process of reaching for
the ball earlier in stolen base situations
- Should be balanced squat (no knees on ground) using balls of the feet (more advanced catchers can slide left foot slightly
forward in squat in stolen base situations)
Beginner Baseball Catcher Drills
Receiving Drills
-Tennis Ball Barehanded: Coach tosses a tennis ball to the catcher without a glove on. Catcher
should work on having soft hands and just catch the ball
-Receiving Baseballs from a Short Distance: Coach tosses baseballs to the catcher with a glove
on from 10-12 feet away
Blocking Drills
-3-Ball Drill: Place three baseballs in front of the catcher and demonstrate how to move in order
to block each baseball successfully.
Coaching cue: Catcher should land on knees, glove between knees, bare hand behind mitt, and
chin tucked into chest.
-Tennis Balls: Coach bounces the ball in front of the catcher to demonstrate how to be
aggressive when blocking. Beginner catchers have a tendency to turn away from the ball. The
key to this drill is for the catcher to watch the ball all the way in to the chest. Keeping the head
in line with and focused on the ball allows the face mask to cover the neck of the catcher. If the
catcher turns his head, the risk of getting hit in the throat increases. Use the chest protector to
keep the ball in front. The glove should drop down between the knees, with the catcher's
throwing hand behind the mitt. This creates a "wall" for the ball to stay in front of the catcher.
Beginners become confident with tennis balls, then move to baseballs for this drill.
Throwing Drill
-Footwork to Second Base: Beginner catchers should learn proper footwork toward the base
where they are throwing the baseball. We use a T (in tape on the ground) to work on footwork
to second base. The catcher's feet should land on the bottom line of the T with his throwing foot
landing first, then the glove foot.
Coaching cue: Let the catcher work through this drill finding balance/athletic stance from
which to throw.
Intermediate Baseball Catcher Drills
Receiving Drills
-Tennis Ball Barehanded: Coach throws a tennis ball to the catcher without a glove on. Catcher
should work on receiving the ball between his thumb and index finger.
-Receiving Baseballs From a Short Distance: Coach throws baseballs to the catcher with a glove
on from 14-16 feet away.
-Receiving Baseballs From a Pitching Machine: Coach sets the machine at a speed comparable
to game speed.
Blocking Drills
-Tennis Balls: Coach bounces the ball in front of the catcher to teach him to catch the baseball.
Intermediate catchers are challenged to "absorb" the tennis ball, trying to make their body soft
when the ball makes contact with their body. We tape a semicircle 5 feet in front of the catcher
and challenge him to keep the ball inside that perimeter. This allows him to get to the baseball
quicker when a runner attempts to steal a base on a ball thrown in the dirt.
-Gain Ground: Catcher gets into receiving stance. Coach points right, left, or straight down,
directing the catcher to get into a blocking position and immediately bounce back up into a
receiving stance.
Throwing Drills
-Footwork to Bases: Intermediate catchers work on throwing to each base, starting with the ball
in his mitt. Coach walks around the catcher and offers cues. Coaching cues are to make sure the
catcher maintains balance throughout his footwork to each base while working on transferring
the ball from the mitt to the bare hand.

Advanced Baseball Catcher Drills
Receiving Drills
-Baseball Barehanded: Coach tosses a baseball to the catcher without a glove on. Catcher
should receive the ball between his thumb and index finger.
-Receiving Baseballs from a Pitcher: Pitcher throws at game velocity or a pitching machine can
be used at a speed faster than game speed.
-3-Man Quick Hands: Coach plus two other players have five baseballs and stand in a
semicircle in front of the catcher, approximately 12 feet away. The player on one side throws a
ball to the catcher, then the middle guy, then the guy on the other side throws a ball. The speed
of this drill can become extremely quick with more advanced catchers.
Coaching cue: Catcher should receive each pitch, drop the ball and immediately focus on the
next ball.
Blocking Drills
-Blocking Without a Mitt: Catcher places his hands behind his back. This trains him to use his
chest protector to block the ball.
Coaching cue: Bounce the ball far enough in front of the catcher so it takes a long hop. Short
hops can result in the baseball hitting the catcher in a painful area.
-Block It and Get up: This teaches the catcher how to block the ball and bounce up quickly to
get to the baseball.
Coaching cue: 10 repetitions, then let the catcher rest while another catcher performs the drill.
Throwing Drills
-Footwork to Bases: Advanced catchers need to focus on reducing the time it takes to catch and
release the baseball. The "touch to release" goal for our catchers is under eight tenths of a
second.
-Throwing From Knees: Yes, we work with our catchers on throwing to all three bases from
their knees. There will be times in a game when the pitch is low or in the dirt, and throwing
from their knees may be the only option. This drill also focuses on the transfer of the ball from
mitt to throwing hand.

Cutoffs and Baseball Positions by Number
1. Pitcher (P)
2. Catcher (C)
3. 1st Base (1B)
4. 2nd Base (2B)
5. 3rd Base (3B)
6. Shortstop (SS)
7. Left Field (LF)
8. Center Field (CF)
9. Right Field (RF)
So, as an example, a 6 4 3 double play means the shortstop fielded the ball and threw it to the second
baseman, who turned the double play by throwing it to first base.

1. Base hit with a runner on 2nd base.
In this relay situation, the throw or relay is to home plate. This section describes the defensive positioning for a base hit to
outfield if there is a runner at second base.
1.A. Single to left fielder, runner on 2nd base.
The shortstop will run over to 3rd base and cover the bag. The 3rd baseman is vacating his base so he can be the cut off
man to home plate.
With the throw going towards home plate, be ready for a ball cut off by the third baseman and thrown to the second base
bag. This could happen if there is no play at home, and the batter is trying to move up to 2nd.

1.B. Single to center fielder, runner on second base.
The shortstop will cover the 2nd base bag, notice that this responsibility will be different if there is a runner on 1st. In this
scenario, the 2nd baseman will cover 1st and the shortstop will take 2nd.
See Diagram 1.B. – Positioning for a single hit to center field with a runner on second base. Play is at home plate. First
baseman is the cut-off man. Second baseman covers 1st base.

1.C. Single to right fielder, runner on 2nd base.
The shortstop will cover 2nd base. Again this responsibility will be different if there is a runner on 1st base. With nobody
on base the 2nd baseman will cover 1st and the shortstop has the 2nd base bag.
Diagram of positioning for a single hit to right field with a runner on second base. Play is at home plate, with a possible
cut and throw to 3rd base. First baseman is the cut off man. Second baseman covers 1st base.

2. Base hit, with runners on 1st and 2nd Bases.
In this situation, the throw is to home plate, with potential for a cut and throw to 3rd base. This section describes the
positioning for a base hit to outfield if there are runners on both first and second bases.
2.A. Single to left field, runners on 1st & 2nd bases.
The shortstop will cover 3rd base. With no one on 1st, the 2nd baseman should run to 1st base in case there is an attempt
to get the hitter out at first.
This diagram shows the setup for runners at 1st and 2nd base when a single is hit to left field. The 3rd baseman is the cut-
off guy, so he may choose to reroute the throw if to 2nd or 3rd if needed.

2.B. Single to center field, runners on 1st and 2nd bases.
The shortstop will line up to 3rd base because the outfielder has the option of throwing home or to 3rd depending on the
ball hit and the speed of the runners. The 2nd baseman is covering second base, and will be expecting the ball from a cut
off man if the runner takes to big of a turn around 2nd base.

2.C. Single to right field, runners on 1st and 2nd bases.
The shortstop lines up to 3rd base, expecting the throw from the outfielder who has the option to go to home or to 3rd
base.
You should line up in a straight line and about 15 – 20 feet to the 3rd base side of 2nd base. This will allow you to keep
the ball and runner in your line of vision and make the decision to cut the ball or let it go through. This decision depends
on what the runner decides to do.
To summarize, the shortstop must understand that depending on where the runners start out makes a big difference on
which base to cover during baseball cut-offs and relays.

Gameplay Scrimmage (including player catcher)
- break team up evenly to split squad by number and ability (be sure to distribute pitchers and catchers evenly)
- Scrimmage can be long as 30-35 minutes
- Remind players on gameday protocol, sitting in order on bench, no bats in hand,
have fielding gloves and hats ready. Run on and off field
- Position fielding team at pitcher, catcher and remaining 4 infield position…any extra
fielders and coaches can be spread thru the short outfield.
- Each hitting team gets 5 outs. Batted outs come off the bases. Base on balls, hit batsman apply. Stealing 2nd
and 3rd base is allowed. No bunting. Stress outfielders importance of backing up stolen base attempt throws
- Score is kept by runs scored by hitting team each inning.
- Coach 1 should be allocated behinds and off to the side of the backstop to advise the hitter of proper technique and
approach and reinforce the importance of hitting mechanics and strike zone awareness.
- Coach 2 should be stationed behind the pitcher (coach should allow the pitcher to throw no more than 5
pitches to each batter to keep it moving). He should also be instructing fielders on ready position and
thinking about where to go with ball. Stress responsibility for each position
- Coach 3 can be at first base in foul territory advising runners to run thru the bag and when to run to second.
- Coach 4 at third base in foul territory advising runners when to run home and remind them on proper
baserunning. Can slide feet first at home plate
- Any coaches that are familiar with pitching mechanics take one pitcher at a time from hitting or
fielding team to work in the bullpen on the side. Try to get the player to use the time to throw 15-
20 pitches. Coach can sit on a bucket and receive for pitcher
- Any additional coach’s or volunteers can work with outfielders and/or keep players in order in the bench area
reminding them when to hit and take field
- Be sure to rotate fielders each inning. Should gameplay slow any extra outfielders can work on coach thrown
pop ups in between batters or during instruction at the plate. Same applies to infield coach. To keep players
engaged roll groundballs and have them return the throw to you
- Can finish scrimmage with relay race around the bases
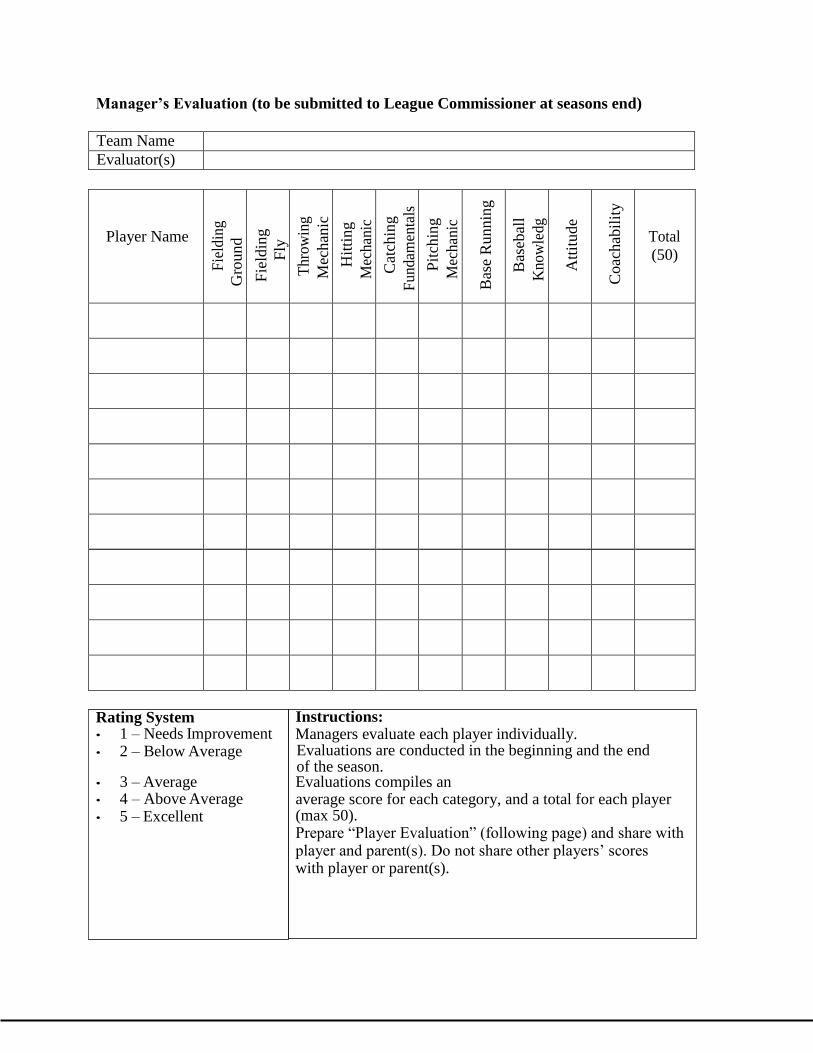
Manager’s Evaluation (to be submitted to League Commissioner at seasons end)
Team Name
Evaluator(s)
Player Name
Fie
ldin
g
Gro
und
Fie
ldin
g
Fly
Thro
win
g
Mec
han
ic
Hit
ting
Mec
han
ic
Cat
chin
g
Fundam
enta
ls
Pit
chin
g
Mec
han
ic
Bas
e R
unnin
g
Bas
ebal
l
Kno
wle
dg
Att
itude
Coac
hab
ilit
y
Total
(50)
Instructions: Managers evaluate each player individually. Evaluations are conducted in the beginning and the end of the season. Evaluations compiles an average score for each category, and a total for each player (max 50). Prepare “Player Evaluation” (following page) and share with player and parent(s). Do not share other players’ scores with player or parent(s).
Rating System • 1 – Needs Improvement • 2 – Below Average
• 3 – Average • 4 – Above Average • 5 – Excellent

Player Evaluation to be shared with player and or parent
(rating scale 1-5…with 5 being excellent)
Player Name:
Manager Name:
Team Name:
Year:
Category Rating
Fielding Ground Balls
Fielding Fly Balls
Throwing Mechanics
Hitting Mechanics
Catching Fundamentals
Pitching Mechanics
Base Running
Baseball Knowledge
Attitude
Coachability
Total
Summary:
Manager: -

d Positions
max pitches 11-12 85 number of pitches days of rest
max pitches 9-10 75 66+ 4
max pitches 7-8 50 51-65 3
36-50 2
21-35 1
up to 20 0
P P P P P
1B 1B 1B 1B 1B
2B 2B 2B 2B 2B
SS SS SS SS SS
3B 3B 3B 3B 3B
LF LF LF LF LF
CF CF CF CF CF
RF RF RF RF RF
C C C C C
B B B B B
B B B B B
B B B B B


