15
Ray Diagrams Noadswood Science, 2013
| Date post: | 13-Dec-2015 |
| Category: |
Documents |
| Upload: | jesse-mills |
| View: | 231 times |
| Download: | 0 times |
Ray Diagrams
Noadswood Science, 2013
Ray Diagrams• To be able to draw ray diagrams for converging and diverging lenses
Tuesday, April 18, 2023
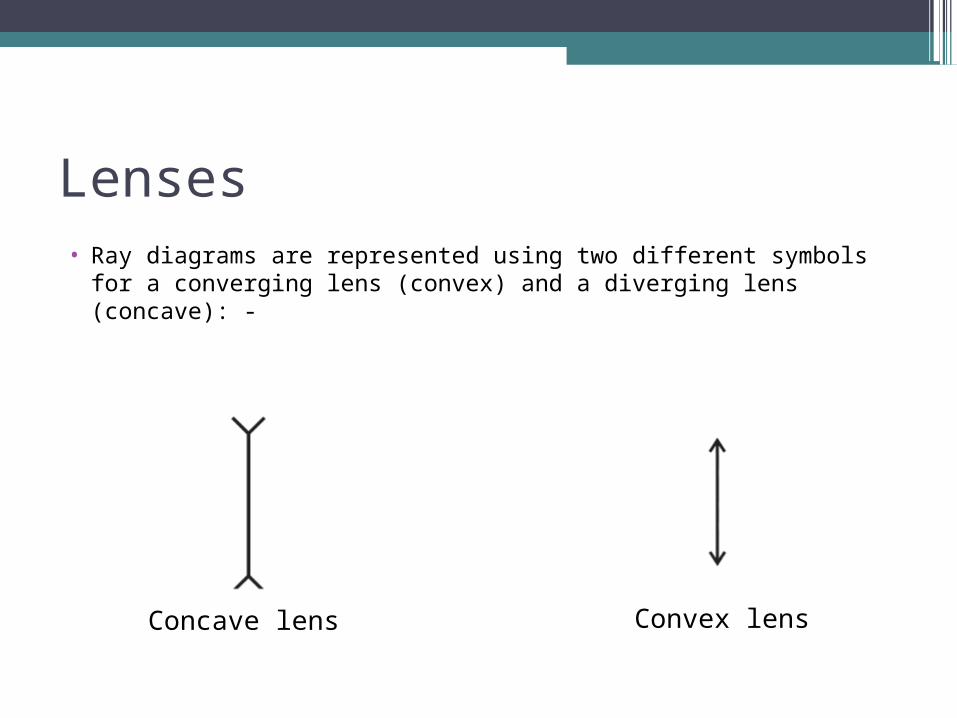
Lenses• Ray diagrams are represented using two different symbols for
a converging lens (convex) and a diverging lens (concave): -
Concave lens Convex lens
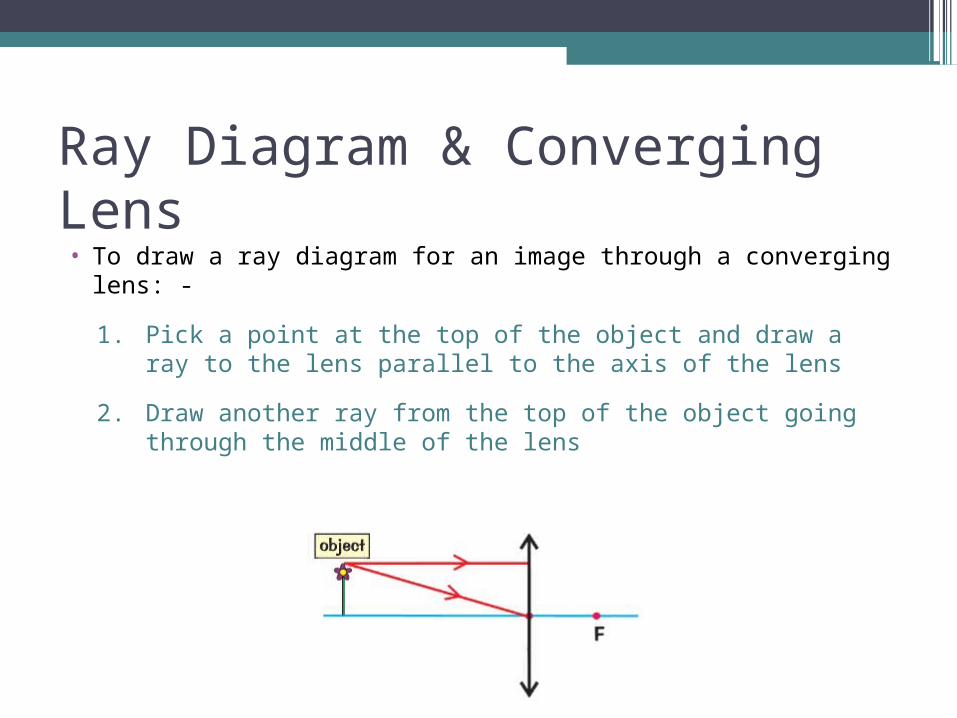
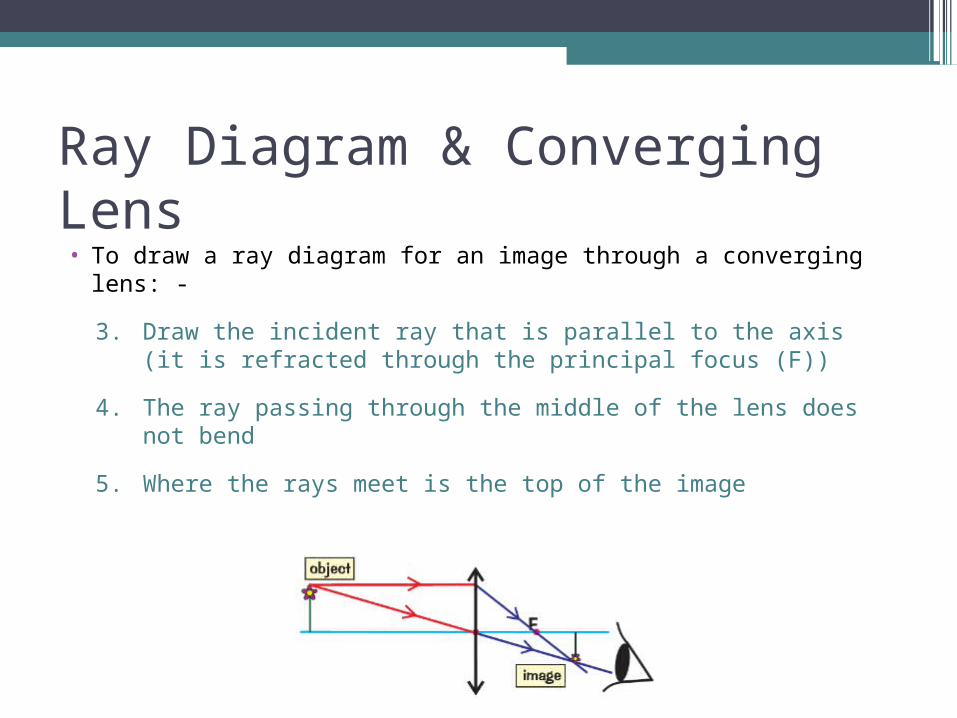
Ray Diagram & Converging Lens• To draw a ray diagram for an image through a converging
lens: -
1. Pick a point at the top of the object and draw a ray to the lens parallel to the axis of the lens
2. Draw another ray from the top of the object going through the middle of the lens
Ray Diagram & Converging Lens• To draw a ray diagram for an image through a converging lens:
-
3. Draw the incident ray that is parallel to the axis (it is refracted through the principal focus (F))
4. The ray passing through the middle of the lens does not bend
5. Where the rays meet is the top of the image
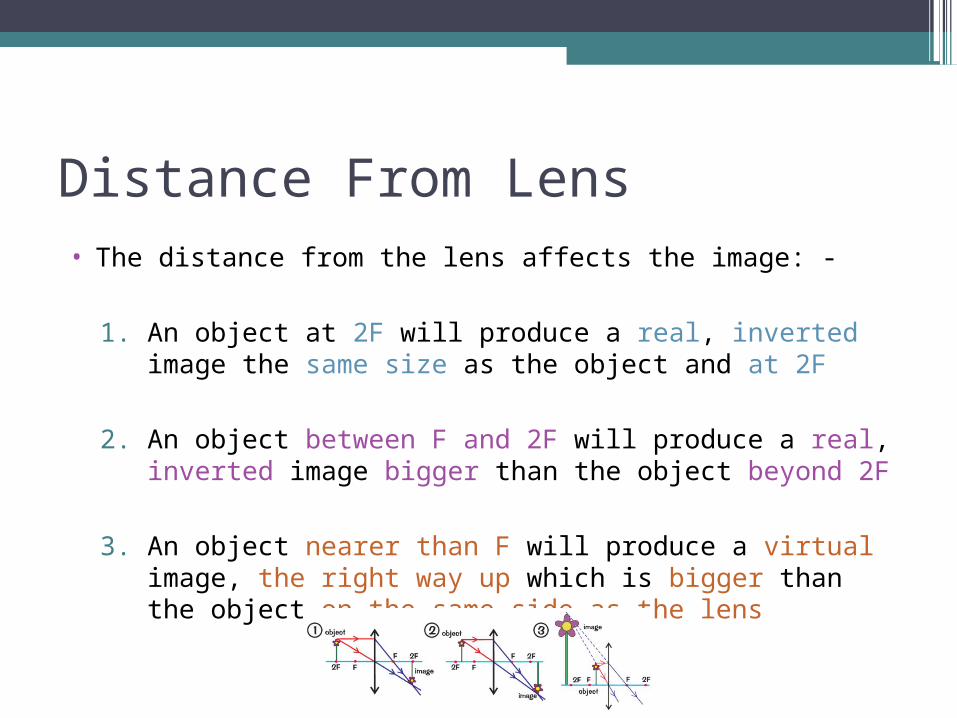
Distance From Lens• The distance from the lens affects the image: -
1. An object at 2F will produce a real, inverted image the same size as the object and at 2F
2. An object between F and 2F will produce a real, inverted image bigger than the object beyond 2F
3. An object nearer than F will produce a virtual image, the right way up which is bigger than the object on the same side as the lens
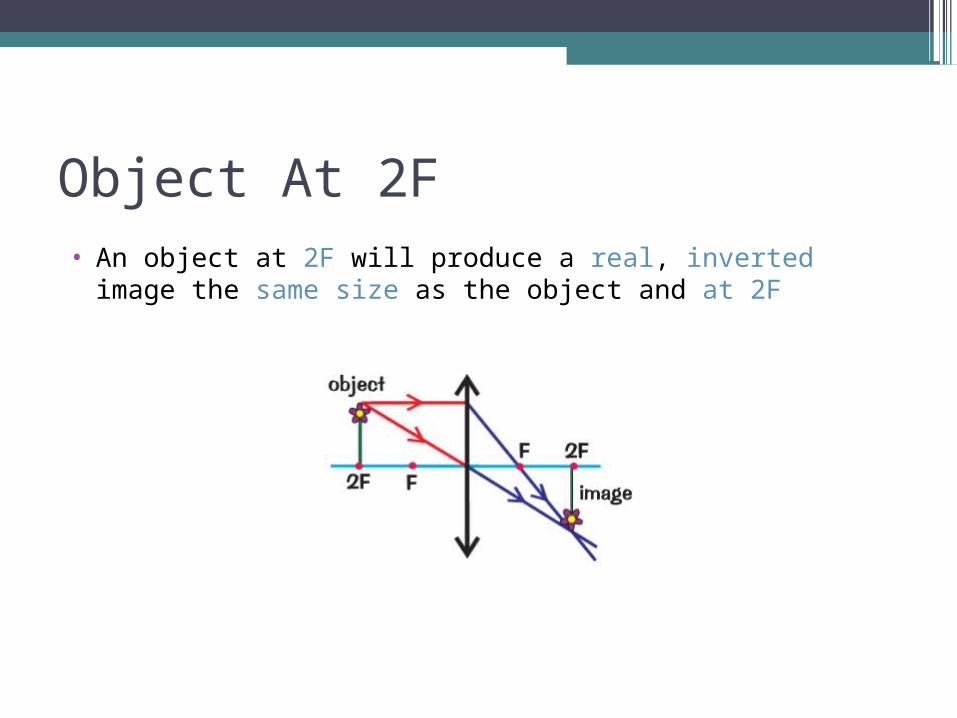
Object At 2F• An object at 2F will produce a real, inverted image the
same size as the object and at 2F
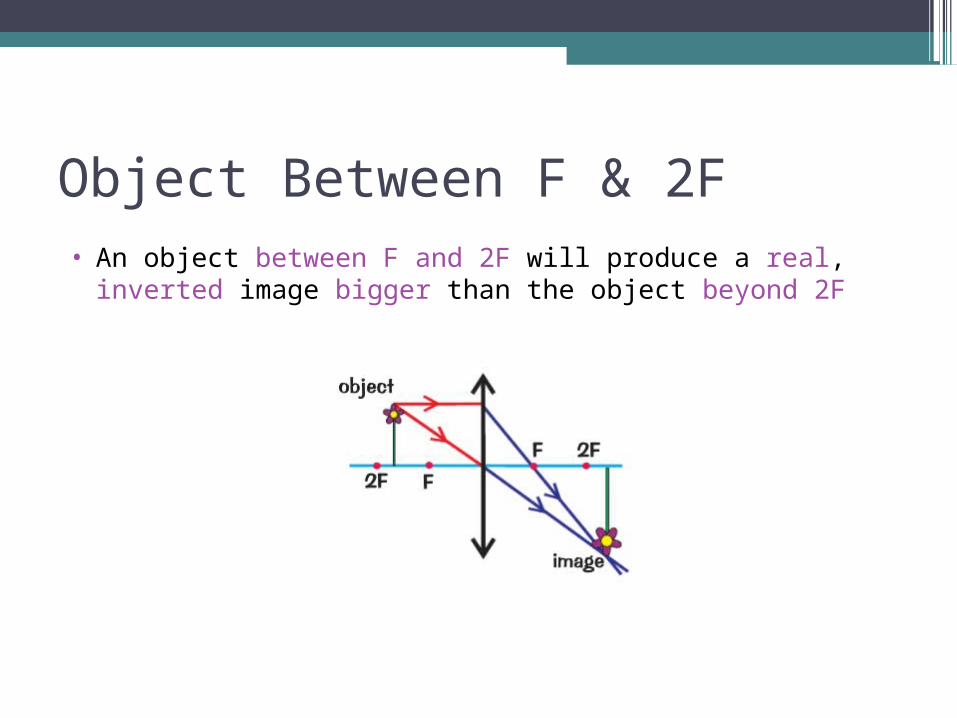
Object Between F & 2F• An object between F and 2F will produce a real, inverted
image bigger than the object beyond 2F
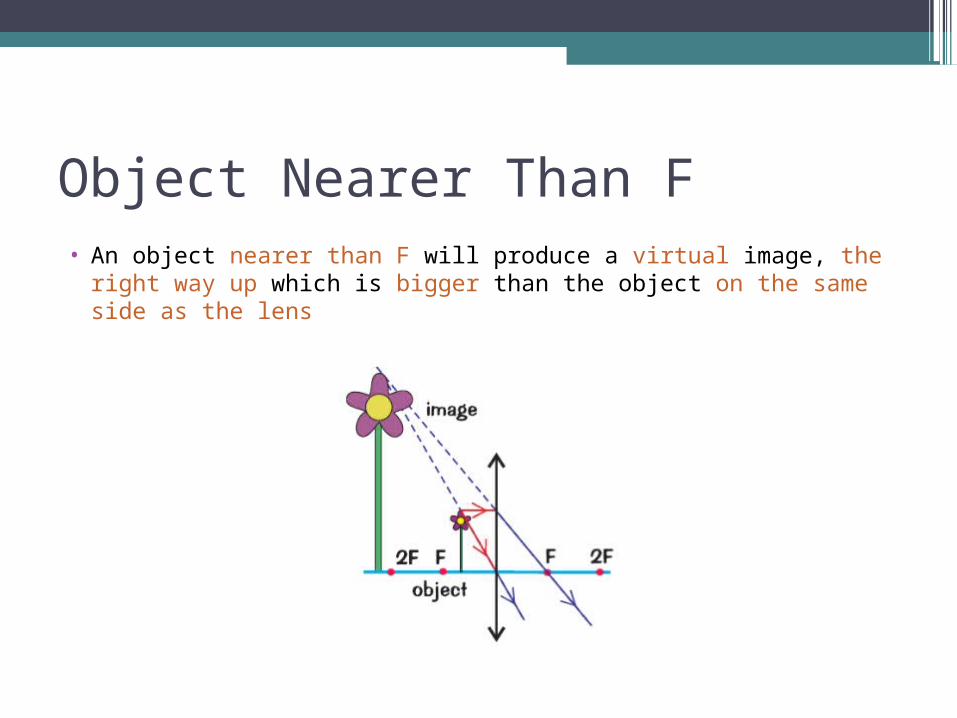
Object Nearer Than F• An object nearer than F will produce a virtual image, the right
way up which is bigger than the object on the same side as the lens
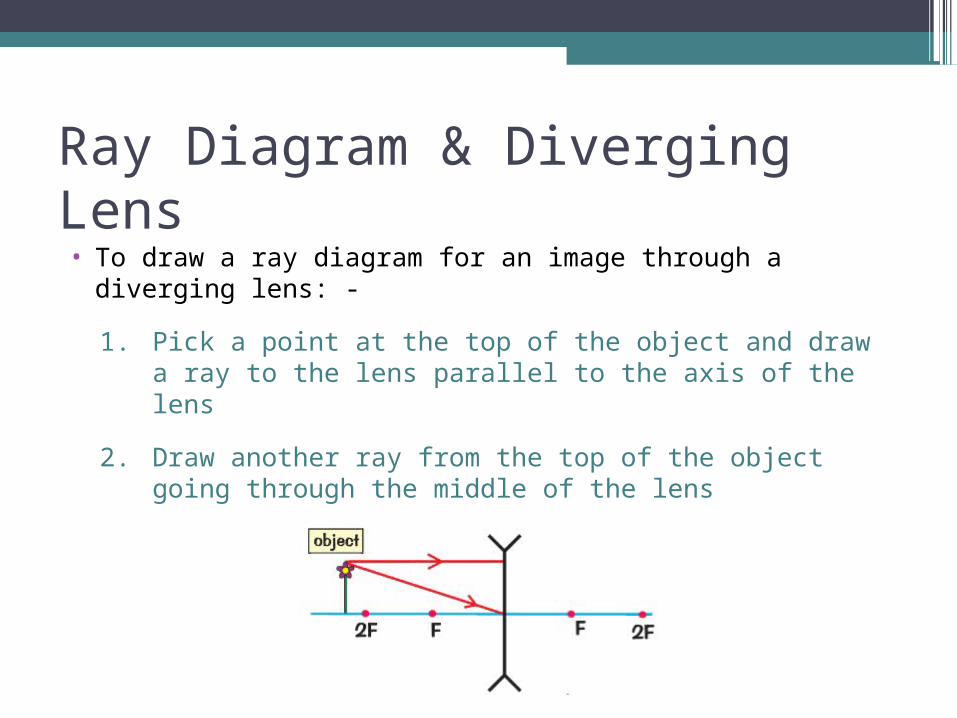
Ray Diagram & Diverging Lens• To draw a ray diagram for an image through a diverging
lens: -
1. Pick a point at the top of the object and draw a ray to the lens parallel to the axis of the lens
2. Draw another ray from the top of the object going through the middle of the lens
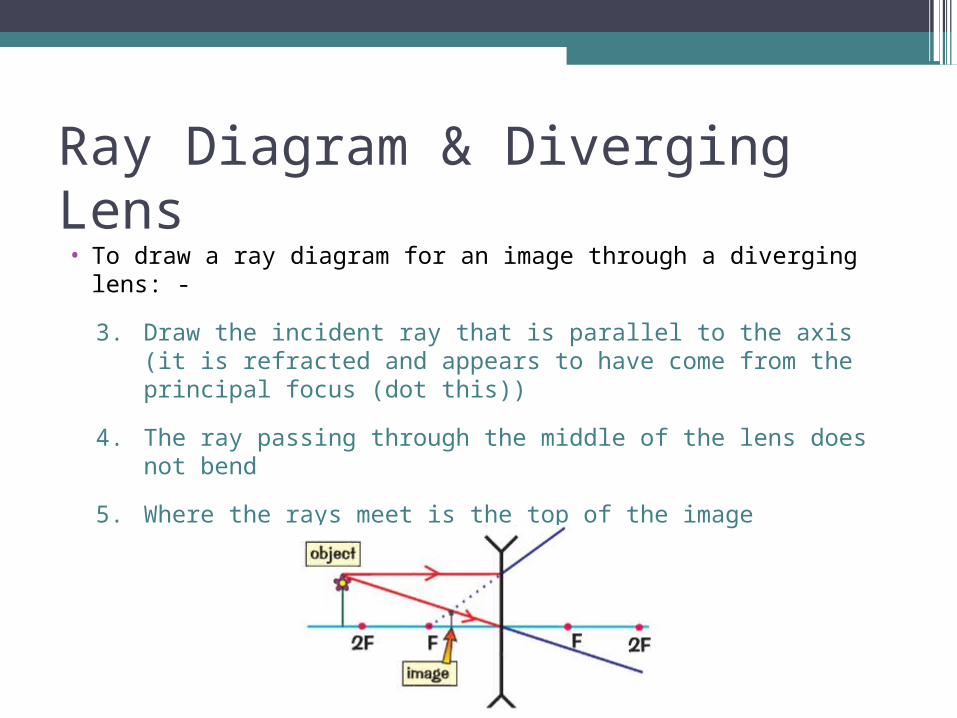
Ray Diagram & Diverging Lens• To draw a ray diagram for an image through a diverging lens: -
3. Draw the incident ray that is parallel to the axis (it is refracted and appears to have come from the principal focus (dot this))
4. The ray passing through the middle of the lens does not bend
5. Where the rays meet is the top of the image
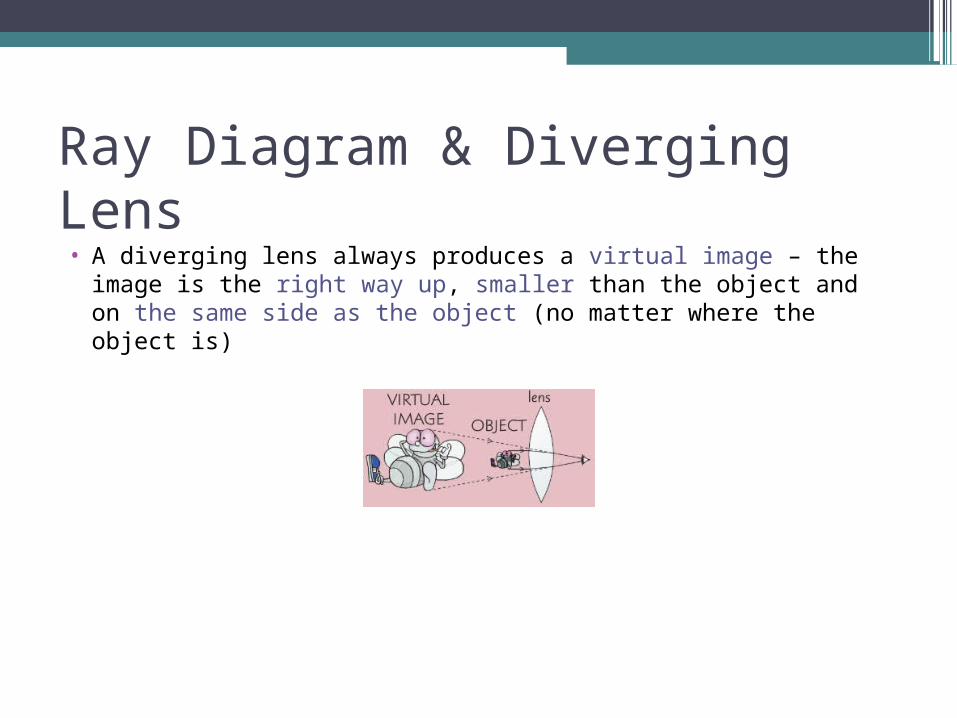
Ray Diagram & Diverging Lens• A diverging lens always produces a virtual image – the
image is the right way up, smaller than the object and on the same side as the object (no matter where the object is)

Magnification• What lenses are used in magnifying glasses and cameras?
• Converging lenses – to work the object being magnified must be closer to the lens than the focal length
• Magnification can be calculated using the following formula: -
Magnification = image height ÷ object height
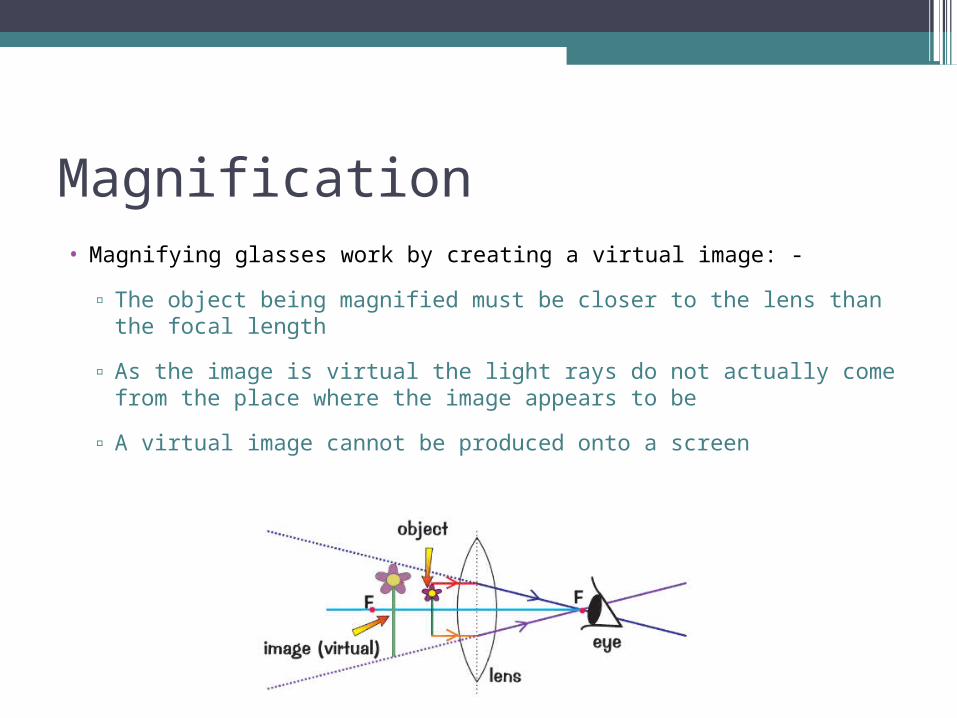
Magnification• Magnifying glasses work by creating a virtual image: -
▫ The object being magnified must be closer to the lens than the focal length
▫ As the image is virtual the light rays do not actually come from the place where the image appears to be
▫ A virtual image cannot be produced onto a screen
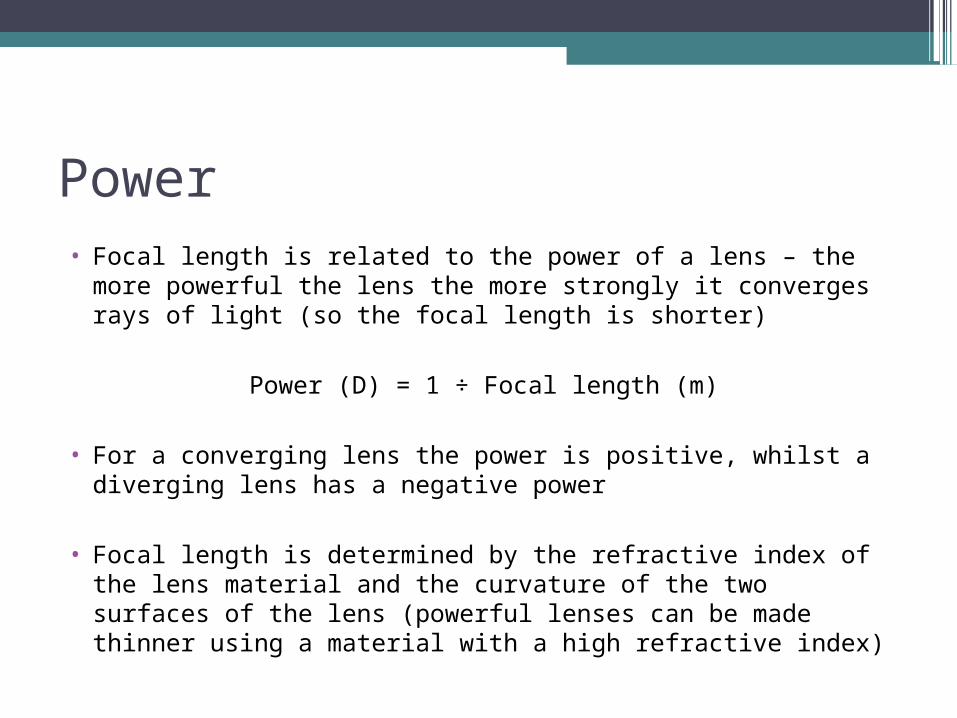
Power• Focal length is related to the power of a lens – the more
powerful the lens the more strongly it converges rays of light (so the focal length is shorter)
Power (D) = 1 ÷ Focal length (m)
• For a converging lens the power is positive, whilst a diverging lens has a negative power
• Focal length is determined by the refractive index of the lens material and the curvature of the two surfaces of the lens (powerful lenses can be made thinner using a material with a high refractive index)


