READ ME FIRST! ELECTRONIC ARTS PRESENTS CD-ROM CLASSICS SYSTEM SHOCK™ Warning to owners of projection televisions: Still pictures or images may cause permanent picture-tube damage or mark the phosphor of the eRT. Avoid repeated or extended use of video games on large-screen projection televisions. EPILEPSY WARNING· PLEASE READ BEFORE USING THIS VIDEO GAME SYSTEM OR ALLOWING YOUR CHILDREN TO USE IT. Some people are susceptible to epileptic seizures or loss of consciousness when exposed to certain flashing lights or light patterns in everyday life. Such people may have a seizure while watching television images or playing certain video games. This may happen even if the person has no medical history of epilepsy or bas never had any epileptic seizures. If you or anyone in your family has ever had symptoms related to epilepsy (seizures or loss of consciousness) when exposed to flashing lights, consult your doctor prior to playing. We advise that parents should monitor the use of video games by their children. If you or your child experience any of the following symptoms: dizziness, blurred vision, eye or muscle twitches, loss of consciousness, disorientation, any involuntary movement or convulsion, while playing a video game, IMMEDIATELY discontinue use and consult your doctor. PRECAUTIONS TO TAKE DURING USE Do not stand too close to the screen. Sit a good distance away from the television screen, as far away as the length of the cable allows. Preferably play the game on a small television screen. Avoid playing if you are tired or have not had much sleep. Make sure that the room in which you are playing is well lit. Rest for at least to to 15 minutes per hour while playing a video game.
Transcript
READ ME FIRST!
ELECTRONIC ARTS PRESENTS
CD-ROM CLASSICSSYSTEM SHOCK™
Warning to owners of projection televisions:Still pictures or images may cause permanent picture-tube damage or mark the phosphor of the eRT. Avoid repeated orextended use of video games on large-screen projection televisions.
EPILEPSY WARNING· PLEASE READ BEFORE USING THIS VIDEO GAME SYSTEMOR ALLOWING YOUR CHILDREN TO USE IT.
Some people are susceptible to epileptic seizures or loss of consciousness when exposed to certain flashing lights orlight patterns in everyday life. Such people may have a seizure while watching television images or playing certainvideo games. This may happen even if the person has no medical history of epilepsy or bas never had any epilepticseizures.If you or anyone in your family has ever had symptoms related to epilepsy (seizures or loss of consciousness) whenexposed to flashing lights, consult your doctor prior to playing.We advise that parents should monitor the use of video games by their children. If you or your child experience any ofthe following symptoms: dizziness, blurred vision, eye or muscle twitches, loss of consciousness, disorientation, anyinvoluntary movement or convulsion, while playing a video game, IMMEDIATELY discontinue use and consult yourdoctor.PRECAUTIONS TO TAKE DURING USE
Do not stand too close to the screen. Sit a good distance away from the television screen, as far away as thelength of the cable allows.Preferably play the game on a small television screen.Avoid playing if you are tired or have not had much sleep.Make sure that the room in which you are playing is well lit.Rest for at least to to 15 minutes per hour while playing a video game.
This document contains all the information that youwill need to get this game up and running. There areimportant sections covering how to produce thenecessary boot disk, how to install and run your game,a full key guide and instructions on how to use theAdobe Acrobat on-line document reader.
For further information, the original manuals areprovided "on-line" on the CD. These can be readusing the included Adobe Acrobat on-line documentreader. To use this, see the section "Using the On-Line Documentation".
2<
System RequirementsComputer. System Shock CD requires at least an Intel486 DX/33+ MHz or 100% compatiblesystem. and MS-DOS version 5.0 or higher.Video Card. VGA or VESA compliant SVGA video card.Hard Drive. You must have a minimum of 20 megabytes free on your hard drive to install and playthis game.Joystick (optional). System Shock CD supports standard two-button joysticks, along with theThrustmaster Mark I. Flight Stick Pro and Gravis Phoenix.Mouse. System Shock CD requires a Microsoft or 100% compatible mouse using Microsoft s:software driver version 7.0 or higher or a 100% compatible driver.Memory. System Shock CD uses 530K (542,720 bytes) of conventional RAM (base memory) andat least 3072K (3,145,728 bytes) of extended memory (XMS). You must have a minimum of 4megabytes of RAM installed in your machine to play from the CD without full speech or SYGAgraphics. You must have at least 8 megabytes of RAM to play ffom the CD with full speech andSVGA graphics.
CD-Specific FeaturesThe CD version of System Shock has several features that add to general gameplay.If you have at least 8 ME RAM, you'll experience even more unique features, including fullspeech for all logs and e-mails, and SVGA capabilities (with a compatible VESA driver).
Keystrokes. You have several keystrokes not necessary for gameplay. However, they are givenhere for your reference:
~rn Displays enhanced features.
~ru Displays map coordinates and current video mode.
~ Cuts off speech sequence when logs or e-mails are playing.VGA video modes. VGA video may be adjusted by selecting VIDEO from the Option Menu. Youhave two VGA video modes available - 320x200 and 320x400. (YGA play recommended forslower machines.)SYGA video modes. If you have a monitor and card with SVGA capabilities and a VESA (orequivalent bios) driver, you can play in SVGA by selecting VIDEO from the Option Menu. You havetwo SVGA video modes available - 640x400 and 640x480.
3
Audio capabilities. You can now experience digital sound effects through 2, 4 or 8 channels. ChooseAUDIO then AUDIO OPTIONS in the Option Menu to change the number of channels. You can also reversechannels (if your speakers are switched).Full speech. All logs and e-mails in the game have been recorded with full speech and ambientsound effects. Certain station functions (such as buttons) also give audio messages.VR Headsets. At the time of publishing, we had insufficient prototype information to documentheadset operation. For information about how to use your VR headset (Forte VFXI or CyberMaxx)with this game, contact the manufacturer.
InstallationWelcome to System Shock CD. This guide includes quick installation instructions for users familiarwith the installation process, and a detailed, step-by-step guide to installing the game. If youexperience any difficulty, consult Troubleshooting. To avoid compatibility or memory problems,please take a moment to confirm that your machine matches the System Requirements. Do not useSystem Shock CD with disk compression utilities. We cannot guarantee the compatibility of ourgames with disk compression utilities, and you may corrupt saved games.Note: Before installing any software, run chkdskfrom your DOS directory. This searches/or any lost allocation
chains (pieces of files). If any are found, please run a disk utility to correct these errors on your hard drive.If you have DOS version 6.2, you can run scandisk tofu: any errors.
It's always a good idea to optimize and defragment your drive before installing new software. You can do so using
MS-DOS6.o or higher. At the C:>prompt, change to your DOS directory and type DFFRAG c: /F, then press 11 ENTER 11.
Quick Installation1. Create a boot disk (see Creating a Boot Disk).2. Insert your new boot disk into the A: drive and reboot your computer. Wait for the DOS prompt.
3. Type the name of your CD-ROM drive (usually D:), then press IIENTERII.
4. Type ORIGIN IIENTERII.
5. Press [IJJ to install System Shock CD. The installation menu appears.6. Use the arrows to highlight the language you 'prefer (ENGLISH, FRANCAIS or DEUTSCH), then press
11 ENTER 11 twice.7. When prompted, follow the installation steps. (See Installation Options.)8. Press 11 ENTER 11 when the "Installation complete" message appears.9. To begin play, switch to the game directory (default is C:\sSHOCK) and type CDSHOCK (for machines
with 8 or more MB RAM) or SS HOCK (for machines with 4MB RAM). Then, press IIENTERII.
4
10. To view/print the playguide and reference card. see Using the On-Line Documentation.
Installation OptionsTo change your sound and music card settings, rerun the Install program from the game directory.If AUTO SETUP locks up your system, restart installation and select a different card or manually setup your sound card with the proper settings.
Use m or m to move the highlighter up and down.
Note: To exit the installation without recording any selections, highlight quit and press 1ll!f!lI!J.1-6. Follow Steps 1 through 6 of Quick Installation.
7. Highlight SETUP SOUND SYSTEM, then press IIENTER~.
8. Highlight CHOOSE MUSIC CARD, then press IIENTERII.
Use m or m to highlight the sound card that most closely matches your system, then press
11 ENTER 11·
Highlight AUTO SETUP if you want the program to detect the correct settings for the card you've
specified, and press 11 ENTER 11·
To choose settings manually. highlight MANUAL SETUP and press 11 ENTER 11. You must enter additional cardinformation. Unless you have modified the settings, the defaults suggested by the install program shouldbe correct.
110 port setting. This setting is normally 220.
9. Highlight CHOOSE DIGITAL CARD, then press IIENTERII.
Highlight the sound card that most closely matches your system, then press 11 ENTER 11.
Highlight AUTO SETUP if you want the program to detect the correct settings for the card you've
specified and press 11 ENTER 11. To choose settings manually, highlight MANUAL SETUP and press
11 ENTERII·If you chose MANUAL SETUP, you will be prompted to provide additional card information.Unless you have modified the settings, the defaults suggested by the install program should becorrect. The following menus handle this information. The settings available may vary betweendifferent card types.I/O port selling. This menu brings up a list of possible values. 220H is the default setting.IRQ setting. This menu gives you a choice of 2,3,5,7 or other (5 is the default for all but theoldest Sound Blaster cards; the oldest default to 7).
DMA setting. This menu gives you a choice of 0, I, or other (I is the default). Rap-10 users havechoices that combine two settings. The default setting is (5, 6). Others are (6, 7) and (7, 5) or other.
Press 11 ENTER ij after highlighting each configuration option. After you choose the DMA setting, youwill return to the Configuration Menu. (Some cards cause the program to choose the DMA settingautomatically.)
10. Highlight TEST MUSIC CARD, then press IIENTERI to test the configuration. If the card is detected,you receive a message and hear music. If it does not match your hardware, an error messageappears. Press any key to stop the test.
11. Highlight TEST DIGITAL CARD, then press IIENTERI to test the configuration. If the card isdetected, you receive a message and hear a sound effect. If it does not match your hardware, anerror message appears. Press any key to clear the screen.For more information on these settings, see your sound card documentation.If you do not hear music or sound effects, even though the program says it detects your card,try a different card configuration.
12. (Optional) To specify a game directory other than the default one (C:\sSHOCK), highlight
CHOOSE INSTALL DIRECTORY, then press jlENTER!. Type the desired drive and path, then press
ENTE again. If you skip this step, the game uses the default directory.
13. (Optional) Highlight OTHER OPTIONS and press IIENTER! to access joystick, cinematic and gameportoptions.
14. Highlight JOYSTICK TYPE and press IIENTERII. Use m or m to highlight the type of joystick
you're using (or choose NO JOYSTICK), then press 11 ENTER 11 to return to the Option Menu.
Note: System Shock CD supports the Gravis Phoenix joystick. The game CD contains afile that will load a presetlist of commands. To load thisfile:
a. Copy SHOCK.PHX from the root directory of the CD into the Phoenix directory on your hard drive.b. Switch to the Phoenix directory on your hard drive.
c. Type PHX SHOCK.PHX IIENTER 11 to load game-specific commands for the joystick.15. (Optional) The game defaults to VGA for cinematic scenes. To change it, highlight CUTSCENE
TYPE and press 11 ENTER!.Highlight SVGA to play cinematic rnidgames in high video resolution (if you have SVGA
capabilities), then press 11 ENTER 11· Or, highlight MCGA to display cinematic scenes in low video
resolution, then press IIENTERij.
6
16. (Optional) If you have a gameport in your portable computer, highlight NOTEBOOKGAMEPORT.
This option defaults to DON'T CHECK.Highlight CHECK and press 11 ENTER 11.
17. When you are through changing options in the OTHEROPTtO S screen, highlight DONE and press
E TER to return to the Main Menu.18. To exit installation and save the current configuration (without re-installing the game), highlight
SAVESETTINGSA D EXIT, then press IIENTER!.
19. To exit without installing or saving changes, highlight QUIT and press IIENTERI.20. If you're satisfied with the options you selected, highlight INSTALLSYSTEMSHOCK and press
11 ENTER!. When installation is complete, you will receive a completion message. Press 11 ENTER I toexit to DOS.
21. To begin play, switch to the drive and directory where the game is installed. Type CDSHOCK
11 ENTER 11 to start the game if you have 8 or more MB RAM; type SSHOCK 11 ENTER 11 if you have4MB RAM.
Changing Your Sound Card ConfigurationIf you ever add a sound card (or change from one sound card to another), you must reconfigure thesound card configuration for System Shock CD. Place System Shock CD in your CD-ROM drive.Return to the drive and directory where you installed the game (for example, the default is
C:\sSHOCK) and type INSTALL,then press 11 ENTER I. This allows you to change the selections youmade when you first installed the game. Highlight SETUPSOUNDSYSTEMfrom the Configurationmenu and follow Steps 7 -11 in Installation Options.
You then need to highlight SAVESETTINGSANDEXIT, then press IIENTERI to save your sound cardchanges. Once you start System Shock CD again, your new settings will take effect.
If You Have Trouble InstallingIf you have not already, please review the System Requirements for System Shock CD to be sureyour hardware setup and System Shock CD are compatible.
7
Memory RequirementsSystem Shock CD uses conventional RAM (base memory) and extended memory (XMS). Thoughan expanded memory boot disk setup is included in Creating a Boot Disk, we recommend using anXMS setup for optimal game performance. You must have a minimum of 4 megabytes of totalRAM installed in your machine. Of this memory, you must have at least 3072K (3,145,728 bytes)free XMS memory to run System Shock CD using the SS HOCK executable. If you have 7168K(7,340,032 bytes), you will get full speech and SVGA graphics (with a VESA-standard orequivalent bios driver) when you use the COS HOCK executable file.
To find out how much DOS and XMS memory your computer has available, use the DOS MEM
command. From the DOS prompt, type: MEM I1 ENTER 11.
When the memory information is displayed on the screen, look for the following two listings:
LARGEST EXECUTABLE PROGRAM SIZE - this number indicates how much DOS conventional memory isavailable. You must have at least 530K (542,720 bytes) listed here.
If you have DOS 5.0, look for this line:
BYTES AVAILABLE XMS MEMORY - this number indicates how much extended memory is available. Youmust have at least 3072K (3,145,728 bytes) Listed here to play without full speech and SVGAgraphics (by running SSHOCK). You must have at least 7168K (7,340,032 bytes) listed here to playwith full speech and SVGA graphics (by running CDSHOCK).
If you have DOS 6.0 or higher, look at the last number in the memory table (last column):
EXTENDED (XMS) - the last number on this line indicates how much extended memory is available.You must have at least 3072K (3,145,728 bytes) listed for this entry to run SSHOCK. You must haveat least 7168K (7.340.032 bytes) listed here to play with full speech and SVGA graphics (byrunning COSHOCK).
If You Have Trouble PlayingIf you are experiencing problems running System Shock CD or do not have the appropriate amountof memory, it might help to create a separate boot disk and decrease the number of memoryresident programs (TSRs) you have loaded. Do not delete your AUTOEXEC.BAT orCONFIG.SYS files from your hard drive - without them, your computer will not function.
8
Using the On-Line DocumentationIf you have Microsoft® WindowS® or Windows 95 installed, we recommend that you install the Windows version of the Adobe
Acrobat reader for greater ease of use when reading the on-line manuals. See below for instructions on installing Acrobat/or
Windows. If you have already installed the Acrobat reader from another CD-ROM Classics title, it does IIOf need to be re-
installed, skip to the To Start Adobe Acrobat for DOS or To Start Adobe Acrobat for Windows section.
DOS USERS:System requirements for DOS:
386 or 486 based PC (486 recommended) •DOS 5.0 or higher2 MB of available RAM (4 MB or more recommended)4 MB hard disk spaceMicrosoft-compatible mouseVGA graphics cardPostscript or LaserJet printer supported
To install the DOS Adobe Acrobat on-line document reader:1. Insert the CD in your CD drive.
2. Type 0: (or the letter of your CD drive. if different) and press E TER to move to the CD drive.
3. When you see the "0:" prompt. type ADOBE\ACRODOS\INSTALL and press ~ENTER!.
4. Follow the menu prompts to install the on-line documentation reader.
To start Adobe Acrobat for DOS:1. The CD must be in the drive to run the program.2. Move to the directory where Adobe Acrobat is installed. By default. it is installed in
C:\ACRODOS, so you would type:
C: IIENTERij
CD\ACRODOS IIENTER!
3. Type ACROBAT IiENTERi to start the program.
To open an on-line document file:Select Open from the File menu. (The on-line documents are located on the CD-ROMClassics CD.)
9
Double-click on the D: (or appropriate CD drive leuer) from the DRIVE dialogue box.Double-click on the language that you require.Double-click on an on-line documentation file to open it.
To learn how to use Adobe Acrobat:
Open the file HELPREAD.PDF in the C:\ACRODOS directory on your hard drive. Complete Acrobatinstructions are contained in this file.
Windows 9S Users:
To install Adobe Acrobat for Windows:I. From within Windows 95, Insert the CD in your CD drive. The CD must be in the drive to
install and run the program.
2. Click on the START button, and select RUN ...3. Type d:\adobe\acrowin\acroread.exe (If your CD-ROM isn't drive 0:, substitute the
appropriate letter for '0'.)
4. Click OK or press ENT R and follow the instructions on your screen.
To start Adobe Acrobat for Windows:I. Start Windows and ensure that the CD is in the drive.
2. Click on the START button.3. Select Programs, Adobe Acrobat 2.0, and then Acrobat Reader 2.0
Windows 3.1X Users:
System requirements for Windows:
386-or 486-based PC (486 recommended)4MB RAMMicrosoft Windows 3.1 or greaterTo install Adobe Acrobat for Windows:I. Insert the CD in your CD drive. The CD must be in the drive to install and run the program.2. Start Windows.3. From the Windows Program Manager, choose RUN ... from the File menu. The Run dialogue
box appears.4. Type d:\adobe\acrowin\acroread.exe (If your CD-ROM isn't drive 0:, substitute the
appropriate letter for '0'.)
10
5. Click OK or press IIENTfRI and follow the instructions on your screen.
To start Adobe Acrobat for Windows:I. Start Windows and ensure that the CD is in the drive.2. If the Acrobat Reader 2.0 icon is not visible in the Program Manager window, double-click on
the Acrobat program group icon. The Acrobat window opens.3. Double-click the Acrobat Reader 2.0 icon. The program begins.
To open an on-line document file:Select Open from the File menu. (The on-line documents are located on the CD-ROMClassics CD).Double-click on the D: (or appropriate CD drive letter) from the DRIVE box.Double-click on the language that you require.Double-click on an on-line documentation file to open it.
To learn how to use Adobe Acrobat:Open the file HELP _ R.PDF in the C:\ACROREAD\HELP directory on your hard drive.Complete Acrobat instructions are contained in this file.
To print a document file:Select Print from the File menu. Choose the range you want to print from the Print Rangedialogue box.If you receive a "Acrobat does not support printing at this device resolution ..." message,increase the resolution in the Print Quality dialogue box.In DOS, prior to printing, go into Print Setup from the File menu. Choose Bitmap, whichwill provide a list of available printer devices.The Adobe Acrobat Document Reader does not support 9-pin printers.
Quick Acrobat Tips:If you have difficulty viewing documents, click on the magnifying glass icon on the bottom ofthe screen to increase resolution.Each document file contains bookmarks that function as an electronic table of contents. Toview bookmarks, select Bookmarks and Page from the View menu. The bookmarks appear tothe left of the document window.To jump to the page associated with a bookmark, double-click on the page icon next to thebookmark.To show or hide any subordinate bookmarks, click the triangle to the left of bookmark.
11
To move through the document one page at a time click the Previous or Next Page buttons or
press the 1b3!E! cursor keys.To move through a document one screen at a time, click above or below the scroll box in the
s~roll bar or press the ~~ keys.
Creating a Boot DiskBefore creating a boot disk, we recommend that you make a paper copy of your hard drive's
config.sys and autoexec.bat start-up files. Type at the DOS prompt: type config.sys IIENTER!
Either hand-copy or, if you have a printer, use ~ to generate a printout of this startup file. Now,
at the DOS prompt type: type autoexec.bat UENTERI
Hand copy or use to generate a printout of this startup file.To create a separate boot disk, insert a blank high density disk in your A: drive. (Your computer
will not boot from the B: drive.) From the DOS prompt, type: format a: Is IIENTER!After the disk is formatted, you must create a config.sys and an autoexec.bat using theconfigurations below.
Modifying CONFIG.SYSWhen the DOS prompt returns and the format is complete, type: edit a:\config.sys IIENTER!When the new screen appears, type in the following commands:CONFIG.SYS with XMS setup (no EMS driver)
Type in the information for your sound card exactly as it appears on the printout of your config.sysfile. It should come from the sound card directory, e.g. c:\ss16\oRv\crMMSYs.SYs.
DEVICE=c:\<path>\<your CD-ROM driver> <parameters>Type in the information for your CD-ROM driver line from the printout of the config.sys. It willusually be a line containing the driver name (example: SBCD.SYS) followed by the device name ofyour CD ROM (example: ID:MscDOOl).
12
Exiting CONFIG.SYSAfter typing these lines, you should exit and save your file. Do so by typing:
~ru~[J)]
Modifying AUTOEXEC.BATNext you need an autoexec.bat file on your boot disk. Type: edit a:\autoexec.bat liENTERYWhen the new screen appears, type:
Each mouse driver is loaded differently. See Mouse Setup.<MSCDEX LINE>
Copy the MSCDEX.EXEline from your hard drive autoexec.bat file exactly as it appears.<SOUNDCARDLINES>
Copy your sound card lines as they appear in your hard drive autoexec.bat. Include SET BLASTER,SET SOUND,and any other lines that contain the sound card directory.
c:CD\<game directory>
(The autoexec.bat file does not vary with different memory drivers.)Exit and save this file by typing:
~rn~[J;!
To Use Your New Boot DiskTurn your computer off, insert your new boot disk in your A: drive and turn the computer back on.The boot disk should run and automatically take you into the System Shock game directory.Installation FailsIf the installation should fail, an error message should tell you the nature of the problem. SeeTroubleshooting for solutions to some common problems. If you continue having problems evenafter creating a separate boot disk, try deleting the game from your computer and booting from theboot disk. Then, reinstall the game from the CD. (Note that this will delete any saved games youmight already have.)
13
TroubleshootingIf you have not aLready, please review the SystemRequirements for System Shock CD to ensure thatyou comply.
Mouse and Joystick ProblemsQ: Why won't my joystick work correctly?A: Be sure that your joystick has been calibrated. (You may need to recalibrate it after you exit
cyberspace.) To do so, open the Option screen (Iml) and then click INPUT. Click CENTER
JOYSTICK, then place your joystick in the center position and press 11 ENTER 11. If this does not solvethe problem, contact ElectronicArts Customer Service. A speed-adjustable gamecard may helpsolve joystick problems on high-end systems.
Q: My mouse is not working with System Shock. My mouse works with all of my other softwareapplications - why not with System Shock?
A: If your mouse does not work with System Shock CD, first check to see if your mouse has beenloaded in the autoexec.bat file you are booting from. It will be either on your boot disk (if you'reusing one) or on your hard drive. Windowsand many other "rnulti-tasking" environments load theirown built-in mouse driver. These drivers will not operate outside of their shell environment.
Loading a driver into the DOS environment can be as simple as typing MOUSE11 ENTER 11 at the
command prompt. For example: C:\>MOUSE 11 ENTER 11
This command can differ from mouse driver software to mouse driver software. Consult yourmouse user's guide and Mouse Setup, for further details.
Memory and Configuration ProblemsQ: System Shock exited to DOS with this error: "DOS/16M: [some number] cannot allocate
transfer buffer." What does this mean?A: You have too many items loaded into your conventional (base) memory You must have at least
530K (542,720 bytes) free to play System Shock CD. If you're not using a boot disk, make oneusing the steps listed in Creating a Boot Disk.
Q: System Shock threw me out to DOS with a fatal memory error. It said "Not enough memory."What's wrong?
A: You are trying to play the game using the SSHOCKexecutable and have less than 3072K(3,145,728 bytes) free extended memory (XMS), or you're using the CDSI-IOCKexecutable andhave less than 7168K (7,340,032 bytes) free extended memory (XMS).
14
To find out how much memory you have, use the DOS command MEM and look at the BYTES
AVAILABLE XMS MEMORY line for DOS 5.0. For DOS 6.0 and higher, look at the EXTENDED XMS
line. It should indicate at least 3072K free extended memory. This is the amount of extendedmemory available. If this number is less than 3072K, modify the autoexec. bat and config.sysfiles on your boot disk. Refer to Creating a Boot Disk, for instructions on making a system bootdisk for System Shock CD.
Q: While I was playing System Shock, the game exited to DOS with this message: "Could 1I0tfind palette." How can [fix this?
A: The game needs more files than you have specified in your CONFIG.SYS. Follow the on screeninstructions and modify your boot disk files as indicated. You will then need to reboot your ••system with the boot disk in the A: drive.
Q: Why does my computer crash when I try to play System Shock while I am logged into ourLAN (local area networks?
A: LAN software often tries to take over the same system resources that System Shock CD uses.Sometimes the two can coexist, but often they can't. If you have strange problems with SystemShock CD while your LAN drivers are loaded, try booting from a clean boot disk that does notload your LAN drivers. Please refer to Creating a Boot Disk.
Audio ProblemsQ: I have a 100% Sound Blaster- compatible sound card, but I'm 1I0t getting allY sound. Why 1I0t?A: Your sound card may have to be put into Sound Blaster emulation through its software or a
switch, or you may need to change the port configuration for your card (check your sound carddocumentation).
Q: I have a Roland RAP-10 sound card. It was detected during installation, so why am I havingproblems during gameplay?
A: (DMA channels) System Shock CD is one of the first games to support full stereo sound effectsand speech on the Roland RAP-1O card. The RAP- I0 does, however, require two available high(16-bit) DMA channels, and one may be conflicting with a peripheral (such as a SCSI card ornetwork adapter). The install program defaults to DMA channels 5 and 6. You may wish to tryother DMA channel pairs. Some motherboard chip sets may not know how to handle high (16-bit)DMA.
A: (IRQ setting) Looping or stuttering sound effects may be caused by an IRQ port conflict. If youhave changed your RAP-IO's IRQ default setting (9), you must manually configure System ShockCD in the install program for the new setting. Some sound cards (such as the Creative Labs SoundBlaster 16 and Sound Galaxy SC400) have their own MPU-401 MIDI interfaces that default to IRQchannel 2.
15
This can cause conflicts with both IRQ channels 2 and 9 on cards such as the RAP-IO. SimplydisabLing these MPU-401 interfaces may not be enough to avoid IRQ conflicts with the RAP-IO. Ifproblems persist, it may be necessary to remove the other sound card or change the RAP-I O's IRQjumper setting. Additionally, be sure that the I/O addresses are different between your RAP-I 0 andyour other sound card's MPU-401 interface.
Other Common ProblemsQ: Why does my computer crash when / try to play System Shock through Microsoft Windows
(or OS/2, Desqview or DOS 5.0 Task Swapper)?A: "Multi-tasking environments" - Windows, Desqview, Software Carousel, DOS 5.0 Task
Swapper and so forth - often conflict in their use of memory and other system resources withSystem Shock CD. We do not recommend playing System Shock CD under these circumstances.Even if you do run the game under a muJti-tasker, do not swap to another application whileplaying. Your system may crash if you try to suspend System Shock CD to run another program.In general, we recommend that you log out of Windows (or similar applications) and play fromthe DOS prompt.
Q: After / play System Shock CD for all hour or two, the game seems to grow sluggish. Am /imagining things, or is this a common problem?
A: Sometimes playing the game for an extended period of time does cause the program to slowdown. Save your game, then exit and power down your system. After a few minutes, restartSystem Shock and load your saved game. This should solve the problem.
Q: Occasionally, / can't reload a save-game file. The game will load, but my machine locks upor the game environment does strange things. Why?
A: Make a boot disk. Also, don't use a compressed drive (e.g., Double Space or Stacker). Becausegames like System Shock CD frequently access the hard drive, disk compression sometimescauses problems. ,
Q: System Shock stilldoesn't work after I made a boot disk and/or modified my config.sysandautoexec.batfiles.
A: Copy down the error code and information the computer displayed when it quit to DOS. Thensee Electronic Arts Customer Service.
16
Mouse SetupBe sure that you are using a I(X)% Microsoft-rompatible mouse driver - a Microsoft version 7.0 or higher mousedriver is preferable. If you are using a boot disk, this driver must be loaded within your boot disk configuration. Sincethe command line may differ from mouse to mouse, consult your hard chive's autoexecbat by typing at the oosprompt: type c:lautoexfC.bat. Look for your mouse driver line and copy it into your boot disk's autoexec.bat,Consult your mouse user's guide for more detailed instructions on loading the mouse driver for your computer.
Disk Cache ProgramsWe do not recommend using a disk cache if you have less than 8 megabytes of free RAM. If youhave 8 MB or more of RAM and want to install SMARTDRVEXE (a disk caching program), werecommend that you allocate 1024K of memory to the disk cache. We also recommend using theSMARTDrive versions from Windows 3.1 or DOS 6.0. If you use a disk cache with only 8MB, youmay not have enough XMS memory available to run CDSHOCK, though SS HOCK should run fine.Note: Though other disk cache programs may work with System Shock CD, we cannot guarantee compatibility.
On machines with more than 4 MB of free RAM, System Shock CD uses up to 2 more megs foradvanced features as long as that extra memory has not been allocated to a disk cache. If you installSMARTDrive, add the following line to the beginning of your AUTOEXEC.BAT file. (You may alsoneed to change the path, depending upon where your disk cache program is located.)C:\ooS\sMARTDRV.EXE 1024 C (The letter after 1024 should match the drive where the game is installed.)
1/0 and IRQ PortsIf you've selected an incorrect I/O or IRQ port setting for your music or sound card, sound andmusic won't play and you'll get an error message when you test the card. The game may also lockup. Type INSTALL IIENTER! from the game directory and re-install your sound system withappropriate settings. (See Changing Your Sound Card Configuration.y
General MIDISystem Shock CD has joined the next generation of music quality with its support of the GeneralMIDI standard as defined by the MPU-401 instruction set. At the time of publishing, only a fewcards support MPU-401. These cards include Roland SCC-l, Roland RAP-IO, EnsoniqSoundscape, Creative Labs Sound Blaster 16 with attached General MIDI daughterboard (such asthe Wave Blaster), and Creative Labs Sound Blaster ASP 16 with attached daughterboard. Othermanufacturers have already released, or are planning to release, sound cards that utilize the MPU-40 I instruction set. However, sound cards that use a memory-resident program (TSR) to emulateMPU-401 may not work with this software.Note: Some General MIDI sound cards offer digitized speech or sound effect capabilities. Review your sound
card documentation or contact the manufacturer if you have any questions.
17
Specific Sound Card InformationSystem Shock CD natively supports (without using emulation techniques) cards listed in this section.However, some music and sound cards require you to load special drivers and/or choose specific ports:Sound Blaster AWE32. The game natively supports the AWE Synthesizer chip located on your soundcard. You do not need to load any emulation drivers to receive General MIDI-quality music support.Simply load AWEUTIL (from your sound card directory) in your autoexec.bat with its default parameters.Also, select the same I/O port for music and digital sound effects.ProAudio Spectrum. Although this game does not directly support ProAudio Spectrum, this card type canuse the Sound Blaster emulation mode to play music and sound effects. When using one of these, makesure you have the drivers configured correctly for Sound Blaster emulation and that they are not loaded intohigh memory.If you have ProAudio Spectrum, select SOUND BLASTER for both music and digitized sound effects (duringinstallation). (Refer to readme.txt by running the install program and choosing VIEW README.)
Roland RAP-IO. System Shock CD is one of the fITStgames to use the Rap- IQ card for both sound anddigital effects. The CD version of this game supports both. If you're having problems with the gamelocking up, or with sound effects looping or stuttering, you may have DMA or IRQ conflicts. Refer toAudio Problems in the Troubleshooting section.Ensoniq Soundscape. This game supports the Ensoniq Soundscape along with its General MIDIcapabilities. In your autoexec.bat, load SSINIT /1 (from your sound card directory) prior to starting SystemShock CD. Select 330 for the I/O port for music, 220 for digital sound effects. Choose an IRQsetting of 5and a DMA setting of 1.
18
REFERENCE CARDStarting the GameEnter the System Shock directory (default is C:\sHOCK). Type sshock and press IIENTERII. Type cdshock 11 ENTER 11
to run the enhanced CD version if you have 8MB RAM or more. Click on play intro, new game, credits orcontinue (only appears after you save games). For new games, set difficulty levels (0 is easiest, 3 mostdifficult), type your name and click START.
Manipulating ObjectsSelect item in Inventory/buttons in MFDs ...Left-clickIdentify item in viewscreenActivate side iconOpen lnventory/Mf'DsFire .Swing WeaponMove .Use item in viewscreenPick up item in viewscreenActivate Inventory hardwarePlace item in Inventory/MFDs
CyberspaceJack into cyberspaceUse software programs in InventoryIdentify.................. . .Open Inventory/MFDsSelect Pulsar or Drill software in InventoryMove . Left-click and hold or hold down SPACEBAR.
Pick up software and scan data. . Collide with itemFire combat software . Right-click
4-5. Multi-Functional Displays (MFDs)Press the appropriate button to turn the display on/off.
20
Left or Right MFD
[[j)jor~
~or~
IiYI or ~
~or~
Name
WEAPON
ITEM
AUTOMAP
TARGET
DATA
Function
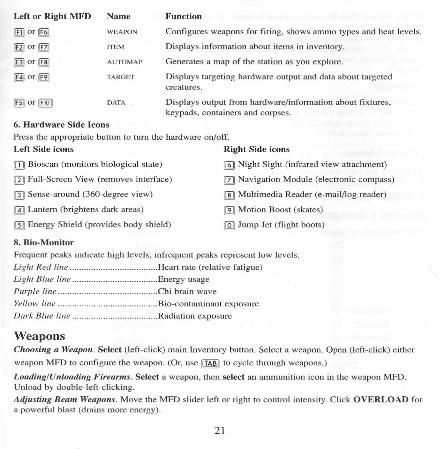
Configures weapons for firing, shows arnmo types and heat levels.
Displays information about items in inventory.
Generates a map of the station as you explore.
Displays targeting hardware output and data about targetedcreatures.
Displays output from hardware/information about fixtures.keypads. containers and corpses.
6. Hardware Side IconsPress the appropriate button to turn the hardware on/off.Left Side icons Right Side icons
!I! Bioscan (monitors biological state)
rn Full-Screen View (removes interface)
o Sense-around (360·degree view)
!4! Lantern (brightens dark areas)
m Energy Shield (provides body shield)
m Night Sight (infrared view attachment)
rnJ Navigation Module (electronic compass)
rn Multimedia Reader (e-rnail/log reader)
m Motion Boost (skates)
~ Jump Jet (flight boots)
8. Bio-MonitorFrequent peaks indicate high levels. infrequent peaks represent low levels.Light Red line ..Heart rate (relative fatigue)Light Blue line Energy usagePurple line Chi brain waveYellow line .Bio-contaminant exposureDark Blue line ...Radiation exposure
WeaponsChoosing a Weapon. Select (left-click) main Inventory button. Select a weapon. Open (left-click) eitherweapon MFD to configure the weapon. (Or, use [!![l to cycle through weapons.)
Loading/Unloading Firearms. Select a weapon. then select an ammunition icon in the weapon MFD.Unload by double-left-clicking.Adjusting Beam Weapons. Move the MFD slider left or right to control intensity. Click OVERLOAD fora powerful blast (drains more energy).
21
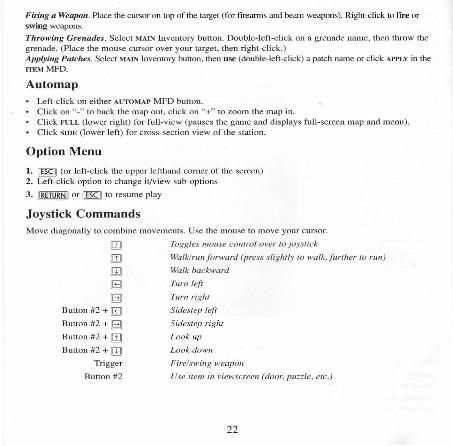
Firing a Weapon. Place the cursor on top of the target (for firearms and beam weapons). Right-click to fire orswing weapons.Throwing Grenades. Select MAIN Inventory button. Double-left-click on a grenade name, then throw thegrenade. (place the mouse cursor over your target, then right-click.)Applying Patches. Select MAIN Inventory button, then use (double-left-click) a patch name or click APPLY in theITEMMFD.
AutomapLeft-click on either AUTOMAP MFD button.Click on "-" to back the map out, click on "+" to zoom the map in.Click FULL (lower right) for full-view (pauses the game and displays full-screen map and menu).Click SIDE (lower left) for cross-section view of the station.
Option Menu
1. ~ (or left-click the upper lefthand corner of the screen)2. Left-click option to change it/view sub-options
3. ~ or ~ to resume play
Joystick CommandsMove diagonally to combine movements. Use the mouse to move your cursor.
Walk/run forward (press slightly to walk,further to run)
Walk backward
Turn leftTurn right
Sidestep leftSidestep right
Look upLook down
Fire/swing weaponUse item in viewscreen (door. puzzle, etc.)
22
rnmEl~
Button #2 + GJButton #2 + l!3
Trigger
Cyberman Commands
Move, aim and fire by manipulating the Cyberman like a mouse - slide the device horizontally whilepressing the left and right buttons. The middle button combines with movement to control leaning andview angle:
To lean, press the middle button and tilt the device left or right.• To change your view angle, press the middle button and tilt the device forward or backward.
Cyberspace Joystick Commands
Dive or pitch downwardClimb or pitch upward
Bank left
Bank rightRollleji
Roll rightFire/swing weapon
Keyboard Commands~ Run forward
m or m Walk forward
!M or m Walk backward
~ or B Turn left
[£i or Ell Turn right
~ or ~B Sidestep left
[£] or ~EIl Sidestep right
!£l] or I[QRlJIB Lean left (while standing or crouching)
m or IltfRjJlEIl Lean right (while standing or crouching)
To move, place your cursor in the viewscreen, then left-click-and-hold. The cursor location and shapedetermines the direction of motion.To increase speed, move the cursor away from the center of the viewscreen.
Fatigue. To rest, slow down, stop moving for a few seconds, or apply Staminup dermal patches.
~T...•WRNmTAND •••••••• •..Tt; TmRIGHTANl. MDVEfORWARO 1. SPRINT l. MOVE fORWAR
m •..+...• MOVT ~l. TURNlffT l. fORWARO l. TURNRI&HT
•.T...• •..T...•MOH •..T.•1. SlIOTITfT t BACKWARO l. SlIDTRIGHT
~ BANKlffTAND I ClIMB rP BANK RIGHTClIMB ANOCllMB
«II 0 THRUST ItI>TURNlffT fORWARO TURNHIGHT
~BANKlffTANU ~ \} BANIRIGHT
DIVT DIVT ANOUIVT
Climbing. Move face-first against a ladder or climbable wall. Click-and-hold both mouse buttons andmove forward.
View and Posture. Left-click in the View Angle Control and Posture Control boxes or use keyboard.
Option MenuYou must be playing the game to access the game options. To bring up the menu, press ~ or move yourcursor to the upper-left corner of the screen. You'll see "Click for Options." When you left-click in thisspot, the Option menu appears in your Inventory Panel.SELECT (left-click) an option 10 change it.SELECT the RETURN option or press ~ again to return to the game.
LOAD GAME C!@!JI!I!). Displays list of saved games. Select the game you want to load.
SAVE GAME C!@!Jm). Displays save game slots. Select a slot. then type a short description (up 10 30characters) and press~.AUDIO. Adjusts music and sound effects (not available if you haven't correctly configured your soundcard).
MUSIC. Adjusts music volume (left-click-and-drag the slider).DIGITAL FX. Adjusts digital sound effects volume (left-click-and-drag the slider). Cards without digitalcontrol will display a button that toggles sound ON/OFF instead.AUDIO MESSAGES VOLUME. Adjusts volume of audio logs and e-rnails (left-click-and-drag the slider).MESSAGES. Selects how e-mail and log messages display, either as TEXT, SPEECH or BOTH.
25
VIDEO. Adjusts video display.VIDEO MODE.Adjusts screen resolution. The highlighted buttons are modes supported by your video card. Thefirst two (320x200 and 320x4(0) are VGA modes; the other two (640x400 and 640x480) are SVGA modes thatrequire a VESA (or equivalent bios) driver.GAMMA CORREcnON. Adjusts the overall lighting level (left-click and drag the slider left or right).DETAIL. Adjusts level of graphics detail to MI jLowjHJGH/MAX. The MlN mode has a faster frame rate but haslower-detail graphics. The MAX mode has a slower frame rate but high-detail graphics. (If you want a fasterframe rate while playing in MAX mode, don't remove the interface screen.)
OPTIONS.Accesses advanced options:LANGUAGE. Cycles through English, French and German versions of text and speech.ON-LINE HELP. Toggles on-line help ON/OFF.
TEXT LENGTH. Toggles between NORMAL/TERSE text (longer messages with extra fiction/abridgedversions containing only important info).REfURN. Returns you to the main Option menu.
1Nl' T. Accesses other options.pop-up CURSORS. Toggles the text cursors on the Lnventory and MFD buttons ON/OFF.
MOUSE HAND. Switches the LEFT and RIGHT mouse buttons.CENTER JOYSTICK. Allows you to reset center position of joystick.DOUBLE-CLICK. Lets you set double-click speed. Left-click-and-drag the slider left or right.RETURN. Returns you to the main Option menu.
RETURN. Returns you to the game.QUIT. Exits the game without saving.
26
Technical SupportIf, after thoroughly reviewing ALL the documentation, you are still having a problem with this software, pleaseread the following section.
Electronic Arts has a staff of customer service technicians ready to help you with any problems you mayencounter with the game. Electronic Arts Customer Service is available Monday to Friday during normalbusiness hours on (01753) 546465.
Today's PCs run with millions of different hardware and software combinations. Because of this, you may alsohave to refer to your computer dealer or hardware manufacturer in order to properly configure their product torun with our game.
When you call, if at all possible, be near your computer. if it is not possible, make sure you have the followinginformation ready:
The error message displayed when the problem occurred (if any).A listing of your machine type and hardware contents, including CPU. sound and video board details.The DOS version number you are currently running.Your mouse and driver type.The contents of your CONFIG.SYS and AUTOEXEC.BAT files.Your CD-ROM drive type and CD-ROM extensions version, if fitted.The contents of a CHKDSK and MEMjC statement
Or you may write to us at the following address, including the above information.
Electronic Arts Customer Service, P'O. Box 835, Slough, Berkshire, England SL3 8XP
NoticeElectronic Arts reserves the right to make improvements in this product described in this manual at any time andwithout notice.
This manual, and the software described in this manual, is under copyright All rights are reserved. No part ofthis manual or the described software may be copied, reproduced, translated or reduced to any electronic mediumor machine-readable form without the prior written consent of Electronic Arts Limited, 90 Heron Drive, Slough,Berks SL3 8XU, England.
Electronic Arts makes no warranties, conditions or representations express or implied, with respect to thismanual, its quality, merchantability or fitness for any particular purpose. This manual is provided "as is".Electronic Arts makes certain limited warranties with respect to the software and the media for the software. Inno event shall Electronic Arts be liable for any special, indirect or consequential damages.
These terms and conditions do not affect or prejudice the statutory rights of a purchaser in any case where apurchaser is a consumer acquiring goods otherwise than in the course of a business.
27
Limited WarrantyElectronic Arts warrants to the original purchaser of this computer software product that the recording media onwhich the software programs are recorded will be free from defects in materials and workmanship for 90 daysfrom the date of purchase. During such period defective media will be replaced if the original product is returnedto Electronic Arts at the address on the rear of this document, together with a dated proof of purchase, astatement describing the defects. the faulty media and your return address.
This warranty is in addition to. and does not affect your statutory rights in any way.
This warranty does not apply to the software program themselves, which are provided "as is", nor does it applyto media which has been subject to misuse, damage or excessive wear.
N.B. Media Replacement NoticeElectronic Arts are NOT able to replace damaged media once the 9O-day limited warranty has expired. Thisnotice supercedes the Media Replacement Notice on the on-line documentation.