66
Red Hat Ceph Storage 2 Installation Guide for Ubuntu Installing Red Hat Ceph Storage on Ubuntu Last Updated: 2019-04-11

Red Hat Ceph Storage 2
Installation Guide for Ubuntu
Installing Red Hat Ceph Storage on Ubuntu
Last Updated: 2019-04-11


Red Hat Ceph Storage 2 Installation Guide for Ubuntu
Installing Red Hat Ceph Storage on Ubuntu

Legal Notice
Copyright © 2019 Red Hat, Inc.
The text of and illustrations in this document are licensed by Red Hat under a Creative CommonsAttribution–Share Alike 3.0 Unported license ("CC-BY-SA"). An explanation of CC-BY-SA isavailable athttp://creativecommons.org/licenses/by-sa/3.0/. In accordance with CC-BY-SA, if you distribute this document or an adaptation of it, you mustprovide the URL for the original version.
Red Hat, as the licensor of this document, waives the right to enforce, and agrees not to assert,Section 4d of CC-BY-SA to the fullest extent permitted by applicable law.
Red Hat, Red Hat Enterprise Linux, the Shadowman logo, JBoss, OpenShift, Fedora, the Infinitylogo, and RHCE are trademarks of Red Hat, Inc., registered in the United States and othercountries.
Linux ® is the registered trademark of Linus Torvalds in the United States and other countries.
Java ® is a registered trademark of Oracle and/or its affiliates.
XFS ® is a trademark of Silicon Graphics International Corp. or its subsidiaries in the United Statesand/or other countries.
MySQL ® is a registered trademark of MySQL AB in the United States, the European Union andother countries.
Node.js ® is an official trademark of Joyent. Red Hat Software Collections is not formally related toor endorsed by the official Joyent Node.js open source or commercial project.
The OpenStack ® Word Mark and OpenStack logo are either registered trademarks/service marksor trademarks/service marks of the OpenStack Foundation, in the United States and other countriesand are used with the OpenStack Foundation's permission. We are not affiliated with, endorsed orsponsored by the OpenStack Foundation, or the OpenStack community.
All other trademarks are the property of their respective owners.
Abstract
This document provides instructions on installing Red Hat Ceph Storage on Ubuntu 16.04 runningon AMD64 and Intel 64 architectures.

. . . . . . . . . . . . . . . . . . . . . . . . . . . . . . . . . . . . . . . . . . . . . . . . . . . . . . . . . . . . . . . . . . . . . . . . . . . . . . . . . . . . . . . . . . . . . . . . . . . . . . . . . . . . . . . . . . . . . . . . . . . . . . . . . . . . . . . . . . . . . . . . . . . . . . . . . . . . . . . . . . . . . . . . . . . . . . . . . . . . . . . . . . . . . . . . . . . . . . . . . . . . . . . . . . . . . . . . . . . . . . . . . . . . . . . . . . . . . . . . . . . . . . . . . . . . . . . . . . . . . . . . . . . . . . . . . . . . . . . .
. . . . . . . . . . . . . . . . . . . . . . . . . . . . . . . . . . . . . . . . . . . . . . . . . . . . . . . . . . . . . . . . . . . . . . . . . . . . . . . . . . . . . . . . . . . . . . . . . . . . . . . . . . . . . . . . . . . . . . . . . . . . . . . . . . . . . . . . . . . . . . . . . . . . . . . . . . . . . . . . . . . . . . . . . . . . . . . . . . . . . . . . . . . . . . . . . . . . . . . . . . . . . . . . . . . . . . . . . . . . . . . . . . . . . . . . . . . . . . . . . . . . . . . . . . . . . . . . . . . . . . . . . . . . . . . . . . . . . . . .
. . . . . . . . . . . . . . . . . . . . . . . . . . . . . . . . . . . . . . . . . . . . . . . . . . . . . . . . . . . . . . . . . . . . . . . . . . . . . . . . . . . . . . . . . . . . . . . . . . . . . . . . . . . . . . . . . . . . . . . . . . . . . . . . . . . . . . . . . . . . . . . . . . . . . . . . . . . . . . . . . . . . . . . . . . . . . . . . . . . . . . . . . . . . . . . . . . . . . . . . . . . . . . . . . . . . . . . . . . . . . . . . . . . . . . . . . . . . . . . . . . . . . . . . . . . . . . . . . . . . . . . . . . . . . . . . . . . . . . . .
. . . . . . . . . . . . . . . . . . . . . . . . . . . . . . . . . . . . . . . . . . . . . . . . . . . . . . . . . . . . . . . . . . . . . . . . . . . . . . . . . . . . . . . . . . . . . . . . . . . . . . . . . . . . . . . . . . . . . . . . . . . . . . . . . . . . . . . . . . . . . . . . . . . . . . . . . . . . . . . . . . . . . . . . . . . . . . . . . . . . . . . . . . . . . . . . . . . . . . . . . . . . . . . . . . . . . . . . . . . . . . . . . . . . . . . . . . . . . . . . . . . . . . . . . . . . . . . . . . . . . . . . . . . . . . . . . . . . . . . .
. . . . . . . . . . . . . . . . . . . . . . . . . . . . . . . . . . . . . . . . . . . . . . . . . . . . . . . . . . . . . . . . . . . . . . . . . . . . . . . . . . . . . . . . . . . . . . . . . . . . . . . . . . . . . . . . . . . . . . . . . . . . . . . . . . . . . . . . . . . . . . . . . . . . . . . . . . . . . . . . . . . . . . . . . . . . . . . . . . . . . . . . . . . . . . . . . . . . . . . . . . . . . . . . . . . . . . . . . . . . . . . . . . . . . . . . . . . . . . . . . . . . . . . . . . . . . . . . . . . . . . . . . . . . . . . . . . . . . . . .
. . . . . . . . . . . . . . . . . . . . . . . . . . . . . . . . . . . . . . . . . . . . . . . . . . . . . . . . . . . . . . . . . . . . . . . . . . . . . . . . . . . . . . . . . . . . . . . . . . . . . . . . . . . . . . . . . . . . . . . . . . . . . . . . . . . . . . . . . . . . . . . . . . . . . . . . . . . . . . . . . . . . . . . . . . . . . . . . . . . . . . . . . . . . . . . . . . . . . . . . . . . . . . . . . . . . . . . . . . . . . . . . . . . . . . . . . . . . . . . . . . . . . . . . . . . . . . . . . . . . . . . . . . . . . . . . . . . . . . . .
Table of Contents
CHAPTER 1. WHAT IS RED HAT CEPH STORAGE?
CHAPTER 2. PREREQUISITES2.1. OPERATING SYSTEM
2.1.1. Adjusting the PID Count2.2. ENABLING THE RED HAT CEPH STORAGE REPOSITORIES
2.2.1. Online Repositories2.2.2. Local Repository
2.3. CONFIGURING RAID CONTROLLERS2.4. CONFIGURING NETWORK2.5. CONFIGURING FIREWALL2.6. CONFIGURING NETWORK TIME PROTOCOL2.7. CREATING AN ANSIBLE USER WITH SUDO ACCESS2.8. ENABLING PASSWORD-LESS SSH (ANSIBLE DEPLOYMENT ONLY)
CHAPTER 3. STORAGE CLUSTER INSTALLATION3.1. INSTALLING RED HAT CEPH STORAGE USING ANSIBLE
Before you start3.1.1. Installing ceph-ansible3.1.2. Configuring Ceph Global Settings3.1.3. Configuring Monitor Settings3.1.4. Configuring Ceph OSD Settings3.1.5. Overriding Ceph Default Settings3.1.6. Deploying a Ceph Cluster
3.2. INSTALLING RED HAT CEPH STORAGE BY USING THE COMMAND-LINE INTERFACE3.2.1. Monitor Bootstrapping3.2.2. OSD Bootstrapping3.2.3. Calamari Server Installation
CHAPTER 4. CLIENT INSTALLATION4.1. INSTALLING THE CEPH-CLIENT ROLE4.2. CEPH COMMAND-LINE INTERFACE INSTALLATION4.3. CEPH BLOCK DEVICE INSTALLATION
Before you startInstalling Ceph Block Devices by Using the Command Line
4.4. CEPH OBJECT GATEWAY INSTALLATION4.4.1. Installing Ceph Object Gateway by using Ansible4.4.2. Installing Ceph Object Gateway Manually
CHAPTER 5. UPGRADING CEPH STORAGE CLUSTER5.1. UPGRADING FROM RED HAT CEPH STORAGE 1.3 TO 2
5.1.1. Upgrading a Ceph Monitor Node5.1.2. Upgrading a Ceph OSD Node5.1.3. Upgrading the Ceph Object Gateway Nodes
Before You StartProcedure: Upgrading the Ceph Object Gateway NodeSee Also
5.1.4. Upgrading a Ceph Client Node5.2. UPGRADING BETWEEN MINOR VERSIONS AND APPLYING ASYNCHRONOUS UPDATES
5.2.1. Changes Between Ansible 2.1 and 2.2
CHAPTER 6. WHAT TO DO NEXT?
4
677789
101011121314
15151515161919212223233034
373737383838414141
4545464952535355555659
60
Table of Contents
1

. . . . . . . . . . . . . . . . . . . . . . . . . . . . . . . . . . . . . . . . . . . . . . . . . . . . . . . . . . . . . . . . . . . . . . . . . . . . . . . . . . . . . . . . . . . . . . . . . . . . . . . . . . . . . . . . . . . . . . . . . . . . . . . . . . . . . . . . . . . . . . . . . . . . . . . . . . . . . . . . . . . . . . . . . . . . . . . . . . . . . . . . . . . . . . . . . . . . . . . . . . . . . . . . . . . . . . . . . . . . . . . . . . . . . . . . . . . . . . . . . . . . . . . . . . . . . . . . . . . . . . . . . . . . . . . . . . . . . . . .APPENDIX A. TROUBLESHOOTINGA.1. ANSIBLE STOPS INSTALLATION BECAUSE IT DETECTS LESS DEVICES THAN IT EXPECTED
6161
Red Hat Ceph Storage 2 Installation Guide for Ubuntu
2

Table of Contents
3

CHAPTER 1. WHAT IS RED HAT CEPH STORAGE?Red Hat Ceph Storage is a scalable, open, software-defined storage platform that combines the moststable version of the Ceph storage system with a Ceph management platform, deployment utilities, andsupport services.
Red Hat Ceph Storage is designed for cloud infrastructure and web-scale object storage. Red Hat CephStorage clusters consist of the following types of nodes:
Red Hat Storage Ansible Administration node
This type of node acts as the traditional Ceph Administration node did for previous versions of RedHat Ceph Storage. This type of node provides the following functions:
Centralized storage cluster management
Ansible administration
Ceph Client Command line interface
The Ceph configuration files and keys
Optionally, local repositories for installing Ceph on nodes that cannot access the Internet forsecurity reasons
NOTE
In Red Hat Ceph Storage 1.3.x, the Ceph Administration node hosted the Calamarimonitoring and administration server, and the ceph-deploy utility, which has beendeprecated in Red Hat Ceph Storage 2. Use Ceph command-line utility or the Ansibleautomation application utility instead to install a Red Hat Ceph Storage cluster.
Monitor nodes
Each monitor node runs the monitor daemon (ceph-mon), which maintains a master copy of thecluster map. The cluster map includes the cluster topology. A client connecting to the Ceph clusterretrieves the current copy of the cluster map from the monitor which enables the client to read fromand write data to the cluster.Ceph can run with one monitor; however, to ensure high availability in a production cluster, Red Hatrecommends to deploy at least three monitor nodes.
OSD nodes
Each Object Storage Device (OSD) node runs the Ceph OSD daemon (ceph-osd), which interactswith logical disks attached to the node. Ceph stores data on these OSD nodes.Ceph can run with very few OSD nodes, which the default is three, but production clusters realizebetter performance beginning at modest scales, for example 50 OSDs in a storage cluster. Ideally, aCeph cluster has multiple OSD nodes, allowing isolated failure domains by creating the CRUSH map.
MDS nodes
Each Metadata Server (MDS) node runs the MDS daemon (ceph-mds), which manages metadatarelated to files stored on the Ceph File System (CephFS). The MDS daemon also coordinates accessto the shared cluster.MDS and CephFS are Technology Preview features and as such they are not fully supported yet. Forinformation on MDS installation and configuration, see the Ceph File System Guide (TechnologyPreview).
Red Hat Ceph Storage 2 Installation Guide for Ubuntu
4

Object Gateway node
Ceph Object Gateway node runs the Ceph RADOS Gateway daemon (ceph-radosgw), and is anobject storage interface built on top of librados to provide applications with a RESTful gateway toCeph Storage Clusters. The Ceph RADOS Gateway supports two interfaces:
S3
Provides object storage functionality with an interface that is compatible with a large subset of theAmazon S3 RESTful API.
Swift
Provides object storage functionality with an interface that is compatible with a large subset of theOpenStack Swift API.
For details on the Ceph architecture, see the Architecture Guide.
For minimum recommended hardware, see the Hardware Guide.
CHAPTER 1. WHAT IS RED HAT CEPH STORAGE?
5

CHAPTER 2. PREREQUISITES
Figure 2.1. Prerequisite Workflow
Before installing Red Hat Ceph Storage, review the following prerequisites first and prepare each CephMonitor, OSD, and client nodes accordingly.
Table 2.1. Prerequisites Checks
Task Required Section Recommendation
Verifying the operatingsystem version
Yes Section 2.1,“Operating System”
Verify the PID count
Enabling Cephsoftware repositories
Yes Section 2.2, “Enablingthe Red Hat CephStorage Repositories”
Two installation methods:
Content Delivery Network(CDN)
Local Repository (ISO)
Using a RAIDcontroller
No Section 2.3,“Configuring RAIDControllers”
For OSD nodes only.
Configuring networkInterface
Yes Section 2.4,“Configuring Network”
Using a public network is required.Having a private network for clustercommunication is optional, butrecommended.
Configuring a firewall No Section 2.5,“Configuring Firewall”
Configuring theNetwork TimeProtocol
Yes Note
Creating an Ansibleuser
No Section 2.7, “Creatingan Ansible User withSudo Access”
Ansible deployment only. Creating theAnsible user is required on all Cephnodes.
Red Hat Ceph Storage 2 Installation Guide for Ubuntu
6

Enabling password-less SSH
No Section 2.8, “EnablingPassword-less SSH(Ansible DeploymentOnly)”
Ansible deployment only.
Task Required Section Recommendation
2.1. OPERATING SYSTEM
Red Hat Ceph Storage 2 and later requires Ubuntu 16.04 with a homogeneous version running onAMD64 and Intel 64 architectures for all Ceph nodes.
IMPORTANT
Red Hat does not support clusters with heterogeneous operating systems and versions.
Return to prerequisite checklist
2.1.1. Adjusting the PID Count
Hosts with high numbers of OSDs, that being more than 12, may spawn a lot of threads, especiallyduring recovery and re-balancing events. The kernel defaults to a relatively small maximum number ofthreads, typically 32768.
1. Check the current pid_max settings:
# cat /proc/sys/kernel/pid_max
2. As root, consider setting kernel.pid_max to a higher number of threads. The theoreticalmaximum is 4,194,303 threads. For example, add the following to the /etc/sysctl.conf fileto set it to the maximum value:
kernel.pid_max = 4194303
3. As root, to load the changes without a rebooting:
# sysctl -p
4. As root, verify the changes:
# sysctl -a | grep kernel.pid_max
2.2. ENABLING THE RED HAT CEPH STORAGE REPOSITORIES
Before you can install Red Hat Ceph Storage, you must choose an installation method. Red Hat CephStorage supports two installation methods:
Online Repositories
CHAPTER 2. PREREQUISITES
7

For Ceph Storage clusters with Ceph nodes that can connect directly to the Internet, you canuse online repositories from the https://rhcs.download.redhat.com/ubuntu site. You will need yourCustomer Name and Customer Password received from https://rhcs.download.redhat.com tobe able to use the repositories.
IMPORTANT
Contact your account manager to obtain credentials forhttps://rhcs.download.redhat.com.
Local RepositoryFor Ceph Storage clusters where security measures preclude nodes from accessing the Internet,install Red Hat Ceph Storage 2 from a single software build delivered as an ISO image, whichwill allow you to install local repositories.
2.2.1. Online Repositories
Online Installations for…
Ansible Administration NodeAs root, enable the Red Hat Ceph Storage 2 Tools repository:
$ sudo bash -c 'umask 0077; echo deb https://customername:[email protected]/2-updates/Tools $(lsb_release -sc) main | tee /etc/apt/sources.list.d/Tools.list'$ sudo bash -c 'wget -O - https://www.redhat.com/security/fd431d51.txt | apt-key add -'$ sudo apt-get update
Monitor NodesAs root, enable the Red Hat Ceph Storage 2 Monitor repository:
$ sudo bash -c 'umask 0077; echo deb https://customername:[email protected]/2-updates/MON $(lsb_release -sc) main | tee /etc/apt/sources.list.d/MON.list'$ sudo bash -c 'wget -O - https://www.redhat.com/security/fd431d51.txt | apt-key add -'$ sudo apt-get update
OSD NodesAs root, enable the Red Hat Ceph Storage 2 OSD repository:
$ sudo bash -c 'umask 0077; echo deb https://customername:[email protected]/2-updates/OSD $(lsb_release -sc) main | tee /etc/apt/sources.list.d/OSD.list'$ sudo bash -c 'wget -O - https://www.redhat.com/security/fd431d51.txt | apt-key add -'$ sudo apt-get update
Red Hat Ceph Storage 2 Installation Guide for Ubuntu
8

Ceph Object Gateway and Client NodesAs root, enable the Red Hat Ceph Storage 2 Tools repository:
$ sudo bash -c 'umask 0077; echo deb https://customername:[email protected]/2-updates/Tools $(lsb_release -sc) main | tee /etc/apt/sources.list.d/Tools.list'$ sudo bash -c 'wget -O - https://www.redhat.com/security/fd431d51.txt | apt-key add -'$ sudo apt-get update
IMPORTANT
If you install Red Hat Ceph Storage manually, create an APT preferences file on allnodes. The file ensures that the apt-get utility uses Red Hat Ceph Storage packagesfrom the Red Hat repositories and not from the Ubuntu Xenial repositories that can includea newer version of the ceph package. Using the ceph packages from the Ubuntu Xenialrepository causes the installation to fail with the unmet dependencies error.
To create an APT preferences file on all nodes.
1. Create a new file in the /etc/apt/preferences.d/ directory named rhcs2:
$ sudo touch /etc/apt/preferences.d/rhcs2
2. Add the following content to the file:
Explanation: Prefer Red Hat packagesPackage: *Pin: release o=/Red Hat/Pin-Priority: 999
Return to prerequisite checklist
2.2.2. Local Repository
ISO Installations
Download the Red Hat Ceph Storage ISO
1. Visit the Red Hat Ceph Storage for Ubuntu page on the Customer Portal to obtain the RedHat Ceph Storage installation ISO image files.
2. Copy the ISO image to the node.
3. As root, mount the copied ISO image to the /mnt/rhcs2/ directory:
$ sudo mkdir -p /mnt/rhcs2$ sudo mount -o loop /<path_to_iso>/rhceph-2.0-ubuntu-x86_64.iso /mnt/rhcs2
CHAPTER 2. PREREQUISITES
9

NOTE
For ISO installations using Ansible to install Red Hat Ceph Storage 2,mounting the ISO and creating a local repository is not required.
Create a Local Repository
1. Copy the ISO image to the node.
2. As root, mount the copied ISO image:
$ sudo mkdir -p /mnt/<new_directory>$ sudo mount -o loop /<path_to_iso_file> /mnt/<new_directory>
3. As root, add the ISO image as a software source:
$ sudo apt-get install software-properties-common$ sudo add-apt-repository "deb file:/mnt/<new_directory> $(lsb_release -sc) main"
NOTE
If you are completely disconnected from the Internet, then you must use ISOimages to receive any updates.
Return to prerequisite checklist
2.3. CONFIGURING RAID CONTROLLERS
If a RAID controller with 1-2 GB of cache is installed on a host, enabling write-back caches might resultin increased small I/O write throughput. To prevent this problem, the cache must be non-volatile.
Modern RAID controllers usually have super capacitors that provide enough power to drain volatilememory to non-volatile NAND memory during a power loss event. It is important to understand how aparticular controller and firmware behave after power is restored.
Some RAID controllers require manual intervention. Hard drives typically advertise to the operatingsystem whether their disk caches should be enabled or disabled by default. However, certain RAIDcontrollers or some firmware do not provide such information, so verify that disk level caches aredisabled to avoid file system corruption.
Create a single RAID 0 volume with write-back for each OSD data drive with write-back cache enabled.
If Serial Attached SCSI (SAS) or SATA connected Solid-state Drive (SSD) disks are also present on thecontroller, investigate whether your controller and firmware support passthrough mode. Passthrough mode helps avoid caching logic, and generally results in much lower latency for fastmedia.
Return to prerequisite checklist
2.4. CONFIGURING NETWORK
Red Hat Ceph Storage 2 Installation Guide for Ubuntu
10

All Ceph clusters require a public network. You must have a network interface card configured to a publicnetwork where Ceph clients can reach Ceph monitors and Ceph OSD nodes.
You might have a network interface card for a cluster network so that Ceph can conduct heart-beating,peering, replication, and recovery on a network separate from the public network.
IMPORTANT
Red Hat does not recommend using a single network interface card for both a public andprivate network.
For additional information on network configuration see the Network Configuration Reference chapter inthe Configuration Guide for Red Hat Ceph Storage 2.
Return to prerequisite checklist
2.5. CONFIGURING FIREWALL
Red Hat Ceph Storage 2 uses the iptables service, which you must configure to suit yourenvironment.
Monitor nodes use port 6789 for communication within the Ceph cluster. The monitor where the calamari-lite is running uses port 8002 for access to the Calamari REST-based API.
On each Ceph OSD node, the OSD daemon uses several ports in the range 6800-7300:
One for communicating with clients and monitors over the public network
One for sending data to other OSDs over a cluster network, if available; otherwise, over thepublic network
One for exchanging heartbeat packets over a cluster network, if available; otherwise, over thepublic network
Ceph object gateway nodes use port 7480 by default. However, you can change the default port, forexample to port 80. To use the SSL/TLS service, open port 443.
For more information about public and cluster network, see Network.
Configuring Access
1. As root, on all Ceph Monitor nodes, open port 6789 on the public network:
$ sudo iptables -I INPUT 1 -i <iface> -p tcp -s <IP-address>/<prefix> --dport 6789 -j ACCEPT
2. If calamari-lite is running on the Ceph Monitor node, as root, open port 8002 on the publicnetwork:
$ sudo iptables -I INPUT 1 -i <iface> -p tcp -s <IP-address>/<prefix> --dport 8002 -j ACCEPT
3. As root, on all OSD nodes, open ports 6800-7300:
CHAPTER 2. PREREQUISITES
11

$ sudo iptables -I INPUT 1 -i <iface> -m multiport -p tcp -s <IP-address>/<prefix> --dports 6800:7300 -j ACCEPT
Where <ip-address> is the network address of the OSD nodes.
4. As root, on all object gateway nodes, open the relevant port or ports on the public network.
a. To open the default port 7480:
$ sudo iptables -I INPUT 1 -i <iface> -p tcp -s <IP-address>/<prefix> --dport 7480 -j ACCEPT
b. Optionally, as root, if you changed the default Ceph object gateway port, for example toport 80, open this port:
$ sudo iptables -I INPUT 1 -i <iface> -p tcp -s <IP-address>/<prefix> --dport 80 -j ACCEPT
c. Optionally, as root, to use SSL/TLS, open port 443:
$ sudo iptables -I INPUT 1 -i <iface> -p tcp -s <IP-address>/<prefix> --dport 443 -j ACCEPT
5. As root, make the changes persistent on each node:
a. Install the iptables-persistent package:
$ sudo apt-get install iptables-persistent
b. In the terminal UI that appears, select yes to save current IPv4 iptables rules to the /etc/iptables/rules.v4 file and current IPv6 iptables rules to the /etc/iptables/rules.v6 file.
NOTE
If you add a new iptables rule after installing iptables-persistent,add the new rule to the rules file:
$ sudo iptables-save > /etc/iptables/rules.v4
Return to prerequisite checklist
2.6. CONFIGURING NETWORK TIME PROTOCOL
NOTE
If using Ansible to deploy a Red Hat Ceph Storage cluster, then the installation,configuration, and enabling NTP is done automatically during the deployment.
You must configure the Network Time Protocol (NTP) on all Ceph Monitor and OSD nodes. Ensure thatCeph nodes are NTP peers. NTP helps preempt issues that arise from clock drift.
Red Hat Ceph Storage 2 Installation Guide for Ubuntu
12

1. As root, install the ntp package:
$ sudo apt-get install ntp
2. As root, start the NTP service and ensure it is running:
$ sudo service ntp start$ sudo service ntp status
3. Ensure that NTP is synchronizing Ceph monitor node clocks properly:
$ ntpq -p
Return to prerequisite checklist
2.7. CREATING AN ANSIBLE USER WITH SUDO ACCESS
Ansible must login to Ceph nodes as a user that has passwordless root privileges, because Ansibleneeds to install software and configuration files without prompting for passwords.
Red Hat recommends creating an Ansible user on all Ceph nodes in the cluster.
IMPORTANT
Do not use ceph as the user name. The ceph user name is reserved for the Cephdaemons.
A uniform user name across the cluster can improve ease of use, but avoid using obvioususer names, because intruders typically use them to for brute force attacks. For example, root, admin, or <productname> are not advised.
The following procedure, substituting <username> for the user name you define, describes how tocreate an Ansible user with passwordless root privileges on a Ceph node.
1. Use the ssh command to log in to a Ceph node:
$ ssh <user_name>@<hostname>
Replace <hostname> with the host name of the Ceph node.
2. Create a new Ansible user and set a new password for this user:
$sudo adduser <username>
3. Ensure that the user you added has the root privileges:
$ sudo cat << EOF >/etc/sudoers.d/<username><username> ALL = (root) NOPASSWD:ALLEOF
4. Ensure the correct file permissions:
CHAPTER 2. PREREQUISITES
13

$ sudo chmod 0440 /etc/sudoers.d/<username>
Return to prerequisite checklist
2.8. ENABLING PASSWORD-LESS SSH (ANSIBLE DEPLOYMENTONLY)
Since Ansible will not prompt for a password, you must generate SSH keys on the administration nodeand distribute the public key to each Ceph node.
1. Generate the SSH keys, but do not use sudo or the root user. Instead, use the Ansible useryou created in Creating an Ansible User with Sudo Access. Leave the passphrase empty:
$ ssh-keygen
Generating public/private key pair.Enter file in which to save the key (/ceph-admin/.ssh/id_rsa):Enter passphrase (empty for no passphrase):Enter same passphrase again:Your identification has been saved in /ceph-admin/.ssh/id_rsa.Your public key has been saved in /ceph-admin/.ssh/id_rsa.pub.
2. Copy the key to each Ceph Node, replacing <username> with the user name you created inCreating an Ansible User with Sudo Access and <hostname> with a host name of a Cephnode:
$ ssh-copy-id <username>@<hostname>
3. Modify or create (using a utility such as vi) the ~/.ssh/config file of the Ansible administrationnode so that Ansible can log in to Ceph nodes as the user you created without requiring you tospecify the -u <username> option each time you execute the ansible-playbookcommand. Replace <username> with the name of the user you created and <hostname> witha host name of a Ceph node:
Host node1 Hostname <hostname> User <username>Host node2 Hostname <hostname> User <username>Host node3 Hostname <hostname> User <username>
After editing the ~/.ssh/config file on the Ansible administration node, ensure thepermissions are correct:
$ chmod 600 ~/.ssh/config
Return to prerequisite checklist
Red Hat Ceph Storage 2 Installation Guide for Ubuntu
14

CHAPTER 3. STORAGE CLUSTER INSTALLATIONProduction Ceph storage clusters start with a minimum of three monitor hosts and three OSD nodescontaining multiple OSDs.
You can install a Red Hat Ceph Storage cluster by using:
Ansible automation application
Command-line interface
3.1. INSTALLING RED HAT CEPH STORAGE USING ANSIBLE
Previously, Red Hat did not provide the ceph-ansible package for Ubuntu. In Red Hat Ceph Storageversion 2 and later, you can use the Ansible automation application to deploy a Ceph cluster from anUbuntu node. Execute the procedures in Figure 2.1, “Prerequisite Workflow” first.
To add more Monitors or OSDs to an existing storage cluster, see the Red Hat Ceph StorageAdministration Guide for details:
Adding a Monitor
Adding an OSD
Before you start
Install Python on all nodes:
# apt install python
3.1.1. Installing ceph-ansible
1. Install the ceph-ansible package:
$ sudo apt-get install ceph-ansible
2. As root, add the Ceph hosts to the /etc/ansible/hosts file. Remember to comment outexample hosts.If the Ceph hosts have sequential naming, consider using a range:
a. Add Monitor nodes under the [mons] section:
CHAPTER 3. STORAGE CLUSTER INSTALLATION
15

[mons]<monitor-host-name><monitor-host-name><monitor-host-name>
b. Add OSD nodes under the [osds] section:
[osds]<osd-host-name[1:10]>
Optionally, use the devices parameter to specify devices that the OSD nodes will use. Usea comma-separated list to list multiple devices.
[osds]<ceph-host-name> devices="[ '<device_1>', '<device_2>' ]"
For example:
[osds]ceph-osd-01 devices="[ '/dev/sdb', '/dev/sdc' ]"ceph-osd-02 devices="[ '/dev/sdb', '/dev/sdc', '/dev/sdd' ]"
When specifying no devices, then set the osd_auto_discovery option to true in the osds.yml file. See Section 3.1.4, “Configuring Ceph OSD Settings” for more details.
Using the devices parameter is useful when OSDs use devices with different names orwhen one of the devices failed on one of the OSDs. See Section A.1, “Ansible StopsInstallation Because It Detects Less Devices Than It Expected” for more details.
3. As the Ansible user, ensure that Ansible can reach the Ceph hosts:
$ ansible all -m ping
NOTE
See Section 2.7, “Creating an Ansible User with Sudo Access” for more details oncreating an Ansible user.
3.1.2. Configuring Ceph Global Settings
1. Create a directory under the home directory so Ansible can write the keys:
# cd ~# mkdir ceph-ansible-keys
2. As root, create a symbolic link to the Ansible group_vars directory in the /etc/ansible/directory:
# ln -s /usr/share/ceph-ansible/group_vars /etc/ansible/group_vars
3. As root, create an all.yml file from the all.yml.sample file and open it for editing:
Red Hat Ceph Storage 2 Installation Guide for Ubuntu
16

# cd /etc/ansible/group_vars# cp all.yml.sample all.yml# vim all.yml
4. Uncomment the fetch_directory setting under the GENERAL section. Then, point it to thedirectory you created in step 1:
fetch_directory: ~/ceph-ansible-keys
5. Uncomment the ceph_repository_type setting and set it to either cdn or iso:
ceph_repository_type: cdn
6. Select the installation method. There are two approaches:
a. If Ceph hosts have connectivity to the Red Hat Content Delivery Network (CDN), uncommentand set the following:
ceph_origin: repositoryceph_repository: rhcsceph_repository_type: cdnceph_rhcs_version: 2
b. If Ceph nodes cannot connect to the Red Hat Content Delivery Network (CDN), uncommentthe ceph_repository_type setting and set it to iso. This approach is most frequentlyused in high security environments.
ceph_repository_type: iso
Then, uncomment the ceph_rhcs_iso_path setting and specify the path to the ISOimage:
ceph_rhcs_iso_path: <path>
Example
ceph_rhcs_iso_path: /path/to/ISO_file.iso
7. For RCHS 2.5 and later versions, uncomment and set ceph_rhcs_cdn_debian_repo and ceph_rhcs_cdn_debian_repo_version so that Ansible can automatically enable andaccess Ubuntu online repositories:
ceph_rhcs_cdn_debian_repo: <repo-path>ceph_rhcs_cdn_debian_repo_version: <repo-version>
Example
ceph_rhcs_cdn_debian_repo: https://<login>:<pwd>@rhcs.download.redhat.comceph_rhcs_cdn_debian_repo_version: /2-release/
CHAPTER 3. STORAGE CLUSTER INSTALLATION
17

Where <login> is the RHN user login and <pwd> is the RHN user’s password.
8. Set the generate_fsid setting to false:
generate_fsid: false
NOTE
With generate_fsid set to false, then you must specify a value for the FileSystem Identifier (FSID) manually. For example, using the command-line utility, uuidgen, you can generate a Universally Unique Identifier (UUID). Once yougenerate a UUID, then uncomment the fsid setting and specify the generatedUUID:
fsid: <generated_uuid>
With generate_fsid set to true, then the UUID will be automaticallygenerated. This removes the need to specify the UUID in the fsid setting.
9. To enable authentication, uncomment the cephx setting under the Ceph Configuration section.Red Hat recommends running Ceph with authentication enabled:
cephx: true
10. Uncomment the monitor_interface setting and specify the network interface:
monitor_interface:
Example
monitor_interface: eth0
NOTE
The monitor_interface setting will use the IPv4 address. To use an IPv6address, use the monitor_address setting instead.
11. If not using IPv6, then skip this step. Uncomment and set the ip_version option:
ip_version: ipv6
12. Set journal size:
journal_size: <size_in_MB>
If not filled, the default journal size will be 5 GB. See Journal Settings for additional details.
13. Set the public network. Optionally, set the cluster network, too:
public_network: <public_network>cluster_network: <cluster_network>
Red Hat Ceph Storage 2 Installation Guide for Ubuntu
18

See Section 2.4, “Configuring Network” and Network Configuration Reference for additionaldetails.
14. If not using IPv6, then skip this step. Uncomment and set the radosgw_civetweb_bind_ipoption:
radosgw_civetweb_bind_ip: "[{{ ansible_default_ipv6.address }}]"
IMPORTANT
Currently, there is a rendering bug when displaying content within double curlybrackets on the Customer Portal. The Customer Portal team is working diligentlyto resolve this issue.
The HTML escape codes being displayed in the above step represent the left ({)and right (}) curly brackets respectively. For example, written in long hand, the radosgw_civetweb_bind_ip option would be the following:
radosgw_civetweb_bind_ip: “[<left_curly_bracket><left_curly_bracket> ansible_default_ipv6.address <right_curly_bracket><right_curly_bracket>]"
3.1.3. Configuring Monitor Settings
Ansible will create Ceph Monitors without any additional configuration steps. However, you may overridedefault settings for authentication, and for use with OpenStack. By default, the Calamari API is disabled.
To configure monitors, perform the following:
1. Navigate to the /etc/ansible/group_vars/ directory:
# cd /etc/ansible/group_vars/
2. As root, create an mons.yml file from mons.yml.sample file and open it for editing:
# cp mons.yml.sample mons.yml# vim mons.yml
3. To enable the Calamari API, uncomment the calamari setting and set it to true:
calamari: true
4. To configure other settings, uncomment them and set appropriate values.
3.1.4. Configuring Ceph OSD Settings
To configure OSDs:
1. Navigate to the /etc/ansible/group_vars/ directory:
CHAPTER 3. STORAGE CLUSTER INSTALLATION
19

# cd /etc/ansible/group_vars/
2. As root, create a new osds.yml file from the osds.yml.sample file and open it for editing:
# cp osds.yml.sample osds.yml# vim osds.yml
3. Uncomment and set settings that are relevant for your use case. See Table 3.1, “What settingsare needed for my use case?” for details.
4. Once you are done editing the file, save your changes and close the file.
Table 3.1. What settings are needed for my use case?
I want: Relevant Options Comments
to have the Ceph journal and OSDdata co-located on the samedevice and to specify OSD diskson my own.
devices
journal_collocation: true
The devices setting accepts alist of devices. Ensure that thespecified devices correspond tothe storage devices on the OSDnodes.
to have the Ceph journal and OSDdata co-located on the samedevice and ceph-ansible todetect and configure all theavailable devices.
osd_auto_discovery: true
journal_collocation: true
to use one or more dedicateddevices to store the Ceph journal.
devices
raw_multi_journal: true
raw_journal_devices
The devices and raw_journal_devicessettings except a list of devices.Ensure that the devices specifiedcorrespond to the storage deviceson the OSD nodes.
to use directories instead of disks. osd_directory: true
osd_directories
The osd_directories settingaccepts a list of directories.IMPORTANT: Red Hat currentlydoes not support this scenario.
to have the Ceph journal and OSDdata co-located on the samedevice and encrypt OSD data.
devices
dmcrypt_journal_collocation: true
The devices setting accepts alist of devices. Ensure that thespecified devices correspond tothe storage devices on the OSDnodes.
Note that all OSDs will beencrypted. For details, see theEncryption chapter in the Red HatCeph Storage 2 ArchitectureGuide.
Red Hat Ceph Storage 2 Installation Guide for Ubuntu
20

to use one or more dedicateddevices to store the Ceph journaland encrypt OSD data.
devices
dmcrypt_dedicated_journal: true
raw_journal_devices
The devices and raw_journal_devicessettings except a list of devices.Ensure that the devices specifiedcorrespond to the storage deviceson the OSD nodes.
Note that all OSDs will beencrypted. For details, see theEncryption chapter in the Red HatCeph Storage 2 ArchitectureGuide.
to use the BlueStore back endinstead of the FileStore back end.
devices
bluestore: true
The devices setting accepts alist of devices.
For details on BlueStore, see theOSD BlueStore (TechnologyPreview) chapter in theAdministration Guide for Red HatCeph Storage.
I want: Relevant Options Comments
For additional settings, see the osds.yml.sample file located in /usr/share/ceph-ansible/group_vars/.
WARNING
Some OSD options will conflict with each other. Avoid enabling these sets of optionstogether:
journal_collocation and raw_multi_journal
journal_collocation and osd_directory
raw_multi_journal and osd_directory
In addition, specifying one of these options is required.
3.1.5. Overriding Ceph Default Settings
Unless otherwise specified in the Ansible configuration files, Ceph uses its default settings.
Because Ansible manages the Ceph configuration file, edit the /etc/ansible/group_vars/all.ymlfile to change the Ceph configuration. Use the ceph_conf_overrides setting to override the defaultCeph configuration.
CHAPTER 3. STORAGE CLUSTER INSTALLATION
21

Ansible supports the same sections as the Ceph configuration file; [global], [mon], [osd], [mds], [rgw], and so on. You can also override particular instances, such as a particular Ceph Object Gatewayinstance. For example:
#################### CONFIG OVERRIDE ####################
ceph_conf_overrides: client.rgw.rgw1: log_file: /var/log/ceph/ceph-rgw-rgw1.log
NOTE
Ansible does not include braces when referring to a particular section of the Cephconfiguration file. Sections and settings names are terminated with a colon.
IMPORTANT
Do not set the cluster network with the cluster_network parameter in the CONFIGOVERRIDE section because this can cause two conflicting cluster networks being set inthe Ceph configuration file.
To set the cluster network, use the cluster_network parameter in the CEPHCONFIGURATION section. For details, see Configuring Ceph Global Settings.
3.1.6. Deploying a Ceph Cluster
1. Navigate to the Ansible configuration directory:
# cd /usr/share/ceph-ansible
2. As root, create a site.yml file from the site.yml.sample file:
# cp site.yml.sample site.yml
3. As the Ansible user, run the Ansible playbook from within the directory where the playbookexists:
$ ansible-playbook site.yml [-u <user_name>]
Once the playbook runs, it creates a running Ceph cluster.
NOTE
During the deployment of a Red Hat Ceph Storage cluster with Ansible, theinstallation, configuration, and enabling NTP is done automatically on each nodein the storage cluster.
4. As root, on the Ceph Monitor nodes, create a Calamari user:
Syntax
Red Hat Ceph Storage 2 Installation Guide for Ubuntu
22

# calamari-ctl add_user --password <password> --email <email_address> <user_name>
Example
# calamari-ctl add_user --password abc123 --email [email protected] user1
3.2. INSTALLING RED HAT CEPH STORAGE BY USING THECOMMAND-LINE INTERFACE
All Ceph clusters require at least one monitor, and at least as many OSDs as copies of an object storedon the cluster. Red Hat recommends using three monitors for production environments and a minimum ofthree Object Storage Devices (OSD).
Bootstrapping the initial monitor is the first step in deploying a Ceph storage cluster. Ceph monitordeployment also sets important criteria for the entire cluster, such as:
The number of replicas for pools
The number of placement groups per OSD
The heartbeat intervals
Any authentication requirement
Most of these values are set by default, so it is useful to know about them when setting up the cluster forproduction.
Installing a Ceph storage cluster by using the command line interface involves these steps:
Bootstrapping the initial Monitor node
Adding an Object Storage Device (OSD) node
IMPORTANT
Red Hat does not support or test upgrading manually deployed clusters. Currently, theonly supported way to upgrade to a minor version of Red Hat Ceph Storage 2 is to use theAnsible automation application as described in Important. Therefore, Red Hatrecommends to use Ansible to deploy a new cluster with Red Hat Ceph Storage 2. SeeSection 3.1, “Installing Red Hat Ceph Storage using Ansible” for details.
You can use command-line utilities, such as apt-get, to upgrade manually deployedclusters, but Red Hat does not support or test this.
3.2.1. Monitor Bootstrapping
Bootstrapping a Monitor and by extension a Ceph storage cluster, requires the following data:
Unique Identifier
The File System Identifier (fsid) is a unique identifier for the cluster. The fsid was originally usedwhen the Ceph storage cluster was principally used for the Ceph file system. Ceph now supports
CHAPTER 3. STORAGE CLUSTER INSTALLATION
23

native interfaces, block devices, and object storage gateway interfaces too, so fsid is a bit of amisnomer.
Cluster Name
Ceph clusters have a cluster name, which is a simple string without spaces. The default cluster nameis ceph, but you can specify a different cluster name. Overriding the default cluster name isespecially useful when you work with multiple clusters.When you run multiple clusters in a multi-site architecture, the cluster name for example, us-west, us-east identifies the cluster for the current command-line session.
NOTE
To identify the cluster name on the command-line interface, specify the Cephconfiguration file with the cluster name, for example, ceph.conf, us-west.conf, us-east.conf, and so on.
Example:
# ceph --cluster us-west.conf ...
Monitor Name
Each Monitor instance within a cluster has a unique name. In common practice, the Ceph Monitorname is the node name. Red Hat recommend one Ceph Monitor per node, and no co-locating theCeph OSD daemons with the Ceph Monitor daemon. To retrieve the short node name, use the hostname -s command.
Monitor Map
Bootstrapping the initial Monitor requires you to generate a Monitor map. The Monitor map requires:
The File System Identifier (fsid)
The cluster name, or the default cluster name of ceph is used
At least one host name and its IP address.
Monitor Keyring
Monitors communicate with each other by using a secret key. You must generate a keyring with aMonitor secret key and provide it when bootstrapping the initial Monitor.
Administrator Keyring
To use the ceph command-line interface utilities, create the client.admin user and generate itskeyring. Also, you must add the client.admin user to the Monitor keyring.
The foregoing requirements do not imply the creation of a Ceph configuration file. However, as a bestpractice, Red Hat recommends creating a Ceph configuration file and populating it with the fsid, the mon initial members and the mon host settings at a minimum.
You can get and set all of the Monitor settings at runtime as well. However, the Ceph configuration filemight contain only those settings which overrides the default values. When you add settings to a Cephconfiguration file, these settings override the default settings. Maintaining those settings in a Cephconfiguration file makes it easier to maintain the cluster.
To bootstrap the initial Monitor, perform the following steps:
Red Hat Ceph Storage 2 Installation Guide for Ubuntu
24

1. Enable the Red Hat Ceph Storage 2 Monitor repository. For ISO-based installations, see the ISOinstallation section.
2. On your initial Monitor node, install the ceph-mon package as root:
$ sudo apt-get install ceph-mon
3. As root, create a Ceph configuration file in the /etc/ceph/ directory. By default, Ceph uses ceph.conf, where ceph reflects the cluster name:
Syntax
# touch /etc/ceph/<cluster_name>.conf
Example
# touch /etc/ceph/ceph.conf
4. As root, generate the unique identifier for your cluster and add the unique identifier to the [global] section of the Ceph configuration file:
Syntax
# echo "[global]" > /etc/ceph/<cluster_name>.conf# echo "fsid = `uuidgen`" >> /etc/ceph/<cluster_name>.conf
Example
# echo "[global]" > /etc/ceph/ceph.conf# echo "fsid = `uuidgen`" >> /etc/ceph/ceph.conf
5. View the current Ceph configuration file:
$ cat /etc/ceph/ceph.conf[global]fsid = a7f64266-0894-4f1e-a635-d0aeaca0e993
6. As root, add the initial Monitor to the Ceph configuration file:
Syntax
# echo "mon initial members = <monitor_host_name>[,<monitor_host_name>]" >> /etc/ceph/<cluster_name>.conf
Example
# echo "mon initial members = node1" >> /etc/ceph/ceph.conf
7. As root, add the IP address of the initial Monitor to the Ceph configuration file:
Syntax
CHAPTER 3. STORAGE CLUSTER INSTALLATION
25

# echo "mon host = <ip-address>[,<ip-address>]" >> /etc/ceph/<cluster_name>.conf
Example
# echo "mon host = 192.168.0.120" >> /etc/ceph/ceph.conf
NOTE
To use IPv6 addresses, you must set the ms bind ipv6 option to true. Seethe Red Hat Ceph Storage Configuration Guide for more details.
8. As root, create the keyring for the cluster and generate the Monitor secret key:
Syntax
# ceph-authtool --create-keyring /tmp/<cluster_name>.mon.keyring --gen-key -n mon. --cap mon '<capabilites>'
Example
# ceph-authtool --create-keyring /tmp/ceph.mon.keyring --gen-key -n mon. --cap mon 'allow *'creating /tmp/ceph.mon.keyring
9. As root, generate an administrator keyring, generate a <cluster_name>.client.admin.keyring user and add the user to the keyring:
Syntax
# ceph-authtool --create-keyring /etc/ceph/<cluster_name>.client.admin.keyring --gen-key -n client.admin --set-uid=0 --cap mon '<capabilites>' --cap osd '<capabilites>' --cap mds '<capabilites>'
Example
# ceph-authtool --create-keyring /etc/ceph/ceph.client.admin.keyring --gen-key -n client.admin --set-uid=0 --cap mon 'allow *' --cap osd 'allow *' --cap mds 'allow'creating /etc/ceph/ceph.client.admin.keyring
10. As root, add the <cluster_name>.client.admin.keyring key to the <cluster_name>.mon.keyring:
Syntax
# ceph-authtool /tmp/<cluster_name>.mon.keyring --import-keyring /etc/ceph/<cluster_name>.client.admin.keyring
Example
Red Hat Ceph Storage 2 Installation Guide for Ubuntu
26

# ceph-authtool /tmp/ceph.mon.keyring --import-keyring /etc/ceph/ceph.client.admin.keyringimporting contents of /etc/ceph/ceph.client.admin.keyring into /tmp/ceph.mon.keyring
11. Generate the Monitor map. Specify using the node name, IP address and the fsid, of the initialMonitor and save it as /tmp/monmap:
Syntax
$ monmaptool --create --add <monitor_host_name> <ip-address> --fsid <uuid> /tmp/monmap
Example
$ monmaptool --create --add node1 192.168.0.120 --fsid a7f64266-0894-4f1e-a635-d0aeaca0e993 /tmp/monmapmonmaptool: monmap file /tmp/monmapmonmaptool: set fsid to a7f64266-0894-4f1e-a635-d0aeaca0e993monmaptool: writing epoch 0 to /tmp/monmap (1 monitors)
12. As root on the initial Monitor node, create a default data directory:
Syntax
# mkdir /var/lib/ceph/mon/<cluster_name>-<monitor_host_name>
Example
# mkdir /var/lib/ceph/mon/ceph-node1
13. As root, populate the initial Monitor daemon with the Monitor map and keyring:
Syntax
# ceph-mon [--cluster <cluster_name>] --mkfs -i <monitor_host_name> --monmap /tmp/monmap --keyring /tmp/<cluster_name>.mon.keyring
Example
# ceph-mon --mkfs -i node1 --monmap /tmp/monmap --keyring /tmp/ceph.mon.keyringceph-mon: set fsid to a7f64266-0894-4f1e-a635-d0aeaca0e993ceph-mon: created monfs at /var/lib/ceph/mon/ceph-node1 for mon.node1
14. View the current Ceph configuration file:
# cat /etc/ceph/ceph.conf[global]fsid = a7f64266-0894-4f1e-a635-d0aeaca0e993mon_initial_members = node1
CHAPTER 3. STORAGE CLUSTER INSTALLATION
27

mon_host = 192.168.0.120
For more details on the various Ceph configuration settings, see the Red Hat Ceph StorageConfiguration Guide. The following example of a Ceph configuration file lists some of the mostcommon configuration settings:
Example
[global]fsid = <cluster-id>mon initial members = <monitor_host_name>[, <monitor_host_name>]mon host = <ip-address>[, <ip-address>]public network = <network>[, <network>]cluster network = <network>[, <network>]auth cluster required = cephxauth service required = cephxauth client required = cephxosd journal size = <n>filestore xattr use omap = trueosd pool default size = <n> # Write an object n times.osd pool default min size = <n> # Allow writing n copy in a degraded state.osd pool default pg num = <n>osd pool default pgp num = <n>osd crush chooseleaf type = <n>
15. As root, create the done file:
Syntax
# touch /var/lib/ceph/mon/<cluster_name>-<monitor_host_name>/done
Example
# touch /var/lib/ceph/mon/ceph-node1/done
16. As root, update the owner and group permissions on the newly created directory and files:
Syntax
# chown -R <owner>:<group> <path_to_directory>
Example
# chown -R ceph:ceph /var/lib/ceph/mon# chown -R ceph:ceph /var/log/ceph# chown -R ceph:ceph /var/run/ceph# chown ceph:ceph /etc/ceph/ceph.client.admin.keyring# chown ceph:ceph /etc/ceph/ceph.conf# chown ceph:ceph /etc/ceph/rbdmap
Red Hat Ceph Storage 2 Installation Guide for Ubuntu
28
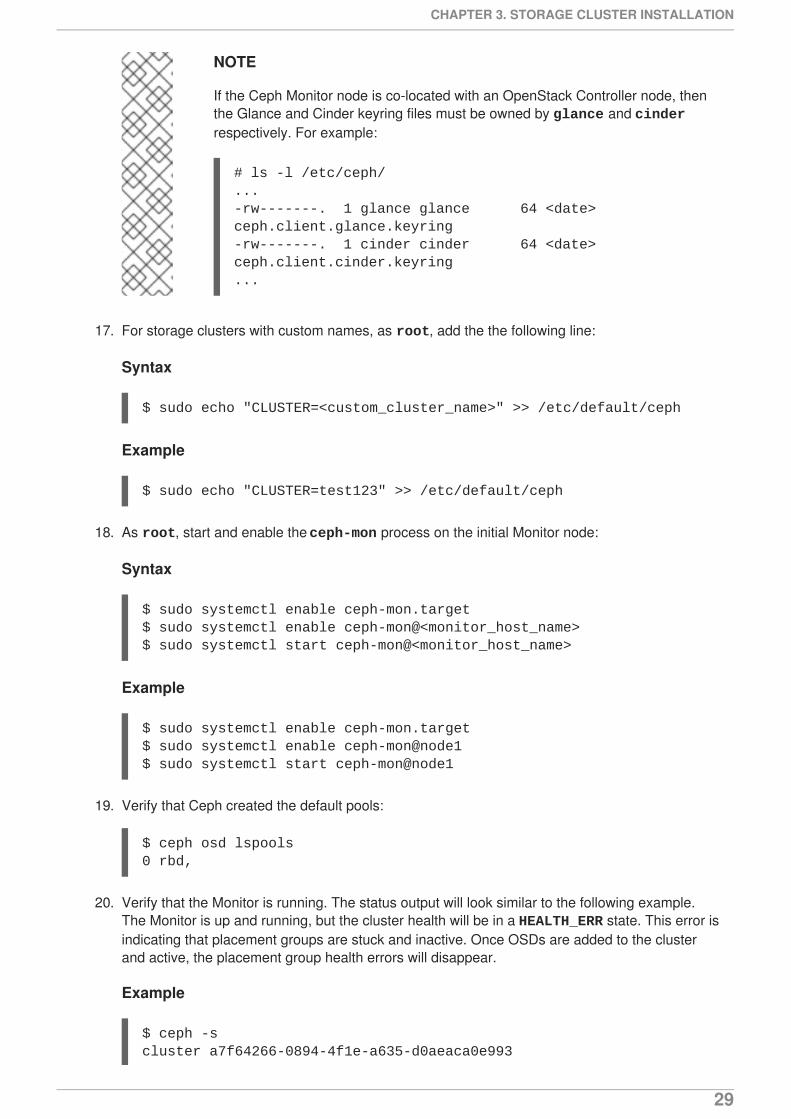
NOTE
If the Ceph Monitor node is co-located with an OpenStack Controller node, thenthe Glance and Cinder keyring files must be owned by glance and cinderrespectively. For example:
# ls -l /etc/ceph/...-rw-------. 1 glance glance 64 <date> ceph.client.glance.keyring-rw-------. 1 cinder cinder 64 <date> ceph.client.cinder.keyring...
17. For storage clusters with custom names, as root, add the the following line:
Syntax
$ sudo echo "CLUSTER=<custom_cluster_name>" >> /etc/default/ceph
Example
$ sudo echo "CLUSTER=test123" >> /etc/default/ceph
18. As root, start and enable the ceph-mon process on the initial Monitor node:
Syntax
$ sudo systemctl enable ceph-mon.target$ sudo systemctl enable ceph-mon@<monitor_host_name>$ sudo systemctl start ceph-mon@<monitor_host_name>
Example
$ sudo systemctl enable ceph-mon.target$ sudo systemctl enable ceph-mon@node1$ sudo systemctl start ceph-mon@node1
19. Verify that Ceph created the default pools:
$ ceph osd lspools0 rbd,
20. Verify that the Monitor is running. The status output will look similar to the following example.The Monitor is up and running, but the cluster health will be in a HEALTH_ERR state. This error isindicating that placement groups are stuck and inactive. Once OSDs are added to the clusterand active, the placement group health errors will disappear.
Example
$ ceph -scluster a7f64266-0894-4f1e-a635-d0aeaca0e993
CHAPTER 3. STORAGE CLUSTER INSTALLATION
29

health HEALTH_ERR 192 pgs stuck inactive; 192 pgs stuck unclean; no osdsmonmap e1: 1 mons at {node1=192.168.0.120:6789/0}, election epoch 1, quorum 0 node1osdmap e1: 0 osds: 0 up, 0 inpgmap v2: 192 pgs, 3 pools, 0 bytes data, 0 objects0 kB used, 0 kB / 0 kB avail192 creating
To add more Red Hat Ceph Storage Monitors to the storage cluster, see the Red Hat Ceph StorageAdministration Guide
3.2.2. OSD Bootstrapping
Once you have your initial monitor running, you can start adding the Object Storage Devices (OSDs).Your cluster cannot reach an active + clean state until you have enough OSDs to handle thenumber of copies of an object.
The default number of copies for an object is three. You will need three OSD nodes at minimum.However, if you only want two copies of an object, therefore only adding two OSD nodes, then updatethe osd pool default size and osd pool default min size settings in the Cephconfiguration file.
For more details, see the OSD Configuration Reference section in the Red Hat Ceph StorageConfiguration Guide.
After bootstrapping the initial monitor, the cluster has a default CRUSH map. However, the CRUSH mapdoes not have any Ceph OSD daemons mapped to a Ceph node.
To add an OSD to the cluster and updating the default CRUSH map, execute the following on each OSDnode:
1. Enable the Red Hat Ceph Storage 2 OSD repository. For ISO-based installations, see the ISOinstallation section.
2. As root, install the ceph-osd package on the Ceph OSD node:
$ sudo apt-get install ceph-osd
3. Copy the Ceph configuration file and administration keyring file from the initial Monitor node tothe OSD node:
Syntax
# scp <user_name>@<monitor_host_name>:<path_on_remote_system> <path_to_local_file>
Example
# scp root@node1:/etc/ceph/ceph.conf /etc/ceph# scp root@node1:/etc/ceph/ceph.client.admin.keyring /etc/ceph
4. Generate the Universally Unique Identifier (UUID) for the OSD:
Red Hat Ceph Storage 2 Installation Guide for Ubuntu
30

$ uuidgenb367c360-b364-4b1d-8fc6-09408a9cda7a
5. As root, create the OSD instance:
Syntax
# ceph osd create <uuid> [<osd_id>]
Example
# ceph osd create b367c360-b364-4b1d-8fc6-09408a9cda7a0
NOTE
This command outputs the OSD number identifier needed for subsequent steps.
6. As root, create the default directory for the new OSD:
Syntax
# mkdir /var/lib/ceph/osd/<cluster_name>-<osd_id>
Example
# mkdir /var/lib/ceph/osd/ceph-0
7. As root, prepare the drive for use as an OSD, and mount it to the directory you just created.Create a partition for the Ceph data and journal. The journal and the data partitions can belocated on the same disk. This example is using a 15 GB disk:
Syntax
# parted <path_to_disk> mklabel gpt# parted <path_to_disk> mkpart primary 1 10000# mkfs -t <fstype> <path_to_partition># mount -o noatime <path_to_partition> /var/lib/ceph/osd/<cluster_name>-<osd_id># echo "<path_to_partition> /var/lib/ceph/osd/<cluster_name>-<osd_id> xfs defaults,noatime 1 2" >> /etc/fstab
Example
# parted /dev/sdb mklabel gpt# parted /dev/sdb mkpart primary 1 10000# parted /dev/sdb mkpart primary 10001 15000# mkfs -t xfs /dev/sdb1# mount -o noatime /dev/sdb1 /var/lib/ceph/osd/ceph-0# echo "/dev/sdb1 /var/lib/ceph/osd/ceph-0 xfs defaults,noatime 1 2" >> /etc/fstab
CHAPTER 3. STORAGE CLUSTER INSTALLATION
31

8. As root, initialize the OSD data directory:
Syntax
# ceph-osd -i <osd_id> --mkfs --mkkey --osd-uuid <uuid>
Example
# ceph-osd -i 0 --mkfs --mkkey --osd-uuid b367c360-b364-4b1d-8fc6-09408a9cda7a... auth: error reading file: /var/lib/ceph/osd/ceph-0/keyring: can't open /var/lib/ceph/osd/ceph-0/keyring: (2) No such file or directory... created new key in keyring /var/lib/ceph/osd/ceph-0/keyring
NOTE
The directory must be empty before you run ceph-osd with the --mkkey option.If you have a custom cluster name, the ceph-osd utility requires the --clusteroption.
9. As root, register the OSD authentication key. If your cluster name differs from ceph, insert yourcluster name instead:
Syntax
# ceph auth add osd.<osd_id> osd 'allow *' mon 'allow profile osd' -i /var/lib/ceph/osd/<cluster_name>-<osd_id>/keyring
Example
# ceph auth add osd.0 osd 'allow *' mon 'allow profile osd' -i /var/lib/ceph/osd/ceph-0/keyringadded key for osd.0
10. As root, add the OSD node to the CRUSH map:
Syntax
# ceph [--cluster <cluster_name>] osd crush add-bucket <host_name> host
Example
# ceph osd crush add-bucket node2 host
11. As root, place the OSD node under the default CRUSH tree:
Syntax
Red Hat Ceph Storage 2 Installation Guide for Ubuntu
32

# ceph [--cluster <cluster_name>] osd crush move <host_name> root=default
Example
# ceph osd crush move node2 root=default
12. As root, add the OSD disk to the CRUSH map
Syntax
# ceph [--cluster <cluster_name>] osd crush add osd.<osd_id> <weight> [<bucket_type>=<bucket-name> ...]
Example
# ceph osd crush add osd.0 1.0 host=node2add item id 0 name 'osd.0' weight 1 at location {host=node2} to crush map
NOTE
You can also decompile the CRUSH map, and add the OSD to the device list.Add the OSD node as a bucket, then add the device as an item in the OSD node,assign the OSD a weight, recompile the CRUSH map and set the CRUSH map.For more details, see the Red Hat Ceph Storage Storage Strategies Guide formore details.
13. As root, update the owner and group permissions on the newly created directory and files:
Syntax
# chown -R <owner>:<group> <path_to_directory>
Example
# chown -R ceph:ceph /var/lib/ceph/osd# chown -R ceph:ceph /var/log/ceph# chown -R ceph:ceph /var/run/ceph# chown -R ceph:ceph /etc/ceph
14. For storage clusters with custom names, as root, add the following line to the /etc/default/ceph file:
Syntax
$ sudo echo "CLUSTER=<custom_cluster_name>" >> /etc/default/ceph
Example
$ sudo echo "CLUSTER=test123" >> /etc/default/ceph
CHAPTER 3. STORAGE CLUSTER INSTALLATION
33

15. The OSD node is in your Ceph storage cluster configuration. However, the OSD daemon is down and in. The new OSD must be up before it can begin receiving data. As root, enable andstart the OSD process:
Syntax
$ sudo systemctl enable ceph-osd.target$ sudo systemctl enable ceph-osd@<osd_id>$ sudo systemctl start ceph-osd@<osd_id>
Example
$ sudo systemctl enable ceph-osd.target$ sudo systemctl enable ceph-osd@0$ sudo systemctl start ceph-osd@0
Once you start the OSD daemon, it is up and in.
Now you have the monitors and some OSDs up and running. You can watch the placement groups peerby executing the following command:
$ ceph -w
To view the OSD tree, execute the following command:
$ ceph osd tree
Example
ID WEIGHT TYPE NAME UP/DOWN REWEIGHT PRIMARY-AFFINITY-1 2 root default-2 2 host node2 0 1 osd.0 up 1 1-3 1 host node3 1 1 osd.1 up 1 1
To expand the storage capacity by adding new OSDs to the storage cluster, see the Red Hat CephStorage Administration Guide for more details.
3.2.3. Calamari Server Installation
The Calamari server provides a RESTful API for monitoring Ceph storage clusters.
To install calamari-server, perform the following steps on all Monitor nodes.
1. As root, enable the Red Hat Ceph Storage 2 Monitor repository
2. As root, install calamari-server:
$ sudo apt-get install calamari-server
Red Hat Ceph Storage 2 Installation Guide for Ubuntu
34

3. As root, initialize the calamari-server:
Syntax
$ sudo calamari-ctl clear --yes-i-am-sure$ sudo calamari-ctl initialize --admin-username <uid> --admin-password <pwd> --admin-email <email>
Example
$ sudo calamari-ctl clear --yes-i-am-sure$ sudo calamari-ctl initialize --admin-username admin --admin-password admin --admin-email [email protected]
IMPORTANT
The calamari-ctl clear --yes-i-am-sure command is only necessaryfor removing the database of old Calamari server installations. Running thiscommand on a new Calamari server results in an error.
NOTE
During initialization, the calamari-server will generate a self-signed certificateand a private key and place them in the /etc/calamari/ssl/certs/ and /etc/calamari/ssl/private directories respectively. Use HTTPS whenmaking requests. Otherwise, user names and passwords are transmitted in cleartext.
The calamari-ctl initialize process generates a private key and a self-signed certificate, whichmeans there is no need to purchase a certificate from a Certificate Authority (CA).
To verify access to the HTTPS API through a web browser, go to the following URL. Click through theuntrusted certificate warnings, because the auto-generated certificate is self-signed:
https://<calamari_hostname>:8002/api/v2/cluster
To use a key and certificate from a CA:
1. Purchase a certificate from a CA. During the process, you will generate a private key and acertificate for CA. Or you can also use the self-signed certificate generated by Calamari.
2. Save the private key associated to the certificate to a path, preferably under /etc/calamari/ssl/private/.
3. Save the certificate to a path, preferably under /etc/calamari/ssl/certs/.
4. Open the /etc/calamari/calamari.conf file.
5. Under the [calamari_web] section, modify ssl_cert and ssl_key to point to the respectivecertificate and key path, for example:
[calamari_web]...
CHAPTER 3. STORAGE CLUSTER INSTALLATION
35

ssl_cert = /etc/calamari/ssl/certs/calamari-lite-bundled.crtssl_key = /etc/calamari/ssl/private/calamari-lite.key
6. As root, re-initialize Calamari:
$ sudo calamari-ctl initialize
Red Hat Ceph Storage 2 Installation Guide for Ubuntu
36

CHAPTER 4. CLIENT INSTALLATIONRed Hat Ceph Storage supports the following types of Ceph clients:
Ceph CLI
The Ceph command-line interface (CLI) enables administrators to execute Ceph administrativecommands. See Section 4.2, “Ceph Command-line Interface Installation” for information on installingthe Ceph CLI.
Block Device
The Ceph Block Device is a thin-provisioned, resizable block device. See Section 4.3, “Ceph BlockDevice Installation” for information on installing Ceph Block Devices.
Object Gateway
The Ceph Object Ǵateway provides its own user management and Swift- and S3-compliant APIs.See Section 4.4, “Ceph Object Gateway Installation” for information on installing Ceph ObjectGateways.
In addition, the ceph-ansible utility provides the ceph-client role that copies the Cephconfiguration file and the administration keyring to nodes. See Section 4.1, “Installing the ceph-clientrole” for details.
IMPORTANT
To use Ceph clients, you must have a Ceph cluster storage running, preferably in the active + clean state.
In addition, before installing the Ceph clients, ensure to perform the tasks listed in theFigure 2.1, “Prerequisite Workflow” section.
4.1. INSTALLING THE CEPH-CLIENT ROLE
The ceph-client role copies the Ceph configuration file and administration keyring to a node. Inaddition, you can use this role to create custom pools and clients.
To deploy the ceph-client role by using Ansible, see the Red Hat Ceph Storage 2 Installation Guidefor Red Hat Enterprise Linux.
4.2. CEPH COMMAND-LINE INTERFACE INSTALLATION
The Ceph command-line interface (CLI) is provided by the ceph-common package and includes thefollowing utilities:
ceph
ceph-authtool
ceph-dencoder
rados
To install the Ceph CLI:
1. On the client node, enable the Tools repository.
CHAPTER 4. CLIENT INSTALLATION
37

2. On the client node, install the ceph-common package:
$ sudo apt-get install ceph-common
3. From the initial monitor node, copy the Ceph configuration file, in this case ceph.conf, and theadministration keyring to the client node:
Syntax
# scp /etc/ceph/<cluster_name>.conf <user_name>@<client_host_name>:/etc/ceph/# scp /etc/ceph/<cluster_name>.client.admin.keyring <user_name>@<client_host_name:/etc/ceph/
Example
# scp /etc/ceph/ceph.conf root@node1:/etc/ceph/# scp /etc/ceph/ceph.client.admin.keyring root@node1:/etc/ceph/
Replace <client_host_name> with the host name of the client node.
4.3. CEPH BLOCK DEVICE INSTALLATION
The following procedure shows how to install and mount a thin-provisioned, resizable Ceph BlockDevice.
IMPORTANT
Ceph Block Devices must be deployed on separate nodes from the Ceph Monitor andOSD nodes. Running kernel clients and kernel server daemons on the same node canlead to kernel deadlocks.
Before you start
Ensure to perform the tasks listed in the Section 4.2, “Ceph Command-line Interface Installation”section.
If you use Ceph Block Devices as a back end for virtual machines (VMs) that use QEMU,increase the default file descriptor. See the Ceph - VM hangs when transferring large amounts ofdata to RBD disk Knowledgebase article for details.
Installing Ceph Block Devices by Using the Command Line
1. Create a Ceph Block Device user named client.rbd with full permissions to files on OSDnodes (osd 'allow rwx') and output the result to a keyring file:
ceph auth get-or-create client.rbd mon 'allow r' osd 'allow rwx pool=<pool_name>' \-o /etc/ceph/rbd.keyring
Replace <pool_name> with the name of the pool that you want to allow client.rbd to haveaccess to, for example rbd:
Red Hat Ceph Storage 2 Installation Guide for Ubuntu
38

$ sudo ceph auth get-or-create \client.rbd mon 'allow r' osd 'allow rwx pool=rbd' \-o /etc/ceph/rbd.keyring
See the User Management section in the Red Hat Ceph Storage Administration Guide for moreinformation about creating users.
2. Create a block device image:
rbd create <image_name> --size <image_size> --pool <pool_name> \--name client.rbd --keyring /etc/ceph/rbd.keyring
Specify <image_name>, <image_size>, and <pool_name>, for example:
$ rbd create image1 --size 4096 --pool rbd \--name client.rbd --keyring /etc/ceph/rbd.keyring
CHAPTER 4. CLIENT INSTALLATION
39

WARNING
The default Ceph configuration includes the following Ceph Block Devicefeatures:
layering
exclusive-lock
object-map
deep-flatten
fast-diff
If you use the kernel RBD (krbd) client, you will not be able to map theblock device image because the current kernel version included in Red HatEnterprise Linux 7.3 does not support object-map, deep-flatten, and fast-diff.
To work around this problem, disable the unsupported features. Use one ofthe following options to do so:
Disable the unsupported features dynamically:
rbd feature disable <image_name> <feature_name>
For example:
# rbd feature disable image1 object-map deep-flatten fast-diff
Use the --image-feature layering option with the rbd createcommand to enable only layering on newly created block deviceimages.
Disable the features be default in the Ceph configuration file:
rbd_default_features = 1
This is a known issue, for details see the Release Notes Red Hat CephStorage 2.2.
All these features work for users that use the user-space RBD client toaccess the block device images.
3. Map the newly created image to the block device:
rbd map <image_name> --pool <pool_name>\--name client.rbd --keyring /etc/ceph/rbd.keyring
Red Hat Ceph Storage 2 Installation Guide for Ubuntu
40

For example:
$ sudo rbd map image1 --pool rbd --name client.rbd \--keyring /etc/ceph/rbd.keyring
4. Use the block device by creating a file system:
mkfs.ext4 -m5 /dev/rbd/<pool_name>/<image_name>
Specify the pool name and the image name, for example:
$ sudo mkfs.ext4 -m5 /dev/rbd/rbd/image1
This can take a few moments.
5. Mount the newly created file system:
mkdir <mount_directory>mount /dev/rbd/<pool_name>/<image_name> <mount_directory>
For example:
$ sudo mkdir /mnt/ceph-block-device$ sudo mount /dev/rbd/rbd/image1 /mnt/ceph-block-device
For additional details, see the Red Hat Ceph Storage Block Device Guide.
4.4. CEPH OBJECT GATEWAY INSTALLATION
The Ceph object gateway, also know as the RADOS gateway, is an object storage interface built on topof the librados API to provide applications with a RESTful gateway to Ceph storage clusters.
For more information about the Ceph object gateway, see the Object Gateway Guide for Ubuntu.
There are two ways to install the Ceph object gateway:
Using the Ansible automation application, see Section 4.4.1, “Installing Ceph Object Gateway byusing Ansible” for details
Using the comand-line interface, see Section 4.3.2, "Installing Ceph Object Gateway Manuallyfor details
4.4.1. Installing Ceph Object Gateway by using Ansible
To deploy the Ceph Object Gateway using Ansible, see the Red Hat Ceph Storage 2 Installation Guidefor Red Hat Enterprise Linux.
After installation for a multi-site cluster is complete, proceed to the Multi-site chapter in the ObjectGateway Guide for Ubuntu for details on configuring a cluster for multi-site.
4.4.2. Installing Ceph Object Gateway Manually
CHAPTER 4. CLIENT INSTALLATION
41

1. Enable the Red Hat Ceph Storage 2 Tools repository. For ISO-based installations, see the ISOinstallation section.
2. On the Object Gateway node, install the radosgw package:
$ sudo apt-get install radosgw
3. On the initial Monitor node, do the following steps.
a. Update the Ceph configuration file as follows:
[client.rgw.<obj_gw_hostname>]host = <obj_gw_hostname>rgw frontends = "civetweb port=80"rgw dns name = <obj_gw_hostname>.example.com
Where <obj_gw_hostname> is a short host name of the gateway node. To view the shorthost name, use the hostname -s command.
b. Copy the updated configuration file to the new Object Gateway node and all other nodes inthe Ceph storage cluster:
Syntax
$ sudo scp /etc/ceph/<cluster_name>.conf <user_name>@<target_host_name>:/etc/ceph
Example
$ sudo scp /etc/ceph/ceph.conf root@node1:/etc/ceph/
c. Copy the <cluster_name>.client.admin.keyring file to the new Object Gatewaynode:
Syntax
$ sudo scp /etc/ceph/<cluster_name>.client.admin.keyring <user_name>@<target_host_name>:/etc/ceph/
Example
$ sudo scp /etc/ceph/ceph.client.admin.keyring root@node1:/etc/ceph/
4. On the Object Gateway node, create the data directory:
Syntax
$ sudo mkdir -p /var/lib/ceph/radosgw/<cluster_name>-rgw.`hostname -s`
Example
Red Hat Ceph Storage 2 Installation Guide for Ubuntu
42

$ sudo mkdir -p /var/lib/ceph/radosgw/ceph-rgw.`hostname -s`
5. On the Object Gateway node, add a user and keyring to bootstrap the object gateway:
Syntax
$ sudo ceph auth get-or-create client.rgw.`hostname -s` osd 'allow rwx' mon 'allow rw' -o /var/lib/ceph/radosgw/<cluster_name>-rgw.`hostname -s`/keyring
Example
$ sudo ceph auth get-or-create client.rgw.`hostname -s` osd 'allow rwx' mon 'allow rw' -o /var/lib/ceph/radosgw/ceph-rgw.`hostname -s`/keyring
IMPORTANT
When you provide capabilities to the gateway key you must provide the readcapability. However, providing the Monitor write capability is optional; if youprovide it, the Ceph Object Gateway will be able to create pools automatically.
In such a case, ensure to specify a reasonable number of placement groups in apool. Otherwise, the gateway uses the default number, which might not besuitable for your needs. See Ceph Placement Groups (PGs) per Pool Calculatorfor details.
6. On the Object Gateway node, create the done file:
Syntax
$ sudo touch /var/lib/ceph/radosgw/<cluster_name>-rgw.`hostname -s`/done
Example
$ sudo touch /var/lib/ceph/radosgw/ceph-rgw.`hostname -s`/done
7. On the Object Gateway node, change the owner and group permissions:
$ sudo chown -R ceph:ceph /var/lib/ceph/radosgw$ sudo chown -R ceph:ceph /var/log/ceph$ sudo chown -R ceph:ceph /var/run/ceph$ sudo chown -R ceph:ceph /etc/ceph
8. For storage clusters with custom names, as root, add the the following line:
Syntax
$ sudo echo "CLUSTER=<custom_cluster_name>" >> /etc/default/ceph
CHAPTER 4. CLIENT INSTALLATION
43

Example
$ sudo echo "CLUSTER=test123" >> /etc/default/ceph
9. On the Object Gateway node, open TCP port 80:
$ sudo iptables -I INPUT 1 -i <network_interface> -p tcp -s <ip_address>/<netmask> --dport 80 -j ACCEPT
10. On the Object Gateway node, start and enable the ceph-radosgw process:
Syntax
$ sudo systemctl enable ceph-radosgw.target$ sudo systemctl enable ceph-radosgw@rgw.<rgw_hostname>$ sudo systemctl start ceph-radosgw@rgw.<rgw_hostname>
Example
$ sudo systemctl enable ceph-radosgw.target$ sudo systemctl enable [email protected]$ sudo systemctl start [email protected]
Once installed, the Ceph Object Gateway automatically creates pools if the write capability is set on theMonitor. See the Pools chapter in the Storage Strategies Guide for information on creating poolsmanually.
Red Hat Ceph Storage 2 Installation Guide for Ubuntu
44

CHAPTER 5. UPGRADING CEPH STORAGE CLUSTERThere are two main upgrading paths:
from Red Hat Ceph Storage 1.3 to 2 (Important)
between minor versions of Red Hat Ceph Storage 2 or between asynchronous updates(Important)
5.1. UPGRADING FROM RED HAT CEPH STORAGE 1.3 TO 2
IMPORTANT
Please contact Red Hat support prior to upgrading, if you have a large Ceph ObjectGateway storage cluster with millions of objects present in buckets.
For more details refer to the Red Hat Ceph Storage 2.5 Release Notes, under the SlowOSD startup after upgrading to Red Hat Ceph Storage 2.5 heading.
You can upgrade the Ceph Storage Cluster in a rolling fashion and while the cluster is running. Upgradeeach node in the cluster sequentially, only proceeding to the next node after the previous node is done.
Red Hat recommends upgrading the Ceph components in the following order:
Monitor nodes
OSD nodes
Ceph Object Gateway nodes
All other Ceph client nodes
Two methods are available to upgrade a Red Hat Ceph Storage 1.3.2 to 2.0:
Using Red Hat’s Content Delivery Network (CDN)
Using a Red Hat provided ISO image file
After upgrading the storage cluster you might have a health warning regarding the CRUSH map usinglegacy tunables. See the Red Hat Ceph Storage Strategies Guide for more information.
Example
$ ceph -s cluster 848135d7-cdb9-4084-8df2-fb5e41ae60bd health HEALTH_WARN crush map has legacy tunables (require bobtail, min is firefly) monmap e1: 1 mons at {ceph1=192.168.0.121:6789/0} election epoch 2, quorum 0 ceph1 osdmap e83: 2 osds: 2 up, 2 in pgmap v1864: 64 pgs, 1 pools, 38192 kB data, 17 objects 10376 MB used, 10083 MB / 20460 MB avail 64 active+clean
CHAPTER 5. UPGRADING CEPH STORAGE CLUSTER
45

IMPORTANT
Red Hat recommends all Ceph clients to be running the same version as the Cephstorage cluster.
5.1.1. Upgrading a Ceph Monitor Node
Red Hat recommends a minimum of three Monitors for a production storage cluster. There must be anodd number of Monitors. While you are upgrading one Monitor, the storage cluster will still have quorum.
Upgrading Red Hat Ceph Storage from version 1.3.2 to version 2 running on Ubuntu 14.04 Trusty toUbuntu 16.04 Xenial has two main tasks. The Red Hat Ceph Storage packages will be upgraded first,then the Ubuntu operating system will be upgraded next. These two main tasks will need to be done oneach Monitor node in the storage cluster. Perform the following steps on each Monitor node in thestorage cluster, sequentially upgrading one Monitor node at a time.
IMPORTANT
Red Hat does not support running Red Hat Ceph Storage 2 clusters on Ubuntu 14.04Trusty in a production environment. This is only a transitional step to get to Red Hat CephStorage 2 on Ubuntu 16.04 Xenial, which is the supported platform. Red Hat recommendshaving a full system backup before proceeding with these upgrade procedures.
1. As root, disable any Red Hat Ceph Storage 1.3.x repositories:If the following lines exist in the /etc/apt/sources.list or in the /etc/apt/sources.list.d/ceph.list files, then comment out the online repositories forRed Hat Ceph Storage 1.3 by adding a # to the beginning of the line.
deb https://<customer_name>:<customer_password>@rhcs.download.redhat.com/ubuntu/1.3-updates/Installerdeb https://<customer_name>:<customer_password>@rhcs.download.redhat.com/ubuntu/1.3-updates/Calamarideb https://<customer_name>:<customer_password>@rhcs.download.redhat.com/ubuntu/1.3-updates/Tools
Also, check for the following files in /etc/apt/sources.list.d/:
Calamari.listceph-mon.listceph-osd.listInstaller.listTools.list
NOTE
Remove any reference to Red Hat Ceph Storage 1.3.x in the APT source file(s). Ifan ISO-based installation was performed for Red Hat Ceph Storage 1.3.x, thenskip this first step.
Red Hat Ceph Storage 2 Installation Guide for Ubuntu
46

2. Enable the Red Hat Ceph Storage 2 Monitor repository. For ISO-based installations, see the ISOinstallation section.
3. As root, stop the Monitor process:
Syntax
$ sudo stop ceph-mon id=<monitor_host_name>
Example
$ sudo stop ceph-mon id=node1
4. As root, update the ceph-mon package:
$ sudo apt-get update$ sudo apt-get dist-upgrade$ sudo apt-get install ceph-mon
a. Verify the latest Red Hat version is installed:
$ dpkg -s ceph-base | grep VersionVersion: 10.2.2-19redhat1trusty
5. As root, update the owner and group permissions:
Syntax
# chown -R <owner>:<group> <path_to_directory>
Example
# chown -R ceph:ceph /var/lib/ceph/mon# chown -R ceph:ceph /var/log/ceph# chown -R ceph:ceph /var/run/ceph# chown ceph:ceph /etc/ceph/ceph.client.admin.keyring# chown ceph:ceph /etc/ceph/ceph.conf# chown ceph:ceph /etc/ceph/rbdmap
NOTE
If the Ceph Monitor node is co-located with an OpenStack Controller node, thenthe Glance and Cinder keyring files must be owned by glance and cinderrespectively. For example:
# ls -l /etc/ceph/...-rw-------. 1 glance glance 64 <date> ceph.client.glance.keyring-rw-------. 1 cinder cinder 64 <date> ceph.client.cinder.keyring...
CHAPTER 5. UPGRADING CEPH STORAGE CLUSTER
47

6. Remove packages that are no longer needed:
$ sudo apt-get purge ceph ceph-osd
NOTE
The ceph package is now a meta-package. Only the ceph-mon package isneeded on the Monitor nodes, only the ceph-osd package is needed on theOSD nodes, and only the ceph-radosgw package is needed on the RADOSGateway nodes.
7. As root, replay device events from the kernel:
# udevadm trigger
8. Upgrade from Ubuntu 14.04 Trusty to Ubuntu 16.04 Xenial.
a. Configure update-manager for the Red Hat Ceph Storage packages:
i. Create a new file
$ sudo touch /etc/update-manager/release-upgrades.d/rhcs.cfg
ii. Add the following lines to the new file
[Sources]AllowThirdParty=yes
b. Start the Ubuntu upgrade:
$ sudo do-release-upgrade -d
c. Follow the on screen instructions
d. Verify the Ceph package versions:
$ dpkg -s ceph-base | grep VersionVersion: 10.2.2-19redhat1xenial
e. As root, enable the ceph-mon process:
$ sudo systemctl enable ceph-mon.target$ sudo systemctl enable ceph-mon@<monitor_host_name>
f. As root, reboot the Monitor node:
# shutdown -r now
g. Once the Monitor node is up, check the health of the Ceph storage cluster before moving tothe next Monitor node:
# ceph -s
Red Hat Ceph Storage 2 Installation Guide for Ubuntu
48

To add more Red Hat Ceph Storage Monitors to the storage cluster, see the Red Hat Ceph StorageAdministration Guide
5.1.2. Upgrading a Ceph OSD Node
Upgrading Red Hat Ceph Storage from version 1.3.2 to version 2 running on Ubuntu 14.04 Trusty toUbuntu 16.04 Xenial has two main tasks. The Red Hat Ceph Storage packages will be upgraded first,then the Ubuntu operating system will be upgraded next. These two main tasks will need to be done oneach OSD node in the storage cluster. Perform the following steps on each OSD node in the storagecluster, sequentially upgrading one OSD node at a time.
IMPORTANT
Red Hat does not support running Red Hat Ceph Storage 2 clusters on Ubuntu 14.04Trusty in a production environment. This is only a transitional step to get to Red Hat CephStorage 2 on Ubuntu 16.04 Xenial, which is the supported platform. Red Hat recommendshaving a full system backup before proceeding with these upgrade procedures.
During the upgrade of an OSD node, some placement groups will become degraded, because the OSDmight be down or restarting. You will need to tell the storage cluster not to mark an OSD out, becauseyou do not want to trigger a recovery. The default behavior is to mark an OSD out of the CRUSH mapafter five minutes.
On a Monitor node, set noout and norebalance flags for the OSDs:
# ceph osd set noout# ceph osd set norebalance
Perform the following steps on each OSD node in the storage cluster. Sequentially upgrading one OSDnode at a time. If an ISO-based installation was performed for Red Hat Ceph Storage 1.3, then skip thisfirst step.
1. As root, disable the Red Hat Ceph Storage 1.3 repositories:If the following lines exist in the /etc/apt/sources.list or in the /etc/apt/sources.list.d/ceph.list files, then comment out the online repositories forRed Hat Ceph Storage 1.3 by adding a # to the beginning of the line.
deb https://<customer_name>:<customer_password>@rhcs.download.redhat.com/ubuntu/1.3-updates/Installerdeb https://<customer_name>:<customer_password>@rhcs.download.redhat.com/ubuntu/1.3-updates/Calamarideb https://<customer_name>:<customer_password>@rhcs.download.redhat.com/ubuntu/1.3-updates/Tools
Also, check for the following files in /etc/apt/sources.list.d/:
Calamari.listceph-mon.listceph-osd.list
CHAPTER 5. UPGRADING CEPH STORAGE CLUSTER
49

Installer.listTools.list
NOTE
Remove any reference to Red Hat Ceph Storage 1.3.x in the APT source file(s). Ifan ISO-based installation was performed for Red Hat Ceph Storage 1.3.x, thenskip this first step.
2. Enable the Red Hat Ceph Storage 2 OSD repository. For ISO-based installations, see the ISOinstallation section.
3. As root, stop any running OSD process:
Syntax
$ sudo stop ceph-osd id=<osd_id>
Example
$ sudo stop ceph-osd id=0
4. As root, update the ceph-osd package:
$ sudo apt-get update$ sudo apt-get dist-upgrade$ sudo apt-get install ceph-osd
a. Verify the latest Red Hat version is installed:
$ dpkg -s ceph-base | grep VersionVersion: 10.2.2-19redhat1trusty
5. As root, update the owner and group permissions on the newly created directory and files:
Syntax
# chown -R <owner>:<group> <path_to_directory>
Example
# chown -R ceph:ceph /var/lib/ceph/osd# chown -R ceph:ceph /var/log/ceph# chown -R ceph:ceph /var/run/ceph# chown -R ceph:ceph /etc/ceph
Red Hat Ceph Storage 2 Installation Guide for Ubuntu
50

NOTE
Running the following find command might speed up the process of changingownership by running the chown command in parallel on a Ceph storage clusterwith a large number of disks:
# find /var/lib/ceph/osd -maxdepth 1 -mindepth 1 -print | xargs -P12 -n1 chown -R ceph:ceph
6. Remove packages that are no longer needed:
$ sudo apt-get purge ceph ceph-mon
NOTE
The ceph package is now a meta-package. Only the ceph-mon package isneeded on the Monitor nodes, only the ceph-osd package is needed on theOSD nodes, and only the ceph-radosgw package is needed on the RADOSGateway nodes.
7. As root, replay device events from the kernel:
# udevadm trigger
8. Upgrade from Ubuntu 14.04 Trusty to Ubuntu 16.04 Xenial.
a. Configure update-manager for the Red Hat Ceph Storage packages:
i. Create a new file
$ sudo touch /etc/update-manager/release-upgrades.d/rhcs.cfg
ii. Add the following lines to the new file
[Sources]AllowThirdParty=yes
b. Start the Ubuntu upgrade:
$ sudo do-release-upgrade -d
c. Follow the on screen instructions
d. Verify the Ceph package versions:
$ dpkg -s ceph-base | grep VersionVersion: 10.2.2-19redhat1xenial
e. As root, enable the ceph-osd process:
$ sudo systemctl enable ceph-osd.target$ sudo systemctl enable ceph-osd@<osd_id>
CHAPTER 5. UPGRADING CEPH STORAGE CLUSTER
51

f. As root, reboot the OSD node:
# shutdown -r now
9. Move to the next OSD node.
NOTE
While the noout and norebalance flags are set, the storage cluster will havethe HEALTH_WARN status:
$ ceph healthHEALTH_WARN noout,norebalance flag(s) set
Once you are done upgrading the Ceph storage cluster, unset the previously set OSD flags and verify thestorage cluster status.
On a Monitor node, and after all OSD nodes have been upgraded, unset the noout and norebalanceflags:
# ceph osd unset noout# ceph osd unset norebalance
In addition, set the require_jewel_osds flag. This flag ensures that no more OSDs with Red HatCeph Storage 1.3 can be added to the storage cluster. If you do not set this flag, the storage status willbe HEALTH_WARN.
# ceph osd set require_jewel_osds
To expand the storage capacity by adding new OSDs to the storage cluster, see the Red Hat CephStorage Administration Guide for more details.
5.1.3. Upgrading the Ceph Object Gateway Nodes
This section describes steps to upgrade a Ceph Object Gateway node to a later version.
IMPORTANT
Red Hat does not support running Red Hat Ceph Storage 2 clusters on Ubuntu 14.04 in aproduction environment. Therefore, upgrading Red Hat Ceph Storage from 1.3 to 2includes:
Upgrading the Red Hat Ceph Storage packages from 1.3 to 2
Upgrading the Ubuntu operation system from 14.04 to 16.04
Perform these steps on each Ceph Object Gateway node in use, sequentially upgradingone node at time.
Red Hat recommends to back up the system before proceeding with these upgradeprocedures.
Red Hat Ceph Storage 2 Installation Guide for Ubuntu
52

Before You Start
Red Hat recommends putting a Ceph Object Gateway behind a load balancer, such as HAProxy.If you use a load balancer, remove the Ceph Object Gateway from the load balancer once norequests are being served.
If you use a custom name for the region pool, specified in the rgw_region_root_poolparameter, add the rgw_zonegroup_root_pool parameter to the [global] section of theCeph configuration file. Set the value of rgw_zonegroup_root_pool to be the same as rgw_region_root_pool, for example:
[global]rgw_zonegroup_root_pool = .us.rgw.root
Procedure: Upgrading the Ceph Object Gateway Node
1. If you used online repositories to install Red Hat Ceph Storage, disable the 1.3 repositories.
a. Comment out the following lines in the /etc/apt/sources.list and /etc/apt/sources.list.d/ceph.list files.
# deb https://<customer_name>:<customer_password>@rhcs.download.redhat.com/ubuntu/1.3-updates/Installer# deb https://<customer_name>:<customer_password>@rhcs.download.redhat.com/ubuntu/1.3-updates/Calamari# deb https://<customer_name>:<customer_password>@rhcs.download.redhat.com/ubuntu/1.3-updates/Tools
b. Remove the following files from the /etc/apt/sources.list.d/ directory.
# rm /etc/apt/sources.list.d/Calamari.list# rm /etc/apt/sources.list.d/ceph-mon.list# rm /etc/apt/sources.list.d/ceph-osd.list# rm /etc/apt/sources.list.d/Installer.list# rm /etc/apt/sources.list.d/Tools.list
2. Enable the Red Hat Ceph Storage 2 Tools repository. For ISO-based installations, see the ISOInstallation section.
3. Stop the Ceph Object Gateway process (ceph-radosgw):
$ sudo stop radosgw id=rgw.<hostname>
Replace <hostname> with the name of Ceph Object Gateway host, for example gateway-node.
$ sudo stop radosgw id=rgw.node
4. Update the ceph-radosgw package:
CHAPTER 5. UPGRADING CEPH STORAGE CLUSTER
53

$ sudo apt-get update$ sudo apt-get dist-upgrade$ sudo apt-get install radosgw
5. Change the owner and group permissions on the newly created /var/lib/ceph/radosgw/and /var/log/ceph/ directories and their content to ceph.
# chown -R ceph:ceph /var/lib/ceph/radosgw# chown -R ceph:ceph /var/log/ceph
6. Remove packages that are no longer needed.
$ sudo apt-get purge ceph
NOTE
The ceph package is now a meta-package. Only the ceph-mon, ceph-osd, andceph-radosgw packages are required on the Monitor, OSD, and Ceph ObjectGateway nodes respectively.
7. Upgrade from Ubuntu 14.04 to 16.04.
a. Configure the update-manager utility for the Red Hat Ceph Storage packages:
i. Create a new rhcs.cfg file in the /etc/update-manager/release-upgrades.d/directory.
$ sudo touch /etc/update-manager/release-upgrades.d/rhcs.cfg
ii. Add the following lines to the file.
[Sources]AllowThirdParty=yes
b. Start the upgrading process and follow the instructions on the screen.
$ sudo do-release-upgrade -d
c. Verify the Ceph package versions:
$ dpkg -s ceph-base | grep VersionVersion: 10.2.2-19redhat1xenial
8. Enable the ceph-radosgw process:
$ sudo systemctl enable ceph-radosgw.target$ sudo systemctl enable ceph-radosgw@rgw.<hostname>
Replace <hostname> with the name of the Ceph Object Gateway host, for example gateway-node.
Red Hat Ceph Storage 2 Installation Guide for Ubuntu
54

$ sudo systemctl enable ceph-radosgw.target$ sudo systemctl enable [email protected]
9. Reboot the Ceph Object Gateway node:
# shutdown -r now
10. If you use a load balancer, add the Ceph Object Gateway node back to the load balancer.
11. Repeat these steps on a next Ceph Object Gateway node.
See Also
The Ceph Object Gateway Guide for Ubuntu
5.1.4. Upgrading a Ceph Client Node
Ceph clients can be the RADOS Gateway, RADOS block devices, the Ceph command-line interface(CLI), Nova compute nodes, qemu-kvm, or any custom application using the Ceph client-side libraries.Red Hat recommends all Ceph clients to be running the same version as the Ceph storage cluster.
IMPORTANT
Red Hat recommends stopping all IO running against a Ceph client node while thepackages are being upgraded. Not stopping all IO might cause unexpected errors tooccur.
1. As root, disable any Red Hat Ceph Storage 1.3 repositories:If the following lines exist in the /etc/apt/sources.list or in the /etc/apt/sources.list.d/ceph.list files, then comment out the online repositories forRed Hat Ceph Storage 1.3 by adding a # to the beginning of the line.
deb https://<customer_name>:<customer_password>@rhcs.download.redhat.com/ubuntu/1.3-updates/Installerdeb https://<customer_name>:<customer_password>@rhcs.download.redhat.com/ubuntu/1.3-updates/Calamarideb https://<customer_name>:<customer_password>@rhcs.download.redhat.com/ubuntu/1.3-updates/Tools
Also, check for the following files in /etc/apt/sources.list.d/:
Calamari.listceph-mon.listceph-osd.listInstaller.listTools.list
CHAPTER 5. UPGRADING CEPH STORAGE CLUSTER
55

NOTE
Remove any reference to Red Hat Ceph Storage 1.3.x in the APT source file(s).
2. On the client node, enable the Tools repository.
3. On the client node, update the ceph-common package:
$ sudo apt-get install ceph-common
Any application depending on the Ceph client-side libraries will have to be restarted after upgrading theCeph client package.
NOTE
For Nova compute nodes with running qemu-kvm instances or if using a dedicated qemu-kvm client, then stopping and starting the qemu-kvm instance processes isrequired. A simple restart will not work here.
5.2. UPGRADING BETWEEN MINOR VERSIONS AND APPLYINGASYNCHRONOUS UPDATES
IMPORTANT
Please contact Red Hat support prior to upgrading, if you have a large Ceph ObjectGateway storage cluster with millions of objects present in buckets.
For more details refer to the Red Hat Ceph Storage 2.5 Release Notes, under the SlowOSD startup after upgrading to Red Hat Ceph Storage 2.5 heading.
In Red Hat Ceph Storage version 2.5 and later, ceph-ansible is available on Ubuntu nodes and can beused to upgrade your cluster.
Use the Ansible rolling_update.yml playbook located in the infrastructure-playbooksdirectory from the administration node to upgrade between two minor versions of Red Hat Ceph Storage2 or to apply asynchronous updates.
Currently, this is the only supported way to upgrade to a minor version. If you use a cluster that was notdeployed by using Ansible, see Taking Over an Existing Cluster for details on configuring Ansible to usea cluster that was deployed without it.
NOTE
The administration node must use Red Hat Enterprise Linux because the ceph-ansiblepackage is not supported on Ubuntu. See the Installing Red Hat Ceph Storage usingAnsible chapter in the Red Hat Ceph Storage 2 Installation Guide for Red Hat EnterpriseLinux.
Ansible upgrades the Ceph nodes in the following order:
Monitor nodes
Red Hat Ceph Storage 2 Installation Guide for Ubuntu
56

OSD nodes
MDS nodes
Ceph Object Gateway nodes
All other Ceph client nodes
NOTE
Upgrading encrypted OSD nodes is the same as upgrading OSD nodes that are notencrypted.
Before you Start
On the Ansible Administration node, enable the Red Hat Ceph Storage 2 Tools repository:
$ sudo bash -c 'umask 0077; echo deb https://customername:[email protected]/2-updates/Tools $(lsb_release -sc) main | tee /etc/apt/sources.list.d/Tools.list'$ sudo bash -c 'wget -O - https://www.redhat.com/security/fd431d51.txt | apt-key add -'$ sudo apt-get update
On the Ansible Administration node, ensure the latest version of ceph-ansible is installed:
$ sudo apt-get install ceph-ansible
In the rolling_update.yml playbook, verify the health_osd_check_retries and health_osd_check_delay values; tune if needed. For each OSD node, Ansible will wait upto 20 minutes. Also, Ansible will check the cluster health every 30 seconds, waiting beforecontinuing the upgrade process. The default values are:
health_osd_check_retries: 40health_osd_check_delay: 30
If the Ceph nodes are not connected to the Red Hat Content Delivery Network (CDN) and youused an ISO image to install Red Hat Ceph Storage, update the local repository with the latestversion of Red Hat Ceph Storage. See Section 2.2, “Enabling the Red Hat Ceph StorageRepositories” for details.
If the ansible node you are using has been changed from RHEL to Ubuntu, copy all the oldvariables in the group_vars/all.yml file to new Ansible node.
If you upgrade from Red Hat Ceph Storage 2.1 to 2.2, review the Section 5.2.1, “ChangesBetween Ansible 2.1 and 2.2” section first. Ansible 2.2 uses slightly different file names andsetting.
Procedure: Updating the Ceph Storage Cluster by using Ansible
1. On the Ansible administration node, edit the /etc/ansible/hosts file with custom osd_scenarios if your cluster has any.
CHAPTER 5. UPGRADING CEPH STORAGE CLUSTER
57

2. On the Ansible administration node, navigate to the /usr/share/ceph-ansible/ directory:
# cd /usr/share/ceph-ansible
3. In the group_vars/all.yml file, uncomment the upgrade_ceph_packages option and set itto True:
upgrade_ceph_packages: True
4. In the group_vars/all.yml file, set generate_fsid to false.
5. Get the current cluster fsid by executing ceph fsid. Set the retrieved fsid in group_vars/all.yml.
6. If the cluster you want to upgrade contains any Ceph Object Gateway nodes, add the radosgw_interface parameter to the group_vars/all.yml file.
radosgw_interface: <interface>
Replace:
<interface> with the interface that the Ceph Object Gateway nodes listen to
7. For RCHS 2.5 and later versions, uncomment and set ceph_rhcs_cdn_debian_repo and ceph_rhcs_cdn_debian_repo_version in the group_vars/all.yml file so that Ansiblecan automatically enable and access Ubuntu online repositories:
ceph_rhcs_cdn_debian_repo: <repo-path>ceph_rhcs_cdn_debian_repo_version: <repo-version>
Example
ceph_rhcs_cdn_debian_repo: https://<login>:<pwd>@rhcs.download.redhat.comceph_rhcs_cdn_debian_repo_version: /2-release/
Where <login> is the RHN user login and <pwd> is the RHN user’s password.
8. Run the rolling_update.yml playbook:Note that the jewel_minor_update=true option means the mgrs tasks are skipped
# cp infrastructure-playbooks/rolling_update.yml .$ ansible-playbook rolling_update.yml
When upgrading from version 2.4 to 2.5, run the playbook using the following command:
$ ansible-playbook rolling_update.yml -e jewel_minor_update=true
9. From the RBD mirroring daemon node, upgrade rbd-mirror manually:
$ sudo apt-get install rbd-mirror
Red Hat Ceph Storage 2 Installation Guide for Ubuntu
58

Restart the daemon:
# systemctl restart ceph-rbd-mirror@<client-id>
IMPORTANT
The rolling_update.yml playbook includes the serial variable that adjusts thenumber of nodes to be updated simultaneously. Red Hat strongly recommends to use thedefault value (1), which ensures that hosts will be upgraded one by one.
5.2.1. Changes Between Ansible 2.1 and 2.2
Red Hat Ceph Storage 2.2 includes Ansible 2.2 that introduces the following changes:
Files in the group_vars directory have the .yml extension. Before updating to 2.2, you mustrename them. To do so:Navigate to the Ansible directory:
# cd usr/share/ceph-ansible
Change the names of the files in group_vars:
# mv groups_vars/all groups_vars/all.yml# mv groups_vars/mons groups_vars/mons.yml# mv groups_vars/osds groups_vars/osds.yml# mv groups_vars/mdss groups_vars/mdss.yml# mv groups_vars/rgws groups_vars/rgws.yml
Ansible 2.2 uses different variable names and handles this change automatically when updatingto version 2.2. See Table 5.1, “Differences in Variable Names Between Ansible 2.1 and 2.2”table for details.
Table 5.1. Differences in Variable Names Between Ansible 2.1 and 2.2
Ansible 2.1 variable name Ansible 2.2 variable name
ceph_stable_rh_storage ceph_rhcs
ceph_stable_rh_storage_version ceph_rhcs_version
ceph_stable_rh_storage_cdn_install ceph_rhcs_cdn_install
ceph_stable_rh_storage_iso_install ceph_rhcs_iso_install
ceph_stable_rh_storage_iso_path ceph_rhcs_iso_path
ceph_stable_rh_storage_mount_path ceph_rhcs_mount_path
ceph_stable_rh_storage_repository_path ceph_rhcs_repository_path
CHAPTER 5. UPGRADING CEPH STORAGE CLUSTER
59

CHAPTER 6. WHAT TO DO NEXT?This is only the beginning of what Red Hat Ceph Storage can do to help you meet the challengingstorage demands of the modern data center. Here are links to more information on a variety of topics:
Benchmarking performance and accessing performance counters, see the Red Hat CephStorage Administration Guide.
Creating and managing snapshots, see the Red Hat Ceph Storage Block Device Guide.
Expanding the Red Hat Ceph Storage cluster, see the Red Hat Ceph Storage AdministrationGuide.
Mirroring RADOS Block Devices, see the Red Hat Ceph Storage Block Device Guide.
Process management, enabling debug logging, and related topics, see the Red Hat CephStorage Administration Guide.
Tunable parameters, see the Red Hat Ceph Storage Configuration Guide.
Using Ceph as the back end storage for OpenStack, see the Red Hat OpenStack PlatformStorage Guide.
Red Hat Ceph Storage 2 Installation Guide for Ubuntu
60

APPENDIX A. TROUBLESHOOTING
A.1. ANSIBLE STOPS INSTALLATION BECAUSE IT DETECTS LESSDEVICES THAN IT EXPECTED
The Ansible automation application stops the installation process and returns the following error:
- name: fix partitions gpt header or labels of the osd disks (autodiscover disks) shell: "sgdisk --zap-all --clear --mbrtogpt -- '/dev/{{ item.0.item.key }}' || sgdisk --zap-all --clear --mbrtogpt -- '/dev/{{ item.0.item.key }}'" with_together: - "{{ osd_partition_status_results.results }}" - "{{ ansible_devices }}" changed_when: false when: - ansible_devices is defined - item.0.item.value.removable == "0" - item.0.item.value.partitions|count == 0 - item.0.rc != 0
What this means:
When the osd_auto_discovery parameter is set to true in the /etc/ansible/group_vars/osds.yml file, Ansible automatically detects and configures all theavailable devices. During this process, Ansible expects that all OSDs use the same devices. The devicesget their names in the same order in which Ansible detects them. If one of the devices fails on one of theOSDs, Ansible fails to detect the failed device and stops the whole installation process.
Example situation:
1. Three OSD nodes (host1, host2, host3) use the /dev/sdb, /dev/sdc, and dev/sdd disks.
2. On host2, the /dev/sdc disk fails and is removed.
3. Upon the next reboot, Ansible fails to detect the removed /dev/sdc disk and expects that onlytwo disks will be used for host2, /dev/sdb and /dev/sdc (formerly /dev/sdd).
4. Ansible stops the installation process and returns the above error message.
To fix the problem:
In the /etc/ansible/hosts file, specify the devices used by the OSD node with the failed disk(host2 in the Example situation above):
[osds]host1host2 devices="[ '/dev/sdb', '/dev/sdc' ]"host3
See Installing Ceph Ansible for details.
APPENDIX A. TROUBLESHOOTING
61

Red Hat Ceph Storage 2 Installation Guide for Ubuntu
62


