132
Red Hat JBoss Fuse 6.2.1 Security Guide Making it safe for your systems to work together Last Updated: 2017-09-21

Red Hat JBoss Fuse 6.2.1
Security Guide
Making it safe for your systems to work together
Last Updated: 2017-09-21


Red Hat JBoss Fuse 6.2.1 Security Guide
Making it safe for your systems to work together
JBoss A-MQ Docs TeamContent [email protected]

Legal Notice
Copyright © 2015 Red Hat.
The text of and illustrations in this document are licensed by Red Hat under a Creative CommonsAttribution–Share Alike 3.0 Unported license ("CC-BY-SA"). An explanation of CC-BY-SA isavailable athttp://creativecommons.org/licenses/by-sa/3.0/. In accordance with CC-BY-SA, if you distribute this document or an adaptation of it, you mustprovide the URL for the original version.
Red Hat, as the licensor of this document, waives the right to enforce, and agrees not to assert,Section 4d of CC-BY-SA to the fullest extent permitted by applicable law.
Red Hat, Red Hat Enterprise Linux, the Shadowman logo, JBoss, OpenShift, Fedora, the Infinitylogo, and RHCE are trademarks of Red Hat, Inc., registered in the United States and othercountries.
Linux ® is the registered trademark of Linus Torvalds in the United States and other countries.
Java ® is a registered trademark of Oracle and/or its affiliates.
XFS ® is a trademark of Silicon Graphics International Corp. or its subsidiaries in the UnitedStates and/or other countries.
MySQL ® is a registered trademark of MySQL AB in the United States, the European Union andother countries.
Node.js ® is an official trademark of Joyent. Red Hat Software Collections is not formally relatedto or endorsed by the official Joyent Node.js open source or commercial project.
The OpenStack ® Word Mark and OpenStack logo are either registered trademarks/service marksor trademarks/service marks of the OpenStack Foundation, in the United States and othercountries and are used with the OpenStack Foundation's permission. We are not affiliated with,endorsed or sponsored by the OpenStack Foundation, or the OpenStack community.
All other trademarks are the property of their respective owners.
Abstract
This guide describes how to secure the Red Hat JBoss Fuse container, the web console, messagebrokers, routing and integration components, web and RESTful services, and it provides a tutorialon LDAP authentication.

. . . . . . . . . . . . . . . . . . . . . . . . . . . . . . . . . . . . . . . . . . . . . . . . . . . . . . . . . . . . . . . . . . . . . . . . . . . . . . . . . . . . . . . . . . . . . . . . . . . . . . . . . . . . . . . . . . . . . . . . . . . . . . . . . . . . . . . . . . . . . . . . . . . . . . . . . . . . . . . . . . . . . . . . . . . . . . . . . . . . . . . . . . . . . . . . . . . . . . . . . . . . . . . . . . . . . . . . . . . . . . . . . . . . . . . . . . . . . . . . . . . . . . . . . . . . . . . . . . . . . . . . . . . . . . . . . . . . . . . .
. . . . . . . . . . . . . . . . . . . . . . . . . . . . . . . . . . . . . . . . . . . . . . . . . . . . . . . . . . . . . . . . . . . . . . . . . . . . . . . . . . . . . . . . . . . . . . . . . . . . . . . . . . . . . . . . . . . . . . . . . . . . . . . . . . . . . . . . . . . . . . . . . . . . . . . . . . . . . . . . . . . . . . . . . . . . . . . . . . . . . . . . . . . . . . . . . . . . . . . . . . . . . . . . . . . . . . . . . . . . . . . . . . . . . . . . . . . . . . . . . . . . . . . . . . . . . . . . . . . . . . . . . . . . . . . . . . . . . . . .
. . . . . . . . . . . . . . . . . . . . . . . . . . . . . . . . . . . . . . . . . . . . . . . . . . . . . . . . . . . . . . . . . . . . . . . . . . . . . . . . . . . . . . . . . . . . . . . . . . . . . . . . . . . . . . . . . . . . . . . . . . . . . . . . . . . . . . . . . . . . . . . . . . . . . . . . . . . . . . . . . . . . . . . . . . . . . . . . . . . . . . . . . . . . . . . . . . . . . . . . . . . . . . . . . . . . . . . . . . . . . . . . . . . . . . . . . . . . . . . . . . . . . . . . . . . . . . . . . . . . . . . . . . . . . . . . . . . . . . . .
. . . . . . . . . . . . . . . . . . . . . . . . . . . . . . . . . . . . . . . . . . . . . . . . . . . . . . . . . . . . . . . . . . . . . . . . . . . . . . . . . . . . . . . . . . . . . . . . . . . . . . . . . . . . . . . . . . . . . . . . . . . . . . . . . . . . . . . . . . . . . . . . . . . . . . . . . . . . . . . . . . . . . . . . . . . . . . . . . . . . . . . . . . . . . . . . . . . . . . . . . . . . . . . . . . . . . . . . . . . . . . . . . . . . . . . . . . . . . . . . . . . . . . . . . . . . . . . . . . . . . . . . . . . . . . . . . . . . . . . .
. . . . . . . . . . . . . . . . . . . . . . . . . . . . . . . . . . . . . . . . . . . . . . . . . . . . . . . . . . . . . . . . . . . . . . . . . . . . . . . . . . . . . . . . . . . . . . . . . . . . . . . . . . . . . . . . . . . . . . . . . . . . . . . . . . . . . . . . . . . . . . . . . . . . . . . . . . . . . . . . . . . . . . . . . . . . . . . . . . . . . . . . . . . . . . . . . . . . . . . . . . . . . . . . . . . . . . . . . . . . . . . . . . . . . . . . . . . . . . . . . . . . . . . . . . . . . . . . . . . . . . . . . . . . . . . . . . . . . . . .
. . . . . . . . . . . . . . . . . . . . . . . . . . . . . . . . . . . . . . . . . . . . . . . . . . . . . . . . . . . . . . . . . . . . . . . . . . . . . . . . . . . . . . . . . . . . . . . . . . . . . . . . . . . . . . . . . . . . . . . . . . . . . . . . . . . . . . . . . . . . . . . . . . . . . . . . . . . . . . . . . . . . . . . . . . . . . . . . . . . . . . . . . . . . . . . . . . . . . . . . . . . . . . . . . . . . . . . . . . . . . . . . . . . . . . . . . . . . . . . . . . . . . . . . . . . . . . . . . . . . . . . . . . . . . . . . . . . . . . . .
. . . . . . . . . . . . . . . . . . . . . . . . . . . . . . . . . . . . . . . . . . . . . . . . . . . . . . . . . . . . . . . . . . . . . . . . . . . . . . . . . . . . . . . . . . . . . . . . . . . . . . . . . . . . . . . . . . . . . . . . . . . . . . . . . . . . . . . . . . . . . . . . . . . . . . . . . . . . . . . . . . . . . . . . . . . . . . . . . . . . . . . . . . . . . . . . . . . . . . . . . . . . . . . . . . . . . . . . . . . . . . . . . . . . . . . . . . . . . . . . . . . . . . . . . . . . . . . . . . . . . . . . . . . . . . . . . . . . . . . .
. . . . . . . . . . . . . . . . . . . . . . . . . . . . . . . . . . . . . . . . . . . . . . . . . . . . . . . . . . . . . . . . . . . . . . . . . . . . . . . . . . . . . . . . . . . . . . . . . . . . . . . . . . . . . . . . . . . . . . . . . . . . . . . . . . . . . . . . . . . . . . . . . . . . . . . . . . . . . . . . . . . . . . . . . . . . . . . . . . . . . . . . . . . . . . . . . . . . . . . . . . . . . . . . . . . . . . . . . . . . . . . . . . . . . . . . . . . . . . . . . . . . . . . . . . . . . . . . . . . . . . . . . . . . . . . . . . . . . . . .
. . . . . . . . . . . . . . . . . . . . . . . . . . . . . . . . . . . . . . . . . . . . . . . . . . . . . . . . . . . . . . . . . . . . . . . . . . . . . . . . . . . . . . . . . . . . . . . . . . . . . . . . . . . . . . . . . . . . . . . . . . . . . . . . . . . . . . . . . . . . . . . . . . . . . . . . . . . . . . . . . . . . . . . . . . . . . . . . . . . . . . . . . . . . . . . . . . . . . . . . . . . . . . . . . . . . . . . . . . . . . . . . . . . . . . . . . . . . . . . . . . . . . . . . . . . . . . . . . . . . . . . . . . . . . . . . . . . . . . . .
. . . . . . . . . . . . . . . . . . . . . . . . . . . . . . . . . . . . . . . . . . . . . . . . . . . . . . . . . . . . . . . . . . . . . . . . . . . . . . . . . . . . . . . . . . . . . . . . . . . . . . . . . . . . . . . . . . . . . . . . . . . . . . . . . . . . . . . . . . . . . . . . . . . . . . . . . . . . . . . . . . . . . . . . . . . . . . . . . . . . . . . . . . . . . . . . . . . . . . . . . . . . . . . . . . . . . . . . . . . . . . . . . . . . . . . . . . . . . . . . . . . . . . . . . . . . . . . . . . . . . . . . . . . . . . . . . . . . . . . .
. . . . . . . . . . . . . . . . . . . . . . . . . . . . . . . . . . . . . . . . . . . . . . . . . . . . . . . . . . . . . . . . . . . . . . . . . . . . . . . . . . . . . . . . . . . . . . . . . . . . . . . . . . . . . . . . . . . . . . . . . . . . . . . . . . . . . . . . . . . . . . . . . . . . . . . . . . . . . . . . . . . . . . . . . . . . . . . . . . . . . . . . . . . . . . . . . . . . . . . . . . . . . . . . . . . . . . . . . . . . . . . . . . . . . . . . . . . . . . . . . . . . . . . . . . . . . . . . . . . . . . . . . . . . . . . . . . . . . . . .
Table of Contents
CHAPTER 1. SECURITY ARCHITECTURE1.1. OSGI CONTAINER SECURITY1.2. APACHE CAMEL SECURITY
CHAPTER 2. SECURING THE CONTAINER2.1. JAAS AUTHENTICATION2.2. ROLE-BASED ACCESS CONTROL2.3. USING ENCRYPTED PROPERTY PLACEHOLDERS2.4. ENABLING REMOTE JMX SSL
CHAPTER 3. SECURING THE JETTY HTTP SERVERJETTY SERVERCREATE X.509 CERTIFICATE AND PRIVATE KEYENABLING SSL/TLSCONNECT TO THE SECURE CONSOLEADVANCED JETTY SECURITY CONFIGURATION
CHAPTER 4. SECURING THE CAMEL ACTIVEMQ COMPONENT4.1. SECURE ACTIVEMQ CONNECTION FACTORY4.2. EXAMPLE CAMEL ACTIVEMQ COMPONENT CONFIGURATION
CHAPTER 5. SECURING THE CAMEL JETTY COMPONENT5.1. ENABLING SSL/TLS SECURITY5.2. BASIC AUTHENTICATION WITH JAAS
CHAPTER 6. SECURING THE CAMEL CXF COMPONENT6.1. THE CAMEL CXF PROXY DEMONSTRATION6.2. SECURING THE WEB SERVICES PROXY6.3. DEPLOYING THE APACHE CAMEL ROUTE6.4. SECURING THE WEB SERVICES CLIENT
CHAPTER 7. SECURING THE MANAGEMENT CONSOLE7.1. CONTROLLING ACCESS TO THE FUSE MANAGEMENT CONSOLE
CHAPTER 8. LDAP AUTHENTICATION TUTORIAL8.1. TUTORIAL OVERVIEW8.2. SET-UP A DIRECTORY SERVER AND CONSOLE8.3. ADD USER ENTRIES TO THE DIRECTORY SERVER8.4. ENABLE LDAP AUTHENTICATION IN THE OSGI CONTAINER8.5. ENABLE SSL/TLS ON THE LDAP CONNECTION
APPENDIX A. MANAGING CERTIFICATESA.1. WHAT IS AN X.509 CERTIFICATE?A.2. CERTIFICATION AUTHORITIESA.3. CERTIFICATE CHAININGA.4. SPECIAL REQUIREMENTS ON HTTPS CERTIFICATESA.5. CREATING YOUR OWN CERTIFICATES
APPENDIX B. ASN.1 AND DISTINGUISHED NAMESB.1. ASN.1B.2. DISTINGUISHED NAMES
INDEX
334
77
344651
565656565858
606061
636369
7474778183
9090
9292929599
106
111111112113114116
123123123
126
Table of Contents
1

Red Hat JBoss Fuse 6.2.1 Security Guide
2
CHAPTER 1. SECURITY ARCHITECTURE
Abstract
In the OSGi container, it is possible to deploy applications supporting a variety of security features.Currently, only the Java Authentication and Authorization Service (JAAS) is based on a common,container-wide infrastructure. Other security features are provided separately by the individualproducts and components deployed in the container.
1.1. OSGI CONTAINER SECURITY
Overview
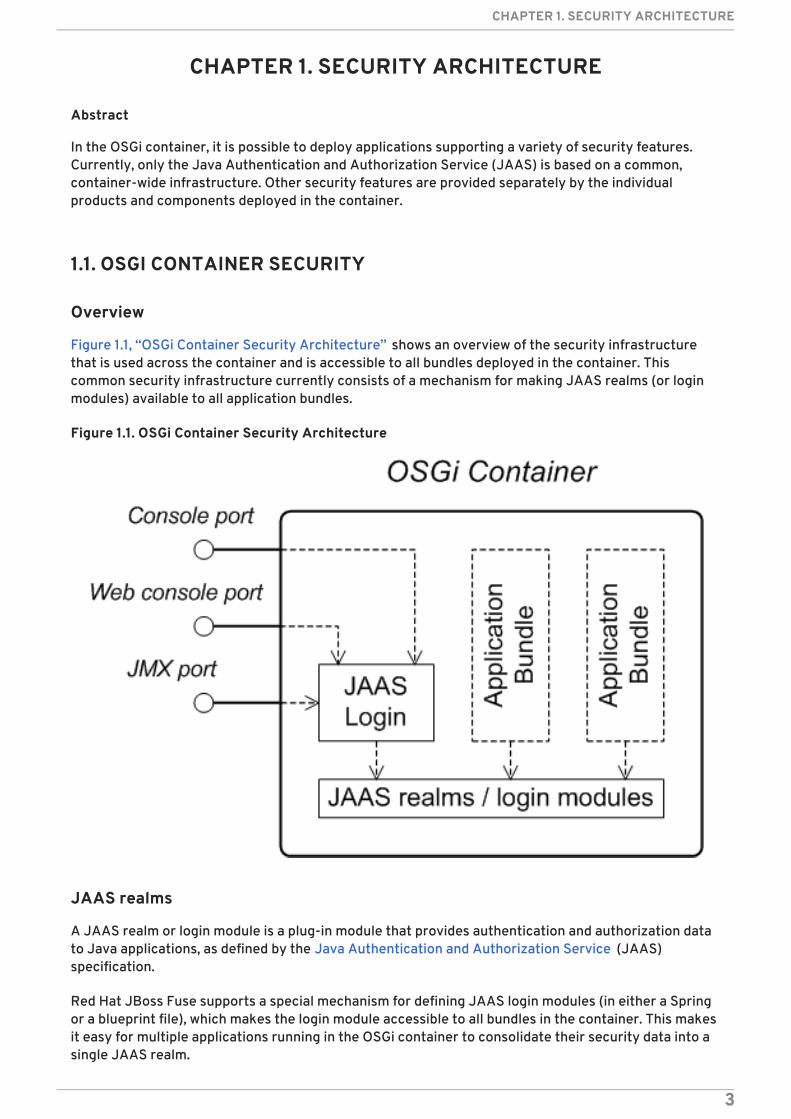
Figure 1.1, “OSGi Container Security Architecture” shows an overview of the security infrastructurethat is used across the container and is accessible to all bundles deployed in the container. Thiscommon security infrastructure currently consists of a mechanism for making JAAS realms (or loginmodules) available to all application bundles.
Figure 1.1. OSGi Container Security Architecture
JAAS realms
A JAAS realm or login module is a plug-in module that provides authentication and authorization datato Java applications, as defined by the Java Authentication and Authorization Service (JAAS)specification.
Red Hat JBoss Fuse supports a special mechanism for defining JAAS login modules (in either a Springor a blueprint file), which makes the login module accessible to all bundles in the container. This makesit easy for multiple applications running in the OSGi container to consolidate their security data into asingle JAAS realm.
CHAPTER 1. SECURITY ARCHITECTURE
3

karaf realm
The OSGi container has a predefined JAAS realm, the karaf realm. Red Hat JBoss Fuse uses the karaf realm to provide authentication for remote administration of the OSGi runtime, for the FuseManagement Console, and for JMX management. The karaf realm uses a simple file-based repository,where authentication data is stored in the InstallDir/etc/users.properties file.
You can use the karaf realm in your own applications. Simply configure karaf as the name of theJAAS realm that you want to use. Your application then performs authentication using the data fromthe users.properties file.
Console port
You can administer the OSGi container remotely either by connecting to the console port with a Karafclient or using the Karaf ssh:ssh command. The console port is secured by a JAAS login feature thatconnects to the karaf realm. Users that try to connect to the console port will be prompted to enter ausername and password that must match one of the accounts from the karaf realm.
JMX port
You can manage the OSGi container by connecting to the JMX port (for example, using Java'sJConsole). The JMX port is also secured by a JAAS login feature that connects to the karaf realm.
Application bundles and JAAS security
Any application bundles that you deploy into the OSGi container can access the container's JAASrealms. The application bundle simply references one of the existing JAAS realms by name (whichcorresponds to an instance of a JAAS login module).
It is essential, however, that the JAAS realms are defined using the OSGi container's own loginconfiguration mechanism—by default, Java provides a simple file-based login configurationimplementation, but you cannot use this implementation in the context of the OSGi container.
1.2. APACHE CAMEL SECURITY
Overview
Figure 1.2, “Apache Camel Security Architecture” shows an overview of the basic options for securelyrouting messages between Apache Camel endpoints.
Red Hat JBoss Fuse 6.2.1 Security Guide
4
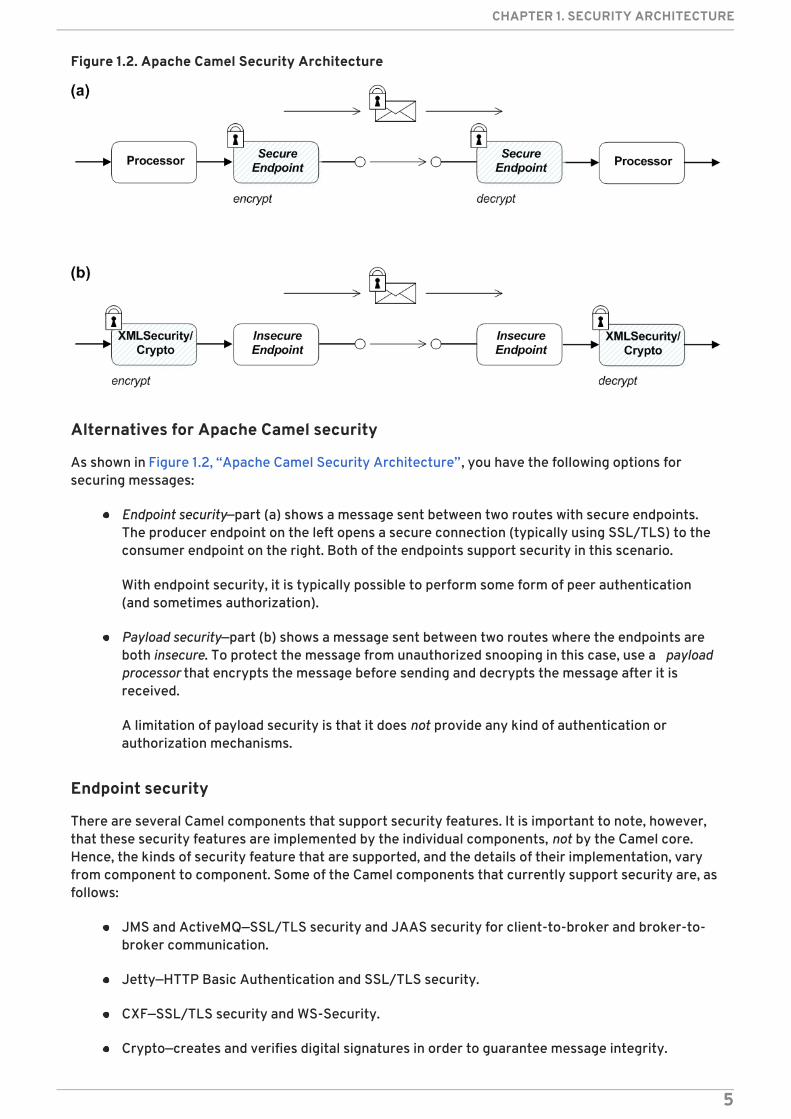
Figure 1.2. Apache Camel Security Architecture
Alternatives for Apache Camel security
As shown in Figure 1.2, “Apache Camel Security Architecture”, you have the following options forsecuring messages:
Endpoint security—part (a) shows a message sent between two routes with secure endpoints.The producer endpoint on the left opens a secure connection (typically using SSL/TLS) to theconsumer endpoint on the right. Both of the endpoints support security in this scenario.
With endpoint security, it is typically possible to perform some form of peer authentication(and sometimes authorization).
Payload security—part (b) shows a message sent between two routes where the endpoints areboth insecure. To protect the message from unauthorized snooping in this case, use a payloadprocessor that encrypts the message before sending and decrypts the message after it isreceived.
A limitation of payload security is that it does not provide any kind of authentication orauthorization mechanisms.
Endpoint security
There are several Camel components that support security features. It is important to note, however,that these security features are implemented by the individual components, not by the Camel core.Hence, the kinds of security feature that are supported, and the details of their implementation, varyfrom component to component. Some of the Camel components that currently support security are, asfollows:
JMS and ActiveMQ—SSL/TLS security and JAAS security for client-to-broker and broker-to-broker communication.
Jetty—HTTP Basic Authentication and SSL/TLS security.
CXF—SSL/TLS security and WS-Security.
Crypto—creates and verifies digital signatures in order to guarantee message integrity.
CHAPTER 1. SECURITY ARCHITECTURE
5
Netty—SSL/TLS security.
MINA—SSL/TLS security.
Cometd—SSL/TLS security.
glogin and gauth—authorization in the context of Google applications.
Payload security
Apache Camel provides the following payload security implementations, where the encryption anddecryption steps are exposed as data formats on the marshal() and unmarshal() operations
the section called “XMLSecurity data format” .
the section called “Crypto data format” .
XMLSecurity data format
The XMLSecurity data format is specifically designed to encrypt XML payloads. When using this dataformat, you can specify which XML element to encrypt. The default behavior is to encrypt all XMLelements. This feature uses a symmetric encryption algorithm.
For more details, see http://camel.apache.org/xmlsecurity-dataformat.html.
Crypto data format
The crypto data format is a general purpose encryption feature that can encrypt any kind of payload. Itis based on the Java Cryptographic Extension and implements only symmetric (shared-key)encryption and decryption.
For more details, see http://camel.apache.org/crypto.html.
Red Hat JBoss Fuse 6.2.1 Security Guide
6

CHAPTER 2. SECURING THE CONTAINER
Abstract
The Red Hat JBoss Fuse container is secured using JAAS. By defining JAAS realms, you can configurethe mechanism used to retrieve user credentials. You can also refine access to the container'sadministrative interfaces by changing the default roles.
2.1. JAAS AUTHENTICATION
Abstract
The Java Authentication and Authorization Service (JAAS) provides a general framework forimplementing authentication in a Java application. The implementation of authentication is modular,with individual JAAS modules (or plug-ins) providing the authentication implementations.
For background information about JAAS, see the JAAS Reference Guide.
2.1.1. Default JAAS Realm
Overview
This section describes how to manage user data for the default JAAS realm in a standalone container.
Default JAAS realm
The Red Hat JBoss Fuse container has a predefined JAAS realm, the karaf realm, which is used bydefault to secure all aspects of the container.
How to integrate an application with JAAS
You can use the karaf realm in your own applications. Simply configure karaf as the name of theJAAS realm that you want to use.
Default JAAS login modules
When you start JBoss Fuse for the first time, the container is configured as a standalone container anduses the karaf default realm. In this default configuration, the karaf realm deploys four JAAS loginmodules, which are enabled simultaneously. To see the deployed login modules, enter the jaas:realms console command, as follows:
JBossFuse:karaf@root> jaas:realmsIndex Realm Module Class 1 karaf org.apache.karaf.jaas.modules.properties.PropertiesLoginModule 2 karaf org.apache.karaf.jaas.modules.publickey.PublickeyLoginModule 3 karaf
CHAPTER 2. SECURING THE CONTAINER
7

IMPORTANT
In a standalone container, both the properties login module and the public key loginmodule are enabled. When JAAS authenticates a user, it tries first of all to authenticatethe user with the properties login module. If that fails, it then tries to authenticate theuser with the public key login module. If that module also fails, an error is raised.
NOTE
The FileAuditLoginModule login module and the EventAdminAuditLoginModulelogin module are used to record an audit trail of successful and failed login attempts.These login modules do not authenticate users.
Configuring users in the properties login module
The properties login module is used to store username/password credentials in a flat file format. Tocreate a new user in the properties login module, open the InstallDir/etc/users.propertiesfile using a text editor and add a line with the following syntax:
For example, to create the jdoe user with password, topsecret, and role, Administrator, youcould create an entry like the following:
Where the Administrator role gives full administrative privileges to the jdoe user.
Configuring user groups in the properties login module
Instead of (or in addition to) assigning roles directly to users, you also have the option of adding usersto user groups in the properties login module. To create a user group in the properties login module,open the InstallDir/etc/users.properties file using a text editor and add a line with thefollowing syntax:
For example, to create the admingroup user group with the roles, SuperUser and Administrator,you could create an entry like the following:
You could then add the majorclanger user to the admingroup, by creating the following user entry:
Configuring the public key login module
org.apache.karaf.jaas.modules.audit.FileAuditLoginModule 4 karaf org.apache.karaf.jaas.modules.audit.EventAdminAuditLoginModule
Username=Password[,UserGroup|Role][,UserGroup|Role]...
jdoe=topsecret,Administrator
_g_\:GroupName=Role1,Role2,...
_g_\:admingroup=SuperUser,Administrator
majorclanger=secretpass,_g_:admingroup
Red Hat JBoss Fuse 6.2.1 Security Guide
8

The public key login module is used to store SSH public key credentials in a flat file format. To create anew user in the public key login module, open the InstallDir/etc/keys.properties file using atext editor and add a line with the following syntax:
For example, you can create the jdoe user with the Administrator role by adding the followingentry to the InstallDir/etc/keys.properties file (on a single line):
IMPORTANT
Do not insert the entire contents of an id_rsa.pub file here. Insert just the block ofsymbols which represents the public key itself.
Configuring user groups in the public key login module
Instead of (or in addition to) assigning roles directly to users, you also have the option of adding usersto user groups in the public key login module. To create a user group in the public key login module,open the InstallDir/etc/keys.properties file using a text editor and add a line with thefollowing syntax:
For example, to create the admingroup user group with the roles, SuperUser and Administrator,you could create an entry like the following:
You could then add the jdoe user to the admingroup, by creating the following user entry:
Username=PublicKey[,UserGroup|Role][,UserGroup|Role]...
jdoe=AAAAB3NzaC1kc3MAAACBAP1/U4EddRIpUt9KnC7s5Of2EbdSPO9EAMMeP4C2USZpRV1AIlH7WT2NWPq/xfW6MPbLm1Vs14E7gB00b/JmYLdrmVClpJ+f6AR7ECLCT7up1/63xhv4O1fnfqimFQ8E+4P208UewwI1VBNaFpEy9nXzrith1yrv8iIDGZ3RSAHHAAAAFQCXYFCPFSMLzLKSuYKi64QL8Fgc9QAAAnEA9+GghdabPd7LvKtcNrhXuXmUr7v6OuqC+VdMCz0HgmdRWVeOutRZT+ZxBxCBgLRJFnEj6EwoFhO3zwkyjMim4TwWeotifI0o4KOuHiuzpnWRbqN/C/ohNWLx+2J6ASQ7zKTxvqhRkImog9/hWuWfBpKLZl6Ae1UlZAFMO/7PSSoAAACBAKKSU2PFl/qOLxIwmBZPPIcJshVe7bVUpFvyl3BbJDow8rXfskl8wO63OzP/qLmcJM0+JbcRU/53Jj7uyk31drV2qxhIOsLDC9dGCWj47Y7TyhPdXh/0dthTRBy6bqGtRPxGa7gJov1xm/UuYYXPIUR/3x9MAZvZ5xvE0kYXO+rx,Administrator
_g_\:GroupName=Role1,Role2,...
_g_\:admingroup=SuperUser,Administrator
jdoe=AAAAB3NzaC1kc3MAAACBAP1/U4EddRIpUt9KnC7s5Of2EbdSPO9EAMMeP4C2USZpRV1AIlH7WT2NWPq/xfW6MPbLm1Vs14E7gB00b/JmYLdrmVClpJ+f6AR7ECLCT7up1/63xhv4O1fnfqimFQ8E+4P208UewwI1VBNaFpEy9nXzrith1yrv8iIDGZ3RSAHHAAAAFQCXYFCPFSMLzLKSuYKi64QL8Fgc9QAAAnEA9+GghdabPd7LvKtcNrhXuXmUr7v6OuqC+VdMCz0HgmdRWVeOutRZT+ZxBxCBgLRJFnEj6EwoFhO3zwkyjMim4TwWeotifI0o4KOuHiuzpnWRbqN/C/ohNWLx+2J6ASQ7zKTxvqhRkImog9/hWuWfBpKLZl6Ae1UlZAFMO/7PSSoAAACBAKKSU2PFl/qOLxIwmBZPPIcJshVe7bVUpFvyl3BbJDow8rXfskl8wO63OzP/qLmcJM0+JbcRU/
CHAPTER 2. SECURING THE CONTAINER
9
Encrypting the stored passwords
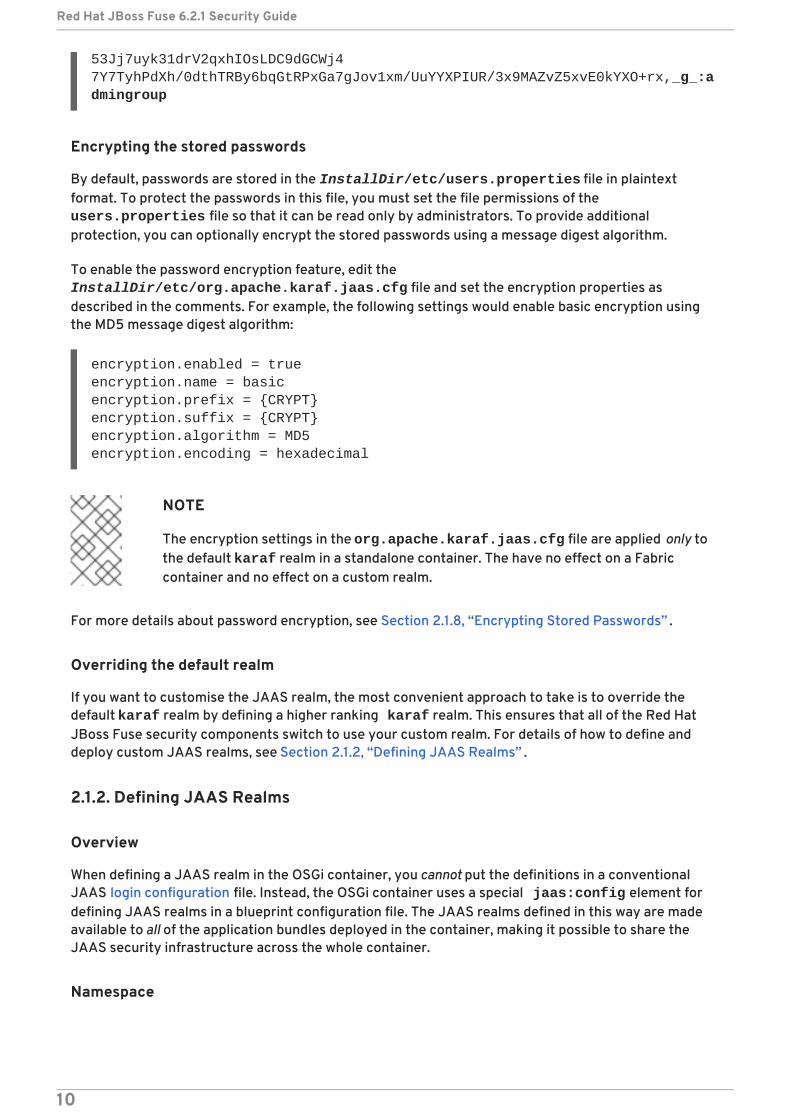
By default, passwords are stored in the InstallDir/etc/users.properties file in plaintextformat. To protect the passwords in this file, you must set the file permissions of the users.properties file so that it can be read only by administrators. To provide additionalprotection, you can optionally encrypt the stored passwords using a message digest algorithm.
To enable the password encryption feature, edit the InstallDir/etc/org.apache.karaf.jaas.cfg file and set the encryption properties asdescribed in the comments. For example, the following settings would enable basic encryption usingthe MD5 message digest algorithm:
NOTE
The encryption settings in the org.apache.karaf.jaas.cfg file are applied only tothe default karaf realm in a standalone container. The have no effect on a Fabriccontainer and no effect on a custom realm.
For more details about password encryption, see Section 2.1.8, “Encrypting Stored Passwords” .
Overriding the default realm
If you want to customise the JAAS realm, the most convenient approach to take is to override thedefault karaf realm by defining a higher ranking karaf realm. This ensures that all of the Red HatJBoss Fuse security components switch to use your custom realm. For details of how to define anddeploy custom JAAS realms, see Section 2.1.2, “Defining JAAS Realms” .
2.1.2. Defining JAAS Realms
Overview
When defining a JAAS realm in the OSGi container, you cannot put the definitions in a conventionalJAAS login configuration file. Instead, the OSGi container uses a special jaas:config element fordefining JAAS realms in a blueprint configuration file. The JAAS realms defined in this way are madeavailable to all of the application bundles deployed in the container, making it possible to share theJAAS security infrastructure across the whole container.
Namespace
53Jj7uyk31drV2qxhIOsLDC9dGCWj47Y7TyhPdXh/0dthTRBy6bqGtRPxGa7gJov1xm/UuYYXPIUR/3x9MAZvZ5xvE0kYXO+rx,_g_:admingroup
encryption.enabled = trueencryption.name = basicencryption.prefix = {CRYPT}encryption.suffix = {CRYPT}encryption.algorithm = MD5encryption.encoding = hexadecimal
Red Hat JBoss Fuse 6.2.1 Security Guide
10
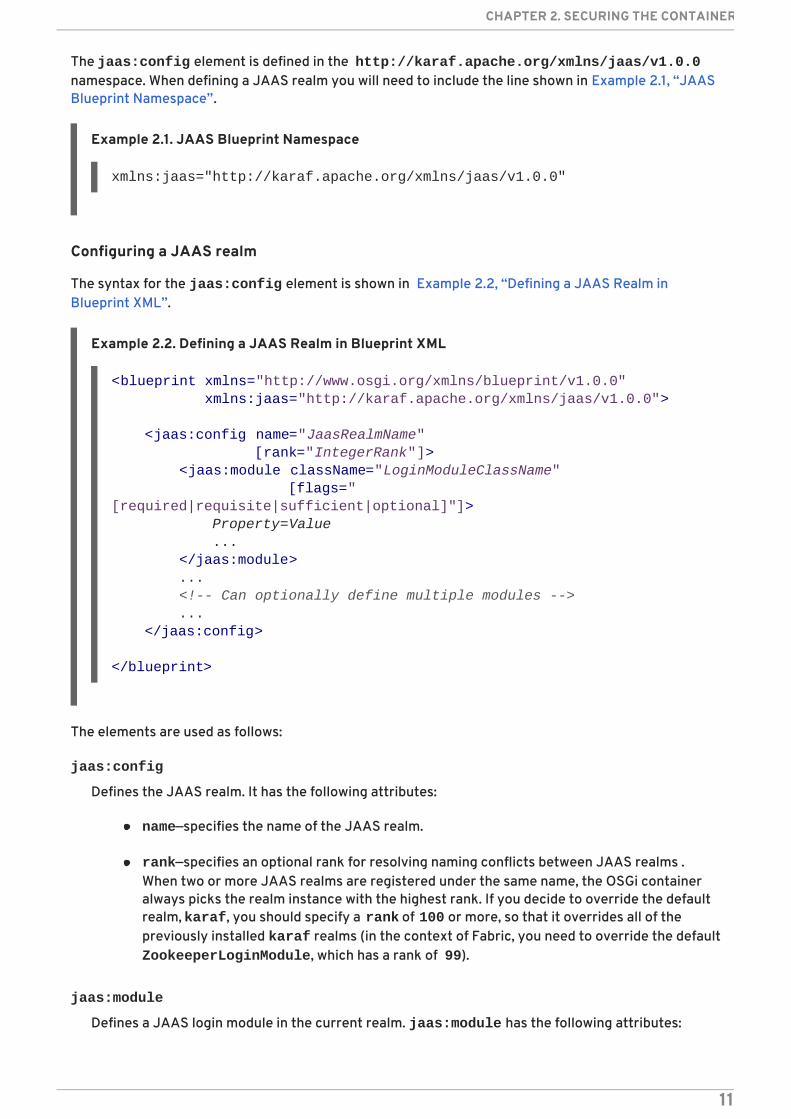
The jaas:config element is defined in the http://karaf.apache.org/xmlns/jaas/v1.0.0namespace. When defining a JAAS realm you will need to include the line shown in Example 2.1, “JAASBlueprint Namespace”.
Example 2.1. JAAS Blueprint Namespace
Configuring a JAAS realm
The syntax for the jaas:config element is shown in Example 2.2, “Defining a JAAS Realm inBlueprint XML”.
Example 2.2. Defining a JAAS Realm in Blueprint XML
The elements are used as follows:
jaas:config
Defines the JAAS realm. It has the following attributes:
name—specifies the name of the JAAS realm.
rank—specifies an optional rank for resolving naming conflicts between JAAS realms .When two or more JAAS realms are registered under the same name, the OSGi containeralways picks the realm instance with the highest rank. If you decide to override the defaultrealm, karaf, you should specify a rank of 100 or more, so that it overrides all of thepreviously installed karaf realms (in the context of Fabric, you need to override the defaultZookeeperLoginModule, which has a rank of 99).
jaas:module
Defines a JAAS login module in the current realm. jaas:module has the following attributes:
xmlns:jaas="http://karaf.apache.org/xmlns/jaas/v1.0.0"
<blueprint xmlns="http://www.osgi.org/xmlns/blueprint/v1.0.0" xmlns:jaas="http://karaf.apache.org/xmlns/jaas/v1.0.0">
<jaas:config name="JaasRealmName" [rank="IntegerRank"]> <jaas:module className="LoginModuleClassName" [flags="[required|requisite|sufficient|optional]"]> Property=Value ... </jaas:module> ... <!-- Can optionally define multiple modules --> ... </jaas:config>
</blueprint>
CHAPTER 2. SECURING THE CONTAINER
11

className—the fully-qualified class name of a JAAS login module. The specified class mustbe available from the bundle classloader.
flags—determines what happens upon success or failure of the login operation. Table 2.1,“Flags for Defining a JAAS Module” describes the valid values.
Table 2.1. Flags for Defining a JAAS Module
Value Description
required Authentication of this login module mustsucceed. Always proceed to the next loginmodule in this entry, irrespective of success orfailure.
requisite Authentication of this login module mustsucceed. If success, proceed to the next loginmodule; if failure, return immediately withoutprocessing the remaining login modules.
sufficient Authentication of this login module is notrequired to succeed. If success, returnimmediately without processing theremaining login modules; if failure, proceed tothe next login module.
optional Authentication of this login module is notrequired to succeed. Always proceed to thenext login module in this entry, irrespective ofsuccess or failure.
The contents of a jaas:module element is a space separated list of property settings, which areused to initialize the JAAS login module instance. The specific properties are determined by theJAAS login module and must be put into the proper format.
NOTE
You can define multiple login modules in a realm.
Converting standard JAAS login properties to XML
Red Hat JBoss Fuse uses the same properties as a standard Java login configuration file, however RedHat JBoss Fuse requires that they are specified slightly differently. To see how the Red Hat JBoss Fuseapproach to defining JAAS realms compares with the standard Java login configuration file approach,consider how to convert the login configuration shown in Example 2.3, “Standard JAAS Properties”,which defines the PropertiesLogin realm using the Red Hat JBoss Fuse properties login moduleclass, PropertiesLoginModule:
Example 2.3. Standard JAAS Properties
PropertiesLogin {
Red Hat JBoss Fuse 6.2.1 Security Guide
12

The equivalent JAAS realm definition, using the jaas:config element in a blueprint file, is shown inExample 2.4, “Blueprint JAAS Properties”.
Example 2.4. Blueprint JAAS Properties
IMPORTANT
You do not use double quotes for JAAS properties in the blueprint configuration.
Example
Red Hat JBoss Fuse also provides an adapter that enables you to store JAAS authentication data in anX.500 server. Example 2.5, “Configuring a JAAS Realm” defines the LDAPLogin realm to use Red HatJBoss Fuse's LDAPLoginModule class, which connects to the LDAP server located atldap://localhost:10389.
Example 2.5. Configuring a JAAS Realm
org.apache.activemq.jaas.PropertiesLoginModule required org.apache.activemq.jaas.properties.user="users.properties" org.apache.activemq.jaas.properties.group="groups.properties";};
<blueprint xmlns="http://www.osgi.org/xmlns/blueprint/v1.0.0" xmlns:jaas="http://karaf.apache.org/xmlns/jaas/v1.0.0" xmlns:ext="http://aries.apache.org/blueprint/xmlns/blueprint-ext/v1.0.0">
<jaas:config name="PropertiesLogin"> <jaas:module className="org.apache.activemq.jaas.PropertiesLoginModule" flags="required"> org.apache.activemq.jaas.properties.user=users.properties org.apache.activemq.jaas.properties.group=groups.properties </jaas:module> </jaas:config>
</blueprint>
<?xml version="1.0" encoding="UTF-8"?><blueprint xmlns="http://www.osgi.org/xmlns/blueprint/v1.0.0" xmlns:jaas="http://karaf.apache.org/xmlns/jaas/v1.0.0" xmlns:ext="http://aries.apache.org/blueprint/xmlns/blueprint-ext/v1.0.0">
<jaas:config name="LDAPLogin" rank="200"> <jaas:module className="org.apache.karaf.jaas.modules.ldap.LDAPLoginModule" flags="required"> initialContextFactory=com.sun.jndi.ldap.LdapCtxFactory
CHAPTER 2. SECURING THE CONTAINER
13

For a detailed description and example of using the LDAP login module, see Section 2.1.7, “JAAS LDAPLogin Module”.
2.1.3. JAAS Properties Login Module
Overview
The JAAS properties login module stores user data in a flat file format (where the stored passwordscan optionally be encrypted using a message digest algorithm). The user data can either be editeddirectly, using a simple text editor, or managed using the jaas:* console commands.
For example, a standalone container uses the JAAS properties login module by default and stores theassociated user data in the InstallDir/etc/users.properties file.
Supported credentials
The JAAS properties login module authenticates username/password credentials, returning the list ofroles associated with the authenticated user.
Implementation classes
The following classes implement the JAAS properties login module:
org.apache.karaf.jaas.modules.properties.PropertiesLoginModule
Implements the JAAS login module.
org.apache.karaf.jaas.modules.properties.PropertiesBackingEngineFactory
Must be exposed as an OSGi service. This service makes it possible for you to manage the user datausing the jaas:* console commands from the Apache Karaf shell (see chapter "JAAS ConsoleCommands" in "Console Reference").
Options
The JAAS properties login module supports the following options:
connection.username=uid=admin,ou=system connection.password=secret connection.protocol= connection.url = ldap://localhost:10389 user.base.dn = ou=users,ou=system user.filter = (uid=%u) user.search.subtree = true role.base.dn = ou=users,ou=system role.filter = (uid=%u) role.name.attribute = ou role.search.subtree = true authentication = simple </jaas:module> </jaas:config></blueprint>
Red Hat JBoss Fuse 6.2.1 Security Guide
14

users
Location of the user properties file.
Format of the user properties file
The user properties file is used to store username, password, and role data for the properties loginmodule. Each user is represented by a single line in the user properties file, where a line has thefollowing form:
User groups can also be defined in this file, where each user group is represented by a single line in thefollowing format:
For example, you can define the users, bigcheese and guest, and the user groups, admingroup and guestgroup, as follows:
Sample Blueprint configuration
The following Blueprint configuration shows how to define a new karaf realm using the propertieslogin module, where the default karaf realm is overridden by setting the rank attribute to 200:
Username=Password[,UserGroup|Role][,UserGroup|Role]...
_g_\:GroupName=Role1[,Role2]...
# Usersbigcheese=cheesepass,_g_:admingroupguest=guestpass,_g_:guestgroup
# Groups_g_\:admingroup=SuperUser,Administrator_g_\:guestgroup=Monitor
<?xml version="1.0" encoding="UTF-8"?><blueprint xmlns="http://www.osgi.org/xmlns/blueprint/v1.0.0" xmlns:jaas="http://karaf.apache.org/xmlns/jaas/v1.0.0" xmlns:cm="http://aries.apache.org/blueprint/xmlns/blueprint-cm/v1.1.0" xmlns:ext="http://aries.apache.org/blueprint/xmlns/blueprint-ext/v1.0.0">
<type-converters> <bean class="org.apache.karaf.jaas.modules.properties.PropertiesConverter"/> </type-converters>
<!-- Allow usage of System properties, especially the karaf.base property --> <ext:property-placeholder placeholder-prefix="$[" placeholder-suffix="]"/>
<jaas:config name="karaf" rank="200"> <jaas:module
CHAPTER 2. SECURING THE CONTAINER
15

Remember to export the BackingEngineFactory bean as an OSGi service, so that the jaas:*console commands can manage the user data.
2.1.4. JAAS OSGi Config Login Module
Overview
The JAAS OSGi config login modules leverages the OSGi Config Admin Service to store user data. Thislogin module is fairly similar to the JAAS properties login module (for example, the syntax of the userentries is the same), but the mechanism for retrieving user data is based on the OSGi Config AdminService.
The user data can be edited directly by creating a corresponding OSGi configuration file, etc/PersistentID.cfg or using any method of configuration that is supported by the OSGi ConfigAdmin Service. The jaas:* console commands are not supported, however.
Supported credentials
The JAAS OSGi config login module authenticates username/password credentials, returning the listof roles associated with the authenticated user.
Implementation classes
The following classes implement the JAAS OSGi config login module:
org.apache.karaf.jaas.modules.osgi.OsgiConfigLoginModule
Implements the JAAS login module.
NOTE
There is no backing engine factory for the OSGi config login module, which means thatthis module cannot be managed using the jaas:* console commands.
Options
The JAAS OSGi config login module supports the following options:
className="org.apache.karaf.jaas.modules.properties.PropertiesLoginModule" flags="required"> users = $[karaf.base]/etc/users.properties </jaas:module> </jaas:config>
<!-- The Backing Engine Factory Service for the PropertiesLoginModule --> <service interface="org.apache.karaf.jaas.modules.BackingEngineFactory"> <bean class="org.apache.karaf.jaas.modules.properties.PropertiesBackingEngineFactory"/> </service>
</blueprint>
Red Hat JBoss Fuse 6.2.1 Security Guide
16

pid
The persistent ID of the OSGi configuration containing the user data. In the OSGi Config Adminstandard, a persistent ID references a set of related configuration properties.
Location of the configuration file
The location of the configuration file follows the usual convention where the configuration for thepersistent ID, PersistentID, is stored in the following file:
Format of the configuration file
The PersistentID.cfg configuration file is used to store username, password, and role data for theOSGi config login module. Each user is represented by a single line in the configuration file, where a linehas the following form:
NOTE
User groups are not supported in the JAAS OSGi config login module.
Sample Blueprint configuration
The following Blueprint configuration shows how to define a new karaf realm using the OSGi configlogin module, where the default karaf realm is overridden by setting the rank attribute to 200:
In this example, the user data will be stored in the file, InstallDir/etc/org.jboss.example.osgiconfigloginmodule.cfg, and it is not possible toedit the configuration using the jaas:* console commands.
2.1.5. JAAS Public Key Login Module
InstallDir/etc/PersistentID.cfg
Username=Password[,Role][,Role]...
<?xml version="1.0" encoding="UTF-8"?><blueprint xmlns="http://www.osgi.org/xmlns/blueprint/v1.0.0" xmlns:jaas="http://karaf.apache.org/xmlns/jaas/v1.0.0" xmlns:cm="http://aries.apache.org/blueprint/xmlns/blueprint-cm/v1.1.0" xmlns:ext="http://aries.apache.org/blueprint/xmlns/blueprint-ext/v1.0.0">
<jaas:config name="karaf" rank="200"> <jaas:module className="org.apache.karaf.jaas.modules.osgi.OsgiConfigLoginModule" flags="required"> pid = org.jboss.example.osgiconfigloginmodule </jaas:module> </jaas:config>
</blueprint>
CHAPTER 2. SECURING THE CONTAINER
17

Overview
The JAAS public key login module stores user data in a flat file format, which can be edited directlyusing a simple text editor. The jaas:* console commands are not supported, however.
For example, a standalone container uses the JAAS public key login module by default and stores theassociated user data in the InstallDir/etc/keys.properties file.
Supported credentials
The JAAS public key login module authenticates SSH key credentials. When a user tries to log in, theSSH protocol uses the stored public key to challenge the user. The user must possess thecorresponding private key in order to answer the challenge. If login is successful, the login modulereturns the list of roles associated with the user.
Implementation classes
The following classes implement the JAAS public key login module:
org.apache.karaf.jaas.modules.publickey.PublickeyLoginModule
Implements the JAAS login module.
NOTE
There is no backing engine factory for the public key login module, which means that thismodule cannot be managed using the jaas:* console commands.
Options
The JAAS public key login module supports the following options:
users
Location of the user properties file for the public key login module.
Format of the keys properties file
The keys.properties file is used to store username, public key, and role data for the public keylogin module. Each user is represented by a single line in the keys properties file, where a line has thefollowing form:
Where the PublicKey is the public key part of an SSH key pair (typically found in a user's home directoryin ~/.ssh/id_rsa.pub in a UNIX system).
For example, to create the user jdoe with the Administrator role, you would create an entry likethe following:
Username=PublicKey[,UserGroup|Role][,UserGroup|Role]...
jdoe=AAAAB3NzaC1kc3MAAACBAP1/U4EddRIpUt9KnC7s5Of2EbdSPO9EAMMeP4C2USZpRV1AIlH7WT2NWPq/xfW6MPbLm1Vs14E7gB00b/JmYLdrmVClpJ+f6AR7ECLCT7up1/63xhv4O1fnfqimFQ8E+4P208UewwI1VBNaFpEy9n
Red Hat JBoss Fuse 6.2.1 Security Guide
18

IMPORTANT
Do not insert the entire contents of the id_rsa.pub file here. Insert just the block ofsymbols which represents the public key itself.
User groups can also be defined in this file, where each user group is represented by a single line in thefollowing format:
Sample Blueprint configuration
The following Blueprint configuration shows how to define a new karaf realm using the public keylogin module, where the default karaf realm is overridden by setting the rank attribute to 200:
In this example, the user data will be stored in the file, InstallDir/etc/keys.properties, and it isnot possible to edit the configuration using the jaas:* console commands.
2.1.6. JAAS JDBC Login Module
Xzrith1yrv8iIDGZ3RSAHHAAAAFQCXYFCPFSMLzLKSuYKi64QL8Fgc9QAAAnEA9+GghdabPd7LvKtcNrhXuXmUr7v6OuqC+VdMCz0HgmdRWVeOutRZT+ZxBxCBgLRJFnEj6EwoFhO3zwkyjMim4TwWeotifI0o4KOuHiuzpnWRbqN/C/ohNWLx+2J6ASQ7zKTxvqhRkImog9/hWuWfBpKLZl6Ae1UlZAFMO/7PSSoAAACBAKKSU2PFl/qOLxIwmBZPPIcJshVe7bVUpFvyl3BbJDow8rXfskl8wO63OzP/qLmcJM0+JbcRU/53Jj7uyk31drV2qxhIOsLDC9dGCWj47Y7TyhPdXh/0dthTRBy6bqGtRPxGa7gJov1xm/UuYYXPIUR/3x9MAZvZ5xvE0kYXO+rx,Administrator
_g_\:GroupName=Role1[,Role2]...
<?xml version="1.0" encoding="UTF-8"?><blueprint xmlns="http://www.osgi.org/xmlns/blueprint/v1.0.0" xmlns:jaas="http://karaf.apache.org/xmlns/jaas/v1.0.0" xmlns:cm="http://aries.apache.org/blueprint/xmlns/blueprint-cm/v1.1.0" xmlns:ext="http://aries.apache.org/blueprint/xmlns/blueprint-ext/v1.0.0">
<!-- Allow usage of System properties, especially the karaf.base property --> <ext:property-placeholder placeholder-prefix="$[" placeholder-suffix="]"/>
<jaas:config name="karaf" rank="200"> <jaas:module className="org.apache.karaf.jaas.modules.publickey.PublickeyLoginModule" flags="required"> users = $[karaf.base]/etc/keys.properties </jaas:module> </jaas:config>
</blueprint>
CHAPTER 2. SECURING THE CONTAINER
19
Overview
The JAAS JDBC login module enables you to store user data in a database back-end, using JavaDatabase Connectivity (JDBC) to connect to the database. Hence, you can use any database thatsupports JDBC to store your user data. To manage the user data, you can use either the nativedatabase client tools or the jaas:* console commands (where the backing engine uses configuredSQL queries to perform the relevant database updates).
You can combine multiple login modules with each login module providing both the authentication andauthorization components. For example, you can combine default PropertiesLoginModule with JDBCLoginModule to ensure access to the system.
NOTE
User groups are not supported in the JAAS JDBC login module.
Supported credentials
The JAAS JDBC Login Module authenticates username/password credentials, returning the list ofroles associated with the authenticated user.
Implementation classes
The following classes implement the JAAS JDBC Login Module:
org.apache.karaf.jaas.modules.jdbc.JDBCLoginModule
Implements the JAAS login module.
org.apache.karaf.jaas.modules.jdbc.JDBCBackingEngineFactory
Must be exposed as an OSGi service. This service makes it possible for you to manage the user datausing the jaas:* console commands from the Apache Karaf shell (see chapter "JAAS ConsoleCommands" in "Console Reference").
Options
The JAAS JDBC login module supports the following options:
datasource
The JDBC data source, specified either as an OSGi service or as a JNDI name. You can specify adata source's OSGi service using the following syntax:
The ServiceInterfaceName is the interface or class that is exported by the data source's OSGiservice (usually javax.sql.DataSource).
Because multiple data sources can be exported as OSGi services in a container, it is usuallynecessary to specify a filter, ServicePropertiesFilter, to select the particular data source that youwant. Filters on OSGi services are applied to the service property settings and follow a syntax thatis borrowed from LDAP filter syntax.
query.password
osgi:ServiceInterfaceName[/ServicePropertiesFilter]
Red Hat JBoss Fuse 6.2.1 Security Guide
20

The SQL query that retrieves the user's password. The query can contain a single question markcharacter, ?, which is substituted by the username at run time.
query.role
The SQL query that retrieves the user's roles. The query can contain a single question markcharacter, ?, which is substituted by the username at run time.
insert.user
The SQL query that creates a new user entry. The query can contain two question marks, ?,characters: the first question mark is substituted by the username and the second question mark issubstituted by the password at run time.
insert.role
The SQL query that adds a role to a user entry. The query can contain two question marks, ?,characters: the first question mark is substituted by the username and the second question mark issubstituted by the role at run time.
delete.user
The SQL query that deletes a user entry. The query can contain a single question mark character, ?,which is substituted by the username at run time.
delete.role
The SQL query that deletes a role from a user entry. The query can contain two question marks, ?,characters: the first question mark is substituted by the username and the second question mark issubstituted by the role at run time.
delete.roles
The SQL query that deletes multiple roles from a user entry. The query can contain a singlequestion mark character, ?, which is substituted by the username at run time.
Example of setting up a JDBC login module
To set up a JDBC login module, perform the following main steps:
1. the section called “Create the database tables”
2. the section called “Create the data source”
3. the section called “Specify the data source as an OSGi service”
Create the database tables
Before you can set up the JDBC login module, you must set up a users table and a roles table in thebacking database to store the user data. For example, the following SQL commands show how tocreate a suitable users table and roles table:
CREATE TABLE users ( username VARCHAR(255) NOT NULL, password VARCHAR(255) NOT NULL, PRIMARY KEY (username)
CHAPTER 2. SECURING THE CONTAINER
21

The users table stores username/password data and the roles table associates a username withone or more roles.
Create the data source
To use a JDBC datasource with the JDBC login module, the correct approach to take is to create adata source instance and export the data source as an OSGi service. The JDBC login module can thenaccess the data source by referencing the exported OSGi service. For example, you could create aMySQL data source instance and expose it as an OSGi service (of javax.sql.DataSource type)using code like the following in a Blueprint file:
The preceding Blueprint configuration should be packaged and installed in the container as an OSGibundle.
Specify the data source as an OSGi service
After the data source has been instantiated and exported as an OSGi service, you are ready toconfigure the JDBC login module. In particular, the datasource option of the JDBC login module canreference the data source's OSGi service using the following syntax:
Where javax.sql.DataSource is the interface type of the exported OSGi service and the filter, (osgi.jndi.service.name=jdbc/karafdb), selects the particular javax.sql.DataSourceinstance whose osgi.jndi.service.name service property has the value, jdbc/karafdb.
For example, you can use the following Blueprint configuration to override the karaf realm with aJDBC login module that references the sample MySQL data source:
);CREATE TABLE roles ( username VARCHAR(255) NOT NULL, role VARCHAR(255) NOT NULL, PRIMARY KEY (username,role));
<blueprint xmlns:xsi="http://www.w3.org/2001/XMLSchema-instance" xmlns="http://www.osgi.org/xmlns/blueprint/v1.0.0"> <bean class="com.mysql.jdbc.jdbc2.optional.MysqlDataSource" id="mysqlDatasource"> <property name="serverName" value="localhost"></property> <property name="databaseName" value="DBName"></property> <property name="port" value="3306"></property> <property name="user" value="DBUser"></property> <property name="password" value="DBPassword"></property> </bean>
<service id="mysqlDS" interface="javax.sql.DataSource" ref="mysqlDatasource"> <service-properties> <entry key="osgi.jndi.service.name" value="jdbc/karafdb"/> </service-properties> </service></blueprint>
osgi:javax.sql.DataSource/(osgi.jndi.service.name=jdbc/karafdb)
Red Hat JBoss Fuse 6.2.1 Security Guide
22

NOTE
The SQL statements shown in the preceding configuration are in fact the default valuesof these options. Hence, if you create user and role tables consistent with these SQLstatements, you could omit the options settings and rely on the defaults.
In addition to creating a JDBCLoginModule, the preceding Blueprint configuration also instantiates andexports a JDBCBackingEngineFactory instance, which enables you to manage the user data usingthe jaas:* console commands.
2.1.7. JAAS LDAP Login Module
Overview
The JAAS LDAP login module enables you to store user data in an LDAP database. To manage thestored user data, use a standard LDAP client tool. The jaas:* console commands are not supported.
<?xml version="1.0" encoding="UTF-8"?><blueprint xmlns="http://www.osgi.org/xmlns/blueprint/v1.0.0" xmlns:jaas="http://karaf.apache.org/xmlns/jaas/v1.0.0" xmlns:cm="http://aries.apache.org/blueprint/xmlns/blueprint-cm/v1.1.0" xmlns:ext="http://aries.apache.org/blueprint/xmlns/blueprint-ext/v1.0.0">
<!-- Allow usage of System properties, especially the karaf.base property --> <ext:property-placeholder placeholder-prefix="$[" placeholder-suffix="]"/>
<jaas:config name="karaf" rank="200"> <jaas:module className="org.apache.karaf.jaas.modules.jdbc.JDBCLoginModule" flags="required"> datasource = osgi:javax.sql.DataSource/(osgi.jndi.service.name=jdbc/karafdb) query.password = SELECT password FROM users WHERE username=? query.role = SELECT role FROM roles WHERE username=? insert.user = INSERT INTO users VALUES(?,?) insert.role = INSERT INTO roles VALUES(?,?) delete.user = DELETE FROM users WHERE username=? delete.role = DELETE FROM roles WHERE username=? AND role=? delete.roles = DELETE FROM roles WHERE username=? </jaas:module> </jaas:config>
<!-- The Backing Engine Factory Service for the JDBCLoginModule --> <service interface="org.apache.karaf.jaas.modules.BackingEngineFactory"> <bean class="org.apache.karaf.jaas.modules.jdbc.JDBCBackingEngineFactory"/> </service>
</blueprint>
CHAPTER 2. SECURING THE CONTAINER
23

For more details about using LDAP with Red Hat JBoss Fuse see Chapter 8, LDAP AuthenticationTutorial.
NOTE
User groups are not supported in the JAAS LDAP login module.
IMPORTANT
In a Fuse Fabric, the Zookeeper login module must always be enabled. Hence, if you wantto enable the LDAP login module in a Fabric, both the Zookeeper login module and theLDAP login module must be enabled. See Section 8.4, “Enable LDAP Authentication inthe OSGi Container” for details.
Supported credentials
The JAAS LDAP Login Module authenticates username/password credentials, returning the list ofroles associated with the authenticated user.
Implementation classes
The following classes implement the JAAS LDAP Login Module:
org.apache.karaf.jaas.modules.ldap.LDAPLoginModule
Implements the JAAS login module. It is preloaded in the container, so you do not need to install itsbundle.
NOTE
There is no backing engine factory for the LDAP Login Module, which means that thismodule cannot be managed using the jaas:* console commands.
Options
The JAAS LDAP login module supports the following options:
authentication
Specifies the authentication method used when binding to the LDAP server. Valid values are
simple—bind with user name and password authentication, requiring you to set the connection.username and connection.password properties.
none—bind anonymously. In this case the connection.username and connection.password properties can be left unassigned.
NOTE
The connection to the directory server is used only for performing searches. In thiscase, an anonymous bind is often preferred, because it is faster than anauthenticated bind (but you would also need to ensure that the directory server issufficiently protected, for example by deploying it behind a firewall).
Red Hat JBoss Fuse 6.2.1 Security Guide
24

connection.url
Specifies specify the location of the directory server using an ldap URL, ldap://Host:Port. You canoptionally qualify this URL, by adding a forward slash, /, followed by the DN of a particular node inthe directory tree. To enable SSL security on the connection, you need to specify the ldaps:scheme in the URL—for example, ldaps://Host:Port. You can also specify multiple URLs, as a space-separated list, for example:
connection.username
Specifies the DN of the user that opens the connection to the directory server. For example, uid=admin,ou=system.
connection.password
Specifies the password that matches the DN from connection.username. In the directory server, thepassword is normally stored as a userPassword attribute in the corresponding directory entry.
context.com.sun.jndi.ldap.connect.pool
If true, enables connection pooling for LDAP connections. Default is false.
context.com.sun.jndi.ldap.connect.timeout
Specifies the timeout for creating a TCP connection to the LDAP server, in units of milliseconds. Werecommend that you set this property explicitly, because the default value is infinite, which canresult in a hung connection attempt.
context.com.sun.jndi.ldap.read.timeout
Specifies the read timeout for an LDAP operation, in units of milliseconds. We recommend that youset this property explicitly, because the default value is infinite.
context.java.naming.referral
An LDAP referral is a form of indirection supported by some LDAP servers. The LDAP referral is anentry in the LDAP server which contains one or more URLs (usually referencing a node or nodes inanother LDAP server). The context.java.naming.referral property can be used to enable ordisable referral following. It can be set to one of the following values:
follow to follow the referrals (assuming it is supported by the LDAP server),
ignore to silently ignore all referrals,
throw to throw a PartialResultException whenever a referral is encountered.
initial.context.factory
Specifies the class of the context factory used to connect to the LDAP server. This must always beset to com.sun.jndi.ldap.LdapCtxFactory.
role.base.dn
Specifies the DN of the subtree of the DIT to search for role entries. For example, ou=groups,ou=system.
connection.url=ldap://10.0.0.153:2389 ldap://10.10.178.20:389
CHAPTER 2. SECURING THE CONTAINER
25

role.filter
Specifies the LDAP search filter used to locate roles. It is applied to the subtree selected by role.base.dn. For example, (member=uid=%u). Before being passed to the LDAP searchoperation, the value is subjected to string substitution, as follows:
%u is replaced by the user name extracted from the incoming credentials, and
%dn is replaced by the RDN of the corresponding user in the LDAP server (which was foundby matching against the user.filter filter).
%fqdn is replaced by the DN of the corresponding user in the LDAP server (which wasfound by matching against the user.filter filter).
role.mapping
Specifies the mapping between LDAP groups and JAAS roles. If no mapping is specified, the defaultmapping is for each LDAP group to map to the corresponding JAAS role of the same name. The rolemapping is specified with the following syntax:
For example, given the LDAP groups, admin, devop, and tester, you could map them to JAASroles, as follows:
role.name.attribute
Specifies the attribute type of the role entry that contains the name of the role/group. If you omitthis option, the role search feature is effectively disabled. For example, cn.
role.search.subtree
Specifies whether the role entry search scope includes the subtrees of the tree selected by role.base.dn. If true, the role lookup is recursive ( SUBTREE). If false, the role lookup isperformed only at the first level (ONELEVEL).
ssl
Specifies whether the connection to the LDAP server is secured using SSL. If connection.url startswith ldaps:// SSL is used regardless of this property.
ssl.provider
Specifies the SSL provider to use for the LDAP connection. If not specified, the default SSL provideris used.
ssl.protocol
Specifies the protocol to use for the SSL connection. You must set this property to TLSv1, in orderto prevent the SSLv3 protocol from being used (POODLE vulnerability).
ssl.algorithm
Specifies the algorithm used by the trust store manager. For example, PKIX.
ldap-group=jaas-role(,jaas-role)*(;ldap-group=jaas-role(,jaas-role)*)*
role.mapping=admin=Administrator;devop=Administrator,Deployer;tester=Monitor
Red Hat JBoss Fuse 6.2.1 Security Guide
26

ssl.keystore
The ID of the keystore that stores the LDAP client's own X.509 certificate (required only if SSLclient authentication is enabled on the LDAP server). The keystore must be deployed using a jaas:keystore element (see the section called “Sample configuration for Apache DS” ).
ssl.keyalias
The keystore alias of the LDAP client's own X.509 certificate (required only if there is more thanone certificate stored in the keystore specified by ssl.keystore).
ssl.truststore
The ID of the keystore that stores trusted CA certificates, which are used to verify the LDAPserver's certificate (the LDAP server's certificate chain must be signed by one of the certificates inthe truststore). The keystore must be deployed using a jaas:keystore element.
user.base.dn
Specifies the DN of the subtree of the DIT to search for user entries. For example, ou=users,ou=system.
user.filter
Specifies the LDAP search filter used to locate user credentials. It is applied to the subtree selectedby user.base.dn. For example, (uid=%u). Before being passed to the LDAP search operation,the value is subjected to string substitution, as follows:
%u is replaced by the user name extracted from the incoming credentials.
user.search.subtree
Specifies whether the user entry search scope includes the subtrees of the tree selected by user.base.dn. If true, the user lookup is recursive ( SUBTREE). If false, the user lookup isperformed only at the first level (ONELEVEL).
Sample configuration for Apache DS
The following Blueprint configuration shows how to define a new karaf realm using the LDAP loginmodule, where the default karaf realm is overridden by setting the rank attribute to 200, and theLDAP login module connects to an Apache Directory Server:
<?xml version="1.0" encoding="UTF-8"?><blueprint xmlns="http://www.osgi.org/xmlns/blueprint/v1.0.0" xmlns:jaas="http://karaf.apache.org/xmlns/jaas/v1.0.0" xmlns:cm="http://aries.apache.org/blueprint/xmlns/blueprint-cm/v1.1.0" xmlns:ext="http://aries.apache.org/blueprint/xmlns/blueprint-ext/v1.0.0">
<jaas:config name="karaf" rank="100">
<jaas:module className="org.apache.karaf.jaas.modules.ldap.LDAPLoginModule" flags="sufficient"> debug=true
CHAPTER 2. SECURING THE CONTAINER
27
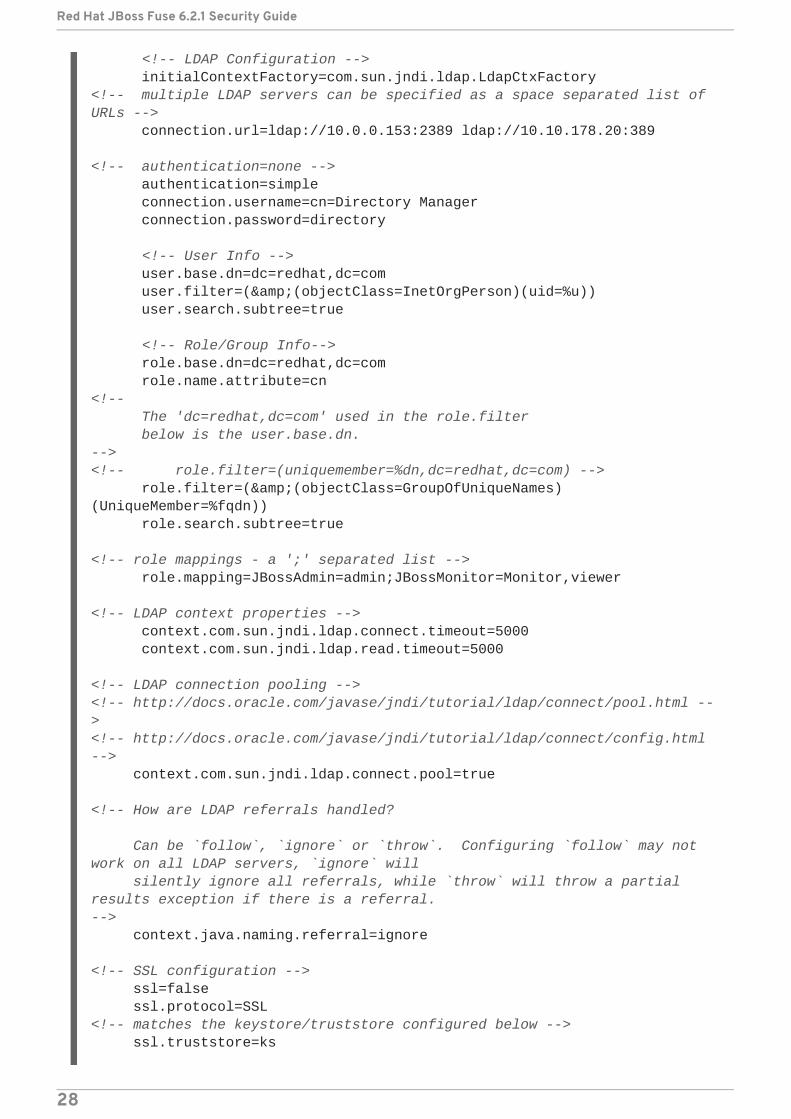
<!-- LDAP Configuration --> initialContextFactory=com.sun.jndi.ldap.LdapCtxFactory<!-- multiple LDAP servers can be specified as a space separated list of URLs --> connection.url=ldap://10.0.0.153:2389 ldap://10.10.178.20:389
<!-- authentication=none --> authentication=simple connection.username=cn=Directory Manager connection.password=directory
<!-- User Info --> user.base.dn=dc=redhat,dc=com user.filter=(&(objectClass=InetOrgPerson)(uid=%u)) user.search.subtree=true
<!-- Role/Group Info--> role.base.dn=dc=redhat,dc=com role.name.attribute=cn<!-- The 'dc=redhat,dc=com' used in the role.filter below is the user.base.dn.--><!-- role.filter=(uniquemember=%dn,dc=redhat,dc=com) --> role.filter=(&(objectClass=GroupOfUniqueNames)(UniqueMember=%fqdn)) role.search.subtree=true
<!-- role mappings - a ';' separated list --> role.mapping=JBossAdmin=admin;JBossMonitor=Monitor,viewer
<!-- LDAP context properties --> context.com.sun.jndi.ldap.connect.timeout=5000 context.com.sun.jndi.ldap.read.timeout=5000
<!-- LDAP connection pooling --><!-- http://docs.oracle.com/javase/jndi/tutorial/ldap/connect/pool.html --><!-- http://docs.oracle.com/javase/jndi/tutorial/ldap/connect/config.html --> context.com.sun.jndi.ldap.connect.pool=true
<!-- How are LDAP referrals handled?
Can be `follow`, `ignore` or `throw`. Configuring `follow` may not work on all LDAP servers, `ignore` will silently ignore all referrals, while `throw` will throw a partial results exception if there is a referral.--> context.java.naming.referral=ignore
<!-- SSL configuration --> ssl=false ssl.protocol=SSL<!-- matches the keystore/truststore configured below --> ssl.truststore=ks
Red Hat JBoss Fuse 6.2.1 Security Guide
28

NOTE
In order to enable SSL, you must remember to use the ldaps scheme in the connection.url setting.
IMPORTANT
You must set ssl.protocol to TLSv1, in order to protect against the Poodlevulnerability (CVE-2014-3566)
Filter settings for different directory servers
The most significant differences between directory servers arise in connection with setting the filteroptions in the LDAP login module. The precise settings depend ultimately on the organisation of yourDIT, but the following table gives an idea of the typical role filter settings required for differentdirectory servers:
Directory Server Typical Filter Settings
389-DS
Red Hat DS
MS Active Directory
Apache DS
OpenLDAP
ssl.algorithm=PKIX </jaas:module> </jaas:config>
<!-- Location of the SSL truststore/keystore <jaas:keystore name="ks" path="file:///${karaf.home}/etc/ldap.truststore" keystorePassword="XXXXXX" />--></blueprint>
user.filter=(&(objectClass=InetOrgPerson)(uid=%u))role.filter=(uniquemember=%fqdn)
user.filter=(&(objectCategory=person)(samAccountName=%u))role.filter=(uniquemember=%fqdn)
user.filter=(uid=%u)role.filter=(member=uid=%u)
user.filter=(uid=%u)role.filter=(member:=uid=%u)
CHAPTER 2. SECURING THE CONTAINER
29

NOTE
In the preceding table, the & symbol (representing the logical And operator) is escapedas & because the option settings will be embedded in a Blueprint XML file.
2.1.8. Encrypting Stored Passwords
Overview
By default, the JAAS login modules store passwords in plaintext format. Although you can (andshould) protect such data by setting file permissions appropriately, you can provide additionalprotection to passwords by storing them in an obscured format (using a message digest algorithm).
Red Hat JBoss Fuse provides a set of options for enabling password encryption, which can becombined with any of the JAAS login modules (except the public key login module, where it is notneeded).
IMPORTANT
Although message digest algorithms are difficult to crack, they are not invulnerable toattack (for example, see the Wikipedia article on cryptographic hash functions ). Alwaysuse file permissions to protect files containing passwords, in addition to using passwordencryption.
Options
You can optionally enable password encryption for JAAS login modules by setting the following loginmodule properties. To do so, either edit the InstallDir/etc/org.apache.karaf.jaas.cfg file ordeploy your own blueprint file as described in the section called “Example of a login module withJasypt encryption”.
encryption.enabled
Set to true, to enable password encryption.
encryption.name
Name of the encryption service, which has been registered as an OSGi service.
encryption.prefix
Prefix for encrypted passwords.
encryption.suffix
Suffix for encrypted passwords.
encryption.algorithm
Specifies the name of the encryption algorithm—for example, MD5 or SHA-1. You can specify one ofthe following encryption algorithms:
MD2
MD5
Red Hat JBoss Fuse 6.2.1 Security Guide
30

SHA-1
SHA-256
SHA-384
SHA-512
encryption.encoding
Encrypted passwords encoding: hexadecimal or base64.
encryption.providerName (Jasypt only)
Name of the java.security.Provider instance that is to provide the digest algorithm.
encryption.providerClassName (Jasypt only)
Class name of the security provider that is to provide the digest algorithm
encryption.iterations (Jasypt only)
Number of times to apply the hash function recursively.
encryption.saltSizeBytes (Jasypt only)
Size of the salt used to compute the digest.
encryption.saltGeneratorClassName (Jasypt only)
Class name of the salt generator.
role.policy
Specifies the policy for identifying role principals. Can have the values, prefix or group.
role.discriminator
Specifies the discriminator value to be used by the role policy.
Encryption services
There are two encryption services provided by JBoss Fuse:
encryption.name = basic, described in the section called “Basic encryption service” ,
encryption.name = jasypt, described in the section called “Jasypt encryption” .
You can also create your own encryption service. To do so, you need to:
implement interface org.apache.karaf.jaas.modules.EncryptionService
and expose your implementation as OSGI service.
Following listing shows, how jasypt encryption service is exposed to OSGI container.
<blueprint xmlns="http://www.osgi.org/xmlns/blueprint/v1.0.0">
CHAPTER 2. SECURING THE CONTAINER
31
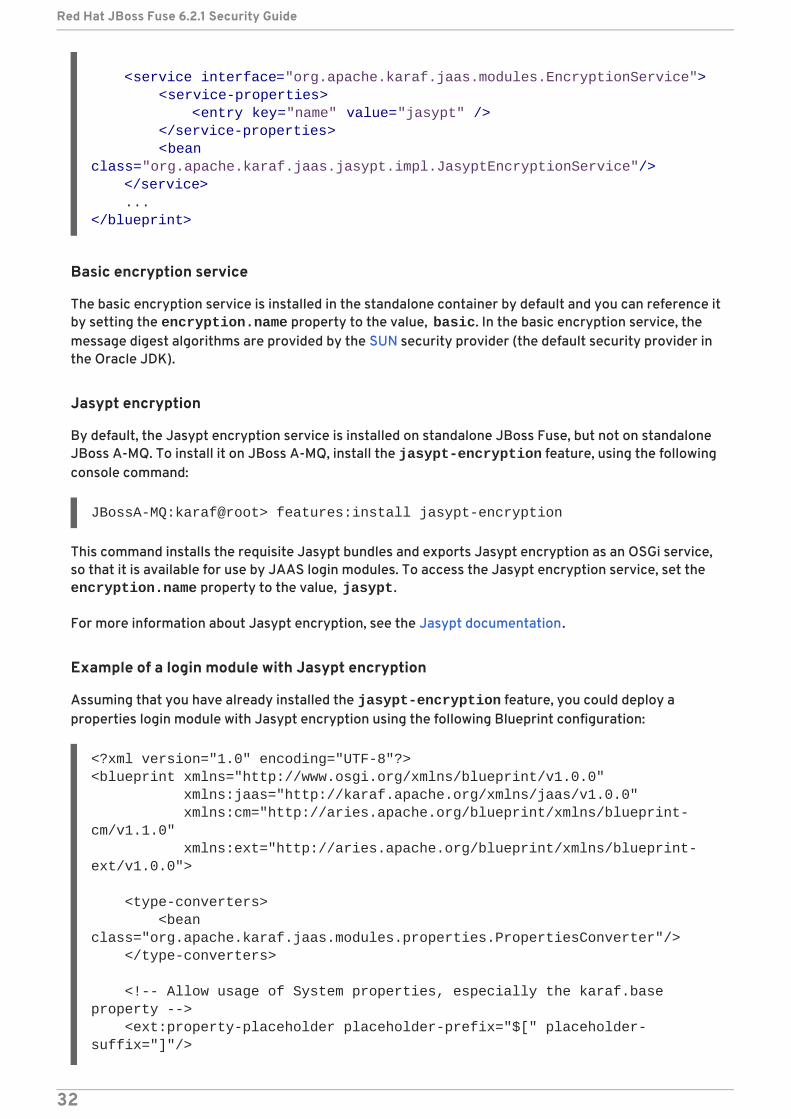
Basic encryption service
The basic encryption service is installed in the standalone container by default and you can reference itby setting the encryption.name property to the value, basic. In the basic encryption service, themessage digest algorithms are provided by the SUN security provider (the default security provider inthe Oracle JDK).
Jasypt encryption
By default, the Jasypt encryption service is installed on standalone JBoss Fuse, but not on standaloneJBoss A-MQ. To install it on JBoss A-MQ, install the jasypt-encryption feature, using the followingconsole command:
This command installs the requisite Jasypt bundles and exports Jasypt encryption as an OSGi service,so that it is available for use by JAAS login modules. To access the Jasypt encryption service, set the encryption.name property to the value, jasypt.
For more information about Jasypt encryption, see the Jasypt documentation.
Example of a login module with Jasypt encryption
Assuming that you have already installed the jasypt-encryption feature, you could deploy aproperties login module with Jasypt encryption using the following Blueprint configuration:
<service interface="org.apache.karaf.jaas.modules.EncryptionService"> <service-properties> <entry key="name" value="jasypt" /> </service-properties> <bean class="org.apache.karaf.jaas.jasypt.impl.JasyptEncryptionService"/> </service> ...</blueprint>
JBossA-MQ:karaf@root> features:install jasypt-encryption
<?xml version="1.0" encoding="UTF-8"?><blueprint xmlns="http://www.osgi.org/xmlns/blueprint/v1.0.0" xmlns:jaas="http://karaf.apache.org/xmlns/jaas/v1.0.0" xmlns:cm="http://aries.apache.org/blueprint/xmlns/blueprint-cm/v1.1.0" xmlns:ext="http://aries.apache.org/blueprint/xmlns/blueprint-ext/v1.0.0">
<type-converters> <bean class="org.apache.karaf.jaas.modules.properties.PropertiesConverter"/> </type-converters>
<!-- Allow usage of System properties, especially the karaf.base property --> <ext:property-placeholder placeholder-prefix="$[" placeholder-suffix="]"/>
Red Hat JBoss Fuse 6.2.1 Security Guide
32

<jaas:config name="karaf" rank="200"> <jaas:module className="org.apache.karaf.jaas.modules.properties.PropertiesLoginModule" flags="required"> users = $[karaf.base]/etc/users.properties encryption.enabled = true encryption.name = jasypt encryption.algorithm = SHA-256 encryption.encoding = base64 encryption.iterations = 100000 encryption.saltSizeBytes = 16 </jaas:module> </jaas:config>
<!-- The Backing Engine Factory Service for the PropertiesLoginModule --> <service interface="org.apache.karaf.jaas.modules.BackingEngineFactory"> <bean class="org.apache.karaf.jaas.modules.properties.PropertiesBackingEngineFactory"/> </service> <!-- Enable automatic encryption of all user passwords in InstallDir/etc/users.properties file - no login required to activate. Encrypted passwords appear in the InstallDir/etc/users.properties file as values enclosed by {CRYPT}...{CRYPT} prefix/suffix pairs --> <bean class="org.apache.karaf.jaas.modules.properties.AutoEncryptionSupport" init-method="init" destroy-method="destroy"> <argument> <map> <entry key="org.osgi.framework.BundleContext" value-ref="blueprintBundleContext"/> <entry key="users" value="$[karaf.base]/etc/users.properties"/> <entry key="encryption.name" value="jasypt"/> <entry key="encryption.enabled" value="true"/> <entry key="encryption.prefix" value="{CRYPT}"/> <entry key="encryption.suffix" value="{CRYPT}"/> <entry key="encryption.algorithm" value="SHA-256"/> <entry key="encryption.encoding" value="base64"/> <entry key="encryption.iterations" value="100000"/> <entry key="encryption.saltSizeBytes" value="16"/> </map> </argument> </bean>
</blueprint>
CHAPTER 2. SECURING THE CONTAINER
33

2.2. ROLE-BASED ACCESS CONTROL
Abstract
This section describes the role-based access control (RBAC) feature, which is enabled by default in theJBoss Fuse container. You can immediately start taking advantage of the RBAC feature, simply byadding one of the standard roles (such as Deployer or Administrator) to a user's credentials. Formore advanced usage, you have the option of customizing the access control lists, in order to controlexactly what each role can do. Finally, you have the option of applying custom ACLs to your own OSGiservices.
2.2.1. Overview of Role-Based Access Control
Overview
By default, the JBoss Fuse role-based access control protects access through the Fuse ManagementConsole, JMX connections, and the Karaf command console. To use the default levels of access control,simply add any of the standard roles to your user authentication data (for example, by editing the users.properties file). You also have the option of customizing access control, by editing therelevant Access Control List (ACL) files.
Mechanisms
Role-based access control in JBoss Fuse is based on the following mechanisms:
JMX Guard
The JBoss Fuse container is configured with a JMX guard, which intercepts every incoming JMXinvocation and filters the invocation through the configured JMX access control lists. The JMXguard is configured at the JVM level, so it intercepts every JMX invocation, without exception.
OSGi Service Guard
For any OSGi service, it is possible to configure an OSGi service guard. The OSGi service guard isimplemented as a proxy object, which interposes itself between the client and the original OSGiservice. An OSGi service guard must be explicitly configured for each OSGi service: it is not installedby default (except for the OSGi services that represent Karaf console commands, which arepreconfigured for you).
Types of protection
The JBoss Fuse implementation of role-based access control is capable of providing the followingtypes of protection:
Fuse Management Console (Hawtio)
Container access through the Fuse Management Console (Hawtio) is controlled by the JMX ACLfiles. The REST/HTTP service that provides the Fuse Management Console is implemented usingJolokia technology, which is layered above JMX. Hence, ultimately, all Fuse Management Consoleinvocations pass through JMX and are regulated by JMX ACLs.
JMX
Red Hat JBoss Fuse 6.2.1 Security Guide
34

Direct access to the container's JMX port is regulated by the JMX ACLs. Moreover, any additionalJMX ports opened by an application running in the container would also be regulated by the JMXACLs, because the JMX guard is set at the JVM level.
Karaf command console
Access to the Karaf command console is regulated by the command console ACL files. Accesscontrol is applied no matter how the Karaf console is accessed. Whether accessing the commandconsole through the Fuse Management Console or through the SSH protocol, access control isapplied in both cases.
NOTE
In the special case where you start up the container directly at the command line (forexample, using the ./bin/fuse script) and no user authentication is performed, youautomatically get the roles specified by the karaf.local.roles property in the etc/system.properties file.
OSGi services
For any OSGi service deployed in the container, you can optionally enable an ACL file, whichrestricts method invocations to specific roles.
Adding roles to users
In the system of role-based access control, you can give users permissions by adding roles to their userauthentication data. For example, the following entry in the etc/users.properties file defines the admin user and grants the Administrator and SuperUser roles.
You also have the option of defining user groups and then assigning users to a particular user group.For example, you could define and use an admingroup user group as follows:
NOTE
User groups are not supported by every type of JAAS login module.
Standard roles
Table 2.2, “Standard Roles for Access Control” lists and describes the standard roles that are usedthroughout the JMX ACLs and the command console ACLs.
Table 2.2. Standard Roles for Access Control
Roles Description
Monitor, Operator, Maintainer Grants read-only access to the container.
admin = secretpass,Administrator,SuperUser
admin = secretpass, _g_:admingroup
_g_\:admingroup = Administrator, SuperUser
CHAPTER 2. SECURING THE CONTAINER
35

Deployer, Auditor Grants read-write access at the appropriate level forordinary users, who want to deploy and runapplications. But blocks access to sensitivecontainer configuration settings.
Administrator, SuperUser Grants unrestricted access to the container.
Roles Description
ACL files
The standard set of ACL files are located under the etc/auth/ directory of the JBoss Fuseinstallation, as follows:
etc/auth/jmx.acl[.*].cfg
JMX ACL files.
etc/auth/org.apache.karaf.command.acl.*.cfg
Command console ACL files.
Customizing role-based access control
A complete set of JMX ACL files and command console ACL files are provided by default. You are freeto customize these ACLs as required to suit the requirements of your system. Details of how to do thisare given in the following sections.
Additional properties for controlling access
The system.properties file under the etc directory provides the following additional properties forcontrolling access through the Karaf command console and the Fuse Management Console (Hawtio):
karaf.local.roles
Specifies the roles that apply when a user starts up the container console locally (for example, byrunning the ./bin/fuse script).
hawtio.roles
Specifies the roles that are allowed to access the container through the Fuse Management Console.This constraint is applied in addition to the access control defined by the JMX ACL files.
karaf.secured.command.compulsory.roles
Specifies the default roles required to invoke a Karaf console command, in case the consolecommand is not configured explicitly by a command ACL file, etc/auth/org.apache.karaf.command.acl.*.cfg. A user must be configured with at leastone of the roles from the list in order to invoke the command. The value is specified as a comma-separated list of roles.
2.2.2. Customizing the JMX ACLs
Red Hat JBoss Fuse 6.2.1 Security Guide
36

Overview
The JMX ACLs are stored in the OSGi Config Admin Service and are normally accessible as the files, etc/auth/jmx.acl.*.cfg. This section explains how you can customize the JMX ACLs by editingthese files yourself.
Architecture
Figure 2.1, “Access Control Mechanism for JMX” shows an overview of the role-based access controlmechanism for JMX connections to the JBoss Fuse container.
Figure 2.1. Access Control Mechanism for JMX
How it works
JMX access control works by inserting a JMX Guard, which is configured through a JVM-wide MBeanServerBuilder object. The Apache Karaf launching scripts have been modified to include thefollowing setting:
JMX access control is now applied as follows:
1. For every non-local JMX invocation, the JVM-wide MBeanServerBuilder calls into an OSGibundle that contains the JMX Guard.
2. The JMX Guard looks up the relevant ACL for the MBean the user is trying to access (wherethe ACLs are stored in the OSGi Config Admin service).
3. The ACL returns the list of roles that are allowed to make this particular invocation on theMBean.
4. The JMX Guard checks the list of roles against the current security subject (the user that ismaking the JMX invocation), to see whether the current user has any of the required roles.
-Djavax.management.builder.initial=org.apache.karaf.management.boot.KarafMBeanServerBuilder
CHAPTER 2. SECURING THE CONTAINER
37

5. If no matching role is found, the JMX invocation is blocked and a SecurityException israised.
Location of JMX ACL files
The JMX ACL files are located in the InstallDir/etc/auth directory, where the ACL file namesobey the following convention:
Technically, the ACLs are mapped to OSGi persistent IDs (PIDs), matching the pattern, jmx.acl[.*].It just so happens that the standalone container stores OSGi PIDs as files, PID.cfg, under the etc/directory by default.
Mapping MBeans to ACL file names
The JMX Guard applies access control to every MBean class that is accessed through JMX (includingany MBeans you define in your own application code). The ACL file for a specific MBean class is derivedfrom the MBean's Object Name, by prefixing it with jmx.acl. For example, given the MBean whoseObject Name is given by org.apache.activemq:type=Broker, the corresponding PID would be:
In the case of a standalone container, the OSGi Config Admin service stores this PID data in thefollowing file:
ACL file format
Each line of a JMX ACL file is an entry in the following format:
Where Pattern is a pattern that matches a method invocation on an MBean, and the right-hand sideof the equals sign is a comma-separated list of roles that give a user permission to make thatinvocation. In the simplest cases, the Pattern is simply a method name. For example, as in thefollowing settings for the org.apache.activemq.Broker MBean (from the jmx.acl.org.apache.activemq.Broker.cfg file):
It is also possible to use the wildcard character, *, to match multiple method names. For example, thefollowing entry gives permission to invoke all method names starting with set:
But the ACL syntax is also capable of defining much more fine-grained control of method invocations.You can define patterns to match methods invoked with specific arguments or even arguments that
etc/auth/jmx.acl[.*].cfg
jmx.acl.org.apache.activemq.Broker
etc/auth/jmx.acl.org.apache.activemq.Broker.cfg
Pattern = Role1[,Role2][,Role3]...
addConnector = Deployer, Auditor, Administrator, SuperUserremoveConnector = Deployer, Auditor, Administrator, SuperUserenableStatistics = Deployer, Auditor, Administrator, SuperUseraddNetworkConnector = Deployer, Auditor, Administrator, SuperUser
set* = Deployer, Auditor, Administrator, SuperUser
Red Hat JBoss Fuse 6.2.1 Security Guide
38

match a regular expression. For example, the ACL for the org.apache.karaf.config MBeanpackage exploits this capability to prevent ordinary users from modifying sensitive configurationsettings. The create method from this package is restricted, as follows:
In this case, the Deployer and Auditor roles generally have permission to invoke the createmethod, but only the Administrator and SuperUser roles have permission to invoke create with aPID argument matching jmx.acl.*, org.apache.karaf.command.acl.*, or org.apache.karaf.service.*.
For complete details of the ACL file format, please see the comments in the etc/auth/jmx.acl.cfgfile.
ACL file hierarchy
Because it is often impractical to provide an ACL file for every single MBean, you have the option ofspecifying an ACL file at the level of a Java package, which provides default settings for all of theMBeans in that package. For example, the org.apache.activemq.Broker MBean could be affectedby ACL settings at any of the following PID levels:
Where the most specific PID (top of the list) takes precedence over the least specific PID (bottom ofthe list).
Root ACL definitions
The root ACL file, jmx.acl.cfg, is a special case, because it supplies the default ACL settings for allMBeans. The root ACL has the following settings by default:
This implies that the typical read method patterns (list*, get*, is*) are accessible to all standardroles, but the typical write method patterns and other methods ( set* and *) are accessible only to theadministrator roles, admin, Administrator, SuperUser.
create(java.lang.String)[/jmx[.]acl.*/] = Administrator, SuperUsercreate(java.lang.String)[/org[.]apache[.]karaf[.]command[.]acl.+/] = Administrator, SuperUsercreate(java.lang.String)[/org[.]apache[.]karaf[.]service[.]acl.+/] = Administrator, SuperUsercreate(java.lang.String) = Deployer, Auditor, Administrator, SuperUser
jmx.acl.org.apache.activemq.Brokerjmx.acl.org.apache.activemqjmx.acl.org.apachejmx.acl.orgjmx.acl
list* = viewer, Monitor, Operator, Maintainer,Deployer, Auditor, Administrator, SuperUserget* = viewer, Monitor, Operator, Maintainer,Deployer, Auditor, Administrator, SuperUseris* = viewer, Monitor, Operator, Maintainer,Deployer, Auditor, Administrator, SuperUserset* = admin, Administrator, SuperUser* = admin, Administrator, SuperUser
CHAPTER 2. SECURING THE CONTAINER
39
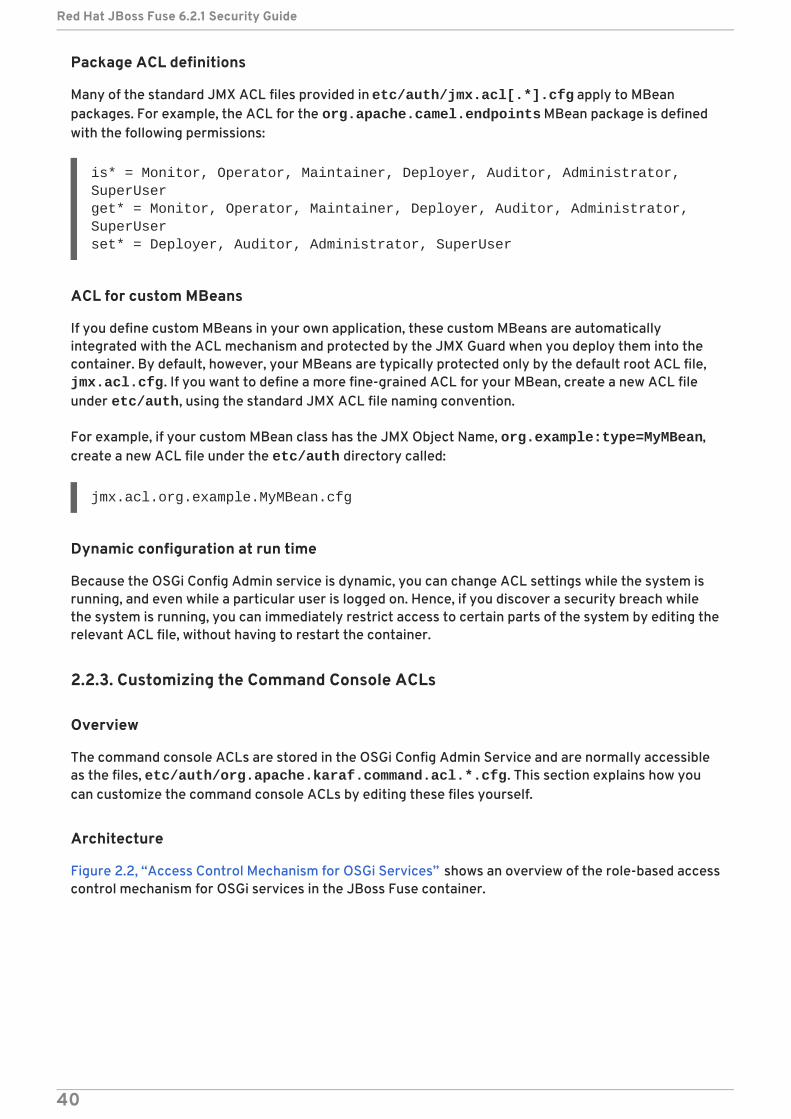
Package ACL definitions
Many of the standard JMX ACL files provided in etc/auth/jmx.acl[.*].cfg apply to MBeanpackages. For example, the ACL for the org.apache.camel.endpoints MBean package is definedwith the following permissions:
ACL for custom MBeans
If you define custom MBeans in your own application, these custom MBeans are automaticallyintegrated with the ACL mechanism and protected by the JMX Guard when you deploy them into thecontainer. By default, however, your MBeans are typically protected only by the default root ACL file, jmx.acl.cfg. If you want to define a more fine-grained ACL for your MBean, create a new ACL fileunder etc/auth, using the standard JMX ACL file naming convention.
For example, if your custom MBean class has the JMX Object Name, org.example:type=MyMBean,create a new ACL file under the etc/auth directory called:
Dynamic configuration at run time
Because the OSGi Config Admin service is dynamic, you can change ACL settings while the system isrunning, and even while a particular user is logged on. Hence, if you discover a security breach whilethe system is running, you can immediately restrict access to certain parts of the system by editing therelevant ACL file, without having to restart the container.
2.2.3. Customizing the Command Console ACLs
Overview
The command console ACLs are stored in the OSGi Config Admin Service and are normally accessibleas the files, etc/auth/org.apache.karaf.command.acl.*.cfg. This section explains how youcan customize the command console ACLs by editing these files yourself.
Architecture
Figure 2.2, “Access Control Mechanism for OSGi Services” shows an overview of the role-based accesscontrol mechanism for OSGi services in the JBoss Fuse container.
is* = Monitor, Operator, Maintainer, Deployer, Auditor, Administrator, SuperUserget* = Monitor, Operator, Maintainer, Deployer, Auditor, Administrator, SuperUserset* = Deployer, Auditor, Administrator, SuperUser
jmx.acl.org.example.MyMBean.cfg
Red Hat JBoss Fuse 6.2.1 Security Guide
40

Figure 2.2. Access Control Mechanism for OSGi Services
How it works
The mechanism for command console access control is, in fact, based on the generic access controlmechanism for OSGi services. It so happens that console commands are implemented and exposed asOSGi services. The Karaf console itself discovers the available commands through the OSGi serviceregistry and accesses the commands as OSGi services. Hence, the access control mechanism for OSGiservices can be used to control access to console commands.
The mechanism for securing OSGi services is based on OSGi Service Registry Hooks. This is anadvanced OSGi feature that makes it possible to hide OSGi services from certain consumers and toreplace an OSGi service with a proxy service.
When a service guard is in place for a particular OSGi service, a client invocation on the OSGi serviceproceeds as follows:
1. The invocation does not go directly to the requested OSGi service. Instead, the request isrouted to a replacement proxy service, which has the same service properties as the originalservice (and some extra ones).
2. The service guard looks up the relevant ACL for the target OSGi service (where the ACLs arestored in the OSGi Config Admin service).
3. The ACL returns the list of roles that are allowed to make this particular method invocation onthe service.
4. If no ACL is found for this command, the service guard defaults to the list of roles specified inthe karaf.secured.command.compulsory.roles property in the etc/system.properties file.
5. The service guard checks the list of roles against the current security subject (the user that ismaking the method invocation), to see whether the current user has any of the required roles.
6. If no matching role is found, the method invocation is blocked and a SecurityException israised.
7. Alternatively, if a matching role is found, the method invocation is delegated to the originalOSGi service.
Configuring default security roles
CHAPTER 2. SECURING THE CONTAINER
41

For any commands that do not have a corresponding ACL file, you specify a default list of security rolesby setting the karaf.secured.command.compulsory.roles property in the etc/system.properties file (specified as a comma-separated list of roles).
Location of command console ACL files
The command console ACL files are located in the InstallDir/etc/auth directory, with the prefix, org.apache.karaf.command.acl.
Mapping command scopes to ACL file names
The command console ACL file names obey the following convention:
Where the CommandScope corresponds to the prefix for a particular group of Karaf consolecommands. For example, the features:install and features:uninstall commands belong tothe features command scope, which has the corresponding ACL file, org.apache.karaf.command.acl.features.cfg.
ACL file format
Each line of a command console ACL file is an entry in the following format:
Where Pattern is a pattern that matches a Karaf console command from the current command scope,and the right-hand side of the equals sign is a comma-separated list of roles that give a user permissionto make that invocation. In the simplest cases, the Pattern is simply an unscoped command name. Forexample, the org.apache.karaf.command.acl.features.cfg ACL file includes the followingrules for the features commands:
IMPORTANT
If no match is found for a specific command name, it is assumed that no role is requiredfor this command and it can be invoked by any user.
You can also define patterns to match commands invoked with specific arguments or even argumentsthat match a regular expression. For example, the org.apache.karaf.command.acl.osgi.cfgACL file exploits this capability to prevent ordinary users from invoking the osgi:start and
etc/auth/org.apache.karaf.command.acl.CommandScope.cfg
Pattern = Role1[,Role2][,Role3]...
list = Monitor, Operator, Maintainer, Deployer, Auditor, Administrator, SuperUserlistRepositories = Monitor, Operator, Maintainer, Deployer, Auditor, Administrator, SuperUserlistUrl = Monitor, Operator, Maintainer, Deployer, Auditor, Administrator, SuperUserinfo = Monitor, Operator, Maintainer, Deployer, Auditor, Administrator, SuperUserinstall = Administrator,SuperUseruninstall = Administrator,SuperUser
Red Hat JBoss Fuse 6.2.1 Security Guide
42

osgi:stop commands with the -f (force) flag (which must be specified to manage system bundles).This restriction is coded as follows in the ACL file:
In this case, the Deployer and Auditor roles generally have permission to invoke the osgi:startand osgi:stop commands, but only the Administrator and SuperUser roles have permission toinvoke these commands with the force option, -f.
For complete details of the ACL file format, please see the comments in the etc/auth/org.apache.karaf.command.acl.osgi.cfg file.
Dynamic configuration at run time
The command console ACL settings are fully dynamic, which means you can change the ACL settingswhile the system is running and the changes will take effect within a few seconds, even for users thatare already logged on.
2.2.4. Defining ACLs for OSGi Services
Overview
It is possible to define a custom ACL for any OSGi service (whether system level or application level).By default, OSGi services do not have access control enabled (with the exception of the OSGi servicesthat expose Karaf console commands, which are pre-configured with command console ACL files). Thissection explains how to define a custom ACL for an OSGi service and how to invoke methods on thatservice using a specified role.
ACL file format
An OSGi service ACL file has one special entry, which identifies the OSGi service to which this ACLapplies, as follows:
Where the value of service.guard is an LDAP search filter that is applied to the registry of OSGiservice properties in order to pick out the matching OSGi service. The simplest type of filter, (objectClass=InterfaceName), picks out an OSGi service with the specified Java interface name, InterfaceName.
The remaining entries in the ACL file are of the following form:
Where Pattern is a pattern that matches a service method, and the right-hand side of the equals signis a comma-separated list of roles that give a user permission to make that invocation. The syntax ofthese entries is essentially the same as the entries in a JMX ACL file—see the section called “ACL fileformat”.
start[/.*[-][f].*/] = Administrator, SuperUserstart = Deployer, Auditor, Administrator, SuperUserstop[/.*[-][f].*/] = Administrator, SuperUserstop = Deployer, Auditor, Administrator, SuperUser
service.guard = (objectClass=InterfaceName)
Pattern = Role1[,Role2][,Role3]...
CHAPTER 2. SECURING THE CONTAINER
43

How to define an ACL for a custom OSGi service
To define an ACL for a custom OSGi service, perform the following steps:
1. It is customary to define an OSGi service using a Java interface (you could use a regular Javaclass, but this is not recommended). For example, consider the Java interface, MyService,which we intend to expose as an OSGi service:
2. To expose the Java interface as an OSGi service, you would typically add a service elementto an OSGi Blueprint XML file (where the Blueprint XML file is typically stored under the src/main/resources/OSGI-INF/blueprint directory in a Maven project). For example,assuming that MyServiceImpl is the class that implements the MyService interface, youcould expose the MyService OSGi service as follows:
3. To define an ACL for the the OSGi service, you must create an OSGi Config Admin PID with theprefix, org.apache.karaf.service.acl.
For example, in the case of a standalone container (where the OSGi Config Admin PIDs arestored as .cfg files under the etc/auth/ directory), you can create the following ACL file forthe MyService OSGi service:
NOTE
It does not matter exactly how you name this file, as long as it starts with therequired prefix, org.apache.karaf.service.acl. The corresponding OSGiservice for this ACL file is actually specified by a property setting in this file (asyou will see in the next step).
4. Specify the contents of the ACL file in a format like the following:
package org.example;
public interface MyService { void doit(String s);}
<?xml version="1.0" encoding="UTF-8"?><blueprint xmlns="http://www.osgi.org/xmlns/blueprint/v1.0.0" xmlns:xsi="http://www.w3.org/2001/XMLSchema-instance" default-activation="lazy"> <bean id="myserviceimpl" class="org.example.MyServiceImpl"/> <service id="myservice" ref="myserviceimpl" interface="org.example.MyService"/> </blueprint>
etc/auth/org.apache.karaf.service.acl.myservice.cfg
service.guard = (objectClass=InterfaceName)Pattern = Role1[,Role2][,Role3]...
Red Hat JBoss Fuse 6.2.1 Security Guide
44

The service.guard setting specifies the InterfaceName of the OSGi service (using thesyntax of an LDAP search filter, which is applied to the OSGi service properties). The otherentries in the ACL file consist of a method Pattern, which associates a matching method tothe specified roles. For example, you could define a simple ACL for the MyService OSGiservice with the following settings in the org.apache.karaf.service.acl.myservice.cfg file:
5. Finally, in order to enable the ACL for this OSGi service, you must edit the karaf.secured.services property in the etc/system.properties file. The value of the karaf.secured.services property has the syntax of an LDAP search filter (which getsapplied to the OSGi service properties). In general, to enable ACLs for an OSGi service, ServiceInterface, you must modify this property as follows:
For example, to enable the MyService OSGi service:
CAUTION
The initial value of the karaf.secured.services property has the settings to enable thecommand console ACLs. If you delete or corrupt these entries, the command console ACLsmight stop working.
How to invoke an OSGi service secured with RBAC
If you are writing Java code to invoke methods an a custom OSGi service (that is, implementing a clientof the OSGi service), you must use the Java security API to specify the role you are using to invoke theservice. For example, to invoke the MyService OSGi service using the Deployer role, you could usecode like the following:
service.guard = (objectClass=org.example.MyService)doit = Deployer, Auditor, Administrator, SuperUser
karaf.secured.services=(|(objectClass=ServiceInterface)(...ExistingPropValue...))
karaf.secured.services=(|(objectClass=org.example.MyService)(&(osgi.command.scope=*)(osgi.command.function=*)))
// Javaimport javax.security.auth.Subject;import org.apache.karaf.jaas.boot.principal.RolePrincipal;// ... Subject s = new Subject();s.getPrincipals().add(new RolePrincipal("Deployer"));Subject.doAs(s, new PrivilegedAction() { public Object run() { svc.doit("foo"); // invoke the service }}
CHAPTER 2. SECURING THE CONTAINER
45

NOTE
This example uses the Karaf role type, org.apache.karaf.jaas.boot.principal.RolePrincipal. If necessary, youcould use your own custom role class instead, but in that case you would have to specifyyour roles using the syntax className:roleName in the OSGi service's ACL file.
How to discover the roles required by an OSGi service
When you are writing code against an OSGi service secured by an ACL, it can sometimes be useful tocheck what roles are allowed to invoke the service. For this purpose, the proxy service exports anadditional OSGi property, org.apache.karaf.service.guard.roles. The value of this property isa java.util.Collection object, which contains a list of all the roles that could possibly invoke amethod on that service.
2.3. USING ENCRYPTED PROPERTY PLACEHOLDERS
Overview
When securing a container it is undesirable to use plain text passwords in configuration files. Theycreate easy to target security holes. One way to avoid this problem is to use encrypted propertyplaceholders when ever possible. This feature is supported both in Blueprint XML files and in SpringXML files.
How to use encrypted property placeholders
To use encrypted property placeholders in a Blueprint XML file or in a Spring XML file, perform thefollowing steps:
1. Download and install Jasypt , to gain access to the Jasypt listAlgorithms.sh, encrypt.shand decrypt.sh command-line tools.
NOTE
When installing the Jasypt command-line tools, don't forget to enable executepermissions on the script files, by running chmod u+x ScriptName.sh.
2. Choose a master password and an encryption algorithm. To discover which algorithms aresupported in your current Java environment, run the listAlgorithms.sh Jasypt command-line tool, as follows:
On Windows platforms, the script is listAlgorithms.bat. JBoss Fuse uses PBEWithMD5AndDES by default.
3. Use the Jasypt encrypt command-line tool to encrypt your sensitive configuration values (forexample, passwords for use in configuration files). For example, the following commandencrypts the PlaintextVal value, using the specified algorithm and master password
./listAlgorithms.shDIGEST ALGORITHMS: [MD2, MD5, SHA, SHA-256, SHA-384, SHA-512]
PBE ALGORITHMS: [PBEWITHMD5ANDDES, PBEWITHMD5ANDTRIPLEDES, PBEWITHSHA1ANDDESEDE, PBEWITHSHA1ANDRC2_40]
Red Hat JBoss Fuse 6.2.1 Security Guide
46

MasterPass:
4. Create a properties file with encrypted values. For example, suppose you wanted to store someLDAP credentials. You could create a file, etc/ldap.properties, with the followingcontents:
Example 2.6. Property File with an Encrypted Property
The encrypted property values (as generated in the previous step) are identified by wrappingin the ENC() function.
5. (Blueprint XML only) Add the requisite namespaces to your Blueprint XML file:
Aries extensions—http://aries.apache.org/blueprint/xmlns/blueprint-ext/v1.0.0
Apache Karaf Jasypt—http://karaf.apache.org/xmlns/jasypt/v1.0.0
Example 2.7, “Encrypted Property Namespaces” shows a Blueprint file with the requisitenamespaces.
Example 2.7. Encrypted Property Namespaces
6. Configure the location of the properties file for the property placeholder and configure theJasypt encryption algorithm .
Blueprint XML
Example 2.8, “Jasypt Blueprint Configuration” shows how to configure the ext:property-placeholder element to read properties from the etc/ldap.properties file. The enc:property-placeholder element configuresJasypt to use the PBEWithMD5AndDES encryption algorithm and to read the masterpassword from the JASYPT_ENCRYPTION_PASSWORD environment variable.
Example 2.8. Jasypt Blueprint Configuration
./encrypt.sh input="PlaintextVal" algorithm=PBEWithMD5AndDES password=MasterPass
#ldap.propertiesldap.password=ENC(amIsvdqno9iSwnd7kAlLYQ==)ldap.url=ldap://192.168.1.74:10389
<blueprint xmlns="http://www.osgi.org/xmlns/blueprint/v1.0.0" xmlns:ext="http://aries.apache.org/blueprint/xmlns/blueprint-ext/v1.0.0" xmlns:enc="http://karaf.apache.org/xmlns/jasypt/v1.0.0">...</blueprint>
<blueprint xmlns="http://www.osgi.org/xmlns/blueprint/v1.0.0"
CHAPTER 2. SECURING THE CONTAINER
47

Spring XML
Example 2.9, “Jasypt Spring Configuration” shows how to configure Jasypt to use the PBEWithMD5AndDES encryption algorithm and to read the master password from the JASYPT_ENCRYPTION_PASSWORD environment variable.
The EncryptablePropertyPlaceholderConfigurer bean is configured to readproperties from the etc/ldap.properties file and to read properties from the io.fabric8.mq.fabric.ConfigurationProperties class (which defines the karaf.base property, for example).
Example 2.9. Jasypt Spring Configuration
xmlns:ext="http://aries.apache.org/blueprint/xmlns/blueprint-ext/v1.0.0" xmlns:enc="http://karaf.apache.org/xmlns/jasypt/v1.0.0">
<ext:property-placeholder> <location>file:etc/ldap.properties</location> </ext:property-placeholder>
<enc:property-placeholder> <enc:encryptor class="org.jasypt.encryption.pbe.StandardPBEStringEncryptor"> <property name="config"> <bean class="org.jasypt.encryption.pbe.config.EnvironmentStringPBEConfig"> <property name="algorithm" value="PBEWithMD5AndDES" /> <property name="passwordEnvName" value="JASYPT_ENCRYPTION_PASSWORD" /> </bean> </property> </enc:encryptor> </enc:property-placeholder>...</blueprint>
<bean id="environmentVariablesConfiguration" class="org.jasypt.encryption.pbe.config.EnvironmentStringPBEConfig"> <property name="algorithm" value="PBEWithMD5AndDES" /> <property name="passwordEnvName" value="JASYPT_ENCRYPTION_PASSWORD" /></bean>
<bean id="configurationEncryptor" class="org.jasypt.encryption.pbe.StandardPBEStringEncryptor"> <property name="config" ref="environmentVariablesConfiguration" /></bean>
<bean id="propertyConfigurer"
Red Hat JBoss Fuse 6.2.1 Security Guide
48

7. Use the placeholders in your configuration file. The placeholders you use for encryptedproperties are the same as you use for regular properties. Use the syntax ${prop.name}.
8. Make sure that the jasypt-encryption feature is installed in the container. If necessary,install the jasypt-encryption feature with the following console command:
9. Shut down the container, by entering the following command:
10. Carefully restart the container and deploy your secure application, as follows:
1. Open a command window (first command window) and enter the following commands tostart the JBoss Fuse container in the background:
2. Open a second command window and start the client utility, to connect to the containerrunning in the background:
Where Username and Password are valid JAAS user credentials for logging on to thecontainer console.
3. In the second command window, use the console to install your secure application thatuses encrypted property placeholders. Check that the application has launchedsuccessfully (for example, using the osgi:list command to check its status).
4. After the secure application has started up, go back to the first command window andunset the JASYPT_ENCRYPTION_PASSWORD environment variable.
IMPORTANT
Unsetting the JASYPT_ENCRYPTION_PASSWORD environment variableensures there will be minimum risk of exposing the master password. TheJasypt library retains the master password in encrypted form in memory.
class="org.jasypt.spring31.properties.EncryptablePropertyPlaceholderConfigurer"> <constructor-arg ref="configurationEncryptor" /> <property name="location" value="file:${karaf.base}/etc/ldap.properties"/> <property name="properties"> <bean class="io.fabric8.mq.fabric.ConfigurationProperties"/> </property></bean>
JBossFuse:karaf@root> features:install jasypt-encryption
JBossFuse:karaf@root> shutdown
export JASYPT_ENCRYPTION_PASSWORD="your super secret master pass phrase"./bin/start
./bin/client -u Username -p Password
CHAPTER 2. SECURING THE CONTAINER
49
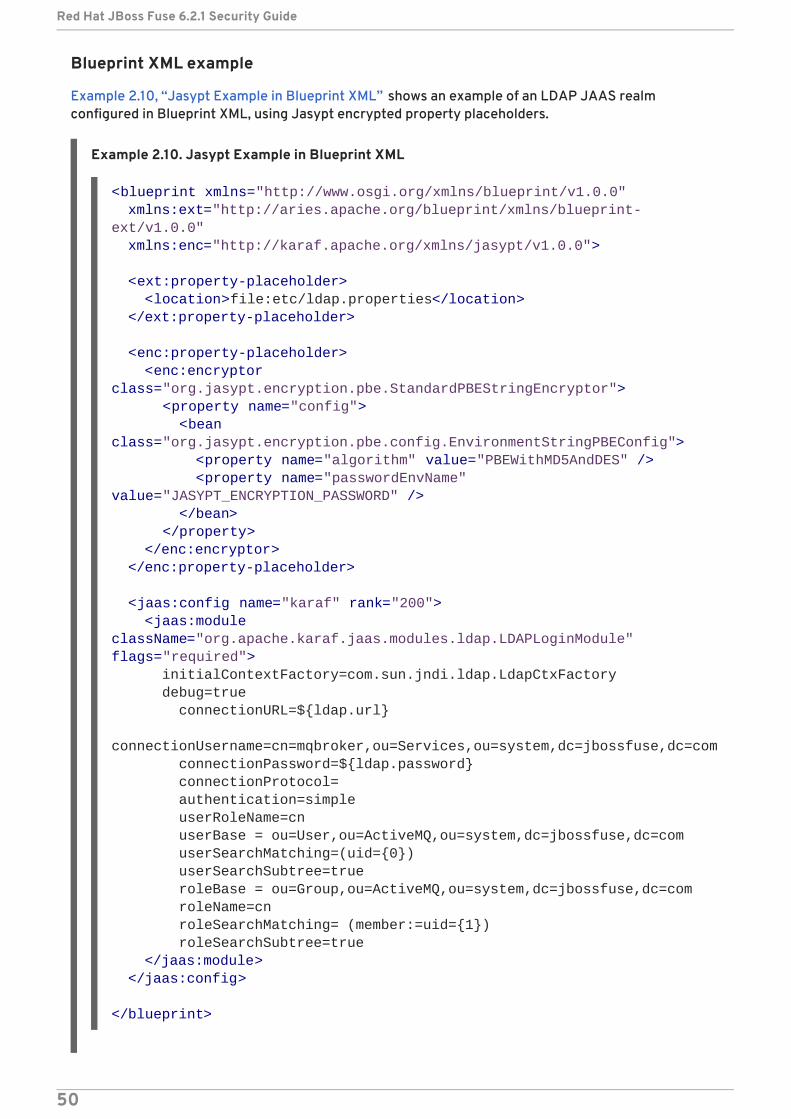
Blueprint XML example
Example 2.10, “Jasypt Example in Blueprint XML” shows an example of an LDAP JAAS realmconfigured in Blueprint XML, using Jasypt encrypted property placeholders.
Example 2.10. Jasypt Example in Blueprint XML
<blueprint xmlns="http://www.osgi.org/xmlns/blueprint/v1.0.0" xmlns:ext="http://aries.apache.org/blueprint/xmlns/blueprint-ext/v1.0.0" xmlns:enc="http://karaf.apache.org/xmlns/jasypt/v1.0.0">
<ext:property-placeholder> <location>file:etc/ldap.properties</location> </ext:property-placeholder>
<enc:property-placeholder> <enc:encryptor class="org.jasypt.encryption.pbe.StandardPBEStringEncryptor"> <property name="config"> <bean class="org.jasypt.encryption.pbe.config.EnvironmentStringPBEConfig"> <property name="algorithm" value="PBEWithMD5AndDES" /> <property name="passwordEnvName" value="JASYPT_ENCRYPTION_PASSWORD" /> </bean> </property> </enc:encryptor> </enc:property-placeholder>
<jaas:config name="karaf" rank="200"> <jaas:module className="org.apache.karaf.jaas.modules.ldap.LDAPLoginModule" flags="required"> initialContextFactory=com.sun.jndi.ldap.LdapCtxFactory debug=true connectionURL=${ldap.url} connectionUsername=cn=mqbroker,ou=Services,ou=system,dc=jbossfuse,dc=com connectionPassword=${ldap.password} connectionProtocol= authentication=simple userRoleName=cn userBase = ou=User,ou=ActiveMQ,ou=system,dc=jbossfuse,dc=com userSearchMatching=(uid={0}) userSearchSubtree=true roleBase = ou=Group,ou=ActiveMQ,ou=system,dc=jbossfuse,dc=com roleName=cn roleSearchMatching= (member:=uid={1}) roleSearchSubtree=true </jaas:module> </jaas:config>
</blueprint>
Red Hat JBoss Fuse 6.2.1 Security Guide
50

The ${ldap.password} placeholder is replaced with the decrypted value of the ldap.passwordproperty from the etc/ldap.properties properties file.
2.4. ENABLING REMOTE JMX SSL
Overview
Red Hat JBoss Fuse provides a JMX port that allows remote monitoring and management of Fusecontainers using MBeans. By default, however, the credentials that you send over the JMX connectionare unencrypted and vulnerable to snooping. To encrypt the JMX connection and protect againstpassword snooping, you need to secure JMX communications by configuring JMX over SSL.
To configure JMX over SSL, perform the following steps:
1. Create the jbossweb.keystore file
2. Create and deploy the keystore.xml file
3. Add the required properties to org.apache.karaf.management.cfg
4. Restart the container
After you have configured JMX over SSL access, you should test the connection.
WARNING
If you are planning to enable SSL/TLS security, you must ensure that you explicitlydisable the SSLv3 protocol, in order to safeguard against the Poodle vulnerability(CVE-2014-3566). For more details, see Disabling SSLv3 in JBoss Fuse 6.x andJBoss A-MQ 6.x.
NOTE
If you configure JMX over SSL while Red Hat JBoss Fuse is running, you will need torestart it.
Prerequisites
If you haven't already done so, you need to:
Set your JAVA_HOME environment variable
Configure a JBoss Fuse user with the Administrator role
Edit the <installDir>/jboss-fuse-6.2.1.redhat-084/etc/users.properties fileand add the following entry, on a single line:
This creates a new user with username, admin, password, YourPassword, and the
admin=YourPassword,Administrator
CHAPTER 2. SECURING THE CONTAINER
51

Administrator role.
Create the jbossweb.keystore file
Open a command prompt and make sure you are in the etc/ directory of your JBoss Fuse installation:
At the command line, using a -dname value (Distinguished Name) appropriate for your application,type this command:
IMPORTANT
Type the entire command on a single command line.
The command returns output that looks like this:
cd <installDir>/jboss-fuse-6.2.1.redhat-084/etc
$JAVA_HOME/bin/keytool -genkey -v -alias jbossalias -keyalg RSA -keysize 1024 -keystore jbossweb.keystore -validity 3650 -keypass JbossPassword -storepass JbossPassword -dname "CN=127.0.0.1, OU=RedHat Software Unit, O=RedHat, L=Boston, S=Mass, C=USA"
Generating 1,024 bit RSA key pair and self-signed certificate (SHA256withRSA) with a validity of 3,650 days for: CN=127.0.0.1, OU=RedHat Software Unit, O=RedHat, L=Boston, ST=Mass, C=USANew certificate (self-signed):[[ Version: V3 Subject: CN=127.0.0.1, OU=RedHat Software Unit, O=RedHat, L=Boston, ST=Mass, C=USA Signature Algorithm: SHA256withRSA, OID = 1.2.840.113549.1.1.11
Key: Sun RSA public key, 1024 bits modulus: 1123086025790567043604962990501918169461098372864273201795342440080393808 1594100776075008647459910991413806372800722947670166407814901754459100720279046 3944621813738177324031064260382659483193826177448762030437669318391072619867218 036972335210839062722456085328301058362052369248473659880488338711351959835357 public exponent: 65537 Validity: [From: Thu Jun 05 12:19:52 EDT 2014, To: Sun Jun 02 12:19:52 EDT 2024] Issuer: CN=127.0.0.1, OU=RedHat Software Unit, O=RedHat, L=Boston, ST=Mass, C=USA SerialNumber: [ 4666e4e6]
Red Hat JBoss Fuse 6.2.1 Security Guide
52

Check whether <installDir>/jboss-fuse-6.2.1.redhat-084/etc now contains the file jbossweb.keystore.
Create and deploy the keystore.xml file
1. Using your favorite xml editor, create and save the keystore.xml file in the <installDir>/jboss-fuse-6.2.1.redhat-084/etc directory.
2. Include this text in the file:
3. Deploy the keystore.xml file to the container, by copying it into the <installDir>/jboss-fuse-6.2.1.redhat-084/deploy directory (the hot deploydirectory).
NOTE
Subsequently, if you need to undeploy the keystore.xml file, you can do so bydeleting the keystore.xml file from the deploy/ directory while the Karafcontainer is running.
Certificate Extensions: 1[1]: ObjectId: 2.5.29.14 Criticality=falseSubjectKeyIdentifier [KeyIdentifier [0000: AC 44 A5 F2 E6 2F B2 5A 5F 88 FE 69 60 B4 27 7D .D.../.Z_..i`.'.0010: B9 81 23 9C ..#.]]
] Algorithm: [SHA256withRSA] Signature:0000: 01 1D 95 C0 F2 03 B0 FD CF 3A 1A 14 F5 2E 04 E5 .........:......0010: DD 18 DD 0E 24 60 00 54 35 AE FE 36 7B 38 69 4C ....$`.T5..6.8iL0020: 1E 85 0A AF AE 24 1B 40 62 C9 F4 E5 A9 02 CD D3 [email protected]: 91 57 60 F6 EF D6 A4 84 56 BA 5D 21 11 F7 EA 09 .W`.....V.]!....0040: 73 D5 6B 48 4A A9 09 93 8C 05 58 91 6C D0 53 81 s.kHJ.....X.l.S.0050: 39 D8 29 59 73 C4 61 BE 99 13 12 89 00 1C F8 38 9.)Ys.a........80060: E2 BF D5 3C 87 F6 3F FA E1 75 69 DF 37 8E 37 B5 ...<..?..ui.7.7.0070: B7 8D 10 CC 9E 70 E8 6D C2 1A 90 FF 3C 91 84 50 .....p.m....<..P
][Storing jbossweb.keystore]
<blueprint xmlns="http://www.osgi.org/xmlns/blueprint/v1.0.0" xmlns:jaas="http://karaf.apache.org/xmlns/jaas/v1.0.0"> <jaas:keystore name="sample_keystore" rank="1" path="file:etc/jbossweb.keystore" keystorePassword="JbossPassword" keyPasswords="jbossalias=JbossPassword" /></blueprint>
CHAPTER 2. SECURING THE CONTAINER
53
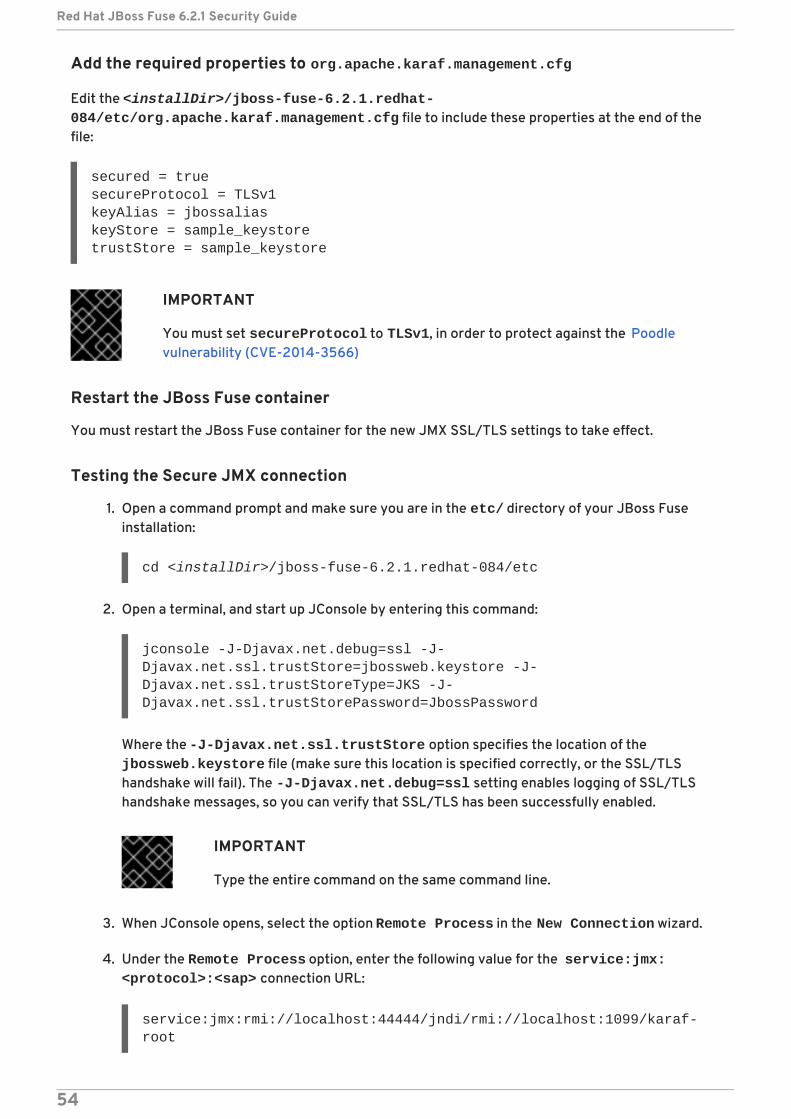
Add the required properties to org.apache.karaf.management.cfg
Edit the <installDir>/jboss-fuse-6.2.1.redhat-084/etc/org.apache.karaf.management.cfg file to include these properties at the end of thefile:
IMPORTANT
You must set secureProtocol to TLSv1, in order to protect against the Poodlevulnerability (CVE-2014-3566)
Restart the JBoss Fuse container
You must restart the JBoss Fuse container for the new JMX SSL/TLS settings to take effect.
Testing the Secure JMX connection
1. Open a command prompt and make sure you are in the etc/ directory of your JBoss Fuseinstallation:
2. Open a terminal, and start up JConsole by entering this command:
Where the -J-Djavax.net.ssl.trustStore option specifies the location of the jbossweb.keystore file (make sure this location is specified correctly, or the SSL/TLShandshake will fail). The -J-Djavax.net.debug=ssl setting enables logging of SSL/TLShandshake messages, so you can verify that SSL/TLS has been successfully enabled.
IMPORTANT
Type the entire command on the same command line.
3. When JConsole opens, select the option Remote Process in the New Connection wizard.
4. Under the Remote Process option, enter the following value for the service:jmx:<protocol>:<sap> connection URL:
secured = truesecureProtocol = TLSv1keyAlias = jbossaliaskeyStore = sample_keystoretrustStore = sample_keystore
cd <installDir>/jboss-fuse-6.2.1.redhat-084/etc
jconsole -J-Djavax.net.debug=ssl -J-Djavax.net.ssl.trustStore=jbossweb.keystore -J-Djavax.net.ssl.trustStoreType=JKS -J-Djavax.net.ssl.trustStorePassword=JbossPassword
service:jmx:rmi://localhost:44444/jndi/rmi://localhost:1099/karaf-root
Red Hat JBoss Fuse 6.2.1 Security Guide
54

And fill in the Username, and Password fields with valid JAAS credentials (as set in the etc/users.properties file):
Username: adminPassword: YourPassword
CHAPTER 2. SECURING THE CONTAINER
55

CHAPTER 3. SECURING THE JETTY HTTP SERVER
Abstract
You can configure the built-in Jetty HTTP server to use SSL/TLS security by adding the relevantconfiguration properties to the etc/org.ops4j.pax.web.cfg configuration file. In particular, youcan add SSL/TLS security to the Fuse Management Console in this way.
JETTY SERVER
The JBoss Fuse container is pre-configured with a Jetty server, which acts as a general-purpose HTTPserver and HTTP servlet container. Through a single HTTP port (by default, http://Host:8181), theJetty container can host multiple services, for example:
Fuse Management Console (by default, http://Host:8181/hawtio)
Apache CXF Web services endpoints (if the host and port are left unspecified in the endpointconfiguration)
Some Apache Camel endpoints
If you use the default Jetty server for all of your HTTP endpoints, you can conveniently add SSL/TLSsecurity to these HTTP endpoints by following the steps described here.
CREATE X.509 CERTIFICATE AND PRIVATE KEY
Before you can enable SSL, you must create an X.509 certificate and private key for the Web console.The certificate and private key must be in Java keystore format. For details of how to create a signedcertificate and private key, see Appendix A, Managing Certificates.
ENABLING SSL/TLS
To enable SSL/TLS:
1. Open etc/org.ops4j.pax.web.cfg in a text editor.
2. Disable the insecure HTTP port by adding the org.osgi.service.http.enabled and setting it to false; and enable the secure HTTPS port by adding the org.osgi.service.http.secure.enabledand setting it to true. The etc/org.ops4j.pax.web.cfg file should now have the followingcontents:
3. Edit the etc/jetty.xml file and add the following Call element to configure the SSLconnector for Jetty:
# Configures the SMX Web Console to use SSLorg.ops4j.pax.web.config.file=etc/jetty.xml
org.osgi.service.http.enabled=falseorg.osgi.service.http.port=8181
org.osgi.service.http.secure.enabled=true
Red Hat JBoss Fuse 6.2.1 Security Guide
56
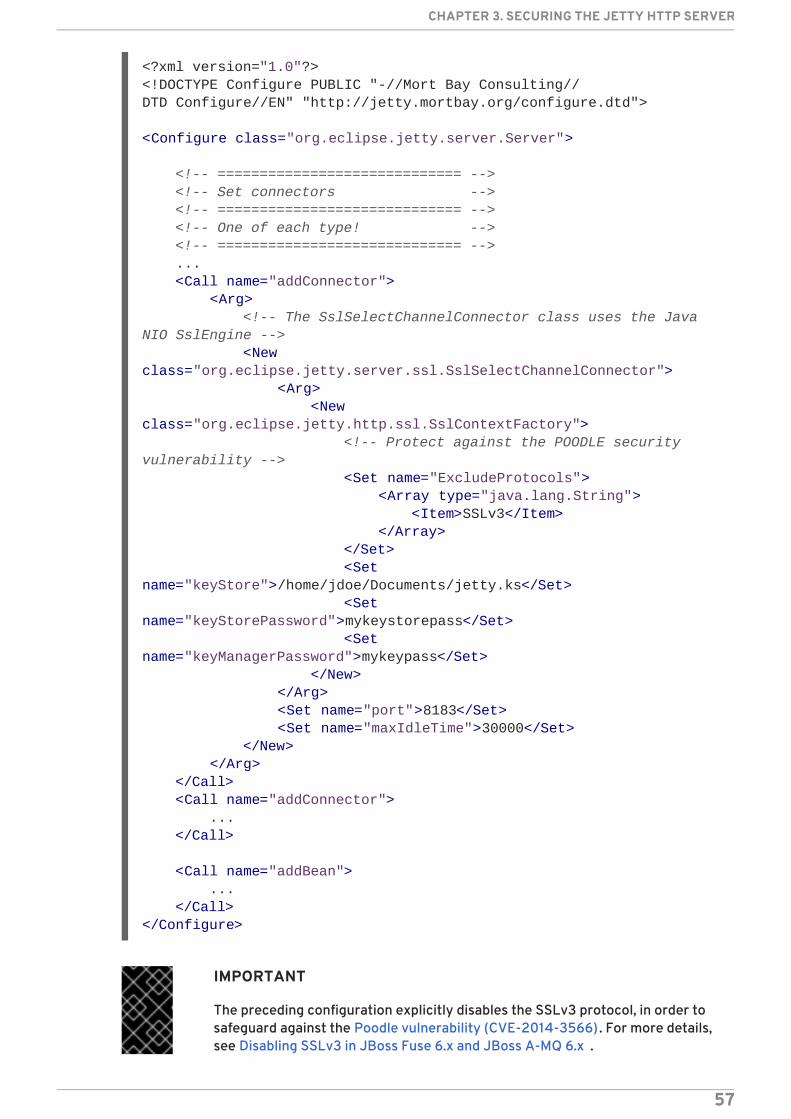
IMPORTANT
The preceding configuration explicitly disables the SSLv3 protocol, in order tosafeguard against the Poodle vulnerability (CVE-2014-3566). For more details,see Disabling SSLv3 in JBoss Fuse 6.x and JBoss A-MQ 6.x .
<?xml version="1.0"?><!DOCTYPE Configure PUBLIC "-//Mort Bay Consulting//DTD Configure//EN" "http://jetty.mortbay.org/configure.dtd">
<Configure class="org.eclipse.jetty.server.Server">
<!-- ============================= --> <!-- Set connectors --> <!-- ============================= --> <!-- One of each type! --> <!-- ============================= --> ... <Call name="addConnector"> <Arg> <!-- The SslSelectChannelConnector class uses the Java NIO SslEngine --> <New class="org.eclipse.jetty.server.ssl.SslSelectChannelConnector"> <Arg> <New class="org.eclipse.jetty.http.ssl.SslContextFactory"> <!-- Protect against the POODLE security vulnerability --> <Set name="ExcludeProtocols"> <Array type="java.lang.String"> <Item>SSLv3</Item> </Array> </Set> <Set name="keyStore">/home/jdoe/Documents/jetty.ks</Set> <Set name="keyStorePassword">mykeystorepass</Set> <Set name="keyManagerPassword">mykeypass</Set> </New> </Arg> <Set name="port">8183</Set> <Set name="maxIdleTime">30000</Set> </New> </Arg> </Call> <Call name="addConnector"> ... </Call>
<Call name="addBean"> ... </Call></Configure>
CHAPTER 3. SECURING THE JETTY HTTP SERVER
57

4. (Optional) If you prefer, you can use a system property to help you specify the location of theJava keystore file. For example, instead of setting the keyStore property explicitly (in thepreceding etc/jetty.xml configuration):
You could use the karaf.home system property to specify the location of the keystore filerelative to the JBoss Fuse install directory:
5. Customize the properties of the SslSocketConnector instance defined in the etc/jetty.xml file, as follows:
port
The secure HTTPS port number.
keyStore
The location of the Java keystore file on the file system. Relative paths are resolvedrelative to the KARAF_HOME environment variable (by default, the install directory).
keyStorePassword
The store password that unlocks the Java keystore file.
keyManagerPassword
The key password that decrypts the private key stored in the keystore (usually the same asthe store password).
6. Restart the JBoss Fuse container, in order for the configuration changes to take effect.
CONNECT TO THE SECURE CONSOLE
After configuring SSL security for the Jetty server in the Pax Web configuration file, you should be ableto open the Fuse Management Console by browsing to the following URL:
NOTE
Remember to type the https: scheme, instead of http:, in this URL.
Initially, the browser will warn you that you are using an untrusted certificate. Skip this warning andyou will be presented with the login screen for the Fuse Management Console.
ADVANCED JETTY SECURITY CONFIGURATION
<Set name="keyStore">/home/jdoe/Documents/jetty.ks</Set>
<Set name="keyStore"> <SystemProperty name="karaf.home"/>/etc/jetty.ks</Set>
https://localhost:8183/
Red Hat JBoss Fuse 6.2.1 Security Guide
58

The Jetty server provides flexible and sophisticated options for configuring security. You can exploitthese advanced options by editing the etc/jetty.xml file and configuring it as described in theJetty security documentation:
Jetty/Howto/Configure SSL
Jetty/Reference/SSL Connectors
SslContextFactory
API documentation (all Jetty versions)
CHAPTER 3. SECURING THE JETTY HTTP SERVER
59

CHAPTER 4. SECURING THE CAMEL ACTIVEMQ COMPONENT
Abstract
The Camel ActiveMQ component enables you to define JMS endpoints in your routes that can connectto an Apache ActiveMQ broker. In order to make your Camel ActiveMQ endpoints secure, you mustcreate an instance of a Camel ActiveMQ component that uses a secure connection factory.
4.1. SECURE ACTIVEMQ CONNECTION FACTORY
Overview
Apache Camel provides an Apache ActiveMQ component for defining Apache ActiveMQ endpoints in aroute. The Apache ActiveMQ endpoints are effectively Java clients of the broker and you can eitherdefine a consumer endpoint (typically used at the start of a route to poll for JMS messages) or define aproducer endpoint (typically used at the end or in the middle of a route to send JMS messages to abroker).
When the remote broker is secure (SSL security, JAAS security, or both), the Apache ActiveMQcomponent must be configured with the required client security settings.
Programming the security properties
Apache ActiveMQ enables you to program SSL security settings (and JAAS security settings) bycreating and configuring an instance of the ActiveMQSslConnectionFactory JMS connectionfactory. Programming the JMS connection factory is the correct approach to use in the context of thecontainers such as OSGi, J2EE, Tomcat, and so on, because these settings are local to the applicationusing the JMS connection factory instance.
NOTE
A standalone broker can configure SSL settings using Java system properties. For clientsdeployed in a container, however, this is not a practical approach, because theconfiguration must apply only to individual bundles, not the entire OSGi container. ACamel ActiveMQ endpoint is effectively a kind of Apache ActiveMQ Java client, so thisrestriction applies also to Camel ActiveMQ endpoints.
Defining a secure connection factory
Example 4.1, “Defining a Secure Connection Factory Bean” shows how to create a secure connectionfactory bean in Spring XML, enabling both SSL/TLS security and JAAS authentication.
Example 4.1. Defining a Secure Connection Factory Bean
<bean id="jmsConnectionFactory" class="org.apache.activemq.ActiveMQSslConnectionFactory"> <property name="brokerURL" value="ssl://localhost:61617" /> <property name="userName" value="Username"/> <property name="password" value="Password"/> <property name="trustStore" value="/conf/client.ts"/> <property name="trustStorePassword" value="password"/></bean>
Red Hat JBoss Fuse 6.2.1 Security Guide
60

The following properties are specified on the ActiveMQSslConnectionFactory class:
brokerURL
The URL of the remote broker to connect to, where this example connects to an SSL-enabledOpenWire port on the local host. The broker must also define a corresponding transport connectorwith compatible port settings.
userName and password
Any valid JAAS login credentials, Username and Password.
trustStore
Location of the Java keystore file containing the certificate trust store for SSL connections. Thelocation is specified as a classpath resource. If a relative path is specified, the resource location isrelative to the org/jbossfuse/example directory on the classpath.
trustStorePassword
The password that unlocks the keystore file containing the trust store.
It is also possible to specify keyStore and keyStorePassword properties, but these would only beneeded, if SSL mutual authentication is enabled (where the client presents an X.509 certificate to thebroker during the SSL handshake).
4.2. EXAMPLE CAMEL ACTIVEMQ COMPONENT CONFIGURATION
Overview
This section describes how to initialize and configure a sample Camel ActiveMQ component instance,which you can then use to define ActiveMQ endpoints in a Camel route. This makes it possible for aCamel route to send or receive messages from a broker.
Prerequisites
The camel-activemq feature, which defines the bundles required for the Camel ActiveMQcomponent, is not installed by default. To install the camel-activemq feature, enter the followingconsole command:
Sample Camel ActiveMQ component
The following Spring XML sample shows a complete configuration of a Camel ActiveMQ componentthat has both SSL/TLS security and JAAS authentication enabled. The Camel ActiveMQ componentinstance is defined to with the activemqssl bean ID, which means it is associated with the activemqssl scheme (which you use when defining endpoints in a Camel route).
JBossFuse:karaf@root> features:install camel-activemq
<?xml version="1.0" encoding="UTF-8"?><beans ... >
CHAPTER 4. SECURING THE CAMEL ACTIVEMQ COMPONENT
61

Sample Camel route
The following Camel route defines a sample endpoint that sends messages securely to the security.test queue on the broker, using the activemqssl scheme to reference the CamelActiveMQ component defined in the preceding example:
... <!-- Configure the activemqssl component: --> <bean id="jmsConnectionFactory" class="org.apache.activemq.ActiveMQSslConnectionFactory"> <property name="brokerURL" value="ssl://localhost:61617" /> <property name="userName" value="Username"/> <property name="password" value="Password"/> <property name="trustStore" value="/conf/client.ts"/> <property name="trustStorePassword" value="password"/> </bean>
<bean id="pooledConnectionFactory" class="org.apache.activemq.pool.PooledConnectionFactory"> <property name="maxConnections" value="8" /> <property name="maximumActive" value="500" /> <property name="connectionFactory" ref="jmsConnectionFactory" /> </bean>
<bean id="jmsConfig" class="org.apache.camel.component.jms.JmsConfiguration"> <property name="connectionFactory" ref="pooledConnectionFactory"/> <property name="transacted" value="false"/> <property name="concurrentConsumers" value="10"/> </bean>
<bean id="activemqssl" class="org.apache.activemq.camel.component.ActiveMQComponent"> <property name="configuration" ref="jmsConfig"/> </bean>
</beans>
<?xml version="1.0" encoding="UTF-8"?><beans ...> ... <camelContext xmlns="http://camel.apache.org/schema/spring"> <route> <from uri="timer://myTimer?fixedRate=true&period=5000"/> <transform><constant>Hello world!</constant></transform> <to uri="activemqssl:security.test"/> </route> </camelContext> ...</beans>
Red Hat JBoss Fuse 6.2.1 Security Guide
62

CHAPTER 5. SECURING THE CAMEL JETTY COMPONENT
Abstract
5.1. ENABLING SSL/TLS SECURITY
Overview
This section explains how to enable SSL/TLS security on the Apache Camel Jetty component, which isused to create a HTTPS Web server. The key step is to customize the Jetty component by setting the sslSocketConnectorProperties property, which configures SSL/TLS. You must also change theprotocol scheme on the Jetty URI from http to https.
Tutorial steps
To configure SSL/TLS security for a Camel Jetty endpoint deployed in the OSGi container, perform thefollowing steps:
1. the section called “Generate a Maven project” .
2. the section called “Customize the POM file” .
3. the section called “Install sample keystore files” .
4. the section called “Configure Jetty with SSL/TLS” .
5. the section called “Build the bundle” .
6. the section called “Install the camel-jetty feature” .
7. the section called “Deploy the bundle” .
8. the section called “Test the bundle” .
9. the section called “Uninstall the bundle” .
Generate a Maven project
The maven-archetype-quickstart archetype creates a generic Maven project, which you can thencustomize for whatever purpose you like. To generate a Maven project with the coordinates, org.jbossfuse.example:jetty-security, enter the following command:
The result of this command is a directory, ProjectDir/jetty-security, containing the files for thegenerated project.
mvn archetype:create-DarchetypeArtifactId=maven-archetype-quickstart-DgroupId=org.jbossfuse.example-DartifactId=jetty-security
CHAPTER 5. SECURING THE CAMEL JETTY COMPONENT
63
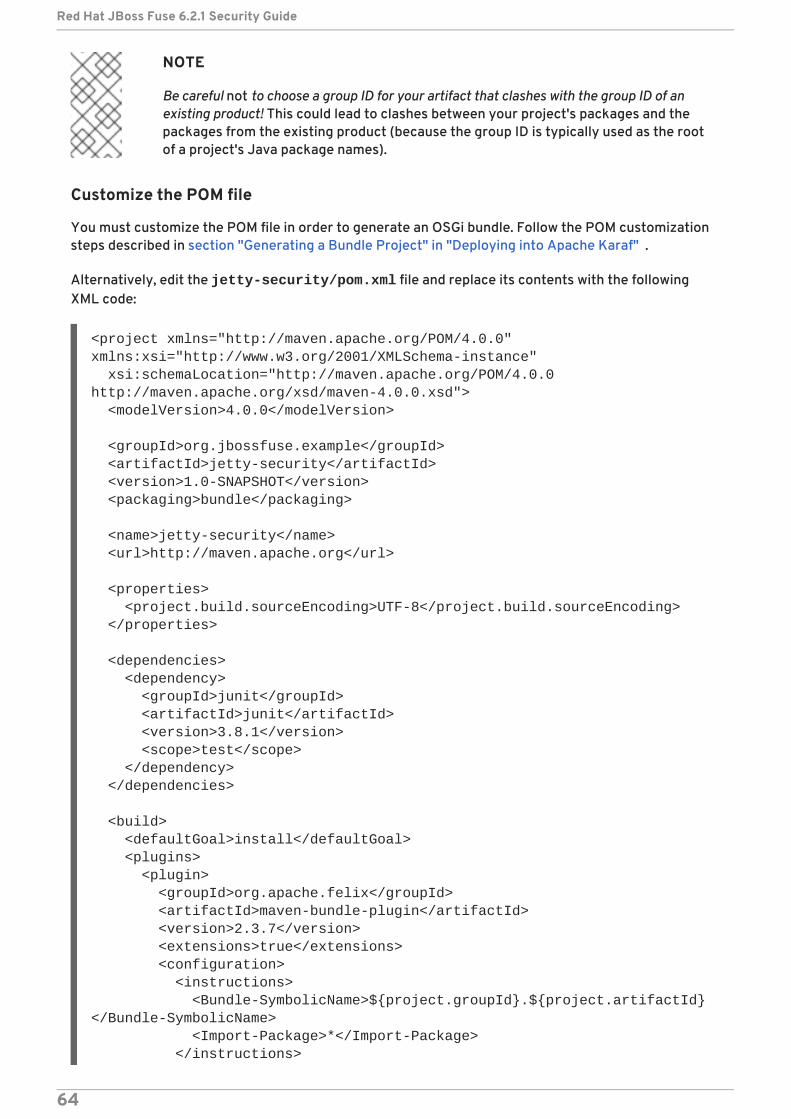
NOTE
Be careful not to choose a group ID for your artifact that clashes with the group ID of anexisting product! This could lead to clashes between your project's packages and thepackages from the existing product (because the group ID is typically used as the rootof a project's Java package names).
Customize the POM file
You must customize the POM file in order to generate an OSGi bundle. Follow the POM customizationsteps described in section "Generating a Bundle Project" in "Deploying into Apache Karaf" .
Alternatively, edit the jetty-security/pom.xml file and replace its contents with the followingXML code:
<project xmlns="http://maven.apache.org/POM/4.0.0" xmlns:xsi="http://www.w3.org/2001/XMLSchema-instance" xsi:schemaLocation="http://maven.apache.org/POM/4.0.0 http://maven.apache.org/xsd/maven-4.0.0.xsd"> <modelVersion>4.0.0</modelVersion>
<groupId>org.jbossfuse.example</groupId> <artifactId>jetty-security</artifactId> <version>1.0-SNAPSHOT</version> <packaging>bundle</packaging>
<name>jetty-security</name> <url>http://maven.apache.org</url>
<properties> <project.build.sourceEncoding>UTF-8</project.build.sourceEncoding> </properties>
<dependencies> <dependency> <groupId>junit</groupId> <artifactId>junit</artifactId> <version>3.8.1</version> <scope>test</scope> </dependency> </dependencies>
<build> <defaultGoal>install</defaultGoal> <plugins> <plugin> <groupId>org.apache.felix</groupId> <artifactId>maven-bundle-plugin</artifactId> <version>2.3.7</version> <extensions>true</extensions> <configuration> <instructions> <Bundle-SymbolicName>${project.groupId}.${project.artifactId}</Bundle-SymbolicName> <Import-Package>*</Import-Package> </instructions>
Red Hat JBoss Fuse 6.2.1 Security Guide
64

Install sample keystore files
The certificates used in this demonstration are taken from a sample in the Apache CXF 3.0.4.redhat-621084 distribution, which is included in the InstallDir/extras directory. Using a standardarchive utility, expand the CXF archive file and extract the contents to a convenient location on yourfilesystem. You will find the sample certificates in the CXFInstallDir/samples/wsdl_first_https/src/main/config directory.
Copy the clientKeystore.jks certificate and the serviceKeystore.jks certificate from the CXFInstallDir/samples/wsdl_first_https/src/main/config directory to the EsbInstallDir/etc/certs directory (where you will need to create the etc/certs sub-directory).After copying, you should have the following directory structure under EsbInstallDir/etc/:
Where clientKeystore.jks, and serviceKeystore.jks are the keystores that are used in thisdemonstration.
WARNING
The demonstration key store and trust sture are provided for testing purposesonly. Do not deploy these certificates in a production system. To set up a genuinelysecure SSL/TLS system, you must generate custom certificates, as described inAppendix A, Managing Certificates.
Configure Jetty with SSL/TLS
The Jetty Web server is created by defining a Jetty endpoint at the start of an Apache Camel route.The route is then responsible for processing the incoming HTTP request and generating a reply. The
</configuration> </plugin>
<plugin> <groupId>org.apache.maven.plugins</groupId> <artifactId>maven-compiler-plugin</artifactId> <configuration> <source>1.7</source> <target>1.7</target> </configuration> </plugin> </plugins> </build>
</project>
EsbInstallDir/etc/ | \--certs/ | \--clientKeystore.jks serviceKeystore.jks
CHAPTER 5. SECURING THE CAMEL JETTY COMPONENT
65

current example simply sends back a small HTML page in the reply. For a more realistic application,you would typically process the incoming message using a bean, which accesses the message throughthe Java servlet API.
Create the following directory to hold the Spring configuration files:
In the spring directory that you just created, use your favourite text editor to create the file, jetty-spring.xml, containing the following XML configuration:
ProjectDir/jetty-security/src/main/resources/META-INF/spring
<?xml version="1.0" encoding="UTF-8"?><beans xmlns="http://www.springframework.org/schema/beans" xmlns:xsi="http://www.w3.org/2001/XMLSchema-instance" xsi:schemaLocation=" http://www.springframework.org/schema/beans http://www.springframework.org/schema/beans/spring-beans-3.0.xsd http://activemq.apache.org/schema/core http://activemq.apache.org/schema/core/activemq-core-5.4.0.xsd http://camel.apache.org/schema/spring http://camel.apache.org/schema/spring/camel-spring.xsd">
<bean id="jetty" class="org.apache.camel.component.jetty8.JettyHttpComponent8"> <property name="sslContextParameters" ref="sslContextParameters" /> </bean>
<sslContextParameters id="sslContextParameters" xmlns="http://camel.apache.org/schema/spring"> <secureSocketProtocols> <!-- Do NOT enable SSLv3 (POODLE vulnerability) --> <secureSocketProtocol>TLSv1</secureSocketProtocol> <secureSocketProtocol>TLSv1.1</secureSocketProtocol> <secureSocketProtocol>TLSv1.2</secureSocketProtocol> </secureSocketProtocols> <keyManagers keyPassword="skpass"> <keyStore resource="etc/certs/serviceKeystore.jks" password="sspass"/> </keyManagers> <trustManagers> <keyStore resource="etc/certs/serviceKeystore.jks" password="sspass"/> </trustManagers> </sslContextParameters>
<camelContext trace="true" xmlns="http://camel.apache.org/schema/spring"> <route> <from uri="jetty:https://0.0.0.0:8282/services?matchOnUriPrefix=true"/> <transform> <constant><html><body>Hello from Fuse ESB server</body></html></constant> </transform> </route> </camelContext>
Red Hat JBoss Fuse 6.2.1 Security Guide
66

The jetty bean defines a new instance of the Apache Camel Jetty component, overriding the defaultcomponent defined in the camel-jetty JAR file. This Jetty component is configured using the sslContextParameters element, as follows:
secureSocketProtocols
Explicitly lists the SSL/TLS protocols supported by the Jetty server.
IMPORTANT
This configuration explicitly disables the SSLv3 protocol, in order to safeguardagainst the Poodle vulnerability (CVE-2014-3566). For more details, see DisablingSSLv3 in JBoss Fuse 6.x and JBoss A-MQ 6.x.
keyManagers/@keyPassword
The password that decrypts the private key stored in the keystore (usually having the same valueas password).
keyManagers/keyStore/@resource
The location of the Java keystore file (in JKS format) containing the Jetty server's own X.509certificate and private key. This location is specified on the filesystem (not on the classpath),relative to the directory where the OSGi container is started.
keyManagers/keyStore/@password
The keystore password that unlocks the keystore.
trustManagers/@resource
The location of the Java keystore file containing one or more trusted certificates (that is, the CAcertificates that have been used to sign X.509 certificates from trusted clients). This location isspecified on the filesystem (not on the classpath), relative to the directory where the OSGicontainer is started.
Strictly speaking, this property is not needed, if clients do not send certificates to the Jetty service.
trustManagers/@password
The keystore password that unlocks the truststore trust store.
You must also modify the URI at the start of the route (the uri attribute of the from element). Makesure that the scheme of the URI matches the secure Jetty component, jetty, that you have justcreated. You must also change the protocol scheme from http to https.
NOTE
Always double-check you have changed the protocol scheme to https. This is such asmall change, it is easy to forget.
Build the bundle
</beans>
CHAPTER 5. SECURING THE CAMEL JETTY COMPONENT
67
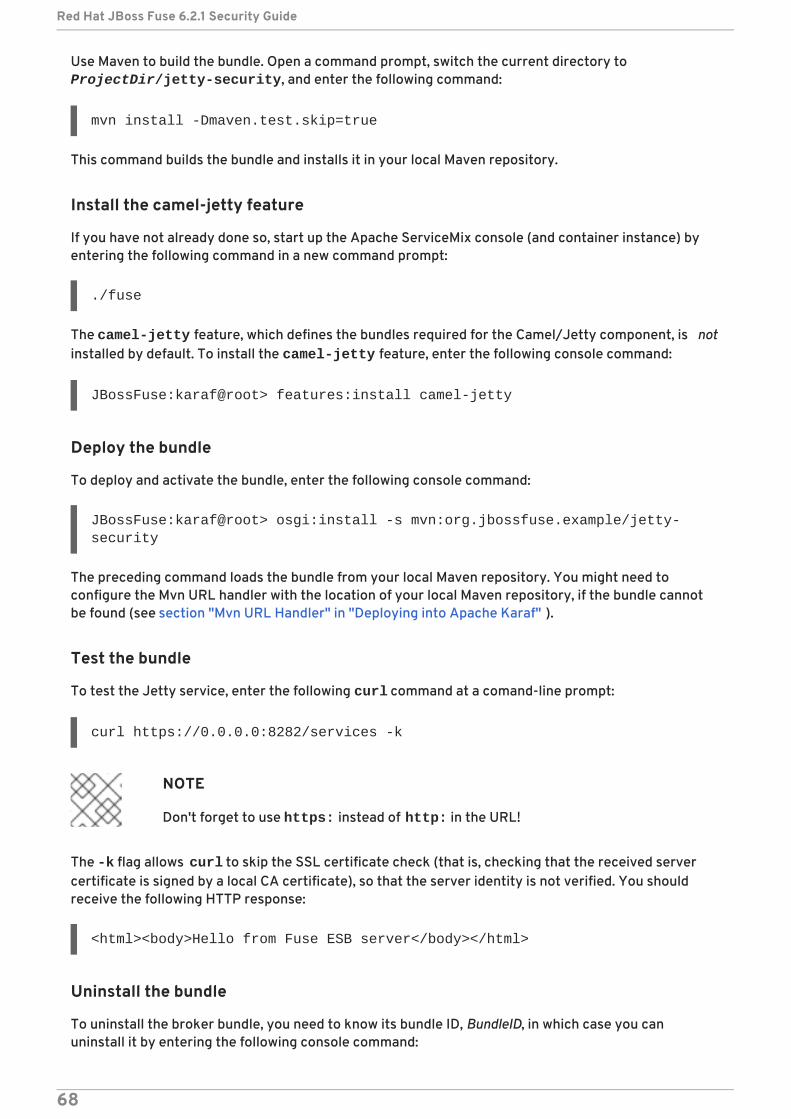
Use Maven to build the bundle. Open a command prompt, switch the current directory to ProjectDir/jetty-security, and enter the following command:
This command builds the bundle and installs it in your local Maven repository.
Install the camel-jetty feature
If you have not already done so, start up the Apache ServiceMix console (and container instance) byentering the following command in a new command prompt:
The camel-jetty feature, which defines the bundles required for the Camel/Jetty component, is notinstalled by default. To install the camel-jetty feature, enter the following console command:
Deploy the bundle
To deploy and activate the bundle, enter the following console command:
The preceding command loads the bundle from your local Maven repository. You might need toconfigure the Mvn URL handler with the location of your local Maven repository, if the bundle cannotbe found (see section "Mvn URL Handler" in "Deploying into Apache Karaf" ).
Test the bundle
To test the Jetty service, enter the following curl command at a comand-line prompt:
NOTE
Don't forget to use https: instead of http: in the URL!
The -k flag allows curl to skip the SSL certificate check (that is, checking that the received servercertificate is signed by a local CA certificate), so that the server identity is not verified. You shouldreceive the following HTTP response:
Uninstall the bundle
To uninstall the broker bundle, you need to know its bundle ID, BundleID, in which case you canuninstall it by entering the following console command:
mvn install -Dmaven.test.skip=true
./fuse
JBossFuse:karaf@root> features:install camel-jetty
JBossFuse:karaf@root> osgi:install -s mvn:org.jbossfuse.example/jetty-security
curl https://0.0.0.0:8282/services -k
<html><body>Hello from Fuse ESB server</body></html>
Red Hat JBoss Fuse 6.2.1 Security Guide
68
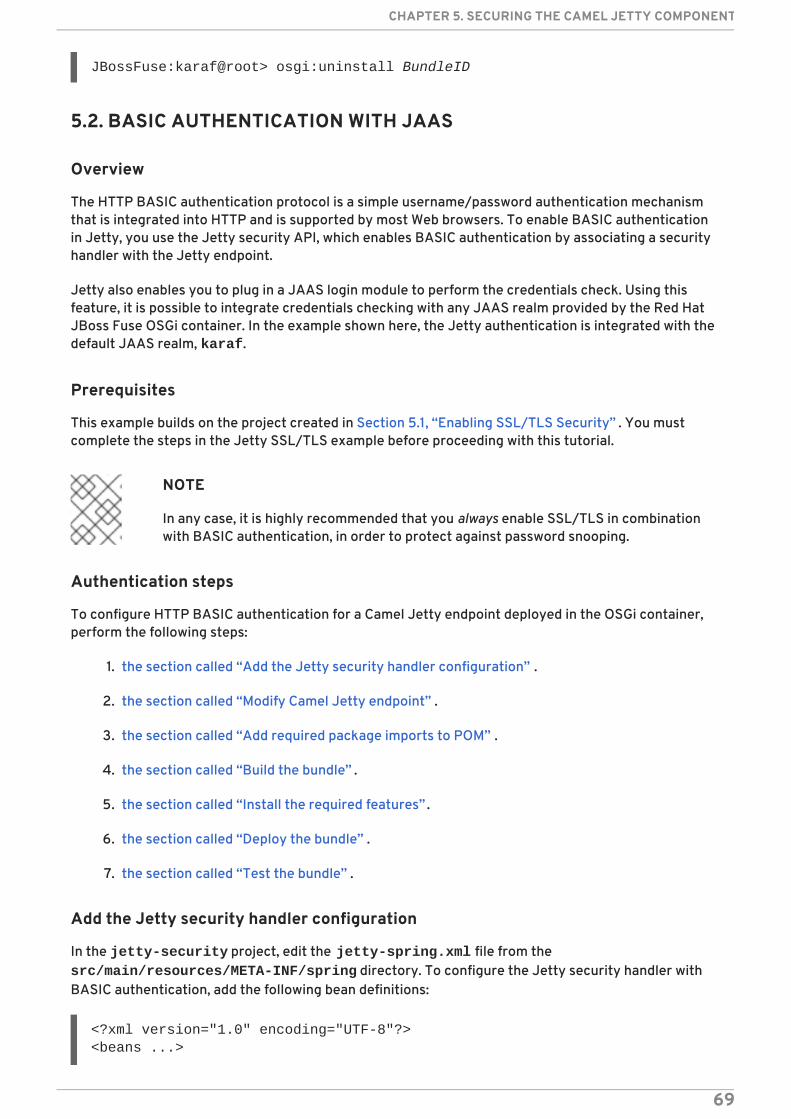
5.2. BASIC AUTHENTICATION WITH JAAS
Overview
The HTTP BASIC authentication protocol is a simple username/password authentication mechanismthat is integrated into HTTP and is supported by most Web browsers. To enable BASIC authenticationin Jetty, you use the Jetty security API, which enables BASIC authentication by associating a securityhandler with the Jetty endpoint.
Jetty also enables you to plug in a JAAS login module to perform the credentials check. Using thisfeature, it is possible to integrate credentials checking with any JAAS realm provided by the Red HatJBoss Fuse OSGi container. In the example shown here, the Jetty authentication is integrated with thedefault JAAS realm, karaf.
Prerequisites
This example builds on the project created in Section 5.1, “Enabling SSL/TLS Security” . You mustcomplete the steps in the Jetty SSL/TLS example before proceeding with this tutorial.
NOTE
In any case, it is highly recommended that you always enable SSL/TLS in combinationwith BASIC authentication, in order to protect against password snooping.
Authentication steps
To configure HTTP BASIC authentication for a Camel Jetty endpoint deployed in the OSGi container,perform the following steps:
1. the section called “Add the Jetty security handler configuration” .
2. the section called “Modify Camel Jetty endpoint” .
3. the section called “Add required package imports to POM” .
4. the section called “Build the bundle” .
5. the section called “Install the required features” .
6. the section called “Deploy the bundle” .
7. the section called “Test the bundle” .
Add the Jetty security handler configuration
In the jetty-security project, edit the jetty-spring.xml file from the src/main/resources/META-INF/spring directory. To configure the Jetty security handler withBASIC authentication, add the following bean definitions:
JBossFuse:karaf@root> osgi:uninstall BundleID
<?xml version="1.0" encoding="UTF-8"?><beans ...>
CHAPTER 5. SECURING THE CAMEL JETTY COMPONENT
69

Two aspects of Jetty authentication are configured by the preceding bean definitions:
HTTP BASIC authentication—the constraint bean enables HTTP BASIC authentication on theJetty security handler. The roles property (of String[] type) is used to define which roleshave access to the Jetty container. In this example, this property is set to Administrator, soonly users with the Administrator role can access this Jetty container.
JAAS login service—the loginService bean specifies that the requisite authentication data is
... <!-- --> <bean id="loginService" class="org.eclipse.jetty.plus.jaas.JAASLoginService"> <property name="name" value="karaf"/> <property name="loginModuleName" value="karaf"/> <property name="roleClassNames"> <list> <value>org.apache.karaf.jaas.boot.principal.RolePrincipal</value> </list> </property> </bean>
<bean id="identityService" class="org.eclipse.jetty.security.DefaultIdentityService"/>
<bean id="constraint" class="org.eclipse.jetty.util.security.Constraint"> <property name="name" value="BASIC"/> <property name="roles" value="Administrator"/> <property name="authenticate" value="true"/> </bean>
<bean id="constraintMapping" class="org.eclipse.jetty.security.ConstraintMapping"> <property name="constraint" ref="constraint"/> <property name="pathSpec" value="/*"/> </bean>
<bean id="securityHandler" class="org.eclipse.jetty.security.ConstraintSecurityHandler"> <property name="authenticator"> <bean class="org.eclipse.jetty.security.authentication.BasicAuthenticator"/> </property> <property name="constraintMappings"> <list> <ref bean="constraintMapping"/> </list> </property> <property name="loginService" ref="loginService"/> <property name="strict" value="false"/> <property name="identityService" ref="identityService"/> </bean> ...</beans>
Red Hat JBoss Fuse 6.2.1 Security Guide
70

extracted from a JAAS realm. The loginModuleName property specifies that the Jetty loginservice uses the karaf JAAS realm, which is the OSGi container's default JAAS realm (seeSection 1.1, “OSGi Container Security” ).
Modify Camel Jetty endpoint
After creating the Jetty securityHandler bean, you must modify the Jetty endpoint URI in theApache Camel route, so that it hooks into the security handler. To add the security handler to the Jettyendpoint, set the handlers option equal to the security handler's bean ID, as shown in the followingexample:
NOTE
URI options must be separated by the & entity, instead of the plain & character, inthe context of an XML file.
Add required package imports to POM
Edit the jetty-security project's POM file, jetty-security/pom.xml. Near the start of the POMfile, define the jetty-version property as follows:
Further down the POM file, in the configuration of the Maven bundle plug-in, modify the bundleinstructions to import additional Java packages, as follows:
<beans ...> <camelContext trace="true" xmlns="http://camel.apache.org/schema/spring"> <route> <from uri="jetty:https://0.0.0.0:8282/services?handlers=securityHandler&matchOnUriPrefix=true"/> <transform> <constant><html><body>Hello from Fuse ESB server</body></html></constant> </transform> </route> </camelContext></beans>
<project ... > ... <properties> ... <jetty-version>8.1.17.v20150415</jetty-version> </properties> ...</project>
<project ... > ... <build> ... <plugin>
CHAPTER 5. SECURING THE CAMEL JETTY COMPONENT
71

NOTE
These extra imports are required, because the Maven bundle plug-in is not capable ofscanning Spring files to determine their package dependencies automatically.
Build the bundle
Use Maven to build the bundle. Open a command prompt, switch the current directory to ProjectDir/jetty-security, and enter the following command:
Install the required features
If you have not already done so, start up the JBoss Fuse container by entering the following commandin a new command prompt:
Install the jetty and camel-jetty features, by entering the following console commands:
<groupId>org.apache.felix</groupId> <artifactId>maven-bundle-plugin</artifactId> <extensions>true</extensions> <configuration> <instructions> <Bundle-SymbolicName> ${project.artifactId} </Bundle-SymbolicName> <Import-Package> javax.security.auth, javax.security.auth.callback, javax.security.auth.login, javax.security.auth.spi, org.apache.karaf.jaas.modules, org.apache.karaf.jaas.boot.principal, org.eclipse.jetty.plus.jaas;version=${jetty-version}, org.eclipse.jetty.security;version=${jetty-version}, * </Import-Package> <Private-Package>org.apache.camel.jaas</Private-Package>
</instructions> </configuration> </plugin> </plugins> </build> ...</project>
mvn install
./fuse
karaf@root> features:install jettykaraf@root> features:install camel-jetty
Red Hat JBoss Fuse 6.2.1 Security Guide
72

Deploy the bundle
To deploy and activate the bundle, enter the following console command:
Test the bundle
To test the Jetty service, enter the following curl command at a comand-line prompt:
NOTE
Don't forget to use https: instead of http: in the URL!
The --user option is needed to specify the BASIC authentication credentials. For the Username and Password values, specify valid JAAS credentials (the valid credentials you can use for this step arespecified in the EsbInstallDir/etc/users.properties file). You should now receive thefollowing HTTP reply message:
JBossFuse:karaf@root> osgi:install -s mvn:org.jbossfuse.example/jetty-security
curl https://0.0.0.0:8282/services -k --user Username:Password
<html><body>Hello from Fuse ESB server</body></html>
CHAPTER 5. SECURING THE CAMEL JETTY COMPONENT
73
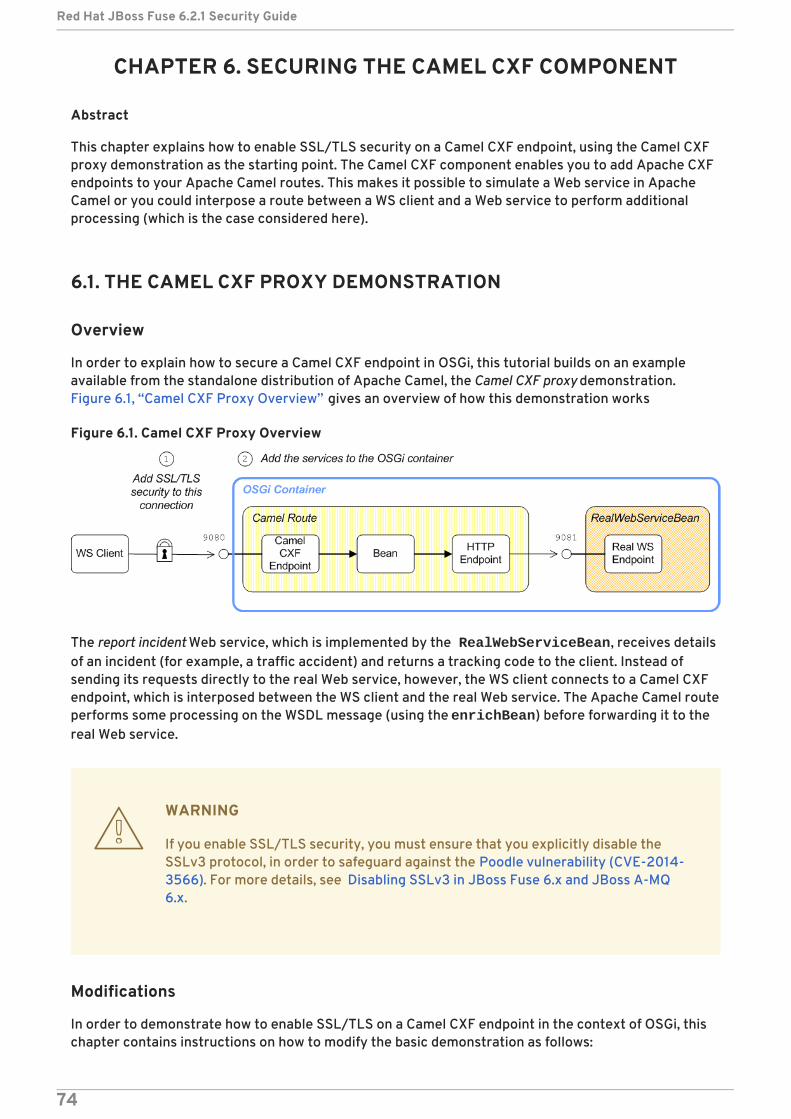
CHAPTER 6. SECURING THE CAMEL CXF COMPONENT
Abstract
This chapter explains how to enable SSL/TLS security on a Camel CXF endpoint, using the Camel CXFproxy demonstration as the starting point. The Camel CXF component enables you to add Apache CXFendpoints to your Apache Camel routes. This makes it possible to simulate a Web service in ApacheCamel or you could interpose a route between a WS client and a Web service to perform additionalprocessing (which is the case considered here).
6.1. THE CAMEL CXF PROXY DEMONSTRATION
Overview
In order to explain how to secure a Camel CXF endpoint in OSGi, this tutorial builds on an exampleavailable from the standalone distribution of Apache Camel, the Camel CXF proxy demonstration.Figure 6.1, “Camel CXF Proxy Overview” gives an overview of how this demonstration works
Figure 6.1. Camel CXF Proxy Overview
The report incident Web service, which is implemented by the RealWebServiceBean, receives detailsof an incident (for example, a traffic accident) and returns a tracking code to the client. Instead ofsending its requests directly to the real Web service, however, the WS client connects to a Camel CXFendpoint, which is interposed between the WS client and the real Web service. The Apache Camel routeperforms some processing on the WSDL message (using the enrichBean) before forwarding it to thereal Web service.
WARNING
If you enable SSL/TLS security, you must ensure that you explicitly disable theSSLv3 protocol, in order to safeguard against the Poodle vulnerability (CVE-2014-3566). For more details, see Disabling SSLv3 in JBoss Fuse 6.x and JBoss A-MQ6.x.
Modifications
In order to demonstrate how to enable SSL/TLS on a Camel CXF endpoint in the context of OSGi, thischapter contains instructions on how to modify the basic demonstration as follows:
Red Hat JBoss Fuse 6.2.1 Security Guide
74

1. SSL/TLS security is enabled on the connection between the WS client and the Camel CXFendpoint.
2. The Apache Camel route and the RealWebServiceBean bean are both deployed into theOSGi container.
Obtaining the demonstration code
The Camel CXF proxy demonstration is available only from the standalone distribution of ApacheCamel, which is included in the InstallDir/extras directory. Using a standard archive utility,expand the Camel archive file and extract the contents to a convenient location on your filesystem.
Assuming that you have installed Apache Camel in CamelInstallDir, you can find the Camel CXF proxydemonstration in the following directory:
Obtaining the sample certificates
This demonstration needs X.509 certificates. In a real deployment, you should generate thesecertificates yourself using a private certificate authority. For this demonstration, however, we usesome sample certificates from the Apache CXF wsdl_first_http example. This demonstration isavailable from the standalone distribution of Apache CXF, which is included in the InstallDir/extras directory. Using a standard archive utility, expand the CXF archive file andextract the contents to a convenient location on your filesystem.
Assuming that you have installed Apache CXF in CXFInstallDir, you can find the wsdl_first_httpdemonstration in the following directory:
Physical part of the WSDL contract
The physical part of the WSDL contract refers to the wsdl:service and wsdl:port elements. Theseelements specify the transport details that are needed to connect to a specific Web services endpoint.For the purposes of this demonstration, this is the most interesting part of the contract and it is shownin Example 6.1, “The ReportIncidentEndpointService WSDL Service” .
Example 6.1. The ReportIncidentEndpointService WSDL Service
CamelInstallDir/examples/camel-example-cxf-proxy
CXFInstallDir/samples/wsdl_first_http
<wsdl:definitions xmlns:soap="http://schemas.xmlsoap.org/wsdl/soap/" ... xmlns:wsdl="http://schemas.xmlsoap.org/wsdl/" targetNamespace="http://reportincident.example.camel.apache.org"> ... <!-- Service definition --> <wsdl:service name="ReportIncidentEndpointService"> <wsdl:port name="ReportIncidentEndpoint" binding="tns:ReportIncidentBinding"> <soap:address location="http://localhost:9080/camel-example-cxf-proxy/webservices/incident"/> </wsdl:port>
CHAPTER 6. SECURING THE CAMEL CXF COMPONENT
75

NOTE
The address URL appearing in the WSDL contract (the value of the soap:addresselement's location attribute) is not important here, because the application codeoverrides the default value of the address URL.
WSDL addressing details
A WS client needs three pieces of information to connect to a WSDL service: the WSDL service name, theWSDL port name, and the address URL of the Web service. The following addressing details are used toconnect to the proxy Web service and to the real Web service in this example:
WSDL service name
The full QName of the WSDL service is as follows:
WSDL port name
The full QName of the WSDL port is as follows:
Address URL
The address URL of the proxy Web service endpoint (which uses the HTTPS protocol) is as follows:
NOTE
The preceding address is specified when the reportIncident bean is createdusing a cxf:cxfEndpoint element in the bundle's Spring configuration file, src/main/resources/META-INF/spring/camel-config.xml.
The address URL of the real Web service endpoint (using the HTTP protocol) is as follows:
NOTE
The preceding address is specified when the realWebService bean is created inthe bundle's Spring configuration file, src/main/resources/META-INF/spring/camel-config.xml.
</wsdl:service>
</wsdl:definitions>
{http://reportincident.example.camel.apache.org}ReportIncidentEndpointService
{http://reportincident.example.camel.apache.org}ReportIncidentEndpoint
https://localhost:9080/camel-example-cxf-proxy/webservices/incident
http://localhost:9081/real-webservice
Red Hat JBoss Fuse 6.2.1 Security Guide
76

6.2. SECURING THE WEB SERVICES PROXY
Overview
This section explains how to enable SSL/TLS security on the Camel CXF endpoint, which acts as aproxy for the real Web service. Assuming that you already have the X.509 certificates available, allthat is required is to add a block of configuration data to the Spring configuration file (where theconfiguration data is contained in a httpj:engine-factory element). There is just one slightlysubtle aspect to this, however: you need to understand how the Camel CXF endpoint gets associatedwith the SSL/TLS configuration details.
Implicit configuration
A WS endpoint can be configured by creating the endpoint in Spring and then configuring SSL/TLSproperties on its Jetty container. The configuration can be somewhat confusing, however, for thefollowing reason: the Jetty container (which is configured by a httpj:engine-factory element inSpring) does not explicitly reference the WS endpoints it contains and the WS endpoints do not explicitlyreference the Jetty container either. The connection between the Jetty container and its containedendpoints is established implicitly, in that they are both configured to use the same TCP port, asillustrated by Figure 6.2, “WS Endpoint Implicitly Configured by httpj:engine-factory Element” .
Figure 6.2. WS Endpoint Implicitly Configured by httpj:engine-factory Element
The connection between the Web service endpoint and the httpj:engine-factory element isestablished as follows:
1. The Spring container loads and parses the file containing the httpj:engine-factoryelement.
2. When the httpj:engine-factory bean is created, a corresponding entry is created in theregistry, storing a reference to the bean. The httpj:engine-factory bean is also used toinitialize a Jetty container that listens on the specified TCP port.
3. When the WS endpoint is created, it scans the registry to see if it can find a httpj:engine-factory bean with the same TCP port as the TCP port in the endpoint's address URL.
4. If one of the beans matches the endpoint's TCP port, the WS endpoint installs itself into thecorresponding Jetty container. If the Jetty container has SSL/TLS enabled, the WS endpointshares those security settings.
Steps to add SSL/TLS security to the Jetty container
CHAPTER 6. SECURING THE CAMEL CXF COMPONENT
77

To add SSL/TLS security to the Jetty container, thereby securing the WS proxy endpoint, perform thefollowing steps:
1. the section called “Add certificates to the bundle resources” .
2. the section called “Modify POM to switch off resource filtering” .
3. the section called “Instantiate the CXF Bus” .
4. the section called “Add the httpj:engine-factory element to Spring configuration” .
5. the section called “Define the cxfcore:, sec: and httpj: prefixes” .
6. the section called “Modify proxy address URL to use HTTPS” .
Add certificates to the bundle resources
The certificates used in this demonstration are taken from a sample in the Apache CXF 3.0.4.redhat-621084 product. If you install the standalone version of Apache CXF (available in the InstallDir/extras/ directory), you will find the sample certificates in the CXFInstallDir/samples/wsdl_first_https/src/main/config directory.
Copy the clientKeystore.jks and serviceKeystore.jks keystores from the CXFInstallDir/samples/wsdl_first_https/src/main/config directory to the CamelInstallDir/examples/camel-example-cxf-proxy/src/main/resources/certsdirectory (you must first create the certs sub-directory).
Modify POM to switch off resource filtering
Including the certificates directly in the bundle as resource is the most convenient way to deploythem. But when you deploy certificates as resources in a Maven project, you must remember to disableMaven resource filtering, which corrupts binary files.
To disable filtering of .jks files in Maven, open the project POM file, CamelInstallDir/examples/camel-example-cxf-proxy/pom.xml, with a text editor and addthe following resources element as a child of the build element:
<?xml version="1.0" encoding="UTF-8"?>...<project ...> ... <build> <plugins> ... </plugins>
<resources> <resource> <directory>src/main/resources</directory> <filtering>true</filtering> <excludes> <exclude>**/*.jks</exclude> </excludes> </resource> <resource>
Red Hat JBoss Fuse 6.2.1 Security Guide
78

Instantiate the CXF Bus
You should instantiate the CXF bus explicitly in the Spring XML (this ensures that it will be available tothe Jetty container, which is instantiated by the httpj:engine-factory element in the next step).Edit the camel-config.xml file in the src/main/resources/META-INF/spring directory,adding the cxfcore:bus element as a child of the beans element, as follows:
NOTE
The cxfcore: namespace prefix will be defined in a later step.
Add the httpj:engine-factory element to Spring configuration
To configure the Jetty container that listens on TCP port 9080 to use SSL/TLS security, edit the camel-config.xml file in the src/main/resources/META-INF/spring directory, adding the httpj:engine-factory element as shown in Example 6.2, “httpj:engine-factory Element withSSL/TLS Enabled”.
In this example, the required attribute of the sec:clientAuthentication element is set to false, which means that a connecting client is not required to present an X.509 certificate to theserver during the SSL/TLS handshake (although it may do so, if it has such a certificate).
Example 6.2. httpj:engine-factory Element with SSL/TLS Enabled
<directory>src/main/resources</directory> <filtering>false</filtering> <includes> <include>**/*.jks</include> </includes> </resource> </resources> </build>
</project>
<beans ... > ... <cxfcore:bus/> ...</beans>
<beans ... > ... <httpj:engine-factory bus="cxf"> <httpj:engine port="${proxy.port}"> <httpj:tlsServerParameters secureSocketProtocol="TLSv1"> <sec:keyManagers keyPassword="skpass"> <sec:keyStore resource="certs/serviceKeystore.jks" password="sspass" type="JKS"/> </sec:keyManagers> <sec:trustManagers> <sec:keyStore resource="certs/serviceKeystore.jks" password="sspass" type="JKS"/>
CHAPTER 6. SECURING THE CAMEL CXF COMPONENT
79
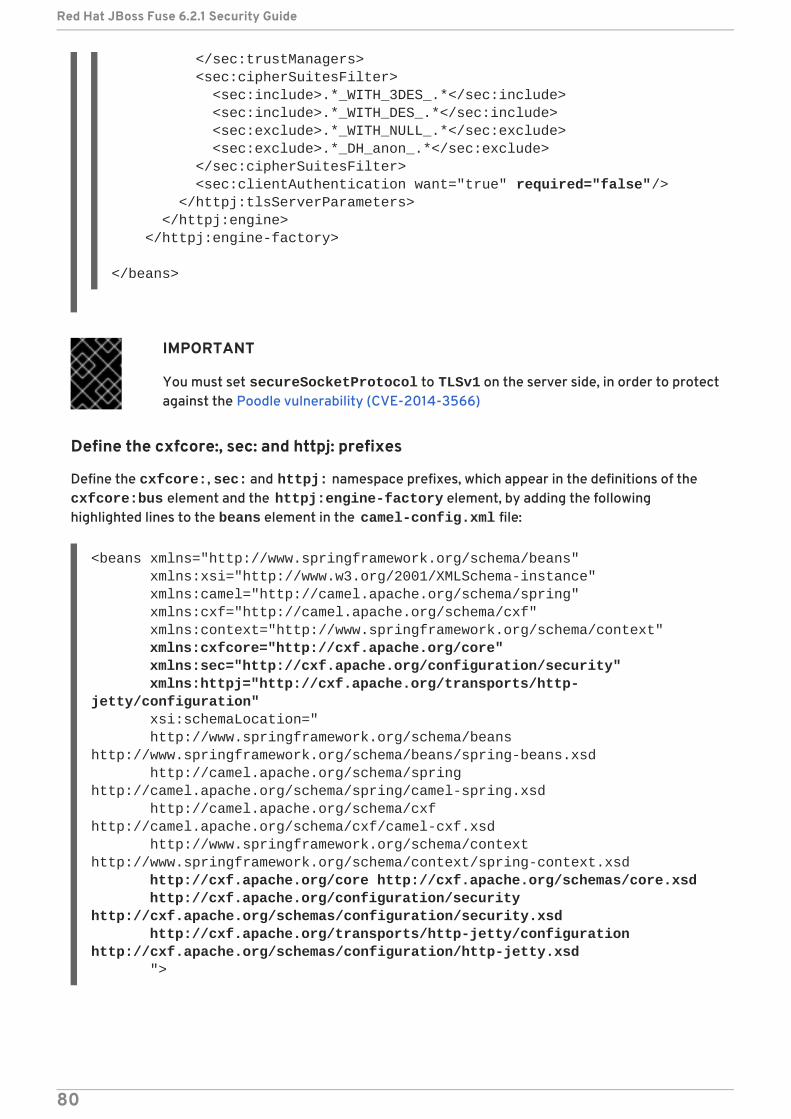
IMPORTANT
You must set secureSocketProtocol to TLSv1 on the server side, in order to protectagainst the Poodle vulnerability (CVE-2014-3566)
Define the cxfcore:, sec: and httpj: prefixes
Define the cxfcore:, sec: and httpj: namespace prefixes, which appear in the definitions of the cxfcore:bus element and the httpj:engine-factory element, by adding the followinghighlighted lines to the beans element in the camel-config.xml file:
</sec:trustManagers> <sec:cipherSuitesFilter> <sec:include>.*_WITH_3DES_.*</sec:include> <sec:include>.*_WITH_DES_.*</sec:include> <sec:exclude>.*_WITH_NULL_.*</sec:exclude> <sec:exclude>.*_DH_anon_.*</sec:exclude> </sec:cipherSuitesFilter> <sec:clientAuthentication want="true" required="false"/> </httpj:tlsServerParameters> </httpj:engine> </httpj:engine-factory>
</beans>
<beans xmlns="http://www.springframework.org/schema/beans" xmlns:xsi="http://www.w3.org/2001/XMLSchema-instance" xmlns:camel="http://camel.apache.org/schema/spring" xmlns:cxf="http://camel.apache.org/schema/cxf" xmlns:context="http://www.springframework.org/schema/context" xmlns:cxfcore="http://cxf.apache.org/core" xmlns:sec="http://cxf.apache.org/configuration/security" xmlns:httpj="http://cxf.apache.org/transports/http-jetty/configuration" xsi:schemaLocation=" http://www.springframework.org/schema/beans http://www.springframework.org/schema/beans/spring-beans.xsd http://camel.apache.org/schema/spring http://camel.apache.org/schema/spring/camel-spring.xsd http://camel.apache.org/schema/cxf http://camel.apache.org/schema/cxf/camel-cxf.xsd http://www.springframework.org/schema/context http://www.springframework.org/schema/context/spring-context.xsd http://cxf.apache.org/core http://cxf.apache.org/schemas/core.xsd http://cxf.apache.org/configuration/security http://cxf.apache.org/schemas/configuration/security.xsd http://cxf.apache.org/transports/http-jetty/configuration http://cxf.apache.org/schemas/configuration/http-jetty.xsd ">
Red Hat JBoss Fuse 6.2.1 Security Guide
80

NOTE
It is essential to specify the locations of the http://cxf.apache.org/configuration/security schema and the http://cxf.apache.org/transports/http-jetty/configuration schema inthe xsi:schemaLocation attribute. These will not automatically be provided by theOSGi container.
Modify proxy address URL to use HTTPS
The proxy endpoint at the start of the Apache Camel route is configured by the cxf:cxfEndpointelement in the camel-config.xml file. By default, this proxy endpoint is configured to use the HTTPprotocol. You must modify the address URL to use the secure HTTPS protocol instead, however. In the camel-config.xml file, edit the address attribute of the cxf:cxfEndpoint element, replacing the http: prefix by the https: prefix, as shown in the following fragment:
Notice also that the address URL is configured to use the TCP port, ${proxy.port} (which has thevalue 9080 by default). This TCP port value is the same as the value set for the Jetty container(configured by the http:engine-factory element), thus ensuring that this endpoint is deployed intothe Jetty container. The attributes of the cxf:cxfEndpoint specify the WSDL addressing details asdescribed in the section called “WSDL addressing details” :
serviceName
Specifies the WSDL service name.
endpointName
Specifies the WSDL port name.
address
Specifies the address URL of the proxy Web service.
6.3. DEPLOYING THE APACHE CAMEL ROUTE
Overview
The Maven POM file in the basic Camel CXF proxy demonstration is already configured to generate anOSGi bundle. Hence, after building the demonstration using Maven, the demonstration bundle (whichcontains the Apache Camel route and the RealWebServicesBean bean) is ready for deployment into
<beans ...> ... <cxf:cxfEndpoint id="reportIncident" address="https://localhost:${proxy.port}/camel-example-cxf-proxy/webservices/incident" endpointName="s:ReportIncidentEndpoint" serviceName="s:ReportIncidentEndpointService" wsdlURL="etc/report_incident.wsdl" xmlns:s="http://reportincident.example.camel.apache.org"/> ...</beans>
CHAPTER 6. SECURING THE CAMEL CXF COMPONENT
81

the OSGi container.
Prerequisites
Before deploying the Apache Camel route into the OSGi container, you must configure the proxy Webservice to use SSL/TLS security, as described in the previous section, Section 6.2, “Securing the WebServices Proxy”.
Steps to deploy the Camel route
To deploy the Web services proxy demonstration into the OSGi container, perform the following steps:
1. the section called “Build the demonstration” .
2. the section called “Start the OSGi container” .
3. the section called “Install the required features” .
4. the section called “Deploy the bundle” .
5. the section called “Check the console output” .
Build the demonstration
Use Maven to build and install the demonstration as an OSGi bundle. Open a command prompt, switchthe current directory to CamelInstallDir/examples/camel-example-cxf-proxy, and enter thefollowing command:
Start the OSGi container
If you have not already done so, start up the Apache ServiceMix console (and container instance) byentering the following command in a new command prompt:
Install the required features
The camel-cxf feature, which defines the bundles required for the Camel/CXF component, is notinstalled by default. To install the camel-cxf feature, enter the following console command:
You also need the camel-http feature, which defines the bundles required for the Camel/HTTPcomponent. To install the camel-http feature, enter the following console command:
Deploy the bundle
Deploy the camel-example-cxf-proxy bundle, by entering the following console command:
mvn install -Dmaven.test.skip=true
./fuse
JBossFuse:karaf@root> features:install camel-cxf
JBossFuse:karaf@root> features:install camel-http
Red Hat JBoss Fuse 6.2.1 Security Guide
82

NOTE
In this case, it is preferable to deploy the bundle directly using install, rather thanusing hot deploy, so that you can see the bundle output on the console screen.
If you have any difficulty using the mvn URL handler, see section "Mvn URL Handler" in"Deploying into Apache Karaf" for details of how to set it up.
Check the console output
After the bundle is successfully deployed, you should see output like the following in the consolewindow:
6.4. SECURING THE WEB SERVICES CLIENT
Overview
In the basic Camel CXF proxy demonstration, the Web services client is actually implemented as aJUnit test under the src/test directory. This means that the client can easily be run using the Mavencommand, mvn test. To enable SSL/TLS security on the client, the Java implementation of the testclient is completely replaced and a Spring file, containing the SSL/TLS configuration, is added to the src/test/resources/META-INF/spring directory. Before describing the steps you need toperform to set up the client, this section explains some details of the client's Java code and Springconfiguration.
Implicit configuration
Apart from changing the URL scheme on the endpoint address to https:, most of the configuration toenable SSL/TLS security on a client proxy is contained in a http:conduit element in Springconfiguration. The way in which this configuration is applied to the client proxy, however, is potentiallyconfusing, for the following reason: the http:conduit element does not explicitly reference the clientproxy and the client proxy does not explicitly reference the http:conduit element. The connectionbetween the http:conduit element and the client proxy is established implicitly, in that they bothreference the same WSDL port, as illustrated by Figure 6.3, “Client Proxy Implicitly Configured byhttp:conduit Element”.
JBossFuse:karaf@root> install -s mvn:org.apache.camel/camel-example-cxf-proxy/2.15.1.redhat-621084
JBossFuse:karaf@root> Starting real web service...Started real web service at: http://localhost:9081/real-webservice
CHAPTER 6. SECURING THE CAMEL CXF COMPONENT
83

Figure 6.3. Client Proxy Implicitly Configured by http:conduit Element
The connection between the client proxy and the http:conduit element is established as follows:
1. The client loads and parses the Spring configuration file containing the http:conduitelement.
2. When the http:conduit bean is created, a corresponding entry is created in the registry,which stores a reference to the bean under the specified WSDL port name (where the name isstored in QName format).
3. When the JAX-WS client proxy is created, it scans the registry to see if it can find a http:conduit bean associated with the proxy's WSDL port name. If it finds such a bean, itautomatically injects the configuration details into the proxy.
Certificates needed on the client side
The client is configured with the following clientKeystore.jks keystore file from the src/main/resources/certs directory. This keystore contains two entries, as follows:
Trusted cert entry
A trusted certificate entry containing the CA certificate that issued and signed both the servercertificate and the client certificate.
Private key entry
A private key entry containing the client's own X.509 certificate and private key. In fact, thiscertificate is not strictly necessary to run the current example, because the server does not requirethe client to send a certificate during the TLS handshake (see Example 6.2, “httpj:engine-factoryElement with SSL/TLS Enabled”).
Loading Spring definitions into the client
The example client is not deployed directly into a Spring container, but it requires some Springdefinitions in order to define a secure HTTP conduit. So how can you create the Spring definitionswithout a Spring container? It turns out that it is easy to read Spring definitions into a Java-basedclient using the org.apache.cxf.bus.spring.SpringBusFactory class.
The following code shows how to read Spring definitions from the file, META-INF/spring/cxf-client.xml, and create an Apache CXF Bus object that incorporates those definitions:
Red Hat JBoss Fuse 6.2.1 Security Guide
84

Creating the client proxy
In principle, there are several different ways of creating a WSDL proxy: you could use the JAX-WS APIto create a proxy based on the contents of a WSDL file; you could use the JAX-WS API to create a proxywithout a WSDL file; or you could use the Apache CXF-specific class, JaxWsProxyFactoryBean, tocreate a proxy.
For this SSL/TLS client, the most convenient approach is to use the JAX-WS API to create a proxywithout using a WSDL file, as shown in the following Java sample:
NOTE
In this example, you cannot use the JaxWsProxyFactoryBean approach to create aproxy, because a proxy created in this way fails to find the HTTP conduit settingsspecified in the Spring configuration file.
The SERVICE_NAME and PORT_NAME constants are the QNames of the WSDL service and the WSDLport respectively, as defined in Example 6.1, “The ReportIncidentEndpointService WSDL Service” . The ADDRESS_URL string has the same value as the proxy Web service address and is defined as follows:
In particular, note that the address must be defined with the URL scheme, https, which selects HTTPover SSL/TLS.
Steps to add SSL/TLS security to the client
To define a JAX-WS client with SSL/TLS security enabled, perform the following steps:
// Javaimport org.apache.cxf.bus.spring.SpringBusFactory;...protected void startCxfBus() throws Exception { bf = new SpringBusFactory(); Bus bus = bf.createBus("META-INF/spring/cxf-client.xml"); bf.setDefaultBus(bus);}
// Javaimport javax.xml.ws.Service;import org.apache.camel.example.reportincident.ReportIncidentEndpoint;...// create the webservice client and send the requestService s = Service.create(SERVICE_NAME);s.addPort( PORT_NAME, "http://schemas.xmlsoap.org/soap/", ADDRESS_URL );ReportIncidentEndpoint client = s.getPort(PORT_NAME, ReportIncidentEndpoint.class);
private static final String ADDRESS_URL = "https://localhost:9080/camel-example-cxf-proxy/webservices/incident";
CHAPTER 6. SECURING THE CAMEL CXF COMPONENT
85
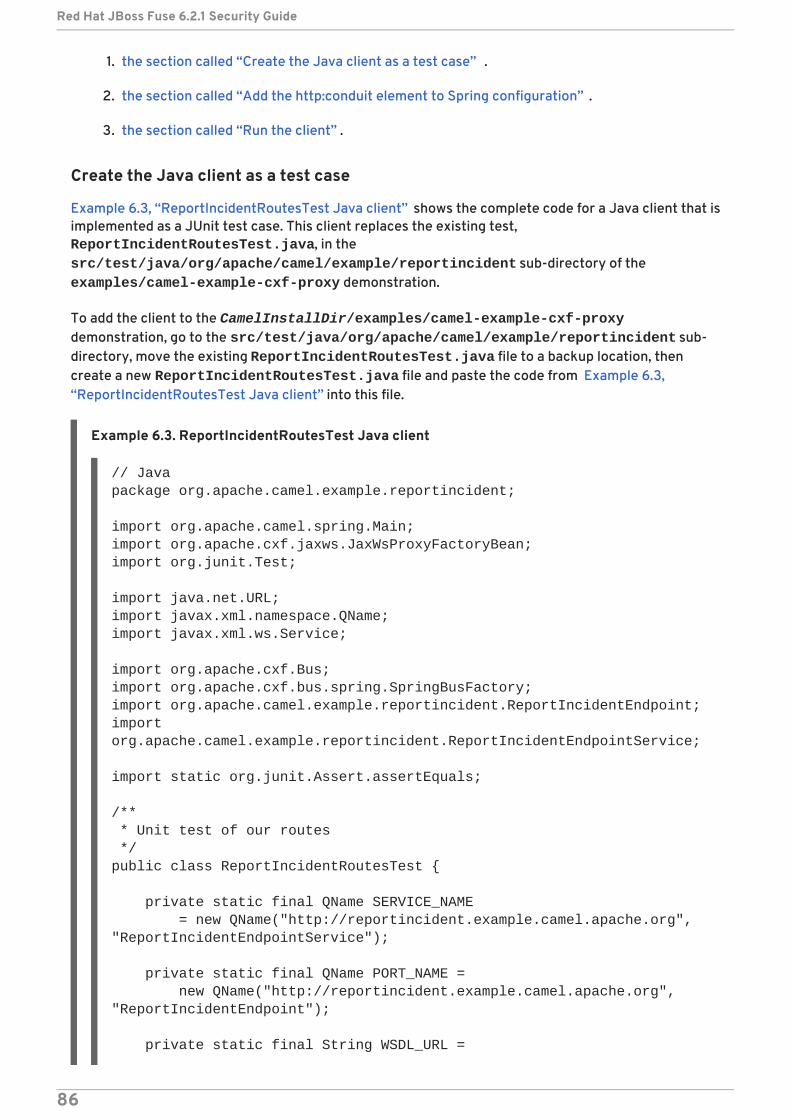
1. the section called “Create the Java client as a test case” .
2. the section called “Add the http:conduit element to Spring configuration” .
3. the section called “Run the client” .
Create the Java client as a test case
Example 6.3, “ReportIncidentRoutesTest Java client” shows the complete code for a Java client that isimplemented as a JUnit test case. This client replaces the existing test, ReportIncidentRoutesTest.java, in the src/test/java/org/apache/camel/example/reportincident sub-directory of the examples/camel-example-cxf-proxy demonstration.
To add the client to the CamelInstallDir/examples/camel-example-cxf-proxydemonstration, go to the src/test/java/org/apache/camel/example/reportincident sub-directory, move the existing ReportIncidentRoutesTest.java file to a backup location, thencreate a new ReportIncidentRoutesTest.java file and paste the code from Example 6.3,“ReportIncidentRoutesTest Java client” into this file.
Example 6.3. ReportIncidentRoutesTest Java client
// Javapackage org.apache.camel.example.reportincident;
import org.apache.camel.spring.Main;import org.apache.cxf.jaxws.JaxWsProxyFactoryBean;import org.junit.Test;
import java.net.URL;import javax.xml.namespace.QName;import javax.xml.ws.Service;
import org.apache.cxf.Bus;import org.apache.cxf.bus.spring.SpringBusFactory;import org.apache.camel.example.reportincident.ReportIncidentEndpoint;import org.apache.camel.example.reportincident.ReportIncidentEndpointService;
import static org.junit.Assert.assertEquals;
/** * Unit test of our routes */public class ReportIncidentRoutesTest {
private static final QName SERVICE_NAME = new QName("http://reportincident.example.camel.apache.org", "ReportIncidentEndpointService");
private static final QName PORT_NAME = new QName("http://reportincident.example.camel.apache.org", "ReportIncidentEndpoint");
private static final String WSDL_URL =
Red Hat JBoss Fuse 6.2.1 Security Guide
86

Add the http:conduit element to Spring configuration
Example 6.4, “http:conduit Element with SSL/TLS Enabled” shows the Spring configuration thatdefines a http:conduit element for the ReportIncidentEndpoint WSDL port. The http:conduit element is configured to enable SSL/TLS security for any client proxies that use thespecified WSDL port.
"file:src/main/resources/etc/report_incident.wsdl";
// should be the same address as we have in our route private static final String ADDRESS_URL = "https://localhost:9080/camel-example-cxf-proxy/webservices/incident";
protected SpringBusFactory bf;
protected void startCxfBus() throws Exception { bf = new SpringBusFactory(); Bus bus = bf.createBus("META-INF/spring/cxf-client.xml"); bf.setDefaultBus(bus); }
@Test public void testRendportIncident() throws Exception { startCxfBus(); runTest(); } protected void runTest() throws Exception { // create input parameter InputReportIncident input = new InputReportIncident(); input.setIncidentId("123"); input.setIncidentDate("2008-08-18"); input.setGivenName("Claus"); input.setFamilyName("Ibsen"); input.setSummary("Bla"); input.setDetails("Bla bla"); input.setEmail("[email protected]"); input.setPhone("0045 2962 7576");
// create the webservice client and send the request Service s = Service.create(SERVICE_NAME); s.addPort(PORT_NAME, "http://schemas.xmlsoap.org/soap/", ADDRESS_URL); ReportIncidentEndpoint client = s.getPort(PORT_NAME, ReportIncidentEndpoint.class); OutputReportIncident out = client.reportIncident(input);
// assert we got a OK back assertEquals("OK;456", out.getCode()); }}
CHAPTER 6. SECURING THE CAMEL CXF COMPONENT
87
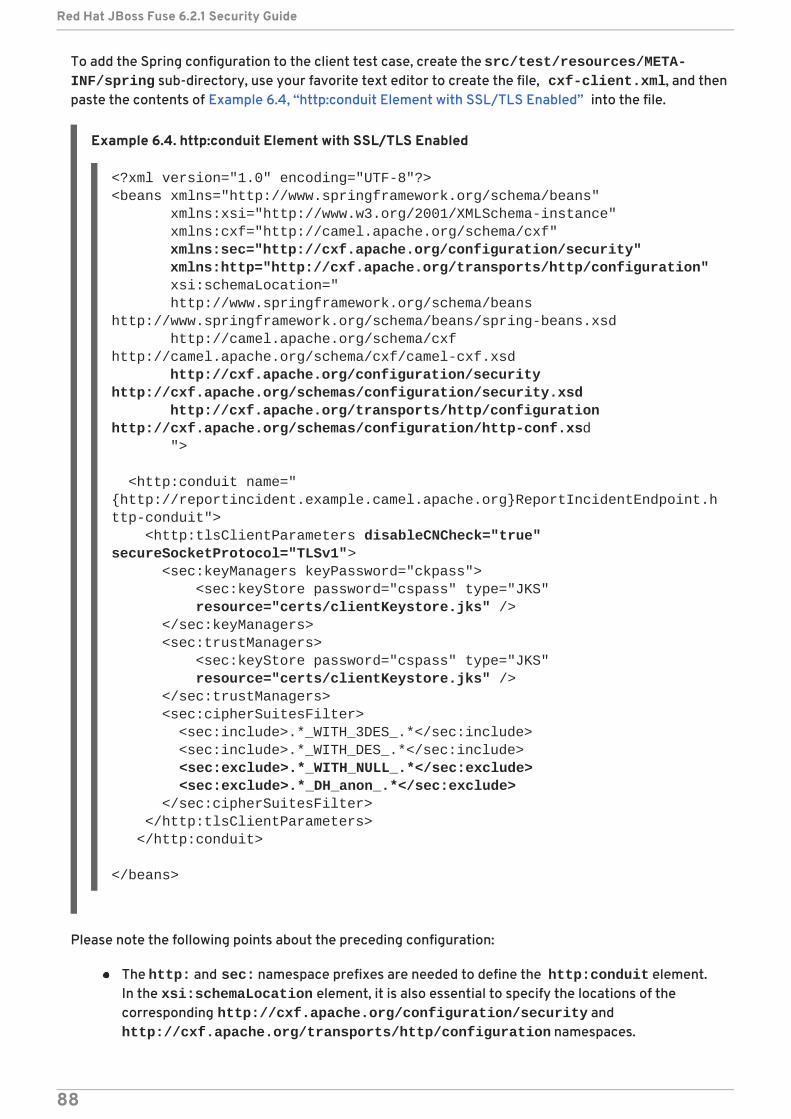
To add the Spring configuration to the client test case, create the src/test/resources/META-INF/spring sub-directory, use your favorite text editor to create the file, cxf-client.xml, and thenpaste the contents of Example 6.4, “http:conduit Element with SSL/TLS Enabled” into the file.
Example 6.4. http:conduit Element with SSL/TLS Enabled
Please note the following points about the preceding configuration:
The http: and sec: namespace prefixes are needed to define the http:conduit element.In the xsi:schemaLocation element, it is also essential to specify the locations of thecorresponding http://cxf.apache.org/configuration/security and http://cxf.apache.org/transports/http/configuration namespaces.
<?xml version="1.0" encoding="UTF-8"?><beans xmlns="http://www.springframework.org/schema/beans" xmlns:xsi="http://www.w3.org/2001/XMLSchema-instance" xmlns:cxf="http://camel.apache.org/schema/cxf" xmlns:sec="http://cxf.apache.org/configuration/security" xmlns:http="http://cxf.apache.org/transports/http/configuration" xsi:schemaLocation=" http://www.springframework.org/schema/beans http://www.springframework.org/schema/beans/spring-beans.xsd http://camel.apache.org/schema/cxf http://camel.apache.org/schema/cxf/camel-cxf.xsd http://cxf.apache.org/configuration/security http://cxf.apache.org/schemas/configuration/security.xsd http://cxf.apache.org/transports/http/configuration http://cxf.apache.org/schemas/configuration/http-conf.xsd ">
<http:conduit name="{http://reportincident.example.camel.apache.org}ReportIncidentEndpoint.http-conduit"> <http:tlsClientParameters disableCNCheck="true" secureSocketProtocol="TLSv1"> <sec:keyManagers keyPassword="ckpass"> <sec:keyStore password="cspass" type="JKS" resource="certs/clientKeystore.jks" /> </sec:keyManagers> <sec:trustManagers> <sec:keyStore password="cspass" type="JKS" resource="certs/clientKeystore.jks" /> </sec:trustManagers> <sec:cipherSuitesFilter> <sec:include>.*_WITH_3DES_.*</sec:include> <sec:include>.*_WITH_DES_.*</sec:include> <sec:exclude>.*_WITH_NULL_.*</sec:exclude> <sec:exclude>.*_DH_anon_.*</sec:exclude> </sec:cipherSuitesFilter> </http:tlsClientParameters> </http:conduit>
</beans>
Red Hat JBoss Fuse 6.2.1 Security Guide
88

The disableCNCheck attribute of the http:tlsClientParameters element is set to true.This means that the client does not check whether the Common Name in the server's X.509certificate matches the server hostname. For more details, see Appendix A, ManagingCertificates.
IMPORTANT
Disabling the CN check is not recommended in a production deployment.
In the sec:keystore elements, the certificate locations are specified using the resourceattribute, which finds the certificates on the classpath. When Maven runs the test, itautomatically makes the contents of src/main/resources available on the classpath, sothat the certificates can be read from the src/main/resources/certs directory.
NOTE
You also have the option of specifying a certificate location using the fileattribute, which looks in the filesystem. But the resource attribute is moresuitable for use with applications packaged in bundles.
The sec:cipherSuitesFilter element is configured to exclude cipher suites matching .*_WITH_NULL_.* and .*_DH_anon_.*. These cipher suites are effectively incomplete andare not intended for normal use.
IMPORTANT
It is recommended that you always exclude the ciphers matching .*_WITH_NULL_.* and .*_DH_anon_.*.
The secureSocketProtocol attribute should be set to TLSv1, to match the server protocoland to ensure that the SSLv3 protocol is not used (POODLE security vulnerability (CVE-2014-3566)).
Run the client
Because the client is defined as a test case, you can run the client using the standard Maven test goal.To run the client, open a new command window, change directory to CamelInstallDir/examples/camel-example-cxf-proxy, and enter the following Mavencommand:
If the test runs successfully, you should see the following output in the OSGi console window:
mvn test
Incident was 123, changed to 456
Invoked real web service: id=456 by Claus Ibsen
CHAPTER 6. SECURING THE CAMEL CXF COMPONENT
89

CHAPTER 7. SECURING THE MANAGEMENT CONSOLE
Abstract
The default setting for Access-Control-Allow-Origin header for the JBoss Fuse ManagementConsole permits unrestricted sharing. To restrict access to the JBoss Fuse Management Console, anOSGI fragment bundle must be implemented.
7.1. CONTROLLING ACCESS TO THE FUSE MANAGEMENT CONSOLE
Contents of the Fragment Bundle
A fragment bundle that enables the jolokia-access.xml policy file can be used to restrict accesswithout altering the original hawtio-web.war. A fragment bundle that contains the jolokia-access.xml policy file within the CORS configuration can be added to limit access to a certain host byusing <allow-origin> sections within the <cors> sections. The <allow-origin> section cancontain the origin URL provided by browsers with the Origin: header, or a wildcard specification with*. For example:
Build the fragment bundle according to the insructions in the OSGI specifications at OSGi DeveloperDownloads. For more information about OSGi dependencies see Managing OSGi dependencies. Ensurethat you add the Fragment-Host header in the Manifest.MF bundle. After building the fragmentbundle, use the following command to install it:
Hawtio-web must be refreshed to pick up the fragment bundle. Use the follwing comands to refreshthe hawtio-web bundle:
To find out the hawtio-web bundle ID:
Identify the number for the hawtio-web bundle. In the example below, the number is 253:
Refresh the hawtio-web bundle using the following command:
<cors> <!-- Allow cross origin access from www.jolokia.org ... --> <allow-origin>http://www.jolokia.org</allow-origin> <!-- ... and all servers from jmx4perl.org with any protocol --> <allow-origin>*://*.jmx4perl.org</allow-origin> <!-- Check for the proper origin on the server side, too --> <strict-checking/></cors>
install file:///Location_Of_Fragment_Bundle_file/hawtio-web-fragment/target/hawtio-web-fragment-1.2-redhat-379.jar
JBossFuse:karaf@root> la | grep -i hawtio
[ 253] [Active ] [ ] [ ] [ 80] hawtio :: hawtio-web (1.4.0.redhat-621083)
JBossFuse:karaf@root> refresh 253
Red Hat JBoss Fuse 6.2.1 Security Guide
90

Repeat the la | grep -i hawtio command to see the hawtio-web line with the fragment bundleattached:
[ 253] [Active ] [ ] [ ] [ 80] hawtio :: hawtio-web (1.4.0.redhat-621083), Fragments: 270
CHAPTER 7. SECURING THE MANAGEMENT CONSOLE
91

CHAPTER 8. LDAP AUTHENTICATION TUTORIAL
Abstract
This tutorial explains how to set up an X.500 directory server and configure the OSGi container to useLDAP authentication.
8.1. TUTORIAL OVERVIEW
Goals
In this tutorial you will:
Install 389 Directory Server
Add user entries to the LDAP server
Add groups to manage security roles
Configure JBoss Fuse to use LDAP authentication
Configure JBoss Fuse to use roles for authorization
Configure SSL/TLS connections to the LDAP server
8.2. SET-UP A DIRECTORY SERVER AND CONSOLE
Overview
This stage of the tutorial explains how to install the X.500 directory server and the managementconsole from the Fedora 389 Directory Server project. If you already have access to a 389 DirectoryServer instance, you can skip the instructions for installing the 389 Directory Server and install the389 Management Console instead.
Prerequisites
If you are installing on a Red Hat Enterprise Linux platform, you must first install the Extra Packagesfor Enterprise Linux (EPEL). See the installation notes under RHEL/Cent OS/ EPEL ( RHEL 6, RHEL 7,Cent OS 6, Cent OS 7) on the fedoraproject.org site.
Install 389 Directory Server
If you do not have access to an existing 389 Directory Server instance, you can install 389 DirectoryServer on your local machine, as follows:
1. On Red Hat Enterprise Linux and Fedora platforms, use the standard yum packagemanagement utility to install 389 Directory Server. Enter the following command at a commandprompt (you must have administrator privileges on your machine):
sudo yum install 389-ds
Red Hat JBoss Fuse 6.2.1 Security Guide
92

NOTE
The required 389-ds and 389-console RPM packages are available forFedora, RHEL6+EPEL, and CentOS7+EPEL platforms. At the time of writing, the 389-console package is not yet available for RHEL 7.
2. After installing the 389 directory server packages, enter the following command to configurethe directory server:
The script is interactive and prompts you to provide the basic configuration settings for the389 directory server. When the script is complete, it automatically launches the 389 directoryserver in the background.
3. For more details about how to install 389 Directory Server, see the Download page.
Install 389 Management Console
If you already have access to a 389 Directory Server instance, you only need to install the 389Management Console, which enables you to log in and manage the server remotely. You can install the389 Management Console, as follows:
On Red Hat Enterprise Linux and Fedora platforms—use the standard yum package managementutility to install the 389 Management Console. Enter the following command at a commandprompt (you must have administrator privileges on your machine):
On Windows platforms—see the Windows Console download instructions from fedoraproject.org.
Connect the console to the server
To connect the 389 Directory Server Console to the LDAP server:
1. Enter the following command to start up the 389 Management Console:
2. A login dialog appears. Fill in the LDAP login credentials in the User ID and Password fields,and customize the hostname in the Administration URL field to connect to your 389management server instance (port 9830 is the default port for the 389 management serverinstance).
sudo setup-ds-admin.pl
sudo yum install 389-console
389-console
CHAPTER 8. LDAP AUTHENTICATION TUTORIAL
93

3. The 389 Management Console window appears. Select the Servers and Applicationstab.
4. In the left-hand pane, drill down to the Directory Server icon.
5. Select the Directory Server icon in the left-hand pane and click Open, to open the 389 Directory Server Console.
6. In the 389 Directory Server Console, click the Directory tab, to view the DirectoryInformation Tree (DIT).
7. Expand the root node, YourDomain (usually named after a hostname, and shown as localdomain in the following screenshot), to view the DIT.
Red Hat JBoss Fuse 6.2.1 Security Guide
94

8.3. ADD USER ENTRIES TO THE DIRECTORY SERVER
Overview
The basic prerequisite for using LDAP authentication with the OSGi container is to have an X.500directory server running and configured with a collection of user entries. For many use cases, you willalso want to configure a number of groups to manage user roles.
Alternative to adding user entries
If you already have user entries and groups defined in your LDAP server, you might prefer to map theexisting LDAP groups to JAAS roles using the role.mapping property in the LDAPLoginModuleconfiguration, instead of creating new entries. For details, see Section 2.1.7, “JAAS LDAP LoginModule”.
Goals
In this portion of the tutorial you will
Add three user entries to the LDAP server
Add four groups to the LDAP server
Adding user entries
Perform the following steps to add user entries to the directory server:
1. Ensure that the LDAP server and console are running. See Section 8.2, “Set-up a DirectoryServer and Console”.
2. In the Directory Server Console, click on the Directory tab, and drill down to the People node, under the YourDomain node (where YourDomain is shown as localdomainin the following screenshots).
CHAPTER 8. LDAP AUTHENTICATION TUTORIAL
95

3. Right-click the People node, and select New → User from the context menu, to open the Create New User dialog.
4. Select the User tab in the left-hand pane of the Create New User dialog.
5. Fill in the fields of the User tab, as follows:
a. Set the First Name field to John.
b. Set the Last Name field to Doe.
c. Set the User ID field to jdoe.
d. Enter the password, secret, in the Password field.
e. Enter the password, secret, in the Confirm Password field.
Red Hat JBoss Fuse 6.2.1 Security Guide
96
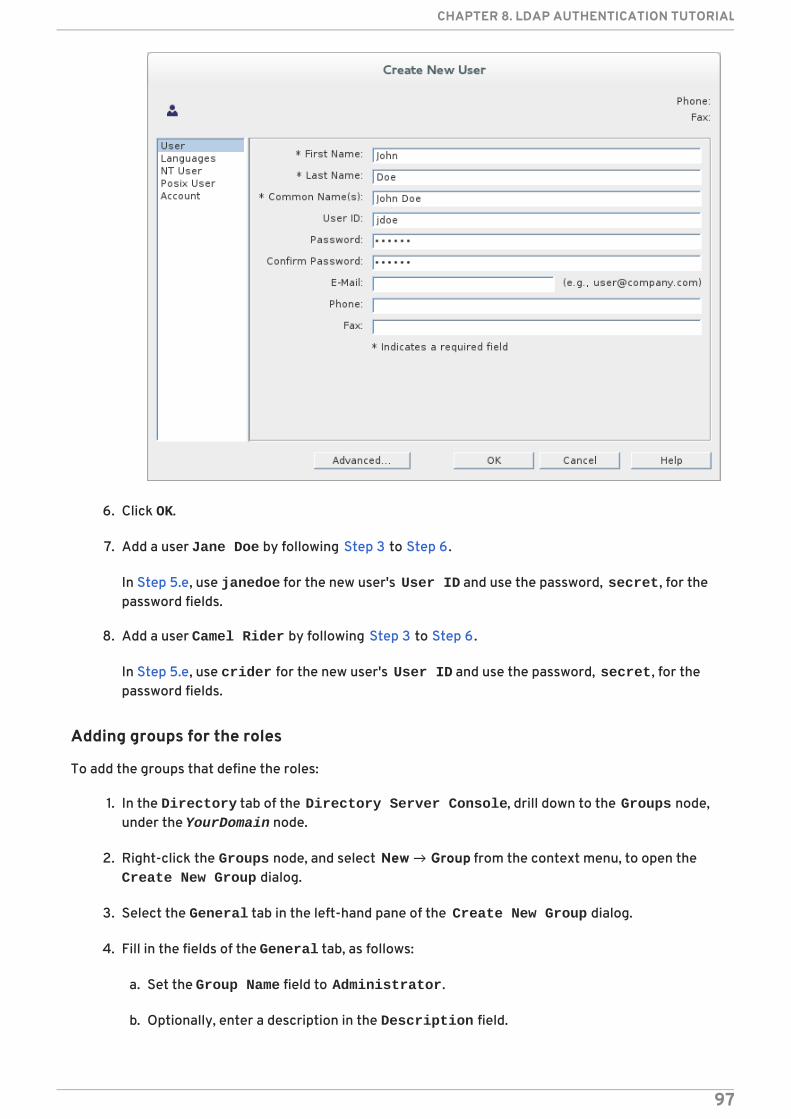
6. Click OK.
7. Add a user Jane Doe by following Step 3 to Step 6.
In Step 5.e, use janedoe for the new user's User ID and use the password, secret, for thepassword fields.
8. Add a user Camel Rider by following Step 3 to Step 6.
In Step 5.e, use crider for the new user's User ID and use the password, secret, for thepassword fields.
Adding groups for the roles
To add the groups that define the roles:
1. In the Directory tab of the Directory Server Console, drill down to the Groups node,under the YourDomain node.
2. Right-click the Groups node, and select New → Group from the context menu, to open the Create New Group dialog.
3. Select the General tab in the left-hand pane of the Create New Group dialog.
4. Fill in the fields of the General tab, as follows:
a. Set the Group Name field to Administrator.
b. Optionally, enter a description in the Description field.
CHAPTER 8. LDAP AUTHENTICATION TUTORIAL
97
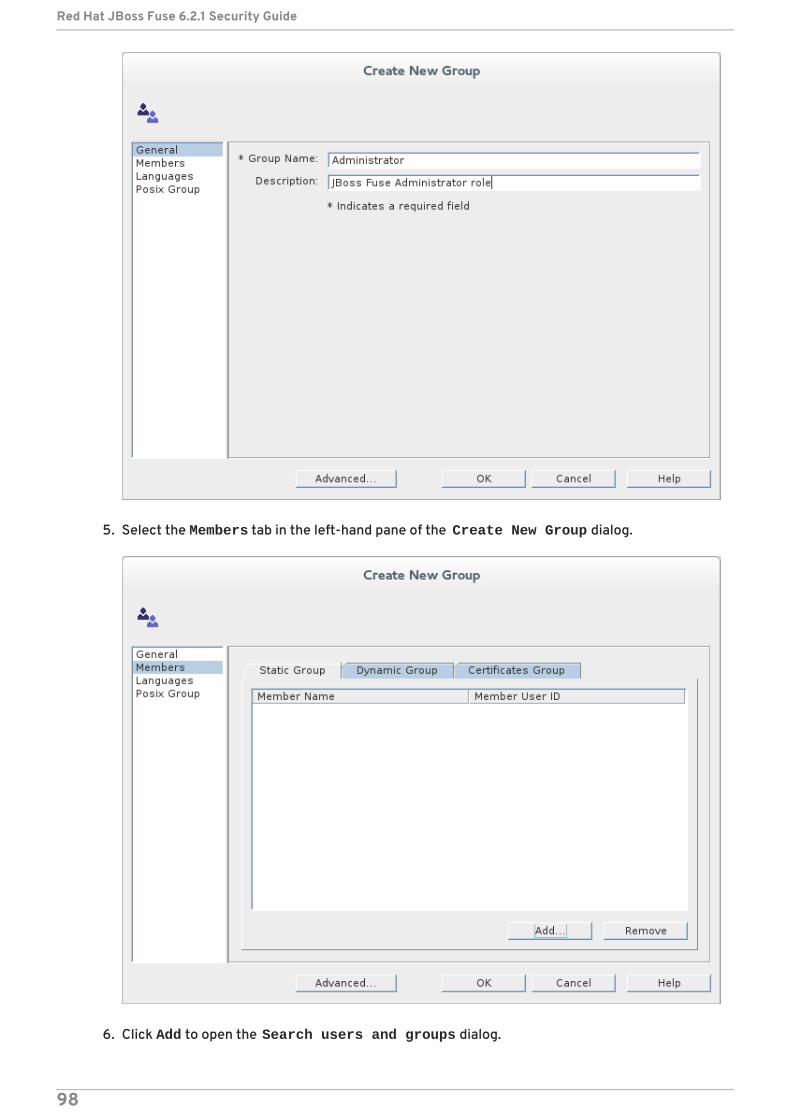
5. Select the Members tab in the left-hand pane of the Create New Group dialog.
6. Click Add to open the Search users and groups dialog.
Red Hat JBoss Fuse 6.2.1 Security Guide
98

7. In the Search field, select Users from the drop-down menu, and click the Search button.
8. From the list of users that is now displayed, select John Doe.
9. Click OK, to close the Search users and groups dialog.
10. Click OK, to close the Create New Group dialog.
11. Add a Deployer role by following Step 2 to Step 10.
In Step 4, enter Deployer in the Group Name field.
In Step 8, select Jane Doe.
12. Add a Monitor role by following Step 2 to Step 10.
In Step 4, enter Monitor in the Group Name field.
In Step 8, select Camel Rider.
8.4. ENABLE LDAP AUTHENTICATION IN THE OSGI CONTAINER
Overview
This section explains how to configure an LDAP realm in the OSGi container. The new realm overridesthe default karaf realm, so that the container authenticates credentials based on user entries storedin the X.500 directory server.
References
More detailed documentation is available on LDAP authentication, as follows:
LDAPLoginModule options—are described in detail in Section 2.1.7, “JAAS LDAP Login Module” .
CHAPTER 8. LDAP AUTHENTICATION TUTORIAL
99

Configurations for other directory servers—this tutorial covers only 389-DS. For details of how toconfigure other directory servers, such as Microsoft Active Directory, see the section called“Filter settings for different directory servers”.
Procedure for standalone OSGi container
To enable LDAP authentication in a standalone OSGi container:
1. Ensure that the X.500 directory server is running.
2. Start Red Hat JBoss Fuse by entering the following command in a terminal window:
./fuse
3. Create a file called ldap-module.xml.
4. Copy Example 8.1, “JAAS Realm for Standalone” into ldap-module.xml.
Example 8.1. JAAS Realm for Standalone
You must customize the following settings in the ldap-module.xml file:
connection.url
Set this URL to the actual location of your directory server instance. Normally, this URL hasthe format, ldap://Hostname:Port. For example, the default port for the 389 DirectoryServer is IP port 389.
<?xml version="1.0" encoding="UTF-8"?><blueprint xmlns="http://www.osgi.org/xmlns/blueprint/v1.0.0" xmlns:jaas="http://karaf.apache.org/xmlns/jaas/v1.0.0" xmlns:ext="http://aries.apache.org/blueprint/xmlns/blueprint-ext/v1.0.0">
<jaas:config name="karaf" rank="200"> <jaas:module className="org.apache.karaf.jaas.modules.ldap.LDAPLoginModule" flags="required"> initialContextFactory=com.sun.jndi.ldap.LdapCtxFactory connection.url=ldap://Hostname:Port connection.username=cn=Directory Manager connection.password=LDAPPassword connection.protocol= user.base.dn=ou=People,dc=localdomain user.filter=(&(objectClass=inetOrgPerson)(uid=%u)) user.search.subtree=true role.base.dn=ou=Groups,dc=localdomain role.name.attribute=cn role.filter=(uniquemember=%fqdn) role.search.subtree=true authentication=simple </jaas:module> </jaas:config></blueprint>
Red Hat JBoss Fuse 6.2.1 Security Guide
100

connection.username
Specifies the username that is used to authenticate the connection to the directory server.For 389 Directory Server, the default is usually cn=Directory Manager.
connection.password
Specifies the password part of the credentials for connecting to the directory server.
authentication
You can specify either of the following alternatives for the authentication protocol:
simple implies that user credentials are supplied and you are obliged to set the connection.username and connection.password options in this case.
none implies that authentication is not performed. There is no need to set the connection.username and connection.password options in this case.
This login module creates a JAAS realm called karaf, which is the same name as the defaultJAAS realm used by JBoss Fuse. By redefining this realm with a rank attribute value greaterthan 0, it overrides the standard karaf realm which has the rank 0 (but note that in thecontext of Fabric, the default karaf realm has a rank of 99, so you need to define a new realmwith rank 100 or greater to override the default realm in a fabric).
For more details about how to configure JBoss Fuse to use LDAP, see Section 2.1.7, “JAASLDAP Login Module”.
IMPORTANT
When setting the JAAS properties above, do not enclose the property values indouble quotes.
5. To deploy the new LDAP module, copy the ldap-module.xml into the JBoss A-MQ deploy/directory.
The LDAP module is automatically activated.
NOTE
Subsequently, if you need to undeploy the LDAP module, you can do so bydeleting the ldap-module.xml file from the deploy/ directory while the Karafcontainer is running.
Procedure for a Fabric
To enable LDAP authentication in a Fabric (affecting all of the containers in the current fabric):
1. Ensure that the X.500 directory server is running.
2. If your local Fabric container is not already running, start it now, by entering the followingcommand in a terminal window:
./fuse
CHAPTER 8. LDAP AUTHENTICATION TUTORIAL
101

NOTE
If the Fabric container you want to connect to is running on a remote host, youcan connect to it using the client command-line utility in the InstallDir/bin directory.
3. Create a new version of the Fabric profile data, by entering the following console command:
NOTE
In effect, this command creates a new branch named 1.1 in the Git repositoryunderlying the ZooKeeper registry.
4. Create the new profile resource, ldap-module.xml (a Blueprint configuration file), in version1.1 of the default profile, as follows:
The built-in profile editor opens automatically, which you can use to edit the contents of the ldap-module.xml resource.
5. Copy Example 8.2, “JAAS Realm for Fabric” into the ldap-module.xml resource,customizing the configuration properties, as necessary.
Example 8.2. JAAS Realm for Fabric
JBossFuse:karaf@root> version-createCreated version: 1.1 as copy of: 1.0
JBossFuse:karaf@root> profile-edit --resource ldap-module.xml default 1.1
<?xml version="1.0" encoding="UTF-8"?><blueprint xmlns="http://www.osgi.org/xmlns/blueprint/v1.0.0" xmlns:jaas="http://karaf.apache.org/xmlns/jaas/v1.0.0" xmlns:ext="http://aries.apache.org/blueprint/xmlns/blueprint-ext/v1.0.0" xmlns:cm="http://aries.apache.org/blueprint/xmlns/blueprint-cm/v1.1.0">
<command-bundle xmlns="http://karaf.apache.org/xmlns/shell/v1.0.0"> <command name="jasypt/encrypt"> <action class="io.fabric8.fabric.jaas.EncryptPasswordCommand" /> </command> </command-bundle>
<!-- AdminConfig property place holder for the org.apache.karaf.jaas --> <cm:property-placeholder persistent-id="io.fabric8.fabric.jaas" update-strategy="reload"> <cm:default-properties> <cm:property name="encryption.name" value="" /> <cm:property name="encryption.enabled" value="true" />
Red Hat JBoss Fuse 6.2.1 Security Guide
102

You must customize the following settings in the ldap-module.xml file:
connection.url
Set this URL to the actual location of your directory server instance. Normally, this URL hasthe format, ldap://Hostname:Port. You must be sure to use a hostname that isaccessible to all of the containers in the fabric (hence, you cannot use localhost as thehostname here). The default port for the 389 Directory Server is IP port 389.
<cm:property name="encryption.prefix" value="{CRYPT}" /> <cm:property name="encryption.suffix" value="{CRYPT}" /> <cm:property name="encryption.algorithm" value="MD5" /> <cm:property name="encryption.encoding" value="hexadecimal" /> </cm:default-properties> </cm:property-placeholder>
<jaas:config name="karaf" rank="200"> <jaas:module className="io.fabric8.jaas.ZookeeperLoginModule" flags="sufficient"> path = /fabric/authentication/users encryption.name = ${encryption.name} encryption.enabled = ${encryption.enabled} encryption.prefix = ${encryption.prefix} encryption.suffix = ${encryption.suffix} encryption.algorithm = ${encryption.algorithm} encryption.encoding = ${encryption.encoding} </jaas:module> <jaas:module className="org.apache.karaf.jaas.modules.ldap.LDAPLoginModule" flags="sufficient"> initialContextFactory=com.sun.jndi.ldap.LdapCtxFactory connection.url=ldap://Hostname:Port connection.username=cn=Directory Manager connection.password=LDAPPassword connection.protocol= user.base.dn=ou=People,dc=localdomain user.filter=(&(objectClass=inetOrgPerson)(uid=%u)) user.search.subtree=true role.base.dn=ou=Groups,dc=localdomain role.name.attribute=cn role.filter=(uniquemember=%fqdn) role.search.subtree=true authentication=simple </jaas:module> </jaas:config>
<!-- The Backing Engine Factory Service for the ZookeeperLoginModule --> <service interface="org.apache.karaf.jaas.modules.BackingEngineFactory"> <bean class="io.fabric8.jaas.ZookeeperBackingEngineFactory" /> </service></blueprint>
CHAPTER 8. LDAP AUTHENTICATION TUTORIAL
103

connection.username
Specifies the username that is used to authenticate the connection to the directory server.For 389 Directory Server, the default is usually cn=Directory Manager.
connection.password
Specifies the password part of the credentials for connecting to the directory server.
authentication
You can specify either of the following alternatives for the authentication protocol:
simple implies that user credentials are supplied and you are obliged to set the connection.username and connection.password options in this case.
none implies that authentication is not performed. There is no need to set the connection.username and connection.password options in this case.
This login module creates a JAAS realm called karaf, which is the same name as the defaultJAAS realm used by Red Hat JBoss Fuse. By redefining this realm with a rank of 200, itoverrides all of the previously installed karaf realms (in the context of Fabric, you need tooverride the default ZookeeperLoginModule, which has a rank of 99).
IMPORTANT
Pay particular attention to the value of the rank to ensure that it is higher thanall previously installed karaf realms. If the rank is not sufficiently high, thenew realm will not be used by the fabric.
IMPORTANT
When setting the JAAS properties above, do not enclose the property values indouble quotes.
IMPORTANT
In a Fabric, the Zookeeper login module must be enabled, in addition to theLDAP login module. This is because Fabric uses the Zookeeper login moduleinternally, to support authentication between ensemble servers. With theconfiguration shown here, Fabric tries to authenticate first of all against theZookeeper login module and, if that step fails, it tries to authenticate against theLDAP login module.
6. Save and close the ldap-module.xml resource by typing Ctrl-S and Ctrl-X.
7. Edit the agent properties of version 1.1 of the default profile, adding an instruction to deploythe Blueprint resource file defined in the previous step. Enter the following console command:
The built-in profile editor opens automatically. Add the following line to the agent properties:
JBossFuse:karaf@root> profile-edit default 1.1
bundle.ldap-realm=blueprint:profile:ldap-module.xml
Red Hat JBoss Fuse 6.2.1 Security Guide
104

Save and close the agent properties by typing Ctrl-S and Ctrl-X.
8. The new LDAP realm is not activated, until you upgrade a container to use the new version, 1.1. To activate LDAP on a single container (for example, on a container called root), enterthe following console command:
To activate LDAP on all containers in the fabric, enter the following console command:
IMPORTANT
It is advisable to upgrade just a single container initially, to make sure thateverything is working properly. This is particularly important, if you have onlyremote access to the fabric: if you upgrade all of the containers at once, youmight not be able to reconnect to the fabric.
9. To check that the LDAP realm is activated, enter the following console command:
If the output of this command lists the ZookeperLoginModule, this means the LDAP realm isnot yet activated. It might take a minute or so for activation of the LDAP realm to complete.
Test the LDAP authentication
Test the new LDAP realm by connecting to the running container using the JBoss Fuse client utility,as follows:
1. Open a new command prompt.
2. Change directory to the JBoss Fuse InstallDir/bin directory.
3. Enter the following command to log on to the running container instance using the identity jdoe:
client -u jdoe -p secret
You should successfully log into the container's remote console. At the command console, typejaas: followed by the [Tab] key (to activate content completion):
JBossFuse:karaf@root> container-upgrade 1.1 root
JBossFuse:karaf@root> container-upgrade --all 1.1
JBossFuse:karaf@root> jaas-realmsIndex Realm Module Class 1 karaf org.apache.karaf.jaas.modules.ldap.LDAPLoginModule
JBossFuse:jdoe@root> jaas:jaas:cancel jaas:groupadd jaas:groupcreate jaas:groupdel jaas:grouproleadd jaas:grouproledel jaas:groups jaas:manage jaas:pending
CHAPTER 8. LDAP AUTHENTICATION TUTORIAL
105
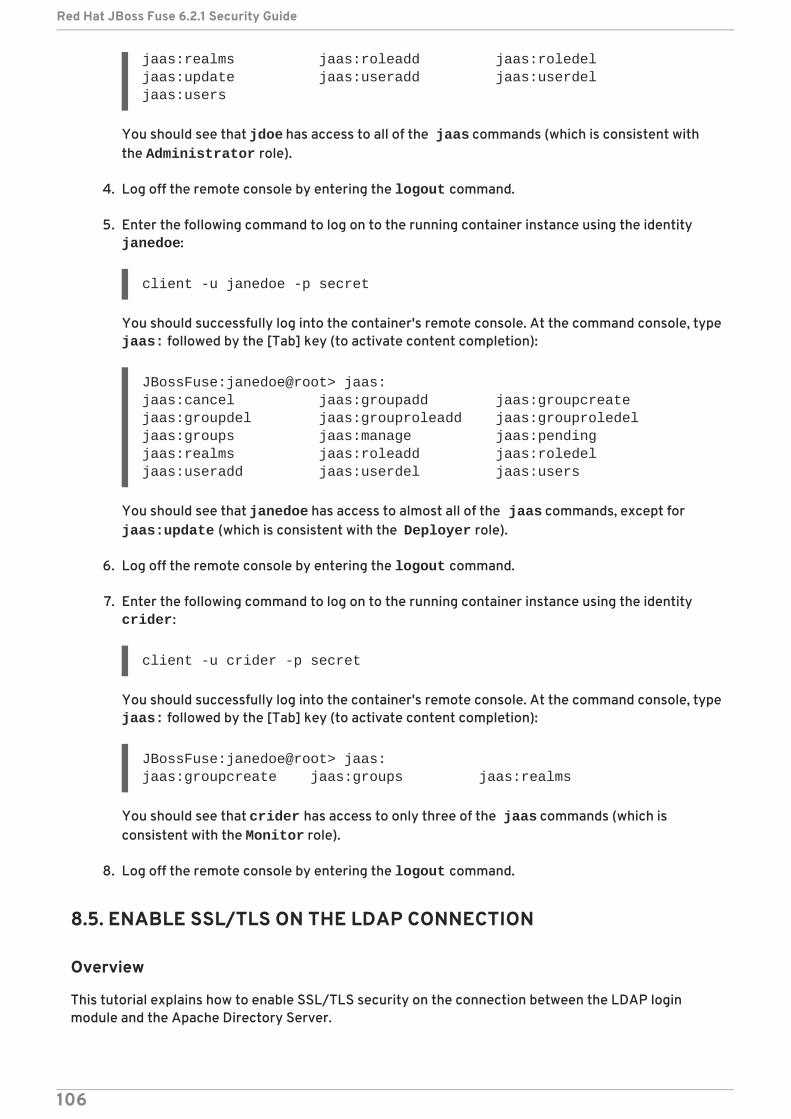
You should see that jdoe has access to all of the jaas commands (which is consistent withthe Administrator role).
4. Log off the remote console by entering the logout command.
5. Enter the following command to log on to the running container instance using the identity janedoe:
client -u janedoe -p secret
You should successfully log into the container's remote console. At the command console, typejaas: followed by the [Tab] key (to activate content completion):
You should see that janedoe has access to almost all of the jaas commands, except for jaas:update (which is consistent with the Deployer role).
6. Log off the remote console by entering the logout command.
7. Enter the following command to log on to the running container instance using the identity crider:
client -u crider -p secret
You should successfully log into the container's remote console. At the command console, typejaas: followed by the [Tab] key (to activate content completion):
You should see that crider has access to only three of the jaas commands (which isconsistent with the Monitor role).
8. Log off the remote console by entering the logout command.
8.5. ENABLE SSL/TLS ON THE LDAP CONNECTION
Overview
This tutorial explains how to enable SSL/TLS security on the connection between the LDAP loginmodule and the Apache Directory Server.
jaas:realms jaas:roleadd jaas:roledel jaas:update jaas:useradd jaas:userdel jaas:users
JBossFuse:janedoe@root> jaas:jaas:cancel jaas:groupadd jaas:groupcreate jaas:groupdel jaas:grouproleadd jaas:grouproledel jaas:groups jaas:manage jaas:pending jaas:realms jaas:roleadd jaas:roledel jaas:useradd jaas:userdel jaas:users
JBossFuse:janedoe@root> jaas:jaas:groupcreate jaas:groups jaas:realms
Red Hat JBoss Fuse 6.2.1 Security Guide
106

The Apache Directory Server is already configured with an SSL endpoint. The default configurationcreates an LDAPS endpoint that listens on the IP port 10636. The directory server automaticallygenerates a self-signed X.509 certificate which it uses to identify itself during the SSL/TLS handshake.
IMPORTANT
You can use the default SSL configuration for simple demonstrations, but it is notsuitable for real deployments. For advice on how to configure a real deployment, see thesection called “Tightening up security”.
Procedure
To enable SSL/TLS security on the connection to the Apache Directory Server:
1. Obtain a copy of the server's self-signed certificate.
a. Using a Web browser , navigate to the following URL:
IMPORTANT
Remember to specify the scheme as https, not just http.
The Web browser now signals an error, because the certificate it receives from the serveris untrusted. In the case of Firefox, you will see the following error in the browser window:
Figure 8.1. Obtaining the Certificate
b. Click I Understand the Risks.
c. Click Add Exception.
https://localhost:10636
CHAPTER 8. LDAP AUTHENTICATION TUTORIAL
107

The Add Security Exception dialog opens.
d. In the Add Security Exception dialog, click Get Certificate.
e. Click View.
The Certificate Viewer dialog opens.
f. In the Certificate Viewer dialog, select the Details tab.
g. Click Export.
The Save Certificate To File dialog opens.
h. In the Save Certificate To File dialog, use the drop-down list to set the Save as type to X.509 Certificate (DER).
i. Save the certificate, ApacheDS.der, to a convenient location on the filesystem.
2. Convert the DER format certificate into a keystore.
a. From a command prompt, change directory to the directory where you have stored the ApacheDS.der file.
b. Enter the following keytool command:
keytool -import -file ApacheDS.der -alias server -keystore truststore.ks -storepass secret
3. Copy the newly created keystore file, truststore.ks, into the JBoss Fuse etc/ directory.
4. Open the ldap-module.xml file you created in Section 8.4, “Enable LDAP Authentication inthe OSGi Container” in a text editor.
5. Edit the connection.url to use ldaps://localhost:10636.
6. Add the highlighted lines in Example 8.3, “LDAP Configuration for Using SSL/TLS” .
Example 8.3. LDAP Configuration for Using SSL/TLS
<?xml version="1.0" encoding="UTF-8"?><blueprint xmlns="http://www.osgi.org/xmlns/blueprint/v1.0.0" xmlns:jaas="http://karaf.apache.org/xmlns/jaas/v1.0.0" xmlns:ext="http://aries.apache.org/blueprint/xmlns/blueprint-ext/v1.0.0">
<!-- Example configuration for using LDAP based authentication. This example uses an JAAS LoginModule from Karaf. It supports authentication of users and also supports retrieving user roles for authorization.
Note, this config overwrite the default karaf domain that is defined inside some JAR file by using a rank > 99 attribute. -->
Red Hat JBoss Fuse 6.2.1 Security Guide
108

7. Copy the ldap-module.xml file into the Red Hat JBoss Fuse deploy/ directory.
The LDAP module is automatically activated.
8. Test the new LDAP realm by connecting to the running container using the JBoss Fuse client utility.
a. Open a new command prompt.
b. Change to the JBoss Fuse install directory.
c. Enter the following command to log on to the running container instance using the identityjdoe:
client -u jdoe -p secret
You should successfully log into the container's remote console because jdoe does havethe admin role.
Tightening up security
The SSL set-up described here is suitable only as a proof-of-concept demonstration. For a realdeployment, you must make the following changes to tighten up security:
Delete all entries from the Red Hat JBoss Fuse's etc/users.properties file.
<jaas:config name="karaf" rank="200"> <jaas:module className="org.apache.karaf.jaas.modules.ldap.LDAPLoginModule" flags="required"> initialContextFactory=com.sun.jndi.ldap.LdapCtxFactory connection.username=uid=admin,ou=system connection.password=secret connection.protocol= connection.url = ldaps://localhost:10636 user.base.dn = ou=users,ou=system user.filter = (uid=%u) user.search.subtree = true role.base.dn = ou=users,ou=system role.filter = (uid=%u) role.name.attribute = ou role.search.subtree = true authentication = simple ssl.protocol=TLSv1 ssl.truststore=truststore ssl.algorithm=PKIX </jaas:module> </jaas:config> <jaas:keystore name="truststore" path="file:///InstallDir/etc/truststore.ks" keystorePassword="secret" /></blueprint>
CHAPTER 8. LDAP AUTHENTICATION TUTORIAL
109
If the ldap-module.xml bundle fails to start up properly, JAAS authentication reverts to thebuilt-in file-based karaf realm, which takes its user data from the users.properties file.
Disable the insecure LDAP endpoint on the Apache Directory Server.
Create and deploy a properly signed X.509 certificate on the Apache Directory Server.
See Appendix A, Managing Certificates.
Make sure that the LDAP server is configured to use the TLSv1 protocol (POODLEvulnerability). Do not enable the SSLv3 protocol. For more information, see Poodlevulnerability (CVE-2014-3566).
Apache Directory Server Reference
For more details of how to configure SSL/TLS security on the Apache Directory Server, see How toenable SSL.
Red Hat JBoss Fuse 6.2.1 Security Guide
110

APPENDIX A. MANAGING CERTIFICATES
Abstract
TLS authentication uses X.509 certificates—a common, secure and reliable method of authenticatingyour application objects. You can create X.509 certificates that identify your Red Hat JBoss Fuseapplications.
A.1. WHAT IS AN X.509 CERTIFICATE?
Role of certificates
An X.509 certificate binds a name to a public key value. The role of the certificate is to associate apublic key with the identity contained in the X.509 certificate.
Integrity of the public key
Authentication of a secure application depends on the integrity of the public key value in theapplication's certificate. If an impostor replaces the public key with its own public key, it canimpersonate the true application and gain access to secure data.
To prevent this type of attack, all certificates must be signed by a certification authority (CA). A CA is atrusted node that confirms the integrity of the public key value in a certificate.
Digital signatures
A CA signs a certificate by adding its digital signature to the certificate. A digital signature is a messageencoded with the CA’s private key. The CA’s public key is made available to applications by distributinga certificate for the CA. Applications verify that certificates are validly signed by decoding the CA’sdigital signature with the CA’s public key.
WARNING
The supplied demonstration certificates are self-signed certificates. Thesecertificates are insecure because anyone can access their private key. To secureyour system, you must create new certificates signed by a trusted CA.
Contents of an X.509 certificate
An X.509 certificate contains information about the certificate subject and the certificate issuer (theCA that issued the certificate). A certificate is encoded in Abstract Syntax Notation One (ASN.1), astandard syntax for describing messages that can be sent or received on a network.
The role of a certificate is to associate an identity with a public key value. In more detail, a certificateincludes:
A subject distinguished name (DN) that identifies the certificate owner.
APPENDIX A. MANAGING CERTIFICATES
111
The public key associated with the subject.
X.509 version information.
A serial number that uniquely identifies the certificate.
An issuer DN that identifies the CA that issued the certificate.
The digital signature of the issuer.
Information about the algorithm used to sign the certificate.
Some optional X.509 v.3 extensions; for example, an extension exists that distinguishesbetween CA certificates and end-entity certificates.
Distinguished names
A DN is a general purpose X.500 identifier that is often used in the context of security.
See Appendix B, ASN.1 and Distinguished Names for more details about DNs.
A.2. CERTIFICATION AUTHORITIES
A.2.1. Introduction to Certificate Authorities
A CA consists of a set of tools for generating and managing certificates and a database that contains allof the generated certificates. When setting up a system, it is important to choose a suitable CA that issufficiently secure for your requirements.
There are two types of CA you can use:
commercial CAs are companies that sign certificates for many systems.
private CAs are trusted nodes that you set up and use to sign certificates for your system only.
A.2.2. Commercial Certification Authorities
Signing certificates
There are several commercial CAs available. The mechanism for signing a certificate using acommercial CA depends on which CA you choose.
Advantages of commercial CAs
An advantage of commercial CAs is that they are often trusted by a large number of people. If yourapplications are designed to be available to systems external to your organization, use a commercialCA to sign your certificates. If your applications are for use within an internal network, a private CAmight be appropriate.
Criteria for choosing a CA
Before choosing a commercial CA, consider the following criteria:
What are the certificate-signing policies of the commercial CAs?
Red Hat JBoss Fuse 6.2.1 Security Guide
112

Are your applications designed to be available on an internal network only?
What are the potential costs of setting up a private CA compared to the costs of subscribing toa commercial CA?
A.2.3. Private Certification Authorities
Choosing a CA software package
If you want to take responsibility for signing certificates for your system, set up a private CA. To set upa private CA, you require access to a software package that provides utilities for creating and signingcertificates. Several packages of this type are available.
OpenSSL software package
One software package that allows you to set up a private CA is OpenSSL, http://www.openssl.org. TheOpenSSL package includes basic command line utilities for generating and signing certificates.Complete documentation for the OpenSSL command line utilities is available athttp://www.openssl.org/docs.
Setting up a private CA using OpenSSL
To set up a private CA, see the instructions in Section A.5, “Creating Your Own Certificates” .
Choosing a host for a private certification authority
Choosing a host is an important step in setting up a private CA. The level of security associated withthe CA host determines the level of trust associated with certificates signed by the CA.
If you are setting up a CA for use in the development and testing of Red Hat JBoss Fuse applications,use any host that the application developers can access. However, when you create the CA certificateand private key, do not make the CA private key available on any hosts where security-criticalapplications run.
Security precautions
If you are setting up a CA to sign certificates for applications that you are going to deploy, make the CAhost as secure as possible. For example, take the following precautions to secure your CA:
Do not connect the CA to a network.
Restrict all access to the CA to a limited set of trusted users.
Use an RF-shield to protect the CA from radio-frequency surveillance.
A.3. CERTIFICATE CHAINING
Certificate chain
A certificate chain is a sequence of certificates, where each certificate in the chain is signed by thesubsequent certificate.
Figure A.1, “A Certificate Chain of Depth 2” shows an example of a simple certificate chain.
APPENDIX A. MANAGING CERTIFICATES
113

Figure A.1. A Certificate Chain of Depth 2
Self-signed certificate
The last certificate in the chain is normally a self-signed certificate—a certificate that signs itself.
Chain of trust
The purpose of a certificate chain is to establish a chain of trust from a peer certificate to a trusted CAcertificate. The CA vouches for the identity in the peer certificate by signing it. If the CA is one that youtrust (indicated by the presence of a copy of the CA certificate in your root certificate directory), thisimplies you can trust the signed peer certificate as well.
Certificates signed by multiple CAs
A CA certificate can be signed by another CA. For example, an application certificate could be signedby the CA for the finance department of Progress Software, which in turn is signed by a self-signedcommercial CA.
Figure A.2, “A Certificate Chain of Depth 3” shows what this certificate chain looks like.
Figure A.2. A Certificate Chain of Depth 3
Trusted CAs
An application can accept a peer certificate, provided it trusts at least one of the CA certificates in thesigning chain.
A.4. SPECIAL REQUIREMENTS ON HTTPS CERTIFICATES
Overview
The HTTPS specification mandates that HTTPS clients must be capable of verifying the identity of theserver. This can potentially affect how you generate your X.509 certificates. The mechanism forverifying the server identity depends on the type of client. Some clients might verify the server identityby accepting only those server certificates signed by a particular trusted CA. In addition, clients caninspect the contents of a server certificate and accept only the certificates that satisfy specificconstraints.
In the absence of an application-specific mechanism, the HTTPS specification defines a genericmechanism, known as the HTTPS URL integrity check, for verifying the server identity. This is thestandard mechanism used by Web browsers.
Red Hat JBoss Fuse 6.2.1 Security Guide
114

HTTPS URL integrity check
The basic idea of the URL integrity check is that the server certificate's identity must match the serverhost name. This integrity check has an important impact on how you generate X.509 certificates forHTTPS: the certificate identity (usually the certificate subject DN’s common name) must match the hostname on which the HTTPS server is deployed.
The URL integrity check is designed to prevent man-in-the-middle attacks.
Reference
The HTTPS URL integrity check is specified by RFC 2818, published by the Internet Engineering TaskForce (IETF) at http://www.ietf.org/rfc/rfc2818.txt.
How to specify the certificate identity
The certificate identity used in the URL integrity check can be specified in one of the following ways:
Using commonName
Using subectAltName
Using commonName
The usual way to specify the certificate identity (for the purpose of the URL integrity check) is throughthe Common Name (CN) in the subject DN of the certificate.
For example, if a server supports secure TLS connections at the following URL:
The corresponding server certificate would have the following subject DN:
Where the CN has been set to the host name, www.redhat.com.
For details of how to set the subject DN in a new certificate, see Section A.5, “Creating Your OwnCertificates”.
Using subjectAltName (multi-homed hosts)
Using the subject DN’s Common Name for the certificate identity has the disadvantage that only onehost name can be specified at a time. If you deploy a certificate on a multi-homed host, however, youmight find it is practical to allow the certificate to be used with any of the multi-homed host names. Inthis case, it is necessary to define a certificate with multiple, alternative identities, and this is onlypossible using the subjectAltName certificate extension.
For example, if you have a multi-homed host that supports connections to either of the following hostnames:
https://www.redhat.com/secure
C=IE,ST=Co. Dublin,L=Dublin,O=RedHat,OU=System,CN=www.redhat.com
www.redhat.comwww.jboss.org
APPENDIX A. MANAGING CERTIFICATES
115
Then you can define a subjectAltName that explicitly lists both of these DNS host names. If yougenerate your certificates using the openssl utility, edit the relevant line of your openssl.cnfconfiguration file to specify the value of the subjectAltName extension, as follows:
Where the HTTPS protocol matches the server host name against either of the DNS host names listedin the subjectAltName (the subjectAltName takes precedence over the Common Name).
The HTTPS protocol also supports the wildcard character, *, in host names. For example, you candefine the subjectAltName as follows:
This certificate identity matches any three-component host name in the domain jboss.org.
WARNING
You must never use the wildcard character in the domain name (and you must takecare never to do this accidentally by forgetting to type the dot, ., delimiter in frontof the domain name). For example, if you specified *jboss.org, your certificatecould be used on any domain that ends in the letters jboss.
A.5. CREATING YOUR OWN CERTIFICATES
Abstract
This chapter describes the techniques and procedures to set up your own private Certificate Authority(CA) and to use this CA to generate and sign your own certificates.
WARNING
Creating and managing your own certificates requires an expert knowledge ofsecurity. While the procedures described in this chapter can be convenient forgenerating your own certificates for demonstration and testing environments, it isnot recommended to use these certificates in a production environment.
A.5.1. Install the OpenSSL Utilities
Installing OpenSSL on RHEL and Fedora platforms
subjectAltName=DNS:www.redhat.com,DNS:www.jboss.org
subjectAltName=DNS:*.jboss.org
Red Hat JBoss Fuse 6.2.1 Security Guide
116
On Red Hat Enterprise Linux (RHEL) 5 and 6 and Fedora platforms, are made available as an RPMpackage. To install OpenSSL, enter the following command (executed with administrator privileges):
Source code distribution
The source distribution of OpenSSL is available from http://www.openssl.org/docs. The OpenSSLproject provides source code distributions only. You cannot download a binary install of the OpenSSLutilities from the OpenSSL Web site.
A.5.2. Set Up a Private Certificate Authority
Overview
If you choose to use a private CA you need to generate your own certificates for your applications touse. The OpenSSL project provides free command-line utilities for setting up a private CA, creatingsigned certificates, and adding the CA to your Java keystore.
WARNING
Setting up a private CA for a production environment requires a high level ofexpertise and extra care must be taken to protect the certificate store fromexternal threats.
Steps to set up a private Certificate Authority
To set up your own private Certificate Authority:
1. Create the directory structure for the CA, as follows:
2. Using a text editor, create the file, X509CA/openssl.cfg, and add the following contents tothis file:
Example A.1. OpenSSL Configuration
yum install openssl
X509CA/demoCAX509CA/demoCA/privateX509CA/demoCA/certsX509CA/demoCA/newcertsX509CA/demoCA/crl
## SSLeay example configuration file.# This is mostly being used for generation of certificate requests.#
APPENDIX A. MANAGING CERTIFICATES
117

RANDFILE = ./.rnd
####################################################################[ req ]default_bits = 2048default_keyfile = keySS.pemdistinguished_name = req_distinguished_nameencrypt_rsa_key = yesdefault_md = sha1
[ req_distinguished_name ]countryName = Country Name (2 letter code)
organizationName = Organization Name (eg, company)
commonName = Common Name (eg, YOUR name)
####################################################################[ ca ]default_ca = CA_default # The default ca section
####################################################################[ CA_default ]
dir = ./demoCA # Where everything is keptcerts = $dir/certs # Where the issued certs are keptcrl_dir = $dir/crl # Where the issued crl are keptdatabase = $dir/index.txt # database index file.#unique_subject = no # Set to 'no' to allow creation of # several certificates with same subject.new_certs_dir = $dir/newcerts # default place for new certs.
certificate = $dir/cacert.pem # The CA certificateserial = $dir/serial # The current serial numbercrl = $dir/crl.pem # The current CRLprivate_key = $dir/private/cakey.pem# The private keyRANDFILE = $dir/private/.rand # private random number file
name_opt = ca_default # Subject Name optionscert_opt = ca_default # Certificate field options
default_days = 365 # how long to certify for
Red Hat JBoss Fuse 6.2.1 Security Guide
118

IMPORTANT
The preceding openssl.cfg configuration file is provided as a demonstrationonly. In a production environment, this configuration file would need to becarefully elaborated by an engineer with a high level of security expertise, andactively maintained to protect against evolving security threats.
3. Initialize the demoCA/serial file, which must have the initial contents 01 (zero one). Enterthe following command:
4. Initialize the demoCA/index.txt, which must initially be completely empty. Enter thefollowing command:
5. Create a new self-signed CA certificate and private key with the command:
You are prompted for a pass phrase for the CA private key and details of the CA distinguishedname as shown in Example A.2, “Creating a CA Certificate” .
Example A.2. Creating a CA Certificate
Generating a 2048 bit RSA private key...........................................................................+++.................+++writing new private key to 'demoCA/private/cakey.pem'Enter PEM pass phrase:Verifying - Enter PEM pass phrase:-----
default_crl_days = 30 # how long before next CRLdefault_md = md5 # which md to use.preserve = no # keep passed DN ordering
policy = policy_anything
[ policy_anything ]countryName = optionalstateOrProvinceName = optionallocalityName = optionalorganizationName = optionalorganizationalUnitName = optionalcommonName = suppliedemailAddress = optional
echo 01 > demoCA/serial
touch demoCA/index.txt
openssl req -x509 -new -config openssl.cfg -days 365 -out demoCA/cacert.pem -keyout demoCA/private/cakey.pem
APPENDIX A. MANAGING CERTIFICATES
119
You are about to be asked to enter information that will be incorporatedinto your certificate request.What you are about to enter is what is called a Distinguished Name or a DN.There are quite a few fields but you can leave some blankFor some fields there will be a default value,If you enter '.', the field will be left blank.-----Country Name (2 letter code) []:DEOrganization Name (eg, company) []:Red HatCommon Name (eg, YOUR name) []:Scooby Doo
NOTE
The security of the CA depends on the security of the private key file and theprivate key pass phrase used in this step.
You must ensure that the file names and location of the CA certificate and private key, cacert.pem and cakey.pem, are the same as the values specified in openssl.cfg.
A.5.3. Create a CA Trust Store File
Overview
A trust store file is commonly required on the client side of an SSL/TLS connection, in order to verify aserver's identity. A trust store file can also be used to check digital signatures (for example, to checkthat a signature was made using the private key corresponding to one of the trusted certificates in thetrust store file).
Steps to create a CA trust store
To add one of more CA certificates to a trust store file:
1. Assemble the collection of trusted CA certificates that you want to deploy.
The trusted CA certificates can be obtained from public CAs or private CAs. The trusted CAcertificates can be in any format that is compatible with the Java keystore utility; forexample, PEM format. All you need are the certificates themselves—the private keys andpasswords are not required.
2. Add a CA certificate to the trust store using the keytool -import command.
Enter the following command to add the CA certificate, cacert.pem, in PEM format, to a JKStrust store.
Where truststore.ts is a keystore file containing CA certificates. If this file does notalready exist, the keytool command creates it. The CAAlias is a convenient identifier for theimported CA certificate and StorePass is the password required to access the keystore file.
keytool -import -file cacert.pem -alias CAAlias -keystore truststore.ts -storepass StorePass
Red Hat JBoss Fuse 6.2.1 Security Guide
120

3. Repeat the previous step to add all of the CA certificates to the trust store.
A.5.4. Generate and Sign a New Certificate
Overview
In order for a certificate to be useful in the real world, it must be signed by a CA, which vouches for theauthenticity of the certificate. This facilitates a scalable solution for certificate verification, because itmeans that a single CA certificate can be used to verify a large collection of certificates.
Steps to generate and sign a new certificate
To generate and sign a new certificate, using your own private CA, perform the following steps:
1. Generate a certificate and private key pair using the keytool -genkeypair command, asfollows:
Because the specified keystore, alice.ks, did not exist prior to issuing the commandimplicitly creates a new keystore and sets its password to StorePass.
The -dname and -validity flags define the contents of the newly created X.509 certificate.
NOTE
When specifying the certificate's Distinguished Name (through the -dnameparameter), you must be sure to observe any policy constraints specified in the openssl.cfg file. If those policy constraints are not heeded, you will not beable to sign the certificate using the CA (in the next steps).
2. Create a certificate signing request using the keystore -certreq command.
Create a new certificate signing request for the alice.ks certificate and export it to the alice_csr.pem file, as follows:
3. Sign the CSR using the openssl ca command.
Sign the CSR for the Alice certificate, using your private CA, as follows:
You will prompted to enter the CA private key pass phrase you used when creating the CA (inStep 5).
keytool -genkeypair -dname "CN=Alice, OU=Engineering, O=Red Hat, ST=Dublin, C=IE" -validity 365 -alias alice -keypass KeyPass -keystore alice.ks -storepass StorePass
keytool -certreq -alias alice -file alice_csr.pem -keypass KeyPass -keystore alice.ks -storepass StorePass
openssl ca -config openssl.cfg -days 365 -in alice_csr.pem -out alice_signed.pem
APPENDIX A. MANAGING CERTIFICATES
121

For more details about the openssl ca command seehttp://www.openssl.org/docs/apps/ca.html#.
4. Convert the signed certificate to PEM only format using the openssl x509 command withthe -outform option set to PEM. Enter the following command:
5. Concatenate the CA certificate file and the converted, signed certificate file to form acertificate chain. For example, on Linux and UNIX platforms, you can concatenate the CAcertificate file and the signed Alice certificate, alice_signed.pem, as follows:
6. Import the new certificate's full certificate chain into the Java keystore using the keytool -import command. Enter the following command:
openssl x509 -in alice_signed.pem -out alice_signed.pem -outform PEM
cat demoCA/cacert.pem alice_signed.pem > alice.chain
keytool -import -file alice.chain -keypass KeyPass -keystore alice.ks -storepass StorePass
Red Hat JBoss Fuse 6.2.1 Security Guide
122

APPENDIX B. ASN.1 AND DISTINGUISHED NAMES
Abstract
The OSI Abstract Syntax Notation One (ASN.1) and X.500 Distinguished Names play an important rolein the security standards that define X.509 certificates and LDAP directories.
B.1. ASN.1
Overview
The Abstract Syntax Notation One (ASN.1) was defined by the OSI standards body in the early 1980s toprovide a way of defining data types and structures that are independent of any particular machinehardware or programming language. In many ways, ASN.1 can be considered a forerunner of moderninterface definition languages, such as the OMG's IDL and WSDL, which are concerned with definingplatform-independent data types.
ASN.1 is important, because it is widely used in the definition of standards (for example, SNMP, X.509,and LDAP). In particular, ASN.1 is ubiquitous in the field of security standards. The formal definitions ofX.509 certificates and distinguished names are described using ASN.1 syntax. You do not requiredetailed knowledge of ASN.1 syntax to use these security standards, but you need to be aware thatASN.1 is used for the basic definitions of most security-related data types.
BER
The OSI's Basic Encoding Rules (BER) define how to translate an ASN.1 data type into a sequence ofoctets (binary representation). The role played by BER with respect to ASN.1 is, therefore, similar tothe role played by GIOP with respect to the OMG IDL.
DER
The OSI's Distinguished Encoding Rules (DER) are a specialization of the BER. The DER consists of theBER plus some additional rules to ensure that the encoding is unique (BER encodings are not).
References
You can read more about ASN.1 in the following standards documents:
ASN.1 is defined in X.208.
BER is defined in X.209.
B.2. DISTINGUISHED NAMES
Overview
Historically, distinguished names (DN) are defined as the primary keys in an X.500 directory structure.However, DNs have come to be used in many other contexts as general purpose identifiers. In ApacheCXF, DNs occur in the following contexts:
APPENDIX B. ASN.1 AND DISTINGUISHED NAMES
123

X.509 certificates—for example, one of the DNs in a certificate identifies the owner of thecertificate (the security principal).
LDAP—DNs are used to locate objects in an LDAP directory tree.
String representation of DN
Although a DN is formally defined in ASN.1, there is also an LDAP standard that defines a UTF-8 stringrepresentation of a DN (see RFC 2253). The string representation provides a convenient basis fordescribing the structure of a DN.
NOTE
The string representation of a DN does not provide a unique representation of DER-encoded DN. Hence, a DN that is converted from string format back to DER format doesnot always recover the original DER encoding.
DN string example
The following string is a typical example of a DN:
Structure of a DN string
A DN string is built up from the following basic elements:
OID .
Attribute Types .
AVA .
RDN .
OID
An OBJECT IDENTIFIER (OID) is a sequence of bytes that uniquely identifies a grammatical constructin ASN.1.
Attribute types
The variety of attribute types that can appear in a DN is theoretically open-ended, but in practice only asmall subset of attribute types are used. Table B.1, “Commonly Used Attribute Types” shows aselection of the attribute types that you are most likely to encounter:
Table B.1. Commonly Used Attribute Types
String Representation X.500 Attribute Type Size of Data Equivalent OID
C countryName 2 2.5.4.6
O organizationName 1...64 2.5.4.10
C=US,O=IONA Technologies,OU=Engineering,CN=A. N. Other
Red Hat JBoss Fuse 6.2.1 Security Guide
124

OU organizationalUnitName 1...64 2.5.4.11
CN commonName 1...64 2.5.4.3
ST stateOrProvinceName 1...64 2.5.4.8
L localityName 1...64 2.5.4.7
STREET streetAddress
DC domainComponent
UID userid
String Representation X.500 Attribute Type Size of Data Equivalent OID
AVA
An attribute value assertion (AVA) assigns an attribute value to an attribute type. In the stringrepresentation, it has the following syntax:
For example:
Alternatively, you can use the equivalent OID to identify the attribute type in the string representation(see Table B.1, “Commonly Used Attribute Types” ). For example:
RDN
A relative distinguished name (RDN) represents a single node of a DN (the bit that appears between thecommas in the string representation). Technically, an RDN might contain more than one AVA (it isformally defined as a set of AVAs). However, this almost never occurs in practice. In the stringrepresentation, an RDN has the following syntax:
Here is an example of a (very unlikely) multiple-value RDN:
Here is an example of a single-value RDN:
<attr-type>=<attr-value>
CN=A. N. Other
2.5.4.3=A. N. Other
<attr-type>=<attr-value>[+<attr-type>=<attr-value> ...]
OU=Eng1+OU=Eng2+OU=Eng3
APPENDIX B. ASN.1 AND DISTINGUISHED NAMES
125
INDEXA
Abstract Syntax Notation One (see ASN.1)
ASN.1, Contents of an X.509 certificate , ASN.1 and Distinguished Names
attribute types, Attribute types
AVA, AVA
OID, OID
RDN, RDN
attribute value assertion (see AVA)
AVA, AVA
B
Basic Encoding Rules (see BER)
BER, BER
C
CA, Integrity of the public key
choosing a host, Choosing a host for a private certification authority
commercial CAs, Commercial Certification Authorities
list of trusted, Trusted CAs
multiple CAs, Certificates signed by multiple CAs
private CAs, Private Certification Authorities
security precautions, Security precautions
certificates
chaining, Certificate chain
peer, Chain of trust
public key, Contents of an X.509 certificate
self-signed, Self-signed certificate
signing, Integrity of the public key
X.509, Role of certificates
chaining of certificates, Certificate chain
OU=Engineering
Red Hat JBoss Fuse 6.2.1 Security Guide
126

D
DER, DER
Distinguished Encoding Rules (see DER)
distinguished names
definition, Overview
DN
definition, Overview
string representation, String representation of DN
J
JAAS
configuration syntax, Configuring a JAAS realm
converting to blueprint, Converting standard JAAS login properties to XML
namespace, Namespace
jaas:config, Configuring a JAAS realm
jaas:module, Configuring a JAAS realm
JMX SSL connection, enabling, Enabling Remote JMX SSL
M
multiple CAs, Certificates signed by multiple CAs
O
OpenSSL, OpenSSL software package
P
peer certificate, Chain of trust
public keys, Contents of an X.509 certificate
R
RDN, RDN
relative distinguished name (see RDN)
root certificate directory, Trusted CAs
S
self-signed certificate, Self-signed certificate
INDEX
127

signing certificates, Integrity of the public key
SSLeay, OpenSSL software package
T
trusted CAs, Trusted CAs
X
X.500, ASN.1 and Distinguished Names
X.509 certificate
definition, Role of certificates
Red Hat JBoss Fuse 6.2.1 Security Guide
128


