1
| Date post: | 21-Dec-2015 |
| Category: |
Documents |
| Upload: | jahese2000 |
| View: | 218 times |
| Download: | 0 times |
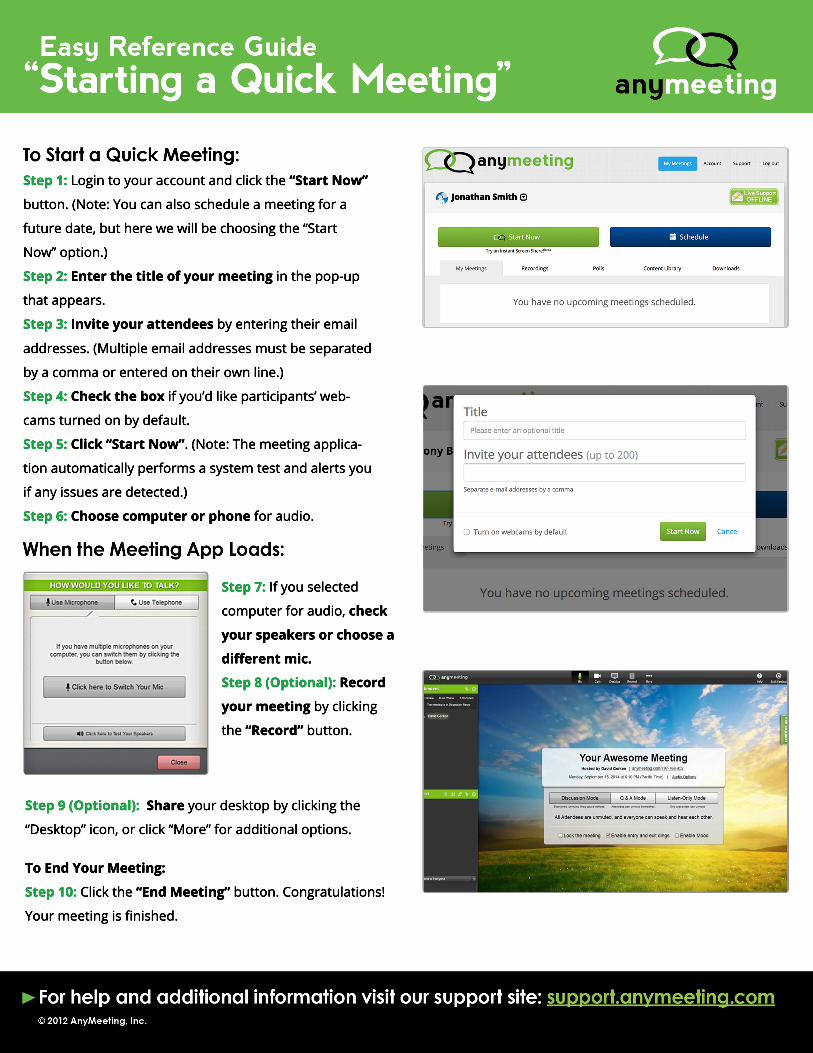
Step 1: Login to your account and click the “Start Now”
button. (Note: You can also schedule a meeting for a
future date, but here we will be choosing the “Start
Now” option.)
Step 2: Enter the title of your meeting in the pop-up
that appears.
Step 3: Invite your attendees by entering their email
addresses. (Multiple email addresses must be separated addresses. (Multiple email addresses must be separated
by a comma or entered on their own line.)
Step 4: Check the box if you’d like participants’ web-
cams turned on by default.
Step 5: Click “Start Now”. (Note: The meeting applica-
tion automatically performs a system test and alerts you
if any issues are detected.)
Step 6: Choose computer or phone for audio.
Step 7: If you selected
computer for audio, check
your speakers or choose a
different mic.
Step 8 (Optional):Step 8 (Optional): Record
your meeting by clicking
the “Record” button.
Step 9 (Optional): Share your desktop by clicking the
“Desktop” icon, or click “More” for additional options.
To End Your Meeting:
Step 10: Click the “End Meeting” button. Congratulations!
Your meeting is finished.
Jonathan Smith


