27
ComponentOne ReportViewer for WPF and Silverlight

ComponentOne
ReportViewer for WPF andSilverlight

Table of ContentsReportViewer for WPF and Silverlight Overview 2
Help with WPF and Silverlight Edition 2
Key Features 3
C1ReportViewer Quick Start 4
Step 1 of 3: Creating the C1ReportViewer Application 4-5
Step 2 of 3: Adding Content to the C1ReportViewer Control 5-7
Step 3 of 3: Running the C1ReportViewer Application 7-8
ReportViewer for WPF Layout and Appearance 9
ReportViewer Elements 9
ReportViewer Templates 9-10
C1ReportViewer Styles and Templates 10
C1ReportViewer Visual States 10
Run-Time Interaction 11
ReportViewer Content Area 11-12
ReportViewer Toolbar 12-13
C1ReportViewer Task-Based Help 14
Adding C1ReportViewer to the Application 14-15
Loading Documents into C1ReportViewer 15-16
Loading Documents from Application Resources (Silverlight) 16-17
Loading Documents from Files on the Client Machine (Silverlight) 17-18
Loading Documents from Files on the Server (Silverlight) 18-22
Creating and Loading Reports Dynamically (Silverlight) 22-24
Hiding the Toolbar 24
Customizing the Toolbar 24-26
ReportViewer for WPF and Silverlight 1
Copyright © 2017 GrapeCity, inc. All rights reserved.

ReportViewer for WPF and Silverlight OverviewAdd report viewing capabilities to your WPF applications. ReportViewer for WPF and Silverlight can display HTMLand PDF-based reports from virtually any report service, including Microsoft SQL Server Reporting Services andC1Report. This powerful viewer allows users to see, search, zoom, select, print and save the reports to local files.
Help with WPF and Silverlight EditionGetting Started
For information on installing ComponentOne Studio WPF Edition, licensing, technical support, namespacesand creating a project with the control, please visit Getting Started with WPF Edition.For information on installing ComponentOne Studio Silverlight Edition, licensing, technical support,namespaces and creating a project with the control, please visit Getting Started with Silverlight Edition.
ReportViewer for WPF and Silverlight 2
Copyright © 2017 GrapeCity, inc. All rights reserved.

Key FeaturesUsing ReportViewer, you can display HTML and PDF-based reports from virtually any report service, includingMicrosoft SQL Server Reporting Services and C1Report. The control lets you view, browse, search, zoom, select, printand save reports to local files. In addition, ReportViewer comes with various features as follows:
View reports from multiple sourcesThe ReportViewer control is engine-agnostic, because it supports the most common document formats: HTMLand PDF. Use ReportViewer to display reports from virtually any report generator such as C1Report, MicrosoftReporting Services, Active Reports, Crystal or any other report provider capable of generating HTML or PDFoutput.
Load and save documentsReportViewer allows users to print the current document in its entirety or print a selection of pages. Or printdirectly from code using the PrintDocument method.Printing supportReportViewer allows users to print the current document in its entirety or print a selection of pages. Or printdirectly from code using the PrintDocument method.
Search textUsers can perform text searches within the document. As matches are found they are brought into view, andusers can navigate through search results in a quick and intuitive manner.
Multiple view modesReportViewer comes with multiple viewing modes to support viewing documents at any scale. Users can setthe zoom level to fit the page into view, and view a single page or multiple pages in side by side layout.
Page customizationSpecify page properties such as page size and margin thickness. You can even design a page template toprovide custom headers and footers that are not generated as part of the report.
Customizable toolbarReportViewer includes a default toolbar for quick development. Creating a custom toolbar is very simplebecause each button in the default toolbar has a corresponding command in the control.
Silverlight toolkit themesAdd style to your UI with built-in support for the most popular Microsoft Silverlight Toolkit themes, includingExpressionDark, ExpressionLight, WhistlerBlue, RainerOrange, ShinyBlue, and BureauBlack.
Load and view PDF files containing attachmentsReportViewer lets you load and view PDF files containing attachments. The attached files appear in the shapeof a clip-shaped icon that can be clicked and readily viewed.
ReportViewer for WPF and Silverlight 3
Copyright © 2017 GrapeCity, inc. All rights reserved.

C1ReportViewer Quick StartThe following quick start guide is intended to get you up and running with ReportViewer for WPF and Silverlight. Inthis quick start you'll create a simple project using a C1ReportViewer control. You'll create a new WPF or Silverlightapplication, add the C1ReportViewer control to your application, add a PDF file that will be displayed inthe C1ReportViewer control, and observe some of the run-time interaction possible with ReportViewer for WPF andSilverlight.
Step 1 of 3: Creating the C1ReportViewer ApplicationIn this step you'll create a WPF application using ReportViewer for WPF and Silverlight. When you add aC1ReportViewer control to your application, you'll have a complete, functional document viewer interface that you candisplay PDF and HTML files in. To set up your project and add a C1ReportViewer control to your application, completethe following steps:
1. From the Visual Studio File menu select New and choose Project.2. In the New Project dialog box choose a language and WPF Application or Silverlight Application in the left-
side menu, choose .NET Framework 4 in the Framework drop-down list, and enter a name for the project. Inthis example the application will be named "QuickStart". If you name the project something else, in later stepsyou may need to change references to "QuickStart" with the name of your project.
3. In the Solution Explorer, right-click the project name and choose Add Reference. In the Add Reference dialogbox, locate and select the C1.WPF and C1.WPF.ReportViewer or C1.Silverlight andC1.Silverlight.ReportViewer assemblies and click OK to add references to your project.
4. Open the XAML view of the MainWindow.xaml or MainPage.xaml file; in this quick start you'll addthe C1ReportViewer control using XAML markup.
5. Add the XAML namespace to the Window tag with the following markup:xmlns:c1="http://schemas.componentone.com/winfx/2006/xaml".
The namespaces will now appear similar to the following:
WPF XAML
<Window x:Class="MainWindow" xmlns="http://schemas.microsoft.com/winfx/2006/xaml/presentation" xmlns:x="http://schemas.microsoft.com/winfx/2006/xaml" xmlns:c1="http://schemas.componentone.com/winfx/2006/xaml" Title="MainWindow" Height="350" Width="525">
Silverlight XAML
<UserControl x:Class="QuickStart.MainPage" xmlns="http://schemas.microsoft.com/winfx/2006/xaml/presentation" xmlns:x="http://schemas.microsoft.com/winfx/2006/xaml" xmlns:d="http://schemas.microsoft.com/expression/blend/2008" xmlns:mc="http://schemas.openxmlformats.org/markup-compatibility/2006" xmlns:c1="http://schemas.componentone.com/winfx/2006/xaml" mc:Ignorable="d" d:DesignHeight="300" d:DesignWidth="400">
This is a unified namespace that will enable you to work with most ComponentOne WPF or Silverlight controlswithout adding multiple namespaces.
ReportViewer for WPF and Silverlight 4
Copyright © 2017 GrapeCity, inc. All rights reserved.

6. Add the <c1:C1ReportViewer x:Name="C1ReportViewer1" /> tag within the Grid tags on the page toadd the C1ReportViewer control to the application.
The XAML will appear similar to the following:
XAML
<Grid x:Name="LayoutRoot" Background="White"> <c1:C1ReportViewer x:Name="C1ReportViewer1" /></Grid>
This will add a C1ReportViewer control named "C1ReportViewer1" to the application. If you run the applicationnow, it will appear similar to the following image:
You've successfully set up your application's user interface, but if you run your application now you'll see thatthe C1ReportViewer control currently contains no content. In the next steps you'll add content to the C1ReportViewercontrol, and then you'll observe some of the run-time interactions possible with the control.
From 2015v2 onwards, please add C1.Win.4 and C1.Win.Barcode.4 dlls to the Silverlight applications referencingC1.WPF.C1Report.CustomFields.4 dll.
Step 2 of 3: Adding Content to the C1ReportViewer ControlIn the previous step you created a WPF application and added the C1ReportViewer control to your project. In this stepyou'll add PDF content to the C1ReportViewer control. Note that in this step you will add a PDF file that is includedwith the WPF Edition samples, which are by default installed in the Documents or MyDocuments folder inthe Documents\ComponentOne Samples\WPF or Documents\ComponentOne Samples\Silverlight directory. Ifyou choose, you can instead use another PDF file and adapt the steps. To customize your project and add a PDF file tothe C1ReportViewer control in your application, complete the following steps:
1. Navigate to the Solution Explorer, right-click the project name, and select Add │ Existing Item.2. In the Add Existing Item dialog box, locate the C1XapOptimizer.pdf file included in the ControlExplorer
sample. In the file type drop-down box, you may need to choose All Files to view the PDF file. Note that if youchoose, you can instead pick another PDF file to use.
3. In the Solution Explorer, click the PDF file you just added to the application. In the Properties window, set itsBuildAction property to Resource and confirm that the Copy to Output Directory item is set to Do notCopy.
ReportViewer for WPF and Silverlight 5
Copyright © 2017 GrapeCity, inc. All rights reserved.

4. Switch to Code view by right-clicking the page and selecting View Code. In the next steps you'll add XAMLmarkup to your application to add content to the drop-down box.
5. Add the following imports statement at the top of the page:
Visual Basic
Imports C1.WPF.ReportViewer
C#
using C1.WPF.ReportViewer;
6. Add the following code to the main class:Visual Basic
Public Sub New() InitializeComponent() Dim resource = Application.GetResourceStream(New Uri("QuickStart;component/C1XapOptimizer.pdf", UriKind.Relative))Me.C1ReportViewer1.LoadDocument(resource.Stream)End Sub
C#
public MainPage(){ InitializeComponent(); var resource = Application.GetResourceStream(new Uri("QuickStart;component/C1XapOptimizer.pdf", UriKind.Relative)); this.C1ReportViewer1.LoadDocument(resource.Stream);}
This code adds a stream and loads the stream into the C1ReportViewer control. Note that if you named theapplication differently, you will need to replace "QuickStart" with the name of your project. If you added a differentPDF file, replace "C1XapOptimizer.pdf " with the name of your file.
If you run the application now, it will appear in the content window within the C1ReportViewer control:
ReportViewer for WPF and Silverlight 6
Copyright © 2017 GrapeCity, inc. All rights reserved.

In this step you added content to the C1ReportViewer control. In the next step you'll view some of the run-timeinteractions possible in the control.
Step 3 of 3: Running the C1ReportViewer ApplicationNow that you've created a WPF or Silverlight application and added content to the C1ReportViewer control, the onlything left to do is run your application. To run your application and observe ReportViewer for WPF and Silverlight'srun-time behavior, complete the following steps:
1. From the Debug menu, select Start Debugging to view how your application will appear at run time.
The application will appear similar to the following:
The C1ReportViewer control appears as a toolbar and content area. Notice that the PDF file you added appearsin the content area of the control.
2. In the toolbar, click the Next Page arrow button to move to the next page of the PDF file. You can return tothe previous page by clicking the Previous Page arrow button. You can also navigate to the first or last pageof the document using the First Page and Last Page buttons.
3. Click the Zoom Out button to view more of the PDF in the window. Note that you can also choose a zoomlevel by clicking the Zoom drop-down box.
ReportViewer for WPF and Silverlight 7
Copyright © 2017 GrapeCity, inc. All rights reserved.

4. Click the Fit Width button to automatically fit the width of the PDF file to the size of the viewer's contentwindow. Other options include OnePage to view the entire page in the available space and TwoPage to viewtwo pages of the document in the available space.
5. Click in the Search text box and enter text to search for – for example "Sales". Notice that the document scrollsto the next instance of that word and that the word is highlighted in the PDF file. The toolbar also displays thenumber of instances of that word or phrase. You can click the Find Previous and Find Next buttons tonavigate to the previous or next instance of the word.
6. Click the Save button. In the Save As dialog box enter a name for the file and click the Save button to save thefile to a location of your choice. If you choose, you can click the Print button in the toolbar to print the file.
Congratulations! You've completed the C1ReportViewer quick start and created a simple application, added andcustomized a ReportViewer for WPF and Silverlight control, and viewed some of the run-time capabilities of thecontrol.
ReportViewer for WPF and Silverlight 8
Copyright © 2017 GrapeCity, inc. All rights reserved.

ReportViewer for WPF Layout and AppearanceThe following topics detail how to customize the C1ReportViewer control's layout and appearance. You can use built-in layout options to lay your controls out in panels such as Grids or Canvases. Themes allow you to customize theappearance of the grid and take advantage of Silverlight's XAML-based styling. You can also use templates to formatand lay out the control and to customize the control's actions.
ReportViewer ElementsReportViewer for WPF and Silverlight includes the C1ReportViewer control, a simple viewer that allows you to loadand view HTML and PDF files. When you add the C1ReportViewer control to a XAML window it exists as a fullyfunctional input control that can be customized and include loaded content.
The C1ReportViewer control consists of two parts: a toolbar and a content area. The image below identifies thetoolbar and content area:
Any HTML content or PDF that you load into the C1ReportViewer control will be viewed in the content area. Thetoolbar allows users to manipulate the content at run time, for example to print or zoom in or out the content. Formore information about the content area and toolbar, see the ReportViewer Content Area and ReportViewer Toolbartopics.
ReportViewer for WPF and Silverlight also includes the C1ReportViewerToolbar control which consists of just thetoolbar element.
ReportViewer TemplatesOne of the main advantages to using a WPF control is that controls are "lookless" with a fully customizable userinterface. Just as you design your own user interface (UI), or look and feel, for WPF applications, you can provide yourown UI for data managed by ReportViewer for WPF and Silverlight. Extensible Application Markup Language(XAML; pronounced "Zammel"), an XML-based declarative language, offers a simple approach to designing your UIwithout having to write code.
Accessing Templates
You can access templates in Microsoft Expression Blend by selecting the C1ReportViewer control and, in the menu,selecting Edit Template. Select Edit a Copy to create an editable copy of the current template or Create Empty, tocreate a new blank template.
ReportViewer for WPF and Silverlight 9
Copyright © 2017 GrapeCity, inc. All rights reserved.

Once you've created a new template, the template will appear in the Objects and Timeline window. Note that youcan use the Template property to customize the template.
Note: If you create a new template through the menu, the template will automatically be linked to thattemplate's property. If you manually create a template in XAML you will have to link the appropriate templateproperty to the template you've created.
Additional Templates
In addition to the default template, the C1ReportViewer control includes a few additional templates. These additionaltemplates can also be accessed in Microsoft Expression Blend – in Blend select the C1ReportViewer control and, in themenu, select Edit Additional Templates. Choose a template, and select Create Empty.
C1ReportViewer Styles and TemplatesReportViewer for WPF and Silverlight's C1ReportViewer control provides several style properties that you can useto change the appearance of the control. Some of the included styles are described in the table below:
Style Description
FocusVisualStyle Gets or sets a property that enables customization of appearance, effects, or otherstyle characteristics that will apply to this element when it captures keyboard focus.This is a dependency property.
FontStyle Gets or sets the font style. This is a dependency property.
PageTemplate Gets or sets the DataTemplate used to display pages.
Style Gets or sets the style used by this element when it is rendered. This is a dependencyproperty.
ToolbarStyle Gets or set the style applied to this C1ReportViewer control's toolbar.
C1ReportViewer Visual StatesIn Microsoft Expression Blend, you can add custom states and state groups to define a different appearance for eachstate of your user control – for example, the visual state of the control could change on mouse over. You can view andedit visual states by creating a new template. Once you've done so the available visual states for that part will bevisible in the States window:
ReportViewer for WPF and Silverlight 10
Copyright © 2017 GrapeCity, inc. All rights reserved.

Run-Time InteractionUsers can interact with items in the toolbar and content area of the C1ReportViewer control at run time. Users canmove and drag content in the content area or use the toolbar to manipulate the document displayed in the contentarea.
ReportViewer Content AreaAt run time, users can manipulate content in the content area, scrolling, selecting, and copying content from theC1ReportViewer control.
Scrolling Content
When the content of the control is taller and viewer than the viewing area of the control's content area, scrollbarsappear to allow users to move to different areas of the document:
You can scroll through the content area using the arrow buttons, moving the scrollbar thumb buttons, with thekeyboard arrow buttons, or with the mouse scroll wheel.
Selecting Content
You can select content using by clicking and dragging the mouse cursor over the content you want to select. Whencontent is selected, it will appear highlight. For example, the words "How XapOptimizer Works" are selected in theimage below:
ReportViewer for WPF and Silverlight 11
Copyright © 2017 GrapeCity, inc. All rights reserved.

Copying Content
The C1ReportViewer control includes a context menu that allows you to copy content. First select the content that youwant to copy and then right-click the document. A context menu will appear; by selecting Copy in the context menuyou can copy the content:
You can also copy selected content using the keyboard by using the CTRL + C key combination.
ReportViewer ToolbarAt run time, users can use the toolbar to manipulate the document displayed in the content area. The toolbar appearssimilar to the following image by default:
Note that some items in the toolbar are not active or visible by default. For example, the Previous Page button is notactive when on the first page of the document. The following options are included in the toolbar:
ReportViewer for WPF and Silverlight 12
Copyright © 2017 GrapeCity, inc. All rights reserved.

Image Name Description
Save Save the current document to the local file system.
Print Prints the current document.
First Page Navigates to the first page in the document.
Previous Page Navigates to the previous page in the document.
Page Navigates to a specific page entered in the text box.
Next Page Navigates to the next page in the document.
Last Page Navigates to the last page in the document.
Zoom Out Zooms out of the document.
Zoom In Zooms into the document.
Zoom Zooms to the value selected.
Fit Width Fits the width of the document to the size of the viewport.
One Page Fits the size of the document to the size of the viewport so that anentire page is displayed.
Two Pages Displays two pages side-by-side.
Find Searches the document for text entered in the box as it is typed.
Find Previous Navigates to the previous instance of the searched text.
Find Next Navigates to the next instance of the searched text.
Each of the toolbar interactions can be also be performed programmatically so that you can easily replace the built-intoolbar with your own custom toolbar. If you choose to create a custom toolbar, you can hide the built-in toolbarusing the ToolbarVisibility property.
ReportViewer for WPF and Silverlight 13
Copyright © 2017 GrapeCity, inc. All rights reserved.

C1ReportViewer Task-Based HelpThe following task-based help topics assume that you are familiar with Visual Studio and Expression Blend and knowhow to use the C1ReportViewer control in general. If you are unfamiliar with the ReportViewer for WPF andSilverlight product, please see the C1ReportViewer Quick Start first.
Each topic in this section provides a solution for specific tasks using the ReportViewer for WPF andSilverlight product. Most task-based help topics also assume that you have created a new WPF or Silverlight projectand added a C1ReportViewer control to the project – for information about creating the control, see AddingC1ReportViewer to the Application.
Adding C1ReportViewer to the ApplicationComplete the following steps to add a C1ReportViewer control to your application:
1. From the Visual Studio File menu select New and choose Project.2. In the New Project dialog box choose a language in the left-side menu, choose .NET Framework 4 in the
Framework drop-down list, and enter a name for the project.3. In the Solution Explorer, right-click the project name and choose Add Reference. In the Add Reference dialog
box, locate and select the following assemblies and click OK to add references to your project:C1.WPFC1.WPF.ReportViewerC1.WPF.RichTextBoxC1.WPF.Zip
4. Open the XAML view of the MainWindow.xaml file and add the XAML namespace to the UserControl tag withthe following markup: xmlns:c1="http://schemas.componentone.com/winfx/2006/xaml".
The namespaces will now appear similar to the following:
XAML
<Window x:Class="MainWindow" xmlns="http://schemas.microsoft.com/winfx/2006/xaml/presentation" xmlns:x="http://schemas.microsoft.com/winfx/2006/xaml" xmlns:c1="http://schemas.componentone.com/winfx/2006/xaml" Title="MainWindow" Height="350" Width="525">
This is a unified namespace that will enable you to work with most ComponentOne WPF or Silverlight controlswithout adding multiple namespaces.
5. Add the <c1:C1ReportViewer x:Name="C1ReportViewer1" /> tag within the Grid tags on the page toadd the C1ReportViewer control to the application.
The XAML will appear similar to the following:
XAML
<Grid x:Name="LayoutRoot" Background="White"> <c1:C1ReportViewer x:Name="C1ReportViewer1" /></Grid>
This will add a C1ReportViewer control named "C1ReportViewer1" to the application. If you run the applicationnow, it will appear similar to the following image:
ReportViewer for WPF and Silverlight 14
Copyright © 2017 GrapeCity, inc. All rights reserved.

You've successfully set up your application's user interface, but if you run your application now you'll see thatthe C1ReportViewer control currently contains no content. See the Loading Documents into C1ReportViewer topic foroptions for loading content.
Note: If the C1ReportViewer control was installed to the Visual Studio Toolbox, simply dragging the controlonto a page will automatically perform all the steps above.
Loading Documents into C1ReportViewerIf you run the application after adding a C1ReportViewer control to your application, you'll see an emptyC1ReportViewer on the page. The next step is to invoke the LoadDocument method to add some content to thecontrol. The LoadDocument method allows you to load content from Stream objects (which may contain PDF, HTML,or MHTML documents), or from strings (which may contain HTML or MHTML documents).
You can easily load a document from an application resource. For example, complete the following steps:
1. Navigate to the Solution Explorer, right-click the project name, and select Add │ Existing Item.2. In the Add Existing Item dialog box, locate a PDF file. In the file type drop-down box, you may need to choose
All Files to view the PDF file. Note that if you choose, you can instead pick another PDF file to use.3. In the Solution Explorer, click the PDF file you just added to the application (in this example, we'll assume the
file is named resource.pdf). In the Properties window, set its BuildAction property to Resource and confirmthat the Copy to Output Directory item is set to Do not Copy.
4. Switch to Code view by right-clicking the page and selecting View Code. In the next steps you'll add XAMLmarkup to your application to add content to the drop-down box.
5. Add the following imports statement at the top of the page:
Visual Basic
Imports C1.WPF.ReportViewer
C#
using C1.WPF.ReportViewer;
ReportViewer for WPF and Silverlight 15
Copyright © 2017 GrapeCity, inc. All rights reserved.

6. Add the following code to the main class:
Visual Basic
Public Sub New() InitializeComponent() Dim resource = Application.GetResourceStream(New Uri("AppName;component/resource.pdf", UriKind.Relative))Me.C1ReportViewer1.LoadDocument(resource.Stream)End Sub
C#
public MainPage(){ InitializeComponent(); var uri = new Uri("/AppName;component/resource.pdf", UriKind.Relative); var resource = Application.GetResourceStream(uri); this.C1ReportViewer1.LoadDocument(resource.Stream);}
This code adds a stream and loads the stream into the C1ReportViewer control. Note that if you named theapplication differently, you will need to replace "AppName" with the name of your project. If you added a differentPDF file, replace "resource.pdf" with the name of your file.
Loading Documents from Application Resources(Silverlight)You can easily load a document from an application resource. For example, complete the following steps:
1. Navigate to the Solution Explorer, right-click the project name, and select Add │ Existing Item.2. In the Add Existing Item dialog box, locate a PDF file. In the file type drop-down box, you may need to choose
All Files to view the PDF file. Note that if you choose, you can instead pick another PDF file to use.3. In the Solution Explorer, click the PDF file you just added to the application (in this example, we'll assume the
file is named resource.pdf). In the Properties window, set its BuildAction property to Resource and confirmthat the Copy to Output Directory item is set to Do not Copy.
4. Switch to Code view by right-clicking the page and selecting View Code. In the next steps you'll add XAMLmarkup to your application to add content to the drop-down box.
5. Add the following imports statement at the top of the page:
Visual Basic
Imports C1.Silverlight|variable=Silverlight.ReportViewer
C#
using C1.Silverlight|variable=Silverlight.ReportViewer;
ReportViewer for WPF and Silverlight 16
Copyright © 2017 GrapeCity, inc. All rights reserved.

6. Add the following code to the main class:
Visual Basic
Public Sub New() InitializeComponent() Dim resource = Application.GetResourceStream(New Uri("AppName;component/resource.pdf", UriKind.Relative))Me.C1ReportViewer1.LoadDocument(resource.Stream)End Sub
C#
public MainPage(){ InitializeComponent(); var uri = new Uri("/AppName;component/resource.pdf", UriKind.Relative); var resource = Application.GetResourceStream(uri); this.C1ReportViewer1.LoadDocument(resource.Stream);}
This code adds a stream and loads the stream into the C1ReportViewer control. Note that if you named theapplication differently, you will need to replace "AppName" with the name of your project. If you added a differentPDF file, replace "resource.pdf" with the name of your file.
Loading Documents from Files on the Client Machine (Silverlight)In this example, you'll set up the application so that users can load a file from the local file system. You will add a button to theapplication and then add code to choose and open a file at run time. Because this example uses the OpenFileDialog control thiscode must be executed in a Button Click event. Note that this topic assumes you have added a C1ReportViewer control named"C1ReportViewer1" to your application.
Complete the following steps.
1. Open the MainPage.xaml file in your application, and open XAML view.2. Add the following markup to add a button control to the application.
<Button Content="Load File" Height="23" Name="Button1" Width="70" Click="Button1_Click" />3. Right-click the page and select View Code. In Code View you'll add code to initialize the button you added in the previous
step.4. Add the following imports statement at the top of the page:
Visual Basic
Imports C1.Silverlight.ReportViewer
C#
ReportViewer for WPF and Silverlight 17
Copyright © 2017 GrapeCity, inc. All rights reserved.

using C1.Silverlight.ReportViewer;
5. Add the following Button_Click event handler code:
Visual Basic
Private Sub Button1_Click(ByVal sender As System.Object, ByVal e As System.Windows.RoutedEventArgs) Handles Button1.Click Dim dialog = New OpenFileDialog() dialog.Filter = "PDF files|*.pdf|HTML files|*.html;*.mhtml" If dialog.ShowDialog() = True Then Using fileStream = dialog.File.OpenRead() Try C1ReportViewer1.LoadDocument(fileStream) Catch ex As Exception MessageBox.Show("Failed to load document.") End Try End Using End IfEnd Sub
C#
private void Button1_Click(System.Object sender, System.Windows.RoutedEventArgs e){ dynamic dialog = new OpenFileDialog(); dialog.Filter = "PDF files|*.pdf|HTML files|*.html;*.mhtml"; if (dialog.ShowDialog() == true) { using (fileStream == dialog.File.OpenRead()) { try { C1ReportViewer1.LoadDocument(fileStream); } catch (Exception ex) { MessageBox.Show("Failed to load document."); } } }}
This code initializes a dialog box to be opened when the button is clicked. In the dialog box users can select a file to openin the C1ReportViewer control. Notice how, in the code above, the LoadDocument method allows you to load PDF andHTML content.
6. Run the application.7. In the running application, click the Load File button. Notice that a dialog box appears, allowing you to choose a PDF or
HTML file of your choice.8. Locate and select a PDF file on your local machine to open and then click the Open button. The dialog box will close and
the file you selected will be loaded into the C1ReportViewer control.
ReportViewer for WPF and Silverlight 18
Copyright © 2017 GrapeCity, inc. All rights reserved.

Loading Documents from Files on the Server (Silverlight)A common usage scenario for the C1ReportViewer control is to have a report server (such as C1Report or MicrosoftSQL Server Reporting Services) generate reports on a schedule, and deploy them to the file system on the server. YourSilverlight or WPF applications can then get these files from the server and display them to the user with very littleoverhead.
This scenario is illustrated in the C1ReportViewerQuickstart sample.
After adding the C1ReportViewer to your application, you should add a Silverlight-enabled WCF service to the serverproject. This service will provide the Silverlight client with the list of reports available and with the actual documentstreams for each report.
For example, the following is a typical implementation of a report provider Web service:
Visual Basic
<ServiceContract([Namespace] := "")> _<AspNetCompatibilityRequirements(RequirementsMode := AspNetCompatibilityRequirementsMode.Allowed)> _Public Class ReportingService <OperationContract> _ Public Function GetReportList() As String() Dim path__1 = Path.Combine(System.AppDomain.CurrentDomain.BaseDirectory, "Resources") Return Directory.GetFiles(path__1, "*.pdf") End Function <OperationContract>Public Function GetReportStream(reportName As String) As Byte() ' get file name Dim path__1 = Path.Combine(System.AppDomain.CurrentDomain.BaseDirectory, "Resources") reportName = Path.Combine(path__1, reportName)
' load file into stream Dim ms = New MemoryStream() Dim buff = New Byte(63999) {} Using sr = New FileStream(reportName, FileMode.Open) While True Dim read As Integer = sr.Read(buff, 0, buff.Length) ms.Write(buff, 0, read) If read = 0 Then Exit While End If End While End UsingEnd Function' return byte streamReturn ms.ToArray()End Class
C#
ReportViewer for WPF and Silverlight 19
Copyright © 2017 GrapeCity, inc. All rights reserved.

[ServiceContract(Namespace = "")][AspNetCompatibilityRequirements(RequirementsMode = AspNetCompatibilityRequirementsMode.Allowed)]public class ReportingService{ [OperationContract] public string[] GetReportList() { var path = Path.Combine(System.AppDomain.CurrentDomain.BaseDirectory, "Resources"); return Directory.GetFiles(path, "*.pdf"); }
[OperationContract] public byte[] GetReportStream(string reportName) { // get file name var path = Path.Combine(System.AppDomain.CurrentDomain.BaseDirectory, "Resources"); reportName = Path.Combine(path, reportName);
// load file into stream var ms = new MemoryStream(); var buff =new byte[64000]; using (var sr = new FileStream(reportName, FileMode.Open)) { for (; ; ) { int read = sr.Read(buff, 0, buff.Length); ms.Write(buff, 0, read); if (read == 0) break; } } }
// return byte stream return ms.ToArray(); }}
As you can see, the code is very standard. The first method lists the reports available on the server so the Silverlightapplication can show a list of reports to the user, and the second method returns the byte stream that represents theselected report.
The client part of the application uses the service as follows:
Visual Basic
Public Sub New() InitializeComponent()
ReportViewer for WPF and Silverlight 20
Copyright © 2017 GrapeCity, inc. All rights reserved.

' go get the list of reports available Dim svc = New ReportingServiceReference.ReportingServiceClient() AddHandler svc.GetReportListCompleted, AddressOf svc_GetReportListCompleted svc.GetReportListAsync()End Sub
' populate ComboBox with list of reports available on the serverPrivate Sub svc_GetReportListCompleted(sender As Object, e As ReportingServiceReference.GetReportListCompletedEventArgs) _cmbReport.Items.Clear() For Each file As String In e.Result _cmbReport.Items.Add(Path.GetFileNameWithoutExtension(file)) Next _cmbReport.IsEnabled = True _cmbReport.SelectedIndex = 0End Sub
' show the report that was selectedPrivate Sub ReportType_Click(sender As Object, e As EventArgs) ' build report name Dim reportName As String = DirectCast(_cmbReport.SelectedItem, String) reportName += If(_btnPDF.IsChecked.Value, ".pdf", ".mhtml")
' go get the stream Dim svc = New ReportingServiceReference.ReportingServiceClient() AddHandler svc.GetReportStreamCompleted, AddressOf svc_GetReportStreamCompleted svc.GetReportStreamAsync(reportName)End Sub
' display the reportPrivate Sub svc_GetReportStreamCompleted(sender As Object, e As ReportingServiceReference.GetReportStreamCompletedEventArgs) Dim ms = New MemoryStream(e.Result) _reportViewer.LoadDocument(ms)End Sub
C#
public MainPage(){ InitializeComponent();
// go get the list of reports available var svc = new ReportingServiceReference.ReportingServiceClient(); svc.GetReportListCompleted += svc_GetReportListCompleted; svc.GetReportListAsync();}
// populate ComboBox with list of reports available on the servervoid svc_GetReportListCompleted(object sender,
ReportViewer for WPF and Silverlight 21
Copyright © 2017 GrapeCity, inc. All rights reserved.
ReportingServiceReference.GetReportListCompletedEventArgs e){ _cmbReport.Items.Clear(); foreach (string file in e.Result) { _cmbReport.Items.Add(Path.GetFileNameWithoutExtension(file)); } _cmbReport.IsEnabled = true; _cmbReport.SelectedIndex = 0;}
// show the report that was selectedvoid ReportType_Click(object sender, EventArgs e){ // build report name string reportName = (string)_cmbReport.SelectedItem; reportName += _btnPDF.IsChecked.Value ? ".pdf" : ".mhtml";
// go get the stream var svc = new ReportingServiceReference.ReportingServiceClient(); svc.GetReportStreamCompleted += svc_GetReportStreamCompleted; svc.GetReportStreamAsync(reportName); }
// display the report void svc_GetReportStreamCompleted(object sender, ReportingServiceReference.GetReportStreamCompletedEventArgs e) { var ms = new MemoryStream(e.Result); _reportViewer.LoadDocument(ms); }
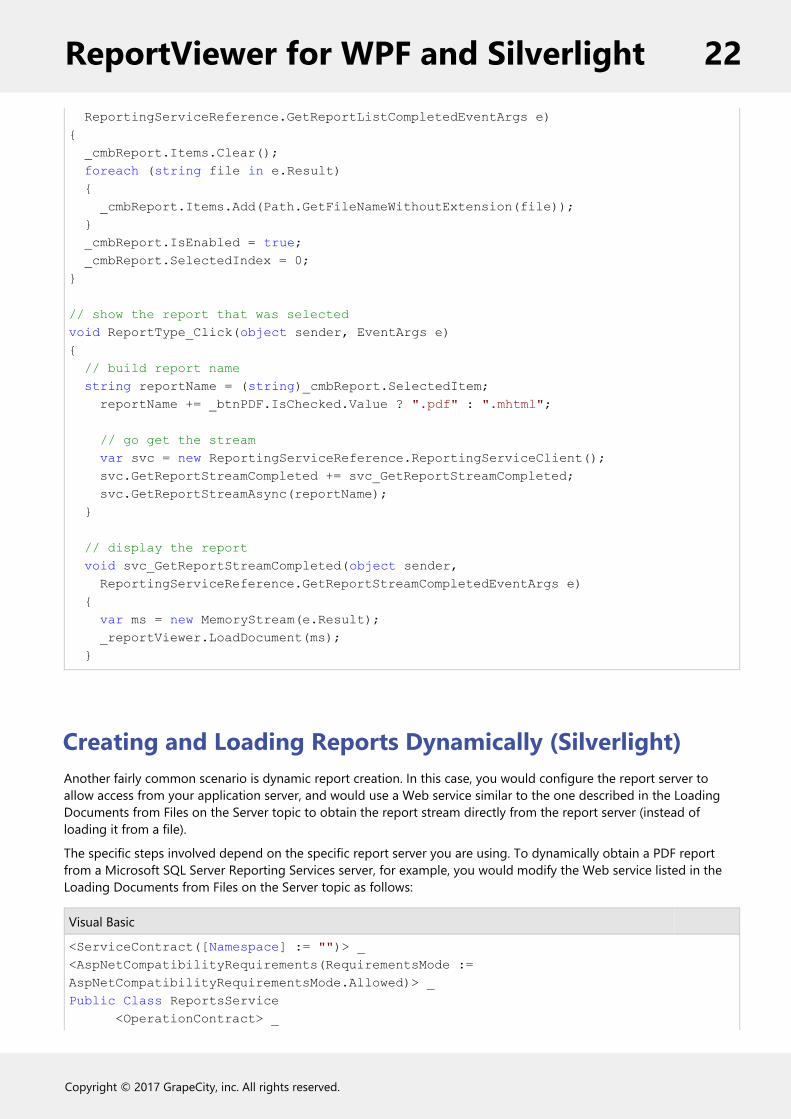
Creating and Loading Reports Dynamically (Silverlight)Another fairly common scenario is dynamic report creation. In this case, you would configure the report server toallow access from your application server, and would use a Web service similar to the one described in the LoadingDocuments from Files on the Server topic to obtain the report stream directly from the report server (instead ofloading it from a file).
The specific steps involved depend on the specific report server you are using. To dynamically obtain a PDF reportfrom a Microsoft SQL Server Reporting Services server, for example, you would modify the Web service listed in theLoading Documents from Files on the Server topic as follows:
Visual Basic
<ServiceContract([Namespace] := "")> _<AspNetCompatibilityRequirements(RequirementsMode := AspNetCompatibilityRequirementsMode.Allowed)> _Public Class ReportsService <OperationContract> _
ReportViewer for WPF and Silverlight 22
Copyright © 2017 GrapeCity, inc. All rights reserved.

Public Function GetReportStream(reportName As String) As Byte() Dim reportServer As String = "YOUR REPORT SERVER NAME"
Dim url = String.Format("http://{0}/ReportServer?/{1}&rs:Format=PDF", reportServer, reportName.Replace(" "C, "+"C))
Dim wc = New System.Net.WebClient() wc.UseDefaultCredentials = True
Dim stream = wc.OpenRead(url) Dim ms = New MemoryStream()
Dim buf = New Byte(64 * 1024 - 1) {} While True Dim read As Integer = stream.Read(buf, 0, buf.Length) If read = 0 Then Exit While End If ms.Write(buf, 0, read) End While ms.Flush()
Return ms.ToArray() End FunctionEnd Class
C#
[ServiceContract(Namespace = "")][AspNetCompatibilityRequirements(RequirementsMode = AspNetCompatibilityRequirementsMode.Allowed)]public class ReportsService{ [OperationContract] public byte[] GetReportStream(string reportName) { string reportServer = "YOUR REPORT SERVER NAME";
var url = string.Format("http://{0}/ReportServer?/{1}&rs:Format=PDF", reportServer, reportName.Replace(' ', '+'));
var wc = new System.Net.WebClient(); wc.UseDefaultCredentials = true;
var stream = wc.OpenRead(url); var ms = new MemoryStream();
var buf = new byte[64 * 1024]; for (; ; )
ReportViewer for WPF and Silverlight 23
Copyright © 2017 GrapeCity, inc. All rights reserved.

{ int read = stream.Read(buf, 0, buf.Length); if (read == 0) break; ms.Write(buf, 0, read); } ms.Flush();
return ms.ToArray(); }}
As you can see, the difference is minimal. This approach still allows you to specify the report caching policy on thereport server, so there is no loss of performance or scalability.
Hiding the ToolbarIf you choose to create a customized toolbar (for an example, see the Customizing the Toolbar topic), you may needto hide the default toolbar available in the C1ReportViewer control. You can hide the built-in toolbar using theToolbarVisibility property. For example:
XAML
<c1:C1ReportViewer x:Name="C1ReportViewer1" ToolbarVisibility="Collapsed"/>
Visual Basic
Me.C1ReportViewer.ToolbarVisibility = Visibility.Collapsed
C#
this.C1ReportViewer.ToolbarVisibility = Visibility.Collapsed;
Customizing the ToolbarCreating a custom toolbar for C1ReportViewer is very simple. All buttons in the default toolbar have a correspondingCommand in the control, so you can create a custom toolbar using only XAML. Here is some sample code usingC1Toolbar to create a C1ReportViewer toolbar:
XAML
<Grid x:Name="LayoutRoot"> <Grid.RowDefinitions> <RowDefinition Height="Auto" /> <RowDefinition /> </Grid.RowDefinitions> <c1:C1ToolbarStrip> <c1:C1ToolbarButton
ReportViewer for WPF and Silverlight 24
Copyright © 2017 GrapeCity, inc. All rights reserved.
Content="First" Command="{Binding FirstPageCommand,ElementName=reportViewer}" /> <c1:C1ToolbarButton Content="Previous" Command="{Binding PreviousPageCommand,ElementName=reportViewer}" /> <ContentPresenter Content="{Binding PageNumber,ElementName=reportViewer}" /> <TextBlock Text="/"/> <ContentPresenter Content="{Binding PageCount,ElementName=reportViewer}" /> <c1:C1ToolbarButton Content="Next" Command="{Binding NextPageCommand,ElementName=reportViewer}" /> <c1:C1ToolbarButton Content="Last" Command="{Binding LastPageCommand,ElementName=reportViewer}" /> <ComboBox SelectedItem="{Binding Zoom,ElementName=reportViewer,Mode=TwoWay}"> <sys:Double>0.5</sys:Double> <sys:Double>1</sys:Double> <sys:Double>1.5</sys:Double> </ComboBox> </c1:C1ToolbarStrip> <c1:C1ReportViewer x:Name="reportViewer" Grid.Row="1" ToolbarVisibility="Collapsed"/></Grid>
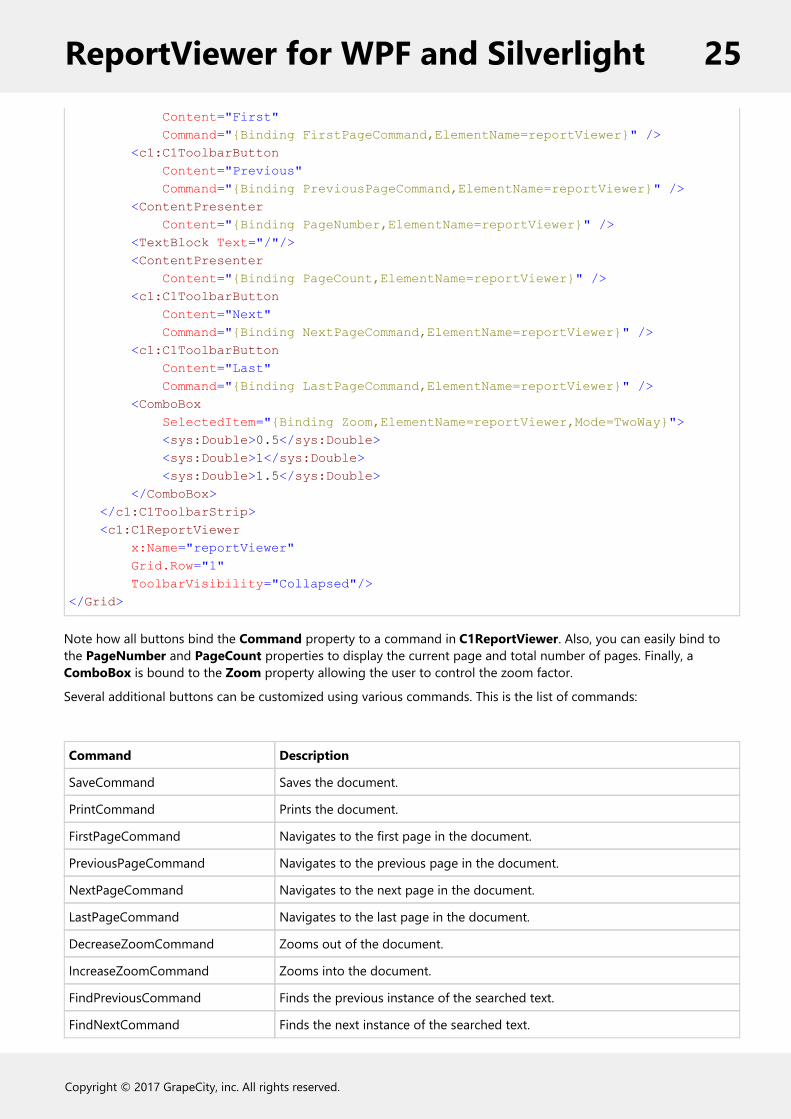
Note how all buttons bind the Command property to a command in C1ReportViewer. Also, you can easily bind tothe PageNumber and PageCount properties to display the current page and total number of pages. Finally, aComboBox is bound to the Zoom property allowing the user to control the zoom factor.
Several additional buttons can be customized using various commands. This is the list of commands:
Command Description
SaveCommand Saves the document.
PrintCommand Prints the document.
FirstPageCommand Navigates to the first page in the document.
PreviousPageCommand Navigates to the previous page in the document.
NextPageCommand Navigates to the next page in the document.
LastPageCommand Navigates to the last page in the document.
DecreaseZoomCommand Zooms out of the document.
IncreaseZoomCommand Zooms into the document.
FindPreviousCommand Finds the previous instance of the searched text.
FindNextCommand Finds the next instance of the searched text.
ReportViewer for WPF and Silverlight 25
Copyright © 2017 GrapeCity, inc. All rights reserved.

C1PdfViewerToolbar's template also expects ToggleButtons with the following names:
Option Description
FitWidth Fits the width of the document to the size of the control.
OnePage Displays one page.
TwoPages Displays two pages side-by-side.
To use one of these ToggleButtons, for example TwoPages, inside a custom toolbar scenario, you would need to putthe TwoPages ToggleButton inside the C1ReportViewer template. If you are making your own toolbar outside of thecontrol, add a Button and set C1ReportViewer.ViewMode = ViewMode.TwoPages in the click handler.
ReportViewer for WPF and Silverlight 26
Copyright © 2017 GrapeCity, inc. All rights reserved.


