Rybbon Getting Started & Marketo Integration Guide System Requirement: Marketo Standard Edition or higher. The integration described in this document is not supported by Marketo Spark Edition. 1. Embedding Rybbon Gifts into Marketo with My Tokens .............................. 2 1.1. Create A ‘Send Via Marketo’ Campaign ........................................................... 2 1.2. Create A Marketo My Token for your gifting campaign. ........................................ 3 1.3. Using a Rybbon Gift My Token ...................................................................... 6 1.4. Testing Emails and Campaigns With Rybbon Gifts ............................................... 7 1.5. Changing the Lead fields used for Recipient tracking. ......................................... 8 1.6. Known Limitations................................................................................... 10 2. Logging Gift Claims as Lead Activity .................................................... 11 2.1. Create an API Only User Role in Marketo ........................................................ 11 2.2. Create an API Only User in Marketo .............................................................. 13 2.3. Creating custom service in Marketo .............................................................. 14 2.4. Copy Marketo credentials for API acces to Rybbon Settings .................................. 16 2.5. Viewing and Using Rybbon Lead Activity ........................................................ 19
Transcript
Rybbon Getting Started & Marketo Integration Guide
System Requirement: Marketo Standard Edition or higher. The integration described in this
document is not supported by Marketo Spark Edition.
1. Embedding Rybbon Gifts into Marketo with My Tokens .............................. 2
1.1. Create A ‘Send Via Marketo’ Campaign ........................................................... 2
1.2. Create A Marketo My Token for your gifting campaign. ........................................ 3
1.3. Using a Rybbon Gift My Token ...................................................................... 6
1.4. Testing Emails and Campaigns With Rybbon Gifts ............................................... 7
1.5. Changing the Lead fields used for Recipient tracking. ......................................... 8
1.6. Known Limitations ................................................................................... 10
2. Logging Gift Claims as Lead Activity .................................................... 11
2.1. Create an API Only User Role in Marketo ........................................................ 11
2.2. Create an API Only User in Marketo .............................................................. 13
2.3. Creating custom service in Marketo .............................................................. 14
2.4. Copy Marketo credentials for API acces to Rybbon Settings .................................. 16
2.5. Viewing and Using Rybbon Lead Activity ........................................................ 19
1. Embedding Rybbon Gifts into Marketo with My Tokens
1.1. Create A ‘Send Via Marketo’ Campaign
Rybbon allows you to organize, customize and track gift deliveries by campaign. A Rybbon
Campaign can represent:
1. An on-going marketing program. Example - a customer referral program
2. A one-time project. Example – thanking everyone that responded to a customer
feedback survey.
Tip: We recommend organizing Rybbon Campaigns to match the Marketo Programs and Smart
Campaigns that will be sending the gifts. This is a simple and clean way to keep your gift
deliveries and costs organized.
To create a Rybbon Campaign, you can either select a gift and click on ‘Create a Campaign’
or, go to Campaigns and click Create New Campaign. Then, select ‘Create and Send Via
Marketo’
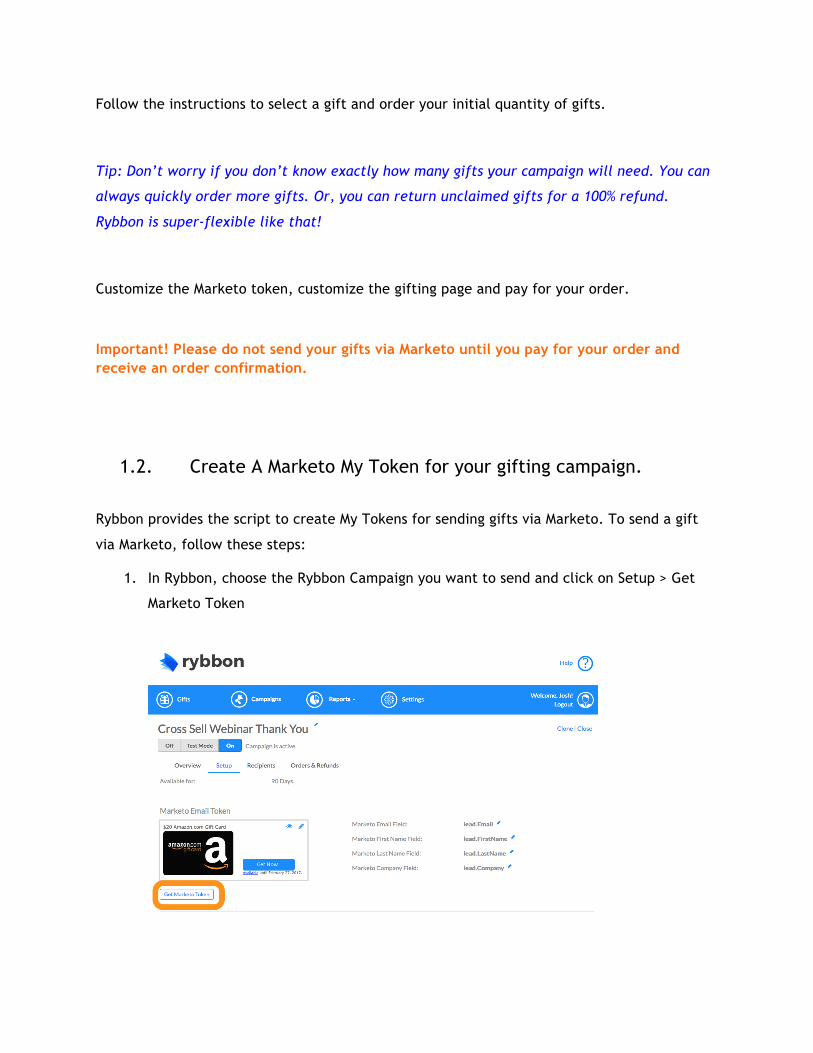
Follow the instructions to select a gift and order your initial quantity of gifts.
Tip: Don’t worry if you don’t know exactly how many gifts your campaign will need. You can
always quickly order more gifts. Or, you can return unclaimed gifts for a 100% refund.
Rybbon is super-flexible like that!
Customize the Marketo token, customize the gifting page and pay for your order.
Important! Please do not send your gifts via Marketo until you pay for your order and receive an order confirmation.
1.2. Create A Marketo My Token for your gifting campaign.
Rybbon provides the script to create My Tokens for sending gifts via Marketo. To send a gift
via Marketo, follow these steps:
1. In Rybbon, choose the Rybbon Campaign you want to send and click on Setup > Get
Marketo Token
2. Choose the Token option – HTML or Text Only. Most marketers use HTML emails and
should choose the HTML option. If you want to send gifts in text only emails, select
the Text Only option.
3. Click and copy the script provided to the clipboard.
4. In Marketo, create a My Token of the type ‘Email Script’. We recommend creating it
on the folder or Program that contains the Smart Campaign that will be sending the
gift emails.
5. Edit the Token and paste the script into token editor.
6. Important: Under Standard Objects, select Lead, then select Company Name, Email
Address, First Name and Last Name. Save the Token.
a. Note: If you have a large number of fields, it may take several seconds, even a
couple of minutes for the list of objects to load. You can also try using a
different browse like Chrome or Firefox.
b. Note: If you want Recipient information to come from a different set of fields,
you can customize the fields used by going to Settings > Marketo Settings. See
the section 1.3.
7. Click Save to close this dialog. Click Save again on the My Tokens list.
1.3. Using a Rybbon Gift My Token
1. Rybbon Tokens can be embedded in any Local Email Asset (i.e. emails you create
under a Program in Marketing Activities).
2. Edit Draft a local email asset.
3. Click Insert Token on the toolbar and find or search for the Rybbon token you want to
embed. Leave Default Value blank – it is not used.
4. Save and Approve the email asset.
5. Send the Email using Batch or Triggered campaigns
6. Note: It is important to create the email asset and the campaign that sends the email
within the hierarchy under the program or folder where the My Token is defined.
1.4. Testing Emails and Campaigns With Rybbon Gifts
1. You run Rybbon gift campaigns in test mode to test Marketo emails and campaign
flows.
2. Go to the campaign and set the mode to ‘Test Mode’. Rybbon will deliver a dummy
gift any time a gift is claimed while the campaign is in this mode.
3. You can use Marketo’s “Send Sample” functionality to test what the Rybbon tokens
will look like when the email goes out.
a. A Lead must be selected for the token to work.
4. Remember to claim gifts from all test emails so that there are not outstanding
claims.
5. Put the campaign back in ‘On’ mode before sending out actual gifts.
1.5. Changing the Lead fields used for Recipient tracking.
Rybbon tokens use the following standard Marketo objects to track and deliver gifts sent to a
Marketo lead record:
Recipient Information Marketo – Friendly Label Marketo – Object Name
Recipient Email Email Address lead.Email
Recipient First Name First Name lead.FirstName
Recipient Last Name Last Name lead.LastName
Recipient Company Name Company Name lead.Company
You can customize Rybbon to use a different set of fields. To do this, simply visit Settings >
Marketo Settings and make changes:
Using the above method will change the settings for ALL Rybbon gift campaigns. In case you
need to use different fields for just a specific gift campaign, you can do so in the Customer
Marketo Email Token screen in campaign setup -
Important: You MUST update the Marketo MyTokens that were created before you changed the field mapping. Click on ‘Send Via Marketo’ to grab the updated token script and past it into the Marketo’s ‘Edit Script Token’ box.
1.6. Known Limitations
1. Marketo Spark edition does not support Email Script tokens and REST API access.
Contact Rybbon Customer Care for options on how to send Rybbon gifts via Marketo
Spark edition.
2. Marketo Sales Insight does not support processing of Email Script tokens in emails sent
from Salesforce.com. Marketo suggested workaround is to use the Request Campaign
functionality in Sales Insight to send the emails via a Smart Campaign:
a. https://nation.marketo.com/thread/5331
b. https://docs.marketo.com/display/public/DOCS/Request+a+Marketo+Campaig
n+for+a+Lead+in+Salesforce1
3. Marketo Social Promotions (Sweepstakes and Referral) fulfillment emails do not
support processing of Email Script tokens. The workaround is to use a Smart Campaign
and program status to send fulfillment emails.
2. Logging Gift Claims as Lead Activity Optionally, you can connect Rybbon to Marketo via Marketo’s REST API to enable Rybbon to
log gift redemptions as Marketo lead activity.
Connecting Rybbon to Marketo via Marketo’s REST API requires a one-time setup. Follow the
following four steps using a Marketo account with Admin role privileges.
1. Create an API Only user Role in Marketo
2. Create API Only user in Marketo
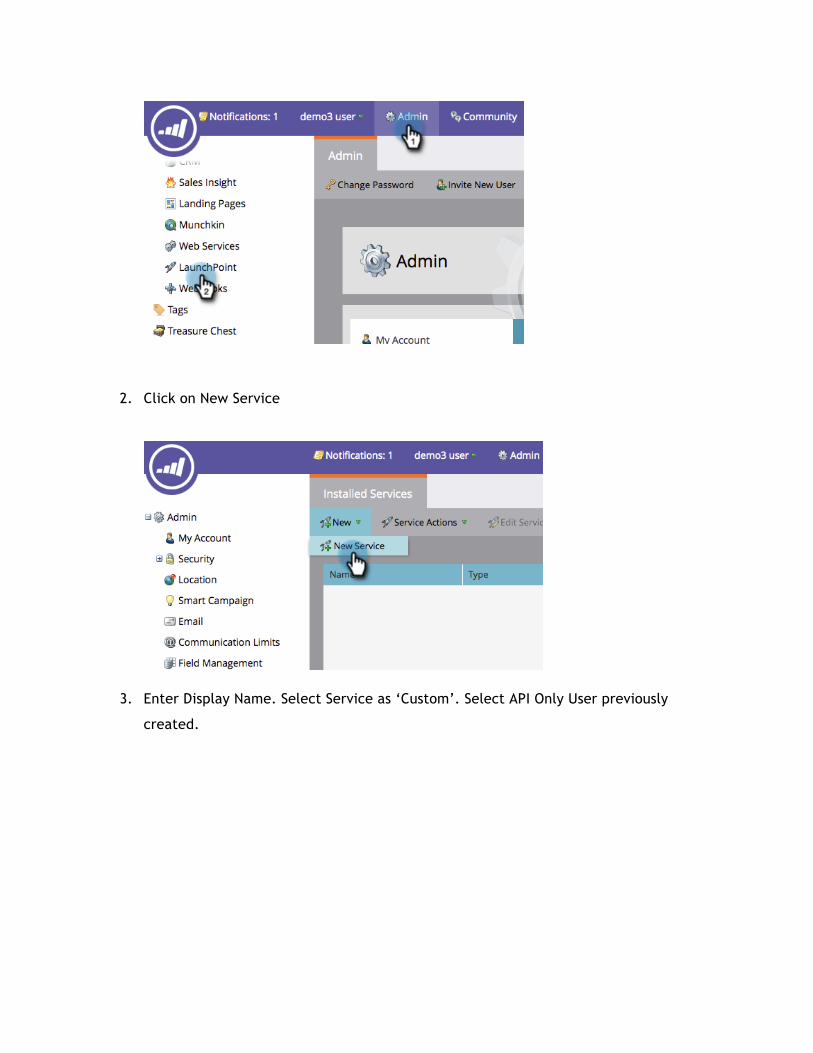
3. Create Custom Service in Marketo
4. Copy Marketo custom service parameters to Rybbon Marketo Settings
Note: If you are using multiple Marketo Lead Partitions, make sure the API user has access
to only one lead partition. Logging lead activity to multiple partitions is best managed
with multiple Rybbon accounts.
2.1. Create an API Only User Role in Marketo
Note: Instructions for this step are also available under