1 En S-ES21CR-K S-ES21CR-T Operating Instructions Speaker System WHAT’S IN THE BOX BEFORE USE Thank you for buying this Pioneer product. Please read through these operating instructions before using your speaker system to optimize performance. • This speaker system has an impedance of 8 Ω, and should be connected only to an amplifier designed with a load impedance of 8 Ω (the amplifier’s speaker output connector should clearly be labeled “8 Ω“). • In order to prevent damage to the speaker system resulting from input overload, please observe the following precautions: -Be sure to turn the connected devices off and remove the power cord from the wall outlet beforehand when changing the connection or installation method. -Do not use excessive amplifier volume if using a tone control to emphasize high or low frequencies. • Do not use the speaker to output distorted sound for long periods of time. This can result in a fire hazard. INSTALLATION PRECAUTIONS • Do not install these units near a stove or other heating appliance, or put them in a place exposed to the sun. Such locations may cause the cabinet to change color and the speaker system to break down. • Do not place the speaker on an unstable surface, as doing so may cause the speaker to fall and cause damage or bodily injury. CENTER SPEAKER • Do not attach the center speaker to the wall or ceiling. It may fall off and cause injury. • This speaker system is magnetically shielded. However, depending on the installation location, color distortion may occur if the speaker system is installed extremely close to the screen of a television set. If this happens, turn off the television, then turn it on again after 15 min to 30 min. If the problem persists, place the speaker system away from the television set. • Do not install your speakers overhead on the ceiling or wall. The grille is designed to be detachable, and as such it may fall and cause damage or personal injury if installed overhead. SURROUND SPEAKERS • The surround speakers are not magnetically shielded and so should not be placed near a TV or monitor, as the interaction of magnetic materials can cause distortion of the colors on your TV screen. Magnetic storage media (such as floppy discs and tape or video cassettes) should also not be kept close to these speakers. PLACEMENT AND FINE TUNING CENTER SPEAKER The speaker should be positioned below the TV. For best results align the front of the speaker with the front of the TV. If the speaker is placed under the TV and very close to the floor, then tilting upwards may be beneficial. Do not place the center speaker on top of TV, the speaker may fall from the TV due to external shocks such as earthquakes, endangering those nearby or damaging the speaker. Surround speakers x 2 Speaker cords x 3 Center speaker x 1 Non-skid pads x 12 (4 pcs x 3 sheets) Operating instructions Center (2 m) Surround right / left (10 m)
Transcript
S-ES21CR-KS-ES21CR-T
Operating Instructions
Speaker System
S-ES21CR_En.fm 1 ページ 2013年6月26日 水曜日 午前9時49分
WHAT’S IN THE BOX
BEFORE USEThank you for buying this Pioneer product. Please read through these operating instructions before using your speaker system to optimize performance.
• This speaker system has an impedance of 8 Ω, and should be connected only to an amplifier designed with a load impedance of 8 Ω (the amplifier’s speaker output connector should clearly be labeled “8 Ω“).
• In order to prevent damage to the speaker system resulting from input overload, please observe the following precautions:
-Be sure to turn the connected devices off and remove the power cord from the wall outlet beforehand when changing the connection or installation method.
-Do not use excessive amplifier volume if using a tone control to emphasize high or low frequencies.
• Do not use the speaker to output distorted sound for long periods of time. This can result in a fire hazard.
INSTALLATION PRECAUTIONS• Do not install these units near a stove or other
heating appliance, or put them in a place exposed to the sun. Such locations may cause the cabinet to change color and the speaker system to break down.
• Do not place the speaker on an unstable surface, as doing so may cause the speaker to fall and cause damage or bodily injury.
CENTER SPEAKER• Do not attach the center speaker to the wall or
ceiling. It may fall off and cause injury.
• This speaker system is magnetically shielded. However, depending on the installation location, color distortion may occur if the speaker system is installed extremely close to the screen of a television set.If this happens, turn off the television, then turn it on again after 15 min to 30 min. If the problem persists, place the speaker system away from the television set.
• Do not install your speakers overhead on the ceiling or wall. The grille is designed to be detachable, and as such it may fall and cause damage or personal injury if installed overhead.
SURROUND SPEAKERS• The surround speakers are not magnetically shielded
and so should not be placed near a TV or monitor, as the interaction of magnetic materials can cause distortion of the colors on your TV screen. Magnetic storage media (such as floppy discs and tape or video cassettes) should also not be kept close to these speakers.
PLACEMENT AND FINE TUNING
CENTER SPEAKERThe speaker should be positioned below the TV. For best results align the front of the speaker with the front of the TV. If the speaker is placed under the TV and very close to the floor, then tilting upwards may be beneficial.
Do not place the center speaker on top of TV, the speaker may fall from the TV due to external shocks such as earthquakes, endangering those nearby or damaging the speaker.
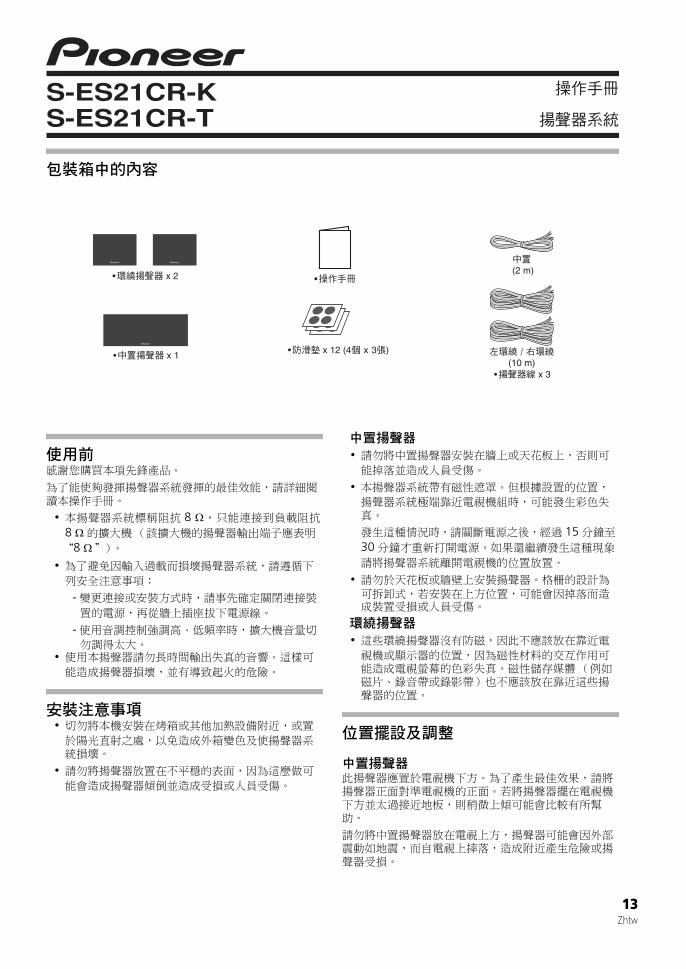
Surround speakers x 2
Speaker cords x 3
Center speaker x 1 Non-skid pads x 12 (4 pcs x 3 sheets)
Operating instructions
Center(2 m)
Surround right / left(10 m)
1En
2En
S-ES21CR_En.fm 2 ページ 2013年6月26日 水曜日 午前9時49分
SURROUND SPEAKERSFor best results the speakers should be positioned at or above ear level. Depending upon your room layout and preferences, the left and right rear speakers should be positioned on the side walls just the rear of the listening position, or on the walls.
STANDARD SURROUND SETUPThis is a standard multichannel surround sound speaker setup for optimal 5.1 channel home theater sound.
NON-SKID PADSIf the center and surround speakers are placed on a hard surface, such as wood or tile place four non-skid pads on the bottom flat surface of the speakers.
MAKING AMPLIFIER SETTINGSBefore connecting the speakers, please read theoperating instructions supplied with your amplifier to select the speaker setting of amplifier :
• CENTER / SURROUND SPEAKERS : SMALL
CONNECTING YOUR SYSTEM
Make sure all equipment is turned off before making any connections.
• Correct wiring of your speakers is essential for achieving the best sound quality. Be careful to ensure proper polarity of connection.
Connect to the speaker terminals on the rear of the amplifier.Connect the red marked speaker cord to the red (+) terminal and the other cord to the black (–) terminal as shown below (for more details, refer to your amplifier instruction manual).
Connect to the speaker terminals on the rear of the speakers.
To connect, press the lever and insert the red marked speaker cord into the red (+) terminal and the other cord into the black (–) terminal as shown below.
After connecting the plugs, pull lightly on the cords to make sure that the ends of the cords are securely connected to the terminals. Poor connections can create noise and interruptions in the sound.
Surround left Surround right
Center
Frontleft
Listening position
Frontright
Subwoofer(not supplied)
Center speaker
Surround speakers
CAUTIONThese speaker terminals carry HAZARDOUS LIVE voltage. To prevent the risk of electric shock when connecting or disconnecting the speaker cables, disconnect the power cord before touching any uninsulated parts.
D3-4-2-2-3_A1_En
SpeakersAmplifier
Red marked half ofspeaker cord
Other half ofspeaker cord
Black Red
S-ES21CR_En.fm 3 ページ 2013年6月26日 水曜日 午前9時49分
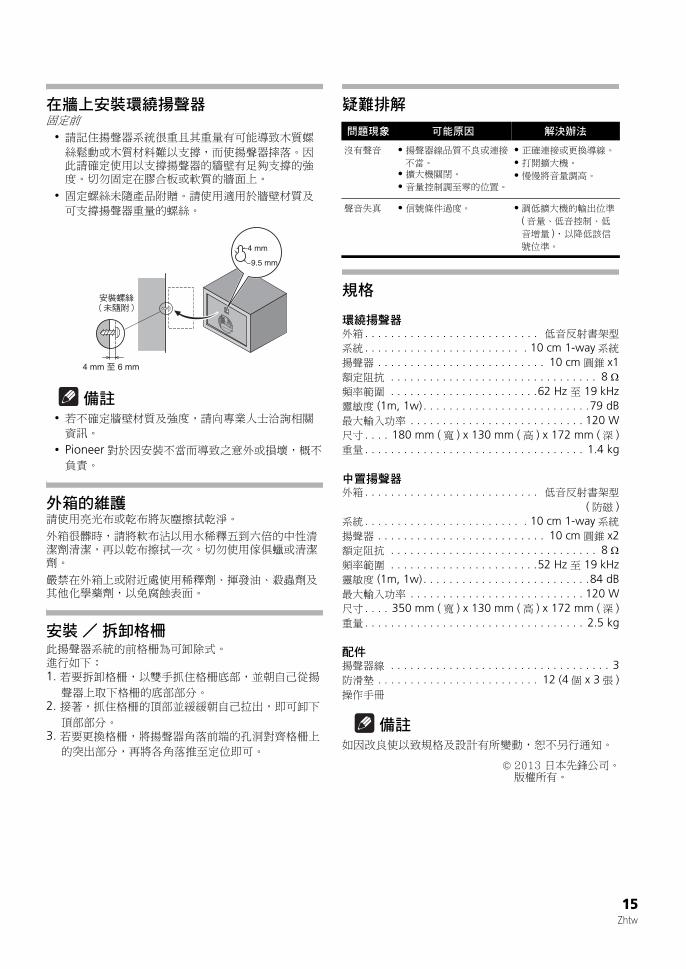
WALL-MOUNTING THE SURROUND SPEAKERSBefore mounting
• Remember that the speaker system is heavy and that its weight could cause the screws to work loose, or the wall material to fail to support it, resulting in the speaker falling. Make sure that the wall you intend to mount the speakers on is strong enough to support them. Do not mount on plywood or soft surface walls.
• Mounting screws are not supplied. Use screws suitable for the wall material and support the weight of the speaker.
• If you are unsure of the quality and strength of the walls, consult a professional for advice.
• Pioneer is not responsible for any accidents or damage that result from improper installation.
CABINET MAINTENANCEUse a polishing cloth or dry cloth to wipe off dust and dirt.When the cabinet is very dirty, clean with a soft cloth dipped in some neutral cleanser diluted five or six times with water, and then wipe again with a dry cloth. Do not use furniture wax or cleaners.Never use thinners, benzine, insecticide sprays and other chemicals on or near the cabinets, since these will corrode the surfaces.
ATTACHING / DETATCHING THE GRILLEThe front grille of this speaker system is removable. Proceed as follows:
1. To detatch the grille, grab it by its bottom with both hands and toward you to separate the bottom part of the grille from the speaker.
2. Next, grab the top part of the grille and gently pull it toward you to remove the top portion.
3. To replace the grille, align the holes in the front of the speaker’s corners with the projections on the grille, and push each of the corners into place.
TROUBLESHOOTING
4 mm to 6 mm
4 mm
9.5 mm
Mounting screw(not supplied)
Symptom Possible cause Remedy
No sound • Bad speaker cord or connection.• Amplifier is off.• Volume control is at zero.
• Connect correctly or replace cord.• Turn on amplifier.• Slowly turn up volume.
Sound is distorted.
• Extreme signal condition. • Turn down the amplifier’s output level (volume, bass control, bass boost) to lower the level.
If you want to dispose this product, do not mix it with general household waste. There is a separate collection system for used electronic products in accordance with legislation that requires proper treatment, recovery and recycling.
Private households in the member states of the EU, in Switzerland and Norway may return their used electronic products free of charge to designated collection facilities or to a retailer (if you purchase a similar new one).
For countries not mentioned above, please contact your local authorities for the correct method of disposal.
By doing so you will ensure that your disposed product undergoes the necessary treatment, recovery and recycling and thus prevent potential negative effects on the environment and human health.
K058b_A1_En
5Fr
S-ES21CR-KS-ES21CR-T
Mode d’emploi
Enceintes acoustiques
CONTENU DE L’EMBALLAGE
AVANT LA MISE EN SERVICENous vous remercions pour cet achat d’un produit Pioneer.Afin d’optimiser leurs performances, veuillez lire attentivement ce mode d’emploi avant d’utiliser vos enceintes.
• Ce système de haut-parleurs a une impédance de 8 Ω et il doit être raccordé uniquement à un amplificateur conçu pour une impédance de charge de 8 Ω (le connecteur de sortie haut-parleur sur l’amplificateur doit porter clairement la mention “8 Ω”).
• Pour éviter des dégâts causés au système de haut-parleurs par une surchage à l’entrée, veuillez respecter les précautions suivantes :
-Veillez à éteindre les dispositifs raccordés et à débrancher le cordon d’alimentation au niveau de la prise secteur avant de changer les connexions ou la méthode d’installation.
-N’élevez pas excessivement le volume de l’amplificateur si vous utilisez une commande de tonalité pour accentuer les hautes et les basses fréquences.
• N’utilisez pas les enceintes pour fournir des sons distordus pendant longtemps, car ceci pourrait entraîner un incendie.
PRÉCAUTIONS À L’INSTALLATION • N’installez pas ces appareils près d’un poêle ou d’un
autre appareil de chauffage et ne les placez pas en plein soleil, car de tels endroits pourraient décolorer le coffret et provoquer une panne du système de haut-parleurs.
• Ne placez pas les enceintes sur une surface instable, car elles pourraient tomber et provoquer des blessures corporelles.
ENCEINTE CENTRALE• N’attachez pas l’enceinte centrale sur un mur ou au
plafond, car elle pourrait provoquer des blessures en tombant.
• Ce système de haut-parleurs est magnétiquement blindé. Toutefois, selon l’endroit de son installation, il peut provoquer une distorsion des couleurs s’il est installé tout près de l’écran d’un téléviseur. Si c’est le cas, éteignez le téléviseur, puis allumez-le à nouveau après 15 à 30 minutes. Si le phénomène persiste, écartez le système de haut-parleurs par rapport au téléviseur.
• N’installez pas les enceintes en hauteur, au plafond ou sur un mur. Comme leur grille est détachable, elle pourrait tomber et provoquer des dégâts ou des blessures.
ENCEINTES SURROUND (D’AMBIANCE)• Les enceintes surround ne sont pas
magnétiquement blindées et, par conséquent, ne les placez pas près d’un téléviseur ou d’un moniteur, car l’interaction des matériaux magnétiques peut provoquer une distorsion des couleurs sur l’écran de votre téléviseur. Ne placez pas non plus des supports de stockage magnétique, tels que disquettes, bandes et cassettes vidéo, près de vos enceintes.
EMPLACEMENT ET RÉGLAGE PRÉCIS
ENCEINTE CENTRALEL’enceinte doit être placée sous le téléviseur. Pour obtenir d’excellents résultats, alignez l’avant de l’enceinte et l’avant du téléviseur. Si l’enceinte est placée sous le téléviseur et tout près du plancher, il est préférable de l’incliner vers le haut.
Ne placez pas l’enceinte centrale sur le téléviseur, car elle pourrait en tomber par suite de chocs externes, tels qu’un séisme, ce qui pourrait provoquer des blessures et endommager l’enceinte.
Enceintes Surround x 2
Cordons d’enceinte x 3
Enceinte centrale x 1 Coussinets antidérapants x 12 (4 pièces x 3 feuilles)
Mode d’emploi
Centrale(2 m)
Surround droite / gauche(10 m)
S-ES21CR_Fr.fm 5 ページ 2013年6月26日 水曜日 午前11時2分
6Fr
ENCEINTES SURROUND Pour obtenir d’excellents résulats, ces enceintes doivent être disposées au niveau des oreilles ou au-dessus. En fonction de l’agencement de votre local ou de vos préférences, les enceintes arrière gauche et droite devraient être positionnées sur les parois latérales juste derrière la position d’écoute ou sur les murs.
AGENCEMENT SURROUND STANDARDVoici l’agencement standard des enceintes surround multicanaux pour un son Home cinema 5.1 canaux optimal.
COUSSINETS ANTIDÉRAPANTSSi les enceintes centrale et surround sont posées sur une surface dure, comme sur du bois ou des carreaux par exemple, placez quatre coussinets antidérapants sur le fond plat des enceintes.
RÉGLAGES DE L’AMPLIFICATEURAvant de raccorder les enceintes, veuillez lire le mode d’emploi fourni avec votre amplificateur pour effectuer les réglages d’enceintes sur l’amplificateur.
• ENCEINTES CENTRALE / SURROUND : PETITES
BRANCHEMENT DU SYSTÈME
Assurez-vous que tous les équipements sont éteints avant d’effectuer la moindre connexion.
• Un câblage correct de vos enceintes est essentiel pour bénéficier de la meilleure qualité sonore. Veillez à respecter la polarité des connexions.
Raccordez sur les bornes d’enceintes à l’arrière de l’amplificateur.Branchez le cordon d’enceinte rouge sur la borne rouge (+) et l’autre cordon sur la borne noire (–) comme illustré ci-après. (Pour plus de détails, reportez-vous au mode d’emploi de votre amplificateur.)
Raccordez les bornes d’enceintes sur l’arrière des enceintes.Pour la connexion, appuyez sur le levier et insérez le cordon d’enceinte rouge dans la borne rouge (+) et l’autre cordon dans la borne noire (–), comme illustré ci-après.
Après avoir branché les fiches, tirez légèrement sur les cordons pour vérifier si les bouts des cordons sont fermement immobilisés par les bornes. De mauvaises connexions peuvent être à l’origine de bruits ou d’interruptions des sons.
Surround gauche Surround droit
Centre
Avantgauche
Position d’écoute
Avant droit
Caissonde basses(non fourni)
Enceinte centrale
Enceintes Surround
ATTENTIONLes bornes des haut-parleurs sont sous une tension ACTIVE DANGEREUSE. Pour éviter tout risque de décharge électrique lors du branchement et du débranchement des câbles de haut-parleur, débranchez le cordon d’alimentation avant de toucher des parties non isolées.
D3-4-2-2-3_A1_Fr
EnceintesAmplificateur
Moitié rouge du cordon d’enceinte
Autre moitié du cordon d’enceinte
Noir Rouge
Remarque
S-ES21CR_Fr.fm 6 ページ 2013年6月26日 水曜日 午前11時2分
7Fr
INSTALLATION DES ENCEINTES SURROUND SUR PAROIAvant l’installation
• Sachez que le système de haut-parleurs est pesant. Son poids peut donc faire que les vis se desserrent ou que le matériau de la paroi ne puisse le soutenir, ce qui provoquerait sa chute. Assurez-vous que la paroi sur laquelle vous envisagez d’accrocher les haut-parleurs soit suffisamment solide pour les soutenir. Ne les installez pas sur une paroi en contreplaqué ou dont la surface est peu résistante.
• Des vis de fixation ne sont pas fournies. Utilisez des vis, convenant au matériau de la paroi et capables de soutenir le poids du haut-parleur.
• Si vous hésitez au sujet de la qualité et de la solidité des parois, demandez conseil à un professionnel.
• Pioneer n’est pas responsable en cas d’accident ou de dégâts, résultant d’une installation inappropriée.
ENTRETIEN DU COFFRETUtilisez un tissu de polissage ou un linge sec pour enlever la saleté et les poussières.
Si le coffret est très sale, nettoyez-le avec un linge doux trempé dans un produit de nettoyage neutre, dilué dans cinq à six fois son volume d’eau, puis essuyez-le avec un linge sec. N’utilisez pas de produit de nettoyage ou de cire pour meubles.
N’utilisez jamais de diluant, benzine, insecticide en atomiseur ou autres produits chimiques sur ou à proximité des coffrets, car ils pourraient endommager leurs surfaces.
FIXATION / DÉPOSE DE LA GRILLELa grille avant de ce haut-parleur est amovible.
Procédez comme suit :
1. Pour détacher la grille, saisissez-la des deux mains à sa base et tirez vers vous pour écarter la partie inférieure de la grille du haut-parleur.
2. Ensuite, saisissez la partie supérieure de la grille et tirez doucement vers vous pour détacher le haut.
3. Pour replacer la grille, alignez les orifices sur l’avant des quatre coins du haut-parleur avec les projections de la grille et enfoncez chaque coin en place.
GUIDE DE DÉPANNAGE
4 mm à 6 mm
4 mm
9,5 mm
Vis de fixation(non fournies)
Remarque
Symptômes Causes possibles Correction
Absence de son
• Cordon et/ou connexion inappropriés du cordon d’enceinte.• L’amplificateur est éteint.• La commande du volume est réglée sur zéro.
• Connectez correctement ou remplacez le cordon.• Mettez l’amplificateur sous tension.• Elevez lentemnent le volume sonore.
Le son est distordu.
• Mauvaise qualité des signaux.
• Réduisez le niveau de sortie de l’amplificateur (volume, commande des graves, bass boost).
Si vous souhaitez vous débarrasser de cet appareil, ne le mettez pas à la poubelle avec vos ordures ménagères. Il existe un système de collecte séparé pour les appareils électroniques usagés, qui doivent être récupérés, traités et recyclés conformément à la législation.
Les habitants des états membres de l’UE, de Suisse et de Norvège peuvent retourner gratuitement leurs appareils électroniques usagés aux centres de collecte agréés ou à un détaillant (si vous rachetez un appareil similaire neuf).
Dans les pays qui ne sont pas mentionnés ci-dessus, veuillez contacter les autorités locales pour savoir comment vous pouvez vous débarrasser de vos appareils.
Vous garantirez ainsi que les appareils dont vous vous débarrassez sont correctement récupérés, traités et recyclés et préviendrez de cette façon les impacts néfastes possibles sur l’environnement et la santé humaine.
K058b_A1_Fr
S-ES21CR_Fr.fm 8 ページ 2013年6月26日 水曜日 午前11時2分
9Ru
S-ES21CR-KS-ES21CR-T
Инструкции по эксплуатации
Aкустическая система
КОМПЛЕКТ ПОСТАВКИ
ПЕРЕД ИСПОЛЬЗОВАНИЕМБлагодарим вас за покупку этого изделия Pioneer. Пожалуйста, ознакомьтесь с настоящей инструкцией по эксплуатации перед использованием акустической системы, чтобы обеспечить ее оптимальное функционирование.
• Номинальное полное сопротивление данной акустической системы составляет 8 Ω. Подсоединяйте акустическую систему только к усилителю с полным сопротивлением нагрузки 8 Ω (на выходном разъеме усилителя на громкоговорители должно быть ясно указано “8 Ω”).
• Во избежание повреждений данной акустической системы от перегрузки, вызванной входным сигналом, соблюдайте следующие предосторожности:
-Всегда при изменении соединений или способа установки обязательно отключайте подсоединенные устройства и отсоединяйте кабель питания от сетевой розетки.
-Не используйте чрезмерную громкость усилителя при использовании регулятора тембра для повышения высоких или низких частот.
• Не допускайте вывод через громкоговоритель искаженного звука в течение длительного периода времени. Это может создавать опасность возгорания.
МЕРЫ ПРЕДОСТОРОЖНОСТИ ПРИ УСТАНОВКЕ
• Не устанавливайте эти устройства рядом с печами или другими нагревательными приборами и не размещайте их в местах, подверженных воздействию солнечного света. Установка в таких местах может вызвать изменение окраски корпуса и повреждения акустической системы.
• Не располагайте колонки на неустойчивых поверхностях, поскольку это может привести к падению колонки, что может причинить ущерб или травмы.
ЦЕНТРАЛЬНЫЙ ГРОМКОГОВОРИТЕЛЬ• Не закрепляйте центральный динамик на стене или потолке. Он может упасть и причинить травмы.
• Данная акустическая система защищена магнитным экранированием. Однако в зависимости от места установки, если акустическая система установлена слишком близко к экрану телевизора, это может вызывать появление цветовых искажений. Если это произойдет, выключите телевизор и включите его снова через 15 – 30 минут. Если проблема сохранится, переместите акустическую систему подальше от телевизора.
• Не устанавливайте динамики над головой на потолке или на стене. Поскольку решетка является съемной по конструкции, при установке над головой она может упасть и причинить ущерб или травмы.
ГРОМКОГОВОРИТЕЛИ ОБЪЕМНОГО ЗВУЧАНИЯ
• Громкоговорители объемного звучания не защищены магнитным экранированием, поэтому их не следует размещать вблизи телевизора или монитора, поскольку взаимовлияние магнитных материалов может вызвать цветовые искажения на экране телевизора. Магнитные носители данных (например, гибкие диски, аудио- и видеокассеты) также не следует держать вблизи этих громкоговорителей.
РАЗМЕЩЕНИЕ И ТОЧНАЯ НАСТРОЙКАЦЕНТРАЛЬНЫЙ ГРОМКОГОВОРИТЕЛЬЭтот громкоговоритель следует размещать под ТВ. Для обеспечения наилучшего результата совместите переднюю поверхность громкоговорителя с плоскостью ТВ. Если громкоговоритель размещен под ТВ очень близко к полу, может быть полезен его поворот вверх.Не помещайте центральный громкоговоритель на телевизоре сверху, поскольку громкоговоритель может упасть с телевизора в случае внешнего воздействия, например при землетрясении, и получить повреждения или подвергнуть опасности находящихся рядом людей.
Громкоговорители объемногозвучания, 2 шт.
Колоночные кабели x 3
Центральныйгромкоговоритель, 1 шт.
Противоскользящиепрокладки x 12 (4 шт. x 3 листа)
Инструкции поэксплуатации
Центральный (2 м)
Объемного звучания (10 м)
S-ES21CR_Ru.fm 9 ページ 2013年6月26日 水曜日 午前11時6分
10Ru
ГРОМКОГОВОРИТЕЛИ ОБЪЕМНОГОЗВУЧАНИЯДля обеспечения наилучшего результата эти громкоговорители следует размещать на уровне уха или выше. В зависимости от планировки используемого помещения и предпочтений левый и правый задние громкоговорители следует размещать на боковых стенах немного сзади места прослушивания или на стенах.
ПРОТИВОСКОЛЬЗЯЩИЕ ПРОКЛАДКИЕсли Центральный громкоговоритель и громкоговорители объемного звучания размещены на твердой поверхности, например, деревянной или кафельной, установите по четыре противоскользящих прокладки на нижних поверхностях громкоговорителей.
ВЫПОЛНЕНИЕ НАСТРОЕК УСИЛИТЕЛЯ МОЩНОСТИПеред подсоединением громкоговорителей, пожалуйста, ознакомьтесь с инструкциями по эксплуатации, прилагаемыми к усилителю, чтобы выбрать настройку для громкоговорителей на усилителе:
• ЦЕНТРАЛЬНЫЙ ГРОМКОГОВОРИТЕЛЬ /ГРОМКОГОВОРИТЕЛЬ ОБЪЕМНОГО ЗВУЧАНИЯ : МАЛЕНЬКИЕ
ПОДКЛЮЧЕНИЕ СИСТЕМЫ
Перед подключением убедитесь, что все оборудование выключено.
• Правильное подключение используемых громкоговорителей необходимо для обеспечения наилучшего качества звучания. Будьте внимательны, обеспечивая соблюдение полярности подключения.
Выполните подсоединение к контактным разъемам для громкоговорителей в задней части усилителя.Подсоединяйте колоночный кабель с красной маркировкой к красному контактному разъему (+), а второй кабель — к черному контактному разъему (–), как это показано ниже (за более подробной информацией обращайтесь к руководству по эксплуатации усилителя).
Выполните подсоединение к контактным разъемам в задней части громкоговорителей.Для подсоединения нажмите рычажок и вставьте колоночный кабель с красной маркировкой в красный разъем (+), а второй кабель — в черный (–) разъем, как это показано ниже.
После подсоединения штепселей слегка потяните за кабели, чтобы убедиться в том, что концы кабелей надежно закреплены в контактных разъемах. Плохой контакт может стать причиной появления шумов и пропадания звука.
Переднийправый
Переднийлевый
Центральный
Точка прослушивания
Низкочастотныйгромкоговоритель(не прилагается)
Объемного звучания правыйОбъемного звучания левый
Центральныйгромкоговоритель
Громкоговорители объемного звучания
Важно
ВНИМАНИЕЕсли система ВКЛЮЧЕНА, прикосновение к контактам громкоговорителей ОПАСНО. Во избежание опасности поражения электрическим током при подключении или отключении кабелей громкоговорителей отсоединяйте кабель питания, прежде чем прикасаться к любым неизолированным деталям.
D3-4-2-2-3_A1_Ru
Провод колоночного кабеля с красной маркировкой
черный красный
Второй проводколоночного кабеля
Замечание
S-ES21CR_Ru.fm 10 ページ 2013年6月26日 水曜日 午前11時6分
11Ru
УСТАНОВКА ГРОМКОГОВОРИТЕЛЕЙ ОБЪЕМНОГО ЗВУЧАНИЯ НА СТЕНЕПеред установкой
• Помните, что акустическая система имеет значительный вес. Под ее тяжестью винты могут ослабеть, а материал стены не выдержать нагрузки, что может привести к падению громкоговорителей. Убедитесь в том, что стена, на которой предполагается крепить громкоговорители, обладает достаточной прочностью, чтобы выдержать их вес. Не устанавливайте громкоговорители на фанерных стенах или стенах с мягким покрытием.
• Монтажные винты не прилагается. Используйте винты, соответствующие материалу стены и способные выдерживать вес громкоговорителя.
• Если вы не уверены в качестве или несущей способности стены, обратитесь за консультацией к специалисту.
• Компания Pioneer не несет ответственности за какие-либо несчастные случаи или ущерб, вызванные неправильной установкой.
УХОД ЗА КОРПУСОМДля удаления грязи или пыли используйте бархотку или сухую ткань. Если корпус сильно загрязнен, очистите его мягкой тканью, смоченной в нейтральном моющем средстве, разбавленном пятью или шестью частями воды, и тщательно отжатой, затем еще раз протрите сухой тканью. Не используйте полироль и моющие средства для мебели.Никогда не используйте для ухода за этим корпусом и рядом с ним разбавители, бензин, инсектицидные аэрозоли и другие химические вещества, так как они могут повредить поверхности.
УСТАНОВКА / СНЯТИЕ РЕШЕТКИПередняя решетка этой акустической системы является съемной.Выполняйте следующую процедуру:1. Чтобы снять решетку, возьмите ее обеими руками за
нижнюю часть и потяните на себя, чтобы отсоединить нижнюю часть решетки от громкоговорителя.
2. Затем возьмите решетку за верхнюю часть и осторожно потяните ее на себя, чтобы отсоединить верхнюю часть решетки.
3. Чтобы снова прикрепить решетку, совместите отверстия по углам в передней части громкоговорителя с выступающими втулками на решетке и нажимом установите каждый угол решетки на место.
УСТРАНЕНИЕ НЕПОЛАДОК
от 4 мм до 6 мм
4 мм
9,5 мм
Крепежный винт(не прилагается)
Замечание
НЕПОЛАДКА ВОЗМОЖНАЯ ПРИЧИНА УСТРАНЕНИЕ
Отсутствие звука • Неисправность кабеля громкоговорителя или соединения.• Усилитель выключен.• Регулятор громкости установлен на нулевой уровень.
Если вы желаете утилизировать данное изделие, не выбрасывайте его вместе с обычным бытовым мусором. Существует отдельная система сбора использованных электронных изделий в соответствии с законодательством, которая предполагает соответствующее обращение, возврат и переработку.
Чacтные клиенты-в странах-членах ЕС, в Швейцарии и Норвегии могут бесплатно возвращать использованные электронные изделия в соответствующие пункты сбора или дилеру (при покупке сходного нового изделия).
В странах, не перечисленных выше, для получения информации о правильных способах утилизации обращайтесь в cooтветcтвующие учреждения.
Поступая таким образом, вы можете быть уверены в том, что утилизируемый продукт будет соответствующим образом обработан, передан в соответствующий пункт и переработан без возможных негативных последствий для окружающей среды и здоровья людей.
K058b_A1_Ru
Примечание:В соответствии со статьей 5 Закона Российской Федерации “О защите прав потребителя” и Указанием Правительства Российской Федерации 720 от 16 июня 1997 года корпорация Pioneer Europe NV устанавливает условие на следующую продолжительность срока службы официально поставляемых на Российский рынок товаров.
Аудио и видеооборудование: 7 лет Переносное аудиооборудование: 6 лет Другое оборудование (наушники, микрофон и т.д.): 5 лет Автомобильная электроника: 6 лет
PIONEER CORPORATION1-1, Shin-ogura, Saiwai-ku, Kawasaki-shi, Kanagawa 212-0031, Japan
Корпорация Пайонир1-1, Син-Огура, Сайвай-ку, г. Кавасаки, префектура Канагава, 212-0031, ЯпонияИмпортер: ООО "ПИОНЕР РУС"125040, Россия, г. Москва, ул. Правды, д.26 Тел.: +7(495) 956-89-01PIONEER ELECTRONICS (USA) INC.P.O. BOX 1540, Long Beach, California 90801-1540, U.S.A. TEL: (800) 421-1404
PIONEER ELECTRONICS OF CANADA, INC.340 Ferrier Street, Unit 2, Markham, Ontario L3R 2Z5, Canada TEL: 1-877-283-5901, 905-479-4411
PIONEER ELECTRONICS DE MEXICO S.A. DE C.V.Blvd.Manuel Avila Camacho 138 10 piso Col.Lomas de Chapultepec, Mexico, D.F. 11000 TEL: 55-9178-4270K002*_B5_Ru
S-ES21CR_Zhtw.fm 16 ページ 2013年6月26日 水曜日 午前11時17分
1En
S-ES21-LR-KS-ES21-LR-T
Operating Instructions
Speaker System
WHAT’S IN THE BOX
BEFORE USEThank you for buying this Pioneer product. Please read through these operating instructions before using your speaker system to optimize performance.
• This speaker system has an impedance of 8 Ω, and should be connected only to an amplifier designed with a load impedance of 8 Ω (the amplifier’s speaker output connector should clearly be labeled “8 Ω“).
• In order to prevent damage to the speaker system resulting from input overload, please observe the following precautions:
-Be sure to turn the connected devices off and remove the power cord from the wall outlet beforehand when changing the connection or installation method.
-Do not use excessive amplifier volume if using a tone control to emphasize high or low frequencies.
• Do not use the speaker to output distorted sound for long periods of time. This can result in a fire hazard.
INSTALLATION PRECAUTIONS• Do not install these units near a stove or other
heating appliance, or put them in a place exposed to the sun. Such locations may cause the cabinet to change color and the speaker system to break down.
• Do not attach the front speakers to the wall or ceiling. It may fall off and cause injury.
• Placing the stand on an unstable surface can be dangerous. Be sure to place it on a flat, firm surface.
• This speaker system is magnetically shielded. However, depending on the installation location, color distortion may occur if the speaker system is installed extremely close to the screen of a television set.
If this happens, turn off the television, then turn it on again after 15 min to 30 min. If the problem persists, place the speaker system away from the television set.
• Do not install your speakers overhead on the ceiling or wall. The grille is designed to be detachable, and as such it may fall and cause damage or personal injury if installed overhead.
• Do not place heavy or large objects on top of the speaker. Doing so could provoke the speaker to fall, causing damages or bodily injury.
PLACEMENT AND FINE TUNINGFor best results the speakers should be separated a distance approximately equal to the listening distance. Angling the speakers inward towards the listener will improve the image stability for non-central listeners. Close proximity to a side or rear wall will enhance the midbass performance, although too close (particularly a corner location) and the bass may be unnaturally high and image performance may be degraded.
Front speaker x 2
Speaker cords x 2
Front Grilles x 2
Operating instructions
S-ES21-LR.fm 1 ページ 2013年7月18日 木曜日 午前9時25分
2En
STANDARD SURROUND SETUPThis is a standard multichannel surround sound speaker setup for optimal 5.1 channel home theater sound.
MAKING AMPLIFIER SETTINGSBefore connecting the speakers, please read theoperating instructions supplied with your amplifier to select the speaker setting of amplifier :
• FRONT SPEAKERS : LARGE
CONNECTING YOUR SYSTEM
Make sure all equipment is turned off before making any connections.
• Correct wiring of your speakers is essential for achieving the best sound quality. Be careful to ensure proper polarity of connection.
Connect to the speaker terminals on the rear of the amplifier.Connect the red marked speaker cord to the red (+) terminal and the other cord to the black (–) terminal as shown below (for more details, refer to your amplifier instruction manual).
After connecting the plugs, pull lightly on the cords to make sure that the ends of the cords are securely con-nected to the terminals. Poor connections can create noise and interruptions in the sound.
Connect to the speaker terminals on the rear of the speakers.Unscrew the terminals on the speaker and insert the red marked speaker cord into the red (+) terminal and the other cord into the black (–) terminal as shown below.
SECURING THE FRONT SPEAKERS• Pass a commercially-available reinforced string
through the plastic catch to securely support the speaker to the wall. Be sure that the wall to which you fasten the speaker is strong enough to support the weight of the speaker. After fastening the speaker, make sure that it does not fall over.
• The speaker can incur damage in the event of a fall.• Do not attach the plastic catch directly to the wall. It
should only be used in conjunction with reinforced string to prevent the speaker from falling.
Pass and tie two reinforced strings through the plastic catch, and fasten the speaker to the wall as shown above.
• If you are unsure of the quality and strength of the walls, consult a professional for advice.
• Pioneer is not responsible for any accidents or damage that result from improper installation.
Surround left Surround right
Center
Frontleft
Listening position
Frontright
Subwoofer(not supplied)
CAUTIONThese speaker terminals carry HAZARDOUS LIVE voltage. To prevent the risk of electric shock when connecting or disconnecting the speaker cables, disconnect the power cord before touching any uninsulated parts.
D3-4-2-2-3_A1_En
SpeakersAmplifier
Red marked half of speaker cord
Other half of speaker cord
Black Red
Plastic catchReinforced strings
Backside of speaker
S-ES21-LR.fm 2 ページ 2013年7月18日 木曜日 午前9時25分
3En
CABINET MAINTENANCEUse a polishing cloth or dry cloth to wipe off dust and dirt.When the cabinet is very dirty, clean with a soft cloth dipped in some neutral cleanser diluted five or six times with water, and then wipe again with a dry cloth. Do not use furniture wax or cleaners.Never use thinners, benzine, insecticide sprays and other chemicals on or near the cabinets, since these will corrode the surfaces.
ATTACHING / DETATCHING THE GRILLEThe front grille of this speaker system is removable. Proceed as follows:1. To detatch the grille, grab it by its bottom with both
hands and toward you to separate the bottom part of the grille from the speaker.
2. Next, grab the top part of the grille and gently pull it toward you to remove the top portion.
3. To replace the grille, align the holes in the front of the speaker’s corners with the projections on the grille, and push each of the corners into place.
TROUBLESHOOTINGSymptom Possible cause Remedy
No sound • Bad speaker cord or connection.• Amplifier is off.• Volume control is at zero.
• Connect correctly or replace cord.• Turn on amplifier.• Slowly turn up volume.
Sound is distorted.
• Extreme signal condition. • Turn down the amplifier’s output level (volume, bass control, bass boost) to lower the level.
If you want to dispose this product, do not mix it with general household waste. There is a separate collection system for used electronic products in accordance with legislation that requires proper treatment, recovery and recycling.
Private households in the member states of the EU, in Switzerland and Norway may return their used electronic products free of charge to designated collection facilities or to a retailer (if you purchase a similar new one).
For countries not mentioned above, please contact your local authorities for the correct method of disposal.
By doing so you will ensure that your disposed product undergoes the necessary treatment, recovery and recycling and thus prevent potential negative effects on the environment and human health.
K058b_A1_En
S-ES21-LR.fm 4 ページ 2013年7月18日 木曜日 午前9時25分
5Fr
S-ES21-LR-KS-ES21-LR-T
Mode d’emploi
Enceintes acoustiques
CONTENU DE L’EMBALLAGE
AVANT LA MISE EN SERVICENous vous remercions pour cet achat d’un produit Pioneer.Afin d’optimiser leurs performances, veuillez lire attentivement ce mode d’emploi avant d’utiliser vos enceintes.
• Ce système de haut-parleurs a une impédance de 8 Ω et il doit être raccordé uniquement à un amplificateur conçu pour une impédance de charge de 8 Ω (le connecteur de sortie haut-parleur sur l’amplificateur doit porter clairement la mention “8 Ω”).
• Pour éviter des dégâts causés au système de haut-parleurs par une surchage à l’entrée, veuillez respecter les précautions suivantes :
-Veillez à éteindre les dispositifs raccordés et à débrancher le cordon d’alimentation au niveau de la prise secteur avant de changer les connexions ou la méthode d’installation.
-N’élevez pas excessivement le volume de l’amplificateur si vous utilisez une commande de tonalité pour accentuer les hautes et les basses fréquences.
• N’utilisez pas les enceintes pour fournir des sons distordus pendant longtemps, car ceci pourrait entraîner un incendie.
PRÉCAUTIONS À L’INSTALLATION • N’installez pas ces appareils près d’un poêle ou d’un
autre appareil de chauffage et ne les placez pas en plein soleil, car de tels endroits pourraient décolorer le coffret et provoquer une panne du système de haut-parleurs.
• Ne fixez pas les enceintes avant sur un mur ou au plafond, car elles pourraient causer des blessures en tombant.
• Placez le support sur une surface instable peut être dangereux. Veillez à le placer sur une surface plate et ferme.
• Ce système de haut-parleurs est magnétiquement blindé. Toutefois, selon l’endroit de son installation, il peut provoquer une distorsion des couleurs s’il est installé tout près de l’écran d’un téléviseur. Si c’est le cas, éteignez le téléviseur, puis allumez-le à nouveau après 15 à 30 minutes. Si le phénomène persiste, écartez le système de haut-parleurs par rapport au téléviseur.
• N’installez pas les enceintes en hauteur, au plafond ou sur un mur. Comme leur grille est détachable, elle pourrait tomber et provoquer des dégâts ou des blessures.
• Ne placez pas de grands objets pesants sur le dessus des enceintes, car ceci pourrait provoquer leur chute et causer des blessures et des dégâts.
EMPLACEMENT ET RÉGLAGE PRÉCISPour obtenir d’excellents résultats, les enceintes doivent être séparées d’une distance presque égale à celle de la position d’écoute. Orienter les enceintes vers l’intérieur et vers l’auditeur améliorera la stabilité de l’image sonore pour les auditeurs non centraux.Etre à proximité d’une paroi latérale ou arrière améliore les performances du bas médium, mais une trop grande proximité (surtout dans les coins) risque de donner des graves artificiellement hauts et de dégrader les performances de l’image sonore.
Enceinte avant x 2
Cordons d’enceinte x 2
Grille avant x 2
Mode d’emploi
S-ES21-LR_Fr.fm 5 ページ 2013年7月18日 木曜日 午前10時35分
6Fr
AGENCEMENT SURROUND STANDARDVoici l’agencement standard des enceintes surround multicanaux pour un son Home cinema 5.1 canaux optimal.
RÉGLAGES DE L’AMPLIFICATEURAvant de raccorder les enceintes, veuillez lire le mode d’emploi fourni avec votre amplificateur pour effectuer les réglages d’enceintes sur l’amplificateur.
• ENCEINTES AVANT : GRANDES
BRANCHEMENT DU SYSTÈME
Assurez-vous que tous les équipements sont éteints avant d’effectuer la moindre connexion.
• Un câblage correct de vos enceintes est essentiel pour bénéficier de la meilleure qualité sonore. Veillez à respecter la polarité des connexions.
Raccordez sur les bornes d’enceintes à l’arrière de l’amplificateur.Branchez le cordon d’enceinte rouge sur la borne rouge (+) et l’autre cordon sur la borne noire (–) comme illustré ci-après. (Pour plus de détails, reportez-vous au mode d’emploi de votre amplificateur.)
Après avoir branché les fiches, tirez légèrement sur les cordons pour vérifier si les bouts des cordons sont fermement immobilisés par les bornes. De mauvaises connexions peuvent être à l’origine de bruits ou d’interruptions des sons.
Raccordez les bornes d’enceintes sur l’arrière des enceintes.Dévissez les bornes de l’enceinte et insérez le cordon d’enceinte rouge dans la borne rouge (+) et l’autre cordon dans la borne noire (–), comme illustré ci-après.
FIXATION DES ENCEINTES AVANT• Faites passer un cordon renforcé, disponible dans le
commerce, par l’attache en plastique pour fixer solidement l’enceinte sur le mur. Assurez-vous que la paroi sur laquelle l’enceinte sera attachée est suffisamment solide pour supporter son poids. Après avoir fixé l’enceinte, assurez-vous qu’elle ne se renverse pas.
• L’enceinte risque d’être endommagée si elle tombe.
• Ne fixez pas directement l’attache en plastique sur le mur. Elle doit être utilisée avec un cordon renforcé pour éviter une chute de l’enceinte.
Faites passer et liez les deux cordons renforcés par l’attache en plastique, puis fixez l’enceinte sur le mur comme illustré ci-dessus.
• Si vous hésitez au sujet de la qualité et de la solidité des parois, demandez conseil à un professionnel.
• Pioneer n’est pas responsable en cas d’accident ou de dégâts, résultant d’une installation inappropriée.
Surround gauche Surround droit
Centre
Avantgauche
Position d’écoute
Avant droit
Caissonde basses(non fourni)
ATTENTIONLes bornes des haut-parleurs sont sous une tension ACTIVE DANGEREUSE. Pour éviter tout risque de décharge électrique lors du branchement et du débranchement des câbles de haut-parleur, débranchez le cordon d’alimentation avant de toucher des parties non isolées.
D3-4-2-2-3_A1_Fr
Remarque
EnceintesAmplificateur
Moitié rouge du cordon d’enceinte
Autre moitié du cordon d’enceinte
Noir Rouge
Attache en plastiqueCordons renforcés
Arrière de l’enceinte
Remarque
S-ES21-LR_Fr.fm 6 ページ 2013年7月18日 木曜日 午前10時35分
7Fr
ENTRETIEN DU COFFRETUtilisez un tissu de polissage ou un linge sec pour enlever la saleté et les poussières.
Si le coffret est très sale, nettoyez-le avec un linge doux trempé dans un produit de nettoyage neutre, dilué dans cinq à six fois son volume d’eau, puis essuyez-le avec un linge sec. N’utilisez pas de produit de nettoyage ou de cire pour meubles.
N’utilisez jamais de diluant, benzine, insecticide en atomiseur ou autres produits chimiques sur ou à proximité des coffrets, car ils pourraient endommager leurs surfaces.
FIXATION / DÉPOSE DE LA GRILLELa grille avant de ce haut-parleur est amovible.
Procédez comme suit :
1. Pour détacher la grille, saisissez-la des deux mains à sa base et tirez vers vous pour écarter la partie inférieure de la grille du haut-parleur.
2. Ensuite, saisissez la partie supérieure de la grille et tirez doucement vers vous pour détacher le haut.
3. Pour replacer la grille, alignez les orifices sur l’avant des quatre coins du haut-parleur avec les projections de la grille et enfoncez chaque coin en place.
GUIDE DE DÉPANNAGESymptômes Causes possibles Correction
Absence de son
• Cordon et/ou connexion inappropriés du cordon d’enceinte.• L’amplificateur est éteint.• La commande du volume est réglée sur zéro.
• Connectez correctement ou remplacez le cordon.• Mettez l’amplificateur sous tension.• Elevez lentemnent le volume sonore.
Le son est distordu.
• Mauvaise qualité des signaux.
• Réduisez le niveau de sortie de l’amplificateur (volume, commande des graves, bass boost).
Si vous souhaitez vous débarrasser de cet appareil, ne le mettez pas à la poubelle avec vos ordures ménagères. Il existe un système de collecte séparé pour les appareils électroniques usagés, qui doivent être récupérés, traités et recyclés conformément à la législation.
Les habitants des états membres de l’UE, de Suisse et de Norvège peuvent retourner gratuitement leurs appareils électroniques usagés aux centres de collecte agréés ou à un détaillant (si vous rachetez un appareil similaire neuf).
Dans les pays qui ne sont pas mentionnés ci-dessus, veuillez contacter les autorités locales pour savoir comment vous pouvez vous débarrasser de vos appareils.
Vous garantirez ainsi que les appareils dont vous vous débarrassez sont correctement récupérés, traités et recyclés et préviendrez de cette façon les impacts néfastes possibles sur l’environnement et la santé humaine.
K058b_A1_Fr
S-ES21-LR_Fr.fm 8 ページ 2013年7月18日 木曜日 午前10時35分
9Ru
S-ES21-LR-KS-ES21-LR-T
Инструкции по эксплуатации
Aкустическая система
КОМПЛЕКТ ПОСТАВКИ
ПЕРЕД ИСПОЛЬЗОВАНИЕМБлагодарим вас за покупку этого изделия Pioneer. Пожалуйста, ознакомьтесь с настоящей инструкцией по эксплуатации перед использованием акустической системы, чтобы обеспечить ее оптимальное функционирование.
• Номинальное полное сопротивление данной акустической системы составляет 8 Ω. Подсоединяйте акустическую систему только к усилителю с полным сопротивлением нагрузки 8 Ω (на выходном разъеме усилителя на громкоговорители должно быть ясно указано “8 Ω”).
• Во избежание повреждений данной акустической системы от перегрузки, вызванной входным сигналом, соблюдайте следующие предосторожности:
-Всегда при изменении соединений или способа установки обязательно отключайте подсоединенные устройства и отсоединяйте кабель питания от сетевой розетки.
-Не используйте чрезмерную громкость усилителя при использовании регулятора тембра для повышения высоких или низких частот.
• Не допускайте вывод через громкоговоритель искаженного звука в течение длительного периода времени. Это может создавать опасность возгорания.
МЕРЫ ПРЕДОСТОРОЖНОСТИ ПРИ УСТАНОВКЕ
• Не устанавливайте эти устройства рядом с печами или другими нагревательными приборами и не размещайте их в местах, подверженных воздействию солнечного света. Установка в таких местах может вызвать изменение окраски корпуса и повреждения акустической системы.
• Не закрепляйте передний динамик на стене или потолке. Он может упасть и причинить травмы.
• Размещение стойки на неустойчивой поверхности может представлять опасность. Обязательно размещайте на ровной и твердой поверхности.
• Данная акустическая система защищена магнитным экранированием. Однако в зависимости от места установки, если акустическая система установлена слишком близко к экрану телевизора, это может вызывать появление цветовых искажений. Если это произойдет, выключите телевизор и включите его снова через 15 – 30 минут. Если проблема сохранится, переместите акустическую систему подальше от телевизора.
• Не устанавливайте динамики над головой на потолке или на стене. Поскольку решетка является съемной по конструкции, при установке над головой она может упасть и причинить ущерб или травмы.
• Не помещайте на колонки тяжелые или большие предметы. Это может привести к падению колонки, что может причинить ущерб или травмы.
РАЗМЕЩЕНИЕ И ТОЧНАЯ НАСТРОЙКАДля достижения наилучших результатов громкоговорители следует удалять друг от друга на расстояние, приблизительно равное расстоянию до места прослушивания. Поворот громкоговорителей к центру по направлению к слушателю позволяет повысить стабильность звукового образа для слушателей, располагающихся не в центре.Размещение вблизи к боковой или задней стене улучшает характеристики звучания в средне-низком диапазоне, однако слишком близкое размещение (особенно, размещение в углу) может привести к тому, что низкочастотные звуки будут слишком сильные и характеристики звукового образа будут ухудшены.
ВЫПОЛНЕНИЕ НАСТРОЕК УСИЛИТЕЛЯ МОЩНОСТИПеред подсоединением громкоговорителей, пожалуйста, ознакомьтесь с инструкциями по эксплуатации, прилагаемыми к усилителю, чтобы выбрать настройку для громкоговорителей на усилителе:
• ПЕРЕДНИЕ ГРОМКОГОВОРИТЕЛИ : БОЛЬШИЕ
ПОДКЛЮЧЕНИЕ СИСТЕМЫ
Перед подключением убедитесь, что все оборудование выключено.
• Правильное подключение используемых громкоговорителей необходимо для обеспечения наилучшего качества звучания. Будьте внимательны, обеспечивая соблюдение полярности подключения.
Выполните подсоединение к контактным разъемам для громкоговорителей в задней части усилителя.Подсоединяйте колоночный кабель с красной маркировкой к красному контактному разъему (+), а второй кабель — к черному контактному разъему (–), как это показано ниже (за более подробной информацией обращайтесь к руководству по эксплуатации усилителя).
После подсоединения штепселей слегка потяните за кабели, чтобы убедиться в том, что концы кабелей надежно закреплены в контактных разъемах. Плохой контакт может стать причиной появления шумов и пропадания звука.
Выполните подсоединение к контактным разъемам в задней части громкоговорителей.Отвинтите головки контактных разъемов на громкоговорителе и вставьте колоночный кабель с красной маркировкой в красный разъем (+), а второй кабель — в черный (–) разъем, как это показано ниже.
Переднийправый
Переднийлевый
Центральный
Точка прослушивания
Низкочастотныйгромкоговоритель(не прилагается)
Объемного звучания правыйОбъемного звучания левый
Важно
ВНИМАНИЕЕсли система ВКЛЮЧЕНА, прикосновение к контактам громкоговорителей ОПАСНО. Во избежание опасности поражения электрическим током при подключении или отключении кабелей громкоговорителей отсоединяйте кабель питания, прежде чем прикасаться к любым неизолированным деталям.
D3-4-2-2-3_A1_Ru
Замечание
Провод колоночного кабеля с красной маркировкой
Второй провод колоночного кабеля
черный красный
S-ES21-LR_Ru.fm 10 ページ 2013年7月18日 木曜日 午前10時32分
11Ru
ЗАКРЕПЛЕНИЕ ПЕРЕДНИХ ГРОМКОГОВОРИТЕЛЕЙ
• Пропустите имеющийся в продаже шнур повышенной жесткости через пластмассовый захват, чтобы надежно прикрепить громкоговоритель к стене. Убедитесь в том, что стена, к которой фиксируется динамик, обладает достаточной прочностью, чтобы выдержать вес громкоговорителя. После закрепления динамика убедитесь в том, что он не упадет.
• Падение динамика может причинить ущерб.• Не прикрепляйте пластмассовый захват непосредственно к стене. Его следует использовать только в сочетании со шнуром повышенной жесткости для предотвращения падения громкоговорителя.
Пропустите и прицепите два шнура повышенной прочности через пластмассовый захват и прикрепите громкоговоритель к стене, как это показано вверху.
• Если вы не уверены в качестве или несущей способности стены, обратитесь за консультацией к специалисту.
• Компания Pioneer не несет ответственности за какие-либо несчастные случаи или ущерб, вызванные неправильной установкой.
УХОД ЗА КОРПУСОМДля удаления грязи или пыли используйте бархотку или сухую ткань. Если корпус сильно загрязнен, очистите его мягкой тканью, смоченной в нейтральном моющем средстве, разбавленном пятью или шестью частями воды, и тщательно отжатой, затем еще раз протрите сухой тканью. Не используйте полироль и моющие средства для мебели.Никогда не используйте для ухода за этим корпусом и рядом с ним разбавители, бензин, инсектицидные аэрозоли и другие химические вещества, так как они могут повредить поверхности.
УСТАНОВКА / СНЯТИЕ РЕШЕТКИПередняя решетка этой акустической системы является съемной.Выполняйте следующую процедуру:1. Чтобы снять решетку, возьмите ее обеими руками за
нижнюю часть и потяните на себя, чтобы отсоединить нижнюю часть решетки от громкоговорителя.
2. Затем возьмите решетку за верхнюю часть и осторожно потяните ее на себя, чтобы отсоединить верхнюю часть решетки.
3. Чтобы снова прикрепить решетку, совместите отверстия по углам в передней части громкоговорителя с выступающими втулками на решетке и нажимом установите каждый угол решетки на место.
УСТРАНЕНИЕ НЕПОЛАДОКПластмассовый
захват
Шнуры повышеннойпрочности
Задняя частьколонки
Замечание
НЕПОЛАДКА ВОЗМОЖНАЯ ПРИЧИНА УСТРАНЕНИЕ
Отсутствие звука • Неисправность кабеля громкоговорителя или соединения.• Усилитель выключен.• Регулятор громкости установлен на нулевой уровень.
Примечание:В соответствии со статьей 5 Закона Российской Федерации “О защите прав потребителя” и Указанием Правительства Российской Федерации 720 от 16 июня 1997 года корпорация Pioneer Europe NV устанавливает условие на следующую продолжительность срока службы официально поставляемых на Российский рынок товаров.
Аудио и видеооборудование: 7 лет Переносное аудиооборудование: 6 лет Другое оборудование (наушники, микрофон и т.д.): 5 лет Автомобильная электроника: 6 лет
D3-7-10-6_A1_Ru
Если вы желаете утилизировать данное изделие, не выбрасывайте его вместе с обычным бытовым мусором. Существует отдельная система сбора использованных электронных изделий в соответствии с законодательством, которая предполагает соответствующее обращение, возврат и переработку.
Чacтные клиенты-в странах-членах ЕС, в Швейцарии и Норвегии могут бесплатно возвращать использованные электронные изделия в соответствующие пункты сбора или дилеру (при покупке сходного нового изделия).
В странах, не перечисленных выше, для получения информации о правильных способах утилизации обращайтесь в cooтветcтвующие учреждения.
Поступая таким образом, вы можете быть уверены в том, что утилизируемый продукт будет соответствующим образом обработан, передан в соответствующий пункт и переработан без возможных негативных последствий для окружающей среды и здоровья людей.
PIONEER CORPORATION1-1, Shin-ogura, Saiwai-ku, Kawasaki-shi, Kanagawa 212-0031, Japan
Корпорация Пайонир1-1, Син-Огура, Сайвай-ку, г. Кавасаки, префектура Канагава, 212-0031, ЯпонияИмпортер: ООО "ПИОНЕР РУС"125040, Россия, г. Москва, ул. Правды, д.26 Тел.: +7(495) 956-89-01PIONEER ELECTRONICS (USA) INC.P.O. BOX 1540, Long Beach, California 90801-1540, U.S.A. TEL: (800) 421-1404
PIONEER ELECTRONICS OF CANADA, INC.340 Ferrier Street, Unit 2, Markham, Ontario L3R 2Z5, Canada TEL: 1-877-283-5901, 905-479-4411