Safety & Instruction Manual WARNING: Black Powder or an approved black powder substitute are the only propellant powders that are safe to use in a muzzleloading firearm. Read the instructions and warnings in this manual CAREFULLY BEFORE using this Traditions™ firearm. Traditions™ Performance Firearms 1375 Boston Post Road P.O. Box 776 Old Saybrook, CT 06475 (860) 388-4656 www.traditionsfirearms.com FIT - 65 January 2016
Transcript
Safety & Instruction Manual
WARNING: Black Powder or an approved black powder substitute are the only propellant
powders that are safe to use in a muzzleloading firearm.
Read the instructions and warnings in this manual CAREFULLY BEFORE using this
Your Muzzleloading RifleCongratulations on your purchase of a Traditions™ muzzleloader. You have selected a muzzleloading firearm designed and engineered to give todayʼs shooters the highest performance and optimum accuracy. When given the respect and care that any firearm demands, you can expect many years of reliable service and enjoyable hunting from your new Traditions™ muzzleloader.
The Sport of MuzzleloadingMore and more sportsmen have discovered the challenge and enjoyment of muzzleloading in recent years. For both hunting and target shooting, muzzleloading guns have helped a modern generation recapture and enjoy an important aspect of our nationʼs sporting past. Traditions™ muzzleloaders represent the latest developments in this unique part of the shooting sports. They are manufactured to modern standards for safe and enjoyable shooting. This booklet is intended as a basic guide for the proper maintenance, loading and shooting of Traditions™ muzzleloaders, and it offers important rules and precautions for safe handling and shooting of this type of firearm. In addition to this booklet, it is recommended that the novice obtain further information and instruction before firing a muzzleloader.
Sources for this help include:
1. National Muzzle Loading Rifle Association2. National Rifle Association3. Local sporting goods dealer, state DEP
or conservation department4. Local muzzleloader or hunting club5. National Shooting Sports Foundation
2
3
WARNING!YOU MUST READ THESE INSTRUCTIONS AND WARNINGS CAREFULLY. FAILURE TO READ THESE INSTRUCTIONS AND FOLLOW THESE WARNINGS MAY RESULT IN SERIOUS INJURY OR DEATH TO YOU AND OTHERS AND DAMAGE TO PROPERTY.
This SAFETY & INSTRUCTION MANUAL should always accompany this firearm and be transferred with it upon change of ownership or when the firearm is presented to another person.
DANGER: Always keep your firearm pointed in a safe direction with your finger off the trigger until you are ready to fire. Never point a firearm at anything you do not intend to shoot and always besure of what is beyond your target.
If you donʼt have a manual, a printed copy is availablefree upon request by contacting Traditions™ at the address below. A manual is also available via download at www.traditionsfirearms.com
• CUSTOMER SUPPORT •Traditions Performance Firearms™
1375 Boston Post Road P.O. Box 776
Old Saybrook, CT 06475 (860) 388-4656
www.traditionsfirearms.com
3
4
TABLE OF CONTENTS
1. YOUR SAFETY RESPONSIBILITIES…………….......52. SAFE STORAGE & TRANSPORTATION………......103. SAFETY RULES.......................................................124. BASICS OF THE PURSUIT G4................................165. FUNCTION TEST FOR PURSUIT G4......................196. INITIAL CLEANING……...…………………………….217. BASIC EQUIPMENT FOR SHOOTING.....................238. CHARGING YOUR PURSUIT G4..............................249. PRIMING THE PURSUIT G4.....................................3010.FIRING THE PURSUIT G4.......................................3111. DEPRIMING AFTER FIRING...................................3212. MISFIRES & HANGFIRES…………………………...3213. UNLOADING & UNCHARGING YOUR RIFLE.........3414. SCHEMATIC.............................................................3515. CLEANING & MAINTENANCE……………………....3616. SIGHTING IN & SCOPE MOUNTING…………..…..4317. INFORMATION ON BLACK POWDER & BLACK
POWDER SUBSTITUTES………………………..…..4418. SUGGESTED LOADS FOR PURSUIT G4...............4819. WARRANTY & SERVICE………………………….....50
1. YOUR SAFETY RESPONSIBILITIES ...................... 52. SAFE STORAGE & TRANSPORTATION ................. 103. SAFETY RULES ..................................................... 124. BASICS OF THE PURSUIT G4 .............................. 165. FUNCTION TEST FOR PURSUIT G4 ..................... 196. INITIAL CLEANING ................................................ 217. BASIC EQUIPMENT FOR SHOOTING................... 238. CHARGING YOUR PURSUIT G4 ........................... 249. PRIMING THE PURSUIT G4 .................................. 3010. FIRING THE PURSUIT G4 ..................................... 3111. DEPRIMING AFTER FIRING .................................. 3212. MISFIRES & HANGFIRES ...................................... 3213. UNLOADING & UNCHARGING YOUR RIFLE ........ 3414. SCHEMATIC .......................................................... 3515. CLEANING & MAINTENANCE ............................... 3616. SIGHTING IN & SCOPE MOUNTING ..................... 4317. INFORMATION ON BLACK POWDER & BLACK
1. YOUR SAFETY RESPONSIBILITIESSAFETY IS YOUR NUMBER ONE
RESPONSIBILITY!!!!No matter if you are at home, in the field, at the range, or anywhere;your primary concern as a firearm owner must always be safety. You must always apply the following safety rules in every situation with any kind of firearm regardless of setting. If you feel unsure about any aspect of your firearm or its operation, please contact Traditions™ before using it.
WARNING: YOU MUST FOLLOW ALL OF THESE SAFETY RULES TO ENSURE THE SAFE USE OF YOUR FIREARM. THE FAILURE TO FOLLOW THE INSTRUCTIONS AND WARNINGS IN THIS MANUAL COULD CAUSE SERIOUS PERSONAL INJURY OR DEATH TO YOU OR OTHERS AND DAMAGE TO PROPERTY.When you become a firearm owner, you take on a serious and demanding responsibility. How seriously you take this responsibilitycan be the difference between life and death. There is no excuse for reckless or abusive handling of your firearm. At all times you must handle your firearm with an intense respect for its power and potentialdanger. WARNING: YOU ARE RESPONSIBLE FOR THIS AND ALL YOUR FIREARMS AT ALL TIMES. In owning a firearm, you have a constant responsibility for your firearms' safety and security. You must always protect yourself and all others against injury or death from misuse of the firearm 24 hours a day, 7 days a week, 365 days a year. This responsibility is not something you can ever neglect.
WARNING: NEVER SOLELY RELY ON MECHANICAL FEATURES SUCH AS A SAFETY. Mechanical features such as safeties can fail and should never be relied upon with disregard to proper safe firearms handling. Only by following the safe firearms-handling procedures in this manual will the safe use of your firearm be assured. You are responsible for always following these safe firearm handling rules. Mechanical safeties in firearms are aides in establishing a more convenient operating system but are never replacements for safe handling on the part of the shooter.
WARNING: ALWAYS BE SURE OF YOUR TARGET AND WHAT IS BEYOND IT. Always know where a bullet you fire will hit and shoot only where there is a safe back stop free of any obstructions. Bullets can bounce or ricochet off many surfaces like rocks or the surface of water and travel in unpredicatable directions with considerable velocity creating dangerous situations. NEVER fire randomly into the sky.
5
6
WARNING: ALWAYS WEAR EYE AND EAR PROTECTION THAT ARE SPECIFIED FOR USE WITH FIREARMS every time you handle your firearm for loading, firing, cleaning, or maintenance. Make sure that all bystanders where you will be shooting are also wearing the proper eye and ear protection.
WARNING: ALWAYS HAVE ADEQUATE VENTILATION WHEN DISCHARGING A FIREARM. Discharging a firearm in poorly ventilated areas, cleaning firearms, or handling ammunition and loading components may result in exposure to lead and other substances known to cause birth defects, reproductive harm, and other serious physical injuries. Review the warnings and labels for all ammunition, loading components, and cleaning products carefully. Wash hands thoroughly after exposure.
WARNING: NEVER ALLOW THIS FIREARM TO BE USED BY ANYONE WHO DOES NOT UNDERSTAND ITS SAFE OPERATION OR HAS NOT READ THIS MANUAL IN ITS ENTIRETY.
WARNING: NEVER DISASSEMBLE YOUR FIREARM beyond the instructions outlined in this manual. Improper disassembly or re-assembly of your firearm may create a dangerous situation which can lead to serious injury or death to you or others or also the destruction of property.
WARNING: NEVER MANIPULATE, ADJUST, OR ALTER ANY OF THE INTERNAL COMPONENTS OF YOUR FIREARM. Improper manipulation or alteration of any internal component may affect the safety and reliability of your firearm and create a situation where serious injury or death could occur. In addition do not replace any of the parts in your rifle unless they are genuine Traditions™ parts. The use of non-Traditions™ parts will void all warranties. Any alteration or replacement of parts in your Traditions™ firearm not performed by a qualified gunsmith using genuine Traditions™ parts may cause death, personal injury, or property damage. NOTE: Altering the factory-standard mechanical function of your firearm will VOID your warranty and could lead to unsafe handling and function of the firearm.
WARNING! DO NOT DRILL HOLES IN THE BARREL AS THIS COULD WEAKEN THE BARREL STRUCTURE LEADING TO A RUPTURE. A RUPTURED BARREL CAN CAUSE SERIOUS INJURY AND/OR DEATH TO THE SHOOTER OR BYSTANDERS AND DAMAGE TO PROPERTY. DRILLING HOLES IN THE BARREL VOID ALL WARRANTIES.
6
7
DANGER: SAFE FIREARMS HANDLING IS YOUR PERSONAL RESPONSIBILITY ALWAYS. Firearms have the potential to be dangerous resulting in serious injury or death if they are misused or handled inappropriately. Safety must always be the primary concern of anyone who owns or handles firearms. Accidents are the result of violating the rules of safe firearm handling. Professional firearm safety training is available to supplement the safety instructionin this manual. Some examples of organizations to contact are your local firearms dealer, state conservation department, hunter safety department, law enforcement agency, local sportsman's club, the NSSF, and the National Rifle Association (NRA) for availability of firearms training.
DANGER: ALWAYS TREAT EVERY FIREARM AS IF IT IS LOADED AND WILL FIRE. Never assume or take anyone's word that the firearm is uncharged or unprimed - you must always physically check for yourself. Never pass a loaded firearm to another person. You must first open the action and then visually check that it is uncharged and unprimed before passing the firearm to another person. Keep your muzzleloading firearm uncharged, unprimed, and safely stored when not in use.
DANGER: NEVER PLACE YOUR FINGER INSIDE THE TRIGGER GUARD OR ON THE TRIGGER UNLESS YOU INTEND TO FIRE. Always keep your finger off the trigger until your sights are on the target and you are prepared to fire. Also make sure that other objects do not touch the trigger at any time.
DANGER: ALWAYS KEEP YOUR FIREARM POINTED IN A SAFE DIRECTION. Never point the muzzle of a firearm at anyone or anything you do not intend to shoot. Many incidents have occured because people pointed what they thought was an unloaded firearm in an unsafe direction. This is especially important when loading, unloading, or field stripping the gun. ALWAYS control the direction of the firearm.
DANGER: NEVER CROSS ANY OBSTACLES SUCH AS FENCES OR STREAMS WITH A CHARGED OR PRIMED MUZZLELOADING FIREARM. Always make sure your muzzleloading firearm is unprimed or unloaded before crossing a fence, climbing a tree, jumping a ditch, or negotiating any other obstacles.
DANGER: ALWAYS REMOVE THE PRIMER OR PERCUSSION/MUSKET CAP FROM THE BREECH PLUG OR NIPPLE BEFORE YOU CLIMB TO OR DESCEND FROM A TREE STAND. NEVER RAISE OR LOWER A PRIMED MUZZLELOADER FIREARM TO OR FROM A TREESTAND. Failure to follow this rule may cause serious injury and/or death to the shooter or bystanders and damage to property.
7
8
DANGER: NEVER LEAN A CHARGED AND PRIMED RIFLE AGAINST A TREE, A WALL, OR ANY SURFACE WHERE IT MAY FALL OVER. Once a rifle has been charged or primed it is your responsibility to protect against any situation that may result in an accidental discharge. Failure to follow this rule may cause serious injury and/or death to the shooter or bystanders and damage to property.
DANGER: NEVER UNDER ANY CIRCUMSTANCES USE ALCOHOL OR DRUGS BEFORE OR WHILE SHOOTING. In addition, do not use your firearm if you are on any medication which impairs, even slightly, your mental or physical. You should also not use your firearm if you are excessively tired, distracted, or impaired in any way. You need to be alert and have your full attention devoted to the safe use of the firearm.
DANGER: ALWAYS USE THE CORRECT COMBINATION OF MUZZLELOADING APPROVED LOAD COMPONENTS FOR YOUR PARTICULAR MUZZLELOADING FIREARM as detailed in this manual.
DANGER: MAKE CERTAIN THE BARREL IS CLEAR OF ANY OBSTRUCTIONS BEFORE SHOOTING. Dirt, water, snow and other objects may inadvertently become lodged in the bore of the barrel. A small obstruction can cause a dangerous increase in pressure and may damage your firearm and cause injury to yourself and other. Refer to the field cleaning section of this manual if you discover any obstructions in the barrel for instructions on how to remove it.
CAUTION: BEFORE HANDLING ANY FIREARM, UNDERSTAND ITS OPERATION. Not all firearms are the same and some have features and mechanical operation unique to that specific firearm. Before using a firearm you should learn the mechanical features of that specific firearm you intend to use. If you feel unsure about any operational aspects of this firearm, please contact Traditions™ before proceeding with its operation.
APPROPRIATE USE FOR YOUR FIREARM MEANS USING YOUR FIREARM FOR LEGAL PURPOSES. It is your responsibility to ensure that you are in compliance with all applicable Federal, State, and Local laws and ordinances regarding the use of your firearm.
MAKE SURE THAT ALL ACCESSORIES SUCH AS SLINGS, SCOPES, AND ANY OTHER ACCESSORIES ARE COMPATIBLE with the firearm and that they do not interfere with the safe operation of the firearm. It is your responsibility to understand and follow all instructions in this manaul, as well as those which may be supplied with your ammunition and loading components and any accessory and how they all relate to each other.
8
9
USE TRADITIONS™ SCOPE MOUNTS ONLY. All current Traditions™ rifles come drilled and tapped for use with scopes. Traditions™ offers a wide variety of scopes, scope mounts, and rings in varying sizes and finishes to suit your needs. When mounting a scope use only Traditions™ mounts to ensure proper fit and function. Traditions™ mounts are specifically made to fit these predrilled existing holes in your firearm.
9
10
2. SAFE STORAGE &TRANSPORTATION
WARNING: DO NOT LOAD UNTIL READY TO DISCHARGE YOUR RIFLE.
WARNING: FIREARMS ARE DANGEROUS IF THEY ARE USED AND/OR STORED IMPROPERLY. THEY POSE A RISK OF SERIOUSOR FATAL INJURIES. FIREARMS CAN BE ESPECIALLYDANGEROUS TO CHILDREN WHEN THEY ARE STORED IN ANIRRESPONSIBLE AND UNSAFE MANNER. FOR YOUR SAFETY ANDTHE SAFETY OF OTHERS, IT IS IMPERATIVE THAT YOU KEEPYOUR FIREARM LOCKED AND UNLOADED IN A SECURE PLACE. THE AMMUNITION AND LOADING COMPONENTS SHOULD BE STORED IN A SEPARATE, LOCKED, SECURE LOCATION WHEN IT IS NOT IN USE. SAFE AND SECURE STORAGE OF YOUR FIREARMIS ONE OF THE MOST IMPORTANT RULES OF FIREARM SAFETY. YOUR FAILURE TO FOLLOW THESE RULES MAY RESULT INSERIOUS INJURY OR DEATH TO YOU OR OTHERS.
WARNING: ALWAYS SECURE YOUR FIREARM IN AMANNER THAT WILL PREVENT UNAUTHORIZED ACCESS.Whenever you are not using your firearm it should be kept unloaded and locked. Your own safety and the safety of others demands that you always secure and store your firearm in a way that will prevent unauthorized access. Never leave a firearm unattended unless it isunloaded, locked, and secured.
WARNING: MAKE SURE TO CHECK TWICE THAT YOUR FIREARM IS UNLOADED BEFORE TRYING TO INSTALL ANY LOCKING DEVICE.
WARNING: FIREARM SECURITY IS YOUR PERSONAL RESPONSIBILITY. ALWAYS SAFELY STORE AND SECURE YOUR FIREARM. You must ensure that your firearms are securely and safely stored so that children and/or unauthorized users may not obtain them. Your firearms should always be kept unloaded and locked when not in use or in your immediate control. Never assume that the use of a lock alone is sufficient to safely secure your firearm. You must continually evaluate your personal situation and employ security systems that prevent children and unauthorized users from gaining access to your firearm. It is recommended that you secure ammunition in a locked container separate from your firearms.
10
11
WARNING: NEVER TRANSPORT A CHARGED OR PRIMEDMUZZLELOADING FIREARM. When transporting your firearm it must be uncharged, unprimed and securely locked. Safe and securetransportation of your firearm is another important aspect of yourresponsibility as a firearm owner.
DANGER: NEVER STORE A CHARGED OR PRIMED MUZZLELOADING FIREARM. When storing your firearm it must beuncharged, unprimed and securely locked. If you fail to follow this instruction, you may experience a double load or fire the muzzleloader thinking it is unloaded.
CAUTION: ALWAYS FOLLOW THE LAW! In many states and local municipalities there are laws and regulations that make it a crime to keep a firearm unlocked in an area that is accessible to children or others. Keeping a firearm locked and unloaded when not in use is not only a common sense safety practice... IT IS THE LAW. You must be familiar with all local, state, and federal laws regarding the safe storage and transportation of your firearm. Failure to know and follow the law may result in unauthorized access or use of your firearm by another for which you may be held accountable. Obey all laws relating to the storage and transportation of firearms. Your local police department or gun shop can provide you with the pertinent information for where you live on storing and/or transporting a firearm safely and legally.
CAUTION: ALWAYS STORE YOUR FIREARM AND AMMUNITION AND LOADING COMPONENTS SEPARATELY. so that they are not accessible to children or other unauthorized persons. Safe and secure storage of your firearm, ammunition, and loading components is your responsibility.
CAUTION: NEVER ASSUME THAT A "SECRET LOCATION" OR "HIDING PLACE" IS A SECURE STORAGE METHOD. Without your knowledge others, such as children, may be aware of your storage location or they may find it by accident. It is your responsibility to properly store your firearms, ammunition, and loading components and to always make sure they are not accessible to children or unauthorized persons. that they are not accessible to children or other unauthorized persons.
11
12
3. SAFETY RULES FOR YOURTRADITIONS™ MUZZLELOADER
In addition to the general Firearm Safety Responsibilities covered so far in this manual, there are additional guidelines specific to black powder muzzleloading firearms that must be adhered to at all times to ensure the safety of the shooter and others.
DANGER: NEVER UNDER ANY CIRCUMSTANCE USESMOKELESS POWDER OF ANY TYPE OR IN ANY QUANTITY INA MUZZLELOADING FIREARM, AND NEVER MIX POWDERS.The use of any smokeless powder at all could result in a detonation or explosion which could cause injury and/or death to the shooter or bystanders and damage to property.
DANGER: NEVER USE ANY POWDER THAT YOU CANNOT POSITIVELY IDENTIFY. The use of any mislabeled or unknown powder could result in injury and/or death to the shooter or bystanders and damage to property.
DANGER: USE ONLY BLACK POWDER OR AN APPROVEDBLACK POWDER SUBSTITUTE IN YOUR TRADITIONS™MUZZLELOADING FIREARM. Never use even small amounts of smokeless powder, even if it may be black in color. The use of any propellant other than black powder or approved black powder substitute may cause injury or death to the shooter or bystanders and damage to property.
WARNING: UNDERSTAND THE TERMINOLOGYREGARDING LOADING. When speaking of a muzzleloading firearm “Charge” or “Charged” refers to the presence of a propellant powder charge and projectile in the bore of the firearm
“Uncharge” or “Uncharged” indicates that the powder charge and projectile have been either fired or removed and that the bore is completely clear.
“Prime” or “Primed” applies to the act of placing a primer, cap, or priming powder in or on a muzzleloader.
“Unprime” or “Unprimed” indicates that the primer, cap, or priming powder has been removed from the firearm or is not in place.
12
13
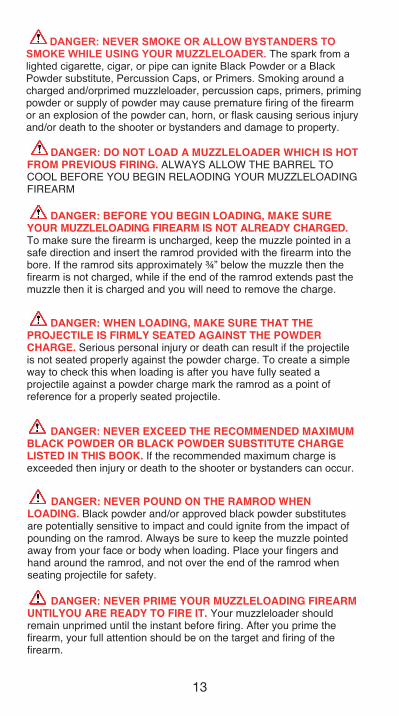
DANGER: NEVER SMOKE OR ALLOW BYSTANDERS TO SMOKE WHILE USING YOUR MUZZLELOADER. The spark from a lighted cigarette, cigar, or pipe can ignite Black Powder or a Black Powder substitute, Percussion Caps, or Primers. Smoking around a charged and/orprimed muzzleloader, percussion caps, primers, priming powder or supply of powder may cause premature firing of the firearmor an explosion of the powder can, horn, or flask causing serious injury and/or death to the shooter or bystanders and damage to property.
DANGER: DO NOT LOAD A MUZZLELOADER WHICH IS HOTFROM PREVIOUS FIRING. ALWAYS ALLOW THE BARREL TO COOL BEFORE YOU BEGIN RELAODING YOUR MUZZLELOADING FIREARM
DANGER: BEFORE YOU BEGIN LOADING, MAKE SUREYOUR MUZZLELOADING FIREARM IS NOT ALREADY CHARGED.To make sure the firearm is uncharged, keep the muzzle pointed in a safe direction and insert the ramrod provided with the firearm into the bore. If the ramrod sits approximately ¾” below the muzzle then the firearm is not charged, while if the end of the ramrod extends past the muzzle then it is charged and you will need to remove the charge.
DANGER: WHEN LOADING, MAKE SURE THAT THEPROJECTILE IS FIRMLY SEATED AGAINST THE POWDER CHARGE. Serious personal injury or death can result if the projectile is not seated properly against the powder charge. To create a simple way to check this when loading is after you have fully seated aprojectile against a powder charge mark the ramrod as a point of reference for a properly seated projectile.
DANGER: NEVER EXCEED THE RECOMMENDED MAXIMUM BLACK POWDER OR BLACK POWDER SUBSTITUTE CHARGE LISTED IN THIS BOOK. If the recommended maximum charge is exceeded then injury or death to the shooter or bystanders can occur.
DANGER: NEVER POUND ON THE RAMROD WHENLOADING. Black powder and/or approved black powder substitutesare potentially sensitive to impact and could ignite from the impact of pounding on the ramrod. Always be sure to keep the muzzle pointed away from your face or body when loading. Place your fingers and hand around the ramrod, and not over the end of the ramrod when seating projectile for safety.
DANGER: NEVER PRIME YOUR MUZZLELOADING FIREARMUNTILYOU ARE READY TO FIRE IT. Your muzzleloader should remain unprimed until the instant before firing. After you prime the firearm, your full attention should be on the target and firing of the firearm.
13
14
DANGER: NEVER PASS A CHARGED MUZZLELOADINGFIREARM TO ANOTHER PERSON. Once charged, a muzzleloading firearm requires your complete attention. Never charge the firearm andthen hand it to another shooter. You should also never shoot a muzzleloading firearm that was charged by someone else. Only theperson who actually performed the loading knows whether the firearm has been charged properly and should fire it.
DANGER: BEFORE YOU ACCEPT A MUZZLELOADING FIREARM FROM SOMEONE, CONFIRM FOR YOURSELF THAT ITIS UNPRIMED AND UNCHARGED. Treat all firearms as if they areloaded and will fire.
DANGER: NEVER CHARGE YOUR MUZZLELOADER DIRECTLY FROM A CAN, HORN OR FLASK. A spark from a previous firing may ignite the stream of powder being poured into the firearm and cause the container to explode. The explosion of a powder can, horn or flask may cause serious injury and/or death to the shooter or bystanders and damage to property. Use a separate pre-calibrated measuring device containing small quantities of powder to charge yourfirearm. Keep the muzzle directed away from your face and body whenloading.
DANGER: WHILE SHOOTING ALWAYS KEEP SUPPLIES OF POWDER, PRIMERS AND CAPS WELL AWAY FROM YOURFIRING POSITION OR SHOOTING BENCH. A powder horn, flask, can of powder, or quantity of primers or caps can ignite with deadlyforce if exposed to sparks or intense heat. Follow the manufacturerʼsinstructions for safe handling and storage of powder, primers, or caps.Keep unused powder, primers, or caps well away from firearms that are being discharged. Sparks from the discharge of a muzzleloading firearm may cause the unused supply of powder, primers, or caps to ignite causing serious injury and/or death to the shooter or bystandersand damage to property.
14
CAUTION: BLACK POWDER AND BLACK POWDERSUBSTITUTES ARE CORROSIVE BY NATURE AND LEAVERESIDUES IN THE BORE AND ON THE FIREARM THAT REQUIREIMMEDIATE CLEANING. A quick field cleaning should be performedjust after you complete firing at the range or hunting. A thorough in depth cleaning is required before the storage for any amount of time tokeep the firearm functioning properly and in a safe condition. Failure to properly clean the firearm may prevent the firearm from functioningsafely and correctly and may result in injury or death to the shooter orothers or damage to property.
You must follow these procedures every time a firearm leaves your hand, is cleaned, handed to you or another person, transported or stored.
1515
4. LEARNING THE BASICS OF THEPURSUIT™ G4
16
16
Gun Model designation on frame
Propellant marking on barrel
Caliber designation on barrel
17
Serial number marking on frame
17
SAFETIES INCLUDED WITH THE PURSUIT™ G4
Your Traditions™ Pursuit™ G4 break-action muzzleloader comes equipped with dual safeties.
The first safety is an internal hammer block safety that blocks the hammer from being released and hitting the primer unless the trigger has been pulled. This prevents the hammer from hitting the primer in the case of a drop or sudden impact.
The second safety is an ambidextrous mechanical trigger block safety that prevents the trigger from being pulled back and allowing the sear to become disengaged.
18
Trigger block safety disengaged, red ring is visible.
Trigger block safety engaged, “safe”, no red ring is visible.
18
5. FUNCTION TEST FOR THEPURSUIT™ G4
DANGER: ALWAYS POINT THE MUZZLE IN A SAFE DIRECTION AND TREAT THE FIREARM AS IF IT WAS LOADEDAND CAN FIRE.
DANGER: CONFIRM THE FIREARM IS UNCHARGEDAND UNPRIMED BEFORE CONDUCTING ANY OF THE FUNCTION TESTS.
Now that you are familiar with the parts of the Pursuit™ G4 a functiontest can be performed on the rifle to ensure that all parts are operating as intended. This function test should also be performed after anytimeyou have disassembled the rifle for cleaning or any maintenance.
Function testing the action
1. Open the action bypressing on the barrelcatch lever which willthen allow the action topivot open.
2. Close the action bypivoting the opposite wayfrom when you openedthe action waiting to heara metallic click indicatingthe action is locked.
19
19
Function testing the hammer
1. Disengage the safety sothe red ring is visible. Cockthe rifle by pulling thehammer rearward until youhear a metallic click andthe hammer is locked intoplace. This means the rifleis now cocked andengaged.
2. Push forward on the rearof the cocked hammer.The hammer shouldremain in place and doesnot fall.
3. While empty and pointed ina safe direction, pull triggerin a rearward motion andhold. Hammer should nowfall forward impacting thetransfer bar. *NOTE: Visiblyinspect to be sure when thehammer is in forwardposition after firing thetransfer bar is in the highestposition.
20
20
Function testing the safety system
1. Disengage the safety buttonby pressing the button fromright to left. You should hear ametallic click when it locks intoplace and a red ring should bevisible indicating the rifle isready to fire.
21
Engage the manual safety button by pressing it from leftto right so that there is no redring visible. A metallic clickshould be heard whenengaged.
2.
3. Pull the trigger to the rear.You should feel resistancewhen the safety is engaged.The trigger stays in place andthe hammer does not fall.
INITIAL CLEANING6.NOTE: BEFORE YOUR INITIAL USE, PLEASE CLEAN &LUBRICATE YOUR MUZZLELOADER!
These are brief instructions on what to do before you use yourmuzzleloader for the first time. Please review the disassembly instructions for the complete set of cleaning instructions. When youfirst remove the new muzzleloader from the box there will be some manufacturing oils and grease for shipping purposes. These residuesneed to be removed so that the muzzleloader will function properly.
DANGER: Make sure the firearm is unloaded with the safety in the “safe” position.
1. Open the action by pulling on the barrel catch lever which will thenallow the action to pivot open.
21
2. Unscrew and remove the Accelerator Breech Plug™by using your fingers or the breech plug wrenchsupplied with the muzzleloader. Then close theaction.
3. Remove the ramrod from the thimbles.
4. With the action closed, unscrew the forend screw using the supplied4mm wrench and remove the forend from the barrel.
5. Remove the barrel from the receiver by pushing the barrel catchlever in. When the action starts to open lift the barrel up and out ofthe receiver. Clean all items with hot, soapy water or muzzleloaderbore solvent such as Traditions™ EZ Clean™. This will remove anymanufacturing residue that may be on the inside or outside of thebarrel.
6. Dry all of the parts completely.
7. Apply a light coat of Traditions™ EZ Clean™ solvent to a dry patch(or use Traditions pre-soaked EZ Clean™ patches) and run up anddown the bore, then use Traditions™ Wonderlube™ prelubedpatches to “season” the lands & grooves of the rifling before loading.This will allow for easier loading and cleaning throughout yourshooting sessions.
Generously lubricate the threads ofthe breech plug with Traditions™breech plug grease. Be careful tonot get any grease inside thebreech plug.
8.
9. Now reassemble your firearm.
A Note about maintenance procedures: Proper maintenance and cleaning of your new muzzleloader will require you to remove the barrel from the receiver. You must clean the muzzleloader each time it is used.
Please refer to the Cleaning & Maintenance section for more information. Take time before such cleaning to study the Disassembly/Assembly procedures and the accompanying photographs to thoroughly acquaint yourself with your rifleʼs subassemblies.
2222
23
7. BASIC EQUIPMENT FORSHOOTING THE PURSUIT™ G4
In order to shoot your Traditions™ muzzleloader, you will need the following accessories or equipment listed below:
CAUTION: DO NOT ATTEMPT TO SHOOT OR LOAD YOURMUZZLELOADING FIREARM UNTIL YOU HAVE READ THISMANUAL COMPLETELY AND FULLY UNDERSTAND IT. FAILURE TO READ AND FOLLOW THESE INSTRUCTIONS COULD RESULT IN INJURY AND/OR DEATH TO THE SHOOTER OR BYSTANDERS AND DAMAGE TO PROPERTY. IF YOU ARE UNABLE TOUNDERSTAND ANY OR ALL OF THIS MANAUL, CALL THECUSTOMER SERVICE DEPARTMENT AT TRADITIONS™.
1. Proper eye protection specified for use with firearms.2. Proper ear protection specified for use with firearms.3. Black powder or an approved black powder substitute in the
appropriate type for your firearm.4. A powder measure.5. Projectiles appropriate for your firearm such as Traditions™
Smackdown bullets6. 209 Primers7. Bore cleaning patches.8. A jag to hold cleaning patches.9. An appropriate bore cleaner for muzzleloaders (like EZ Clean™).10. An appropriate oil or rust inhibiting lubricant (like Wonderlube™).
Note: While not required, a Traditions™ range rod will make loading and cleaning easier and is recommended.
23
24
8. CHARGING YOUR TRADITIONS™PURSUIT™ G4
DANGER: ALWAYS POINT THE MUZZLE IN A SAFE DIRECTION AND DO NOT HAVE ANY PART OF YOUR BODYOVER THE MUZZLE WHEN LOADING.
PREPARING TO LOAD THE CHARGE:
WARNING: Wear proper eye protection for entire loading process.
Prior to loading, you must first that ensure the gun is uncharged, unloaded, and the barrel is free of any obstructions.
The easiest way to achieve this is to remove the Accelerator Breech Plug™ and look down the barrel to see if there is a charge or any obstruction in the barrel.
You may also use the following instructions to ensure the gun is uncharged and unloaded.
1. Push safety button to “safe” so that no red ring is visible on thesafety button
2. Remove ramrod from barrel thimbles
3. Unscrew Jag from ramrod and reverse 180 degrees so thatconcave (hollowed end) is exposed.
4. Re-thread Jag so that the concave (hollowed end) is out. This willmake the ramrod longer and provide the proper length.
5. Insert the ramrod into the barrel. When it is touching the top of thebreech plug it should sit approximately 3/4” below the muzzle.
Note: You should hear a metallic sound as the jag makes contact with the breech plug.
If the ramrod is not 3/4” below the muzzle and you do not hear the metallic sound then the barrel may be either obstructed or loaded. To remove the obstruction, remove the Accelerator Breech Plug™. Do not attempt to clear the barrel by firing. Before loading anything into the barrel, clean all oil and grease from inside the barrel. We recommend using Traditions™ cleaning products to enhance your accuracy and ease shooting & cleaning.
24
To test and clear the ignition channel follow these steps. DANGER: Make sure the barrel is unloaded without a power charge or bullet.
Point the rifle down towards a safe area on the ground and load a primer into the 209 primer pocket of the breech plug. Fire one or twoprimers to blow out any oil or residue from the fire channel. Point themuzzle at a leaf or blade of grass to see if it moves. If it moves, youhave a clear channel. If not, fire additional primers or check thebreech plug for obstructions.
Another way to see if you have a clear fire channel is to screw a loading/cleaning jag on your ramrod and place a dry patch on the muzzle of your rifle. Push the patch down to the breech plug face and leave ramrod & patch in bore. Point rifle in a safe direction, place primer in nipple area of the breech plug and fire two primers. Remove ramrod from the bore and inspect patch. Patch should have a complete circular burn in middle. This tells you that you have a clear fire channel. Stand the butt of the rifle on the ground so that the muzzle is pointed up and away from you and others. Never work with your face or any part of your body over the muzzle, even when the gun is unloaded. Be sure that the firearm is unprimed and the safeties are engaged. Your rifle is now ready to be loaded.
LOADING THE CHARGE FOR MUZZLELOADING RIFLES:Use only black powder or an approved black powder substitute. Follow the powder manufacturerʼs instructions when measuring any type of powder as not all powders are measured the same. Some are measured by weight and some by volume, and volumetric measuring can vary depending on the type andmanufacturer of the powder. (See more information on blackpowder and black powder substitutes)
When loading loose powder:1. Fill your Traditions™ flaskwith Black Powder or Black Powder substitute of your choice.
25
25
2. Adjust your Traditions™powder measure to the desired correct charge for the type of powder you are using based on the powder manufacturerʼs recommendations.
3. Pour powder from yourTraditions™ flask into the desired powder charge. Pour powder from the powder measure down the barrel.
DANGER: Never load powder into a gun directly from a can, powder horn or flask. Always use a separate calibrated powder measuring device. A remaining spark or ember in the barrel maycause serious injury and/or death to you or bystanders and damage to property.
4. Tap the side of the barrel to help settle the powder into the breecharea.
When loading pelletized powder (Pellets):
Drop the desired amount of pellets into the barrel with the igniter side down. Using a pipe cleaner to handle the pellets makes it easier to load and keeps oil from your hands off the pellet.
26
26
LOADING THE PROJECTILE:
TRADITIONS™ SMACKDOWN SABOTED BULLETS:
The plastic material used in our Traditions™ sabots is self-lubricating; therefore you do not need to pre-lube your bullets or sabots.
1. Insert the base of the bulletinto the sabot, making certain the bullet is firmly & fully seated against the bottom of the sabot.
2. Place the assembledprojectile into the muzzle.
3. Start the projectile with your thumb.
4. Using a ball starter, placethe short shaft on top of the bullet and push it downward until the starter hits the top of the muzzle.
27
27
5. Push the projectile deeperinto the bore using the longer shaft of the ball starter until it hits the muzzle.
6. With the loading jag on your ramrod, position the ramrod on top ofthe bullet inside the bore. Holding the ramrod no further than 6” over the bore apply firm pressure downward until the bullet is seated against the powder. (Holding the ramrod any higher will increase your chances of breaking your ramrod.)
Note: If you are using pelletized powder do not crush them when loading the bullet. Testing has shown that crushed or broken pellets will cause accuracy issues.
7. With a clean barrel, afterthe bullet is seated fully against the powder charge, mark the ramrod at the muzzle. This will show you that each projectile is seated at the same depth each time. If you change the desired powder charge or projectile, you will need to change the mark and make a new one for the new charge.
8. Make sure you remove the ramrod from the barrel before primingand shooting the muzzleloader.
IMPORTANT: ALWAYS SEAT THE BULLET FIRMLY ON TOP OF THE POWDER CHARGE. FAILURE TO DO SO MAY RESULT IN INJURY OR DEATH TO YOU AND/OR BYSTANDERS.
28
DANGER: Never place your hand over the ramrod after introduction of the bullet into the barrel. While unlikely, a discharge on loading could expel the ramrod and cause injury to your hand.
28
29
TRADITIONS™ FULL BORE BULLETS:
Note: Full Bore bullets do not require any lube for loading.
1. Place the projectile into the barrel using the ball starter and ramrod.Follow the same procedures as shown with the saboted bullet loading described previously.
Note: Patches are not to be used with Full Bore bullets; these bullets are made to full bore size.
It is critical that the Full Bore bullet is the correct size to your bore. It must fit fairly tight and require moderate pressure to seat on top of the powder. A loose fit could cause the projectile to separate from the powder, particularly if the gun is subjected to jarring or sharp movement before ignition.
CONICAL BULLETS:
Note: When using conical bullets or patched round ball, it is recommended to use loose powder only.
1. Lubricate the projectile with Wonderlube™ 1000 Plus.
2. Place the projectile into the barrel using the ball starter and ramrod.Follow the same procedures as shown with the saboted bullet loading described previously.
Note: Patches are not to be used with conical bullets; these bullets are made to full bore size.
It is critical that the conical bullet is the correct size to your bore. It must fit fairly tight and require moderate pressure to seat on top of the powder. A loose fit could cause the projectile to separate from the powder, particularly if the gun is subjected to jarring or sharp movement before ignition.
29
9. PRIMING THE TRADITIONS™PURSUIT™ G4
WARNING: DO NOT PRIME YOUR MUZZLELOADER UNTIL IMMEDIATELY BEFORE YOU ARE PREPARED TO FIRE.
The 209 shotgun primer is very popular because of its features and benefits for superior ignition. The 209 shotgun primer is exactly as it is named, a shotgun primer, the same primer used in a shotgun shell. The 209 primer has three main benefits over the #11 cap and the musket cap.
First, the 209 primer is a hotter ignition than a #11 percussion or musket cap which provides a more reliable ignition. Second, the 209primer is water-resistant which keeps water and moisture out for a sure-fire ignition when conditions are damp or rainy. Third, the 209 primer is larger than #11 or musket caps and can be handled easier. Your new break-open rifle uses a 209 primer. When priming your muzzleloader please follow these instructions. Only prime your muzzleloader after you have loaded the rifle and you are ready to shoot.
1. Make sure that the manual safety on your muzzleloader is in the“safe” position.
2. Point the muzzleloader in a safe direction.
3. Keeping the muzzle pointedin a safe direction, open theaction to expose the breecharea. Using a 209 capperor your fingers, press theprimer into the opening inthe breech plug. Close theaction of the muzzleloader.
4. Your muzzleloader is now ready to fire.
30
30
10. FIRING THE TRADITIONS™PURSUIT™ G4
DANGER: ALWAYS KEEP THE MUZZLE POINTED IN A SAFEDIRECTION AND BE SURE OF YOUR TARGET AND WHAT ISBEYOND IT.
WARNING: BE SURE TO WEAR PROPER EYE AND EAR PROTECTION ANYTIME YOU FIRE YOUR FIREARM. ALSO MAKESURE ALL BYSTANDERS IN THE AREA ARE WEARING PROPER EYE AND EAR PROTECTION AS WELL.
DANGER: NEVER SOLELY RELY ON THE MECHANICAL SAFETY OF YOUR FIREARM FOR YOUR OR OTHERʼS SAFETY. IT SHOULD NOT REPLACE PROPER SAFE FIREARM HANDLING PROCEDURES DESCRIBED IN THIS MANUAL.
Now after following the previous instructions your muzzleloader is charged, primed, and ready to fire.
1. Grasp the rifle firmly with both hands with your finger off the triggerand out of the trigger guard.
2. Raise the rifle up and firmly pull the stock into your shoulder.
3. Acquire your target and aim with your sights or scope. Remember tobe sure of what is beyond your target as well.
4. Pull the hammer in arearward motion until itlocks in the cocked position.
5. The rifle is now cocked and ready to fire.
6. Press the safety off.
7. Slowly squeeze the trigger until the rifle fires.
31
31
32
11. DEPRIMING YOURMUZZLELOADER AFTER FIRING:
1. Press the barrel catch lever and open the action to expose primer.
2. Using either a de-priming tool or finger, remove the spent primer.
12.MISFIRES & HANGFIRESIf after following the previous instructions the rifle did not fire then you have had a misfire or hangfire. Anyone involved with muzzleloading firearms may experience a misfire or hangfire at one time or another. The following are a few simple procedures that will help you to effectively manage such occurrences.
WARNING: A MISFIRE OR HANGFIRE IS A DANGEROUSSITUATION AND IT IS IMPERATIVE YOU PROCEED WITH EXTREME CAUTION. AS YOU ALWAYS SHOULD DO, BUTESPECIALLY IN THIS SITUATION, BE SURE TO KEEP THE FIREARM POINTED IN A SAFE DIRECTION AS IT MAY FIRE AT ANY TIME.
MisfireA misfire is a failure of either the primer or the main charge to ignite. This could be a very hazardous situation.
WARNING: EXTREME CAUTION SHOULD BE EXERCISED WHEN DEALING WITH A MISFIRE.
Rarely is a misfire the fault of the rifle. Generally, it can be attributed to a problem with the propellant or primer. Should your gun fail to fire for any reason, keep the muzzle pointed at your down-range target for at least one minute with the action closed. By doing so, you make sure you are prepared for the chance of a delayed ignition.
If 209 primer did not fire:
1. Check to make certain that a primer was installed and is still securelypositioned on the nipple or in 209 primer pocket of the breech plug.
2. Verify that the action is free of debris.
3. Try a new primer.
32
33
If the primer fires but the main charge does not:
1. Keep the muzzle pointed at your down-range target for at least oneminute with the action closed. Press the safety button to engage the trigger block safety. After waiting one minute, then remove the primer while still keeping the barrel pointed in a safe direction. Using a cleaning pick, verify that the hole in the breech plug or nipple is clear of any obstruction.
2. Tap the butt pad of the rifle with your hand to direct the powder intothe ignition channel. If you are using pellets this process will not be helpful.
3. Verify that propellant was loaded under your projectile by runningthe ramrod down the muzzle and observing the measure marks on your ramrod. Use extreme caution to always keep the muzzle pointed in a safe direction.
4. Check for any mechanical defects in the breech area. If your gunhas repeatedly failed to fire, you will need to unload the rifle. At this point a beginning shooter should seek assistance from an experienced shooter. Never leave an unfired charge in the barrel.
5. After verifying the above directions reprime the muzzleloader andfire.
Hangfire
A hangfire is a delayed ignition. The primer fires when the trigger is pulled and the main charge fires a brief moment later. There are many reasons that hangfires occur. If you are experiencing hangfires, there are possible causes that you need to evaluate. Verify the following:
1. Verify that the primer is the correct size and properly fitted onto thenipple.
2. Inspect that the ignition channel is clear of obstructions.
3. Verify that the proper propellant is being used and that it is theproper granulation and is free from moisture, contamination and oils.
4. Check the condition of the primers and propellant powder. Forhunting situations, it is a wise practice to use fresh primers and powder. Use a fresh load for each dayʼs hunting.
33
34
13. UNLOADING AND UNCHARGINGYOUR PURSUIT™ G4
There are two different methods for removing the projectile and charge:
Method 1Note: It is recommended to use either a Traditions™ range rod or ramrod extension for this method.
1. Make sure the muzzle of the barrel is pointed in a safe direction atall times. 2. Open the action and carefully remove the primer from the breech plug3. Using your fingers, rotate the Accelerator Breech Plug™counterclockwise. Depending on the amount of shooting done you mayhave to use your spanner wrench to loosen the breech plug. 4. Insert a ramrod or range rod into the muzzle and push the load outthe breech end of the barrel. 5. Clean and wipe all surfaces to remove loose fouling and debris.
Method 21. Open the gun and carefully remove the primer from the breech plug
2. Using a range/bench ramrod, with a ball puller screw in one end,insert the screw end into the muzzle until the screw makes contact with the projectile. 3. Apply pressure to the end of the ramrod while at the same timeturning it, allowing the ball puller screw to bite into the projectile. 4. Continue turning the ramrod until you can determine that the ballpuller screw is well anchored into the projectile. 5. Firmly grasp the exposed end of the ramrod with projectile attached,pull it through the barrel and out of the muzzle. One continuous non-stoppull is generally best.
Note: When extracting saboted bullets the first few inches of the pull will separate the projectile from the plastic sabot. At this point the bullet will be free from the sabot and will come out easily. It will then be necessary to reinsert the ball puller screw back down the barrel and screw it into the plastic sabot and also pull it out.
6. Remove powder, if any.7. Clean and dry the bore of the barrel making sure the breech area isdry before reloading fresh powder.
34
35
14. SCHEMATIC
35
14. SCHEMATIC
35
14. SCHEMATIC
35
14. SCHEMATIC
35
14. SCHEMATIC
35
36
RANGE CLEANING AND ADVICE WHILE SHOOTING
A systematic routine of cleaning while shooting is strongly advised to aid in avoiding problems while loading and to optimize accuracy.
1. When cleaning the bore use Traditions EZ Clean cleaning patchesrather than shooting patches. Shooting patches are too small forcleaning and can be lost in the bore.
2. If a patch becomes lost in the bore, use a Traditions Patch PullerWorm attached to a ramrod for retrieval, or if necessary, remove thebreech plug and push the patch out through the breech area. Neverload a charge over a lost patch.
3. If unusual resistance is felt while loading a projectile, place an EZClean™ cleaning patch on a cleaning jag affixed to the end of aramrod and run it the full length of the barrel several times with yourobjective being to remove as much of the fouling build up as possible.
NOTE: It should never be necessary to hammer or excessively force aprojectile down the bore. Projectiles should load firmly against thepowder charge with a series of short strokes. If the projectile is theproper size, unusual resistance usually indicates the need to swab thebore with a treated cleaning patch. Use EZ Clean™ solvent if barrel isheavily fouled. An occasional cleaning of the bore with a brassTraditions™ Bore Brush is advisable to remove excessive plastic andfouling build-up.
4. When target shooting or sighting in, develop a habit of consistenlywiping the bore with Traditions™ EZ Clean™ patches after each shot.Depending upon the specific load, temperature, and humidity, a shortseries of shots with black powder or black powder substitute can befired before it becomes necessary to wipe the bore with Traditions™EZ Clean™ patches or in order to remove fouling build-up. If for anyreason the projectile will not go all the way down to the powdercharge, it will be necessary to extract the projectile from the barreleither with a bullet puller on a ramrod or the breech plug can beremoved, the charge removed and the projectile forced out the end ofthe barrel with a long bench/range rod or an extended ramrod.
Note: Reference the exploded view diagram in this manual to helpidentify part names and numbers.
WARNING: Confirm no powder charges, primers or projectiles are present or available during any disassembly, reassembly, or function test procedures.
CLEANING & MAINTENANCE15.
36
37
FIELD CLEANING & DISASSEMBLY PROCEDURE
The field disassembly procedure is most often used for general cleaning, lubrication and inspection of your rifle. It must be completed after each shooting session. This procedure allows to quickly clean, lubricate and inspect most important parts and assemblies. The field disassembly procedure outlined below will keep your rifle shooting safely and reliably for years to come. Carefully follow this 4 easy step process.
Required Tools & Supplies:
Supplied 4mm Allen wrench
Accelerator Breech Plug™ wrench
Traditions™ range rod orramrod with jag
Bore brush
EZ Clean™ solvent
Wonderlube™ 1000
Pipe Cleaners
Bore patches
Breech Plug Grease
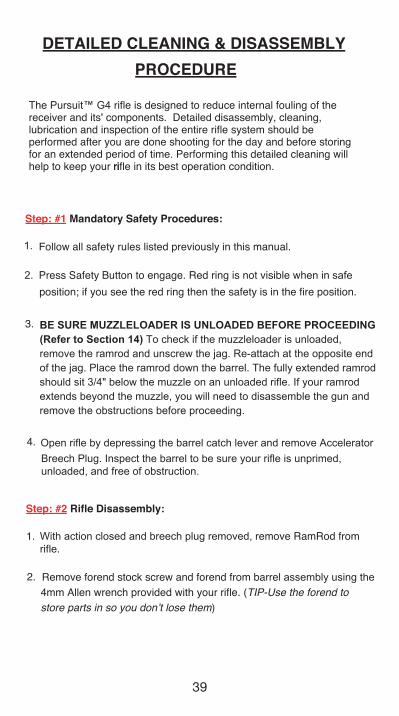
Step: #1 Mandatory Safety Procedures:
1. Follow all safety rules listed previously in this manual.
2. Press Safety Button to engage. Red ring is not visible when in safeposition; if you see the red ring then the safety is in the fire position.
3. BE SURE MUZZLELOADER IS UNLOADED BEFORE PROCEEDINGTo check if the muzzleloader is unloaded, remove the ramrod andunscrew the jag. Re-attach at the opposite end of the jag. Place theramrod down the barrel. The fully extended ramrod should sit 3/4" belowthe muzzle on an unloaded rifle. If your ramrod extends beyond themuzzle, you will need to disassemble the gun and remove theobstructions before proceeding.
4. Open rifle by depressing the barrel catch lever and remove AcceleratorBreech Plug. Inspect the barrel to be sure your rifle is unprimed,unloaded, and free of obstruction.
NOTE: A dirty fouled barrel will directly affect your ability to group shots. However, in a hunting situation, only a few shots will likely betaken. If the barrel is prepped and lubed at the onset, it is not necessary to clean and lube the interior of the barrel between shotswhen hunting.
37
38
Step: #3 Rifle Cleaning & Lubrication:
1. Apply Traditions EZ Clean™ to barrel brush and cleaning patches toclean both interior and exterior of barrel.
2. Dry barrel interior with several dry bore patches.
3. Lubricate with Wonderlube™ to help protect both interior andexterior surfaces of both barrel and receiver from rust and to easeloading.
4. Lightly oil inside of receiver.5. Lightly grease frame pivot pin and barrel catch surface on barrel.
6. Lightly oil all interior and exterior metal surfaces of your rifle.
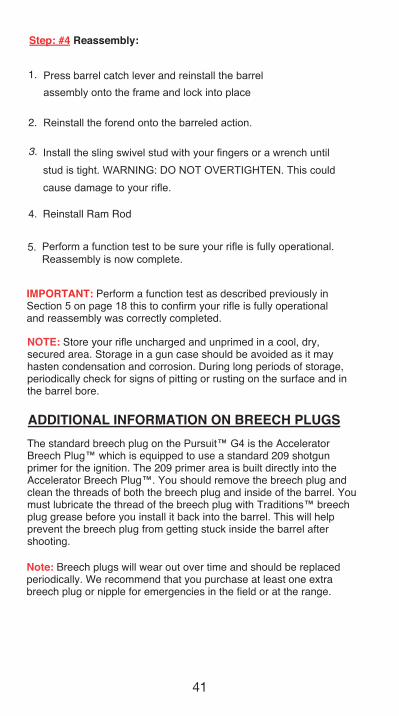
Step: #4 Reassembly:
1. Reinstall the Barrel Assembly onto the Receiver and lock into place.
2. Reinstall the forend stock onto the barreled action and install theforend stock screw.
3. Reinstall Ram Rod
4. Function test to confirm your rifle is fully operational. Reassembly isnow complete.
When barrel starts to open, lift barrel out of the receiver.You can now clean your Barrel, Receiver and Breech Plug.Field disassembly is now complete.
4.
Remove Barrel from Receiver by pushing barrel catch lever in.3.
Remove forend stock screw and forend from barrel assembly using the4mm Allen wrench provided with your rifle. (TIP-Use the forend tostore parts in so you donʼt lose them)
2.
With action closed and breech plug removed, remove RamRod from rifle.
1.
Step: #2 Rifle Disassembly:
38
1.
2.
39
Step: #2 Rifle Disassembly:
Remove forend stock screw and forend from barrel assembly using the 4mm Allen wrench provided with your rifle. (TIP-Use the forend to store parts in so you donʼt lose them)
With action closed and breech plug removed, remove RamRod from rifle.
Step: #1 Mandatory Safety Procedures:
Follow all safety rules listed previously in this manual.
Press Safety Button to engage. Red ring is not visible when in safe position; if you see the red ring then the safety is in the fire position.
BE SURE MUZZLELOADER IS UNLOADED BEFORE PROCEEDING (Refer to Section 14) To check if the muzzleloader is unloaded, remove the ramrod and unscrew the jag. Re-attach at the opposite end of the jag. Place the ramrod down the barrel. The fully extended ramrod should sit 3/4" below the muzzle on an unloaded rifle. If your ramrod extends beyond the muzzle, you will need to disassemble the gun and remove the obstructions before proceeding.
Open rifle by depressing the barrel catch lever and remove AcceleratorBreech Plug. Inspect the barrel to be sure your rifle is unprimed,unloaded, and free of obstruction.
4.
3.
The Pursuit™ G4 rifle is designed to reduce internal fouling of thereceiver and its' components. Detailed disassembly, cleaning, lubrication and inspection of the entire rifle system should be performed after you are done shooting for the day and before storing for an extended period of time. Performing this detailed cleaning will help to keep your ririfle in its best operation condition.
PROCEDUREDETAILED CLEANING & DISASSEMBLY
2.
1.
39
4. Using a dry patch, run a dry patch up and down the bore to helpremove fouling. Repeat with a new patch until the patch comes outclean. This means the bore is clean.
5.
6.
Generously lubricate the threads of the breech plug with breechplug grease.
7.
Apply a light coating of gun oil to all external metal surfaces of yourfirearm using an all-cotton cleaning rag.
8.
Lightly grease frame pivot pin and barrel catch surface on barrel.
40
Using a bore brush on a range rod, run the brush down the barrel in order to loosen lead and copper fouling in the bore.
3.
Apply a light coat of EZ Clean solvent to a dry patch (or use Traditions pre-soaked patches) and run the patch up and down the bore using a range rod (or ramrod with jag). Allow solvent to sit in bore for 10-15 minutes. This will allow time for the solvent to engage and penetrate the lead and copper fouling. NOTE: Traditions Foaming Bore Solvent can also be used instead of the patches.
2.
Clean all small items and frame with hot, soapy water or muzzleloader bore solvent. Use cleaning brush to scrub fouling off of part surfaces. NOTE: Pipe cleaners and a cleaning pick can assist in removing fouling from the ignition hole in the breech plug.
1.
Step: #3 Rifle Cleaning & Lubrication:
Apply a light coat of gun lube to a dry patch and run through the barrel.This will help protect against rust in the bore and allow for easierloading during your next shooting session.
You can now clean your Barrel, Receiver and Breech Plug. Field disassembly is now complete.
4.
Remove Barrel from Receiver by pushing barrel catch lever in. When the barrel starts to open, lift barrel out of receiver.
3.
40
41
IMPORTANT: Perform a function test as described previously in Section 5 on page 18 this to confirm your rifle is fully operational and reassembly was correctly completed.
NOTE: Store your rifle uncharged and unprimed in a cool, dry, secured area. Storage in a gun case should be avoided as it mayhasten condensation and corrosion. During long periods of storage, periodically check for signs of pitting or rusting on the surface and in the barrel bore.
ADDITIONAL INFORMATION ON BREECH PLUGSThe standard breech plug on the Pursuit™ G4 is the Accelerator Breech Plug™ which is equipped to use a standard 209 shotgun primer for the ignition. The 209 primer area is built directly into the Accelerator Breech Plug™. You should remove the breech plug and clean the threads of both the breech plug and inside of the barrel. Youmust lubricate the thread of the breech plug with Traditions™ breech plug grease before you install it back into the barrel. This will help prevent the breech plug from getting stuck inside the barrel after shooting.
Note: Breech plugs will wear out over time and should be replacedperiodically. We recommend that you purchase at least one extrabreech plug or nipple for emergencies in the field or at the range.
Reinstall Ram Rod
5.
4.
Perform a function test to be sure your rifle is fully operational. Reassembly is now complete.
3. Install the sling swivel stud with your fingers or a wrench untilstud is tight. WARNING: DO NOT OVERTIGHTEN. This couldcause damage to your rifle.
Reinstall the forend onto the barreled action.2.
Press barrel catch lever and reinstall the barrel assembly onto the frame and lock into place
1.
Step: #4 Reassembly:
41
42
Removal of the Breech Plug:
1. Insert the larger end of the breech plug wrench over the breech plugand make sure it is fully seated.
2. Insert the handles into the hole at the rear of the breech plugwrench and unscrew the breech plug counter clockwise. Itmay require some extra force to remove the breech plug aftershooting.
3. If for some reason you are unable to remove the breech plug or nipple,please refer to the section on tips for stuck breech plugs.
Cleaning of the Breech Plug:1. Spray the breech plug inside and out with Traditions™ EZ Clean™
solvent or use the EZ Clean™ bath system to loosen the residueand fouling on the plug. Use a stiff brush to clean the outsidethreads and inner area of the breech plug including the fire channel.A pipe cleaner can be used to get the smaller areas clean and dry.
2. Wipe with a clean cotton cloth. Repeat until all residues are off.
3. Dry the breech plug and lube the threads and o-ring withTraditions™ breech plug grease or the appropriate anti-seizegrease. Not using the recommended lubricant will cause o-ringdamage and breech plug seizure.
Note: If the plug is difficult to remove, try these hints to help remove your plug. Spray penetrating oil down the muzzle of the barrel and let it sit for an hour. Remove the barrel from the frame and place in a padded vice to give better leverage while using the spanner wrench toremove the plug. To use the wrench, insert the post of the wrench into the notch on the plug and turn the handle counterclockwise.
Inspect the o-ring to be sure it is not worn or damaged. If so removeand replace with a new one.
2.
Using your fingers rotate the breech plug counter clockwise to remove from the barrel. The Accelerator Breech Plug™ removes in just 3 full rotations from the barrel.
1.
For standard models wiith the Accelerator Breech Plug™:
Removal of the Breech Plug:
42
43
Installation of the Accelerator Breech Plug™:Note: Before attempting to install the Accelerator Breech Plug™ be sure to inspect the fire channel of the breech plug to make sure it is clean and free of any obstructions.
Place the lubricated breech plug in the barrel and thread the breechplug into the barrel using your fingers and rotating the breech plug in a clockwise rotation. Continue to do so until the Accelerator Breech Plug™ makes contact with the barrel and seats firmly.
Note: If the breech plug does not thread smoothly or seat fully, remove it and visually inspect the o-ring for wear and the threads on the plug and inside the barrel for fouling or obstructions. Traditions™recommends removing, cleaning and re-lubing the breech plug every 10-15 shots. With proper maintenance and care the o-ring will last many years. The o-ring is in place as a gas check and helps to blockfouling from reaching the threads. The plug can still be used withoutthe o-ring but may become difficult to remove due to the fouling thatwill take place.
16. SIGHTING IN AND SCOPEMOUNTING
SIGHTING IN:Start your sighting in at approximately 25 yards with a large target. You want to achieve a grouping of shots no matter where on the target first. After you are able to shoot at least 3 shots in the same 2” area, then adjust your sight to the center bullʼs-eye.
If you still cannot remove plug contact the Traditions™ CustomerService Department.
3.
2. Remove the barrel from the receiver. Pour some hot water into thebarrel and let it soak for about a 1/2 hour. Secure the barrel in apadded vise. Position the wrench onto the breech plug and remove. Becareful not to scald yourself with the hot water.
With the breech plug wrench fitted over the breech plug, actually try to tighten the plug and then rock it back and forth to loosen up the fouling.
1.
Important: Always make sure to lubricate the breech plug threadsliberally with Traditions™ breech plug grease before using yourmuzzleloader to help avoid having a stuck breech plug.
Tips for Stuck Breech Plugs:
43
44
To adjust: Move the rear sight in the direction you want the bullet to go. To adjust the sight use a flat tip screwdriver to turn the windage (left or right) and elevation (up or down) adjustment screws on the sight.
Note: Traditions™ recommends while sighting in your muzzleloader that you clean the bore between each of your shots. By doing this youare starting out with a fresh, seasoned bore that will help prevent some shooting errors such as powder build up that could cause poor inaccuracy. Different projectiles and recommended powder chargescan vary in accuracy, so make sure to sight in using the same projectiles and powder charges first and then change if needed.
SCOPE MOUNTING:Most Traditions™ muzzleloaders are drilled and tapped for mounting a scope. Traditions™ offers a wide variety of scopes and mounting options to suit many needs. Visit www.traditionsfirearms.com to see our full line of optics and mounts. To sight in your scope; please follow the scope manufacturerʼs directions.
17. INFORMATION ON BLACKPOWDER & BLACK POWDER
SUBSTITUTES.As a muzzleloading firearm shooter you become a reloader in addition to being the shooter. This adds another aspect of responsibility to youand requires that you strictly adhere to the proper safe charging of your firearm regardless of what type of black powder or black powder substitute you use. Failure to properly follow these instructions and the powder manufacturerʼs recommendations may cause damage to the firearm and injury and/or death to the shooter or bystanders and damage to property.
DANGER: NEVER USE MORE THAN 150 GRAINS OF BLACKPOWDER OF ANY TYPE FROM ANY MANUFACTURER.
BLACK POWDERBlack powder gunpowder is the original propellant of firearms and isstill quite useful to this day. Black powder is generally available in four different granule sizes which determines the appropriate use for thepowder. The burn rate of black powder depends on its grain size. Larger granules burn at a slower rate and therefore work best in large diameter rifles or cannons; while smaller granules burn at a faster rate and work best in small caliber rifles or pistols. Selecting the correct granulation is imperative for the best reliable performance of your muzzleloading firearm.
44
45
Note: When purchasing black powder make sure that thegranulation or type is clearly marked on the manufacturerʼs container so you can assure you are purchasing the correctpowder for your application.
FG (also referred to as 1Fg or Single “F”) This is a very coarse black powder best suited to very large bore rifles and shotguns (10, 8, 4 gauge) that were produced in the past. This powder is one that you will not find very much use for and as such is not often seen for sale.
FFG (also referred to as 2Fg or Double “F”) This is a popular granulation as it has a wide variety of applications. Suitable for rifles .50 caliber and over, black powder shotguns in 12, 16, and 20 gauge and sometimes in large caliber single shot pistols (larger than .50 caliber).
FFFG (also referred to as 3Fg or Triple “F”) Since it is can used in a wide variety of applications this is the most popular and available granulation of black powder. Suitable for use in rifles and single shot pistols .50 caliber and under, as well as in all percussion (cap & ball) revolvers; this powder is the most versatile black powder available.
FFFFG (also referred to as 4Fg or Four “F”) This is the finest of the commonly available black powders and with its fast burn rate has limited applications. The best and most common application of this powder is for the priming of the flash pan on a flintlock rifle. Since it has such limited applications it can sometimes be hard to find at retailers.
WARNING: Traditional black powder is extremely flammabletherefore proper handling and storage procedures from themanufacturer should be strictly followed. If you have any concerns or questions on how exactly to handle or store black powder contact the manufacturer of the powder. Additional information on black powder storage is available from the National Fire Protection Association, 1 Batterymarch Park, Quincy, MA. 02269. (www.nfpa.org). They can be contacted by calling 1-800-344-3555 or emailing [email protected] for pamphlet #495 for information regarding black powder.
BLACK POWDER SUBSTITUTESIn addition to traditional black powder there are now a multitude of suitable black powder substitutes that are appropriate for use in Traditions™ muzzleloading firearms. These powders can offer advantages over traditional black powder but sometimes require specific types of ignition and it is important to consult the powder manufacturerʼs instruction on appropriate ignition types.
45
46
Some black powder substitutes are offered in differing granulations similar to black powder, while others are only offered in one granulation. It is important that you select the appropriate powder and granulation for your specific application and firearm.
In addition most black powder substitutes relate closely to black powder on a volume to volume basis but not by weight. For this reason black powder substitutes are measured by volume as opposed to by weight. When using you a black powder measure you must follow the powder manufacturerʼs instructions on adjusting the measuring of the powder charge compared to what charge you would normally use with black powder.
Some black powder substitutes are also available in a pellet form which provides for easier carrying and loading. Pellets are sometimes offered in different charge sizes so be sure to use the appropriate number of pellets to obtain your desired charge. Consult the pellet manufacturerʼs recommendations if you have any doubts about how many pellets to use.
WARNING: DO NOT USE PYRODEX® CTG. While Pyrodex CTG is a black powder substitute, it is designed to be used in cartridge firearms which use cartridges that originally used black powder as their charge. It is not safe or recommended for use in muzzleloading firearms.
TYPES OF BLACK POWDER & BLACK POWDER SUBSTITUTES
Traditions™ does not sell or endorse any specific brand of black powder or black powder substitute. However listed below are some ofthe currently available black powder or black powder substitutes that are approved for use in Traditions™ products. Please refer to the powder manufacturer for proper loading and measuring techniques as they can vary from manufacturer to manufacturer. If there is ever a question on the appropriate application of a certain powder or the safety of a specific powder charge you must contact the manufacturer of the powder as the source for this information.
46
47
Follow the safe handling and storage precautions printed on the manufacturerʼs container and never purchase or use any powder that has been removed from their manufacturerʼs original container.
DANGER: NEVER UNDER ANY CIRCUMSTANCE USE SMOKELESS POWDER OF ANY TYPE OR IN ANY QUANTITY IN A MUZZLELOADING FIREARM, AND NEVER MIX POWDERS. Theuse of any smokeless powder at all could result in a detonation orexplosion which could cause injury and/or death to the shooter orbystanders and damage to property.
WARNING: NEVER EXCEED THE RECOMMENDED MAXIMUM BLACK POWDER OR BLACK POWDER SUBSTITUTE CHARGELISTED IN THIS BOOK OR BY THE POWDER MANUFACTURER. Ifthe recommended maximum charge is exceeded then injury or deathto the shooter or bystanders can occur.
WARNING: Follow the powder manufacturerʼs instructionswhen measuring any type of powder as not all powders are measured the same. Some are measured by weight and some by volume, and volumetric measuring can vary depending on thetype and manufacturer of the powder.
Use the below table to find out more about some of the available black powders and black powder substitutes from the following companies:
209 Primer suggestions Traditions™ does not sell or endorse any specific brand of 209 primers but has found the primers from Remington, Federal, CCI, and Winchester perform well in our rifles.
For more information regarding primers contact the primer manufacturer and make sure you use an appropriate primer for the powder you are using.
47
48
18. SUGGESTED LOADS FORPURSUIT™ G4
WARNING: NEVER UNDER ANY CIRCUMSTANCE USE SMOKELESS POWDER OF ANY TYPE OR IN ANY QUANTITY IN AMUZZLELOADING FIREARM, AND NEVER MIX POWDERS. The use of any smokeless powder at all could result in a detonation orexplosion which could cause injury and/or death to the shooter orbystanders and damage to property.
WARNING: NEVER EXCEED THE RECOMMENDED MAXIMUM BLACK POWDER OR BLACK POWDER SUBSTITUTE CHARGELISTED IN THIS BOOK OR BY THE POWDER MANUFACTURER. Ifthe recommended maximum charge is exceeded then injury or deathto the shooter or bystanders can occur.
WARNING: FOLLOW THE POWDER MANUFACTURER'S INSTRUCTIONS WHEN MEASURING ANY TYPE OF POWDER AS NOT ALL POWDERS ARE MEASURED THE SAME. SOME ARE MEASURED BY WEIGHT AND SOME BY VOLUME. VOLUMERIC MEASURING CAN VARY DEPENDING ON THE TYPE AND MANUFACTURER OF THE POWDER
WARNING: ONLY USE BULLETS THAT ARE DESIGNED OR APPROVED FOR USE IN A MUZZLELOADING FIREARM.
Note: Velocities listed are approximate and for reference only.
PYRODEX OR TRIPLE SEVEN BLACK POWDER SUBSTITUTE PELLETS
BulletWeight
Sabot/Bullet Dia. Powder
Powder Charge
Velocity FPS
250 gr. Smackdown 50/45
Pyrodex Pellets
2-50 Grain Pellets 1785
250 gr. Smackdown 50/45 777 Pellets
2-50 Grain Pellets 1785
350 gr. Full Bore 50 777 Pellets
2-50 Grain Pellets 1533
48
49
BLACKHORN 209, BLACK MZ, PYRODEX, TRIPLE SEVEN, BLACK POWDER SUBSTITUTES
WARNING: POWDER CHARGES MEASURED IN VOLUMETRIC UNITS, NOT BY WEIGHT.
BulletWeight
Sabot/Bullet Dia. Powder
Powder Charge
Velocity FPS
250 gr. Smackdown 50/45
777 Powder 2F or 3F
80 gr. VU Min. 1681
250.gr.Smackdown 50/45
777 Powder 2F or 3F
100 gr. VU Max. 1835
350 gr. Full Bore 50
777 Powder 2F or 3F
80 gr. VU Min. 1487
350 gr. Full Bore 50
777 Powder 2F or 3F
100 gr. VU Max. 1624
250 gr. Smackdown 50/45 Black MZ
90 gr. VU Min 1759
250 gr. Smackdown 50/45 Black MZ
120 gr. VU Max. 1966
300 gr. Smackdown 50/45 Black MZ
90 gr. VU Min. 1699
300 gr. Smackdown 50/45 Black MZ
120 gr. VU Max. 1894
250 gr. Smackdown 50/45
Blackhorn 209
80 gr. VU Min. 1734
250 gr. Smackdown 50/45
Blackhorn 209
120 gr. VU Max. 2119
300 gr. Smackdown 50/45
Blackhorn 209
80 gr. VU Min. 1620
300 gr. Smackdown 50/45
Blackhorn 209
120 gr. VU Max. 2050
250 gr. Smackdown 50/45
Pyrodex RS Powder
80 gr. VU Min. 1567
250 gr. Smackdown 50/45
Pyrodex RS Powder
100 gr. VU Max. 1706
49
50
19. WARRANTY & SERVICELIMITED LIFETIME MECHANICAL WARRANTYTraditions™ will warrant this muzzleloading firearm (or parts in a kit to be built) to be free of mechanical defects in materials or craftsmanship for the life of the firearm, while in the possession of the original owner except wooden plastic stocks and finishes. Traditions™ will repair or replace, at its own option, product or parts which are returned at ownerʼs expense to the Traditions™ Customer Service Department. Call 860-388-4656 to obtain a factory issued Return Merchandise Authorization number. A full explanation of the specific problem must be given to the customer service representative.
This warranty shall remain in force unless any of the following are determined by the Traditions™ Customer Service Department:
1. Use of any propellant other than black powder or approved blackpowder substitutes.
2. Use of any powder charge in excess of those recommended in thisbooklet or by the powder manufacturer
3. Use of any plastic patching material with round balls.
4. Modification of internal parts as they were shipped from the factory.
5. A lack of proper maintenance and thorough cleaning is evident suchas rust.
6. Peeling of camo finish after 1 year of service.
7. Customer abuse
NOTE: Proof of purchase is required to show original ownership for all warranty work.
Traditions™ specifically disclaims any and all warranties other than those listed above on this page, including warranties of merchantability and/or fitness for a particular purpose.
50
PLEASE HELP US SERVE YOU BETTER
In the event you still need assistance please do not hesitate to contactTraditions™, and a member of our Customer Service Department willbe happy to assist.
In the unlikely event you need warranty service on your new firearm; we need your help to get the work done right and without delay. Itʼs as easy as dropping us a note or picking up the telephone.
Traditions™ conveniently engraves the caliber, serial number and model name on each barrel. Take note of this information, record it on the warranty page in this manual and be prepared to state it when contacting the Traditions™ Customer Service Department with your questions.
Contact Traditions at 860-388-4656, tell us what problem you are experiencing and weʼll get busy to remedy your situation. Help is just a phone call away should you experience a problem. Simply follow these four simple steps and weʼll get your firearm back in perfect working order in the shortest possible time.
Steps to Return a Rifle for Service
1. Do not return your firearm to the dealer.
2. Please call us and describe the problem. Chances are we can eitherguide you to a solution right over the phone or when possible sendyou the parts you need to correct the problem. Should your gun needfactory service, we will give you instructions about where to ship it andissue you a Return Merchandise Authorization number.
3. All firearms must have a factory issued Return MerchandiseAuthorization number (RMA) before returning to Traditions forwarranty service. Firearms without an RMA number will be refused.
In the event you should have questions pertaining to the function or performance of your new Traditions™ firearm please visit our website to get answers to the most commonly asked questions. Log on to www.traditionsfirearms.com where you will find the FAQ page. This pagewill get you fast access to trouble shooting solutions. If you do not find an answer to your specific question on the FAQ page of our website please feel free to email [email protected] and a qualified member of our team will respond to your individual question as quickly as possible.
5151
52
4. Package your unloaded rifle safely and securely inside a sturdy box.The Traditions box your rifle arrived in is NOT a shipping box.NOTE: Firearms packaged and shipped improperly are notcovered under warranty if damage occurs.
5. Write your RMA # on the outside of the box so it can be easily seenwhen it arrives at our facility.
6. Ship your unloaded rifle to:Traditions™1375 Boston Post Rd. • P.O. Box 776Old Saybrook, CT 06475-0776Tel. 860-388-4656Fax. 860-388-4657Website: www.traditionsfirearms.com
WARNING: It is in violation of Federal Law to ship a loaded firearm. If your gun has a live cartridge, charge, and/or projectile in the chamber or barrel, please take it to a local gunsmith for removal or call Traditions Customer Service Department at 860-388-4656.
ATTENTION: YOUR RIFLE MUST BE CLEANED BEFORE IT CAN BE INSPECTED. If we need to clean your rifle in order to inspect it there will be a standard cleaning, lubrication, inspection, and function test (C.L.I.F.) service fee.
NOTE ON ACCESSORIES:Please remove all after-market accessories from your gun prior to being sent in for repairs. This includes scopes, bi-pods, slings, etc. This will ensure that these items will not be lost, misplaced, or damaged during the return process.
52
Safety & Instruction Manual
WARNING: Black Powder or an approved black powder substitute are the only propellant
powders that are safe to use in a muzzleloading firearm.
Read the instructions and warnings in this manual CAREFULLY BEFORE using this
Your new Quick-T™ Ramrod Handle is designed to provide easy and quick loading of your Traditions™ muzzleloader. This handle is designed to be stored on your ramrod for easy access. The Quick-T™ Ramrod Handle in-corporates a palm saver and a jag to thread into the handle so it functions as a work/cleaning rod.
How to use your Quick-T ramrod handle:
• Your Quick-T™ Ramrod Handle will come installed on the ramrod of your new rifle. Simply remove your rifle’s ramrod to remove the Quick-T™ Ramrod Handle.
• The Quick-T™ Ramrod Handle can be used in two ways.
1) When being used as a palm saver: Using only the plastic “T” piece of the Quick-T™ Ramrod Handle, place
the T-handle over the end of the threaded side of your ramrod. This is a quick and easy way to push your projectile down the barrel and protect your hand from the end of the ramrod.
2) When being used as a work/cleaning rod: Screw the brass jag into the threaded pocket of your Quick-T™ Ramrod
Handle. This allows the Quick-T™ Ramrod Handle to thread directly onto the 10/32 threads on your ramrod, providing a fully functional clea-ning rod for maintaining your rifle in the field or at the range.
If you over-tighten the jag into the Quick-T™ Ramrod handle, the hole in the screw-in brass jag will assist you in removal or tightening. Use a small Allen key through hole if needed.
CAUTION
Always follow the manufacturer’s loading and shooting instructions. Be sure to read the owner’s manual prior to using your rifle.
Never fire your rifle with the Quick-T™ Ramrod Handle threaded on your ramrod installed in the barrel thimbles.
53
NOTES
54
NOTES
55
NOTES
56
NOTES
57
NOTES
58
NOTES
59
NOTES
60
NOTES
61
53
________FOR YOUR RECORDS_______________
Important: Please record information here and keep for your record.
Model No. ____________________________________________
Serial No. ____________________________________________
Model Name __________________________________________
Registration Card mailed on ______________________________
Please call Traditions™ Customer Service Department at 860-388-4656 with any questions or concerns.
To register your warranty online please go to www.traditionsfirearms.com/support/warranty-registration, or you can mail in the warranty card on the opposing page.
To be added to our email list for announcements, specials, and other information please visit our website at: www.traditionsfirearms.com
06/15 AKH
62
39
cut A
long d
otted
line
PRefeRRed cusTOMeR WARRANTy ReGIsTRATION cARd
Referencing the label on the end of the carton, please write in the last 5 digits located on the right half of the uPC code into the boxes below.
4 0 5 8 9uPc #
Model # ���������������������������������������������������������������������������������������
Serial # (from barrel) ����������������������������������������������������������������������������
Name ���������������������������������������������������������������������� Age ���������������
Street ����������������������������������������������������������������������������������������
City ��������������������������������������������� State ����������� zip ������������������������
Day Time Phone # ����������������������������� Date of Purchase�����������������������������������
Purchase Price ��������������������������� Store Name ������������������������������������������
1. What is your age? q1 under 18 q2 18-24 q3 25-34 q4 35-44 q5 45-54 q6 55-64 q7 over 65
2. Reason for your purchase q1 Hunting q2 Target Shooting q3 Personal use q4 Gift q5 Raffle Prize q6 Other
3. do you own? q1 Other muzzleloaders q2 Over/under Shotgun q3 Side by Side Shotgunq4 Semi-Auto Shotgun q5 Pump Shotgun q6 Cartridge Rifle q7 Handgun q8 Bow
4. Where purchased? q1 Gun Shop q2 General Sporting Goods Store q3 Hardware Storeq4 Chain Store q5 Mail Order Catalog q6 Internet Store
5. Is this your first muzzleloader? q1 Yes q2 No
6. Which factors influenced your purchase? q1 Previously owned a Traditions productq2 Magazine Ad/Article q3 Internet/Website q4 Traditions Catalog q5 Recommendation of Salespersonq6 Recommendation of a Friend q7 Price q8 Features q9 Other
7. What type of game do you hunt? q1 Whitetail Deer q2 Mule Deer q3 elk q4 Bear q5 Antelope q6 Turkey q7 Small Game q8 Other
8. What do you think is the best way to get information about Hunting & Hunting products?q1 Magazine Ads q2 Internet/Website q3 Television Programs q4 Radio
9a. Which magazine do you read? ����������������������������������������������������������������
b. Which TV hunting show do you watch? ��������������������������������������������������������
q Check here to receive a free Traditions catalog showing muzzleloadings’ largest selection of firearms and accessories or visit our website at www.traditionsfirearms.com
q To receive a Traditions Firearms Logo cap and catalog, send $12.99 along with your warranty registration card.
NOTe: Return this card within 15 days of purchase in order to validate your limited lifetime warranty.
P.O. Box 776 • Old Saybrook, CT 06475-0776 www.traditionsfirearms.com
Please complete all information above and mail to:
NOTes
P.O. Box 776Old Saybrook, CT 06475-0776
PlacePostage H
ere.Or for additional security enclosein a envelope.