10
1 1 2013 Velaro Salesforce Integration Guide
11
2013 Velaro
Salesforce Integration Guide
2
2013 Velaro
Salesforce Integration Guide
Integrating Velaro with Salesforce
Using Velaro’s Salesforce chat integration tools, you can create leads, contacts, support cases, andsave them to Salesforce right from the Velaro chat window. This guide will walk you through settingup the integration, adding your own custom fields, managing your users, and how this powerful toolis used directly within Velaro's Agent Desktop and live chats.
Please note that the Velaro Salesforce integration is intended for Salesforce Enterprise accountsonly. If your Salesforce account is not at the enterprise level, then please contact your representativeto discuss the API integration.
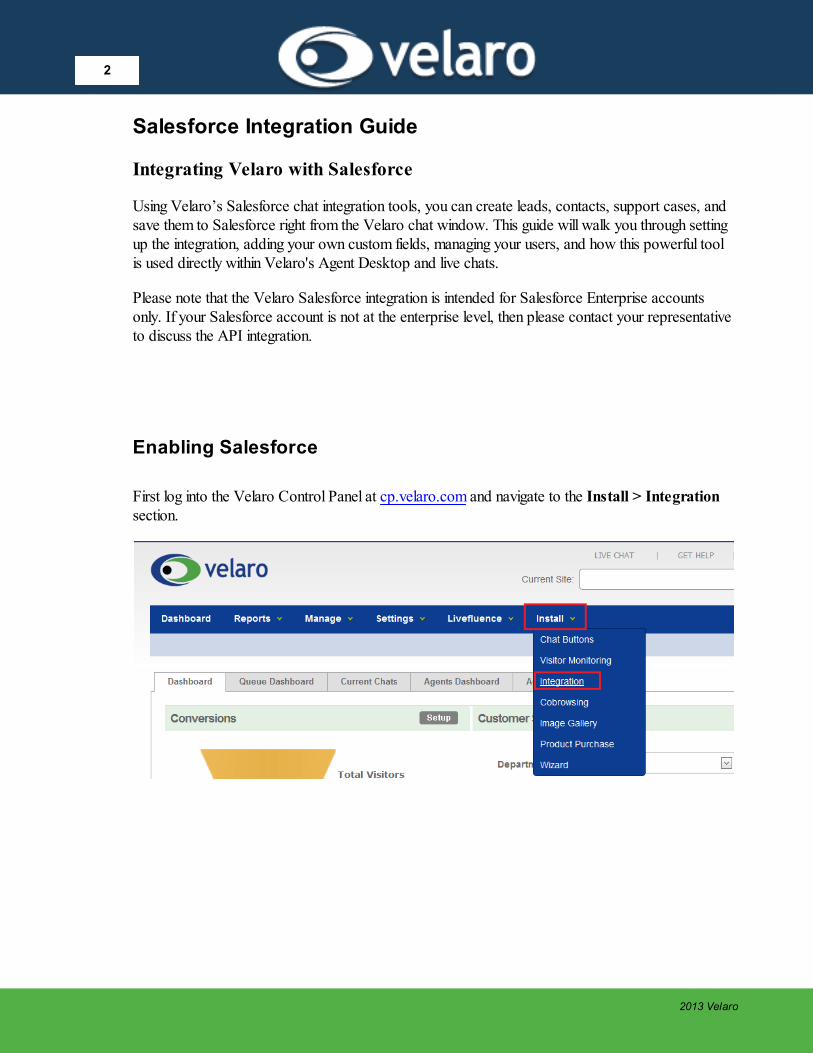
Enabling Salesforce
First log into the Velaro Control Panel at cp.velaro.com and navigate to the Install > Integrationsection.
33
2013 Velaro
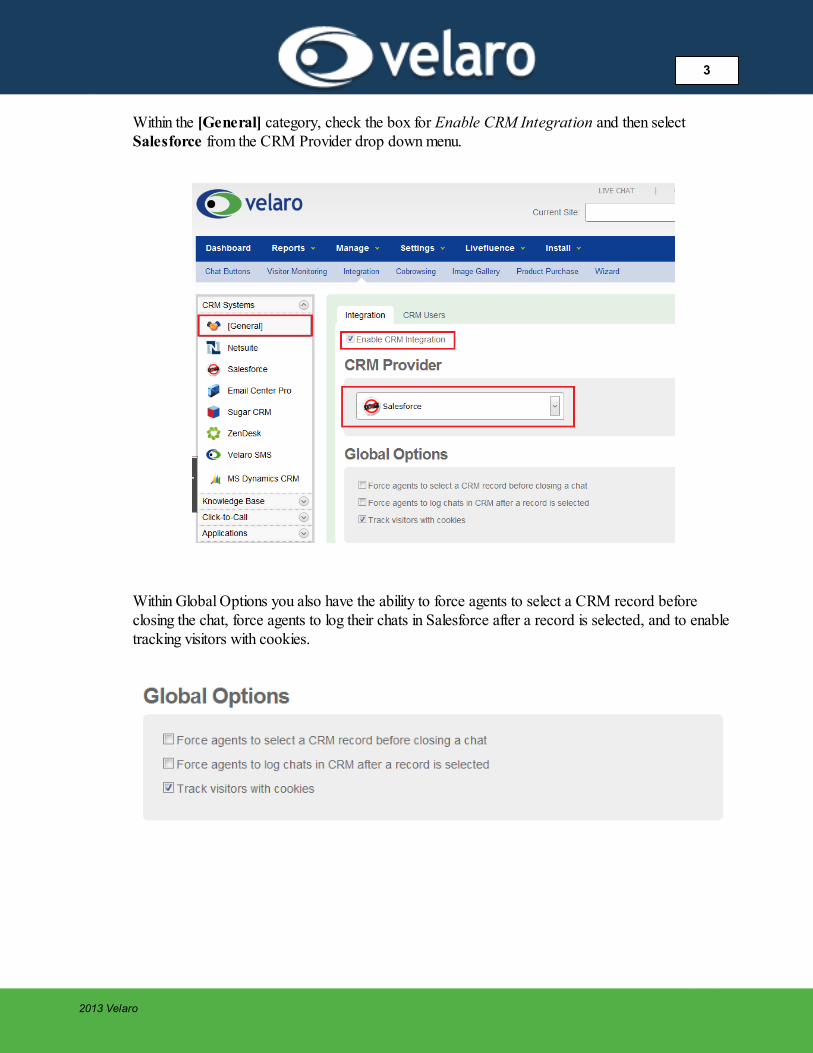
Within the [General] category, check the box for Enable CRM Integration and then selectSalesforce from the CRM Provider drop down menu.
Within Global Options you also have the ability to force agents to select a CRM record beforeclosing the chat, force agents to log their chats in Salesforce after a record is selected, and to enabletracking visitors with cookies.
4
2013 Velaro
Default and Custom Fields
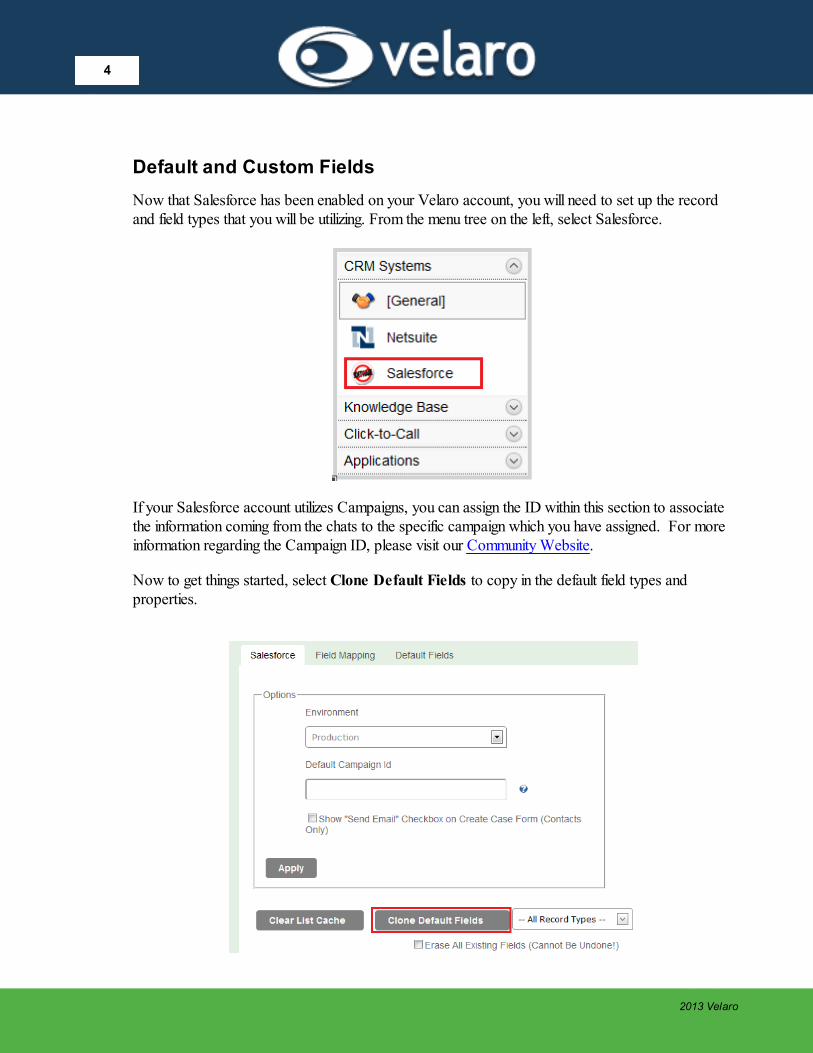
Now that Salesforce has been enabled on your Velaro account, you will need to set up the recordand field types that you will be utilizing. From the menu tree on the left, select Salesforce.
If your Salesforce account utilizes Campaigns, you can assign the ID within this section to associatethe information coming from the chats to the specific campaign which you have assigned. For moreinformation regarding the Campaign ID, please visit our Community Website.
Now to get things started, select Clone Default Fields to copy in the default field types andproperties.
55
2013 Velaro
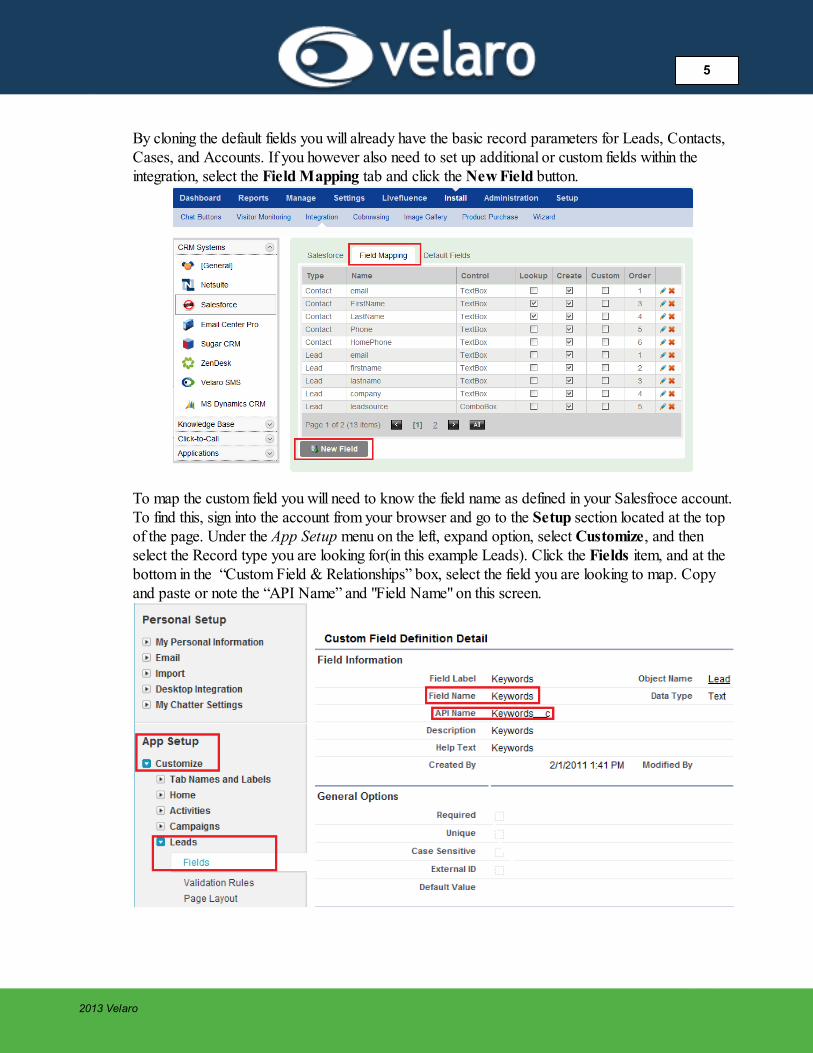
By cloning the default fields you will already have the basic record parameters for Leads, Contacts,Cases, and Accounts. If you however also need to set up additional or custom fields within theintegration, select the Field Mapping tab and click the New Field button.
To map the custom field you will need to know the field name as defined in your Salesfroce account.To find this, sign into the account from your browser and go to the Setup section located at the topof the page. Under the App Setup menu on the left, expand option, select Customize, and thenselect the Record type you are looking for(in this example Leads). Click the Fields item, and at thebottom in the “Custom Field & Relationships” box, select the field you are looking to map. Copyand paste or note the “API Name” and "Field Name" on this screen.
6
2013 Velaro
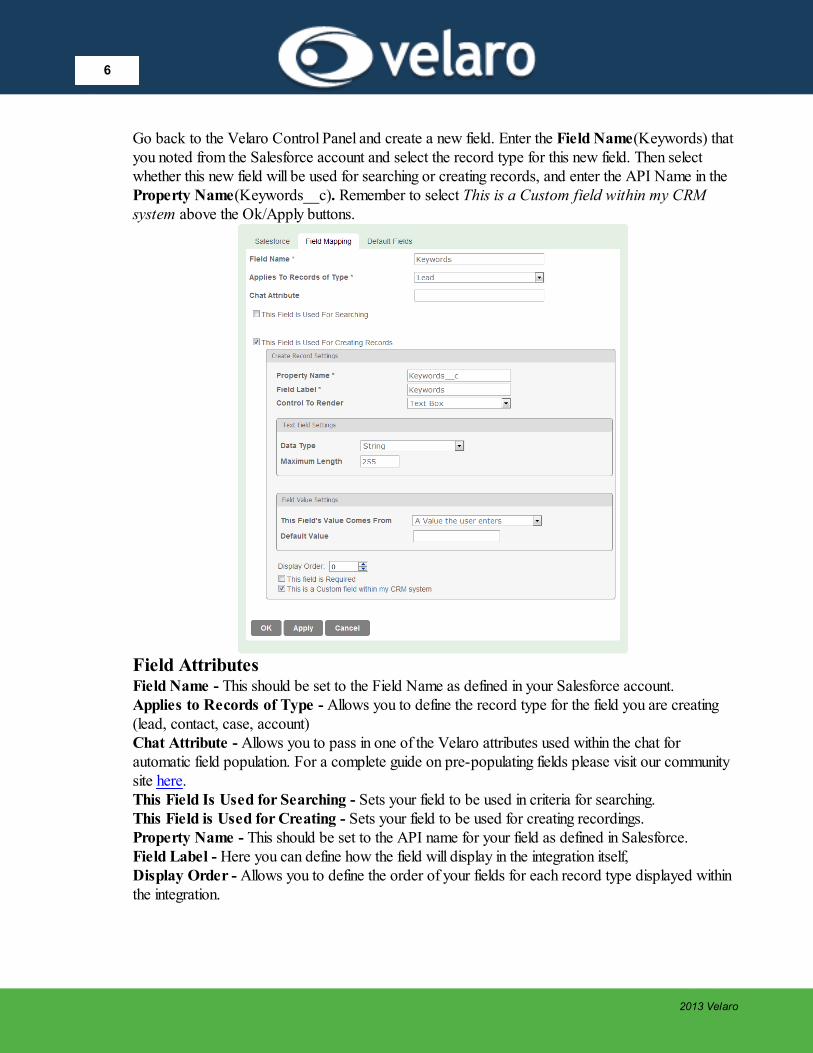
Go back to the Velaro Control Panel and create a new field. Enter the Field Name(Keywords) thatyou noted from the Salesforce account and select the record type for this new field. Then selectwhether this new field will be used for searching or creating records, and enter the API Name in the Property Name(Keywords__c). Remember to select This is a Custom field within my CRMsystem above the Ok/Apply buttons.
Field AttributesField Name - This should be set to the Field Name as defined in your Salesforce account.Applies to Records of Type - Allows you to define the record type for the field you are creating(lead, contact, case, account)Chat Attribute - Allows you to pass in one of the Velaro attributes used within the chat forautomatic field population. For a complete guide on pre-populating fields please visit our communitysite here.This Field Is Used for Searching - Sets your field to be used in criteria for searching.This Field is Used for Creating - Sets your field to be used for creating recordings.Property Name - This should be set to the API name for your field as defined in Salesforce.Field Label - Here you can define how the field will display in the integration itself, Display Order - Allows you to define the order of your fields for each record type displayed withinthe integration.
77
2013 Velaro
Adding Agents
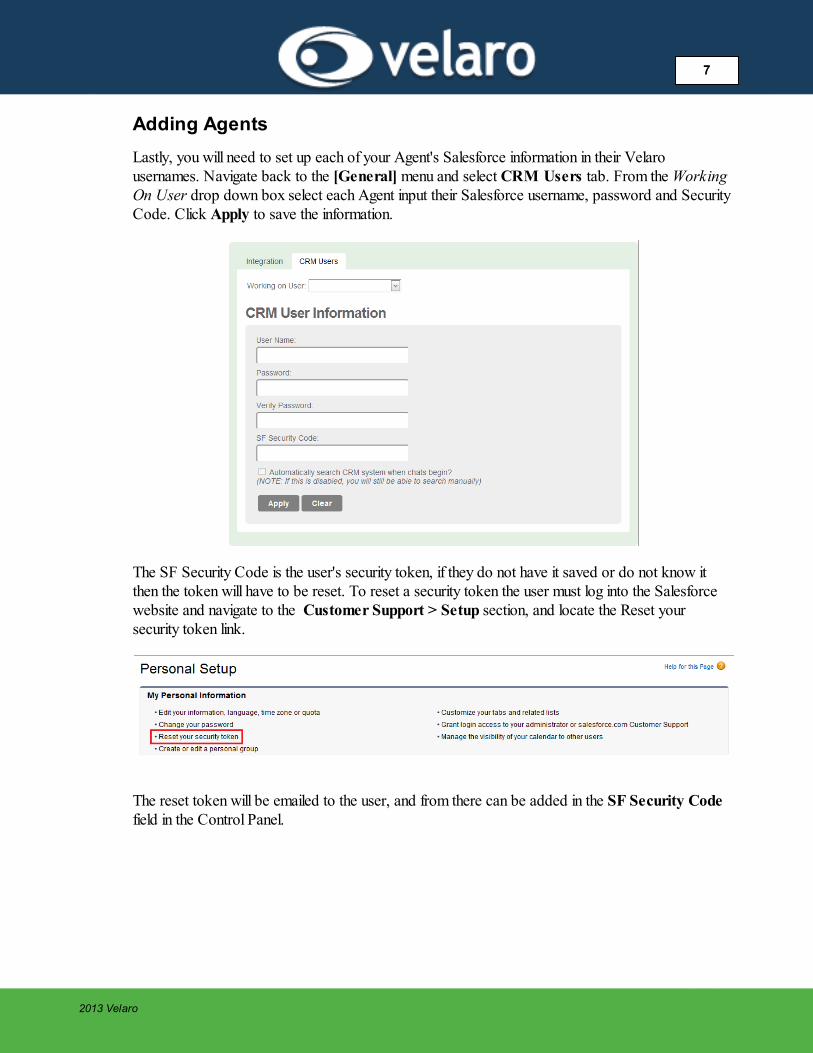
Lastly, you will need to set up each of your Agent's Salesforce information in their Velarousernames. Navigate back to the [General] menu and select CRM Users tab. From the WorkingOn User drop down box select each Agent input their Salesforce username, password and SecurityCode. Click Apply to save the information.
The SF Security Code is the user's security token, if they do not have it saved or do not know itthen the token will have to be reset. To reset a security token the user must log into the Salesforcewebsite and navigate to the Customer Support > Setup section, and locate the Reset yoursecurity token link.
The reset token will be emailed to the user, and from there can be added in the SF Security Codefield in the Control Panel.
8
2013 Velaro
Salesforce in the Agent Desktop
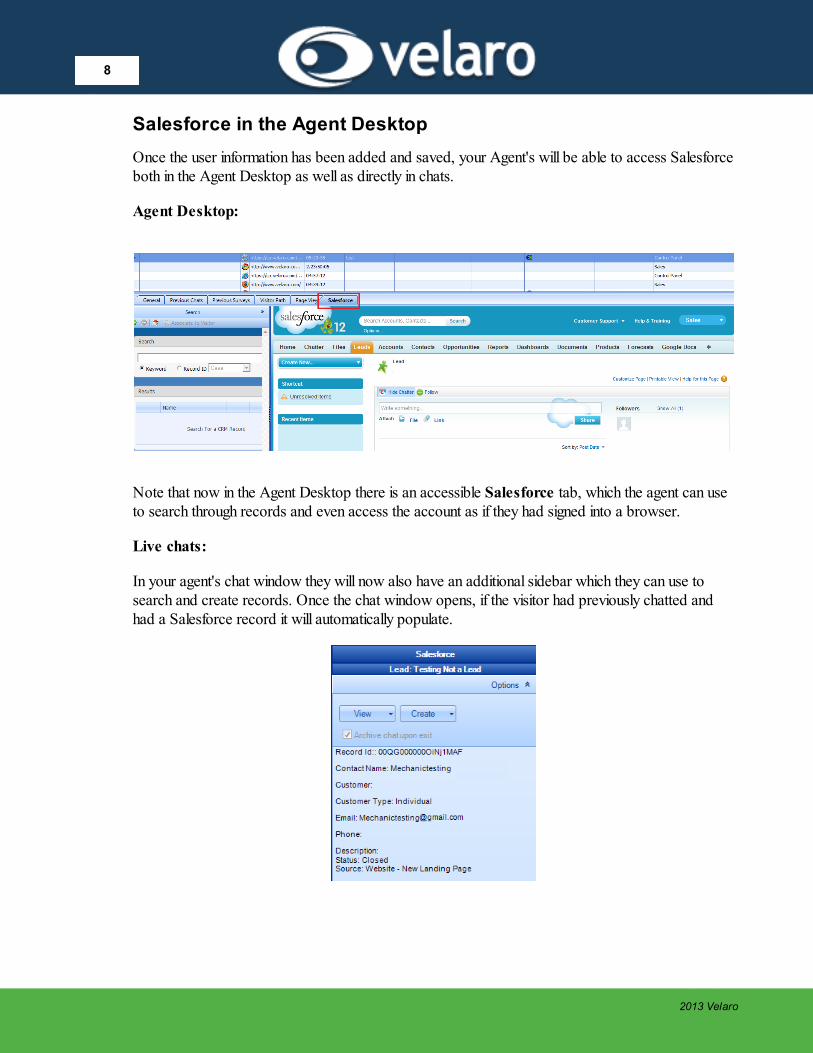
Once the user information has been added and saved, your Agent's will be able to access Salesforceboth in the Agent Desktop as well as directly in chats.
Agent Desktop:
Note that now in the Agent Desktop there is an accessible Salesforce tab, which the agent can useto search through records and even access the account as if they had signed into a browser.
Live chats:
In your agent's chat window they will now also have an additional sidebar which they can use tosearch and create records. Once the chat window opens, if the visitor had previously chatted andhad a Salesforce record it will automatically populate.
99
2013 Velaro
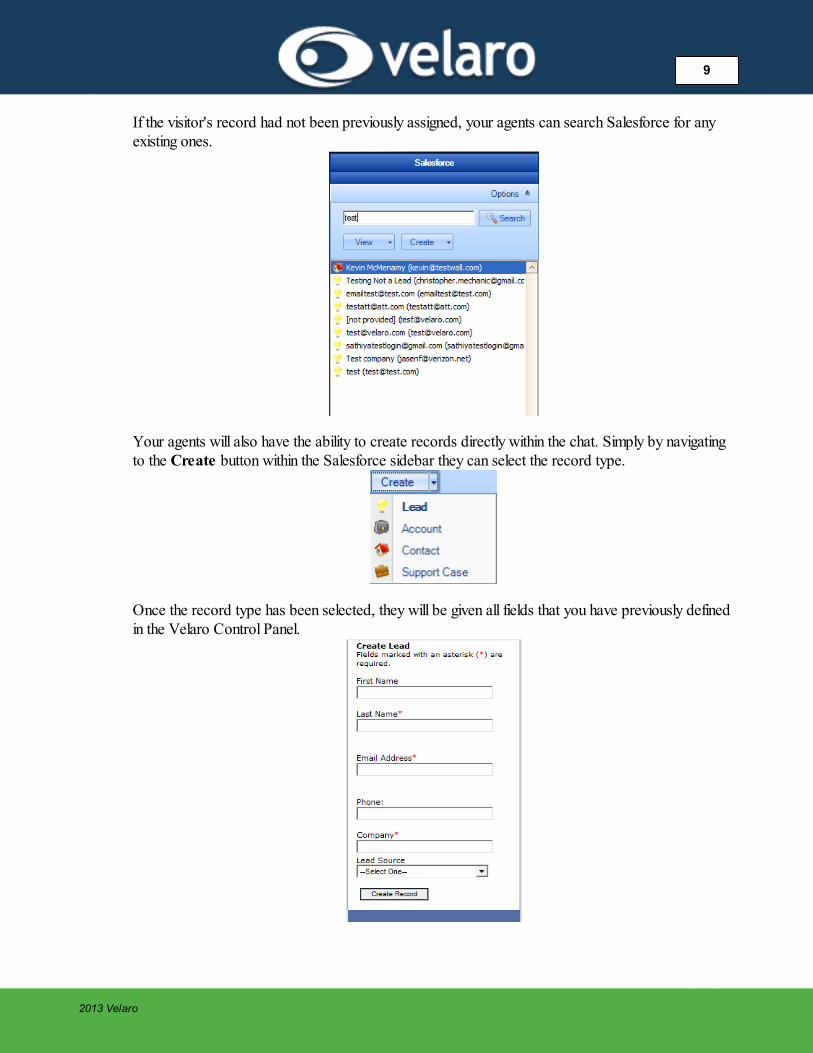
If the visitor's record had not been previously assigned, your agents can search Salesforce for anyexisting ones.
Your agents will also have the ability to create records directly within the chat. Simply by navigatingto the Create button within the Salesforce sidebar they can select the record type.
Once the record type has been selected, they will be given all fields that you have previously definedin the Velaro Control Panel.
10
2013 Velaro
If you would like additional resources, guides, or assistance please utilize the following links:
Online Community Live Chat Email Support
You can also reach Velaro's support department Monday-Friday 8AM-8PM by calling 1-800-983-5276 ex 2.


