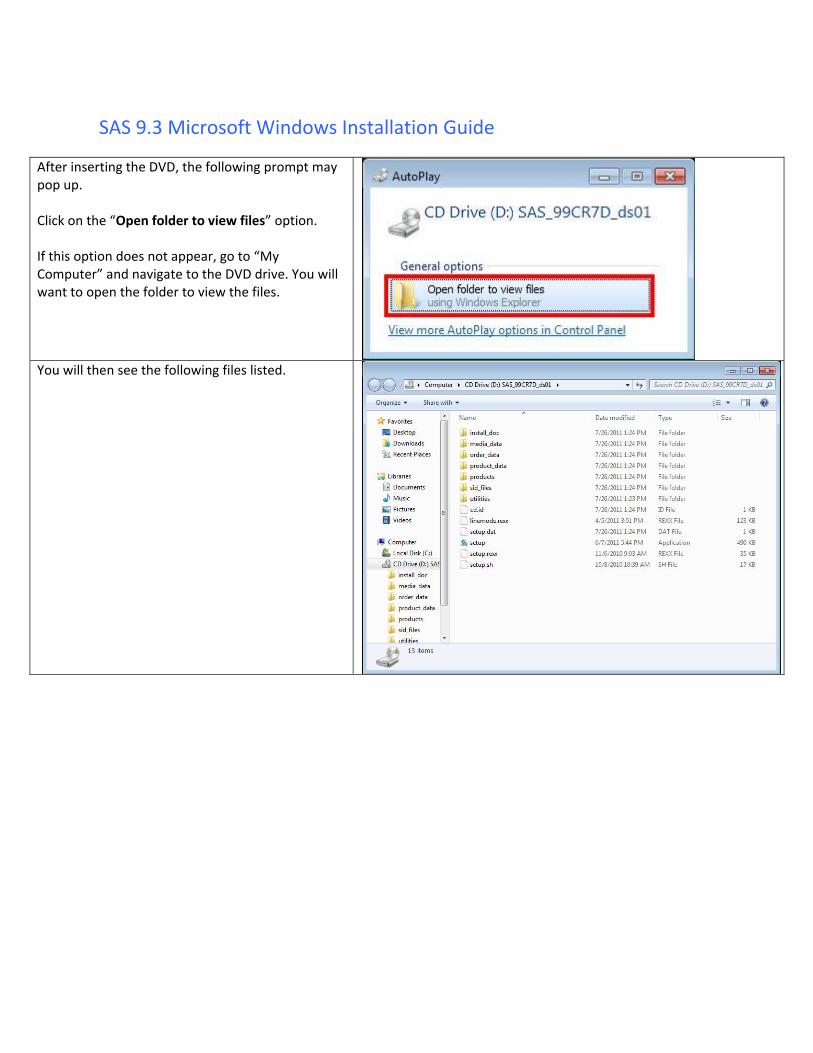
SAS 9.3 Microsoft Windows Installation Guide After inserting the DVD, the following prompt may pop up. Click on the “Open folder to view files” option. If this option does not appear, go to “My Computer” and navigate to the DVD drive. You will want to open the folder to view the files. You will then see the following files listed.
Transcript
SAS 9.3 Microsoft Windows Installation Guide
After inserting the DVD, the following prompt may pop up. Click on the “Open folder to view files” option. If this option does not appear, go to “My Computer” and navigate to the DVD drive. You will want to open the folder to view the files.
You will then see the following files listed.
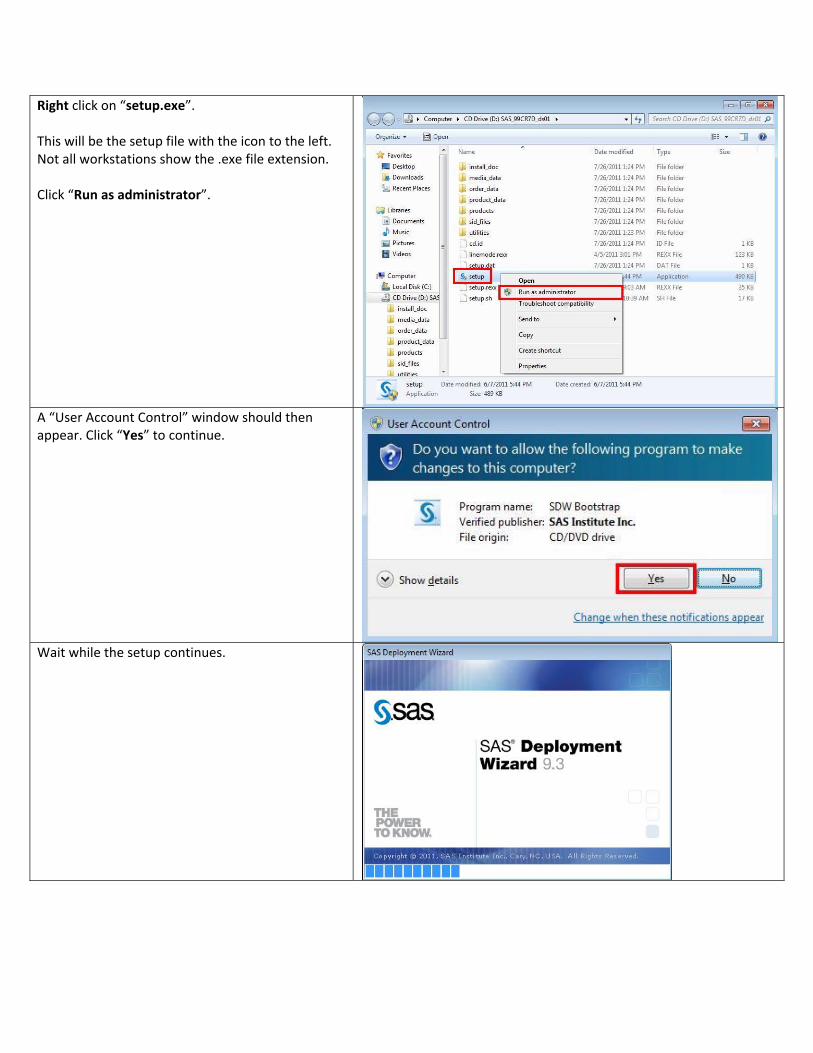
Right click on “setup.exe”. This will be the setup file with the icon to the left. Not all workstations show the .exe file extension. Click “Run as administrator”.
A “User Account Control” window should then appear. Click “Yes” to continue.
Wait while the setup continues.
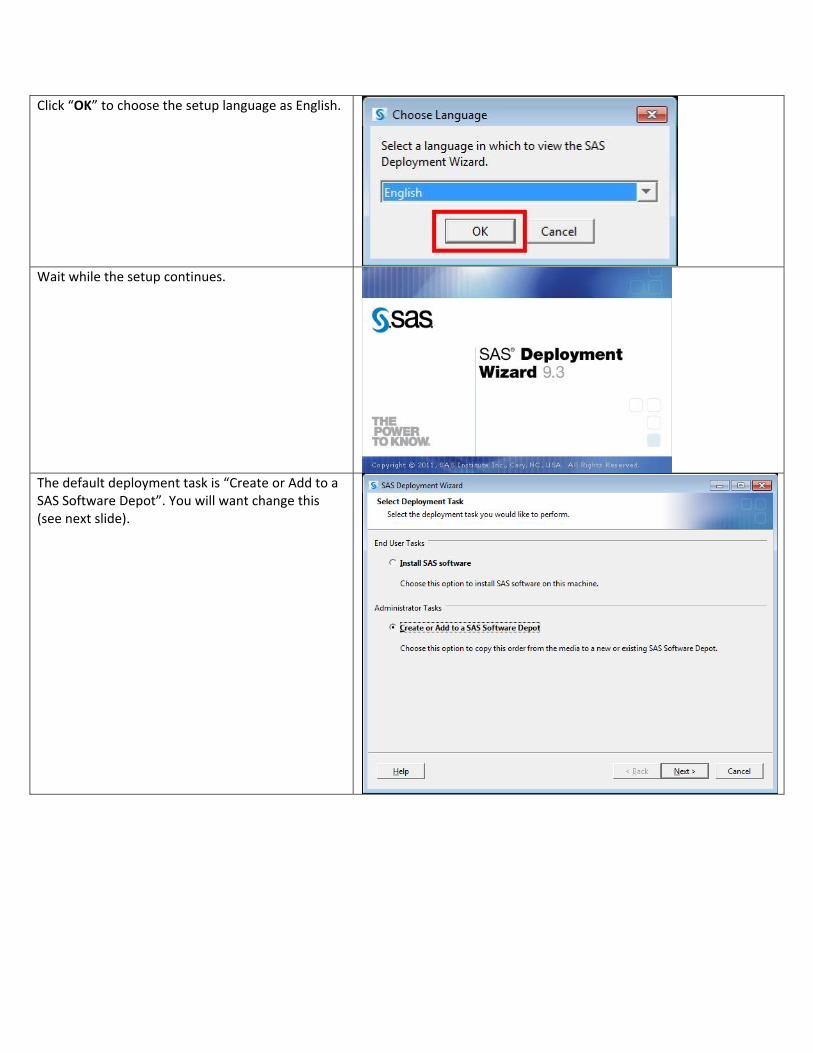
Click “OK” to choose the setup language as English.
Wait while the setup continues.
The default deployment task is “Create or Add to a SAS Software Depot”. You will want change this (see next slide).
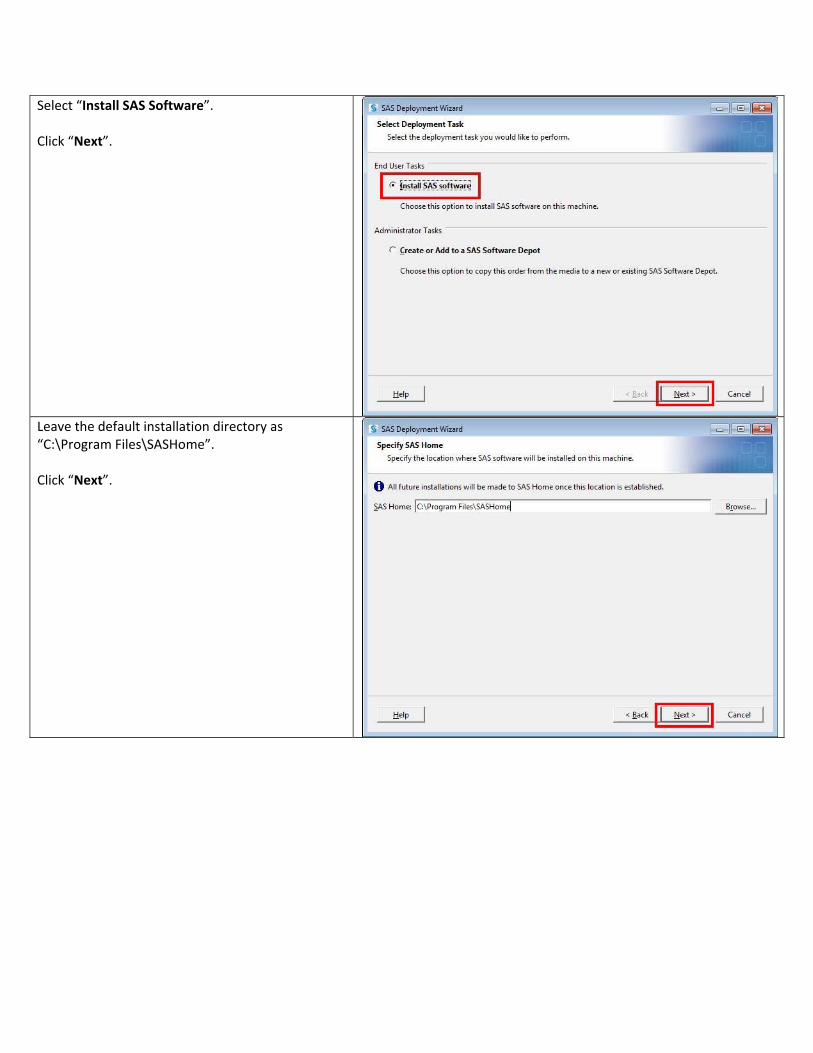
Select “Install SAS Software”. Click “Next”.
Leave the default installation directory as “C:\Program Files\SASHome”. Click “Next”.
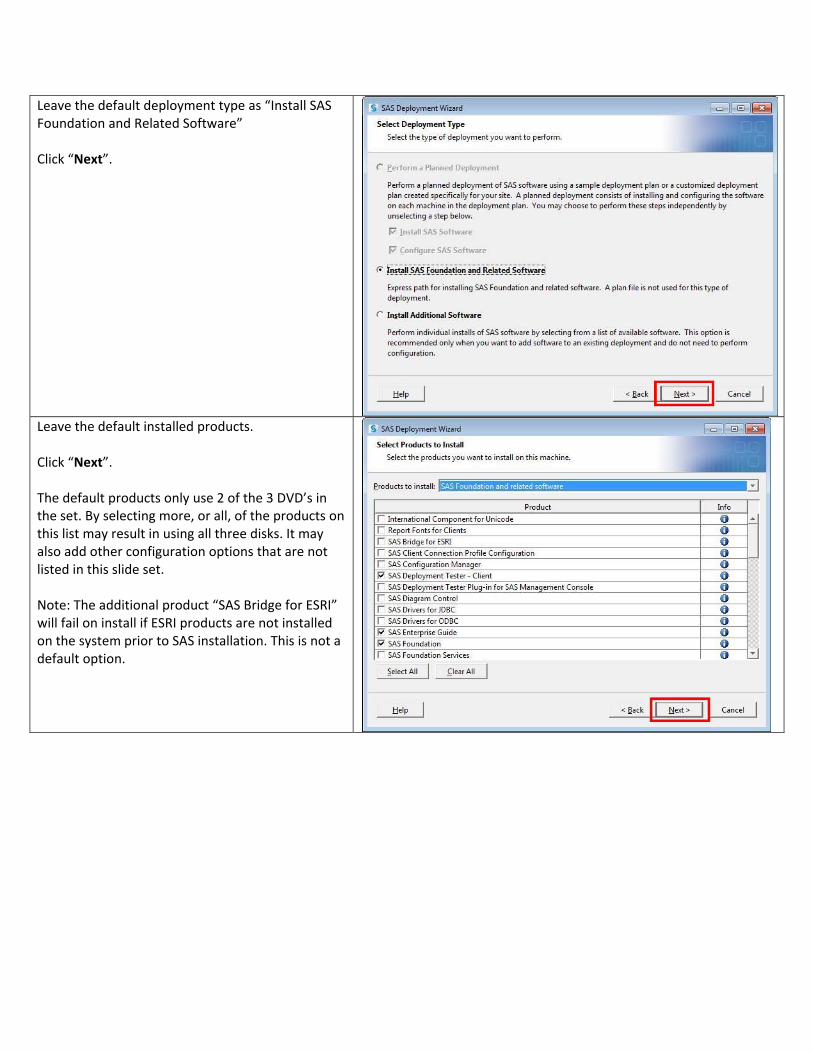
Leave the default deployment type as “Install SAS Foundation and Related Software” Click “Next”.
Leave the default installed products. Click “Next”. The default products only use 2 of the 3 DVD’s in the set. By selecting more, or all, of the products on this list may result in using all three disks. It may also add other configuration options that are not listed in this slide set. Note: The additional product “SAS Bridge for ESRI” will fail on install if ESRI products are not installed on the system prior to SAS installation. This is not a default option.
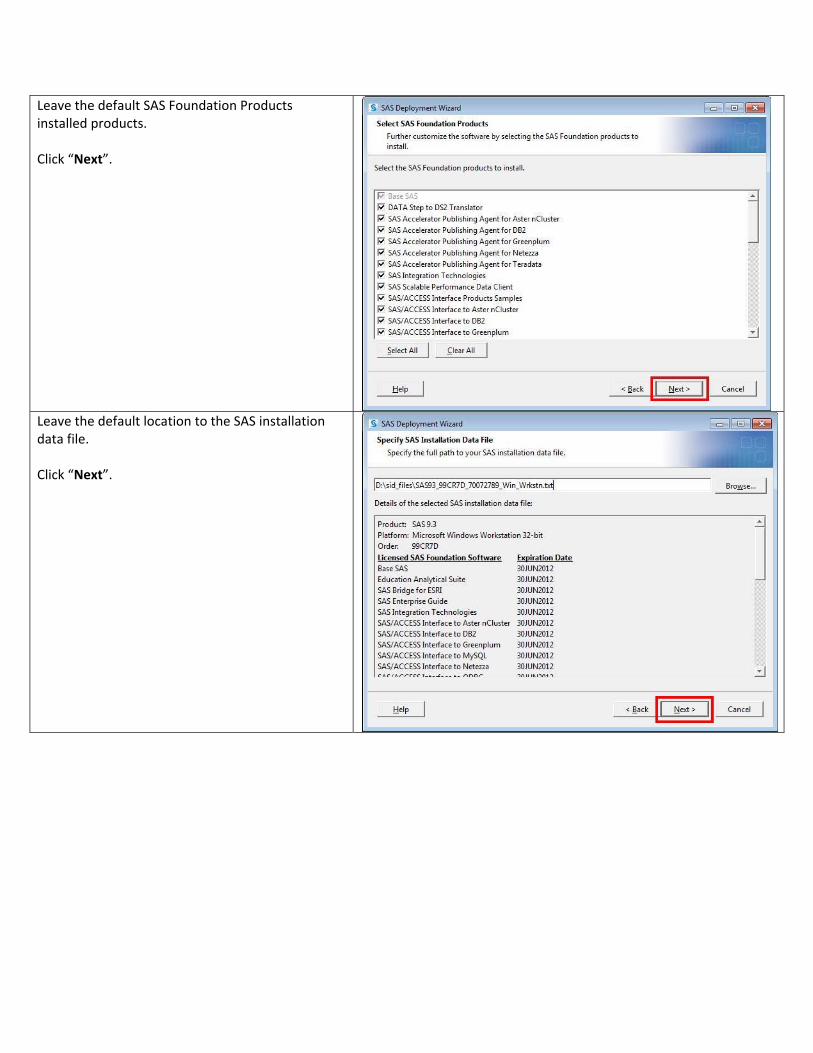
Leave the default SAS Foundation Products installed products. Click “Next”.
Leave the default location to the SAS installation data file. Click “Next”.
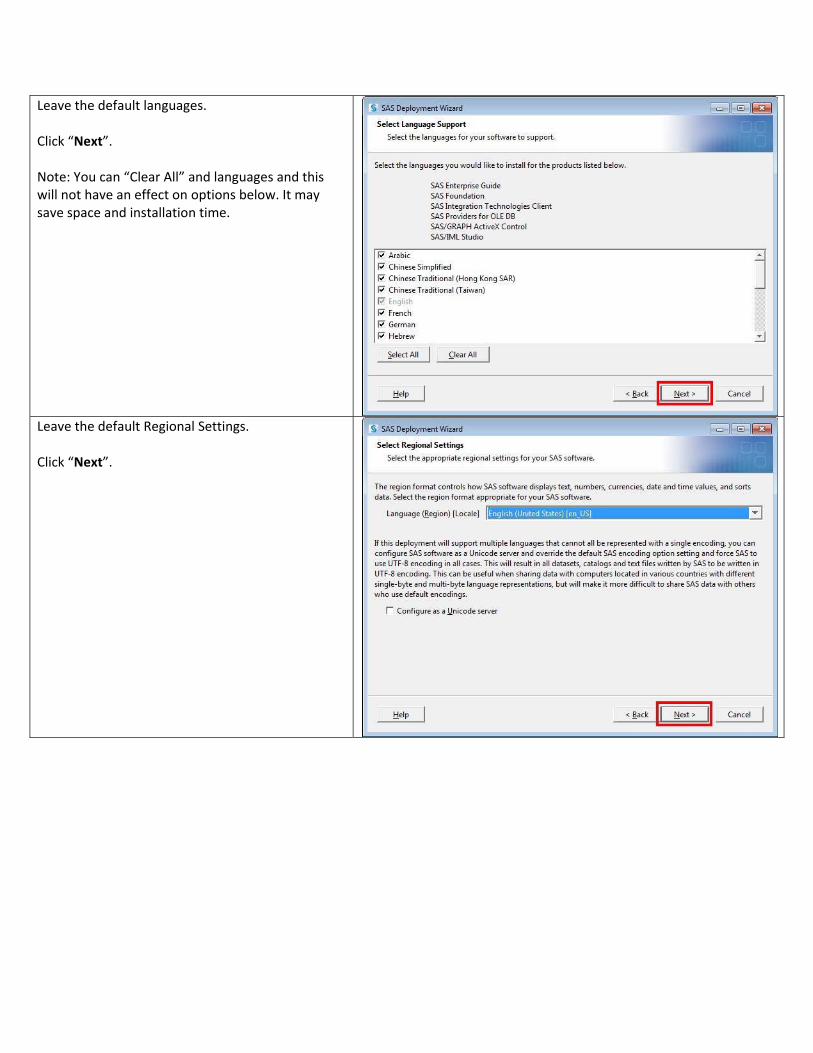
Leave the default languages. Click “Next”. Note: You can “Clear All” and languages and this will not have an effect on options below. It may save space and installation time.
Leave the default Regional Settings. Click “Next”.
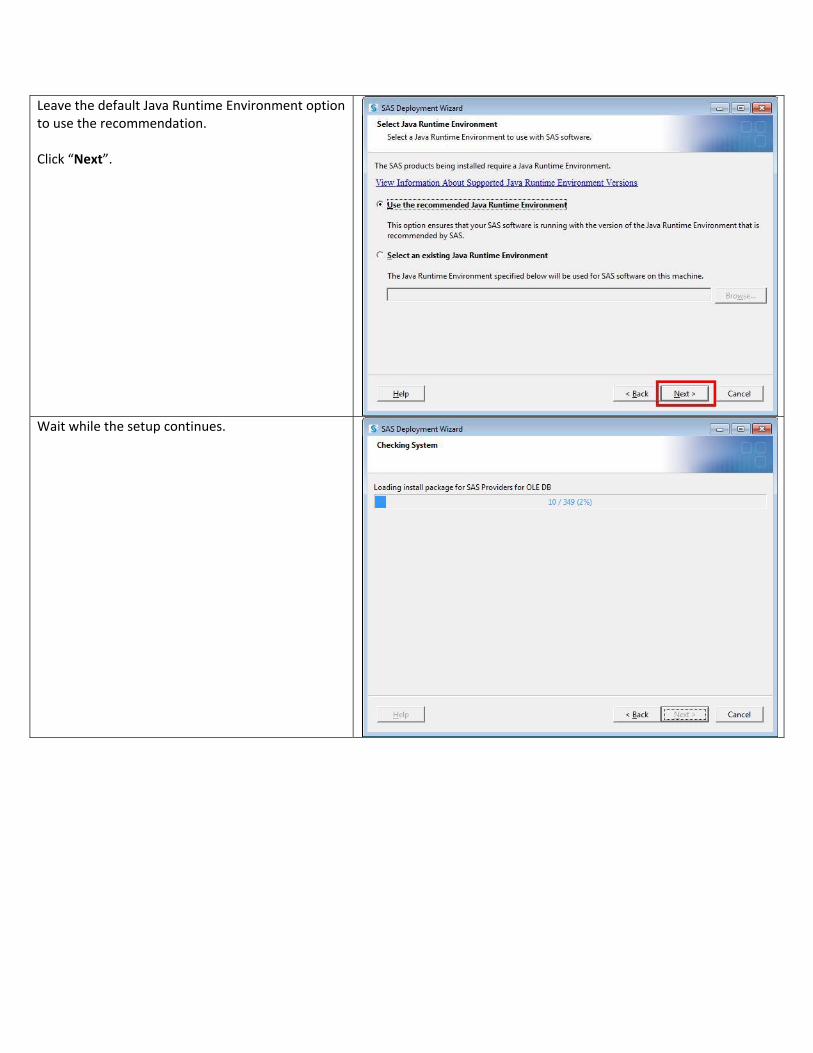
Leave the default Java Runtime Environment option to use the recommendation. Click “Next”.
Wait while the setup continues.
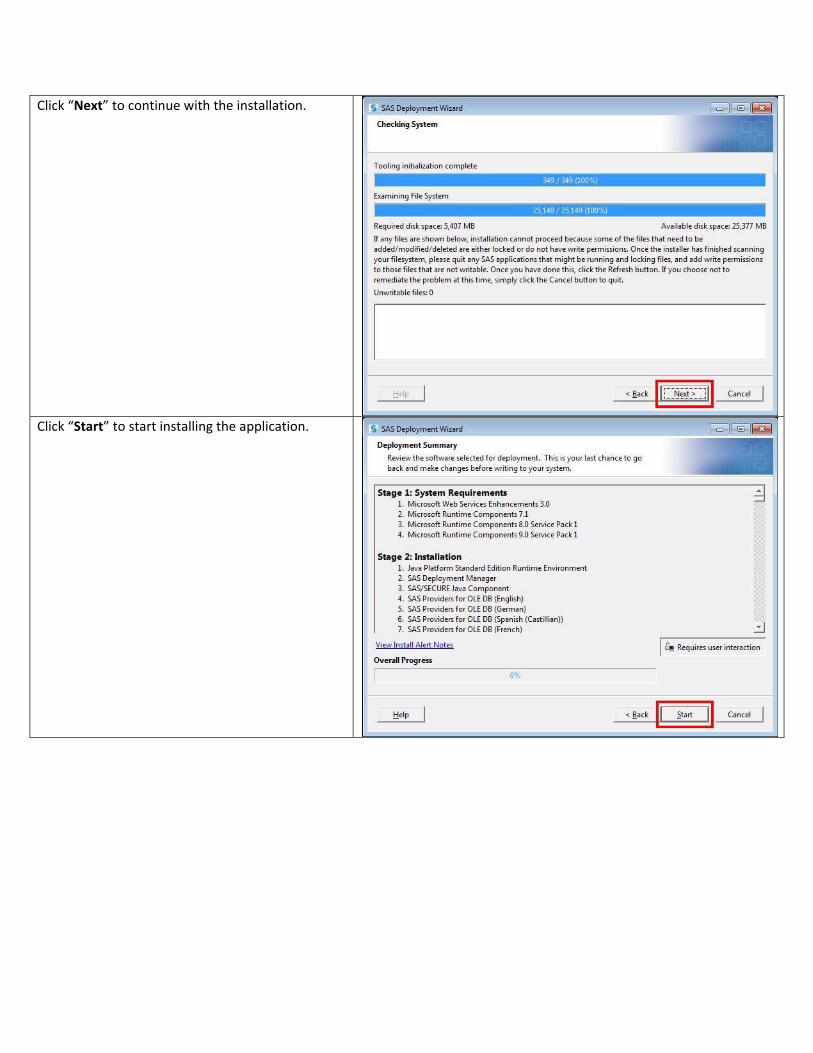
Click “Next” to continue with the installation.
Click “Start” to start installing the application.
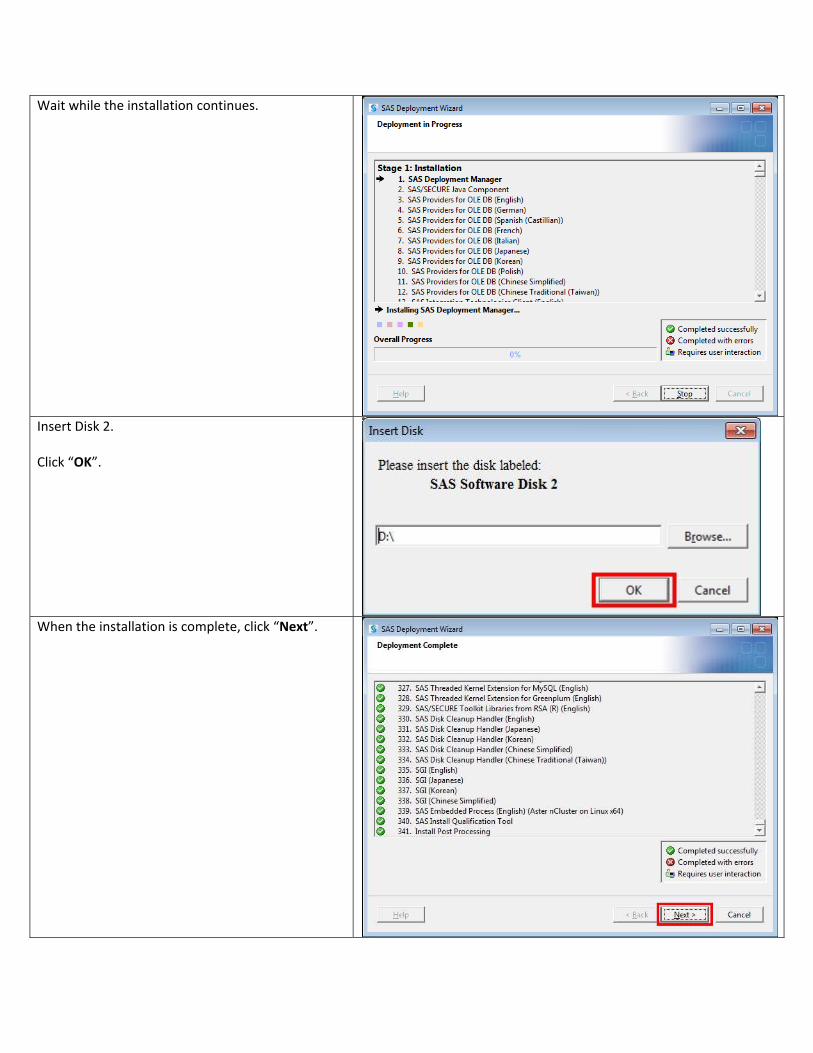
Wait while the installation continues.
Insert Disk 2. Click “OK”.
When the installation is complete, click “Next”.
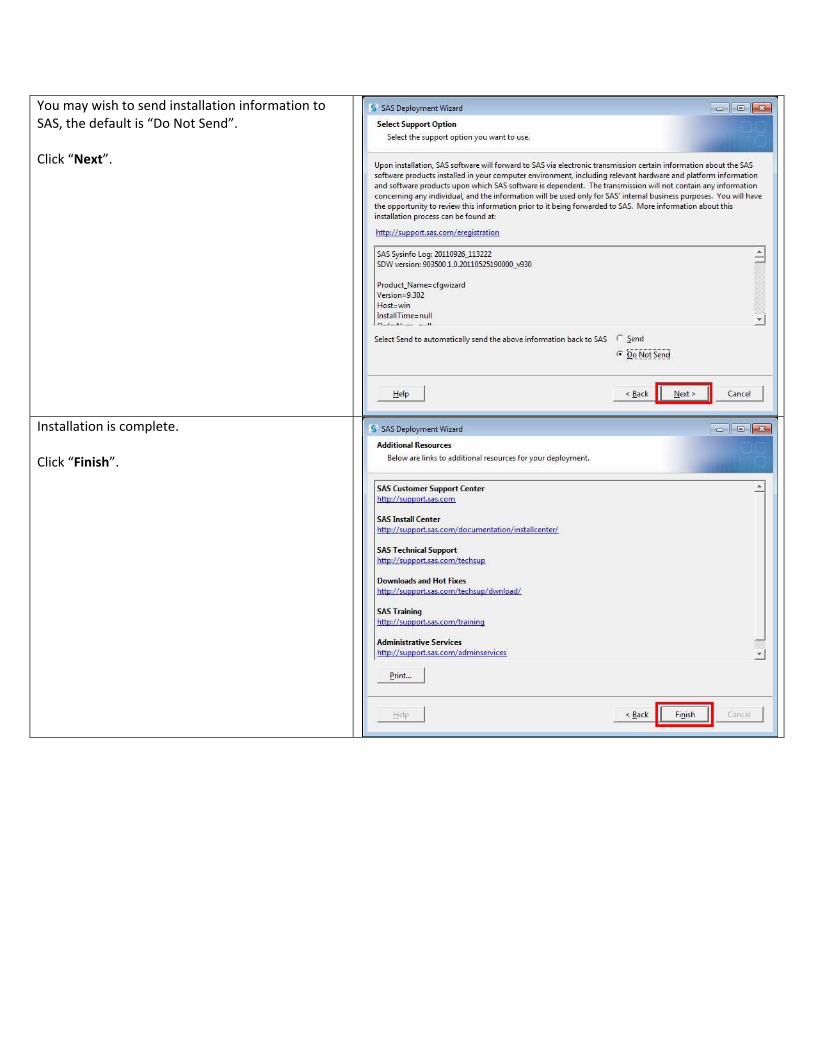
You may wish to send installation information to SAS, the default is “Do Not Send”. Click “Next”.