88
SAS ® 9.4 Management Console: Guide to Users and Permissions SAS ® Documentation
SAS® 9.4 Management Console: Guide to Users and Permissions
SAS® Documentation

The correct bibliographic citation for this manual is as follows: SAS Institute Inc 2015. SAS® 9.4 Management Console: Guide to Users and Permissions. Cary, NC: SAS Institute Inc.
SAS® 9.4 Management Console: Guide to Users and Permissions
Copyright © 2015, SAS Institute Inc., Cary, NC, USA
All rights reserved. Produced in the United States of America.
For a hardcopy book: No part of this publication may be reproduced, stored in a retrieval system, or transmitted, in any form or by any means, electronic, mechanical, photocopying, or otherwise, without the prior written permission of the publisher, SAS Institute Inc.
For a web download or e-book:Your use of this publication shall be governed by the terms established by the vendor at the time you acquire this publication.
U.S. Government License Rights; Restricted Rights: Use, duplication, or disclosure of this software and related documentation by the U.S. government is subject to the Agreement with SAS Institute and the restrictions set forth in FAR 52.227–19, Commercial Computer Software-Restricted Rights (June 1987).
SAS Institute Inc., SAS Campus Drive, Cary, North Carolina 27513.
Electronic book 3, July 2015
SAS® Publishing provides a complete selection of books and electronic products to help customers use SAS software to its fullest potential. For more information about our e-books, e-learning products, CDs, and hard-copy books, visit the SAS Publishing web site at support.sas.com/publishing or call 1-800-727-3228.
SAS® and all other SAS Institute Inc. product or service names are registered trademarks or trademarks of SAS Institute Inc. in the USA and other countries. ® indicates USA registration.
Other brand and product names are registered trademarks or trademarks of their respective companies.
Contents
Accessibility Features of SAS Management Console . . . . . . . . . . . . . . . . . . . v
Chapter 1 / Concepts . . . . . . . . . . . . . . . . . . . . . . . . . . . . . . . . . . . . . . . . . . . . . . . . . . . . . . . . . . . . . . . . . . . . . . . . . . 1About This Document . . . . . . . . . . . . . . . . . . . . . . . . . . . . . . . . . . . . . . . . . . . . . . . . . . . . . . . 1Introduction to User Administration . . . . . . . . . . . . . . . . . . . . . . . . . . . . . . . . . . . . . . . . 2Introduction to Access Management . . . . . . . . . . . . . . . . . . . . . . . . . . . . . . . . . . . . . 12
Chapter 2 / User Administration Tasks . . . . . . . . . . . . . . . . . . . . . . . . . . . . . . . . . . . . . . . . . . . . . . . . . . . 17Getting Information About a User . . . . . . . . . . . . . . . . . . . . . . . . . . . . . . . . . . . . . . . . 18Who Can Manage Users, Groups, and Roles? . . . . . . . . . . . . . . . . . . . . . . . . . 21Add Users . . . . . . . . . . . . . . . . . . . . . . . . . . . . . . . . . . . . . . . . . . . . . . . . . . . . . . . . . . . . . . . . . . . 22Add Administrators . . . . . . . . . . . . . . . . . . . . . . . . . . . . . . . . . . . . . . . . . . . . . . . . . . . . . . . . . 23Manage Passwords . . . . . . . . . . . . . . . . . . . . . . . . . . . . . . . . . . . . . . . . . . . . . . . . . . . . . . . . 25Add Contact Information . . . . . . . . . . . . . . . . . . . . . . . . . . . . . . . . . . . . . . . . . . . . . . . . . . . 27Create a Custom Group . . . . . . . . . . . . . . . . . . . . . . . . . . . . . . . . . . . . . . . . . . . . . . . . . . . 27Create a Custom Role . . . . . . . . . . . . . . . . . . . . . . . . . . . . . . . . . . . . . . . . . . . . . . . . . . . . . 28Change a Role's Capabilities . . . . . . . . . . . . . . . . . . . . . . . . . . . . . . . . . . . . . . . . . . . . . 30Adjust Group or Role Membership . . . . . . . . . . . . . . . . . . . . . . . . . . . . . . . . . . . . . . . 32Make a SAS Copy of DBMS Credentials . . . . . . . . . . . . . . . . . . . . . . . . . . . . . . . . 32Unlock an Internal Account . . . . . . . . . . . . . . . . . . . . . . . . . . . . . . . . . . . . . . . . . . . . . . . 34Adjust Policies for an Internal Account . . . . . . . . . . . . . . . . . . . . . . . . . . . . . . . . . . 34Manage Authentication Domains . . . . . . . . . . . . . . . . . . . . . . . . . . . . . . . . . . . . . . . . . 35Rename a User, Group, or Role . . . . . . . . . . . . . . . . . . . . . . . . . . . . . . . . . . . . . . . . . . 36Delete a User, Group, or Role . . . . . . . . . . . . . . . . . . . . . . . . . . . . . . . . . . . . . . . . . . . . 36Delegate Management of a Group or Role . . . . . . . . . . . . . . . . . . . . . . . . . . . . . 36Include a User in Batch Synchronization . . . . . . . . . . . . . . . . . . . . . . . . . . . . . . . . 37Import or Export Users, Groups, and Roles . . . . . . . . . . . . . . . . . . . . . . . . . . . . 37Tips for Finding a User, Group, or Role . . . . . . . . . . . . . . . . . . . . . . . . . . . . . . . . . 38
Chapter 3 / Exercises in User Administration . . . . . . . . . . . . . . . . . . . . . . . . . . . . . . . . . . . . . . . . . . . 41Assign Capabilities to a Role . . . . . . . . . . . . . . . . . . . . . . . . . . . . . . . . . . . . . . . . . . . . . 41Create and Use an Internal Account . . . . . . . . . . . . . . . . . . . . . . . . . . . . . . . . . . . . . 43
Chapter 4 / Access Management Tasks . . . . . . . . . . . . . . . . . . . . . . . . . . . . . . . . . . . . . . . . . . . . . . . . . . 47Examining Permissions . . . . . . . . . . . . . . . . . . . . . . . . . . . . . . . . . . . . . . . . . . . . . . . . . . . . 48Who Can Set Permissions? . . . . . . . . . . . . . . . . . . . . . . . . . . . . . . . . . . . . . . . . . . . . . . . 51Add an Explicit Grant or Denial . . . . . . . . . . . . . . . . . . . . . . . . . . . . . . . . . . . . . . . . . . . 51Use an Access Control Template (ACT) . . . . . . . . . . . . . . . . . . . . . . . . . . . . . . . . . 52Create a Custom ACT . . . . . . . . . . . . . . . . . . . . . . . . . . . . . . . . . . . . . . . . . . . . . . . . . . . . . 54Update or Delete an ACT . . . . . . . . . . . . . . . . . . . . . . . . . . . . . . . . . . . . . . . . . . . . . . . . . 56Set a Permission Condition (OLAP) . . . . . . . . . . . . . . . . . . . . . . . . . . . . . . . . . . . . . 57Adjust the Repository-Level Settings . . . . . . . . . . . . . . . . . . . . . . . . . . . . . . . . . . . . 58Import or Export ACTs . . . . . . . . . . . . . . . . . . . . . . . . . . . . . . . . . . . . . . . . . . . . . . . . . . . . . 60What Happens When I Select a Check Box? . . . . . . . . . . . . . . . . . . . . . . . . . . . 60Tips for Efficiently Using Permissions . . . . . . . . . . . . . . . . . . . . . . . . . . . . . . . . . . . 61
Chapter 5 / Exercises in Access Management . . . . . . . . . . . . . . . . . . . . . . . . . . . . . . . . . . . . . . . . . . 63Working with Explicit Controls . . . . . . . . . . . . . . . . . . . . . . . . . . . . . . . . . . . . . . . . . . . . 63Working with ACTs . . . . . . . . . . . . . . . . . . . . . . . . . . . . . . . . . . . . . . . . . . . . . . . . . . . . . . . . . 65Working with Inherited Settings . . . . . . . . . . . . . . . . . . . . . . . . . . . . . . . . . . . . . . . . . . 67WriteMetadata and WriteMemberMetadata . . . . . . . . . . . . . . . . . . . . . . . . . . . . . 68
Glossary . . . . . . . . . . . . . . . . . . . . . . . . . . . . . . . . . . . . . . . . . . . . . . . . . . . . . . . . . . . . . . . . . . . . 73Index . . . . . . . . . . . . . . . . . . . . . . . . . . . . . . . . . . . . . . . . . . . . . . . . . . . . . . . . . . . . . . . . . . . . . . . . . 77
iv Contents
Accessibility
Accessibility Features of SAS Management Console
Overview
For information about the accessibility of SAS Management Console, see the Help for that product.
Documentation Format
Please contact [email protected] if you need this document in an alternative digital format.
v
vi Accessibility / Accessibility Features
1Concepts
About This Document . . . . . . . . . . . . . . . . . . . . . . . . . . . . . . . . . . . . . . . . . . . . . . . . . . . . . 1
Introduction to User Administration . . . . . . . . . . . . . . . . . . . . . . . . . . . . . . . . . . . . 2About User Administration . . . . . . . . . . . . . . . . . . . . . . . . . . . . . . . . . . . . . . . . . . . . . . 2About Users . . . . . . . . . . . . . . . . . . . . . . . . . . . . . . . . . . . . . . . . . . . . . . . . . . . . . . . . . . . . . . 2About Groups . . . . . . . . . . . . . . . . . . . . . . . . . . . . . . . . . . . . . . . . . . . . . . . . . . . . . . . . . . . . 3About Roles . . . . . . . . . . . . . . . . . . . . . . . . . . . . . . . . . . . . . . . . . . . . . . . . . . . . . . . . . . . . . . 4About Logins . . . . . . . . . . . . . . . . . . . . . . . . . . . . . . . . . . . . . . . . . . . . . . . . . . . . . . . . . . . . . 6About Internal Accounts . . . . . . . . . . . . . . . . . . . . . . . . . . . . . . . . . . . . . . . . . . . . . . . . 7About Authentication Domains . . . . . . . . . . . . . . . . . . . . . . . . . . . . . . . . . . . . . . . . . 9About Passwords . . . . . . . . . . . . . . . . . . . . . . . . . . . . . . . . . . . . . . . . . . . . . . . . . . . . . . . 10About External Identities . . . . . . . . . . . . . . . . . . . . . . . . . . . . . . . . . . . . . . . . . . . . . . . 11Uniqueness Requirements . . . . . . . . . . . . . . . . . . . . . . . . . . . . . . . . . . . . . . . . . . . . 11
Introduction to Access Management . . . . . . . . . . . . . . . . . . . . . . . . . . . . . . . . . 12About Access Management . . . . . . . . . . . . . . . . . . . . . . . . . . . . . . . . . . . . . . . . . . . 12Granularity and Mechanics of Permissions . . . . . . . . . . . . . . . . . . . . . . . . . 12Inheritance and Precedence of Permissions . . . . . . . . . . . . . . . . . . . . . . . 13Use and Enforcement of Each Permission . . . . . . . . . . . . . . . . . . . . . . . . . 14
About This Document
This document helps you administer users and permissions in SAS Management Console. It explains key concepts and provides step-by-step instructions for selected
1

tasks. For more information about security, see the SAS Intelligence Platform: Security Administration Guide.
Introduction to User Administration
About User Administration
In order to make access distinctions and track user activity, security systems must know who is making each request. The primary purpose of user administration is to provide information that helps systems make this determination. The central piece of user information that the SAS environment requires is one external account ID for each user. The SAS environment uses its copy of these IDs to establish a unique SAS identity for each connecting user. All of a user's group memberships, role memberships, and permission assignments are ultimately tied to their SAS identity.
Note: For identification purposes, only the account IDs are needed. SAS does not maintain copies of external passwords for identification purposes.
To access user administration features in SAS Management Console, select the User Manager node on the Plug-ins tab. Your roles and permissions determine which user administration tasks you can perform.
TIP As an alternative to interactively creating and maintaining identity information, you can write a program that performs these tasks as batch processes. See the user import macros documentation in the SAS Intelligence Platform: Security Administration Guide.
About Users
A user is an individual person or service identity.
We recommend that you create an individual SAS identity for each person who uses the SAS environment. This enables you to make access distinctions in the metadata layer
2 Chapter 1 / Concepts

and establishes a personal folder for each user. If generic access is sufficient for some of your users, those users can instead share the generic PUBLIC group identity.
An individual SAS identity is established by coordination between two sets of identity information:
n in an external system, a user account
n in the metadata, a user definition that includes a copy of the external account ID
To give someone an individual SAS identity, you create a metadata user definition that includes a copy of their external account ID. In the simplest configuration, each user needs an account that is known to the metadata server's host.
n If the metadata server is on Windows, users typically have Active Directory accounts.
n If the metadata server is on UNIX, users might have UNIX accounts. Sometimes a UNIX host recognizes LDAP, Active Directory, or other types of accounts.
Note: For information about alternate configurations (such as web authentication) and exceptions (such as SAS internal accounts), see SAS Intelligence Platform: Security Administration Guide.
About Groups
A group is a set of users.
We recommend that you create groups to simplify security management as follows:
n It is more efficient to assign permissions to groups than to individual users.
n If you need to store passwords in the metadata, you can reduce the amount of required maintenance by using a group to make one shared account available to multiple users.
n It is sometimes more efficient to manage role membership by assigning groups to roles instead of assigning users directly to roles.
Introduction 3
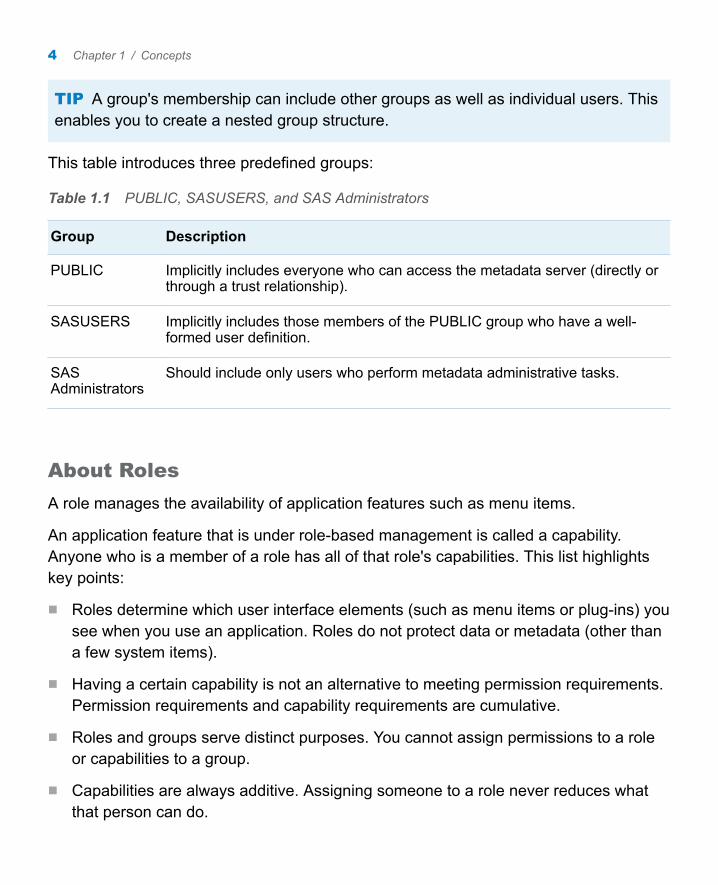
TIP A group's membership can include other groups as well as individual users. This enables you to create a nested group structure.
This table introduces three predefined groups:
Table 1.1 PUBLIC, SASUSERS, and SAS Administrators
Group Description
PUBLIC Implicitly includes everyone who can access the metadata server (directly or through a trust relationship).
SASUSERS Implicitly includes those members of the PUBLIC group who have a well-formed user definition.
SAS Administrators
Should include only users who perform metadata administrative tasks.
About Roles
A role manages the availability of application features such as menu items.
An application feature that is under role-based management is called a capability. Anyone who is a member of a role has all of that role's capabilities. This list highlights key points:
n Roles determine which user interface elements (such as menu items or plug-ins) you see when you use an application. Roles do not protect data or metadata (other than a few system items).
n Having a certain capability is not an alternative to meeting permission requirements. Permission requirements and capability requirements are cumulative.
n Roles and groups serve distinct purposes. You cannot assign permissions to a role or capabilities to a group.
n Capabilities are always additive. Assigning someone to a role never reduces what that person can do.
4 Chapter 1 / Concepts

Each application that supports roles provides one or more predefined roles. Each predefined role has a unique initial set of capabilities. The capabilities that a role provides should reflect the activities and responsibilities of that role's members. You can adjust the distribution of capabilities in these ways:
n Change role memberships. For example, to prevent regular users from seeing plug-ins in SAS Management Console, you might narrow the membership of the Management Console: Content Management role by making changes on that role's Members tab.
n Customize the initial roles-to-capabilities mapping by using any of these techniques:
o Incrementally select or clear explicit capabilities for a role. You cannot deselect capabilities for the unrestricted role.
o Aggregate existing roles so that one or more roles contributes all of their capabilities to another role.
o Create new roles that provide unique combinations of capabilities.
The following table introduces some of the predefined administrative roles:
Table 1.2 Introduction to Selected Administrative Roles
Role Capabilities Overview
Metadata Server: Unrestricted
Members have all capabilities and full access to metadata (but they cannot read other users’ passwords).
Metadata Server: User Administration
Members can create and manage restricted users, groups, roles, internal accounts, logins, and authentication domains.
Management Console: Advanced
Members can see all plug-ins in SAS Management Console.
For details and exceptions, see the discussion of administrative roles in SAS Intelligence Platform: System Administration Guide.
Introduction 5
About Logins
What Is a Login?
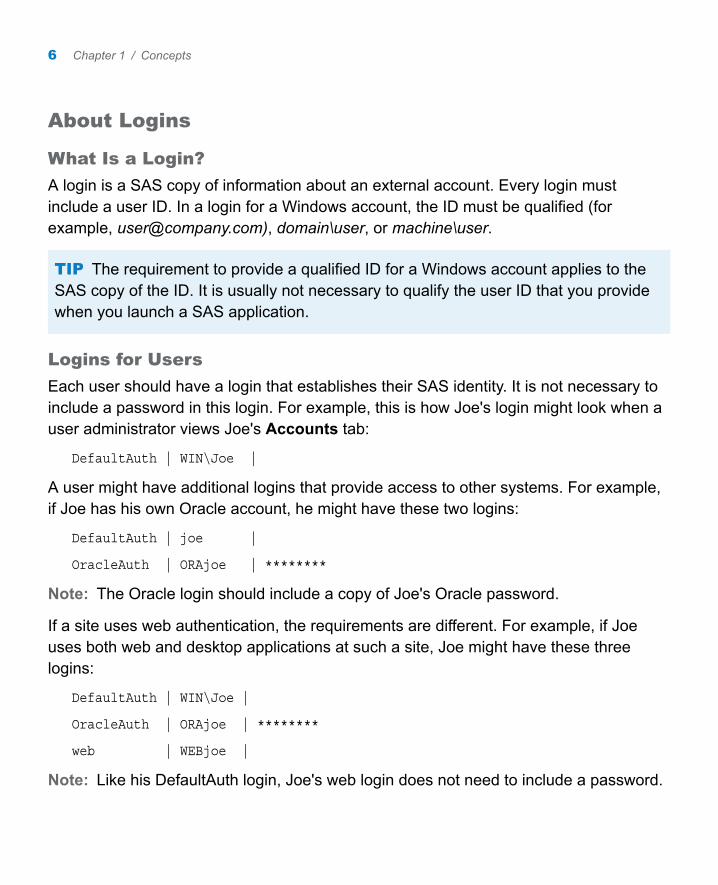
A login is a SAS copy of information about an external account. Every login must include a user ID. In a login for a Windows account, the ID must be qualified (for example, [email protected]), domain\user, or machine\user.
TIP The requirement to provide a qualified ID for a Windows account applies to the SAS copy of the ID. It is usually not necessary to qualify the user ID that you provide when you launch a SAS application.
Logins for Users
Each user should have a login that establishes their SAS identity. It is not necessary to include a password in this login. For example, this is how Joe's login might look when a user administrator views Joe's Accounts tab:
DefaultAuth | WIN\Joe |
A user might have additional logins that provide access to other systems. For example, if Joe has his own Oracle account, he might have these two logins:
DefaultAuth | joe |
OracleAuth | ORAjoe | ********
Note: The Oracle login should include a copy of Joe's Oracle password.
If a site uses web authentication, the requirements are different. For example, if Joe uses both web and desktop applications at such a site, Joe might have these three logins:
DefaultAuth | WIN\Joe |
OracleAuth | ORAjoe | ********
web | WEBjoe |
Note: Like his DefaultAuth login, Joe's web login does not need to include a password.
6 Chapter 1 / Concepts

Logins for Groups
Groups do not have to have logins. The main reason to give a login to a group is to make a shared account available to multiple users. A group login contains a SAS copy of the user ID and password for a shared account. For example, to provide shared access to Oracle, a group might have a login that looks like this:
OracleAuth | sharedORAid | ********
All members of the group can see and use this login. Since this login is for a third-party database, a copy of the DBMS account password should be stored in this login.
About Internal Accounts
What Is an Internal Account?
An internal account is a SAS account that the metadata server authenticates independently, without relying on an external authentication provider such as the operating system. Use internal accounts for only metadata administrators and certain service identities.
Benefits of Internal Accounts
Internal accounts have these advantages:
n Internal accounts provide an alternative to creating external accounts for SAS internal purposes such as inter-process communication.
n Internal accounts can be maintenance free. You do not have to synchronize internal accounts with some other user registry. Internal accounts do not have to conform to the security policies of the rest of your computing environment. For example, even if your host security policy forces password changes every 30 days, you can retain the initial policy for internal account passwords (which is that these passwords never expire).
n Internal accounts are usable only in the SAS realm, so they reduce exposure to the rest of your security environment.
Introduction 7
Limitations of Internal Accounts
Although the Create Internal Account button is available on all user definitions, internal accounts are not intended for regular users. Someone who has only an internal account cannot do these things:
n launch a standard workspace server without interactively providing some external credentials
n participate in Integrated Windows authentication or web authentication
n add, delete, initialize, or unregister a foundation repository
Policies for Internal Accounts
By initial policy, these server-level settings are in effect:
n Accounts do not expire and are not suspended due to inactivity.
n Passwords must be at least six characters, do not have to include mixed case or numbers, and do not expire.
n The five most recent passwords for an account cannot be reused for that account.
n There is no mandatory time delay between password changes.
n After three failed attempts to log on, an account is locked. If an account is locked because of logon failures, further log on attempts cannot be made for one hour.
n For an account that has a password expiration period, there is a forced password change on first use and after the password is reset by someone other than the account owner. By initial policy, passwords do not expire, so there are no forced password changes.
Note: In User Manager, you can customize some of these settings on a per-account basis.
8 Chapter 1 / Concepts
About Authentication Domains
What Is an Authentication Domain?
An authentication domain is a name that facilitates the matching of logins with the servers for which they are valid. This matching is not important when you launch a client, but it is important when you access certain secondary servers such as a third-party DBMS or a standard workspace server.
The second maintenance release of SAS 9.4 supports outbound and trusted authentication domains. A login in an outbound domain is used only to provide SAS applications with seamless access to external resources, such as a third-party vendor database. These logins are not part of the SAS identity phase that attempts to match the authenticated user ID to the current metadata user. Therefore, for outbound domain logins, the uniqueness requirements on the user ID are not enforced.
A login in a trusted domain can be accessed only by a trusted user on behalf of the user. The identity to which the login is associated does not have direct access to the login (they will not see it listed on the Accounts tab in SAS Management Console). Instead, the login will be used on their behalf by a trusted user. A login in a trusted domain also requires the authentication domain to be an outbound domain.
Administration of logins in outbound and trusted authentication domains can be performed only by unrestricted users and user administrators. For more information, see SAS Intelligence Platform: Security Administration Guide.
When Do I Need to Add an Authentication Domain?
In the simplest case, all logins and SAS servers are associated with one authentication domain (DefaultAuth). Here are some reasons for using more authentication domains:
n If you use web authentication, you might need a second authentication domain for the logins that contain web realm user IDs.
n If you want to provide seamless access to a third-party server (such as a DBMS server) that has its own user registry, you need a separate authentication domain for that server and its logins.
Introduction 9
n If both of the following criteria are met, you need a separate authentication domain for the standard workspace server and its logins:
o The standard workspace server does not share an authentication provider with the metadata server (and cannot be configured to do so).
o You want to provide seamless individualized access to the standard workspace server.
About Passwords
Passwords in Logins
In general, it is not necessary to create a SAS copy of an external password. An exception is if you want to provide seamless access to a server that requires credentials that are different from the credentials that users initially submit. These are the most common examples:
n A third-party DBMS server might require a different set of credentials.
n In a multi-platform environment, the standard workspace server might require a different set of credentials.
If credentials are not otherwise available, some applications prompt users for an appropriate user ID and password.
Passwords in Internal Accounts
Internal accounts exist only in the metadata. Each internal account includes a password. By initial policy, internal passwords do not expire.
Passwords in Configuration Files
Passwords for a few required accounts (such as the SAS Administrator and the SAS Trusted User) are included in configuration files. See the instructions for updating managed passwords in SAS Intelligence Platform: Security Administration Guide.
10 Chapter 1 / Concepts

About External Identities
What Is an External Identity?
An external identity is an optional synchronization key for a user, group, or role. If you use batch processes to coordinate SAS identity information with your primary user registry, you need external identities (such as employee IDs) to facilitate matching. This list explains the circumstances in which a user, group, or role needs an external identity:
n For a user, group, or role that you maintain interactively in SAS Management Console, no external identity is needed.
n For a user, group, or role that you maintain using batch processes, one external identity is needed.
Where Do External Identities Come From?
External identities can be added in these ways:
n For a user, group, or role that is created by an import process, an external identity is added as part of that process.
n For any user, group, or role, you can interactively add an external identity on the General tab of their definition.
Uniqueness Requirements
In metadata user administration, certain uniqueness requirements apply. For example, you cannot create a user definition that has the same name as an existing user definition and you cannot assign the same user ID to multiple users. For details, see SAS Intelligence Platform: Security Administration Guide.
Introduction 11
Introduction to Access Management
About Access Management
Permissions that you set on an object’s Authorization tab are part of a metadata-based access control system within the SAS Metadata Server.
These permissions supplement protections in other layers, such as the operating system. Protections are cumulative across layers. You cannot perform a task unless you have sufficient access in all layers.
CAUTION! Do not rely exclusively on metadata-layer permissions to protect data. Manage physical access in addition to metadata-layer access. See the discussion of access to SAS data in SAS Intelligence Platform: Security Administration Guide.
Granularity and Mechanics of Permissions
Repository-Level Controls
Repository-level controls function as a gateway. Participating users should have the ReadMetadata and WriteMetadata permissions at the repository level. Repository-level controls also serve as a parent-of-last-resort, defining access to resources that do not have more specific settings. Repository-level controls are defined on the Permission Pattern tab of the repository ACT. In a standard configuration, the repository ACT is named Default ACT.
Resource-Level Controls
Resource-level controls manage access to a specific object such as a report, a stored process, a table, or a folder. You can define resource-level controls individually (as explicit settings) or in patterns (by using access control templates).
12 Chapter 1 / Concepts

Fine-Grained Controls
Fine-grained controls affect access to subsets of data within a resource. To establish fine-grained controls, you define permission conditions that filter data to constrain access.
Feature-Level Controls
Some applications use roles to limit access to functionality. These applications check each user's roles in order to determine which menu items and features to display for that user. Roles are documented as part of user administration.
Inheritance and Precedence of Permissions
Two Relationship Networks
Permission settings are conveyed across two distinct relationship networks, a resource network and an identity network.
Permissions that are set directly on an object have priority over permissions that are set on the object’s parent. For example, when access to a report is evaluated, a denial that is set on the report (and assigned to the PUBLIC group) overrides a grant that is set on the report's parent folder (even if the grant is assigned to you).
The Resource Relationships Network
Permissions that you set on one object can affect many other objects. For example, a report inherits permissions from the folder in which the report is located. The resource relationship network consists primarily of a folder tree. For details and exceptions, see the discussion of the metadata authorization model in SAS Intelligence Platform: Security Administration Guide.
The Identity Relationships Network
Permissions that you assign to one group can affect many other identities. For example, if you grant a group access to a table, that grant applies to all users who are members of the group. The identity relationship network is governed by a precedence order that starts with a primary identity, can incorporate multiple levels of nested group memberships, and ends with implicit memberships in SASUSERS and then PUBLIC.
Introduction 13
If there is a tie in this network (for example, if you directly assign a user to two groups and give one group a grant and another group a denial), the outcome is a denial.
Use and Enforcement of Each Permission
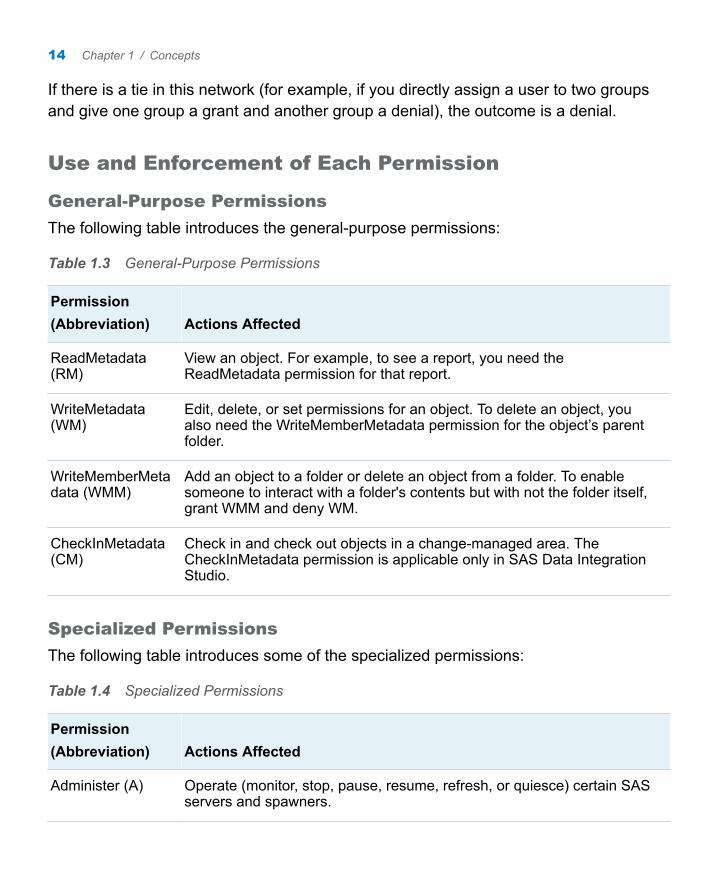
General-Purpose Permissions
The following table introduces the general-purpose permissions:
Table 1.3 General-Purpose Permissions
Permission(Abbreviation) Actions Affected
ReadMetadata (RM)
View an object. For example, to see a report, you need the ReadMetadata permission for that report.
WriteMetadata (WM)
Edit, delete, or set permissions for an object. To delete an object, you also need the WriteMemberMetadata permission for the object’s parent folder.
WriteMemberMetadata (WMM)
Add an object to a folder or delete an object from a folder. To enable someone to interact with a folder's contents but with not the folder itself, grant WMM and deny WM.
CheckInMetadata (CM)
Check in and check out objects in a change-managed area. The CheckInMetadata permission is applicable only in SAS Data Integration Studio.
Specialized Permissions
The following table introduces some of the specialized permissions:
Table 1.4 Specialized Permissions
Permission(Abbreviation) Actions Affected
Administer (A) Operate (monitor, stop, pause, resume, refresh, or quiesce) certain SAS servers and spawners.
14 Chapter 1 / Concepts
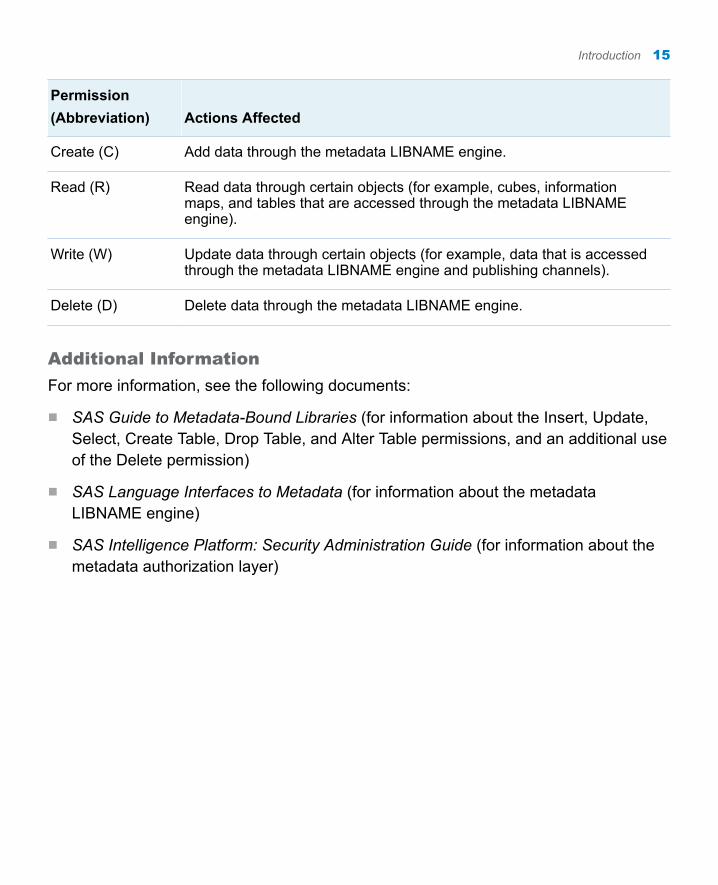
Permission(Abbreviation) Actions Affected
Create (C) Add data through the metadata LIBNAME engine.
Read (R) Read data through certain objects (for example, cubes, information maps, and tables that are accessed through the metadata LIBNAME engine).
Write (W) Update data through certain objects (for example, data that is accessed through the metadata LIBNAME engine and publishing channels).
Delete (D) Delete data through the metadata LIBNAME engine.
Additional Information
For more information, see the following documents:
n SAS Guide to Metadata-Bound Libraries (for information about the Insert, Update, Select, Create Table, Drop Table, and Alter Table permissions, and an additional use of the Delete permission)
n SAS Language Interfaces to Metadata (for information about the metadata LIBNAME engine)
n SAS Intelligence Platform: Security Administration Guide (for information about the metadata authorization layer)
Introduction 15

16 Chapter 1 / Concepts

2User Administration Tasks
Getting Information About a User . . . . . . . . . . . . . . . . . . . . . . . . . . . . . . . . . . . . . 18What Groups Is This User In? . . . . . . . . . . . . . . . . . . . . . . . . . . . . . . . . . . . . . . . . 18What Roles Is This User In? . . . . . . . . . . . . . . . . . . . . . . . . . . . . . . . . . . . . . . . . . . 19What Can This User Do? . . . . . . . . . . . . . . . . . . . . . . . . . . . . . . . . . . . . . . . . . . . . . . 20What Logins Are Available to This User? . . . . . . . . . . . . . . . . . . . . . . . . . . . 20Does This User Have an External Identity? . . . . . . . . . . . . . . . . . . . . . . . . . 21Does This User Have an Internal Account? . . . . . . . . . . . . . . . . . . . . . . . . 21
Who Can Manage Users, Groups, and Roles? . . . . . . . . . . . . . . . . . . . . . . 21
Add Users . . . . . . . . . . . . . . . . . . . . . . . . . . . . . . . . . . . . . . . . . . . . . . . . . . . . . . . . . . . . . . . . . . 22
Add Administrators . . . . . . . . . . . . . . . . . . . . . . . . . . . . . . . . . . . . . . . . . . . . . . . . . . . . . . 23
Manage Passwords . . . . . . . . . . . . . . . . . . . . . . . . . . . . . . . . . . . . . . . . . . . . . . . . . . . . . . 25Update the Password in a Login . . . . . . . . . . . . . . . . . . . . . . . . . . . . . . . . . . . . . 25Reset an Internal Password . . . . . . . . . . . . . . . . . . . . . . . . . . . . . . . . . . . . . . . . . . 26
Add Contact Information . . . . . . . . . . . . . . . . . . . . . . . . . . . . . . . . . . . . . . . . . . . . . . . . 27
Create a Custom Group . . . . . . . . . . . . . . . . . . . . . . . . . . . . . . . . . . . . . . . . . . . . . . . . . 27Why Create a Custom Group? . . . . . . . . . . . . . . . . . . . . . . . . . . . . . . . . . . . . . . . 27How to Create a Custom Group . . . . . . . . . . . . . . . . . . . . . . . . . . . . . . . . . . . . . . 28
Create a Custom Role . . . . . . . . . . . . . . . . . . . . . . . . . . . . . . . . . . . . . . . . . . . . . . . . . . . 28Why Create a Custom Role? . . . . . . . . . . . . . . . . . . . . . . . . . . . . . . . . . . . . . . . . . 28How to Create a Custom Role . . . . . . . . . . . . . . . . . . . . . . . . . . . . . . . . . . . . . . . . 29
Change a Role's Capabilities . . . . . . . . . . . . . . . . . . . . . . . . . . . . . . . . . . . . . . . . . . . 30
17

Adjust Group or Role Membership . . . . . . . . . . . . . . . . . . . . . . . . . . . . . . . . . . . . 32
Make a SAS Copy of DBMS Credentials . . . . . . . . . . . . . . . . . . . . . . . . . . . . . 32Store Shared Credentials for a DBMS . . . . . . . . . . . . . . . . . . . . . . . . . . . . . . . 32Store Individual Credentials for a DBMS . . . . . . . . . . . . . . . . . . . . . . . . . . . . 33
Unlock an Internal Account . . . . . . . . . . . . . . . . . . . . . . . . . . . . . . . . . . . . . . . . . . . . . 34
Adjust Policies for an Internal Account . . . . . . . . . . . . . . . . . . . . . . . . . . . . . . 34
Manage Authentication Domains . . . . . . . . . . . . . . . . . . . . . . . . . . . . . . . . . . . . . . 35Add an Authentication Domain . . . . . . . . . . . . . . . . . . . . . . . . . . . . . . . . . . . . . . . 35Rename an Authentication Domain . . . . . . . . . . . . . . . . . . . . . . . . . . . . . . . . . . 35Delete an Authentication Domain . . . . . . . . . . . . . . . . . . . . . . . . . . . . . . . . . . . . 35
Rename a User, Group, or Role . . . . . . . . . . . . . . . . . . . . . . . . . . . . . . . . . . . . . . . . 36
Delete a User, Group, or Role . . . . . . . . . . . . . . . . . . . . . . . . . . . . . . . . . . . . . . . . . . 36
Delegate Management of a Group or Role . . . . . . . . . . . . . . . . . . . . . . . . . . . 36
Include a User in Batch Synchronization . . . . . . . . . . . . . . . . . . . . . . . . . . . . 37
Import or Export Users, Groups, and Roles . . . . . . . . . . . . . . . . . . . . . . . . . 37
Tips for Finding a User, Group, or Role . . . . . . . . . . . . . . . . . . . . . . . . . . . . . . 38
Getting Information About a User
What Groups Is This User In?
This list explains how group memberships are displayed for a user named Joe:
direct groupsIf Joe is directly assigned to any groups, those assignments are displayed in the Member of list box on the Groups and Roles tab in Joe's Properties dialog box.
18 Chapter 2 / User Administration Tasks
indirect groupsIf Joe is a member of a group that is a member of another group, Joe is an indirect member of the second group. Because indirect membership is not displayed in Joe's Member of list box, you must check the properties of each group that Joe belongs to in order to determine whether that group is a member of another group.
implicit groupsIf Joe has a well-formed user definition, he automatically belongs to both the PUBLIC and SASUSERS groups. These implicit memberships are not reflected in Joe's Member of list box.
What Roles Is This User In?
This list explains how role memberships are displayed for a user named Joe:
direct rolesIf Joe is directly assigned to any roles, those assignments are displayed in the Member of list box on the Groups and Roles tab in Joe's Properties dialog box.
indirect rolesIf Joe is a member of a group that is assigned to a role, Joe is an indirect member of that role. Because indirect membership is not displayed in Joe's Member of list box, you must check the properties of each group that Joe belongs to in order to determine whether that group is a member of any roles. Remember that Joe's Member of list box does not reflect his implicit membership in SASUSERS and PUBLIC. Users get most of their non-administrative capabilities through implicit membership in these groups.
contributing rolesIf Joe is in a role that has contributing roles, Joe has the capabilities of the contributing roles. To determine whether a role has contributing roles, access the role's Properties dialog box and select the Contributing Roles tab.
Getting Information About a User 19

What Can This User Do?
Which Objects Can This User Access?
Joe's access is not displayed as part of his user definition. Instead, Joe's permissions for a particular object are displayed on that object’s Authorization tab.
TIP SAS programmers can create reports that document access to resources. See the discussion of security report macros in the SAS Intelligence Platform: Security Administration Guide.
Which Application Features Are Visible to This User?
Joe has all of the capabilities that are provided by any of his roles. This list highlights key points about a role's Capabilities tab:
n Some roles provide implicit capabilities, which are not displayed.
n A capability that has a gray check box comes from a contributing role.
n These icons indicate the status of the items beneath a node in the tree:
o A full tree icon indicates that all of the capabilities are assigned.
o An empty tree icon indicates that none of the capabilities are assigned.
o A partial tree icon indicates that some of the capabilities are assigned.
What Logins Are Available to This User?
This list explains how the logins that are available to a user named Joe are displayed:
personal loginsJoe's personal logins are displayed on the Accounts tab in his Properties dialog box.
group loginsA login that is assigned to a group can be used by any member of that group. Because Joe's group logins are not displayed on his Accounts tab, you must check
20 Chapter 2 / User Administration Tasks
the properties of each group that Joe belongs to in order to determine whether any of those groups have logins.
Note: Logins are visible only if you have user administration capabilities, you are looking at your own user definition, or you are looking at a group that you belong to.
Does This User Have an External Identity?
To determine whether a user has an external identity, click the External Identities button on the user's General tab.
Does This User Have an Internal Account?
To determine whether a user has an internal account, examine the bottom of the user's Accounts tab. If a user has an internal account, their internal ID is listed in that location. Regular users usually do not have internal accounts.
Note: Internal accounts are visible only if you have user administration capabilities or you are looking at your own user definition.
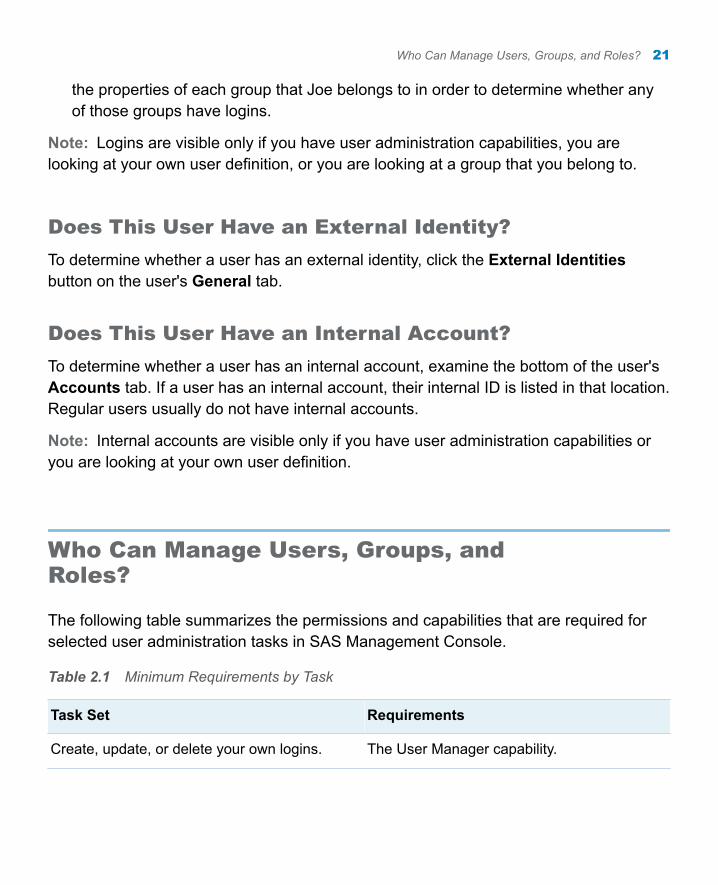
Who Can Manage Users, Groups, and Roles?
The following table summarizes the permissions and capabilities that are required for selected user administration tasks in SAS Management Console.
Table 2.1 Minimum Requirements by Task
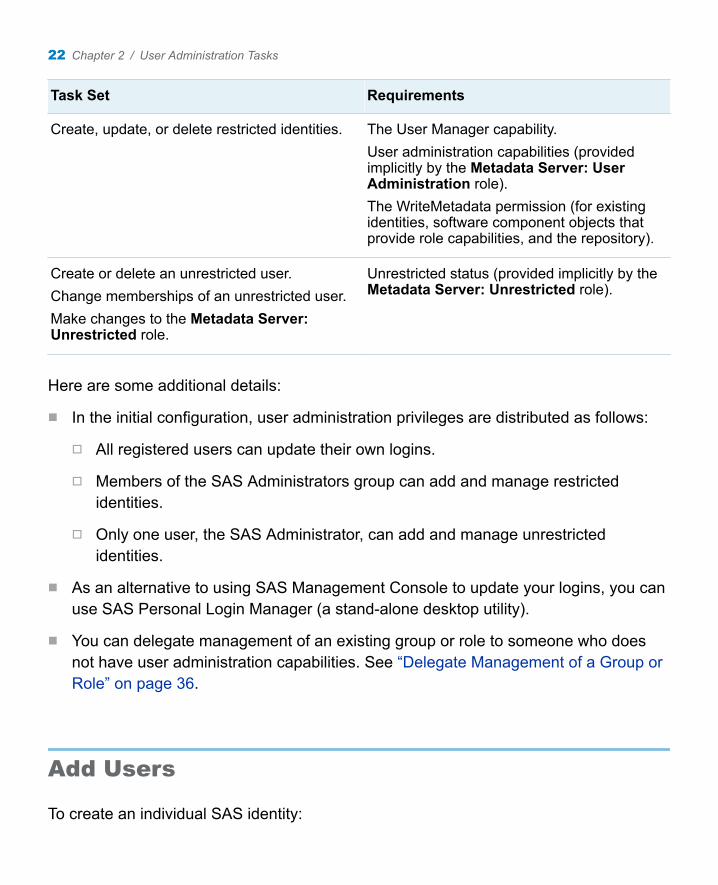
Task Set Requirements
Create, update, or delete your own logins. The User Manager capability.
Who Can Manage Users, Groups, and Roles? 21
Task Set Requirements
Create, update, or delete restricted identities. The User Manager capability.User administration capabilities (provided implicitly by the Metadata Server: User Administration role).The WriteMetadata permission (for existing identities, software component objects that provide role capabilities, and the repository).
Create or delete an unrestricted user.Change memberships of an unrestricted user.Make changes to the Metadata Server: Unrestricted role.
Unrestricted status (provided implicitly by the Metadata Server: Unrestricted role).
Here are some additional details:
n In the initial configuration, user administration privileges are distributed as follows:
o All registered users can update their own logins.
o Members of the SAS Administrators group can add and manage restricted identities.
o Only one user, the SAS Administrator, can add and manage unrestricted identities.
n As an alternative to using SAS Management Console to update your logins, you can use SAS Personal Login Manager (a stand-alone desktop utility).
n You can delegate management of an existing group or role to someone who does not have user administration capabilities. See “Delegate Management of a Group or Role” on page 36.
Add Users
To create an individual SAS identity:
22 Chapter 2 / User Administration Tasks

1 On the Plug-ins tab, select User Manager.
2 For each user:
a Right-click and select New User.
b On the General tab, enter a name.
TIP We recommend that you avoid using spaces or special characters in the name of a user, group, or role that you create. Not all components support spaces and special characters in identity names.
c On the Accounts tab, click New. In the New Login dialog box, select the appropriate authentication domain (for example, DefaultAuth ) and enter the user's external account ID. It is not necessary to include a password in this login.
Note: If the user ID is for a Windows account, you must qualify the ID (for example, WIN\user or [email protected]).
d Click OK to save the new login. Click OK again to save the new user.
3 (Optional) Use the Groups and Roles tab to make a user a direct member of another group or a role.
Note: The user automatically belongs to PUBLIC (everyone who can access the environment) and SASUSERS (those members of PUBLIC who have a well-formed user definition).
Note: You do not have to make changes on the user's Authorization tab. This tab has no effect on what the user can do.
Add Administrators
To create an individual SAS identity that is based on an internal account:
Add Administrators 23
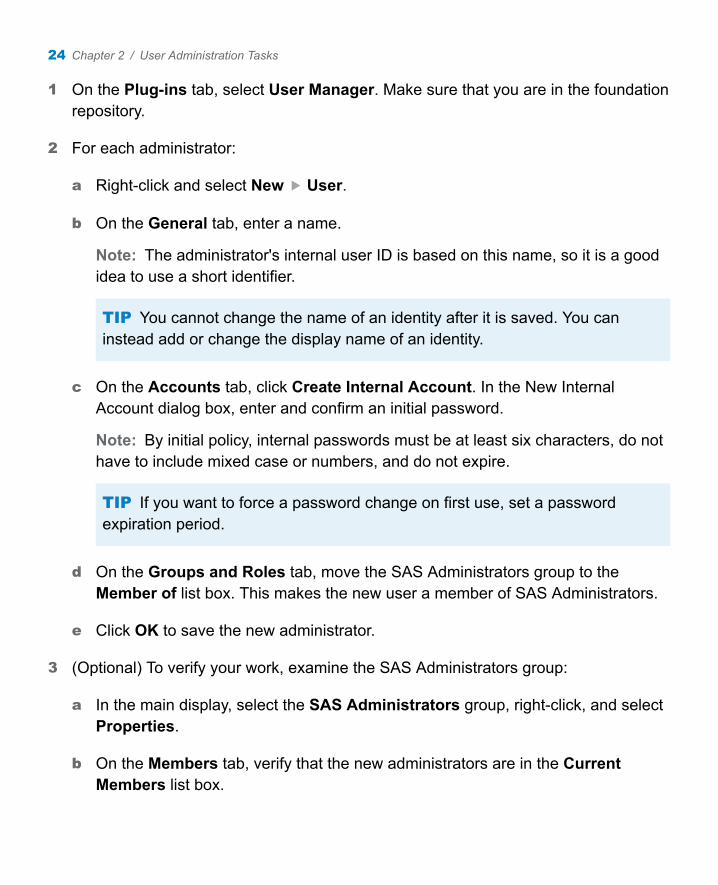
1 On the Plug-ins tab, select User Manager. Make sure that you are in the foundation repository.
2 For each administrator:
a Right-click and select New User.
b On the General tab, enter a name.
Note: The administrator's internal user ID is based on this name, so it is a good idea to use a short identifier.
TIP You cannot change the name of an identity after it is saved. You can instead add or change the display name of an identity.
c On the Accounts tab, click Create Internal Account. In the New Internal Account dialog box, enter and confirm an initial password.
Note: By initial policy, internal passwords must be at least six characters, do not have to include mixed case or numbers, and do not expire.
TIP If you want to force a password change on first use, set a password expiration period.
d On the Groups and Roles tab, move the SAS Administrators group to the Member of list box. This makes the new user a member of SAS Administrators.
e Click OK to save the new administrator.
3 (Optional) To verify your work, examine the SAS Administrators group:
a In the main display, select the SAS Administrators group, right-click, and select Properties.
b On the Members tab, verify that the new administrators are in the Current Members list box.
24 Chapter 2 / User Administration Tasks
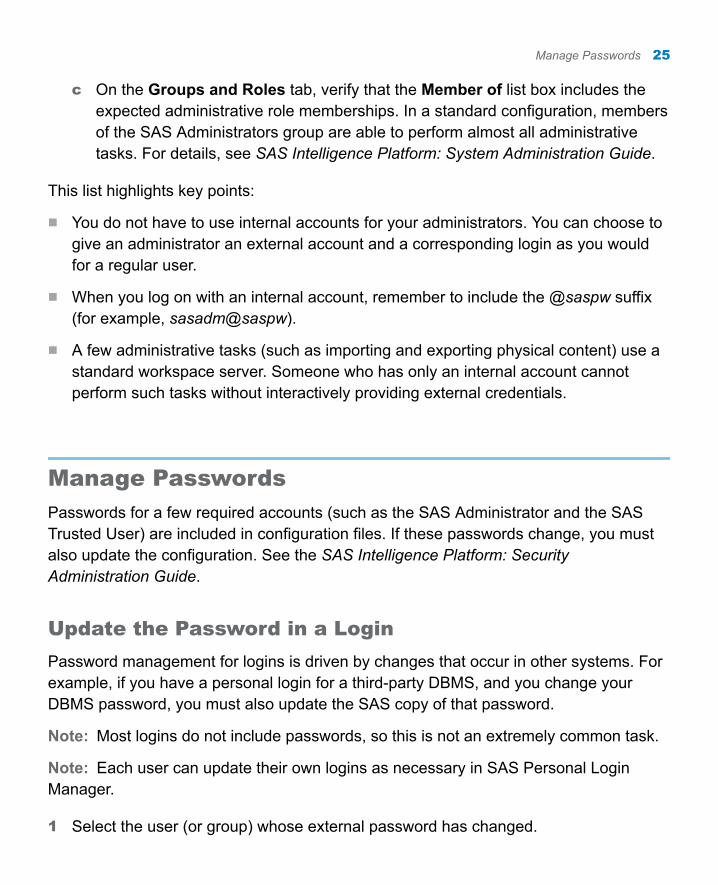
c On the Groups and Roles tab, verify that the Member of list box includes the expected administrative role memberships. In a standard configuration, members of the SAS Administrators group are able to perform almost all administrative tasks. For details, see SAS Intelligence Platform: System Administration Guide.
This list highlights key points:
n You do not have to use internal accounts for your administrators. You can choose to give an administrator an external account and a corresponding login as you would for a regular user.
n When you log on with an internal account, remember to include the @saspw suffix (for example, sasadm@saspw).
n A few administrative tasks (such as importing and exporting physical content) use a standard workspace server. Someone who has only an internal account cannot perform such tasks without interactively providing external credentials.
Manage Passwords
Passwords for a few required accounts (such as the SAS Administrator and the SAS Trusted User) are included in configuration files. If these passwords change, you must also update the configuration. See the SAS Intelligence Platform: Security Administration Guide.
Update the Password in a Login
Password management for logins is driven by changes that occur in other systems. For example, if you have a personal login for a third-party DBMS, and you change your DBMS password, you must also update the SAS copy of that password.
Note: Most logins do not include passwords, so this is not an extremely common task.
Note: Each user can update their own logins as necessary in SAS Personal Login Manager.
1 Select the user (or group) whose external password has changed.
Manage Passwords 25

2 Right-click and select Properties.
3 On the Accounts tab, select the login that you need to update and click Edit.
Note: Only someone who has user administration capabilities can see logins that do not belong to them.
4 In the Login Properties dialog box, enter and confirm the new password.
Reset an Internal Password
Note: Typically, each administrator updates their own internal password as necessary (in SAS Management Console or SAS Personal Login Manager).
1 Select the user whose internal password you want to reset.
2 Right-click and select Properties.
3 At the bottom of the user's Accounts tab, click Update.
Note: If this button is not present, the user does not have an internal account. Internal accounts are intended for only metadata administrators and certain service identities.
4 In the user's Internal Account Properties dialog box, enter and confirm a new password.
Note: By initial policy, internal passwords must be at least six characters, do not have to include mixed case or numbers, and do not expire.
5 If you are resetting someone else's password, inform the owner of the account that their password has been reset and tell them what the new password is.
26 Chapter 2 / User Administration Tasks
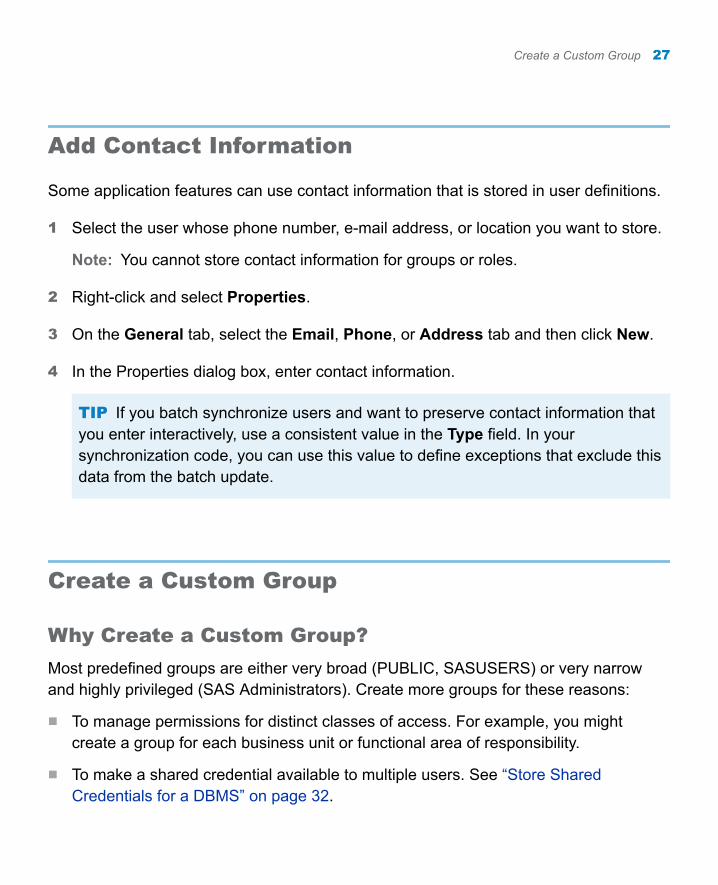
Add Contact Information
Some application features can use contact information that is stored in user definitions.
1 Select the user whose phone number, e-mail address, or location you want to store.
Note: You cannot store contact information for groups or roles.
2 Right-click and select Properties.
3 On the General tab, select the Email, Phone, or Address tab and then click New.
4 In the Properties dialog box, enter contact information.
TIP If you batch synchronize users and want to preserve contact information that you enter interactively, use a consistent value in the Type field. In your synchronization code, you can use this value to define exceptions that exclude this data from the batch update.
Create a Custom Group
Why Create a Custom Group?
Most predefined groups are either very broad (PUBLIC, SASUSERS) or very narrow and highly privileged (SAS Administrators). Create more groups for these reasons:
n To manage permissions for distinct classes of access. For example, you might create a group for each business unit or functional area of responsibility.
n To make a shared credential available to multiple users. See “Store Shared Credentials for a DBMS” on page 32.
Create a Custom Group 27

How to Create a Custom Group
1 On the Plug-ins tab, select User Manager and make sure you are in the correct repository.
2 Right-click and select New Group.
3 In the Properties dialog box:
a On the General tab, enter a name.
TIP We recommend that you avoid using spaces or special characters in the name of a user, group, or role that you create. Not all components support spaces and special characters in identity names.
b On the Members tab, assign user or groups to the new group.
c If you want to make this group a member of other groups or roles, use the Groups and Roles tab.
d If you are using this group to make a shared account available, add a shared login on the Accounts tab.
Note: You do not have to make changes on the group's Authorization tab. This tab has no effect on what the group can do.
Create a Custom Role
Why Create a Custom Role?
In many cases, the predefined roles are sufficient. You might choose to create additional roles for these reasons:
28 Chapter 2 / User Administration Tasks
n To decrease the level of granularity by creating an umbrella role that aggregates two or more existing roles. For example, you might create a role that includes all capabilities other than those of the most privileged roles.
n To increase the level of granularity by creating a mini-role that provides only a subset of the capabilities of a predefined role. For example, you might create a custom role called Report Distribution that provides only the report scheduling and distribution capabilities for SAS Web Report Studio.
n To create a cross-application role for a particular type of functionality. For example, you might create an OLAP role that includes the OLAP capabilities from SAS Enterprise Guide and the SAS Add-In for Microsoft Office.
How to Create a Custom Role
1 On the Plug-ins tab, select User Manager.
2 Right-click and select New Role.
3 In the Properties dialog box:
a On the General tab, enter a name.
TIP We recommend that you avoid using spaces or special characters in the name of a user, group, or role that you create. Not all components support spaces and special characters in identity names.
b On the Members tab, assign users and groups to the role.
c Define the role's capabilities using either or both of these techniques:
n Assign capabilities to the role by selecting check boxes on the Capabilities tab. Clicking a tree icon changes the status of the selections beneath that icon's node.
n Give this role all of the capabilities of one or more other roles by using the Contributing Roles tab. For example, to create a role that includes all capabilities other than those of the most privileged roles, select the
Create a Custom Role 29

Contributing Roles tab, move all roles over and then move the metadata server roles back.
Note: Changes that you make to a role's capabilities affect any roles to which that role contributes its capabilities.
Note: You cannot selectively assign or incrementally remove a contributed capability.
Note: You do not have to make changes on the role's Authorization tab. This tab has no effect on what the role can do.
Change a Role's Capabilities
CAUTION! There is no automated method for reverting a role back to its original set of capabilities. The initial capabilities-to-roles mapping is appropriate in many cases. Instead of adjusting the capabilities of a predefined role, consider creating a new role.
To change the set of capabilities that a role provides:
1 Make sure you have a current backup.
2 In User Manager, select the role.
3 Right-click and select Properties.
4 Use either or both of these techniques:
n Incrementally add or remove capabilities from the role by selecting or clearing check boxes on the Capabilities tab.
Note: A capability that has gray shading behind its check box comes from a contributing role and cannot be removed individually.
30 Chapter 2 / User Administration Tasks

Note: If you click a selected white check box (because you want to clear that check box) and you then see a selected gray check box , your removal of the explicit assignment has revealed an underlying contributed capability.
Note: You cannot deselect capabilities for the unrestricted role.
n Give the role the capabilities of one or more other roles by using the Contributing Roles tab.
Note: These relationships are dynamic; changes that you make to a role's capabilities affect any roles to which that role contributes its capabilities.
Note: You cannot selectively assign or incrementally remove a contributed capability.
This list provides details about the Capabilities tab:
n The metadata server administrative roles include implicit capabilities, which are not displayed on this tab.
n The tree icons indicate the status of the items beneath a node in the tree. Clicking a tree icon changes the status of the selections beneath that icon's node. The status cycles between full, empty, and partial states, with these exceptions:
o The empty state does not occur if there are contributed capabilities.
o The partial state occurs only if the original settings were mixed (some capabilities selected, some capabilities not selected).
Note: The original settings are a cache of the selections that were in place at the time that you first click a particular tree icon. Any intervening action (such as clicking a check box or clicking the tree icon for a different node) causes an update to the original settings cache. There is no cache of earlier states. If you want to undo all of your changes, click Cancel.
5 (Optional) On the General tab, update the role's description to reflect its revised capabilities.
6 Click OK to save the changes to the role.
Change a Role's Capabilities 31
Adjust Group or Role Membership
1 In User Manager, select the group or role whose membership you want to change.
2 Right-click and select Properties.
3 On the Members tab, add or remove identities from the group or role.
Note: The Current Members list box displays only direct members.
Note: You cannot make a role a member of a group or of another role. You can instead make one role contribute all of its capabilities to another role.
Note: On a group definition, do not confuse the Members tab with the Groups and Roles tab. Use a group's Groups and Roles tab only if you want to make that group a member of other groups or roles.
TIP You can filter the contents of the Available Members list box by using the Search radio button.
Make a SAS Copy of DBMS Credentials
To provide seamless access to a third-party DBMS, add a login that contains the user ID and password for a DBMS account. These instructions are also appropriate for providing seamless access to other servers that require credentials that are different from the credentials with which a user initially logs on.
Store Shared Credentials for a DBMS
1 Verify the authentication domain for the DBMS:
32 Chapter 2 / User Administration Tasks
a On the Plug-ins tab, expand the Server Manager node and select the DBMS server.
b In the display area, right-click the server's connection object, select Properties, and access the Options tab. Note which authentication domain is specified.
2 In User Manager, identify or create the group that you will use to manage the shared DBMS account that you want to share. For example, if you want all users to share the account, use the PUBLIC group.
3 On the group's Accounts tab, click New.
4 In the New Login Properties dialog box:
a Enter the user ID and password for the DBMS account.
b Select the authentication domain that you saw in step 1b.
c Click OK to save the login.
5 On the group's Members tab, make sure that everyone who needs to use the shared account is a member. Remember that only direct memberships are displayed, but indirect or implicit membership is also sufficient for making the credentials available.
Store Individual Credentials for a DBMS
Follow the instructions in the preceding topic but add the login to a user's Accounts tab instead of a group's Accounts tab.
Note: If a user has more than one available login in a particular authentication domain, the login that is closest to the user is used. If there is a tie (for example, if a user is a direct member of two groups and both groups have logins in the same authentication domain), then the same login is used consistently, but you cannot control which of the two logins is used.
Make a SAS Copy of DBMS Credentials 33
Unlock an Internal Account
By initial policy, three consecutive failed attempts to log on with an internal account locks that account for one hour. To immediately unlock a locked internal account:
1 In User Manager, select the user whose internal account is locked. Right-click and select Properties.
2 Select the Accounts tab. In the confirmation message box, click Yes.
Adjust Policies for an Internal Account
You can use per-account settings to selectively override some of the server-level policies for internal accounts.
1 On the user's Accounts tab, click Update to open the Internal Account Properties dialog box.
2 Make changes in the Custom Settings group box.
Note: There are two distinct expiration settings. Do not confuse the account expiration date with the password expiration period.
TIP A few required accounts (such as the SAS Administrator and the SAS Trusted User) are included in configuration files. To minimize administrative effort, do not add expiration dates to these accounts or expiration periods to these passwords.
34 Chapter 2 / User Administration Tasks

Manage Authentication Domains
Add an Authentication Domain
1 On the Plug-ins tab, select User Manager (or Server Manager).
2 Right-click and select Authentication Domains.
Note: This menu item is available only if you have user administration capabilities.
3 In the Authentication Domains Management dialog box, click New.
4 In the New Authentication Domain dialog box, enter a name.
Rename an Authentication Domain
CAUTION! Changing the name of an authentication domain can interfere with single sign-on. Do not rename an authentication domain unless you need to make a correction.
To change the name of an authentication domain, select a row in the Authentication Domains Management dialog box and click Edit.
Delete an Authentication Domain
CAUTION! When you delete an authentication domain, all of the logins in that authentication domain are deleted. Before you delete an authentication domain, make sure you have a current backup.
To delete an authentication domain, select a row in the Authentication Domains Management dialog box and click Delete.
Manage Authentication Domains 35
Rename a User, Group, or Role
You can add or change the display name of an identity.
1 In User Manager, select the user, group, or role that you want to rename.
2 Right-click and select Properties.
3 On the General tab, add or edit text in the Display Name field. For an identity that does not have a display name, the name serves as the display name.
Delete a User, Group, or Role
CAUTION! When you delete a user, group, or role, you lose all of that identity's metadata associations. Creating a new identity with the same name does not restore those associations.
1 Select the user, group, or role that you want to delete.
2 Right-click and select Delete. In the confirmation message box, click Yes.
Delegate Management of a Group or Role
To delegate management to someone who does not have user administration capabilities, use direct grants of the WriteMetadata permission. For example, to delegate management of a group named ETL Developers to a user named Tara, you would access the Authorization tab for the ETL Developers group, add Tara, and explicitly grant the WriteMetadata permission to her.
36 Chapter 2 / User Administration Tasks
Note: Do not assume that someone who has only indirect settings on someone else's Authorization tab has not been delegated management. The best way to check for delegation of an identity is to check each entry in the Users and Groups list box on that identity's Authorization tab to see whether there are any explicit or ACT grants of the WriteMetadata permission.
Include a User in Batch Synchronization
Note: Only users, groups, and roles that have an external identity can participate in batch synchronization. The external identity serves as a synchronization key.
1 Select the user, right-click, and select Properties.
2 On the user's General tab, click External Identities.
3 Click New. In the Identifier field, enter a value that identifies the user in your external source.
CAUTION! An inaccurate external identity value can cause inadvertent deletion of an identity during the synchronization process. Make sure that any external identity value that you add corresponds to a key ID value in the tables that you extract from your primary user registry.
Note: SAS does not enforce uniqueness when you store external identity values.
Note: The synchronization process uses only the first external identity in each list.
Import or Export Users, Groups, and Roles
You can use the standard metadata import and export framework to copy identities.
Import or Export Users, Groups, and Roles 37
You initiate these actions on the Folders tab under SAS Folders System Security.
For detailed instructions, see SAS Intelligence Platform: System Administration Guide.
TIP Do not confuse these promotion tools with the user import macros that help you create and synchronize metadata identities from an external provider, such as Active Directory. The user import macros are documented in SAS Intelligence Platform: Security Administration Guide.
Tips for Finding a User, Group, or Role
This list explains how you can modify the User Manager display of users, groups, and roles:
n To sort the list of identities in ascending or descending order, click a column heading.
n To revert to the order in which identities were added to the repository, right-click a column heading and select Sort Original.
n To hide a column, right-click the column heading and select Hide Column.
n To show a hidden column, right-click any column heading and select Show the column name.
n To change the width of a column, click and drag the edge of the column heading.
n To move a column, click and drag the column heading.
n To set a different default view, select the User Manager node on the Plug-ins tab, right-click, and select Options.
n To limit the type of identities displayed, clear the Show Users, Show Groups, or Show Roles check boxes.
n To filter the list of identities displayed, select the Search radio button.
38 Chapter 2 / User Administration Tasks

Note: The User, Group, or Role column lists display names. For an identity that does not have a display name, the name is listed instead.
To find an identity in the User Manager display:
1 Make sure the correct repository is selected at the top of the Plug-ins tab.
2 Ensure that the appropriate Show check box is selected.
3 If you cannot easily locate the identity, select the Search radio button, specify criteria, and click Search Now. The generated list includes all identities that meet all of the specified criteria. To specify additional criteria, click Advanced. When advanced search criteria are applied, a yellow symbol appears on the Advanced button.
Tips for Finding a User, Group, or Role 39

40 Chapter 2 / User Administration Tasks
3Exercises in User Administration
Assign Capabilities to a Role . . . . . . . . . . . . . . . . . . . . . . . . . . . . . . . . . . . . . . . . . . 41
Create and Use an Internal Account . . . . . . . . . . . . . . . . . . . . . . . . . . . . . . . . . . 43
Assign Capabilities to a Role
To practice customizing the distribution of capabilities across roles, complete this exercise in SAS Management Console:
1 Log on as someone who has user administration capabilities and is a member of the SAS Administrators group (for example, sasadm@saspw).
2 On the Plug-ins tab, select User Manager (make sure you are in the foundation repository). In the display area, clear the Show Users and Show Groups check boxes. The roles that exist in your deployment are displayed.
3 Right-click User Manager and select New Role. On the General tab, enter Test Role in the Name field.
Note: Creating a new role isolates this exercise from the rest of your deployment, ensuring that your current configuration is preserved.
4 To learn how to directly assign capabilities, select the Capabilities tab:
41
a Notice that a message at the top of the tab reminds you that a few capabilities (for example, those of the metadata server's roles) are not listed on this tab (because those capabilities are implicit).
b Notice that the first node (Applications) has an empty branch icon . This indicates that no explicit capabilities are assigned to this role.
c Notice that there is a second-level node for each component that provides explicit capabilities. A role can provide capabilities from multiple applications.
d Click + to expand the Management Console node. Click + to expand the Plug-ins node. Select the Authorization Manager check box. Notice that the branch icons are now partial . This indicates that some of the capabilities are selected.
Note: To see a description of any capability, click that capability's text and look at the Description field at the bottom of the tab.
e Click the partial icon for the Plug-ins folder. This action causes all of the capabilities beneath that node to be explicitly selected. Click again to cycle back to the empty branch icon (no capabilities assigned). Click a third time to revert to the immediately preceding state (only the Authorization Manager check box selected).
f Click the Authorization Manager check box to clear it.
5 To learn how to indirectly assign capabilities, select the Contributing Roles tab:
a In the Available Roles list, select Management Console: Content Management. Before you make this a contributing role, verify its capabilities.
b Move the Management Console: Content Management role to the Current Roles list. This role now contributes all of its capabilities to your new role. If capabilities of this contributing role change, the capabilities of your test role change also.
It is necessary to use contributing roles in these circumstances:
42 Chapter 3 / Exercises in User Administration
n You want to extend implicit capabilities (like the capabilities of the metadata server roles) to other roles.
n You want to provide dynamic aggregation of roles so that changes to one role propagate to other roles that have the first role as a contributing role.
6 To learn about interactions between contributed and directly assigned capabilities, select your test role's Capabilities tab again.
a Under Management Console Plug-ins, notice that capabilities from the Management Console: Content Management role are now selected. A gray circle icon identifies these as contributed capabilities.
b Select the already-selected Authorization Manager check box. This adds a direct assignment on top of the contributed assignment, making the assignment independent from the underlying contributing role.
c Click the tree icon for the Plug-ins folder three times (stop when only the Authorization Manager check box is explicitly selected).
d Select the Authorization Manager check box again. It reverts back to the contributed state. You cannot incrementally remove a contributed capability.
7 To close the dialog box (and not save the test role), click Cancel.
Create and Use an Internal Account
To practice creating and using an internal account, complete this exercise in SAS Management Console:
1 Log on as someone who has user administration capabilities (for example, sasadm@saspw).
2 On the Plug-ins tab, select User Manager.
Create and Use an Internal Account 43

3 Right-click User Manager and select New User. On the General tab, enter a short word such as test in the Name field.
4 On the Accounts tab, click Create Internal Account. In the New Internal Account dialog box:
a Notice that the user ID is constructed from the name that you entered on the General tab and an @saspw suffix.
b Enter and confirm a simple initial password such as 123456.
Note: These instructions assume that the default server-level policies for internal accounts are in place.
c Select the Set a custom password expiration period check box and the never expires radio button.
d Click OK to save the new internal account.
5 Notice that the new account appears at the bottom of the Accounts tab. Click OK to save the new user.
6 Log on to SAS Management Console as the new internal user:
a From the main menu, select File Connection Profile. In the informational message box, click Yes.
b In the Connection Profile dialog box, select Create a new connection profile and click OK.
c In the Connection Profile wizard, name the profile internal, provide the machine name and port of the metadata server, and enter the internal credentials (for example, test@saspw and 123456). Select the Save user ID and password in this profile check box. Click Finish.
d In the Connection Profile dialog box, click OK.
44 Chapter 3 / Exercises in User Administration

7 Notice that you have the permissions and capabilities of the SASUSERS and PUBLIC groups (because you did not make any additional group or role assignments for the test user).
Note: To clean up, log back on as someone who has user administration capabilities. In User Manager, delete the user that you created for this exercise. To delete the test user's home directory and MyFolder, select the Folders tab, navigate to SAS Folders Users, right-click the test folder, and select Delete.
Note: There are no server configuration activities for SAS internal authentication. The metadata server always accepts valid internal account credentials. However, internal accounts are intended for only metadata administrators and certain service accounts. Internal accounts are not intended for regular users.
Create and Use an Internal Account 45
46 Chapter 3 / Exercises in User Administration
4Access Management Tasks
Examining Permissions . . . . . . . . . . . . . . . . . . . . . . . . . . . . . . . . . . . . . . . . . . . . . . . . . 48How to Interpret the Authorization Tab . . . . . . . . . . . . . . . . . . . . . . . . . . . . . . 48How to Check the Permissions of an Unlisted User . . . . . . . . . . . . . . . 50Which Items are Parents to This Object? . . . . . . . . . . . . . . . . . . . . . . . . . . . 50
Who Can Set Permissions? . . . . . . . . . . . . . . . . . . . . . . . . . . . . . . . . . . . . . . . . . . . . 51
Add an Explicit Grant or Denial . . . . . . . . . . . . . . . . . . . . . . . . . . . . . . . . . . . . . . . . 51
Use an Access Control Template (ACT) . . . . . . . . . . . . . . . . . . . . . . . . . . . . . . 52Why Use ACTs? . . . . . . . . . . . . . . . . . . . . . . . . . . . . . . . . . . . . . . . . . . . . . . . . . . . . . . . . 52How to Use an ACT . . . . . . . . . . . . . . . . . . . . . . . . . . . . . . . . . . . . . . . . . . . . . . . . . . . . 52
Create a Custom ACT . . . . . . . . . . . . . . . . . . . . . . . . . . . . . . . . . . . . . . . . . . . . . . . . . . . . 54Why Create Custom ACTs? . . . . . . . . . . . . . . . . . . . . . . . . . . . . . . . . . . . . . . . . . . . 54How to Create a Custom ACT . . . . . . . . . . . . . . . . . . . . . . . . . . . . . . . . . . . . . . . . 54
Update or Delete an ACT . . . . . . . . . . . . . . . . . . . . . . . . . . . . . . . . . . . . . . . . . . . . . . . . 56
Set a Permission Condition (OLAP) . . . . . . . . . . . . . . . . . . . . . . . . . . . . . . . . . . 57
Adjust the Repository-Level Settings . . . . . . . . . . . . . . . . . . . . . . . . . . . . . . . . 58Why Adjust the Repository-Level Settings? . . . . . . . . . . . . . . . . . . . . . . . . 58Make Changes to the Repository ACT . . . . . . . . . . . . . . . . . . . . . . . . . . . . . . 58Designate a Different ACT to Serve as the Repository ACT . . . . . 59
Import or Export ACTs . . . . . . . . . . . . . . . . . . . . . . . . . . . . . . . . . . . . . . . . . . . . . . . . . . . 60
What Happens When I Select a Check Box? . . . . . . . . . . . . . . . . . . . . . . . . 60
47
Tips for Efficiently Using Permissions . . . . . . . . . . . . . . . . . . . . . . . . . . . . . . . 61Assign Permissions to Groups . . . . . . . . . . . . . . . . . . . . . . . . . . . . . . . . . . . . . . . 61Use Folders to Organize Content . . . . . . . . . . . . . . . . . . . . . . . . . . . . . . . . . . . . 61Centralize Permissions with ACTs . . . . . . . . . . . . . . . . . . . . . . . . . . . . . . . . . . . 62Deny Broadly, Grant Selectively (To the Extent Possible) . . . . . . . . 62
Examining Permissions
You cannot view someone's permissions by looking at their user definition. To view someone’s permissions, navigate instead to an object or container that you are interested in, open the Properties dialog box, and select the Authorization tab.
How to Interpret the Authorization Tab
The List of Names
The Users and Groups list box includes only those users and groups who participate in the current object's settings. An identity participates if they are included in any of these places:
n the repository ACT's Permission Pattern tab
n a setting that this object inherits from a parent object
n an applied ACT's Permission Pattern tab
n an explicit setting on the object
Note: You cannot remove identities that participate through the repository ACT, an applied ACT, or an inherited setting.
Any restricted user who is not listed has the access of their closest listed group. For each unlisted user, group memberships and identity precedence determine which listed group is closest. For example, the closest listed group for an administrator might be SAS Administrators, and the closest listed group for a regular user might be SASUSERS. For a full discussion of identity precedence, see SAS Intelligence Platform: Security Administration Guide.
48 Chapter 4 / Access Management Tasks

The List of Permissions
The Effective Permissions list box displays the metadata layer access that the selected user or group has to the current object. Effective permissions are a calculation of the net effect of all applicable permission settings. Effective permissions do not reflect role-based constraints or access controlled in other layers such as the operating system.
This table explains the significance of the check box colors:
Table 4.1 Significance of Color in the Permissions List
Color Term Significance
(clear) Explicit The permission is set on the current object and assigned to the selected identity.
(green) ACT The permission comes from an applied ACT whose pattern explicitly assigns the grant or denial to the selected identity.
(gray) Indirect The permission comes from someone else (the unrestricted role or a group that has an explicit or ACT setting) or somewhere else (a parent object or the repository ACT).*
* For the WriteMemberMetadata permission, gray means that the setting either mirrors the setting for the WriteMetadata permission or is derived from group settings.
Examining Permissions 49

How to Check the Permissions of an Unlisted User
Basic Technique
Click Add and temporarily add the user to the Authorization tab.
Note: Each restricted identity that you add gets an explicit grant of the ReadMetadata permission. If you remove the user from the Users and Groups list box, the automatically created explicit grant of ReadMetadata is deleted.
Advanced Technique
If you are unrestricted, an Advanced button on each object's Authorization tab provides access to the object's Explore Authorizations tab. On the Explore Authorizations tab, you can add any user or group and view their permissions for the current object. You cannot change settings on the Explore Authorizations tab. It is not necessary to remove identities from this tab. This tab is for investigation only.
Note: Both the Authorization tab and the advanced Explore Authorizations tab always display effective permissions.
Which Items are Parents to This Object?
If you are unrestricted, an Advanced button on each object's Authorization tab provides access to the Inheritance tab. On this tab, you can trace the current object's parents.
The Inheritance tab displays a tree of items, organized by their security relationships. The first object in the tree is always the current object. If the current object has an immediate parent other than the repository ACT, you can expand the first node in the tree to see those parents. You can continue expanding nodes to further trace the inheritance. The repository-level parent (the repository ACT) is not displayed in the tree.
TIP When you move from the Folders tab to the Inheritance tab, there is a shift in orientation. On the Folders tab, you expand parent nodes in order to get to an object
50 Chapter 4 / Access Management Tasks
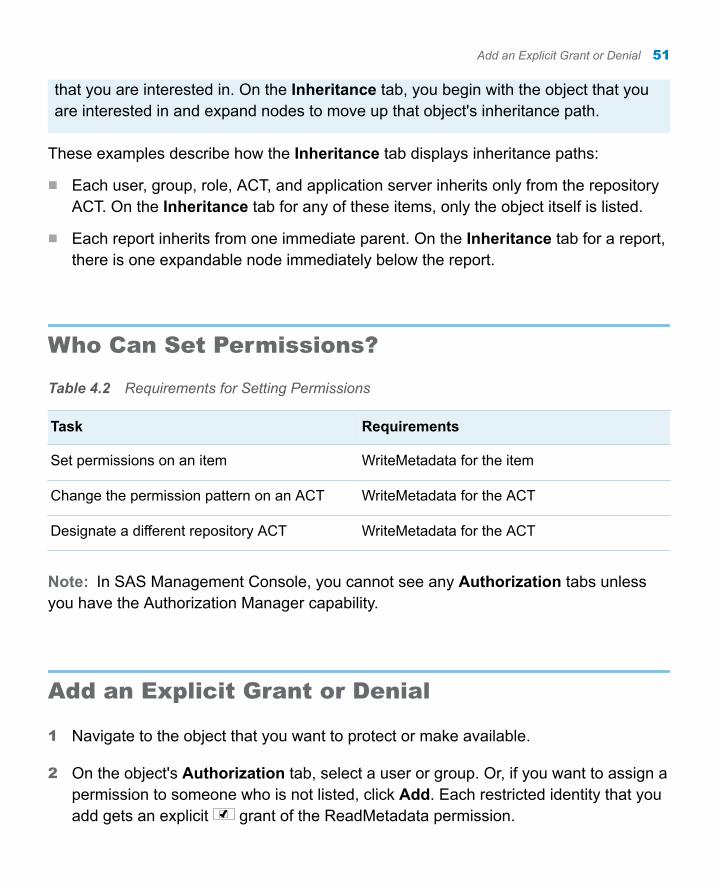
that you are interested in. On the Inheritance tab, you begin with the object that you are interested in and expand nodes to move up that object's inheritance path.
These examples describe how the Inheritance tab displays inheritance paths:
n Each user, group, role, ACT, and application server inherits only from the repository ACT. On the Inheritance tab for any of these items, only the object itself is listed.
n Each report inherits from one immediate parent. On the Inheritance tab for a report, there is one expandable node immediately below the report.
Who Can Set Permissions?
Table 4.2 Requirements for Setting Permissions
Task Requirements
Set permissions on an item WriteMetadata for the item
Change the permission pattern on an ACT WriteMetadata for the ACT
Designate a different repository ACT WriteMetadata for the ACT
Note: In SAS Management Console, you cannot see any Authorization tabs unless you have the Authorization Manager capability.
Add an Explicit Grant or Denial
1 Navigate to the object that you want to protect or make available.
2 On the object's Authorization tab, select a user or group. Or, if you want to assign a permission to someone who is not listed, click Add. Each restricted identity that you add gets an explicit grant of the ReadMetadata permission.
Add an Explicit Grant or Denial 51

3 In the Effective Permissions list box, select check boxes to adjust the settings for the currently selected identity. Each click adds an explicit control to the object's protections (except that clicking an explicit control removes that control and reveals an underlying grant or denial).
4 Repeat steps 2 and 3 for any other identities whose access to this object you want to adjust.
5 Review the settings for each identity in the Users and Groups list box. This is important because settings that you add for a group can affect access for all members of that group. For example, a denial that you add for the PUBLIC group blocks access for all restricted users, unless there are other explicit or ACT (green) grants. You must offset a broad explicit denial with explicit or ACT grants for any restricted identities whose access you want to preserve.
6 In the Properties dialog box, click OK to save your changes.
TIP It is easy to set explicit grants and denials on each object that you want to protect or make available. However, managing a large number of individual permission settings can be cumbersome. See “Tips for Efficiently Using Permissions” on page 61.
Use an Access Control Template (ACT)
Why Use ACTs?
Use ACTs to avoid having to repeatedly set the same explicit permissions for the same identities on multiple objects. When you apply an ACT to an object, the ACT settings are added to the object's protections.
How to Use an ACT
1 Determine whether there is an existing ACT that you can use.
52 Chapter 4 / Access Management Tasks

a On the Plug-ins tab of SAS Management Console, select Authorization Manager Access Control Templates.
b On the Permission Pattern tab of each ACT, examine the settings for each identity. If you do not find an appropriate ACT, consider using a combination of ACTs and explicit settings or creating a new ACT.
Note: Do not confuse an ACT's Authorization tab with its Permission Pattern tab. Settings on an ACT's Authorization tab affect who can access that ACT; settings on an ACT's Permission Pattern tab affect access to the objects to which that ACT is applied.
2 When you have identified an ACT that you want to use, navigate to an object to which you will add that ACT's settings. On the object's Authorization tab, click Access Control Templates.
3 Expand the nodes in the Available list box, move the ACT to the Currently Using list box, and click OK.
Note: The repository ACT is typically not in the Currently Using list box because that ACT is typically not applied to any objects.
Note: You can apply multiple ACTs. If there is a tie (for example, a group is granted ReadMetadata in one applied ACT and denied ReadMetadata in another applied ACT), the outcome is a denial. For a full discussion of precedence, see SAS Intelligence Platform: Security Administration Guide.
4 On the object's Authorization tab, notice that the Users and Groups list box now includes the identities that participate in the ACT that you selected. Select each identity and verify that the revised settings are as you expect. On the Authorization tab of an object to which an ACT is applied, settings that are explicit in the ACT's pattern are green .
5 In the object's Properties dialog box, click OK.
Use an Access Control Template (ACT) 53
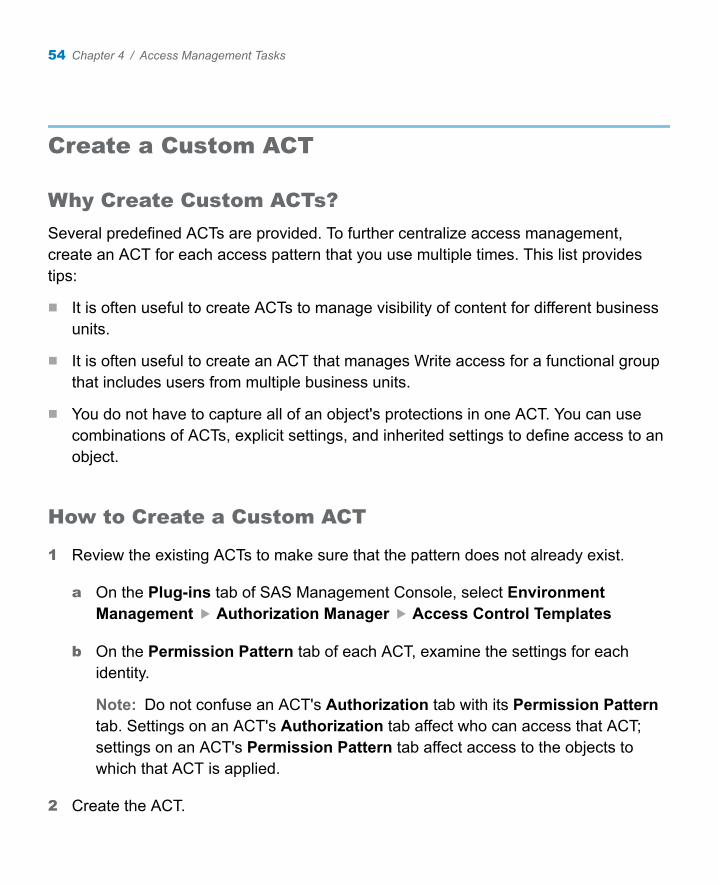
Create a Custom ACT
Why Create Custom ACTs?
Several predefined ACTs are provided. To further centralize access management, create an ACT for each access pattern that you use multiple times. This list provides tips:
n It is often useful to create ACTs to manage visibility of content for different business units.
n It is often useful to create an ACT that manages Write access for a functional group that includes users from multiple business units.
n You do not have to capture all of an object's protections in one ACT. You can use combinations of ACTs, explicit settings, and inherited settings to define access to an object.
How to Create a Custom ACT
1 Review the existing ACTs to make sure that the pattern does not already exist.
a On the Plug-ins tab of SAS Management Console, select Environment Management Authorization Manager Access Control Templates
b On the Permission Pattern tab of each ACT, examine the settings for each identity.
Note: Do not confuse an ACT's Authorization tab with its Permission Pattern tab. Settings on an ACT's Authorization tab affect who can access that ACT; settings on an ACT's Permission Pattern tab affect access to the objects to which that ACT is applied.
2 Create the ACT.
54 Chapter 4 / Access Management Tasks
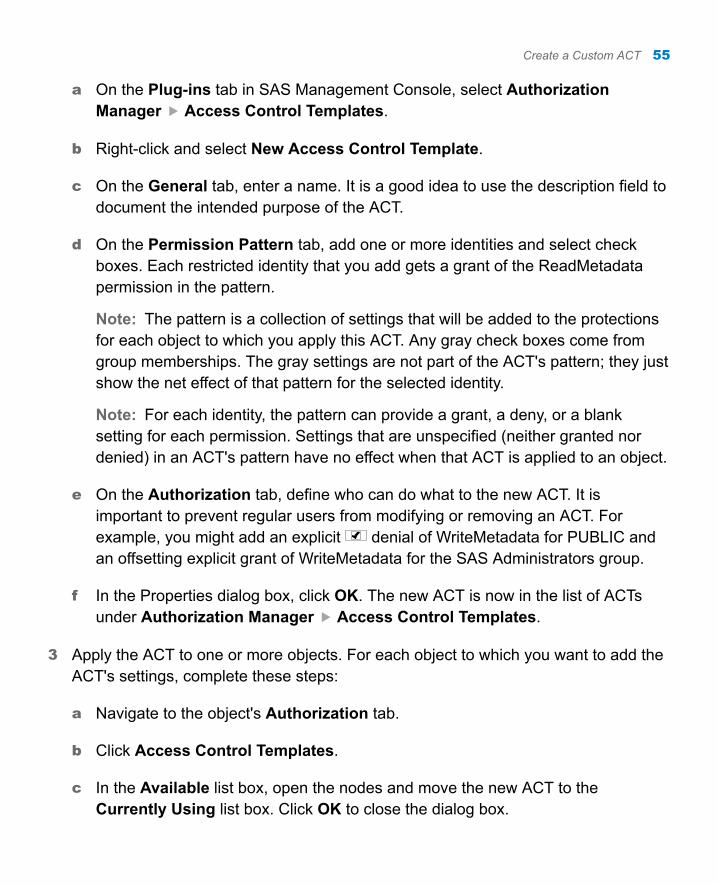
a On the Plug-ins tab in SAS Management Console, select Authorization Manager Access Control Templates.
b Right-click and select New Access Control Template.
c On the General tab, enter a name. It is a good idea to use the description field to document the intended purpose of the ACT.
d On the Permission Pattern tab, add one or more identities and select check boxes. Each restricted identity that you add gets a grant of the ReadMetadata permission in the pattern.
Note: The pattern is a collection of settings that will be added to the protections for each object to which you apply this ACT. Any gray check boxes come from group memberships. The gray settings are not part of the ACT's pattern; they just show the net effect of that pattern for the selected identity.
Note: For each identity, the pattern can provide a grant, a deny, or a blank setting for each permission. Settings that are unspecified (neither granted nor denied) in an ACT's pattern have no effect when that ACT is applied to an object.
e On the Authorization tab, define who can do what to the new ACT. It is important to prevent regular users from modifying or removing an ACT. For example, you might add an explicit denial of WriteMetadata for PUBLIC and an offsetting explicit grant of WriteMetadata for the SAS Administrators group.
f In the Properties dialog box, click OK. The new ACT is now in the list of ACTs under Authorization Manager Access Control Templates.
3 Apply the ACT to one or more objects. For each object to which you want to add the ACT's settings, complete these steps:
a Navigate to the object's Authorization tab.
b Click Access Control Templates.
c In the Available list box, open the nodes and move the new ACT to the Currently Using list box. Click OK to close the dialog box.
Create a Custom ACT 55

d On the object's Authorization tab, verify that the revised settings are as you expect.
Note: On the Authorization tab of an object to which an ACT is applied, settings that are explicit in the ACT's pattern are green .
Note: The applied ACT contributes its settings to the object's protections. The object can also have explicit settings and other applied ACTs (as well as inherited settings).
4 If necessary, adjust the ACT's pattern. The advantage of using an ACT is that you can change the pattern without revisiting the objects to which the pattern is applied. Simply make changes on the ACT's Permission Pattern tab.
Update or Delete an ACT
CAUTION! One ACT can protect thousands of objects. Changes that you make to an ACT's pattern affect every object that ACT is applied to.
CAUTION! When you delete an ACT, you lose all of that ACT's associations to objects where it is applied. Creating a new ACT with the same name does not restore those associations.
1 On the Plug-ins tab of SAS Management Console, navigate to Authorization Manager Access Control Templates and select an ACT.
2 To modify the ACT's pattern:
a Right-click and select Properties.
b Adjust settings on the Permission Pattern tab.
Note: Do not confuse an ACT's Authorization tab with its Permission Pattern tab. Settings on an ACT's Authorization tab affect who can access that ACT; settings on an ACT's Permission Pattern tab affect access to the objects to which that ACT is applied.
56 Chapter 4 / Access Management Tasks
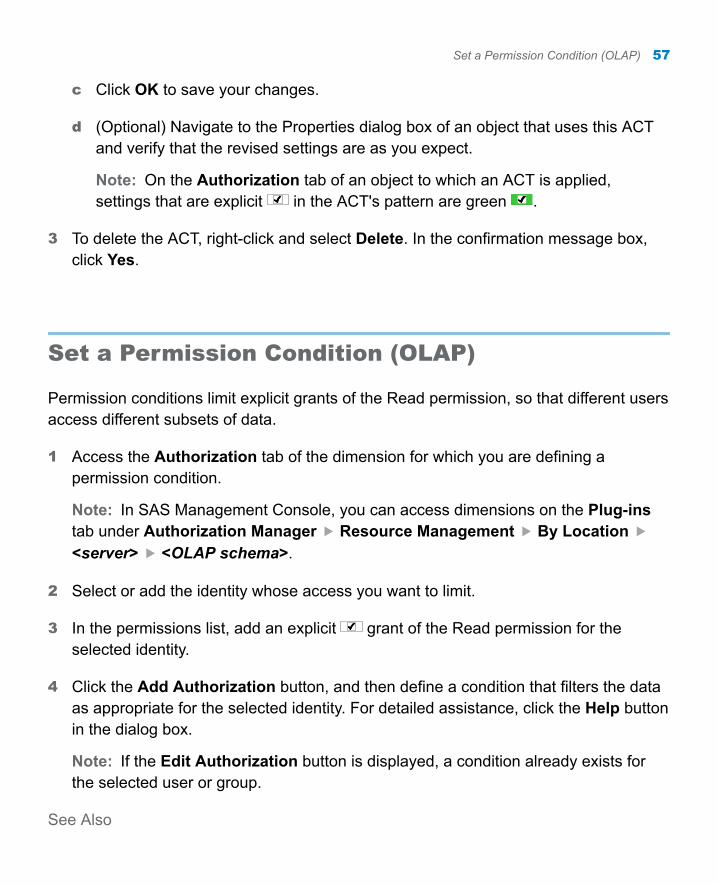
c Click OK to save your changes.
d (Optional) Navigate to the Properties dialog box of an object that uses this ACT and verify that the revised settings are as you expect.
Note: On the Authorization tab of an object to which an ACT is applied, settings that are explicit in the ACT's pattern are green .
3 To delete the ACT, right-click and select Delete. In the confirmation message box, click Yes.
Set a Permission Condition (OLAP)
Permission conditions limit explicit grants of the Read permission, so that different users access different subsets of data.
1 Access the Authorization tab of the dimension for which you are defining a permission condition.
Note: In SAS Management Console, you can access dimensions on the Plug-ins tab under Authorization Manager Resource Management By Location <server> <OLAP schema>.
2 Select or add the identity whose access you want to limit.
3 In the permissions list, add an explicit grant of the Read permission for the selected identity.
4 Click the Add Authorization button, and then define a condition that filters the data as appropriate for the selected identity. For detailed assistance, click the Help button in the dialog box.
Note: If the Edit Authorization button is displayed, a condition already exists for the selected user or group.
See Also
Set a Permission Condition (OLAP) 57

“Fine-Grained Controls” on page 13
Adjust the Repository-Level Settings
Why Adjust the Repository-Level Settings?
CAUTION! Altering the repository-level settings for service identities can prevent necessary access. We recommend that you do not change these settings.
This list provides guidance for working with repository-level settings for a foundation repository:
n All users need ReadMetadata and WriteMetadata access at the repository level. In general, it is appropriate for the SASUSERS group to have these permissions on the repository ACT's Permission Pattern tab.
n If you want to provide broad Read access to data, grant the Read permission at the repository level.
n If you want to experiment with changing repository-level access, create a new ACT and designate that ACT as the repository ACT (instead of modifying the original repository ACT).
Make Changes to the Repository ACT
To make changes to the repository ACT:
1 On the Plug-ins tab in SAS Management Console, select Authorization Manager Access Control Templates.
2 In the display area, select the repository ACT .
3 Right-click and select Properties. Make changes on the Permission Pattern tab. Each restricted identity that you add gets a grant of the ReadMetadata permission in the pattern.
58 Chapter 4 / Access Management Tasks
For example, to give all registered users broad Read access to data, select the SASUSERS group and then select the Grant check box for the Read permission.
Note: Any gray check boxes are settings that come from the selected identity's group memberships.
Note: Do not confuse the Permission Pattern tab with the Authorization tab. Settings on the Authorization tab affect who can access this ACT; settings on this Permission Pattern tab define access to the repository.
Note: In the repository ACT's pattern, an identity that has a blank setting for a particular permission (neither a grant nor a denial) is denied that permission.
Designate a Different ACT to Serve as the Repository ACT
To designate a different repository ACT:
1 Identify or create an ACT that has the repository-level settings that you want to use.
2 On the Plug-ins tab in SAS Management Console, under Authorization Manager Access Control Templates, select the ACT that you want to use to define repository-level access.
3 Right-click and select Repository ACT. In the confirmation message box, click Yes.
In the list of ACTs under Authorization Manager Access Control Templates, the repository ACT icon is now displayed next to the newly designated repository ACT. The ACT that originally served as the repository ACT still exists, but it is no longer in use.
Note: To revert to the original repository ACT, select that ACT and repeat step 3.
Adjust the Repository-Level Settings 59
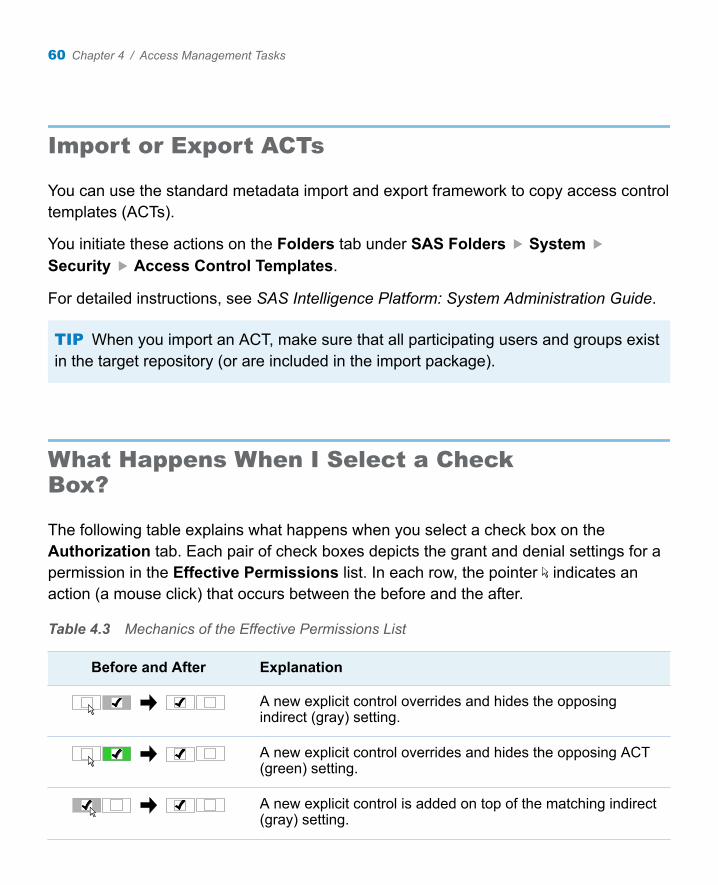
Import or Export ACTs
You can use the standard metadata import and export framework to copy access control templates (ACTs).
You initiate these actions on the Folders tab under SAS Folders System Security Access Control Templates.
For detailed instructions, see SAS Intelligence Platform: System Administration Guide.
TIP When you import an ACT, make sure that all participating users and groups exist in the target repository (or are included in the import package).
What Happens When I Select a Check Box?
The following table explains what happens when you select a check box on the Authorization tab. Each pair of check boxes depicts the grant and denial settings for a permission in the Effective Permissions list. In each row, the pointer indicates an action (a mouse click) that occurs between the before and the after.
Table 4.3 Mechanics of the Effective Permissions List
Before and After Explanation
A new explicit control overrides and hides the opposing indirect (gray) setting.
A new explicit control overrides and hides the opposing ACT (green) setting.
A new explicit control is added on top of the matching indirect (gray) setting.
60 Chapter 4 / Access Management Tasks

Before and After Explanation
A new explicit control is added on top of the matching ACT (green) setting.
A new explicit control replaces the opposing explicit control.
The explicit control is removed and one of these underlying indirect (gray) or ACT (green) settings is revealed.
Tips for Efficiently Using Permissions
Assign Permissions to Groups
You can simplify access control management by assigning permissions to groups rather than to individual users. These examples assume that there are not other explicit or ACT settings on the object:
n To allow only unrestricted users to access an object, set denials on that object for the PUBLIC group.
n To enable only registered users to access an object, set denials for the PUBLIC group and then grant access back to the SASUSERS group.
n To enable only ETL developers and unrestricted users to access an object, create a group for the ETL developers. Then deny permissions to the PUBLIC group and grant access back to the ETL developers group.
Use Folders to Organize Content
You can simplify access control management by creating a folder structure that reflects the access distinctions that you want to make. Instead of setting permissions on each
Tips for Efficiently Using Permissions 61

individual object, set permissions on the folders. The objects in a folder inherit the folder's effective permissions.
TIP To protect the folder structure, do not grant WriteMetadata permission on a folder to someone for whom WriteMemberMetadata permission is sufficient.
Centralize Permissions with ACTs
You can simplify access control management by using ACTs. An ACT is a reusable named pattern of settings that you can apply to multiple objects. Each ACT consists of these elements:
n a list of users and groups
n an indication of whether each permission is granted, denied, or unspecified for each user and group in the list
Deny Broadly, Grant Selectively (To the Extent Possible)
Assign denials to the broadest group (PUBLIC) and then add offsetting grants for users or groups whose access you want to preserve. Deny access at the highest point of control and then grant access back on specific containers or objects. These constraints apply:
n The highest point of control is the repository-level settings that are defined on the repository ACT's Permission Pattern tab. The security model requires that participating users have ReadMetadata and WriteMetadata access at the repository level, so broadly denying access here is not a workable approach. Instead, use the next point of control (for example, the top of the folder tree on the Folders tab).
n Within the folder tree, users need a clear path of grants of ReadMetadata in order to navigate to the objects that they use. For this permission, setting denials on folders at a high level is not a workable approach.
62 Chapter 4 / Access Management Tasks

5Exercises in Access Management
Working with Explicit Controls . . . . . . . . . . . . . . . . . . . . . . . . . . . . . . . . . . . . . . . . 63
Working with ACTs . . . . . . . . . . . . . . . . . . . . . . . . . . . . . . . . . . . . . . . . . . . . . . . . . . . . . . . 65
Working with Inherited Settings . . . . . . . . . . . . . . . . . . . . . . . . . . . . . . . . . . . . . . . 67
WriteMetadata and WriteMemberMetadata . . . . . . . . . . . . . . . . . . . . . . . . . . 68
Working with Explicit Controls
To experiment with explicit controls, complete this exercise in SAS Management Console:
1 Log on as someone who has a well-formed user definition.
2 On the Folders tab, right-click your My Folder and select New Folder. Create a new folder named test.
3 Right-click the test folder and select Properties. On the test folder's Authorization tab, briefly examine the settings for each identity in the Users and Groups list box. Notice that all of the settings are indirect . These settings come from the test folder's parent folder.
Note: You cannot remove anyone, because all of the listed identities participate in settings that are defined elsewhere.
63
4 To give the SASUSERS group an explicit setting:
a In the Users and Groups list box on the test folder's Authorization tab, select SASUSERS. Notice that SASUSERS has an indirect denial of the ReadMetadata permission.
Note: These instructions assume that your My Folder has standard settings. If this setting is not present, select another identity (such as PUBLIC) that does have an indirect denial of ReadMetadata.
b Select the opposing check box (grant ReadMetadata). This gives the SASUSERS group an explicit grant of ReadMetadata permission on the test folder.
c Select the grant ReadMetadata check box again. This removes the explicit grant and reveals the underlying indirect denial.
d Select the (already selected) deny ReadMetadata check box. This adds an explicit denial on top of the indirect denial.
e Click OK. An error message tells you that you cannot save these settings. The only explicit setting on the test folder is the denial of ReadMetadata permission for SASUSERS. This denial blocks access for all registered users, including you. Click OK to close the message box and return to the Authorization tab.
Note: If you are unrestricted, you will not see the error message. Go to step 5.
f To see the impact that the SASUSERS denial has on you, select yourself in the Users and Groups list box on the test folder's Authorization tab. Notice that your previous indirect grant of ReadMetadata permission is now an indirect denial of ReadMetadata permission.
g To restore access for yourself, select the grant ReadMetadata check box. This gives you an explicit grant that offsets the SASUSERS explicit denial. Click OK.
Note: An offsetting grant does not have to be assigned directly to you; it can be assigned to any group that is closer to you than the group that has the explicit denial. For example, your custom group memberships are closer to you than SASUSERS, and SASUSERS is closer to you than PUBLIC.
64 Chapter 5 / Exercises in Access Management
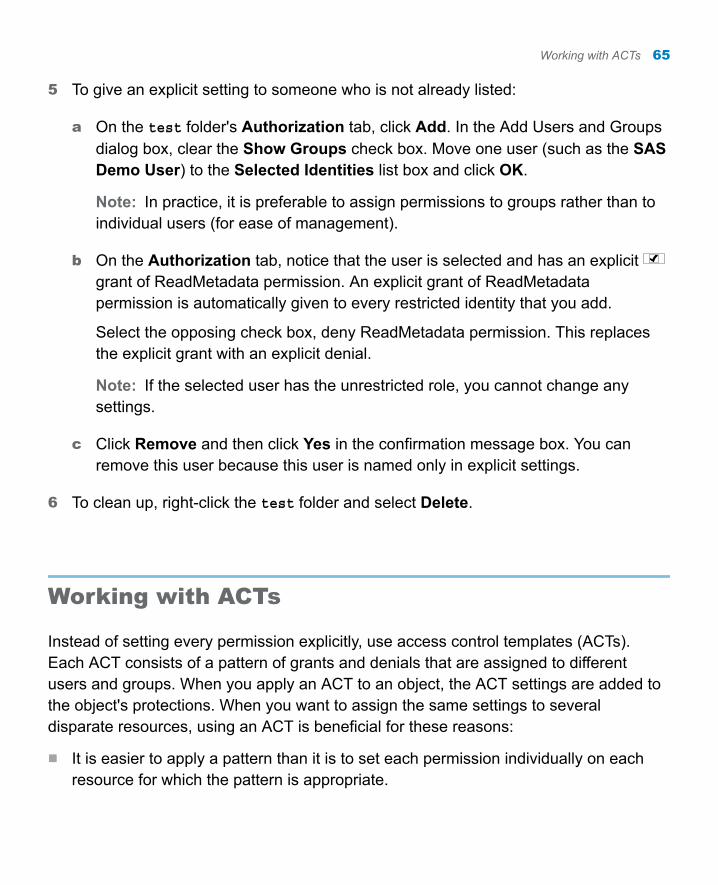
5 To give an explicit setting to someone who is not already listed:
a On the test folder's Authorization tab, click Add. In the Add Users and Groups dialog box, clear the Show Groups check box. Move one user (such as the SAS Demo User) to the Selected Identities list box and click OK.
Note: In practice, it is preferable to assign permissions to groups rather than to individual users (for ease of management).
b On the Authorization tab, notice that the user is selected and has an explicit grant of ReadMetadata permission. An explicit grant of ReadMetadata permission is automatically given to every restricted identity that you add.
Select the opposing check box, deny ReadMetadata permission. This replaces the explicit grant with an explicit denial.
Note: If the selected user has the unrestricted role, you cannot change any settings.
c Click Remove and then click Yes in the confirmation message box. You can remove this user because this user is named only in explicit settings.
6 To clean up, right-click the test folder and select Delete.
Working with ACTs
Instead of setting every permission explicitly, use access control templates (ACTs). Each ACT consists of a pattern of grants and denials that are assigned to different users and groups. When you apply an ACT to an object, the ACT settings are added to the object's protections. When you want to assign the same settings to several disparate resources, using an ACT is beneficial for these reasons:
n It is easier to apply a pattern than it is to set each permission individually on each resource for which the pattern is appropriate.
Working with ACTs 65
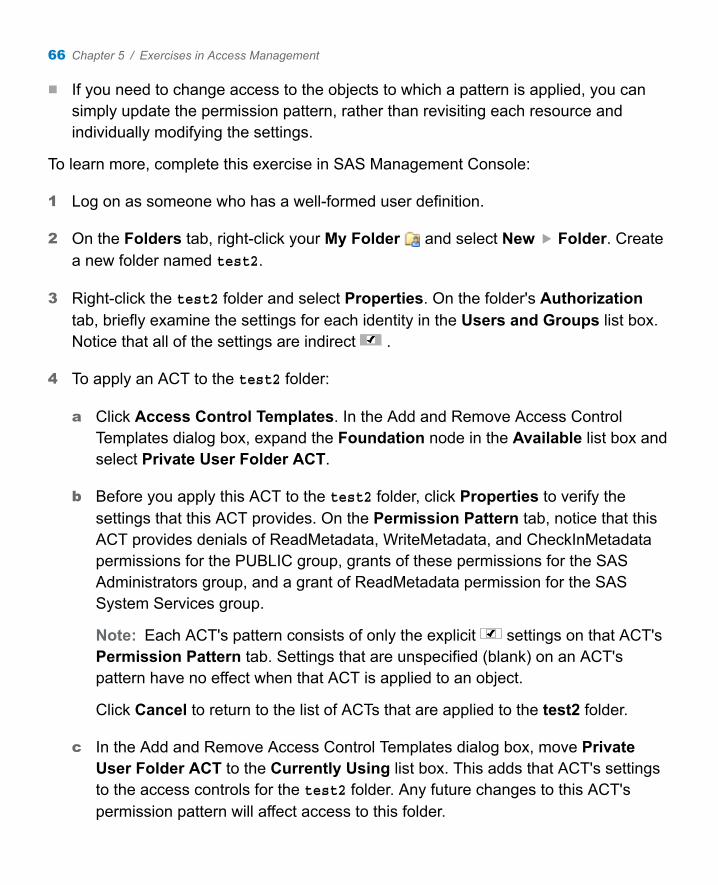
n If you need to change access to the objects to which a pattern is applied, you can simply update the permission pattern, rather than revisiting each resource and individually modifying the settings.
To learn more, complete this exercise in SAS Management Console:
1 Log on as someone who has a well-formed user definition.
2 On the Folders tab, right-click your My Folder and select New Folder. Create a new folder named test2.
3 Right-click the test2 folder and select Properties. On the folder's Authorization tab, briefly examine the settings for each identity in the Users and Groups list box. Notice that all of the settings are indirect .
4 To apply an ACT to the test2 folder:
a Click Access Control Templates. In the Add and Remove Access Control Templates dialog box, expand the Foundation node in the Available list box and select Private User Folder ACT.
b Before you apply this ACT to the test2 folder, click Properties to verify the settings that this ACT provides. On the Permission Pattern tab, notice that this ACT provides denials of ReadMetadata, WriteMetadata, and CheckInMetadata permissions for the PUBLIC group, grants of these permissions for the SAS Administrators group, and a grant of ReadMetadata permission for the SAS System Services group.
Note: Each ACT's pattern consists of only the explicit settings on that ACT's Permission Pattern tab. Settings that are unspecified (blank) on an ACT's pattern have no effect when that ACT is applied to an object.
Click Cancel to return to the list of ACTs that are applied to the test2 folder.
c In the Add and Remove Access Control Templates dialog box, move Private User Folder ACT to the Currently Using list box. This adds that ACT's settings to the access controls for the test2 folder. Any future changes to this ACT's permission pattern will affect access to this folder.
66 Chapter 5 / Exercises in Access Management

Note: The Currently Using list box includes only applied ACTs, so this list typically does not include the repository ACT (default ACT).
d Click OK to return to the Authorization tab. Notice that the PUBLIC denials of ReadMetadata, WriteMetadata, and CheckInMetadata permissions now come from an ACT (those denials are now green ). Select SAS Administrators and notice the green grants of the same permissions. These ACT settings override and hide the underlying indirect settings.
e Click OK to close the Properties dialog box for the test2 folder.
Note: If you are restricted, an error message indicates that you cannot save the settings. Click OK to dismiss the message. On the Authorization tab, select yourself and add explicit grants of ReadMetadata and WriteMetadata permissions. Click OK.
5 To clean up, right-click the test2 folder and select Delete.
Several predefined ACTs are provided on the Plug-ins tab under Authorization Manager Access Control Templates. You can create additional ACTs in this location.
Working with Inherited Settings
Instead of setting permissions on every individual object, use inherited settings. This approach reduces the number of access controls that you have to manage. For example, rather than adding explicit settings or ACTs to every report, you can set permissions on a folder that contains reports for which those permissions are appropriate.
To learn more, complete this exercise in SAS Management Console:
1 Log on as someone who has a well-formed user definition.
2 On the Folders tab, right-click your My Folder and select New Folder. Create a new folder named parent.
Working with Inherited Settings 67

3 Right-click the parent folder and create another folder named child.
4 Right-click the child folder and select Properties. On the Authorization tab, select SASUSERS. Notice that this group has an indirect denial of the Read permission. Click Cancel.
5 Right-click the parent folder and select Properties. On the Authorization tab, select SASUSERS, add an explicit grant of Read permission, and click OK.
6 Right-click the child folder and select Properties. On the Authorization tab, select SASUSERS. Notice that this group now has an inherited grant of Read permission.
7 On the child folder's Authorization tab, add an explicit grant of Read permission on top of the inherited grant of Read permission, and click OK. This ensures that Read access for SASUSERS is preserved even if the setting on the parent folder changes.
8 To verify that the explicit setting on the child folder is preserved, change the parent folder setting for SASUSERS to an explicit denial of Read permission, and then check the child folder settings again. For SASUSERS, the explicit grant of Read permission is still there. The denial on the parent folder is not relevant for the child folder because there is an explicit setting on the child folder.
9 To clean up, right-click the parent folder and select Delete.
WriteMetadata and WriteMemberMetadata
The following permissions affect the ability to create, update, and delete metadata.
68 Chapter 5 / Exercises in Access Management
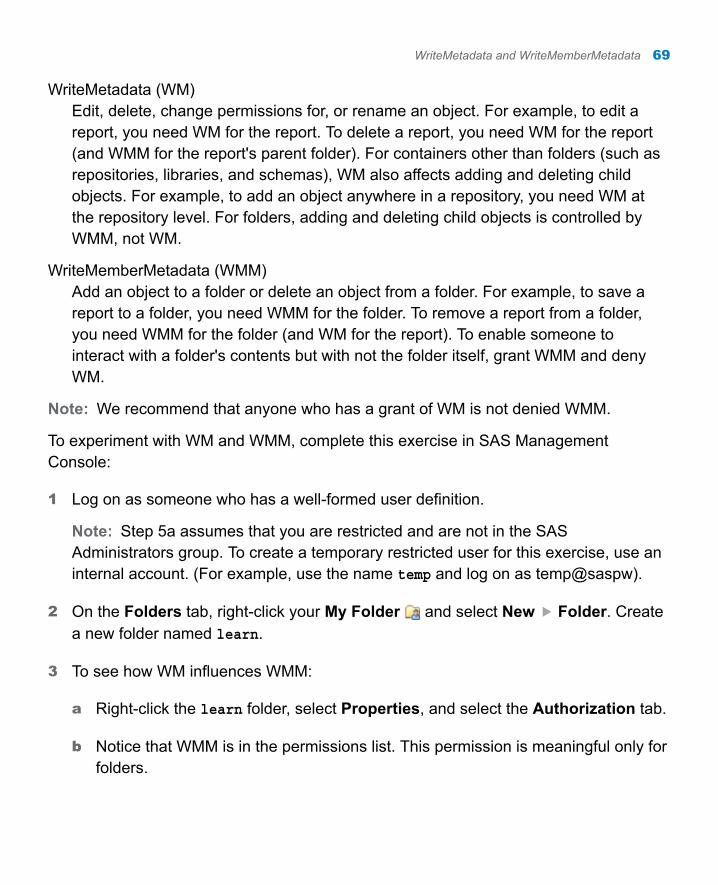
WriteMetadata (WM)Edit, delete, change permissions for, or rename an object. For example, to edit a report, you need WM for the report. To delete a report, you need WM for the report (and WMM for the report's parent folder). For containers other than folders (such as repositories, libraries, and schemas), WM also affects adding and deleting child objects. For example, to add an object anywhere in a repository, you need WM at the repository level. For folders, adding and deleting child objects is controlled by WMM, not WM.
WriteMemberMetadata (WMM)Add an object to a folder or delete an object from a folder. For example, to save a report to a folder, you need WMM for the folder. To remove a report from a folder, you need WMM for the folder (and WM for the report). To enable someone to interact with a folder's contents but with not the folder itself, grant WMM and deny WM.
Note: We recommend that anyone who has a grant of WM is not denied WMM.
To experiment with WM and WMM, complete this exercise in SAS Management Console:
1 Log on as someone who has a well-formed user definition.
Note: Step 5a assumes that you are restricted and are not in the SAS Administrators group. To create a temporary restricted user for this exercise, use an internal account. (For example, use the name temp and log on as temp@saspw).
2 On the Folders tab, right-click your My Folder and select New Folder. Create a new folder named learn.
3 To see how WM influences WMM:
a Right-click the learn folder, select Properties, and select the Authorization tab.
b Notice that WMM is in the permissions list. This permission is meaningful only for folders.
WriteMetadata and WriteMemberMetadata 69

c In the Users and Groups list box, select PUBLIC. Notice that this group has indirect denials for both WM and WMM. Add an explicit grant of WM. Notice that this causes the WMM setting to change to a grant.
d Select the grant WM check box again. This clears the check box and removes the explicit grant. Notice that the WMM setting also reverts to a denial.
e Add an explicit grant of WMM. Notice that this has no effect on the WM setting. WM influences WMM, but WMM does not influence WM. Remove the grant of WMM to revert to the initial settings (indirect denials of both WM and WMM). Click OK.
4 To see how WMM on a folder is conveyed to the objects inside the folder:
a Right-click the learn folder and select New Folder. Create a new folder named child.
b On the learn folder's Authorization tab, click Add. In the Add Users and Groups dialog box, clear the Show Groups check box. Move one restricted user (such as the SAS Demo User) to the Selected Identities list box and click OK.
c In the permissions list, give the user who you just added an explicit denial of WM and an explicit grant of WMM. Click OK.
Note: If the permissions list is disabled, the selected user is unrestricted (for example, the original SAS Administrator is unrestricted). Add a restricted user to the Authorization tab.
d On the child folder's Authorization tab, select the user who you added in step 4b. Notice that the denial of WM on the learn folder is not conveyed to the child folder. Instead, the grant of WMM on the learn folder is conveyed to the child folder as an indirect grant of WM. On the child folder, the WMM setting mirrors the WM setting as usual.
5 To see which actions each permission controls:
70 Chapter 5 / Exercises in Access Management
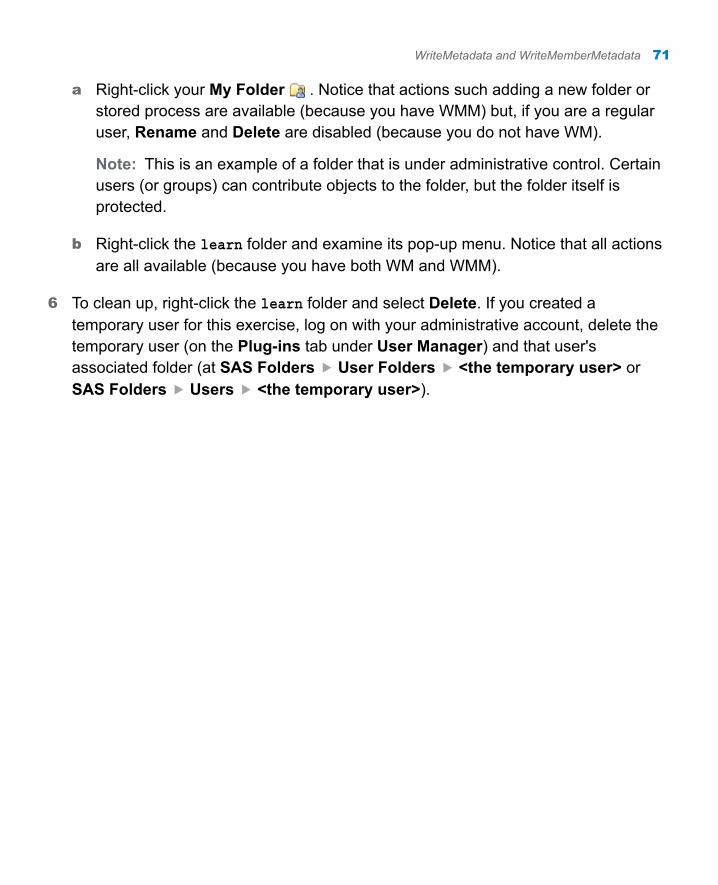
a Right-click your My Folder . Notice that actions such adding a new folder or stored process are available (because you have WMM) but, if you are a regular user, Rename and Delete are disabled (because you do not have WM).
Note: This is an example of a folder that is under administrative control. Certain users (or groups) can contribute objects to the folder, but the folder itself is protected.
b Right-click the learn folder and examine its pop-up menu. Notice that all actions are all available (because you have both WM and WMM).
6 To clean up, right-click the learn folder and select Delete. If you created a temporary user for this exercise, log on with your administrative account, delete the temporary user (on the Plug-ins tab under User Manager) and that user's associated folder (at SAS Folders User Folders <the temporary user> or SAS Folders Users <the temporary user>).
WriteMetadata and WriteMemberMetadata 71
72 Chapter 5 / Exercises in Access Management
Glossary
access control templatea reusable named authorization pattern that you can apply to multiple resources. An access control template consists of a list of users and groups and indicates, for each user or group, whether permissions are granted or denied. Short form: ACT.
authenticationthe process of verifying the identity of a person or process within the guidelines of a specific authorization policy.
authentication domaina SAS internal category that pairs logins with the servers for which they are valid. For example, an Oracle server and the SAS copies of Oracle credentials might all be classified as belonging to an OracleAuth authentication domain.
authentication providera software component that is used for identifying and authenticating users. For example, an LDAP server or the host operating system can provide authentication.
authorizationthe process of determining which users have which permissions for which resources. The outcome of the authorization process is an authorization decision that either permits or denies a specific action on a specific resource, based on the requesting user's identity and group memberships.
capabilityan application feature that is under role-based management. Typically, a capability corresponds to a menu item or button. For example, a Report Creation capability
73

might correspond to a New Report menu item in a reporting application. Capabilities are assigned to roles.
credentialsthe user ID and password for an account that exists in some authentication provider.
external identitya synchronization key for a user, group, or role. For example, employee IDs are often used as external identities for users. This is an optional attribute that is needed only for identities that you batch update using the user import macros.
identitya user, group, or role definition.
internal accounta SAS account that you can create as part of a user definition. Internal accounts are intended for metadata administrators and some service identities; these accounts are not intended for regular users.
internal authenticationa process in which the metadata server verifies a SAS internal account. Internal authentication is intended for only metadata administrators and some service identities.
logina SAS copy of information about an external account. Each login includes a user ID and belongs to one SAS user or group. Most logins do not include a password.
permission conditiona control that defines access to data at a low level, specifying who can access particular rows within a table or particular members within an OLAP cube. Such controls are typically used to subset data by a user characteristic such as employee ID or organizational unit. For example, an OLAP cube that contains employee information might have member-level controls that enable each manager to see the salary history of only that manager's employees. Similarly, a table that contains
74 Glossary

patient medical information might have row-level controls that enable each doctor to see only those rows that contain data about that doctor's patients.
restricted identitya user or group that is subject to capability requirements and permission denials in the metadata environment. Anyone who is not in the META: Unrestricted Users Role and is not listed in the adminUsers.txt file with a preceding asterisk is a restricted identity.
rolea set of capabilities. In some applications, certain actions are available only to users or groups that have a particular role.
service identityan identity or account that exists only for the purpose of supporting certain system activities and does not correspond to a real person. For example, the SAS Trusted User is a service identity.
unrestricted identitya user or group that has all capabilities and permissions in the metadata environment due to membership in the META: Unrestricted Users Role (or listing in the adminUsers.txt file with a preceding asterisk).
web authenticationa configuration in which users of web applications are verified at the web perimeter and the metadata server trusts that verification.
well-formed user definitiona user definition that includes a login with an appropriate user ID. For a Windows account, the user ID in the login must be qualified (for example, WIN\marcel or [email protected]). The login does not have to include a password. For metadata administrators and some service identities, it is appropriate to use an internal account instead of a login.
Glossary 75

76 Glossary

Index
A
access control templates 62creating 54deleting 56exporting 60importing 60updating 56using 52
access control templates (ACTs)
permission settings 65ACT permission settings 65ACTs
See access control templatesadministrators
administrative group 4administrative roles 5intermittent 25
authentication domains 9managing 35
authentication tasksconfiguring SAS internal
authentication 45Authorization tab 48
selecting check boxes on 60significance of check box
colors 49
C
capabilities 4assigning to a role 30assigning to roles 41needed for user administration
21
D
default ACTSee repository ACT
E
explicit controls 63explicit permissions 51external identities 11
adding 37
G
groups 3creating 27DBMS access 32deleting 36membership 32
77
PUBLIC 4renaming 36SASUSERS 4
I
identity precedence 13Inheritance tab 50inherited permission settings
67internal accounts 7
policies 34unlock 34
L
logins 6qualifying Windows user IDs
in 6uniqueness requirement 11used to establish a SAS
identity 23used to provide access to
other systems 32
M
metadataWriteMetadata and
WriteMemberMetadata permissions 68
P
passwords 10maintenance 25
permissions 14ACT settings 65best practices for using 61conditional 57explicit settings 63inheritance 13inherited settings 67who can set 51WriteMetadata (WM) and
WriteMemberMetadata (WMM) 68
R
repository ACT 12making changes to 58
roles 4assigning capabilities to 41creating 28deleting 36membership 32reconfiguring 30renaming 36
S
SAS internal authenticationconfiguring 45
78 Index
U
user administration 2delegating 36requirements for performing
21user IDs
qualifying in logins 6uniqueness requirement 11
users 2creating 22creating administrators 23DBMS access 33deleting 36
dual 25finding 38intermittent administrators 25renaming 36storing contact information 27unrestricted 5
W
WriteMemberMetadata (WMM) permission 68
WriteMetadata (WM) permission 68
Index 79

80 Index


