Access the OptionsOn iPad, tap right-most button in the toolbar to access the Options. On iPhone/iPod touch, tap the Views button (double overlapping squares) in the bottom left of the toolbar, and then tap Options.
Go to BackupIn the Options, tap Backup.
Back up all usersTap Backup All Users Now in the Backup Options to backup all users on your device.
Back up current userTap Backup (User Name) Now to create a backup of the current user.
Export backups to iTunesAfter creating a backup, tap Export Backups, and select a backup to export. When prompted, tap Export to iTunes. Now you will be able to save a backup of your Proloquo2Go customizations to your computer.
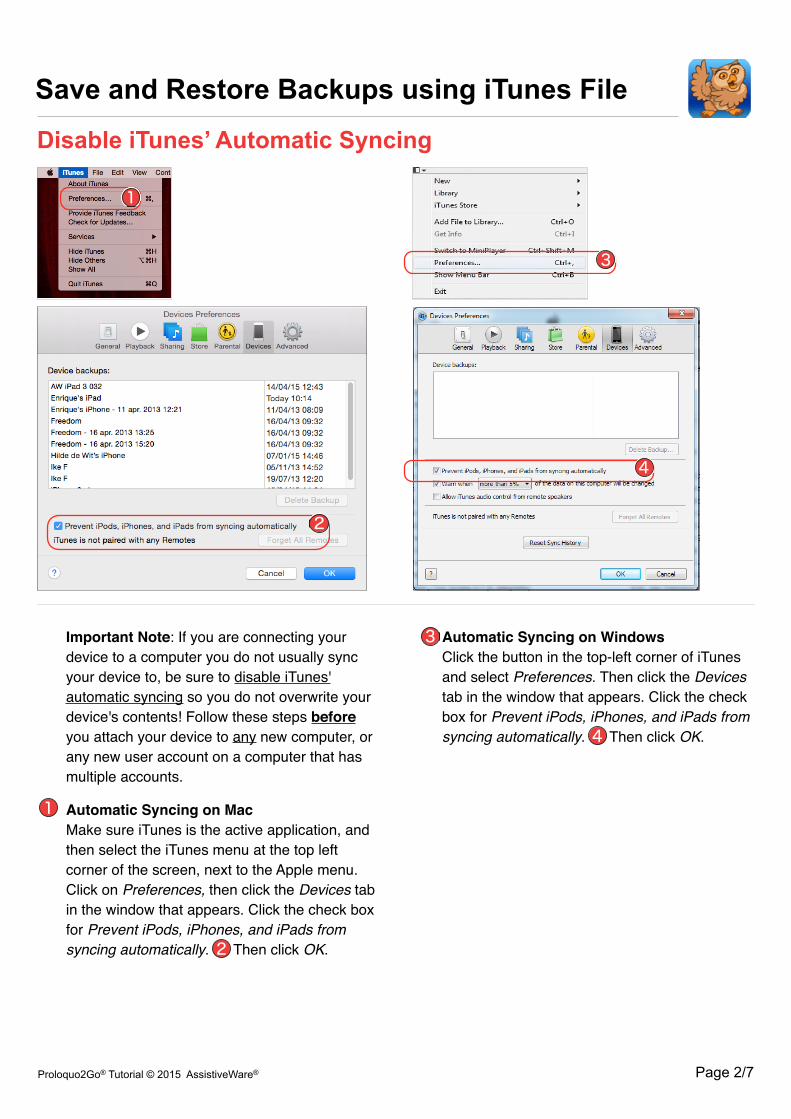
Important Note: If you are connecting your device to a computer you do not usually sync your device to, be sure to disable iTunes' automatic syncing so you do not overwrite your device's contents! Follow these steps before you attach your device to any new computer, or any new user account on a computer that has multiple accounts.
Automatic Syncing on MacMake sure iTunes is the active application, and then select the iTunes menu at the top left corner of the screen, next to the Apple menu. Click on Preferences, then click the Devices tab in the window that appears. Click the check box for Prevent iPods, iPhones, and iPads from syncing automatically. Then click OK.
Automatic Syncing on WindowsClick the button in the top-left corner of iTunes and select Preferences. Then click the Devices tab in the window that appears. Click the check box for Prevent iPods, iPhones, and iPads from syncing automatically. Then click OK.
Select your DeviceIn iTunes, click on the device's icon in the upper-left corner of the iTunes window.
Go to AppsClick the Apps tab in the iTunes window.
Go to File Sharing sectionScroll down until you reach the File Sharing section, and then select Proloquo2Go.
Save BackupsSelect the backup you want to save in the Proloquo2Go Documents list and click the Save to... button to save the backup on your computer. You may see several backup files in iTunes. Backup file names start with the name of the user they contain. Each user is backed up in a separate file.
You can rename the file (be sure to keep the extension .p2gbk), copy the file to another computer or put it on a USB stick. You can also use this backup to restore another device running Proloquo2Go to the exact same contents.
Save and Restore Backups using iTunes File
Save and Restore Backups using iTunes File Sharing
Select your DeviceIn iTunes, click on the device's icon in the upper-left corner of the iTunes window.
Go to AppsClick on the Apps tab in the iTunes window.
Go to File Sharing sectionScroll down until you reach the File Sharing section, and select Proloquo2Go.
Add BackupsClick the Add ... button at the bottom of the Proloquo2Go Documents list and choose a file with the .p2gbk extension from your computer that will then be uploaded to Proloquo2Go.
Save and Restore Backups using iTunes File Sharing
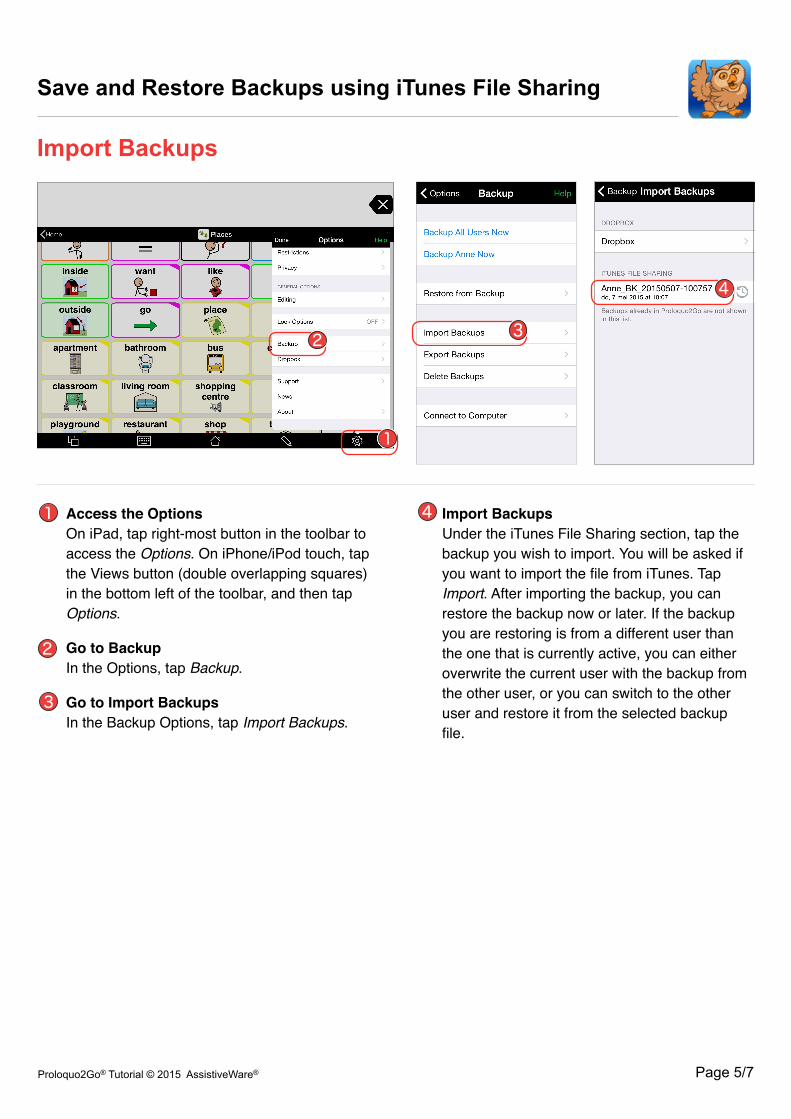
Access the OptionsOn iPad, tap right-most button in the toolbar to access the Options. On iPhone/iPod touch, tap the Views button (double overlapping squares) in the bottom left of the toolbar, and then tap Options.
Go to BackupIn the Options, tap Backup.
Go to Import BackupsIn the Backup Options, tap Import Backups.
Import BackupsUnder the iTunes File Sharing section, tap the backup you wish to import. You will be asked if you want to import the file from iTunes. Tap Import. After importing the backup, you can restore the backup now or later. If the backup you are restoring is from a different user than the one that is currently active, you can either overwrite the current user with the backup from the other user, or you can switch to the other user and restore it from the selected backup file.
Import Backups
Save and Restore Backups using iTunes File Sharing
Go to BackupIf you decide to restore a backup, in the Options, tap Backup.
Restore from BackupTap Restore from Backup and select a backup to restore.
Restore Backup from another userIf you select to restore a backup from a different user than the one that is currently active, you can either overwrite the current user with the backup from the other user, or you can switch to the other user and restore it from the selected backup file.
Restore Backups
Save and Restore Backups using iTunes File Sharing
Access the OptionsOn iPad, tap right-most button in the toolbar to access the Options. On iPhone/iPod touch, tap the Views button (double overlapping squares) in the bottom left of the toolbar, and then tap Options.
Go to Delete BackupsIn the Options, tap Backup. Then tap Delete Backups to delete the backups of one or multiple users.
Edit backupsIn the Delete Backups Options, tap Edit to be able to delete the backups you want.
Delete a backupTap the “minus” icon next to the backup that you want to delete, and then tap the Delete button.
Delete all backupsTap the Delete All Backups button, and then tap Delete when prompted to delete all the backups for a user.