instructables Screen Printing: Cheap, Dirty, and at Home by tracy_the_astonishing You don't have to spend a ton of money on equipment or have a screen printing studio to make some pretty good quality prints. I taught some friends how to reuse old picture frames and curtains to make screens, burn them in the sun, and clean them with a garden hose. While we were at it we took some pictures so we could share the lesson with you. Step 1: Gather Up Your Materials Materials you will need include: The image you want to use. The best is to have your image photocopied onto a transparency at maximum darkness. You can also paint or draw with white out on transparent plastic (cellophane wrap or clear packaging from toys work). Another option is to make a cut-out with dark-colored construction paper or to lay some flat object (pieces of lace are nice) on the screen. Objects that Screen Printing: Cheap, Dirty, and at Home: Page 1
Transcript
instructables
Screen Printing: Cheap, Dirty, and at Home
by tracy_the_astonishing
You don't have to spend a ton of money on equipment or have a screen printing studio to make some pretty goodquality prints.
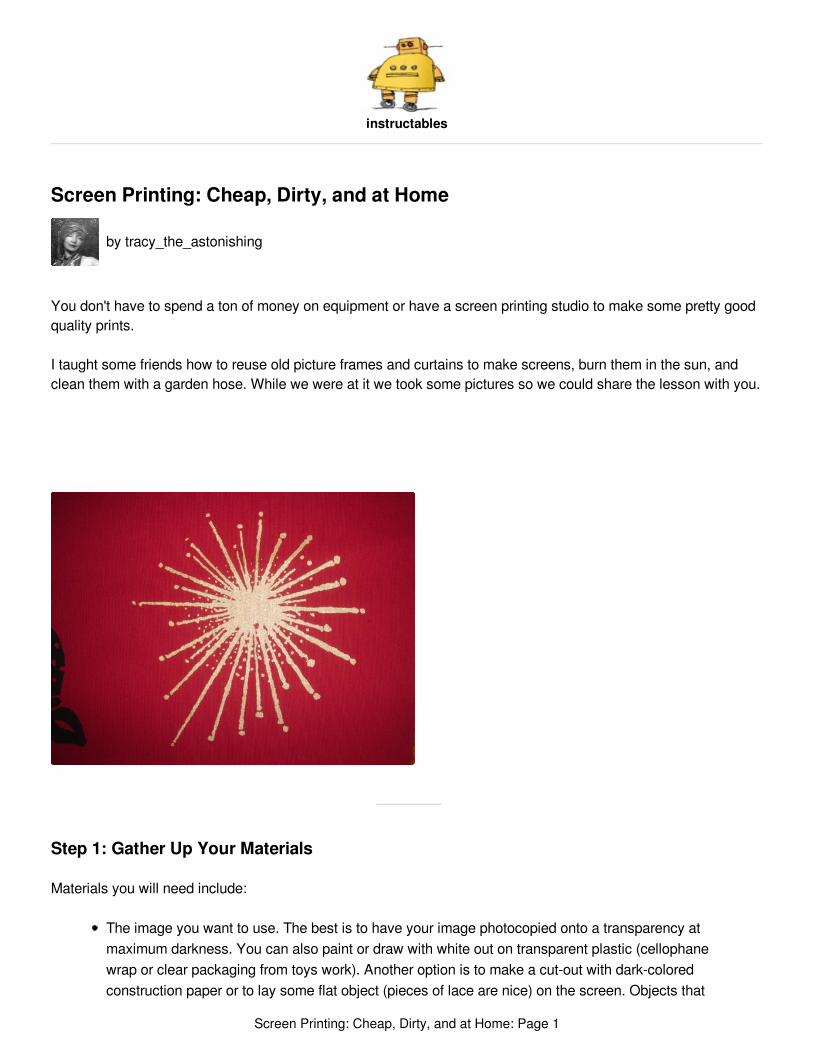
I taught some friends how to reuse old picture frames and curtains to make screens, burn them in the sun, andclean them with a garden hose. While we were at it we took some pictures so we could share the lesson with you.
Step 1: Gather Up Your Materials
Materials you will need include:
The image you want to use. The best is to have your image photocopied onto a transparency atmaximum darkness. You can also paint or draw with white out on transparent plastic (cellophanewrap or clear packaging from toys work). Another option is to make a cut-out with dark-coloredconstruction paper or to lay some flat object (pieces of lace are nice) on the screen. Objects that
Screen Printing: Cheap, Dirty, and at Home: Page 1
aren't flat (skeleton keys, for example) can also work, but you have to move the screen around inthat case to avoid a shadow.
You want your image on the transparency to be super dark because the image won't transfer to the screen if lightgets through. If you want subtlety and shading you can do it with dots, like a newspaper image. In this instructablewe're keeping it simple and only printing one color. Very fine lines are not recommended with this technique. Startout with something big and bold and then start experimenting.
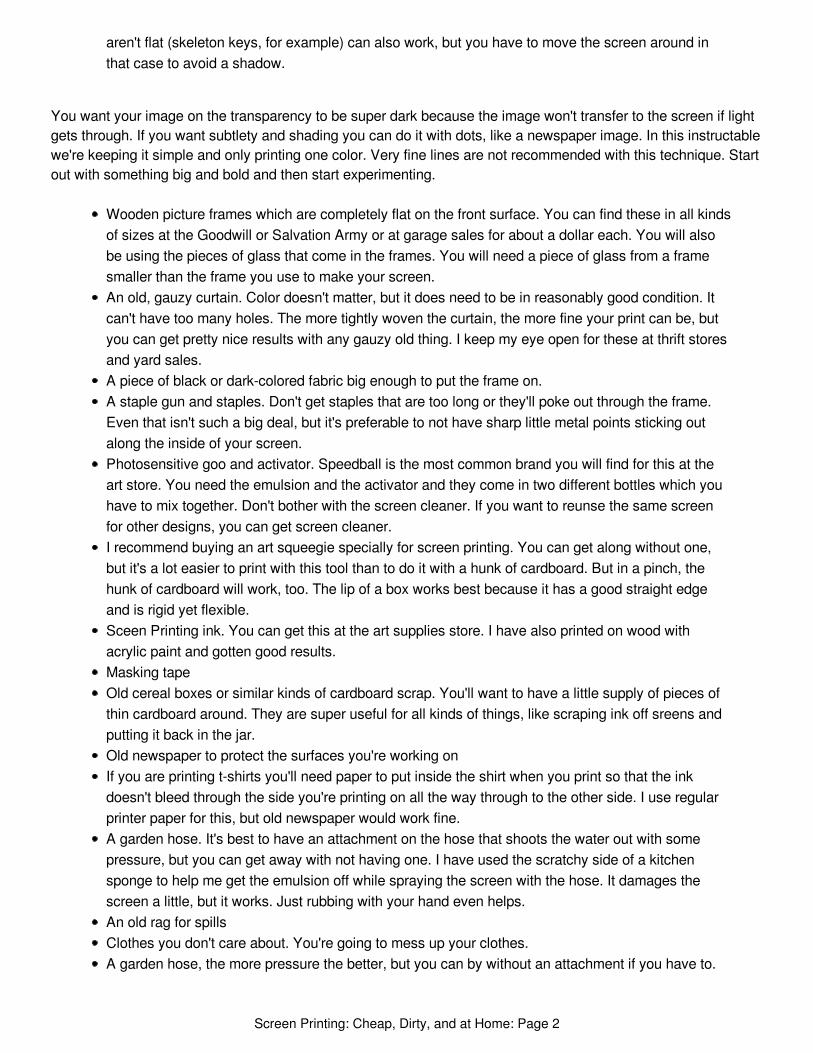
Wooden picture frames which are completely flat on the front surface. You can find these in all kindsof sizes at the Goodwill or Salvation Army or at garage sales for about a dollar each. You will alsobe using the pieces of glass that come in the frames. You will need a piece of glass from a framesmaller than the frame you use to make your screen.An old, gauzy curtain. Color doesn't matter, but it does need to be in reasonably good condition. Itcan't have too many holes. The more tightly woven the curtain, the more fine your print can be, butyou can get pretty nice results with any gauzy old thing. I keep my eye open for these at thrift storesand yard sales.A piece of black or dark-colored fabric big enough to put the frame on.A staple gun and staples. Don't get staples that are too long or they'll poke out through the frame.Even that isn't such a big deal, but it's preferable to not have sharp little metal points sticking outalong the inside of your screen.Photosensitive goo and activator. Speedball is the most common brand you will find for this at theart store. You need the emulsion and the activator and they come in two different bottles which youhave to mix together. Don't bother with the screen cleaner. If you want to reunse the same screenfor other designs, you can get screen cleaner.I recommend buying an art squeegie specially for screen printing. You can get along without one,but it's a lot easier to print with this tool than to do it with a hunk of cardboard. But in a pinch, thehunk of cardboard will work, too. The lip of a box works best because it has a good straight edgeand is rigid yet flexible.Sceen Printing ink. You can get this at the art supplies store. I have also printed on wood withacrylic paint and gotten good results.Masking tapeOld cereal boxes or similar kinds of cardboard scrap. You'll want to have a little supply of pieces ofthin cardboard around. They are super useful for all kinds of things, like scraping ink off sreens andputting it back in the jar.Old newspaper to protect the surfaces you're working onIf you are printing t-shirts you'll need paper to put inside the shirt when you print so that the inkdoesn't bleed through the side you're printing on all the way through to the other side. I use regularprinter paper for this, but old newspaper would work fine.A garden hose. It's best to have an attachment on the hose that shoots the water out with somepressure, but you can get away with not having one. I have used the scratchy side of a kitchensponge to help me get the emulsion off while spraying the screen with the hose. It damages thescreen a little, but it works. Just rubbing with your hand even helps.An old rag for spillsClothes you don't care about. You're going to mess up your clothes.A garden hose, the more pressure the better, but you can by without an attachment if you have to.
Screen Printing: Cheap, Dirty, and at Home: Page 2
Step 2: Build Your Screen
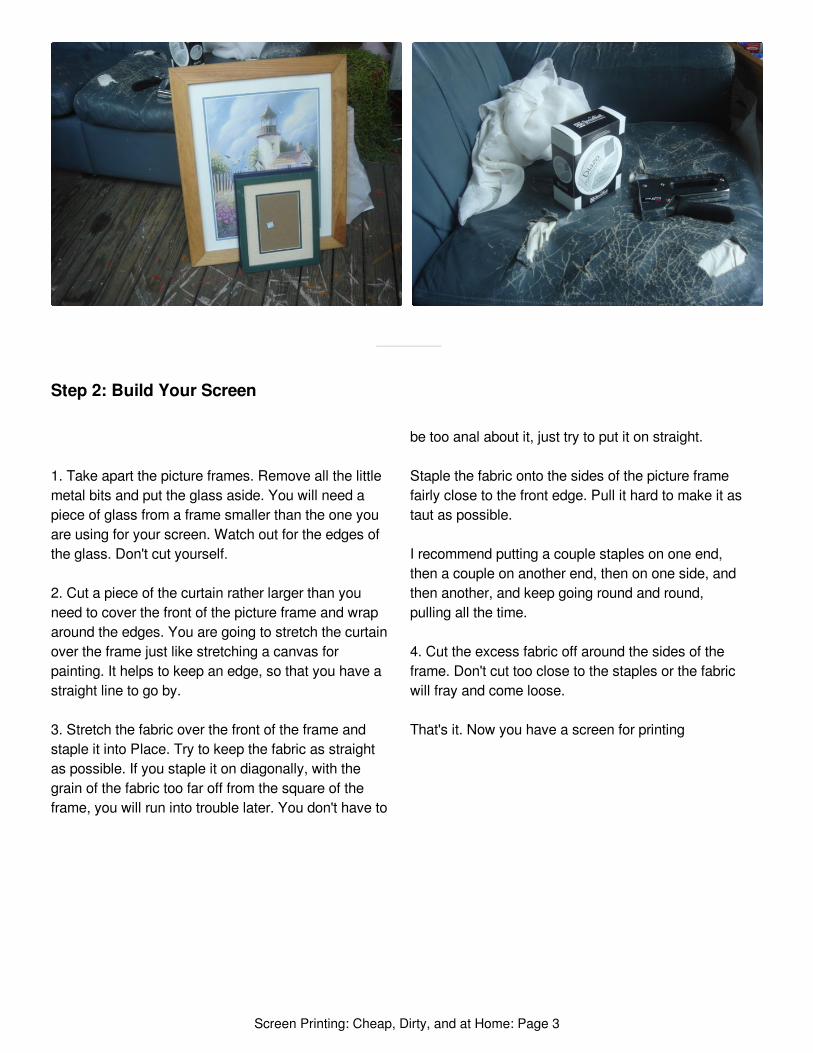
1. Take apart the picture frames. Remove all the littlemetal bits and put the glass aside. You will need apiece of glass from a frame smaller than the one youare using for your screen. Watch out for the edges ofthe glass. Don't cut yourself.
2. Cut a piece of the curtain rather larger than youneed to cover the front of the picture frame and wraparound the edges. You are going to stretch the curtainover the frame just like stretching a canvas forpainting. It helps to keep an edge, so that you have astraight line to go by.
3. Stretch the fabric over the front of the frame andstaple it into Place. Try to keep the fabric as straightas possible. If you staple it on diagonally, with thegrain of the fabric too far off from the square of theframe, you will run into trouble later. You don't have to
be too anal about it, just try to put it on straight.
Staple the fabric onto the sides of the picture framefairly close to the front edge. Pull it hard to make it astaut as possible.
I recommend putting a couple staples on one end,then a couple on another end, then on one side, andthen another, and keep going round and round,pulling all the time.
4. Cut the excess fabric off around the sides of theframe. Don't cut too close to the staples or the fabricwill fray and come loose.
That's it. Now you have a screen for printing
Screen Printing: Cheap, Dirty, and at Home: Page 3
Step 3: Spread the Photo Emulsion Onto the Screen
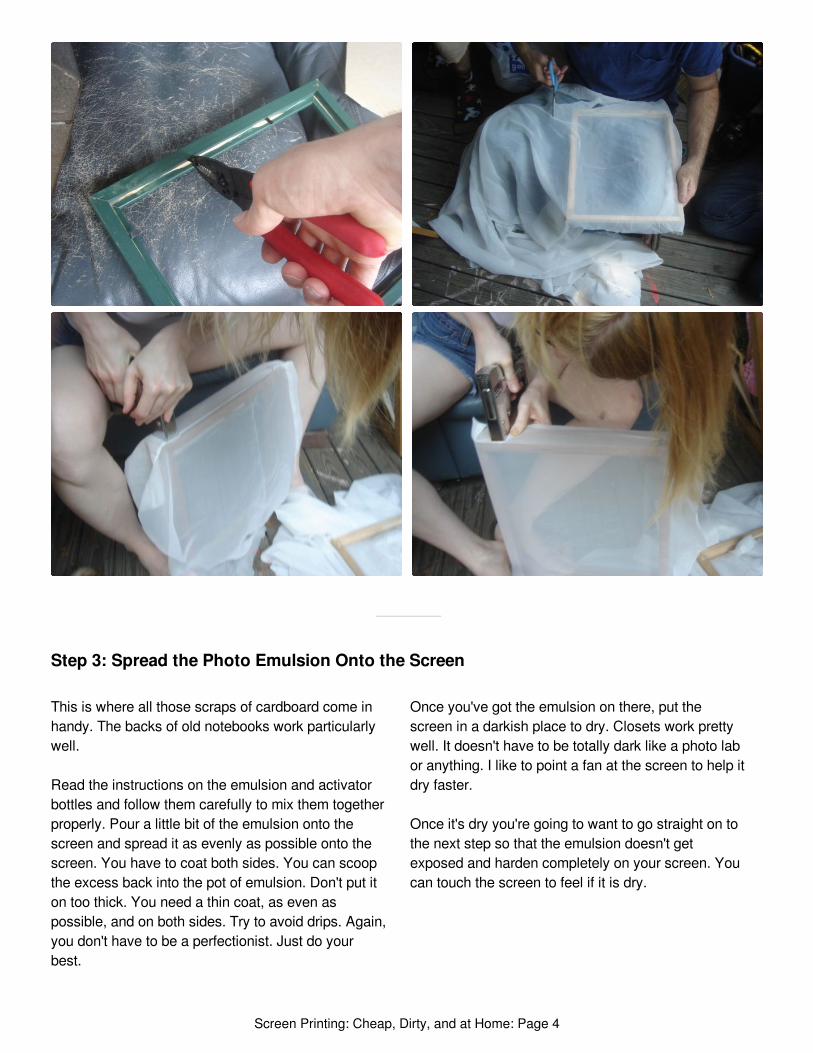
This is where all those scraps of cardboard come inhandy. The backs of old notebooks work particularlywell.
Read the instructions on the emulsion and activatorbottles and follow them carefully to mix them togetherproperly. Pour a little bit of the emulsion onto thescreen and spread it as evenly as possible onto thescreen. You have to coat both sides. You can scoopthe excess back into the pot of emulsion. Don't put iton too thick. You need a thin coat, as even aspossible, and on both sides. Try to avoid drips. Again,you don't have to be a perfectionist. Just do yourbest.
Once you've got the emulsion on there, put thescreen in a darkish place to dry. Closets work prettywell. It doesn't have to be totally dark like a photo labor anything. I like to point a fan at the screen to help itdry faster.
Once it's dry you're going to want to go straight on tothe next step so that the emulsion doesn't getexposed and harden completely on your screen. Youcan touch the screen to feel if it is dry.
Screen Printing: Cheap, Dirty, and at Home: Page 4
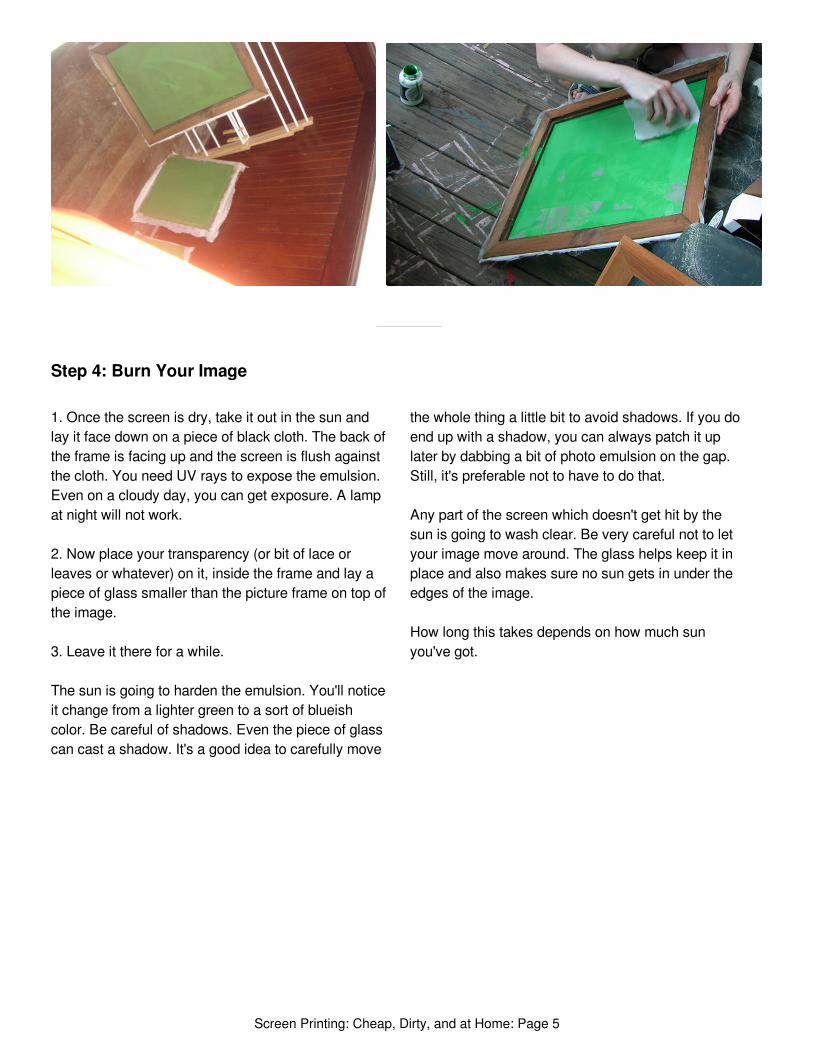
Step 4: Burn Your Image
1. Once the screen is dry, take it out in the sun andlay it face down on a piece of black cloth. The back ofthe frame is facing up and the screen is flush againstthe cloth. You need UV rays to expose the emulsion.Even on a cloudy day, you can get exposure. A lampat night will not work.
2. Now place your transparency (or bit of lace orleaves or whatever) on it, inside the frame and lay apiece of glass smaller than the picture frame on top ofthe image.
3. Leave it there for a while.
The sun is going to harden the emulsion. You'll noticeit change from a lighter green to a sort of blueishcolor. Be careful of shadows. Even the piece of glasscan cast a shadow. It's a good idea to carefully move
the whole thing a little bit to avoid shadows. If you doend up with a shadow, you can always patch it uplater by dabbing a bit of photo emulsion on the gap.Still, it's preferable not to have to do that.
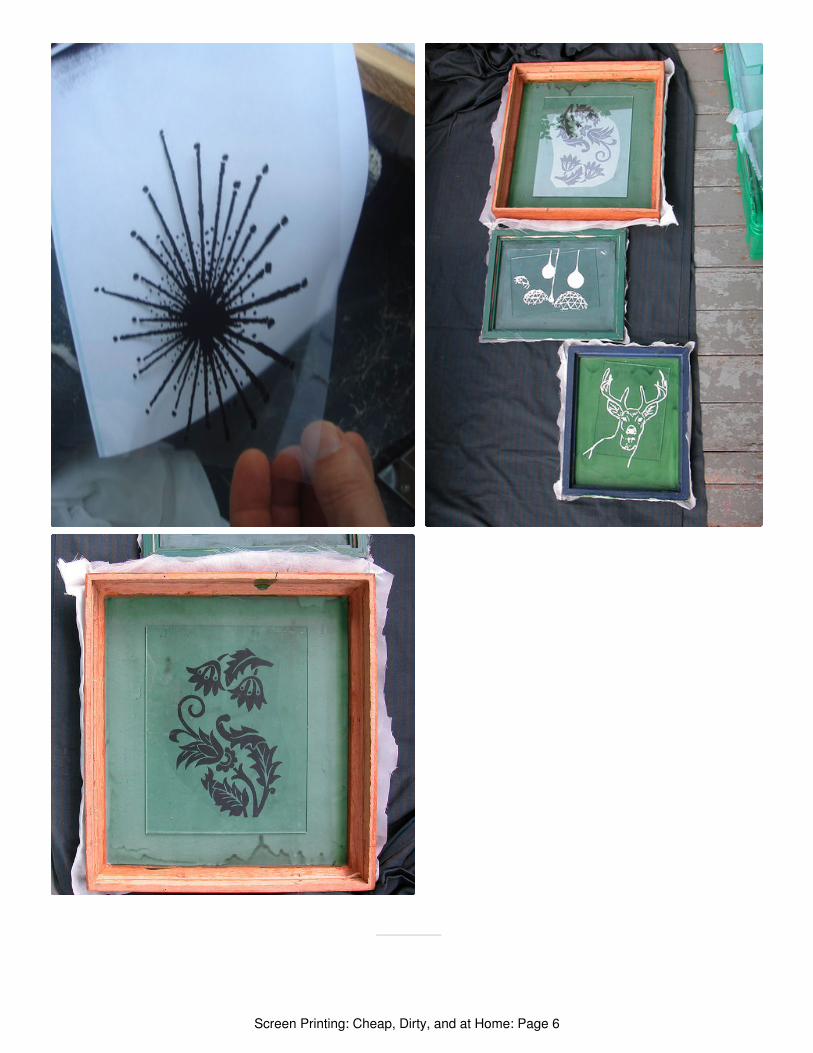
Any part of the screen which doesn't get hit by thesun is going to wash clear. Be very careful not to letyour image move around. The glass helps keep it inplace and also makes sure no sun gets in under theedges of the image.
How long this takes depends on how much sunyou've got.
Screen Printing: Cheap, Dirty, and at Home: Page 5
Screen Printing: Cheap, Dirty, and at Home: Page 6
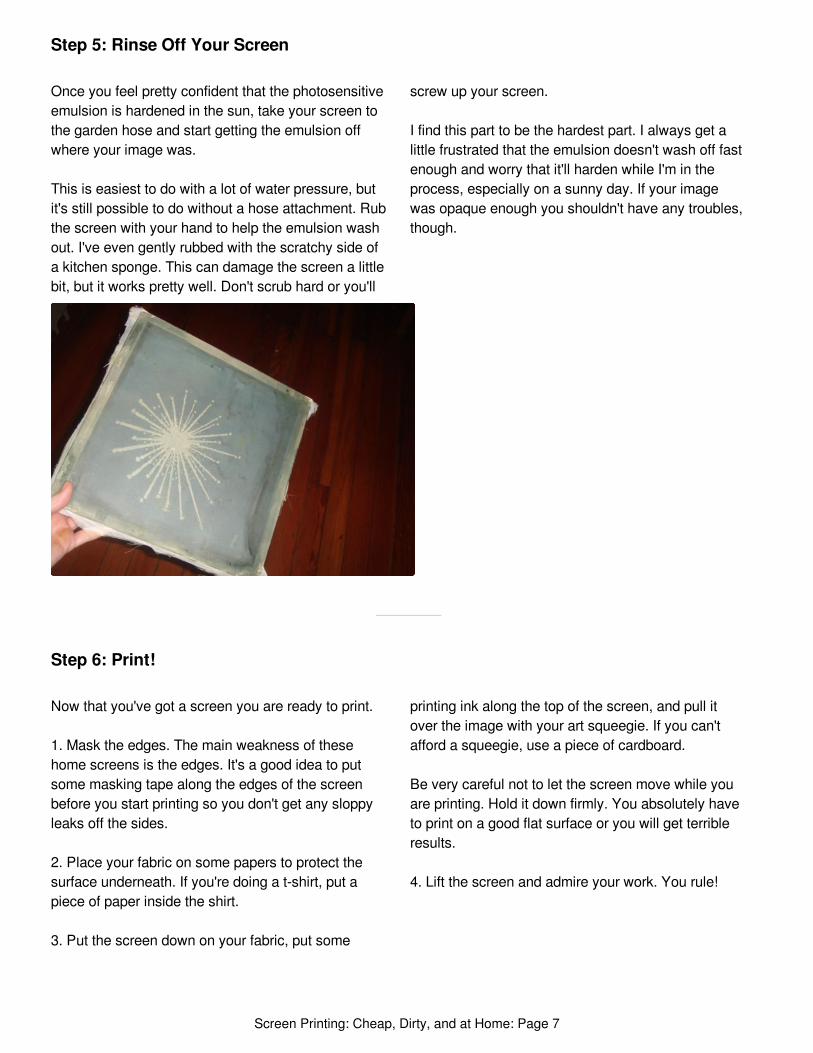
Step 5: Rinse Off Your Screen
Once you feel pretty confident that the photosensitiveemulsion is hardened in the sun, take your screen tothe garden hose and start getting the emulsion offwhere your image was.
This is easiest to do with a lot of water pressure, butit's still possible to do without a hose attachment. Rubthe screen with your hand to help the emulsion washout. I've even gently rubbed with the scratchy side ofa kitchen sponge. This can damage the screen a littlebit, but it works pretty well. Don't scrub hard or you'll
screw up your screen.
I find this part to be the hardest part. I always get alittle frustrated that the emulsion doesn't wash off fastenough and worry that it'll harden while I'm in theprocess, especially on a sunny day. If your imagewas opaque enough you shouldn't have any troubles,though.
Step 6: Print!
Now that you've got a screen you are ready to print.
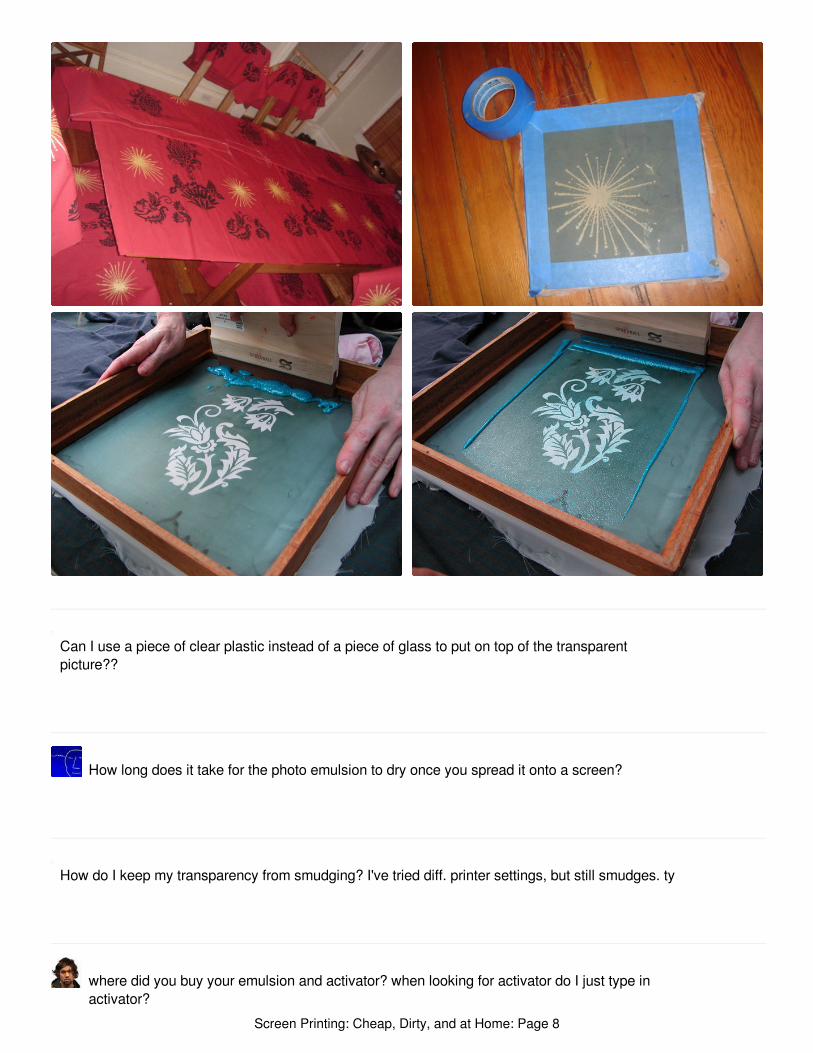
1. Mask the edges. The main weakness of thesehome screens is the edges. It's a good idea to putsome masking tape along the edges of the screenbefore you start printing so you don't get any sloppyleaks off the sides.
2. Place your fabric on some papers to protect thesurface underneath. If you're doing a t-shirt, put apiece of paper inside the shirt.
3. Put the screen down on your fabric, put some
printing ink along the top of the screen, and pull itover the image with your art squeegie. If you can'tafford a squeegie, use a piece of cardboard.
Be very careful not to let the screen move while youare printing. Hold it down firmly. You absolutely haveto print on a good flat surface or you will get terribleresults.
4. Lift the screen and admire your work. You rule!
Screen Printing: Cheap, Dirty, and at Home: Page 7
Can I use a piece of clear plastic instead of a piece of glass to put on top of the transparentpicture??
How long does it take for the photo emulsion to dry once you spread it onto a screen?
How do I keep my transparency from smudging? I've tried diff. printer settings, but still smudges. ty
where did you buy your emulsion and activator? when looking for activator do I just type inactivator?
Screen Printing: Cheap, Dirty, and at Home: Page 8
perfect!
Thank u!!!
Best instructable I've seen for screen printing!
Hi Tracy. I really love your stag transparency. Do you by any chance have a digital copy you'd liketo send me? : ) ...
I made this by tracing a cover of field and stream with a white-out pen directly on the transparency.Try it.
Hi , Can I use the glass of the picture frame in exposing the screen printing in the sun?
I use the glass from a smaller frame to hold down the transparency to keep the light from gettingunder it. Be aware that the shadow from the piece of glass can sometimes make a mark on thescreen, but you can touch it up.
Where did you put the acetate or transparencies?ate the back or front?..
Screen Printing: Cheap, Dirty, and at Home: Page 9
They should be on the inside of the frame so that the screen can sit flat on the bkacl fabric and nolight goes where it ought not go.
How far does the ink stretch? How many shirts can I print with 16 oz of ink and a medium sizeddesign? (roughly)
I don't know... I don't really do stuff in volume. Sorry!
Hi there
I loved this no nonsense guide, thank you! I did this a long while back and have a load of ideas Iwant to do. Question is, should the last step be followed by some sort of heat treatment to makecertain the screen print remains good, if so how?
Thanks!
Depends on the ink you use, but a hot iron is enough for regular flat prints. Be sure to put a pieceof paper between the print and the iron.
Some fancier puffy inks require a heat gun or baking. These inks are kind of nasty and offgas likemad. I wouldn't use them at home.
From: Carl Franklin Hendershot III
hi! i just wanted to let you know that because i like this instructable so much, i have added it to my
Screen Printing: Cheap, Dirty, and at Home: Page 10
www.wickedprintingstuff.com is a pretty good place for all stuff screen printy! Great post by theway, going to have a go at this myself! I've not long graduated in textile design and now I havefound that I have no equipment to print with!!
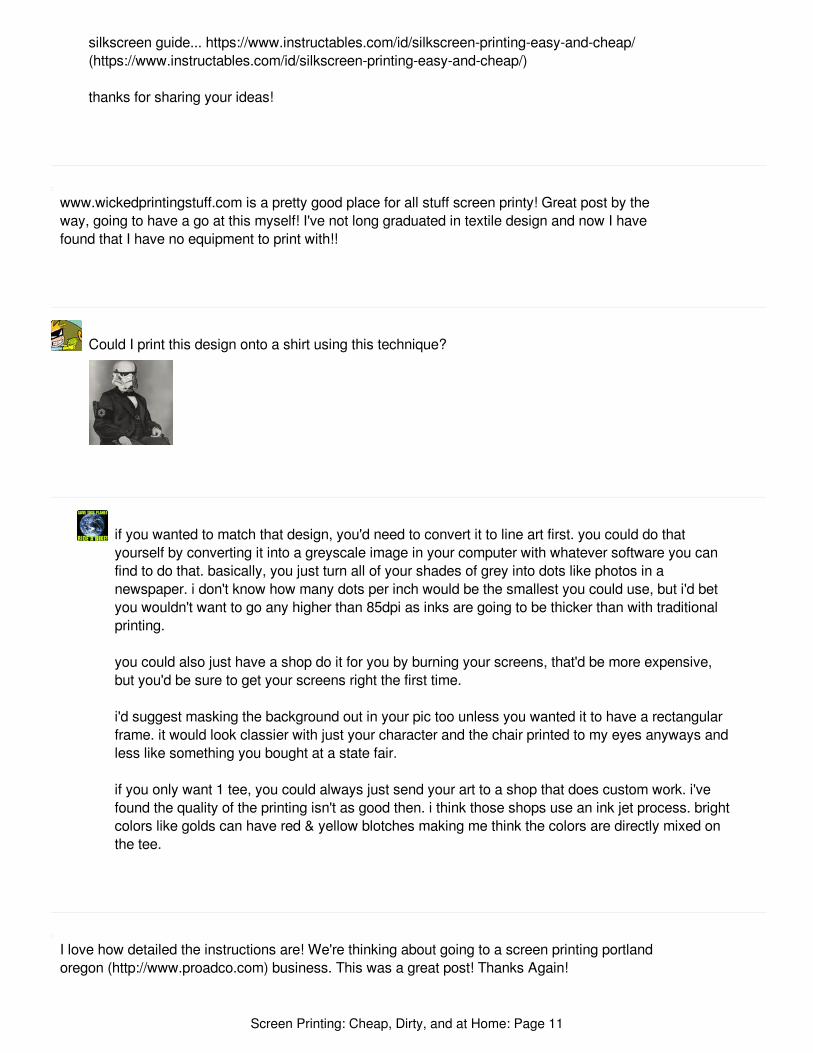
Could I print this design onto a shirt using this technique?
if you wanted to match that design, you'd need to convert it to line art first. you could do thatyourself by converting it into a greyscale image in your computer with whatever software you canfind to do that. basically, you just turn all of your shades of grey into dots like photos in anewspaper. i don't know how many dots per inch would be the smallest you could use, but i'd betyou wouldn't want to go any higher than 85dpi as inks are going to be thicker than with traditionalprinting.
you could also just have a shop do it for you by burning your screens, that'd be more expensive,but you'd be sure to get your screens right the first time.
i'd suggest masking the background out in your pic too unless you wanted it to have a rectangularframe. it would look classier with just your character and the chair printed to my eyes anyways andless like something you bought at a state fair.
if you only want 1 tee, you could always just send your art to a shop that does custom work. i'vefound the quality of the printing isn't as good then. i think those shops use an ink jet process. brightcolors like golds can have red & yellow blotches making me think the colors are directly mixed onthe tee.
I love how detailed the instructions are! We're thinking about going to a screen printing portlandoregon (http://www.proadco.com) business. This was a great post! Thanks Again!
Screen Printing: Cheap, Dirty, and at Home: Page 11
I'm an art teacher with teenagers with no $$ available to us in this economy. I wonder if you knowof a cheap way to make a class set of frames?Also approximately how long does it take for thescreen to be out in the sunshine? 10 min, 10 hours -?
I looked up other ways to screen print that may be more cost effective when first starting out.Here's one way to make your own screen for printing without having to buy a bunch of stuff and gothrough the hard work of using light to create a silkscreen. First off, go to the dollar store and get a wooden picture frame or try walmart for the frame or see ifthey have embroidery hoops that are the correct size and are cheap. Then all you need is ink orfabric paint, sizzlers or razor blade to cut the design, paper, screen, tape, and a squeegie tool ofsome sort and something to print onto (T-shirt or whatever).http://www.guardian.co.uk/lifeandstyle/2010/may/11/how-to-screen-print-tshirts-at-home
I love the idea of using curtains... this sounds like a great idea!
i want video tutorial about How mix Sodium dycromat & glue for Screenprint.
Should I get the Speedball screen filler or screen drawing fluid for the photo emulsion?Thanks-- this sounds so cool!Any other website that sells photo emulsion?
fantastic. Thank you for that information - I wanted to do some screen printing but thought it wouldbe too expensive - I cant wait to give it a go now!
Didnt found the emulsion like "Diazo Photo Emulsion". But found some kinda orange crystallinematerial. The shopkeeper told me that it is the stuff that screenprinter guyz asks for. But theshopkeeper guy dont know which chemical to mix the crystalline material with to prepare theemulsion. Dont wanna mess myself with mixing the chemicals....Can somebody please post what kind of chemicals are used for making the photo emulsion !!
Screen Printing: Cheap, Dirty, and at Home: Page 12
Yesterday I found out that the crystalline material was dichromate. Now what another chemical tomix with the dichromate....any Idea...??
miss tracy i have one little problem we dont have emulsion in our country and its very expensive toimport things rather we have some thing called alco (I hope i am spelling it right) and the sensitizer.the alco is a white paste (like white glue) the sensitizer an orangish sort of liquid. is it the samething that u have described here ?
sa murtuza.. if u ur living in karachi pakistan then i can suggest u some places for all the material...
yeah tht wud be awsum where is it?
it may be interesting to know that the "emulsion" is white glue with a dye (that´s why it may begreen or blue) and the sensitizer is potassium dichromate (wash your hands after using, toxic). It isthe same process as in the old photographic method with dichromate and gum, but it uses the glueto close the screen.
The emulsion is just regular white glue with dye? and the sensitizer is just a potassium dichromatesolution? Is there anything else to this? It seems like this should be easy enough to make on myown. Luckily I'm a chemistry teacher so I have the ability to order K2Cr2O7 easily enough.
i dont know how this guys were talking about.. can you explain to me what is the emulsion and itsuse,, and the synthesizer???
Screen Printing: Cheap, Dirty, and at Home: Page 13
do you have to mix the potassium dichromate with water? also, what kind of glue do you use?
the glue is just regular white glue. You can prepare a solution of the dichromate in water. Since theglue is water based, you can mix it with the dichromate solution.
yes! I am a chemistry teacher too. I have done it with white glue and dichromate many times. Thedichromate crosslinks the polymeric chains of the glue, making it insoluble. Cool project to workwith the students, and they get to choose the design they want to put on the t-shirt.
What ratio of glue to sensitizer works best?
they say to use 9 parts of glue to 1 of the sensitizer. I have never determined the concentration ofthe dichromate in the sensitizer, but if you use the store bought solution, that is the ratio.
It said this needs be exposed in the sun. However, you can buy plant grow lights at Lowe's andHomeDepot (less than $10.00). I bet this would expose the screens. Has anyone tried this?-Mandy
if your looking to "burn" screens the best way to do it cheap is to get a work light from home depotthey give off uv rays and depending on the distance from the screen you can have one done inabout 7 min. if you want more instruction on how to build one of these you get get in touch with methrough my web site www.tikiprinting.com
You can use a 150watt lightbulb instead of the sun. Lightbulb costs a few bucks.
Screen Printing: Cheap, Dirty, and at Home: Page 14
Wow, this is great! I have been wanting to make tags for items that I sell, and I think that I'm goingto try and pull this off---way less money than having them made, and I love to try new things!!!!Thanks sooooo much for the info and tips! Can't wait to try and convince my husband to let me dothis!!
Hey, thanks for this! I bought a screen printing kit and nowhere in the instructions did it tell youwhat side to put the transparency on...or that you could use sunlight in less than a minute insteadof using a 150 watt bulb for an HOUR. I just did it, and it worked perfectly. I have a few shadowsfrom the glass and the frame, but those should be easy enough to patch up. Thank you!
This is great! We've been trying to figure out the best DIY method for making our staff T-shirts forMaker Festival and this looks like it will work perfectly. Thanks for the great instructable!
hi - i really do hope someone can help me on how to clean the screen... i guess i left my "burnt"screen too long. i did the stencil probably a good 4 weeks ago. i put it inside a thick carton box (theones that you get if you buy paper in bulk) - i've never got into one of those, but i reckon it's darkand light-safe in there. today i tried to clean the screen - i used the fotec remover paste (the bluepaste) but it didn't remove all of the photo emulsion on the screen. in the past i've tried to removethe little bits of photo emulsion using acetone - but it doesn't seem to work this time. can anyonehelp with this?
try soaking your screen in bleach a non brand name will do the same. place your screen flat in atray or plastic tray big enought to fit the screen pour enough bleach to cover the screen and let itsoak for about 20 to 30 minutes then rinse out you might half to scrub a little bit on some parts butit should do thats what I do when I use emulsion and want to reuse the screen that didn't turn outgood. it is a whole lot cheaper and you get more than the expensive stuff you buy at art stores.
Screen Printing: Cheap, Dirty, and at Home: Page 15