38
Seminar Graph Drawing H.1 - 3.2: Introduction to Graph Drawing Jesper Nederlof Roeland Luitwieler
| Date post: | 17-Dec-2015 |
| Category: |
Documents |
| Upload: | gary-davis |
| View: | 220 times |
| Download: | 3 times |
Seminar Graph DrawingH.1 - 3.2:
Introduction to Graph Drawing
Jesper Nederlof
Roeland Luitwieler
Outline
• Chapter 2 (Paradigms for Graph Drawing)– Parameters– Paradigms– General framework for Graph Drawing (GD)
• Chapter 3 (Divide & Conquer)– Trees– Series-Parallel Digraphs
Parameters
• Different contexts pose different requirements
• In general: readable to the user
• A “nice” graph drawing satisfies– Drawing conventions (general musts)– Aesthetics (desires)– Constraints (specific musts)

Parameters: drawing conventions
• Polyline drawing– Edges are drawn as polygonal chains
• Straight-line drawing– Edges are drawn as straight lines
• Orthogonal drawing– Like a polyline drawing, but only horizontal and
vertical line segments are allowed
• Grid drawing– Vertices, crossings and edge bends have integer
coordinates
Parameters: drawing conventions
• Planar drawing– No crossings are allowed
• (Strictly) upward drawing– Arcs are drawn as nondecreasing (strictly
increasing) curves in the vertical direction
• (Strictly) downward drawing– Arcs are drawn as nonincreasing (strictly
decreasing) curves in the vertical direction

Parameters: aesthetics
• Properties of the drawing we would like to apply as much as possible– Minimize number of crossings– Minimize area (polygon or convex hull)– Min. sum / maximum / variance of edge lengths– Min. sum / max. / var. of number of bends per edge– Max. angle between two incident arcs of a vertex– Min. aspect ratio: longest side convex hull over
shortest side convex hull– Symmetry

Parameters: constraints
• Refer to specific subgraphs or subdrawings• Examples from the book:
– Place some given vertices• In the centre• On the outer boundary• Close together
– Draw a given path horizontally aligned from left to right (or vertically aligned from top to bottom)
– Draw a given subgraph with a predefined shape

GD algorithms
• Graph drawing algorithms– Satisfy as much parameters as possible
• Usually parameters conflict• Best drawing doesn’t exist most of the time• Establish precedence relation among aesthetics
(often implicit in algorithm)
– Are computationally as efficient as possible• Often real-time response required

Paradigms
• Topology-Shape-Metrics approach
• Hierarchical approach
• Visibility approach
• Augmentation approach
• Force-Directed approach (first session)
• Divide & Conquer approach (Ch. 3)

Topology-Shape-Metrics approach
• Suitable for orthogonal grid drawings
• Based on three equivalence classes– Topology: the same up to a continuous
deformation (the same neighbour order)– Shape: the same up to changing lengths of
line segments, but no angles between them– Metrics: the same up to a translation / rotation– Metrics implies Shape implies Topology

Topology-Shape-Metrics approach
1. Planarization step: determine topology (Ch. 3, 7)– Minimize number of edge crossings– Introduce dummy vertices if necessary– Output: embedded planar graph
2. Orthogonalization step: determine shape (Ch. 4, 5)– Make drawing orthogonal (introduce bends)– Output: orthogonal representation
3. Compaction step: determine metrics (Ch. 5)– Usually: minimize area– Finally, replace dummy vertices by crossings– Output: orthogonal grid drawing

Topology-Shape-Metrics approach
• Aesthetics– Implicit precedence (crossings more important then
bends, etc.)– Others can be taken into account
• Constraints– Several can be taken into account– Must be treated in the right step
• The above goes for all of the approaches discussed in this session

Hierarchical approach
• Suitable for polyline drawings, especially upward (or downward) polyline drawings
• Input: acyclic digraph, however:– If digraph not acyclic, arcs can be temporarily
reversed– If graph not directed, edges can be
temporarily replaced by arcs (not introducing cycles, of course)
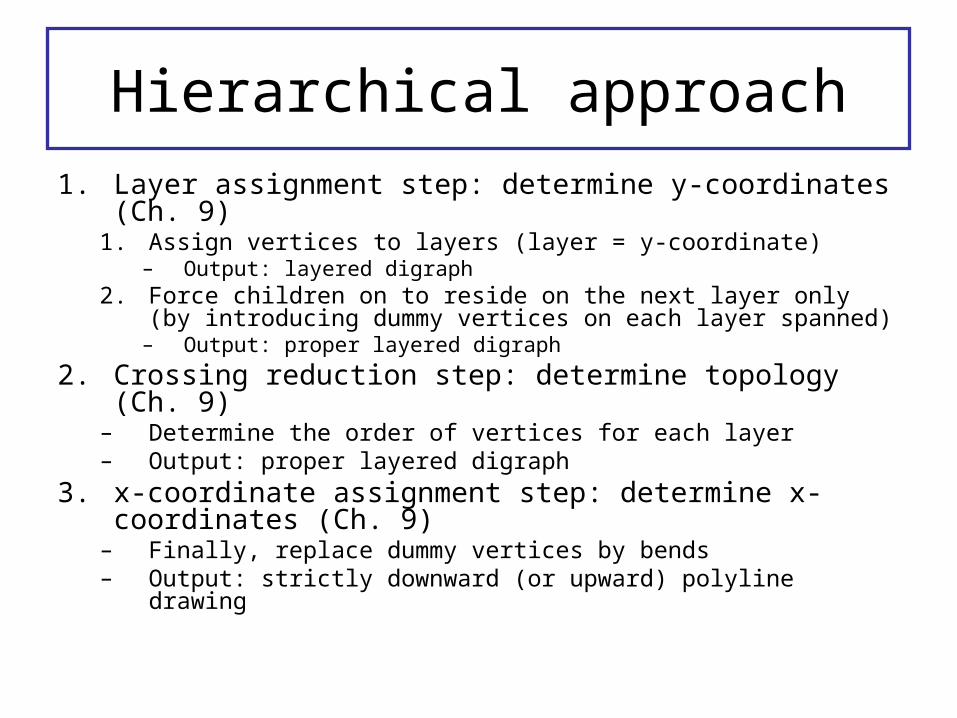
Hierarchical approach
1. Layer assignment step: determine y-coordinates (Ch. 9)
1. Assign vertices to layers (layer = y-coordinate)– Output: layered digraph
2. Force children on to reside on the next layer only (by introducing dummy vertices on each layer spanned)
– Output: proper layered digraph
2. Crossing reduction step: determine topology (Ch. 9)– Determine the order of vertices for each layer– Output: proper layered digraph
3. x-coordinate assignment step: determine x-coordinates (Ch. 9)
– Finally, replace dummy vertices by bends– Output: strictly downward (or upward) polyline drawing

Visibility approach• Suitable for polyline drawings
1. Planarization step: determine topology (Ch. 3, 7)– Minimize number of edge crossings– Introduce dummy vertices if necessary– Output: embedded planar graph
2. Visibility step (Ch. 4)– Map vertices to horizontal segments, edges to vertical segments
between the associated horizontal segments, not intersecting any other horizontal segments
– Usually: minimize area– Output: visibility representation
3. Replacement step (Ch. 4)– Replacement strategies exist constructing a planar polyline drawing– Finally, replace dummy vertices by crossings– Output: polyline drawing

Augmentation approach• Suitable for polyline drawings
1. Planarization step: determine topology (Ch. 3, 7)– Minimize number of edge crossings– Introduce dummy vertices if necessary– Output: embedded planar graph
2. Augmentation step (Ch. 4)– Add dummy edges to obtain a maximal planar graph (=triangulated
planar graph)– Usually: minimize degrees of vertices– Output: triangulated planar graph
3. Triangulation drawing step– Represent each face as a triangle– Finally, remove dummy edges, replace dummy vertices by crossings– Output: polyline drawing

General framework for GD
• There are many other possible approaches– Mix functional steps from approaches
• Take input and output classes into account!
– Lots of unmentioned steps exist– Invent your own steps…
• Many steps will be treated in this course
Chapter 3
• Tree drawing– Layering technique for normal drawings– Radial drawing– Horizontal-vertical-drawing
• Series-Parallel Digraph drawing

Layering
Most natural and most used way.
Layering
• On a grid
• Planar
• Parent always higher than child.
• Same subtrees give same drawing.
• Tries to minimize the total width of the drawing. Not always optimal.

Layering
Y-coordinate = -depth
0
-1
-2
-3
-4
-5
-6
-7

Layering: X-coordinate
• Base-case: T is a leaf, trivial• Divide: Recur on left and right subtree • Conquer:
– Move the drawing of the left and right subtree towards each other until the minimum horizontal distance becomes 2
– Place root in the middle of its children.– Compute the left contour– Compute the right contour
Input: Tree TOutput: Drawing of T and his contours

Layering: X-coordinate
• The left (right) contour of a tree with height h is a sequence of vertices v1,..,vh such that vi is the most left (right) vertex with depth i.
• These contours can be computed during the conquer step.
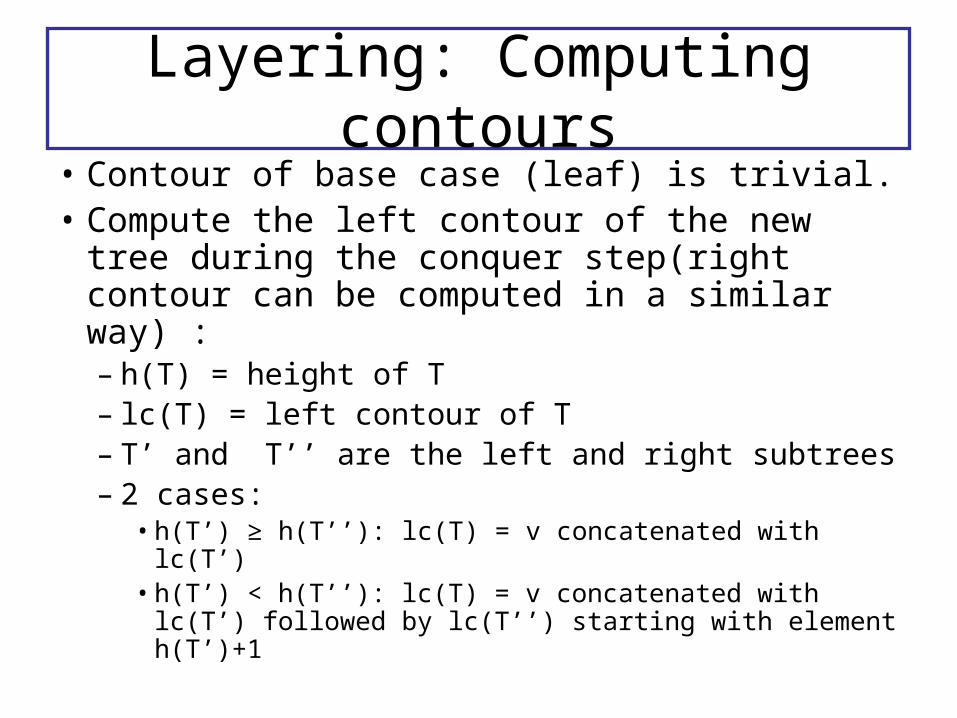
Layering: Computing contours• Contour of base case (leaf) is trivial.• Compute the left contour of the new tree
during the conquer step(right contour can be computed in a similar way) :– h(T) = height of T– lc(T) = left contour of T– T’ and T’’ are the left and right subtrees– 2 cases:
• h(T’) ≥ h(T’’): lc(T) = v concatenated with lc(T’)• h(T’) < h(T’’): lc(T) = v concatenated with lc(T’)
followed by lc(T’’) starting with element h(T’)+1
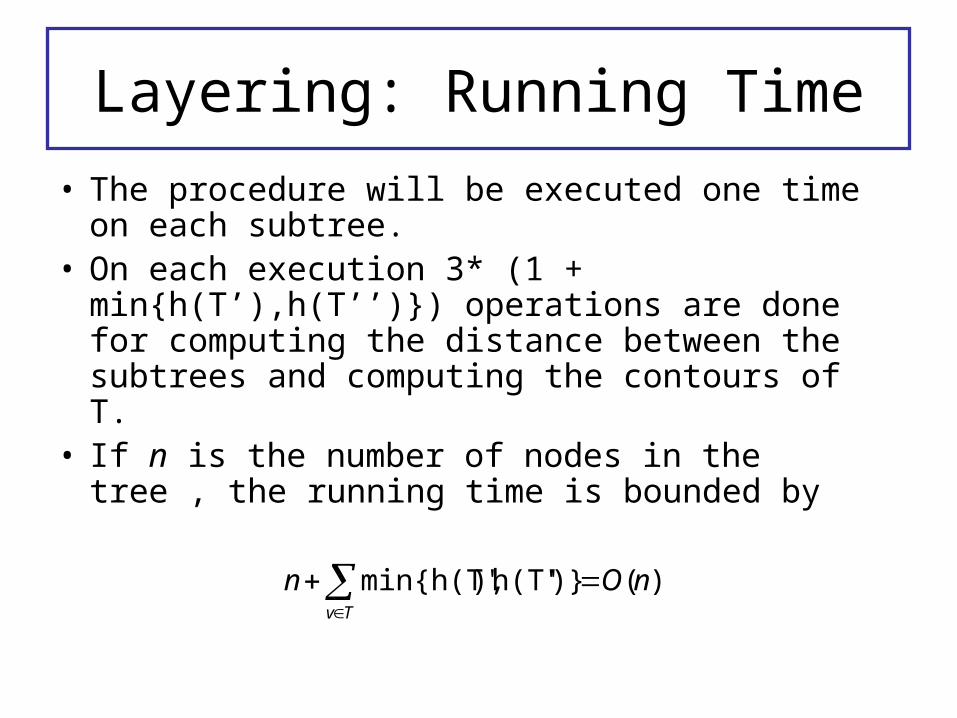
Layering: Running Time
• The procedure will be executed one time on each subtree.
• On each execution 3* (1 + min{h(T’),h(T’’)}) operations are done for computing the distance between the subtrees and computing the contours of T.
• If n is the number of nodes in the tree , the running time is bounded by
)()}'h(T'),min{h(T' nOnTv

Layering: Running time)()}'h(T'),min{h(T' nO
Tv

Layering: Not optimal
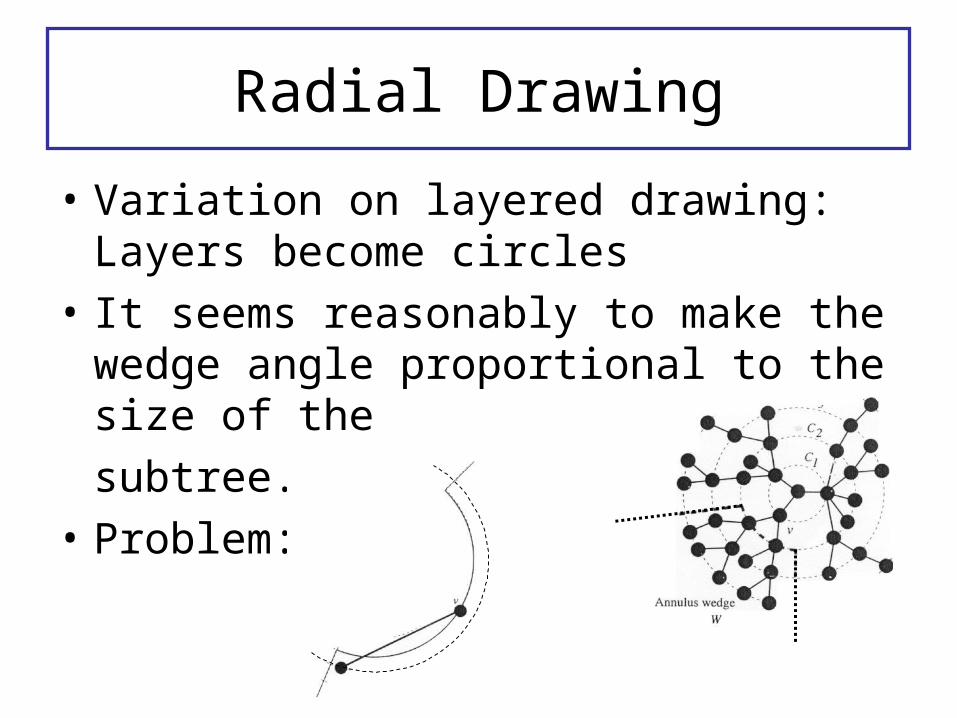
Radial Drawing
• Variation on layered drawing: Layers become circles
• It seems reasonably to make the wedge angle proportional to the size of the
subtree.
• Problem:

Radial Drawing
• So use a convex subset of the wedge
• Now, determine the
angle βv of the wedge with parent(u) = v as follows:
,
)(
)(min
vl
ul vu
a
ciCi+1
Where l(v) = #leaves of subtree with v as root• Now, we can place the vertices in the middle of the wedge.
)(,
)(
)(min Fangle
vl
ul vu

Horizontal Vertical Drawing
• Only orthogonal lines allowed• Simple algorithm “Right-Heavy-HV-Tree-Draw”:
– Divide: Recursively construct drawings of left and right subtrees of T
– Conquer: Place the largest subtree (most leaves) to the right and the other one below the root
• Used area (of smallest rectangle containing the drawing) is O(n log n).
• Poor aspect ratio (n / log n)

Recursive winding
• Arrange the tree such that l(leftChild(v)) ≤ l(rightChild(v)) for each v
• Fix a parameter A to determine later• W(n) and H(n) are the width and height of
the drawing of a tree with n nodes.• If n ≤ A. Using the algorithm “Right-Heavy-
HV-Tree-Draw”, gives:– H(n) ≤ log2 n– W(n) ≤ A
Input: Tree T with l leavesOutput: Horizontal-Vertical drawing of T

Recursive winding
• If n > A: Find the vertex vk on the right contour, such that:– l(vk) > n – A
– l(vk+1) ≤ n -A .v1
v2
Vk-1
vk
T1
T2
Tk-1
T’ T’’
T1 T2 Tk-2 Tk-1
v1 v2 Vk-2 Vk-1
k

Recursive winding
• n’ and n’’ are the number of leaves of the left and right subtree
• W(n) ≤ max{W(n'), W(n"), A} + O(log n)• H(n) ≤ max{H(n') + H(n") + O(log n), A}• A = (n log n)1/2
• max(n', n") ≤ n – A• Solution:
– W(n)=O(n log n)1/2
– W(n)=O(n log n)1/2
• Aspect ratio = O(1)

Series parallel digraphs
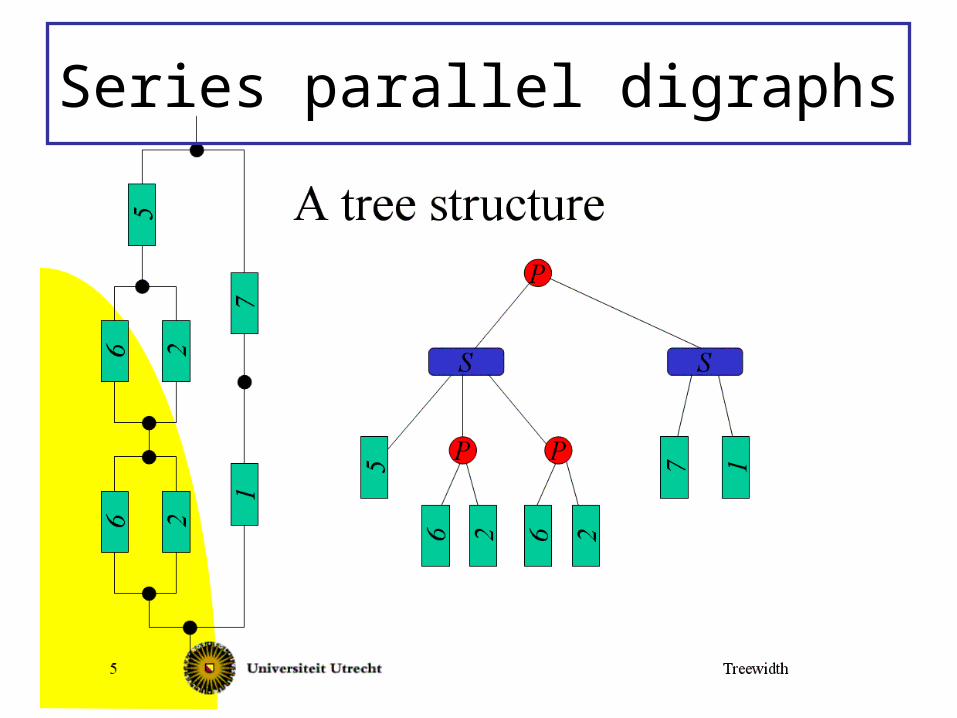
Series parallel digraphs

Divide & Conquer again
• Base Case: If T is a leaf, draw a single vertical line.
• Divide: Else, construct a drawing of the left and right subtree. – Glue the drawings together depending on the
kind of node.
Input: Tree T with l leavesOutput: Horizontal-Vertical drawing of T

Divide & Conquer again
1
2

Conclusion
• Different applications require different drawings
• Several paradigms exist to meet those requirements
• The divide & conquer paradigm can be used for drawing trees and series parallel graphs
• Questions?


