11
Modelo SENA INSTRUCTION MANUAL
| Date post: | 20-Oct-2018 |
| Category: |
Documents |
| Upload: | phamkhuong |
| View: | 218 times |
| Download: | 0 times |

Modelo SENA
INSTRUCTION MANUAL
Dear customer: ENG We would like to thank you for choosing one of our products. The product
you have just purchased is highly valuable and this is why we kindly invite you to read carefully this brief manual so as you can make the most of your equipment.
GENERAL WARNINGS
ENG The installation of the stove must be done according to the local regulations, including those referred to the national or European rules.
Our responsibility is limited to the supply of the equipment. The installation must be done according to the foreseen procedures for this type of equipments, following the prescriptions detailed in these instructions, and the rules established for this profession.
The responsibility of the ensemble of the installation will fall on the installation engineers or, if it proceeds, on the company in charge of the installation; however, in both
cases they must be qualified and renowned personnel.
IMPORTANT! This product includes a spray tin inside the combustion chamber or oven (where applicable) that needs to be removed before starting up the equipment.
REGULATIONS
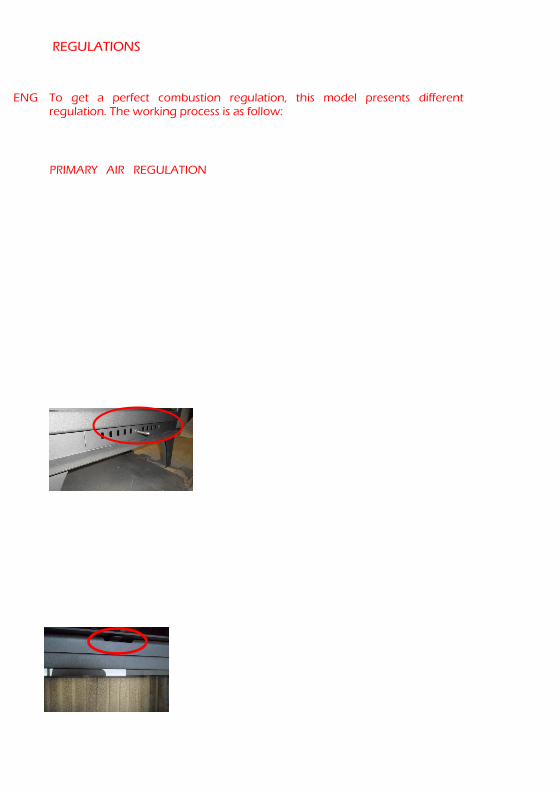
ENG To get a perfect combustion regulation, this model presents different regulation. The working process is as follow:
PRIMARY AIR REGULATION
ARRANGEMENT AND ELEMENTS REPLACEMENT /
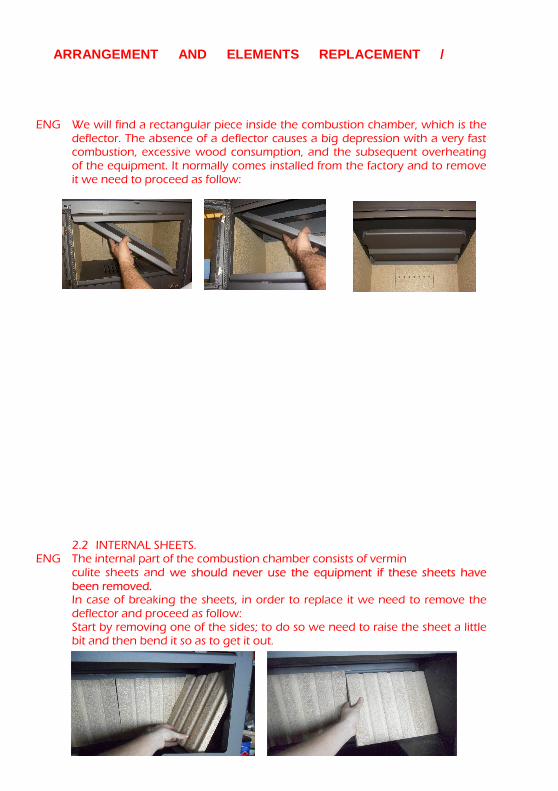
ENG We will find a rectangular piece inside the combustion chamber, which is the
deflector. The absence of a deflector causes a big depression with a very fast combustion, excessive wood consumption, and the subsequent overheating of the equipment. It normally comes installed from the factory and to remove it we need to proceed as follow: 2.1 DEFLECTOR
2.2 INTERNAL SHEETS. ENG The internal part of the combustion chamber consists of vermin culite sheets and we should never use the equipment if these sheets have
been removed. In case of breaking the sheets, in order to replace it we need to remove the deflector and proceed as follow: Start by removing one of the sides; to do so we need to raise the sheet a little bit and then bend it so as to get it out.
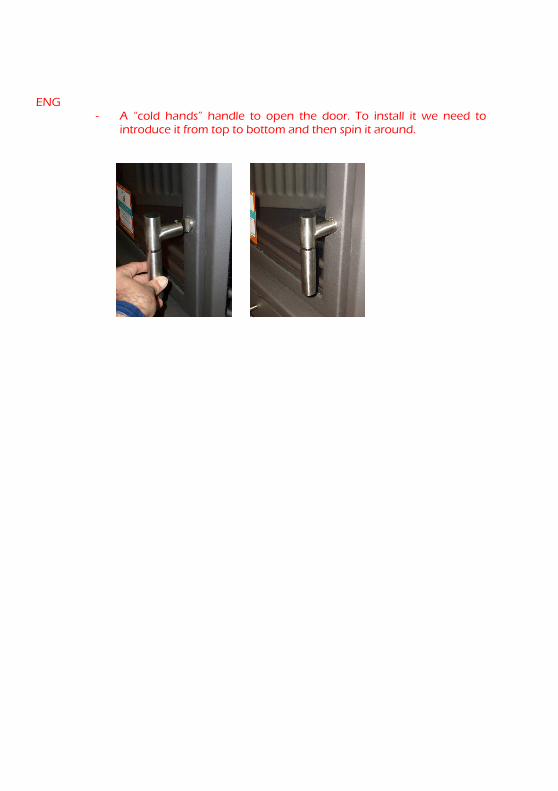
ENG - A “cold hands” handle to open the door. To install it we need to
introduce it from top to bottom and then spin it around.
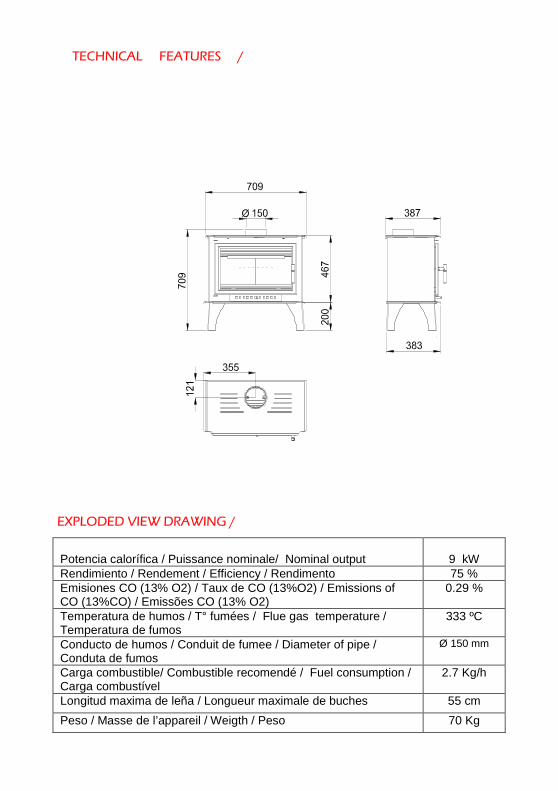
TECHNICAL FEATURES /
EXPLODED VIEW DRAWING /
Potencia calorífica / Puissance nominale/ Nominal output
9 kW
Rendimiento / Rendement / Efficiency / Rendimento 75 % Emisiones CO (13% O2) / Taux de CO (13%O2) / Emissions of CO (13%CO) / Emissões CO (13% O2)
0.29 %
Temperatura de humos / T° fumées / Flue gas temperature / Temperatura de fumos
333 ºC
Conducto de humos / Conduit de fumee / Diameter of pipe / Conduta de fumos
Ø 150 mm
Carga combustible/ Combustible recomendé / Fuel consumption / Carga combustível
2.7 Kg/h
Longitud maxima de leña / Longueur maximale de buches 55 cm
Peso / Masse de l’appareil / Weigth / Peso 70 Kg
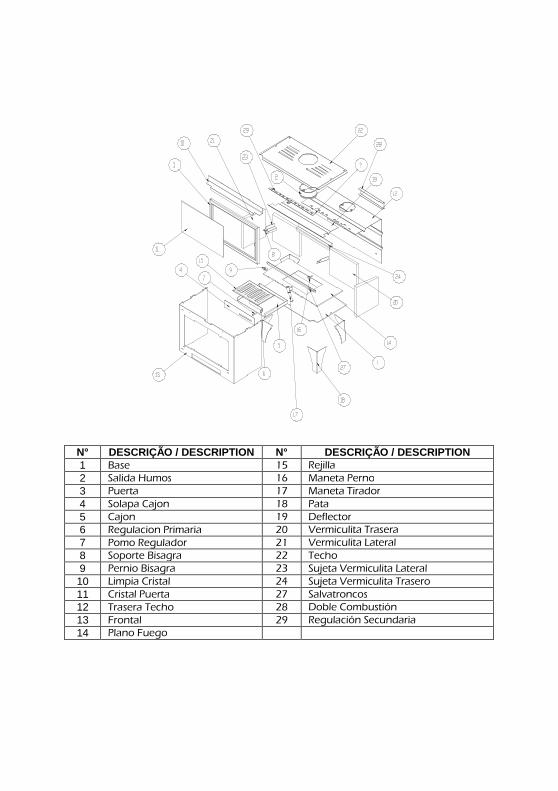
N° DESCRIÇÃO / DESCRIPTION N° DESCRIÇÃO / DESCRIPTION 1 Base 15 Rejilla 2 Salida Humos 16 Maneta Perno 3 Puerta 17 Maneta Tirador 4 Solapa Cajon 18 Pata 5 Cajon 19 Deflector 6 Regulacion Primaria 20 Vermiculita Trasera 7 Pomo Regulador 21 Vermiculita Lateral 8 Soporte Bisagra 22 Techo 9 Pernio Bisagra 23 Sujeta Vermiculita Lateral 10 Limpia Cristal 24 Sujeta Vermiculita Trasero 11 Cristal Puerta 27 Salvatroncos 12 Trasera Techo 28 Doble Combustión 13 Frontal 29 Regulación Secundaria 14 Plano Fuego
IMPORTANT
ENG This product can be installed next to the walls of the room, provided that they meet the following requirements:
• To respect a distance of about 5-10 cm. to the wall.
• To check that the wall is completely made of brick, fireproof brick blocks, concrete, thin hollow brick, etc., and that they are covered by a material susceptible to support high temperatures.
Therefore, in the event of the wall being made of any other material (plasterboard, wood, non glass-ceramic, etc.) the installation engineer should foresee an adequate isolation or leave a minimum security distance to the wall of 80-100cm. In this case, it is compulsory to use thermal insulated pipe.

The data provided in this manual are not binding. The company reserves the right to carry out modifications and
improvements without notice.

Please, do not hesitate to contact your dealer for further information.


