29
Senior Thesis (BIO400) Course Packet (5 th Edition ) Department of Biological Sciences York College of Pennsylvania

Senior Thesis (BIO400)
Course Packet (5th Edition )
Department of Biological Sciences York College of Pennsylvania

Rev. 2/08 2
TABLE OF CONTENTS
Page Contents 3 Introduction to Senior Thesis 5 Students & Faculty Mentors 6 Giving a Progress Report 7 Primary Research Articles 8 AV Services 10 Computer Workshop-PowerPoint 15 Preparing your Senior Thesis Paper &
Poster 16 Guidelines for Written Theses:
Original Research 19 Guidelines for Written Theses:
Research Proposals 22 Putting the Poster Together 24 Poster Templates 25 Poster Example 26 Abstract/Project Summary Format 27 Abstract Examples
29 Senior Thesis Poster Session Student Scholarship Day
30 Poster Evaluation Form 31 Major Field Test

Rev. 2/08 3
Introduction to Senior Thesis
What is Senior Thesis? This course culminates the process that began with the Introduction to Scientific Research course (BIO200) which most students take in their sophomore year. Senior Thesis is considered the "capstone" experience for all Biology majors at York College. In this course, students have the opportunity to organize and present their own previously obtained research data from a scientific pursuit of their own choice. It is not designed to be the time during which a student's research is actually initiated. It is expected that a student, after completing Introduction to Scientific Research, will have initiated a research project (either with York College faculty or through other internship opportunities elsewhere). By registering for Senior Thesis, a student indicates that they are then ready to present their scholarly discoveries to the Biology Department and to the York College community at large in partial fulfillment of the requirements for a B.S. degree in this major. What should I have done BEFORE now? Prior to registering for Senior Thesis, a student should have successfully completed the following courses:
- Introduction to Scientific Research (BIO200) - Statistics (BEH260) - Identified a research mentor
Before enrolling in Senior Thesis, a student must obtain a research mentor who is affiliated with the Biology Department to help supervise their work. Working with their research mentor, a student is expected to initiate and complete a research project (either original research or a research proposal), and to have their raw data ready upon entering the Senior Thesis course. This can be accomplished by either pursuing an Independent Study or by participating in an Internship. The bulk of a student’s research is usually performed in the summer months, however it is also possible to perform experiments, collect data and conduct background research during the regular semester, depending on the students schedule. What will I be expected to do in Senior Thesis? Once a student's research has been completed, Senior Thesis provides them the opportunity to organize and present their work publicly. Currently, the presentation of student research takes the form of a poster presentation. In the Fall & Spring Semesters, the Biology Department hosts a Senior Thesis Poster Session during which students from many departmental courses interact with the Senior Thesis presenters and read and ask questions about the research performed. During this event, all Biology Faculty evaluate each Thesis student’s work based on specific criteria (discussed elsewhere in this manual). This evaluation is used in the assignment of final grades for the course. In the Spring Semester, Biology Senior Thesis students are also required to participate in the York College Student Scholarship Week. One day during this week, students and faculty from the entire college community gather to view scholarly contributions from each academic discipline, including Biology. The format for Scholarship Day is mainly poster presentations - the same posters used for the Departmental Poster Session. The Scholarship Day venue gives each student the opportunity to share their biological discoveries

Rev. 2/08 4
and research interests with other departments. Participation in Student Scholarship Day is required of all Spring Senior Thesis students; Fall Senior Thesis students can participate if they wish. Why is Senior Thesis important for me as a Biologist? Both basic and applied scientific discoveries have been used for such things as disease eradication and species conservation. Had critical data from Flemming, Pauling, Darwin or Watson and Crick been merely facts recorded in a lab manual and never reported, such scientific advancements would have been impossible. Being a "biologist" means that you are capable of not only studying living things, but also that you are able to communicate your discoveries to others for the betterment of life in general. Oftentimes, however, there is a large disparity between a student's ability to perform the research and their ability to present the results of their work to others. Therefore, Senior Thesis represents a very formal means to that end. It allows students to pursue studies in a biological field of their choice and to become conversant in that particular field. It also fosters the development of effective written and oral communication skills and reinforces concepts learned in various upper-division laboratories.

Rev. 2/08 5
Students & Faculty Mentors BEFORE beginning a research project (either original research or research proposal) a student must select a faculty mentor from the Biology department to help supervise and guide their work. Ideally, the faculty member should be selected based on their knowledge of a particular specialty (i.e. animal behavior, botany, microbiology, genetics, development, etc.). For a complex research project, students will oftentimes select two faculty mentors for guidance in two specific but related areas. Prior to registering for this course, it is mandatory that each student has already established a working relationship with a full-time, on-campus member of the Biology faculty. If your immediate mentor is not an on campus York College Biology Faculty, then you must also develop a mentor relationship with one of us on the YCP campus. Either way, a faculty mentor will be an invaluable resource before, during and after a Senior Thesis project has been completed. Prior to actually beginning a research project, a faculty mentor can help students wade through the volumes of literature about their particular topic of interest. In addition, the mentor can help focus the student's attention on a specific question rather than on a broad series of nebulous questions. The faculty mentor can serve as a consultant for students as they begin to design or propose experiments related to the pursuit of their specific objectives. As a student's research or proposal preparation is ongoing, a faculty mentor can help make sure the work stays on track and that the objectives remain clear. They can also help students with data interpretation, statistical analysis, etc. Once the research project or proposal has been completed, a faculty mentor can provide valuable editorial assistance as the results take the form of a poster presentation and a written, publication-quality manuscript.

Rev. 2/08 6
Giving a Progress Report
The very first assignment for Senior Thesis will be to give a Progress Report of your research efforts to date. This formal oral presentation will be made to the Biology faculty. Students must utilize overhead transparencies for their presentation your use a Powerpoint presentation. A computer and projector will be made available. During your presentation, each student should
1) Identify the mentor. “I worked with….”
2) State the title and research question/hypothesis. “The title of my Senior Thesis project is…”
3) Briefly describe the history of your project.
"I first became interested in this topic when…. This developed further into…"
4) Strongly address the rationale of the project (similar to an introduction, including background material). Presentation of your hypothesis/objective may logically follow.
5) During your presentation, make reference to a list of current literature (a bibliography
list) contributing to your project, especially your key research article.
6) Present a time-line during which the research was completed. "My research began on….continued until….and was/will be completed on/before … "
7) Briefly present your results (original research) or your major objectives (research
proposal).
8) Specify the time required to completely finish the project (if any). Report on what experiments are left to be conducted, if any.
"I have the following minor tasks remaining….& anticipate finishing these tasks by…."
Students reporting research proposals should also include the following: 1) Show that the experiments have been designed. 2) Illustrate a clear concept of the nature of the results from the proposed experiments. 3) If the research is an extension of your ISR proposal, bring your ISR proposal with you.
Your Senior Thesis proposal should represent considerable work in addition to the ISR proposal.
In addition, as part of this assignment students will be required to submit a 1-2 page written project summary that includes all of the aforementioned elements. This written summary, along with the oral presentation, will be evaluated by the Biology faculty.

Rev. 2/08 7
Primary Research Articles From your experience in Introduction to Scientific Research, you should be able to distinguish between "primary" and "secondary" types of scientific literature. Basically, a primary research article is one that presents original data, specific methods, and precise results. It is usually (but not always) presented in the standard IMRAD format (Introduction, Methods, Results, and Discussion). In contrast, secondary literature includes such things as reviews and book chapters. They present copious, yet charmingly vague, details of a research area and are usually not written in IMRAD format. In preparation for Senior Thesis, students should have gathered a thorough collection of both primary and secondary research articles in their chosen field. As one of the important Senior Thesis assignments, students will be expected to present to the information contained in one key primary research article in their field. This article could represent the critical piece of literature that sparked a student's initial interest on a particular topic. The key primary article may also be one from which a student derived their methodology (either proposed or actual). It could also be the article that reported a result so controversial that the student was prompted to re-address the authors' hypotheses. Whatever the case may be each student is responsible for presenting to the Senior Thesis class the information contained in one primary research article. The presentation itself should be a casual, journal club-like format wherein the student presents to the class the following information (transparencies should be utilized): • Title of the article • Authors (significance of the authors; have these investigators been the primary individuals to
publish in this area?) • General background of the study described • Specific objective(s) of the study • General details about methodology • Pertinent results (graphs, tables, etc. presented on transparency) • Overall conclusion of the study • Statement indicating how this article is directly related to the student's Senior Thesis project Presentations should last approximately 10-15 minutes. This presentation will count 8% toward a student's final grade in the course. Students should submit a copy of the abstract to the instructor.

Rev. 2/08 8
A.V. Services The staff of of the Schmidt Library are wonderful people who are willing and able to help you prepare for the various Senior Thesis presentations that lie ahead. The director of A.V. Services is Pat Poet and her assistant is Rose Dube. Should you have questions, problems or a special request, please see either of these two delightful people. Or, call the front desk at 1345 (if you leave a message, provide you name and phone number & they'll return your call). Their hours of operation are: Monday-Thursday 8:00 am-11:45 pm
Friday 8:00 am-7:45 pm Saturday 10:00 am-4:45 pm Sunday 1:00 pm-11:45 pm
Here is an abbreviated list of all equipment available to you through A.V. Services: • Poster Printer
This is the machine that is used to print Senior Thesis posters. It works just like a color laser jet printer, however the paper is very large (34” wide spool). A brief tutorial on how to properly format your poster for printing on this device will be provided during the Senior Thesis course
Other equipment that you may use for Senior Thesis or another class project would be: • Ellison Lettering Machine
This device makes "punch-out" letters using colored construction paper. You’ve probably seen this type of lettering used on school Bulletin Boards. This machine also has templates for various shapes (animals, stars, punctuation marks, etc.). If you use this machine, you will be expected to provide your own construction paper or poster paper.
• Laminator
The function of this machine goes without saying (I think!). This will be helpful if you have pictures or graphs that you don’t want to get smudged or smeared. The cost of lamination is $0.03/inch and there is a size limit. Unfortunately, the laminator is NOT large enough to accommodate the large poster size used in Senior Thesis.
• Merlin Label Maker
This machine will copy lettering onto a strip of adhesive tape. You simply type in the letters, the message or the label that you want using the machine’s keyboard and it prints it out; all you have to do is peel & stick. A.V. Services personnel will be able to assist you with this should you have questions. Will you use this for your poster? Maybe- I find it helpful to use these labels on pictures and figures (e.g. Figure 1, Figure 2A, 2B, magn. = 100x, etc.). The cost of these labels is $0.06/inch (with or without typo’s!).

Rev. 2/08 9
• Color Printer If you have a file (e.g. Prizm graph, power point graph, Internet image, etc.) that you would like to print out in color, A.V. Services can do it for you. You provide them with the FINISHED product on disk or on your network drive and they’ll print it out for you. Not only that, but they’ll print onto paper (letter or legal size) or onto transparency (both of which they provide). The cost for this service is $0.50/paper page, $1.50/transparency
page. As a rule of thumb, don’t use solid colored backgrounds for text-only print-outs (e.g. all blue background with white lettering). You run the risk of having the color fade and/or streak. Instead, use white backgrounds with colored accents (e.g. colored text, images, symbols, lines, etc.). Also, this service is based on a first-come, first-served basis. So PLAN AHEAD for the minor set backs that may arise. Bad planning on your part does not constitute an emergency on their part! • Flat-Bed Scanner
A.V. Services is happy to scan any image that you may have. They will scan copies of an image, as well as photographs, transparencies, images from a book or journal, etc. They will save the scanned image to either a floppy disk or zip-disk that you provide or directly onto your network drive. They can also print it out for you. Be advised, however, that scanning an image takes time (especially when using really high resolution). So, plan well in advance. In addition, the quality of the scanned image is only as good as your original image. If your primary image is yucky and you want to modify it, A.V. Services will scan it for you, give you the disk copy and YOU MUST MAKE THE NECESSARY MODIFICATIONS ON YOUR OWN TIME. Do not expect A.V. Services to work major miracles on your image; that’s YOUR job. I’m sure, however, that they could provide limited guidance should you need it. Again, scanner service is based on a first-come, first-served basis. And, it’s not uncommon for it to go on the "blink" sometime during the semester. So, PLAN AHEAD!! They will accept up to 10 scans per person on a "while you wait basis". There is a 20 scan limit per day per person. • Copy Stand A copy stand is a photographic set-up equipped with lights, a 35 mm camera, a "stage" and glare-resistant glass. You can use this set-up if you have images in a book, magazine or journal that you would like to photograph instead of scan. It’s also useful if you have large specimens that are too big for the photomicroscopes in the Biology Dept. Getting a good image with this system is, however, a fine art! You must pick the right film, use the right lighting, and the right exposure in order to get a good image but it is possible. If you use the copy stand, you must provide your own 35 mm film (either slide film or print film). You will also pay for having the film developed. Developing will take time (depending on where you take it) so plan ahead for this.
Rev. 2/08 10
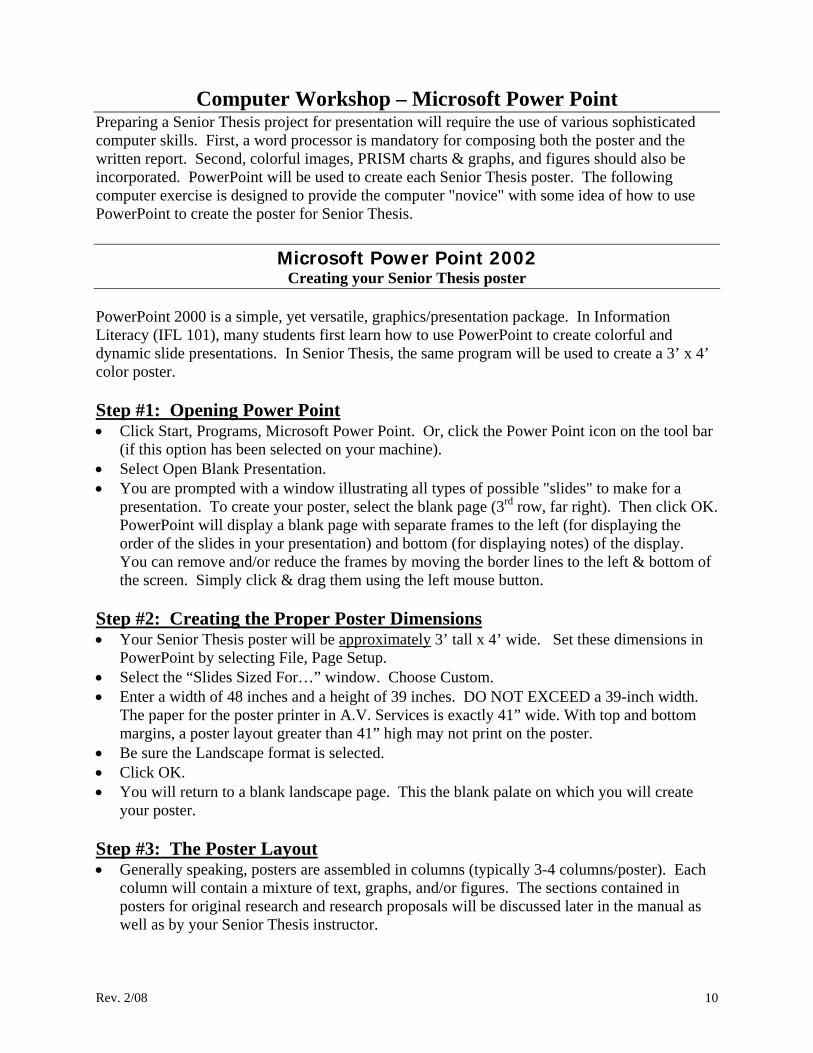
Computer Workshop – Microsoft Power Point Preparing a Senior Thesis project for presentation will require the use of various sophisticated computer skills. First, a word processor is mandatory for composing both the poster and the written report. Second, colorful images, PRISM charts & graphs, and figures should also be incorporated. PowerPoint will be used to create each Senior Thesis poster. The following computer exercise is designed to provide the computer "novice" with some idea of how to use PowerPoint to create the poster for Senior Thesis.
Microsoft Power Point 2002
Creating your Senior Thesis poster PowerPoint 2000 is a simple, yet versatile, graphics/presentation package. In Information Literacy (IFL 101), many students first learn how to use PowerPoint to create colorful and dynamic slide presentations. In Senior Thesis, the same program will be used to create a 3’ x 4’ color poster. Step #1: Opening Power Point • Click Start, Programs, Microsoft Power Point. Or, click the Power Point icon on the tool bar
(if this option has been selected on your machine). • Select Open Blank Presentation. • You are prompted with a window illustrating all types of possible "slides" to make for a
presentation. To create your poster, select the blank page (3rd row, far right). Then click OK. PowerPoint will display a blank page with separate frames to the left (for displaying the order of the slides in your presentation) and bottom (for displaying notes) of the display. You can remove and/or reduce the frames by moving the border lines to the left & bottom of the screen. Simply click & drag them using the left mouse button.
Step #2: Creating the Proper Poster Dimensions • Your Senior Thesis poster will be approximately 3’ tall x 4’ wide. Set these dimensions in
PowerPoint by selecting File, Page Setup. • Select the “Slides Sized For…” window. Choose Custom. • Enter a width of 48 inches and a height of 39 inches. DO NOT EXCEED a 39-inch width.
The paper for the poster printer in A.V. Services is exactly 41” wide. With top and bottom margins, a poster layout greater than 41” high may not print on the poster.
• Be sure the Landscape format is selected. • Click OK. • You will return to a blank landscape page. This the blank palate on which you will create
your poster. Step #3: The Poster Layout • Generally speaking, posters are assembled in columns (typically 3-4 columns/poster). Each
column will contain a mixture of text, graphs, and/or figures. The sections contained in posters for original research and research proposals will be discussed later in the manual as well as by your Senior Thesis instructor.

Rev. 2/08 11
• Students should devise the general layout of their poster in advance before trying to assemble it in PowerPoint. For suggestions, refer to the webpages located at:
http://goose.ycp.edu/~dricker/seniorthesisposter.html
Also, refer to a later chapter in this manual entitled “Putting the Poster Together”. Step #3: Creating a Textbox To enter text into a PowerPoint presentation, you must first create a text box. • Do this by first locating the text box icon on the lower tool bar (a small white page with
black lines & the letter A on it). Alternatively, select Insert from the top toolbar and choose textbox.
• Once you select text box, the cursor changes to the shape of a cross. Drop (left mouse click) the cross on the location you wish the text to appear on the page. A hatched box with white “handles” appears with the blinking cursor inside.
• Type or copy the text into the box. Don’t worry if the box is too large or small at this point. Simply get enter the desired text.
• Once the text is in the box, carefully click on the hatched outline of the box itself. Note the hatch pattern changes.
• To change the dimensions of the box, click & drag the white handles until they reach the appropriate size.
• To change the text font or size, select Format, then Font, and make your choices from the resulting window. Alternatively, you can use the icons located on the tool bar to make your changes.
• To move the box to another location, superimpose the cursor on the hatched outline of the box. The cursor will change from an arrow to a cross of arrows. Left click & drag the textbox to a new location.
Step #4: Importing Images and Clipart It is relatively simple to import an image into Power Point. You can use sources such as the Internet (right mouse click the image you desire and select Save Image As… Save it to your network drive or onto a floppy disk). You can also import scanned images for annotation. Power Point also has a nice selection of Clip Art. Remember to provide references for "pirated" images! To insert images in Power Point: • Select Insert from the tool bar. Then select Picture. Determine whether you want to insert an
image from your files (e.g. your network drive, floppy disk, etc.) or from the Clip Art. • Once you select the appropriate option for you, locate your desired image and select Insert.
The image will be pasted into your presentation. • You can scale the image by clicking and dragging the square black handles that surround the
image.
Rev. 2/08 12
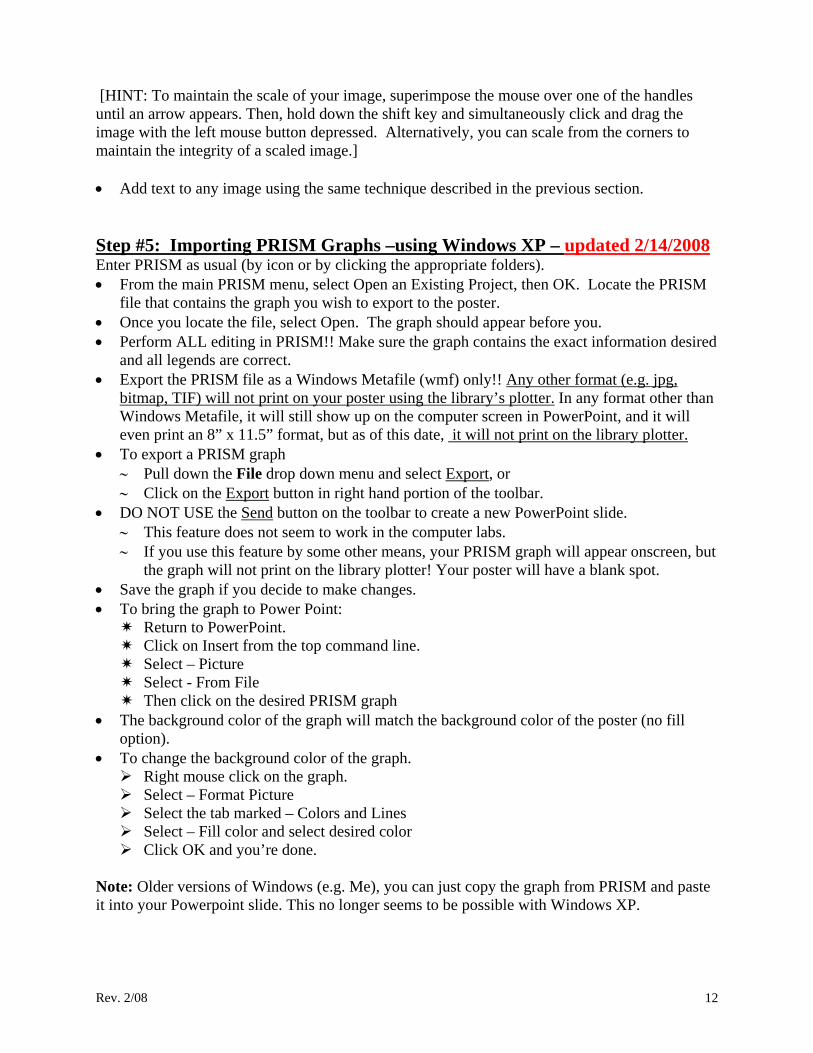
[HINT: To maintain the scale of your image, superimpose the mouse over one of the handles until an arrow appears. Then, hold down the shift key and simultaneously click and drag the image with the left mouse button depressed. Alternatively, you can scale from the corners to maintain the integrity of a scaled image.] • Add text to any image using the same technique described in the previous section. Step #5: Importing PRISM Graphs –using Windows XP – updated 2/14/2008 Enter PRISM as usual (by icon or by clicking the appropriate folders). • From the main PRISM menu, select Open an Existing Project, then OK. Locate the PRISM
file that contains the graph you wish to export to the poster. • Once you locate the file, select Open. The graph should appear before you. • Perform ALL editing in PRISM!! Make sure the graph contains the exact information desired
and all legends are correct. • Export the PRISM file as a Windows Metafile (wmf) only!! Any other format (e.g. jpg,
bitmap, TIF) will not print on your poster using the library’s plotter. In any format other than Windows Metafile, it will still show up on the computer screen in PowerPoint, and it will even print an 8” x 11.5” format, but as of this date, it will not print on the library plotter.
• To export a PRISM graph ∼ Pull down the File drop down menu and select Export, or ∼ Click on the Export button in right hand portion of the toolbar.
• DO NOT USE the Send button on the toolbar to create a new PowerPoint slide. ∼ This feature does not seem to work in the computer labs. ∼ If you use this feature by some other means, your PRISM graph will appear onscreen, but
the graph will not print on the library plotter! Your poster will have a blank spot. • Save the graph if you decide to make changes. • To bring the graph to Power Point:
Return to PowerPoint. Click on Insert from the top command line. Select – Picture Select - From File Then click on the desired PRISM graph
• The background color of the graph will match the background color of the poster (no fill option).
• To change the background color of the graph. Right mouse click on the graph. Select – Format Picture Select the tab marked – Colors and Lines Select – Fill color and select desired color Click OK and you’re done.
Note: Older versions of Windows (e.g. Me), you can just copy the graph from PRISM and paste it into your Powerpoint slide. This no longer seems to be possible with Windows XP.

Rev. 2/08 13
Step #6: Using PowerPoint to Create Simple Bar/Line/Pie Charts • From the toolbar, Select Insert, then Chart. • PowerPoint provides you with a "mock" bar chart that appears with preexisting data listed in
an Excel spreadsheet. Take a few minutes to examine how the data has been organized. How has the row data been graphed? What does the column data represent? Chances are your graph will not be exactly like this one. So, you'll need to use this template to create your own graph. What will your x axis be (that’s the row data, 1st, 2nd, 3rd, 4th quarter in the mock bar chart)? What will your y axis be (that’s the column data, East, West and North in the mock bar chart)?
• Add or delete the necessary columns and rows and insert your own data into the spreadsheet. If you do not need 3 bars for each set of data on your graph, delete the excess rows. If you do not need 4 groupings of data, delete the excess columns.
• After your data have been entered, single click on the slide underneath the graph and spreadsheet windows. The graph should appear on your poster.
• To edit the graph, simply double click on the graph itself. The spreadsheet should come back. The spreadsheet must remain in view before you can edit the graph.
• To change bar colors, left click on the bars. Black, square handles will appear around the bar. Then, right mouse click. Select Format Data Series. Here, you can choose various patterns, shapes, etc. for your bars.
• Suppose you don't want a Bar Chart. Left click on the bars to select them then right click to select Chart Type. Pick the one that suits your needs.
• To change the axes on the graph, left click to select the axis to be edited. Then right click and select Format Axis. Edit the pattern, style, font, number and alignment of the axis.
• To move the legend (or to delete [clear] it), left click the legend, then right click. Format legend will allow you to edit the format, font and placement of the legend. Clear will remove the legend from the graph.
• To remove/edit the gridlines, left click to select them. Right click will allow you to format the gridlines or clear them from the slide entirely.
• Once you've finished with your graph, left click anywhere in the white space surrounding your slide (NOT on the spreadsheet). The spreadsheet will disappear.
• To add text to your graph, click on the Text Box icon (a white piece of paper with the letter A in the upper left corner). Move the t-shaped cursor to the place on your graph where you would like to add the text and left click. A blinking cursor appears in a hatched box. Type in the text you desire. To finish, click anywhere in the empty white space of your slide. You can edit the text style, color and size by left clicking the text and selecting the necessary editing icons or by selecting Format, Font from the top toolbar.
• You can easily rotate text (to make a Y-axis for example) by typing in the text (described above), then selecting the Free Rotate icon (a green arrow encircling a dot). Rotate the text 90o and move it by the usual clicking and dragging technique.
• Add arrows, circles, rectangles, etc. to your illustration using Power Point's auto shapes icons. Select an option from the tool bar. Then move the cross-hairs to the location on the slide where you would like to insert the shape(s). Click and drag the left mouse to create the desired shape. Once in place, the shape can be moved, resized, and recolored as needed.

Rev. 2/08 14
#7: Printing Full Color Posters in Schmidt Library, AV Services • The cost for printing the poster is $.30 per inch. However, because most of the posters will
be used for Student Scholarship Day, the Dean’s office will pay $5.00 per poster (only one poster per student). The Biology Department will be billed for the remaining cost.
• When your poster is complete, save it to a ZIP disk or thumb drive. Take to disk to Front Desk of the library printing assistance.
• Depending on the layout of your poster, printing can take up to several hours. So be prepared! Don’t put off printing until the last minute!
• After your poster has printed, be prepared to let the ink dry for at least 30 minutes. Don’t expect to cart your poster off right after it is cut from the printer roll.
Preparing your Senior Thesis poster and paper. You will notice that during Senior Thesis, we as faculty will place a great deal of emphasis on your poster presentations as compared to your written report. You too may allocate a substantial amount of your time to producing your poster. There are two reasons why this may be so. 1) The deadline of poster day comes before the deadline for your written paper. 2) Producing a poster is a new experience, and as such, your personal learning curve may require you to shift your priorities. After four years here at York College, we expect that your report writing skills are well developed. Since Introduction to Scientific Research, we have provided many opportunities for you to become familiar with the standard scientific format and hone your research and writing skills. Even the format of proposal writing is not entirely new. Because you are already experienced at writing a paper, we are not emphasizing this aspect. Now is the time to pull it all together and show us what you can do. The ball is in your court. Despite your current prowess in lucubrations, you may lose focus during the full court press at the end of the semester. So, here are some reminders:
1) Your paper is as equally important as your poster. 2) You should be allocating a percentage of your time each week to reviewing the
references you have already obtained and considering how and where they will fit into your paper.
3) You should also dedicate time each week to actually writing sections of your paper. Good papers are written. Excellent papers are re-written (many times).
4) Your paper is not a version of your poster in smaller font! Indeed, your paper should be the basis for your poster. One of your major challenges will be to condense all that you have written for your paper for presentation on your poster.
Rev. 2/08 15
Guidelines for the Written Thesis: Original Research
For students doing original thesis research, the written paper will follow the standard IMRAD format. In addition to Introduction, Methods, Results and Discussion, the written thesis will also have a title page and an abstract. The complete order of sections for the
written thesis will be title page, Abstract, Introduction, Methods, Results, Discussion, Literature Cited, tables, figure legends, and figures.
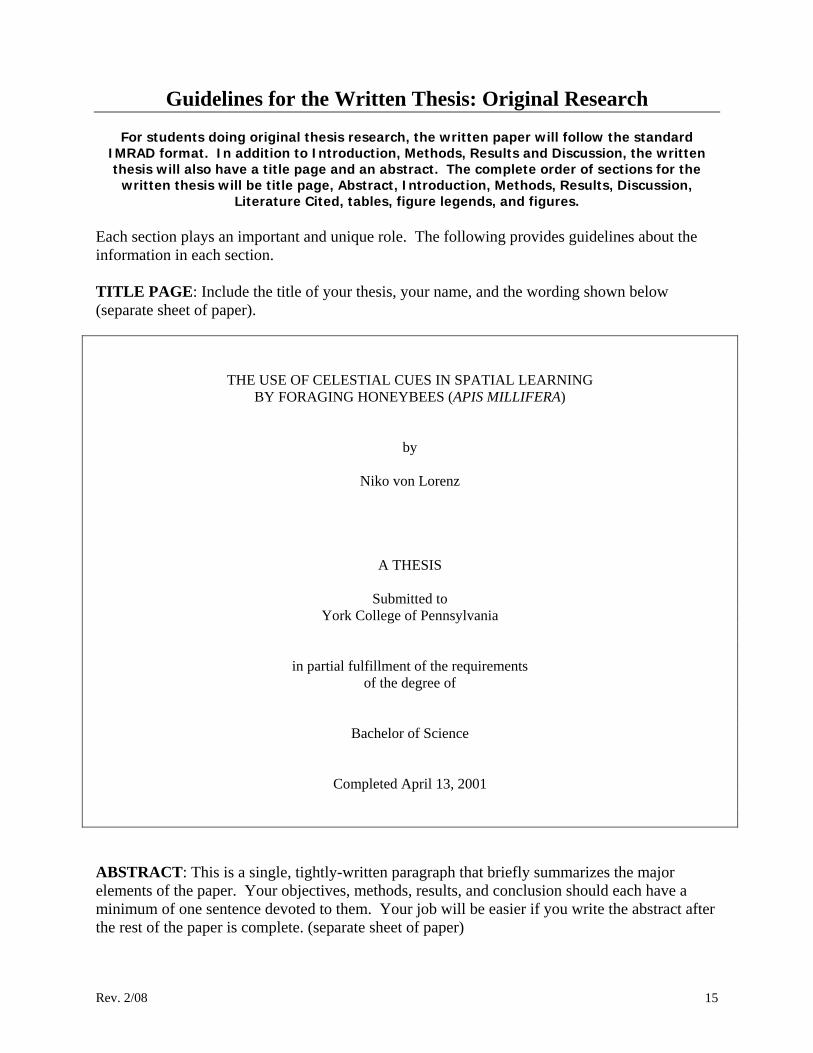
Each section plays an important and unique role. The following provides guidelines about the information in each section. TITLE PAGE: Include the title of your thesis, your name, and the wording shown below (separate sheet of paper).
THE USE OF CELESTIAL CUES IN SPATIAL LEARNING BY FORAGING HONEYBEES (APIS MILLIFERA)
by
Niko von Lorenz
A THESIS
Submitted to York College of Pennsylvania
in partial fulfillment of the requirements of the degree of
Bachelor of Science
Completed April 13, 2001
ABSTRACT: This is a single, tightly-written paragraph that briefly summarizes the major elements of the paper. Your objectives, methods, results, and conclusion should each have a minimum of one sentence devoted to them. Your job will be easier if you write the abstract after the rest of the paper is complete. (separate sheet of paper)

Rev. 2/08 16
INTRODUCTION: This section supplies background information and may also provide a theoretical basis and historical context for your work. To do this, it may be necessary to cite information that has been published in research articles and other literature. A good Introduction indicates why the work was undertaken and why it is interesting. Toward the end of this section you should explicitly state your hypotheses or objectives. METHODS (also called MATERIALS AND METHODS): In this section you will describe the procedures that enabled you to collect your data. A simple listing of “materials” is inappropriate. Ideally, you should include the details that would permit someone to repeat your work based on their reading of this section. Avoid insignificant details such as the name of the company that made your pipette or the days of the week in which you did your work. The predominant verb tense in this section is past tense. The METHODS section is often the most straightforward to write and is therefore a good place to begin. RESULTS: This is the core of the paper in which you present your findings, usually in the form of numerical data. Sometimes raw data may be presented, but it is more common and useful to provide data that have been condensed to some degree. If you are presenting calculated means, don't forget to include some measure of data variability (e.g. standard deviations). Tables may be needed to organize large groups of numbers. Figures (= graphs) can be particularly useful to display trends in data. It is not enough, however, to simply refer readers to tables and figures. Results must be verbally expressed in the Results section. All of your data are not equally important. Draw the reader's attention to particularly noteworthy data or the presence of meaningful trends. If possible, support this with statistical analyses, keeping in mind that statistical significance may conflict with your sense of biological significance. The text of the Results section should summarize the data, but stop short of interpreting their meaning or drawing major conclusions about their importance. DISCUSSION: Interpret your data and evaluate the meaning of your results. Was your hypothesis, as stated in the Introduction, supported by the data? Don't be afraid to report "negative" data (e.g., lack of relationships among variables). In some cases, negative outcomes are more interesting and important than positive and predictable findings. If your data seem anomalous or unreasonable, provide reasons that might help explain this. If possible, connect your findings with the results from published studies by using literature citations. Do your results contradict, reaffirm, or extend previously published findings? How do your results fit into the big picture? Resist the temptation to discuss every aspect of your data and do not provide every conceivable explanation for the obtained results. Speculation should be limited and clearly identified as your own speculation. The last paragraph of this section should be a strong statement of the take-home message. LITERATURE CITED: All citations that appear in the body of your paper must be listed in this section. We will use the author-year format to arrange the citations. List the papers in alphabetical order based on the first author's last name. Refer to your copy of Lab Report Format for YCP Biology Courses for the many details pertinent to citing literature and creating tables, figures, and figure legends.

Rev. 2/08 17
GUIDELINES FOR THE SENIOR THESIS PROPOSAL Your senior thesis proposal will contain a title and six main sections:
• Project Summary • Introduction • Review of Literature • Specific Objectives or Hypotheses • Research Design and Methods • Literature Cited
This handout is intended to provide some guidelines on the contents of these sections. As questions arise when you write your proposal, consult with your thesis mentor. TITLE Select a specific and informative title. Titles such as "An Ecological Study of the Forests in York County" or "Genetic Variation in Aspen" convey little about the study. More informative titles provide a sense of purpose and direction: "The Impact of Nitrogen and Water Availability on Shrub Diversity in a Mesic Forest", or "Genetic Variation in Defense Chemistry of Aspen Foliage and its effect on Forest Tent Caterpillar." Some granting agencies use poster sessions as a forum for attracting matching funds from corporations. The title for your poster is your best advertisement. An informative, catchy title will likely get your prospective reader to proceed to the next section of your poster. SECTION 1 OF PROPOSAL: PROJECT SUMMARY The project summary is a one paragraph (150 words or less) summary of the proposed research. It is not an abstract of the proposal, but is a self-contained description of the activity that would result should the proposal be funded. It usually includes several background sentences that preface a statement of objectives, general methods to be employed and the significance of the proposed activity to the advancement of knowledge. The project summary does not delve into the rationale of why the study should be done (e.g. a study of this type has never been conducted), but rather indicates the perceived value or potential commercial application of the project results. SECTION 2 OF PROPOSAL: INTRODUCTION (also known as executive summary) The first section of the proposal will be the INTRODUCTION. We recommend writing the last sentence (or two) of the INTRODUCTION first. This sentence will provide an indication of the general topic or question that your proposed study will address. The rest of the section will introduce the topic in general terms only, leaving the detailed literature review and the discussion of research design and methods for the sections that follow. It is important that you express why your proposed research topic is interesting and why it merits a research effort. If you do that well, your reader may be compelled to agree with you. At the very least, the reader will appreciate that the proposed research question can be clearly associated with a general but legitimate research area in biology. The INTRODUCTION will be short, probably two or three paragraphs.

Rev. 2/08 18
SECTION 3 OF PROPOSAL: REVIEW OF LITERATURE A successful REVIEW OF LITERATURE section creates a context for the proposed research. The context is created by positioning the proposed research into the “big picture” that has emerged from past research. To do this, you must discuss the salient points of the primary research articles that you consider interesting and relevant to your thesis topic. You might approach this by citing articles that describe what is known about a particular system and point out that there are gaps in the current knowledge of that system. Remember that these articles do not necessarily have to describe research that is similar or identical to your proposed research. A seemingly unrelated article may be quite useful if it makes an observation or cites a method that has relevance to your plans. This includes using articles that examine species, cells, proteins or genes that are different from yours, but share a similar experimental approach as your own. Be advised – conducting a standard experiment or using a previous method on an organism, cell, protein or gene just because ‘it’ has not been tested before is not a compelling motive for conducting research or for persuading funding agencies. The REVIEW OF LITERATURE should convey a sense of the current state of understanding. To do that, the reader has to be brought up to date on the data and viewpoints that are regarded by practitioners in the field as ‘state of the art’. Some thesis topics will have a very large literature to review. Other topics may have attracted only a small number of researchers in the past and the number of relevant publications will be small. Proposals in rapidly evolving disciplines such as immunology and molecular genetics would focus on relatively recent publications. In other areas such as ecology and animal behavior, older ‘classical’ literature may be necessary to cite and discuss. The REVIEW OF LITERATURE should also indicate the limits of current understanding. Do current scientists agree that there are key questions that must be addressed? Are there controversies in the literature that can benefit from well-designed new studies? Where are the gaps in our knowledge? Which important gap(s) will your proposed research address? Convey how your project, if completed, can complement and extend existing knowledge. Clearly, the effectiveness of this section is proportional to the exhaustiveness of the literature review and your demonstrated understanding of difficult papers. You want to start by introducing the topic broadly, gradually narrowing the scope of your review down to the key piece of research that must be conducted to complete the picture. Ideally, the reader will be compelled to agree that the proposed study is the logical next step in the field. End this section with a short paragraph stating your intentions for the proposal. What is your proposal topic and what is the basic goal in doing the proposed research? This statement should be more specific and concrete than the topic statement in the last sentence of the INTRODUCTION. Results from PRELIMINARY STUDIES are generally presented before objectives and methods. Preliminary studies may contribute to the state of knowledge leading to the hypotheses and often indicate that the proposed experiments are indeed technically feasible. The description of preliminary work is short on methods and long on relevant results. SECTION 4 OF PROPOSAL: SPECIFIC OBJECTIVES OR HYPOTHESES In this short section, in list form, state your specific research objectives or your specific research hypotheses. Decide, in consultation with your research mentor, if objectives or hypotheses are

Rev. 2/08 19
more appropriate for your topic. Limit yourself to a small number of highly explicit objectives or hypotheses. SECTION 5 OF PROPOSAL: RESEARCH DESIGN AND METHODS You now have the opportunity to discuss what you want to do. The goal of this section is to make a convincing link between your stated objectives or hypotheses and your plan of action. A reasonable place to start might involve your ideas about a pilot study. Pilot studies, if done, should be simple and should answer questions about the feasibility of specific and potentially troublesome steps in the research. Be advised, however, that pilot studies alone will not suffice as a legitimate research proposal. Your research design may well involve a variation on a design seen during your literature review. Similarly, your methods will probably be very similar to those encountered during your reading. 'The Devil is in the Details' - nowhere in your proposal is this statement more important. This is your opportunity to specifically explain how you will conduct the research; where will you obtain your research organisms, how many will you test, what type of experiments/sampling will you conduct, how will the data be collected/recorded and how will that data be analyzed? Information about equipment, reagents, species, experimental controls, and basic statistics are all appropriate in this section. Other pertinent information in this section: What kind of data will you be collecting? Can you do this research by yourself or will it require collaboration? Will the research be done on campus or elsewhere? Are there seasonal constraints (e.g. reproductive behavior occurring only in April)? Even the most brilliant of research questions will not be funded if you cannot provide a practical and scientifically sound methodology that demonstrates that you can indeed obtain an answer. As you describe your methods, you should point out which hypotheses/objectives each experiment addresses. It is here that you state the expected outcome of your experiment or the conditions under which you may accept or reject or hypothesis. The purpose of this exercise is to demonstrate that you have a substantial grasp of how your particular system works. Predictions based upon your depth of knowledge are more likely to get your proposal funded than a stab in the dark (sometimes known as a fishing expedition because you never know what you might get). SECTION 6 OF PROPOSAL: LITERATURE CITED This section lists the full citations of the articles cited in the proposal. The style of citing literature in the text and in the LITERATURE CITED section should follow that described in the handout entitled Lab Report Format for YCP Biology Courses. ______________________________________________________________________ The following books contain short but useful descriptions of proposal writing in addition to some genuine examples of undergraduate research proposals. These books are currently on reserve in Schmidt Library. Davis, M. 1997. Scientific papers and presentations. Academic Press, San Diego, CA. (see p. 44) McMillan, V.E. 1997. Writing papers in the biological sciences. 2nd ed. Bedford Books, Boston. (see p.
167) Pechenik, J.A. 1993. A short guide to writing about biology. 2nd ed. HarperCollins, New York. (see p.
135)
Rev. 2/08 20
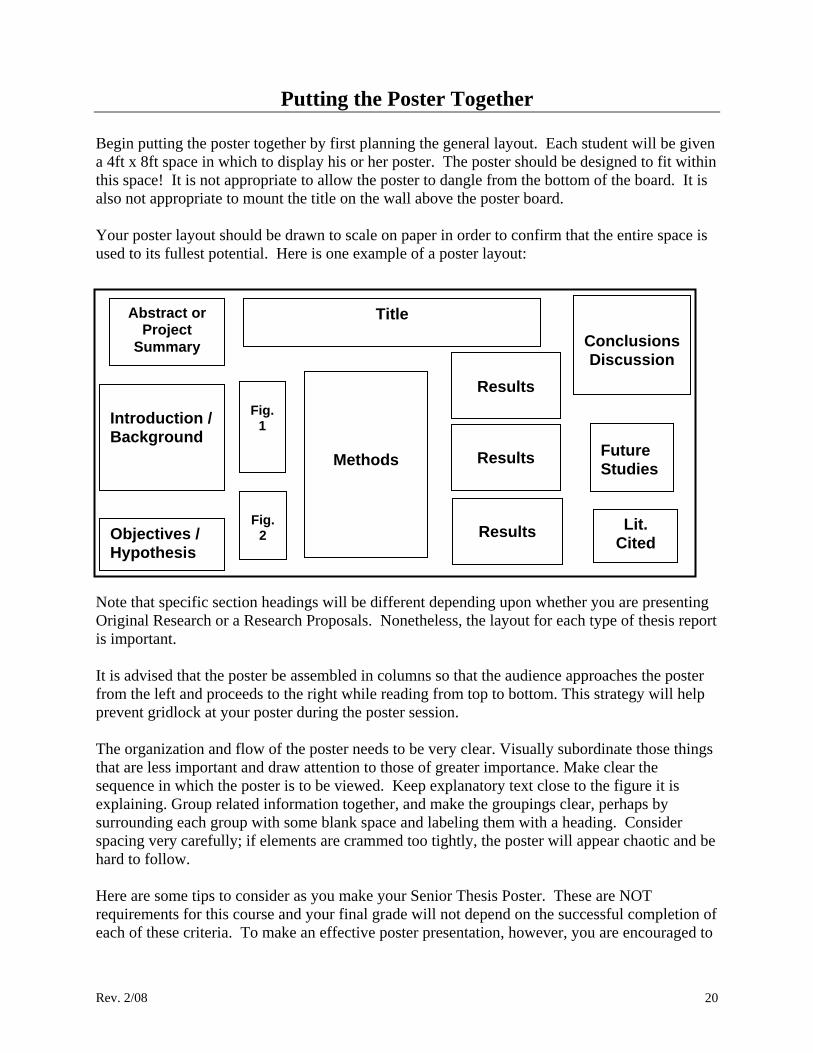
Putting the Poster Together Begin putting the poster together by first planning the general layout. Each student will be given a 4ft x 8ft space in which to display his or her poster. The poster should be designed to fit within this space! It is not appropriate to allow the poster to dangle from the bottom of the board. It is also not appropriate to mount the title on the wall above the poster board. Your poster layout should be drawn to scale on paper in order to confirm that the entire space is used to its fullest potential. Here is one example of a poster layout: Note that specific section headings will be different depending upon whether you are presenting Original Research or a Research Proposals. Nonetheless, the layout for each type of thesis report is important. It is advised that the poster be assembled in columns so that the audience approaches the poster from the left and proceeds to the right while reading from top to bottom. This strategy will help prevent gridlock at your poster during the poster session. The organization and flow of the poster needs to be very clear. Visually subordinate those things that are less important and draw attention to those of greater importance. Make clear the sequence in which the poster is to be viewed. Keep explanatory text close to the figure it is explaining. Group related information together, and make the groupings clear, perhaps by surrounding each group with some blank space and labeling them with a heading. Consider spacing very carefully; if elements are crammed too tightly, the poster will appear chaotic and be hard to follow. Here are some tips to consider as you make your Senior Thesis Poster. These are NOT requirements for this course and your final grade will not depend on the successful completion of each of these criteria. To make an effective poster presentation, however, you are encouraged to
Title Abstract or Project
Summary
Introduction / Background
Objectives / Hypothesis
Fig.
1
Fig.
2
Methods
Results
Results
Results
ConclusionsDiscussion
Future Studies
Lit. Cited

Rev. 2/08 21
consider the following helpful suggestions and try to incorporate them as you create your poster. If you have specific concerns or questions about your poster, PLEASE CONSULT YOUR FACULTY MENTOR!!!!! 1. Design your poster for 3 audiences:
• your rabid competitors (more applicable to graduate students & post-docs) • workers in your general area (don't insult their intelligence!) • workers outside your general area (don't lose your audience in jargon; teach them!)
2. Poster layout should be in column format (vertical arrangement).
This will avoid viewer "gridlock" at your poster that often happens if items are arranged in rows (horizontally).
3. Indicate the sequence in which the posted items should be viewed/read.
Use numbers (1, 2, 3...) or letters (A, B, C...) on each placard. 4. Use "Visual Grammar". Graphics should dominate the poster.
Use large figures, graphs, etc. that are easily viewed from a 4-6 ft. distance. Colors should be used consistently (for example, control data might be represented in blue on every graph, treatment #1 in red, treatment #2 in green, etc.).
5. Identify essential information in large and/or colored and/or bold type.
State the "take-home-messages" in large section headings and be explicit. 6. Emphasize important material visually (graphics, cartoons, figures, etc.) 7. Avoid visual distraction. Organize visual information in a logical manner.
Each panel should be similar in size and shape. Group elements that are related. Avoid "jagged" edges that distract the reader.
8. Make the text readable.
Text should be simple, direct, and large enough to read from a distance of 4-6 feet. Text should be single-spaced. Avoid long lines of text. Text should be left justified only and upper+lower case text should be used.
9. Distinguish between the actual statement of the Data, the Summary of the
Data (restatement of the data) and the Conclusions (interpretation of the data). 10. Keep it simple. Edit ruthlessly. Ask many people to read it.
Short, simple messages are more memorable. Simplify verbiage and reduce sentence complexity.
11. Use the graphics when you present your poster to an observer.
Don't read the text to them. Use the visual aids that you've incorporated.

Rev. 2/08 22
Poster Templates
Once you have a general idea of the poster layout, then it is time to prepare templates for each section. A template is a properly-formatted representation of the text that will appear in each section of the poster. In addition, templates for figures and tables should also be prepared. Template versions of colored text & figures can be printed in low resolution, black & white format. Generally speaking, the poster templates are a means for you to ascertain whether or not the text that you plan to display on our poster fits the layout design. In addition, the templates serve as a means for you, your research mentor, and your peers to carefully proofread your work and make constructive suggestions for improvement or clarification. Therefore, it is imperitive that the templates represent the most complete perspective of your poster. Missing sections make it very difficult to review the poster. The key to making poster templates is to get them as close to the final product as possible. If it’s a text section, all of the pertinent information should be contained in the template. If it’s a graph, figure, or table, all the desired data should be fully represented and the illustration should show all of the information that is planned for the final poster presentation. In addition, each student should submit a title for his or her project as part of the template design. Low resolution, black & white copies will suffice for printed copies of poster templates. On the following page is an example of a printed poster template containing both text and figures. Submission of your poster templates on the assigned date will contribute 7% toward your final grade in the course.

Rev. 2/08 23
Example of a Poster Template
(Can be printed from PowerPoint on 8.5 x 11 paper)
Decrease in Pharmaceutical Costs Following Roux-en-Y Gastric Bypass in Patients with Clinically Severe Obesity
Nancy Nagib
Department of Biological Sciences, York College of Pennsylvania
ABSTRACT
Clinically Severe Obesity (CSO) is
surgically treated disease. The Roux-en-Y
Gastric Bypass (RYGB) has been used to treat
patients with CSO and has resulted in an
improvement in patient comorbidities [2]. The
reduction in mediction-dependent comorbidities
allows us to expect a decrease in medication
expenditure at least 6-months postoperative to
the surgery. Our 26 patients with a mean BMI of
56.8 kg/m2 (Figure 1a), experienced a reduction
in weight, medication-dependent comborbidities,
and a 40% reduction in pharmaceutical costs
postoperatively. The reduction in medication
costs is due to the improvement of comorbidities
following weight loss due to RYGB.
INTRODUCTION
Clinically Severe Obesity (CSO), defined as
being 100 lbs. over ideal weight, causes
increased mortality and comorbidities. This
disease affects the health of 4 million Americans
with the medical care costs consuming 5.5% of
U.S. health care dollars [2, 3]. Attempts to lose
weight by nonsurgical procedures have been
unsuccessful for many patients with CSO. In
comparison with medical treatment, surgical
therapy for CSO has been shown to be
significantly more effective not only at producing
and maintaining weight loss, but also at
improving comorbidities [1, 2]. Comorbidities
include hypertension, diabetes, obstructive sleep
apnea, arthritis, psychosocial impairment, certain
cancers, hyperlipidemia, asthma, and
hypertrophic cardiomyopathy [2]. Patients with
CSO are frequently found consuming a number
of medications to treat their comorbidities.
Postoperative to RYGB, patients have
experience a reduction in weight and a reduction
in medication-dependent comorbidities. This
study, which represents the first 26 consecutive
surgeries performed by the operative surgeon on
patients who had been followed postoperatively
for at least 6 months, demonstrates the
decreased expenditure on medications
postoperative to RYGB.
RESULTS
Mean postoperative BMI (mean follow-up time of 20 months) was reduced to 38.05 kg/m2
(22.1 – 58.05 kg/m2) (Figure 1b)
63% of the cases had a preoperative medication cost greater than the postoperative medication cost (Figure 2)
17% of the cases had a postoperative medication cost greater than the preoperative medication cost (Figure 2)
19% of the cases had equal pre- and postoperative medication costs (Figure 2)
On average, our patients experienced a 40% reduction in medication expenditure postoperatively
There was a significant reduction postoperatively in pharmaceutical expenditures pertaining to asthma, DM, & HTN (Figure 3)
Average total cost of medications preoperatively per patient was $299.13 per month (Figure 4)
Average total cost of medications postoperatively per patient was $188.68 per month (Figure 5)
Collectively, the 26 patients consumed $7,778 worth of obesity-related medications preoperatively on a monthly basis
Collectively, the 26 patients consumed $4, 905 worth of obesity-related medications postoperatively on a monthly basis
CONCLUSION
The data suggests the RYGB not only results in weight loss and improvement of medication-dependent comorbidities, but also in reduction of pharmaceutical costs.
WORKS CITED
1. Martin LF, Tjiauw-King T, Horn J EO, Kauffman GL, Baker DA, Hunter SMD. Comparison of Costs Associated with Medical and surgical Treatment of Obesity. Surgery 1995; 118: 599-606.
2. Benotti PN, Forse RA. The Role of Gastric Surgery in the Multidisciplinary Management of Severe Obesity. The American Journal of Surgery 1995; 169: 361-367.
3. Martin LF, White S, Lindstrom W. Cost-benefit Analysis for the Treatment of Severe Obesity. World Journal of Surgery 1998; 22: 1008-1017.
Acknowledgements:
Deborah Ricker, PhD, YCP Research Mentor
Michael Baumholtz, MD
Kristi Peters, MS
Rose Stike, MEd
John S. Monk, Jr., MD, FACS
METHODS
19 females 7 males (age 26 to 61)
BMI> 40 kg/m2: Diagnosed with CSO
underwent RYGB
Data Collection:
Pre- and Postoperative BMI
Pre- and Postoperative Medications
Min. Postop. time = 6 mos (mean: 20.5 mos)
Patient Medication Cost (York Apothecary)
Analysis: Wilcoxon Signed Ranks Test
Pre- and postoperative medication costs
Preop BMI Distribution
23%
49%
8%
12%
8% 20-30 kg/m2
30-40 kg/m2
40-50 kg/m2
50-60 kg/m2
60-70 kg/m2
70-80 kg/m2
>80 kg/m2
Postop BMI Distribution
20%
36%
36%
8%
64%17%
19%
preop > postoppostop > preoppreop = postop
Figure 1b. Postoperative BMI distribution of the 26 patients, based on a mean follow-up time of 20 mos. (note: weight does not plateau until 24 mos. after RYGB).
Table 1. % Patients w ith medication-dependent comorbidities pre- and postoperatively. Comorbidity Preoperative Postoperative Apnea 12% 0% Asthma 35% 8% Depression 54% 38% Diabetes 27% 8% Hypertension 50% 23%
$0$50
$100
$150$200
$250
$300
pre
op
po
sto
p
$0
$2,000
$4,000
$6,000
$8,000
pre
op
po
stop
Figure 1a. Figure 1b.
Figure 3.
Figure 3. Total expenditure for medications related to asthma, DM, and HTN, were significantly (p< 0.05) reduced postoperatively.
Figure 4.
Figure 4. Average cost of medications per patient on a monthly basis pre- and postoperatively. (Preop SEM = 61.56; postop SEM = 44.79).
Figure 5.
Figure 5. Total pharmaceutical expenditure for the 26 patients pre- and postoperatively.
$0
$250
$500
$750
$1,000
$1,250
Ap
ne
a
* A
sth
ma
De
pre
ssio
n
* D
M
* H
TN
preoperativepostoperative
Figure 3.
Figure 1a. Preoperative BMI distribution of the26 patients, based on BMI at time of hospitalization for RYGB..
Figure 3. Cost comoparision for collective cases of patients and medications. Analysis byWilcoxon Signed Ranks Test shows significant p value of 0.002.

Rev. 2/08 24
Abstract/Project Summary Format In a previous Senior Thesis class, you learned about Abstracts (for original research) and Project Summaries (for research proposals). Briefly, an Abstract is a single, tightly-written paragraph that briefly summarizes the major elements of the original research. A minimum of one sentence each should be devoted to your objectives, methods, results, and conclusion. Your job will be easier if you write the abstract after the rest of the report is complete. In contrast, a Project Summary of a research proposal contains a summary of the proposed activity. It should be a self-contained description of the activity that would result if the proposal were funded. The summary should be written in the third person and include a statement of objectives, methods to be employed and the potential impact of the project on advancing knowledge in the chosen field. It should be informative to other persons working in the same or related fields and, insofar as possible, understandable to a scientifically or technically literate lay reader. Both the Abstract and the Project summary should be suitable for publication and should NOT be more than one page in length (<150 words).
Full Title of the Senior Thesis Project (all caps, bold, Times New Roman font, 14 pt., centered)
Your Name Only
York College of Pennsylvania, Department of Biological Sciences (Times New Roman font, bold, 12 pt., centered)
<<< Text of the Abstract or Project Summary. Times New Roman font, 12 pt., single spaced, <150 words, all scientific names properly written. >
An example of a past Senior Thesis abstract and project summary can be found on the following pages.
Note: For Spring semester Senior Thesis, you will be required to submit your abstract on-line for Scholarship Day. Like many professional meetings, an Abstract/Project Summary booklet is prepared prior to the poster sessions. This booklet will serve as a guide for spectators who wish to learn more about your work. Having the abstract/project summary ahead of time will allow them to read about your work prior to approaching you at the poster session. In addition, the booklet will serve as an important piece of reference material long after the poster sessions are over.

Rev. 2/08 25
SAMPLE --- SAMPLE --- SAMPLE
Abstract from original research project
EVALUATION OF SELECTED ANNUAL FLOWERING PLANTS
Michael Lowe Department of Biological Sciences, York College of Pennsylvania
One hundred species of flowering plants were germinated, planted, grown and evaluated
in this plant trial. The first objective was to determine the horticultural value of the plants selected. The second was to determine how previous All America and Fleur select award winners or new offers performed in the plant trial. The third was to encourage the gardening public to use a wider variety of flowering plants. Evaluations of these plants encompassed a 12-week period from July 21 to October 13, 1999. Six evaluation categories, with a scoring system of one through 5, were used to determine the winners. The categories were Vigor, Resistance to Disease and Pests, Foliage, Uniformity of Size, Flower (appearance), and Uniformity of Bloom. Novelty was used as an additional bonus category with a 1 or 2-point value. The top 20 performers achieved a season average of 3.99 or higher. The top performer was a Gopher globe "Buddy". Although the top 20 plants were exceptional performers and many were previous award winners, only four are readily available to the public through commercial garden centers. Opening these trials to the public encourages the use of a wider variety of exceptional plants.

Rev. 2/08 26
SAMPLE --- SAMPLE --- SAMPLE
Project Summary from research proposal
EFFECTS OF PHYSICAL EXERCISE AND VITAMIN C ON ABSORPTION OF FERRIC SODIUM CITRATE IN PRE-MENOPAUSAL,
NON-ANEMIC WOMEN
Carrie Huff Department of Biological Sciences, York College of Pennsylvania
Virtually no information exists concerning the combined effects of exercise and
vitamin C on the absorption of iron in men. Even less in known about these effects in women. This proposal intends to study the effects of vitamin C and exercise on iron absorption in women. To examine this, each subject will ingest one of four solutions containing ferric sodium citrate and/or vitamin C and then perform either restful activity or an hour of moderate exercise on a treadmill. Blood samples will be taken throughout the experiment to measure serum iron, ferritin, and transferrin levels. Results will then be studied to determine if the use of vitamin C has a significant influence on the absorption of iron. Also, the role moderate exercise has on iron absorption can be observed. If vitamin C increases iron absorption, the supplementing vitamin C with iron may be a more time/cost effective treatment of iron deficiency anemia. The use of exercise to further hasten recovery could also help bring the body to a healthier, non-anemic state in less time that it would take otherwise.

Rev. 2/08 27
Senior Thesis Poster Session & Student Scholarship Day
On the day of reckoning, the dreaded Senior Thesis Poster Session and/or Student Scholarship Day, you will be expected to proudly stand in front of your poster while a barrage of faculty and students parade by you. During the session, various people will approach you to inquire about your research or proposal. They may ask specific questions or they may request that you give them a brief presentation of your work. In either case, the hard work that was devoted to putting together a vivid, concise poster will pay off. Here are some tips for giving an effective poster presentation: • Rehearse an 8-10 minute summary of your poster.
Practice referring to specific graphs and figures to make important points. Some viewers may ask you to identify the key ideas you are trying to convey, so it is helpful to think about what to say as a brief introductory overview of the poster to open the discussion.
• The poster is primarily a visual display.
Show rather than tell the story. Tables and figures should hold the main content of a successful poster and you should refer to them frequently during your presentation. Graphics must dominate, and text should augment rather than overwhelm the illustrations.
• Do not use extensive text; do not assume your audience will read
everything. Edit ruthlessly to remove unnecessary text. It may help to have someone else help edit, since they are less attached emotionally to your words.
• Concisely state the main conclusions.
Leave the reader no doubts about the take-home message of your work. Posters are on display for several hours, and therefore they allow time for lengthy discussion with colleagues. Be prepared to openly answer questions and discuss ideas with the poster viewers.

Rev. 2/08 28
Senior Thesis Poster Evaluation
Student Name:_______________________________________
Evaluator Name:_______________________________________
Final Poster Score = ________________% HOW DID THE POSTER LOOK?
• Cookie-cutter appearance… or signs of creativity and innovation? • Attention-grabbing qualities…did anything about it “pull” you in? • Amount of text… too much reading, too little… or just enough? • PowerPoint esthetics…. Tastefully done? • Is it readable, legible, well organized and succinct?
HOW WAS THE POSTER PRESENTED?
• Oral presentation concise and coherent and rehearsed? • How were questions handled? • Did the presenter demonstrate a command of both the theoretical and empirical areas of
the subject?
SCIENTIFIC MERIT
• Were hypotheses or objectives or questions explicitly stated? • Were methods adequately described? • Do the methods adequately address the hypothesis/objective? • Were statistical analyses appropriate? • Is there evidence of independent synthesis of ideas or data? • Did conclusions (either real or anticipated) seem reasonable and logical?

Rev. 2/08 29
Major Field Test
Each Senior Thesis student will be required to take a Major Field Test in Biology
prior to the end of the course. This standardized test is designed and graded by the Educational Testing Service (ETS). The Test results are used by the Department and the Administration to evaluate student knowledge in a particular area (for us, Biology). The Test consists of two sections, each with approximately 75 questions. Generally speaking, it takes approximately 2-3 hours to complete the exam. The Biology faculty will administer the exam during one of the Senior Thesis meeting times. Because the test will take more than 1 hour to complete, you will be expected to stay for the duration of the test. The date of the test will be announced each semester.
Questions on the test cover topics such as genetics, cell division, cell respiration,
evolution, general chemistry & physics, and general physiology. All questions are multiple choice.
Students should realize that their final score on the Major Field Test will not be
considered in the grade for Senior Thesis. However, should a student fail to take the Test, their Senior Thesis grade will be reduced and final grade reports will not be released by the College until the exam is completed.


