25
Setting up C Programming Environment
Setting up C Programming Environment
Before you start..
Please note that this is “NOT” a required part of the course and is not a homework.
This manual is written for someone who has never programmed / never used Linux before.
If you have background knowledge, you can ignore this.
If you have any questions, please email Yoonji Shin [email protected]
Don’t be scared, programming is fun! Enjoy :)
!
!
!
!
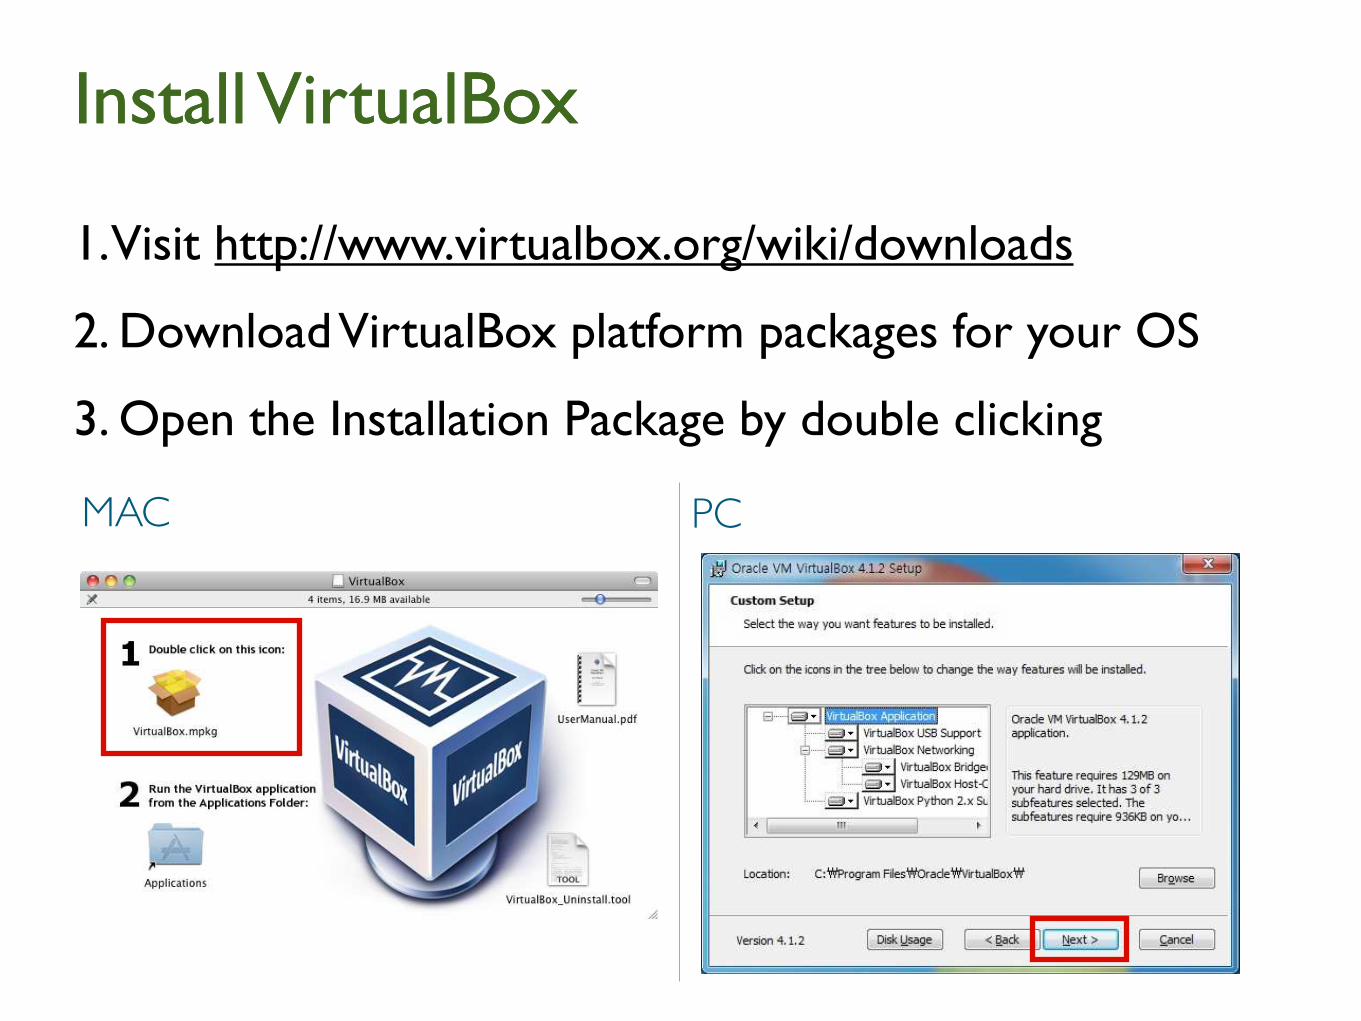
1. Visit http://www.virtualbox.org/wiki/downloads
2. Download VirtualBox platform packages for your OS
3. Open the Installation Package by double clicking
Install VirtualBox
MAC PC
Install VirtualBox

Install VirtualBox
MAC PC
4. Click continue and finish installing VirtualBox
5. When finished installation, close the window.
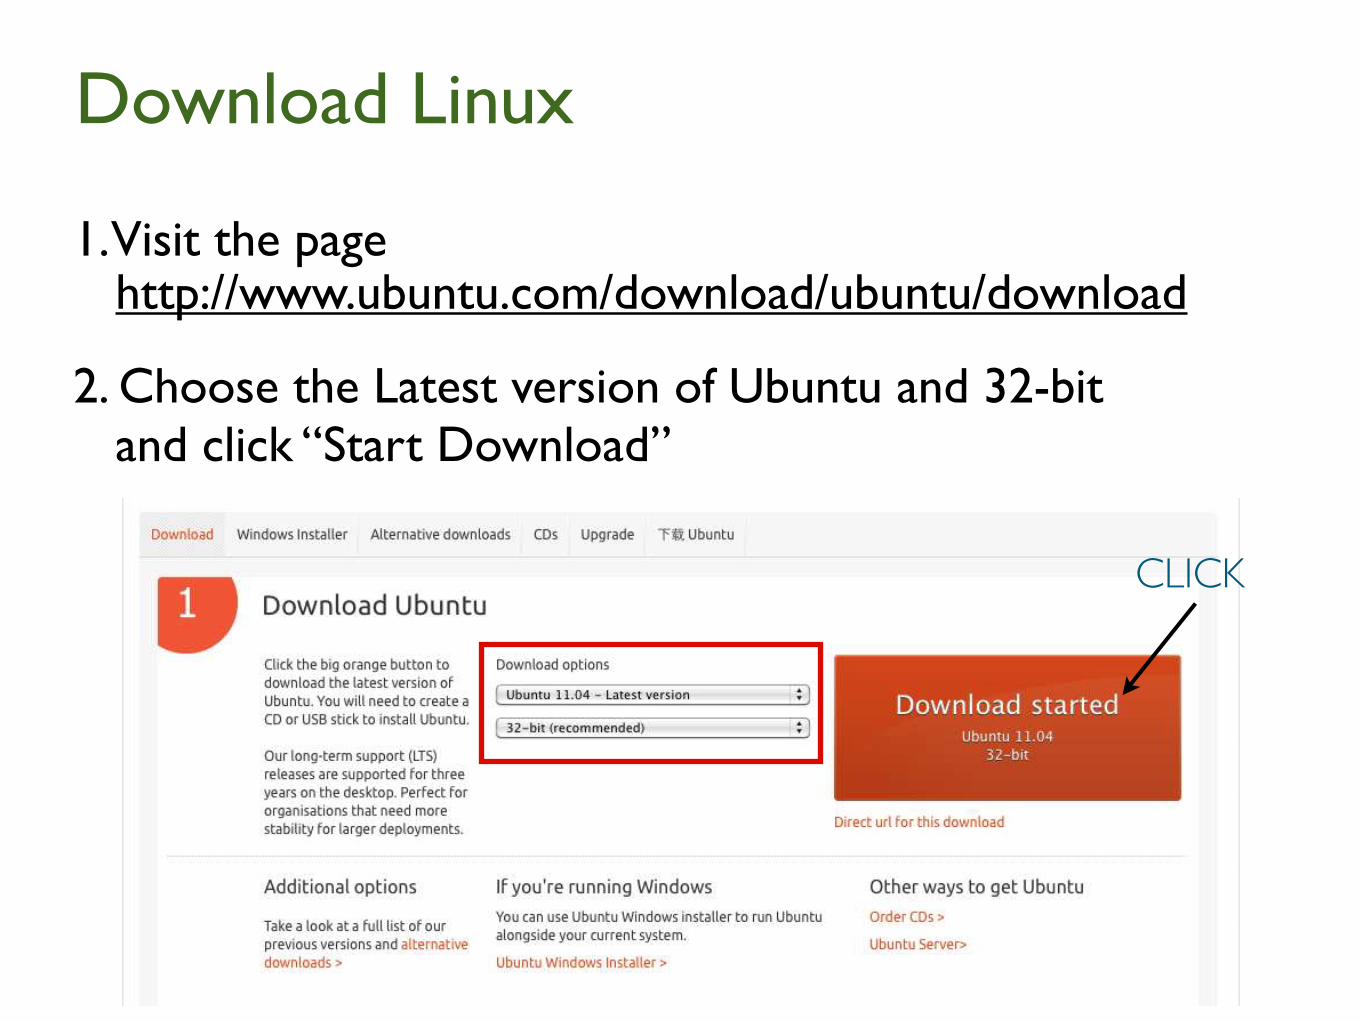
Download Linux
1. Visit the page http://www.ubuntu.com/download/ubuntu/download
2. Choose the Latest version of Ubuntu and 32-bit and click “Start Download”
CLICK

Install Linux using Virtual Box
1. Run VirtualBox by double-clicking the icon
2. Click “New” button on the top left corner
MAC PC
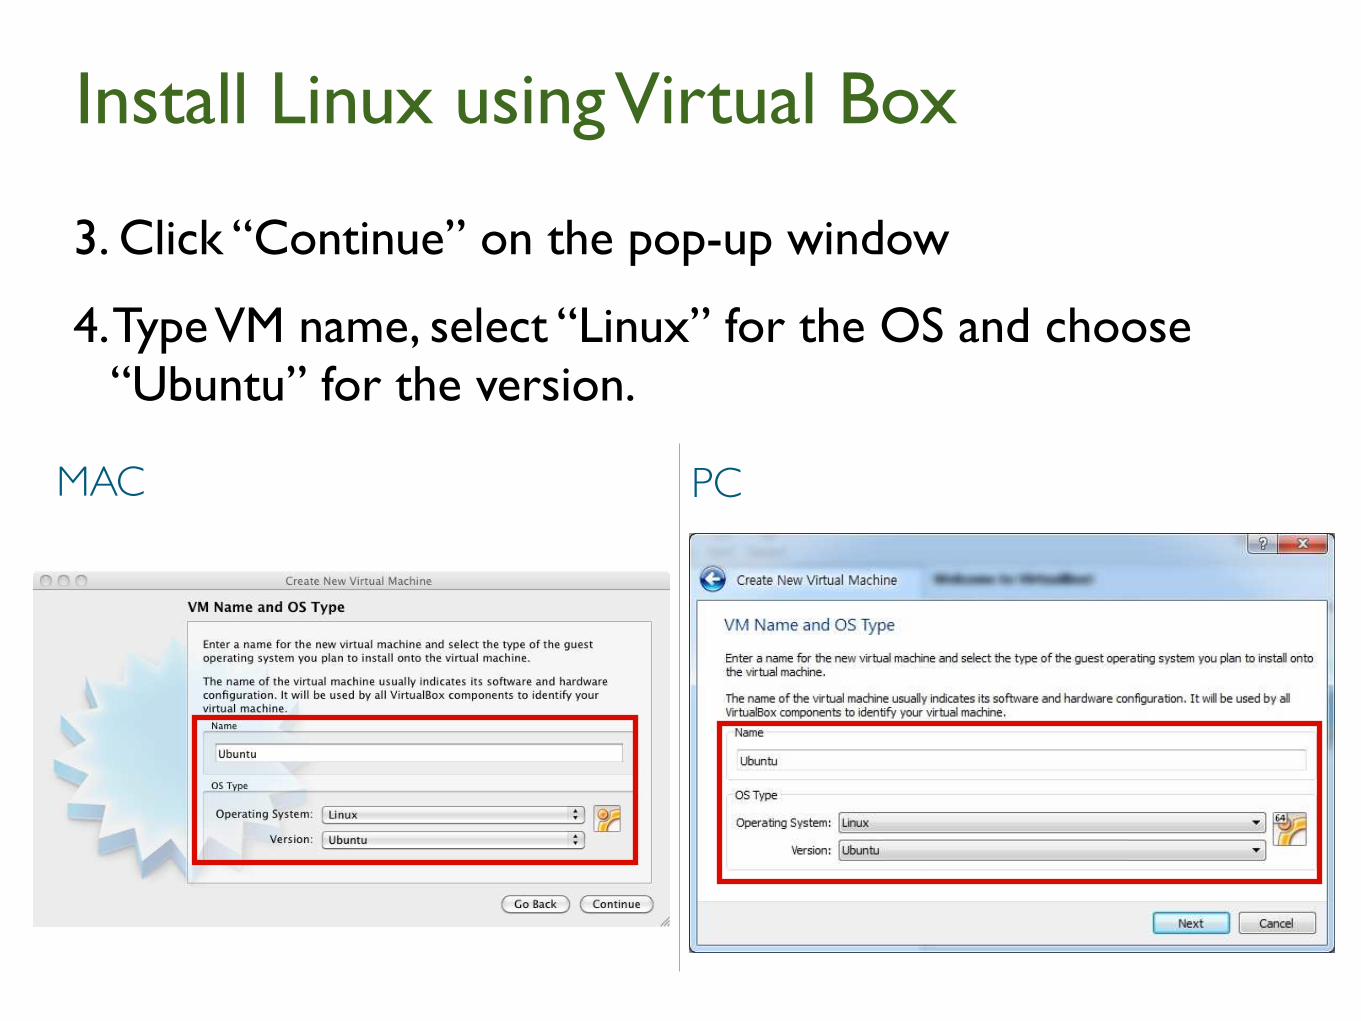
3. Click “Continue” on the pop-up window
4. Type VM name, select “Linux” for the OS and choose “Ubuntu” for the version.
PCMAC
Install Linux using Virtual Box
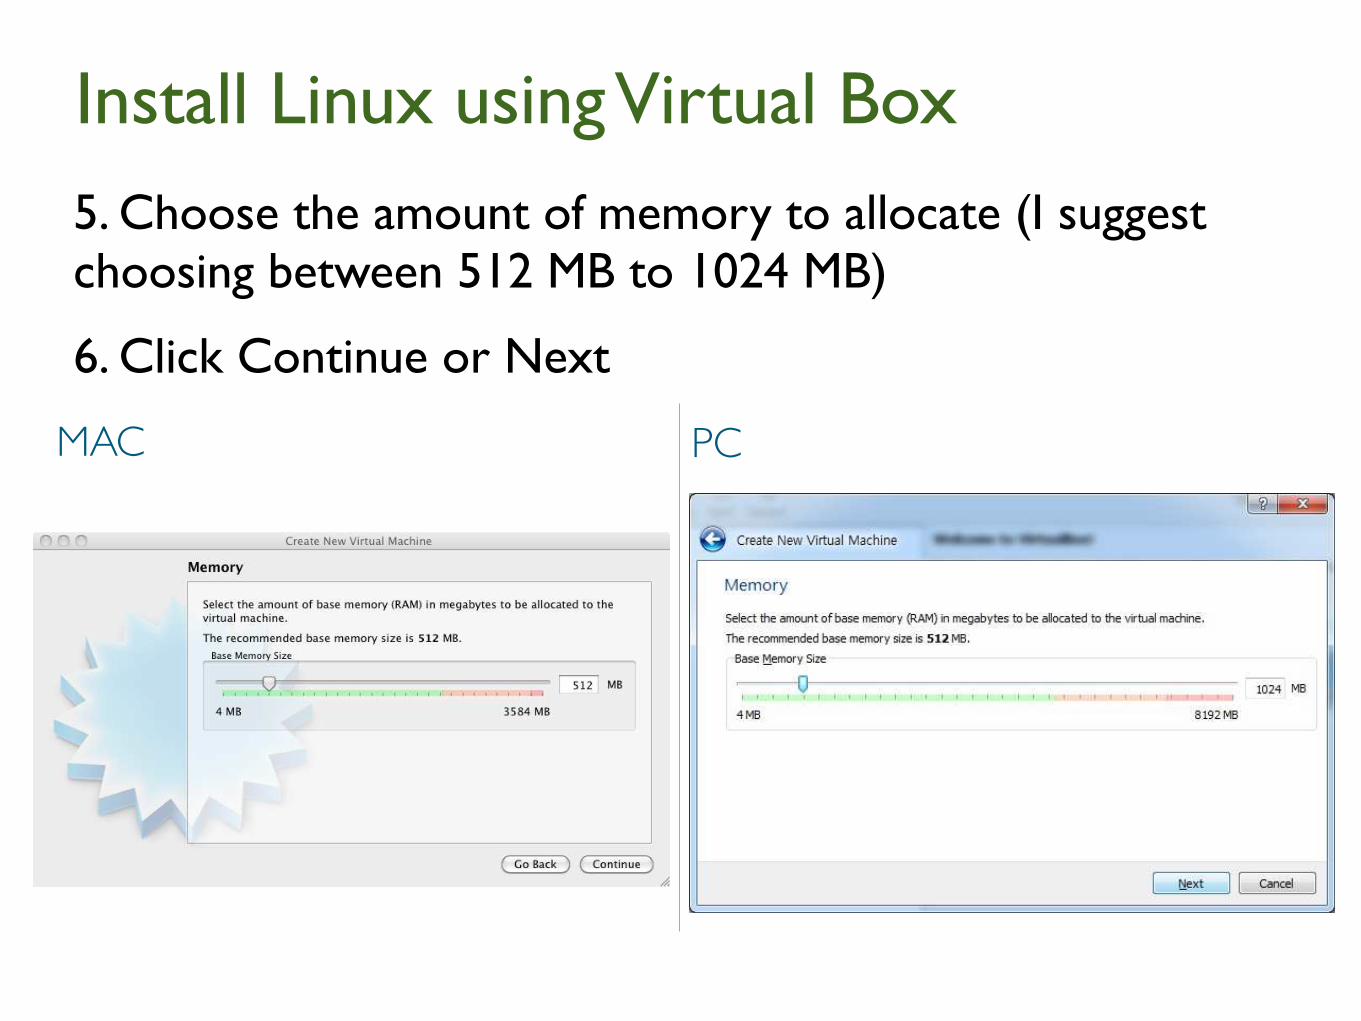
5. Choose the amount of memory to allocate (I suggest choosing between 512 MB to 1024 MB)
6. Click Continue or Next
PCMAC
Install Linux using Virtual Box
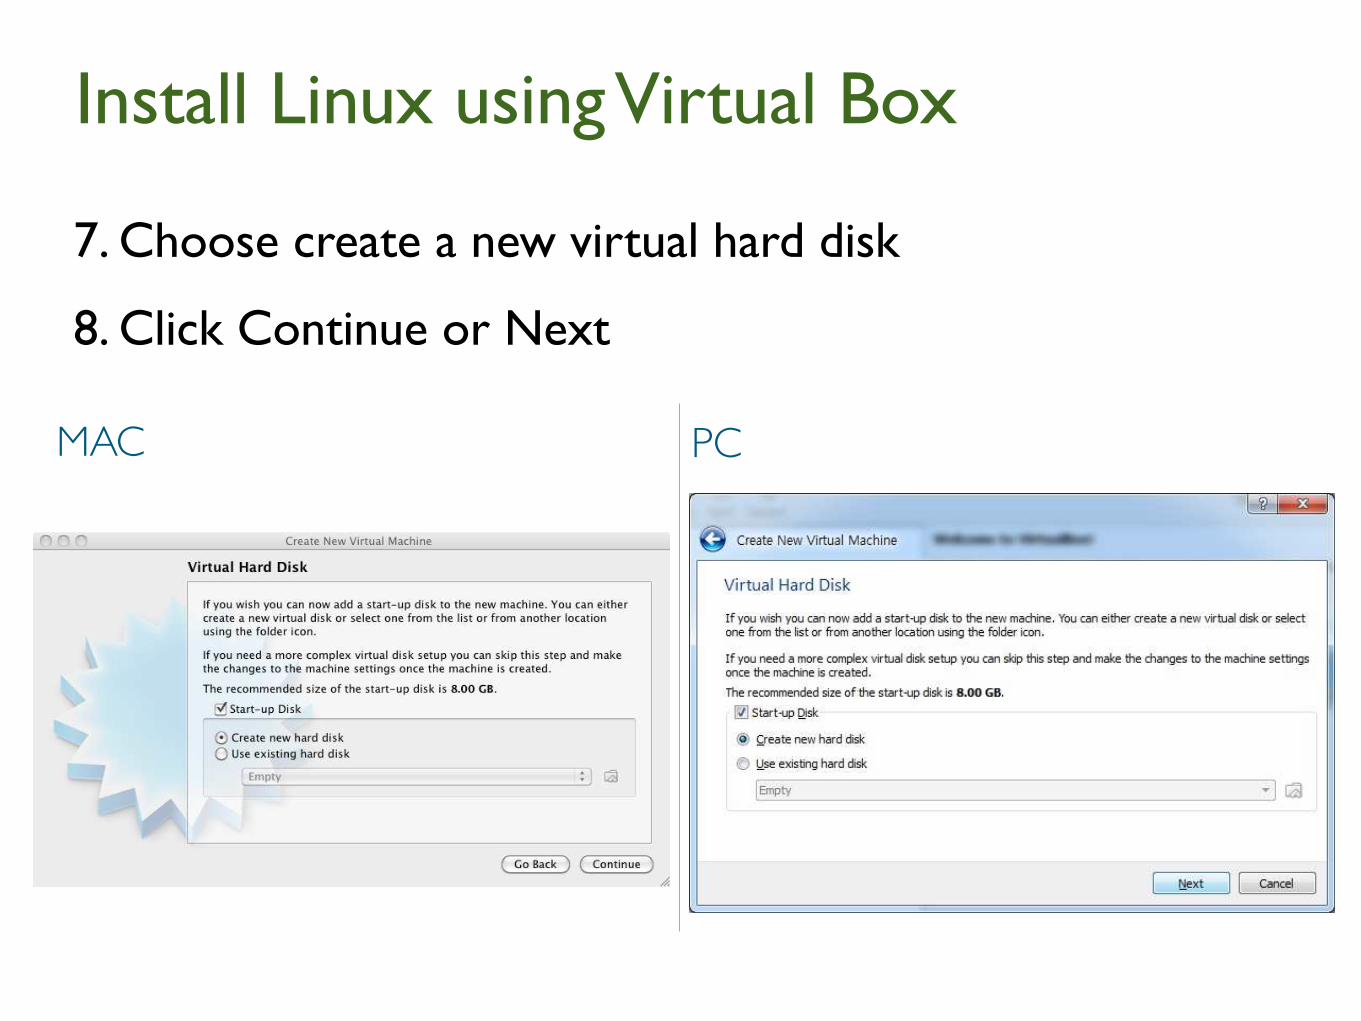
7. Choose create a new virtual hard disk
8. Click Continue or Next
PCMAC
Install Linux using Virtual Box
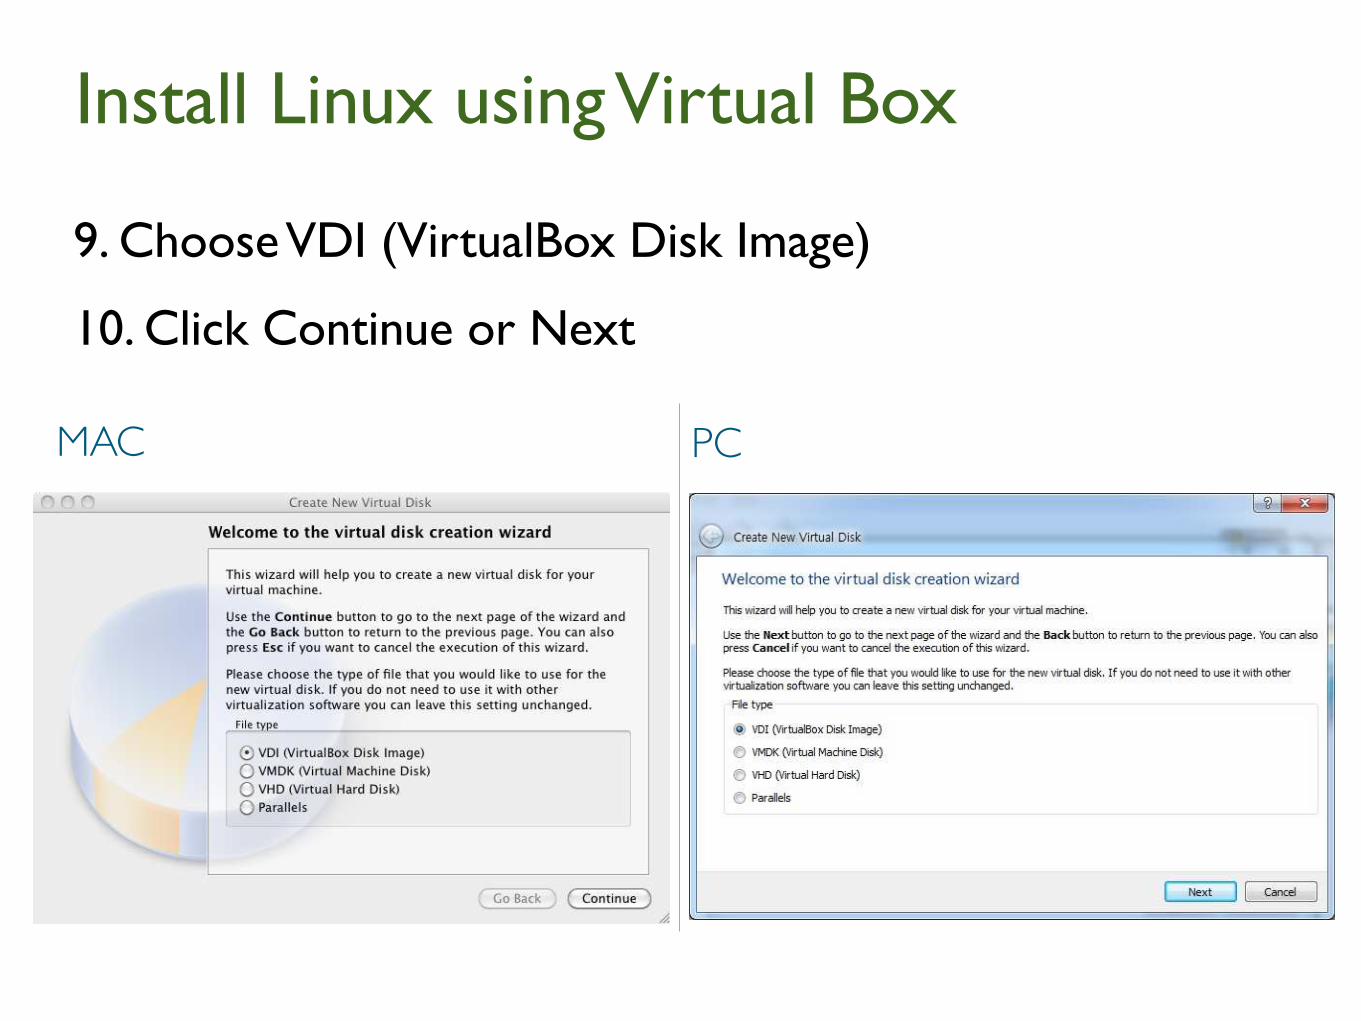
9. Choose VDI (VirtualBox Disk Image)
10. Click Continue or Next
PCMAC
Install Linux using Virtual Box

11. Choose “Dynamically Allocated” click continue. This way, the size of your Virtual Hard Disk will grow as you use.
PCMAC
Install Linux using Virtual Box

12. Click the folder icon and choose the ubuntu iso file you downloaded.
13. Select the size of the Virtual Disk (I recommend choosing 8 GB) and click continue
PCMAC
Install Linux using Virtual Box

14. Click Create
PCMAC
Install Linux using Virtual Box

1. Choose Ubuntu from left column and click Start
MAC & PC
Running Linux

2. Click continue on pop-up window
Running Linux
PCMAC

3. Click the folder icon and choose the ubuntu iso file you downloaded and click continue and start
Running Linux
PCMAC
Running Linux
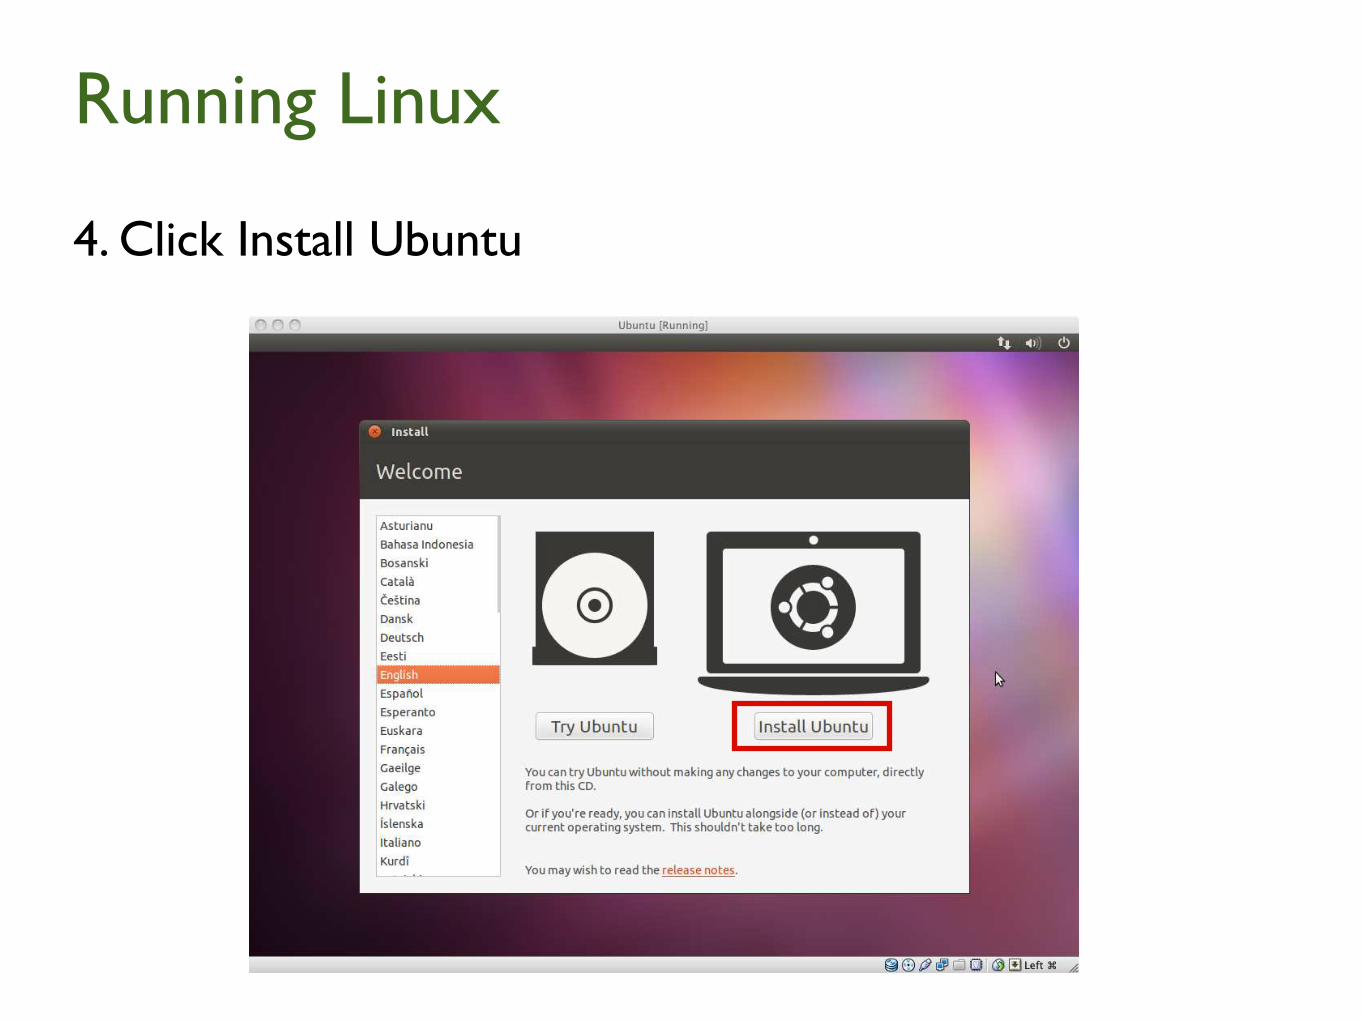
4. Click Install Ubuntu

Running Linux
4. Check “Download updates” and click Forward
Running Linux
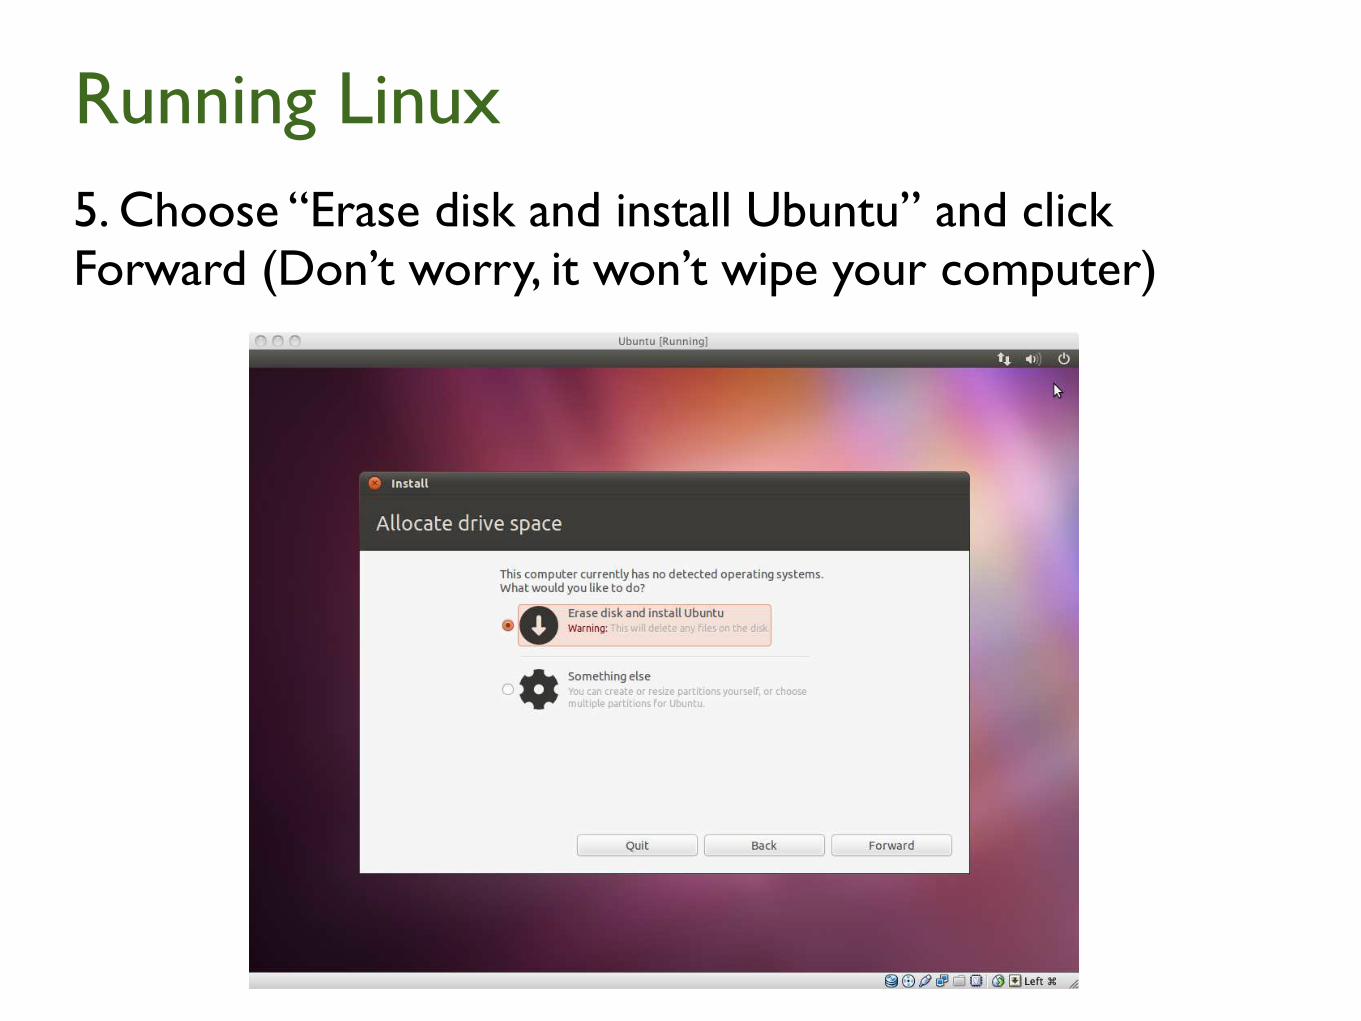
5. Choose “Erase disk and install Ubuntu” and click Forward (Don’t worry, it won’t wipe your computer)

Running Linux
6. Click “Install Now” and wait. Maybe grab a snack.
7. When finished, click Restart and press Enter.

C Programming on Linux
1. Open Terminal (Applications-Accessories-Terminal)
C Programming on Linux
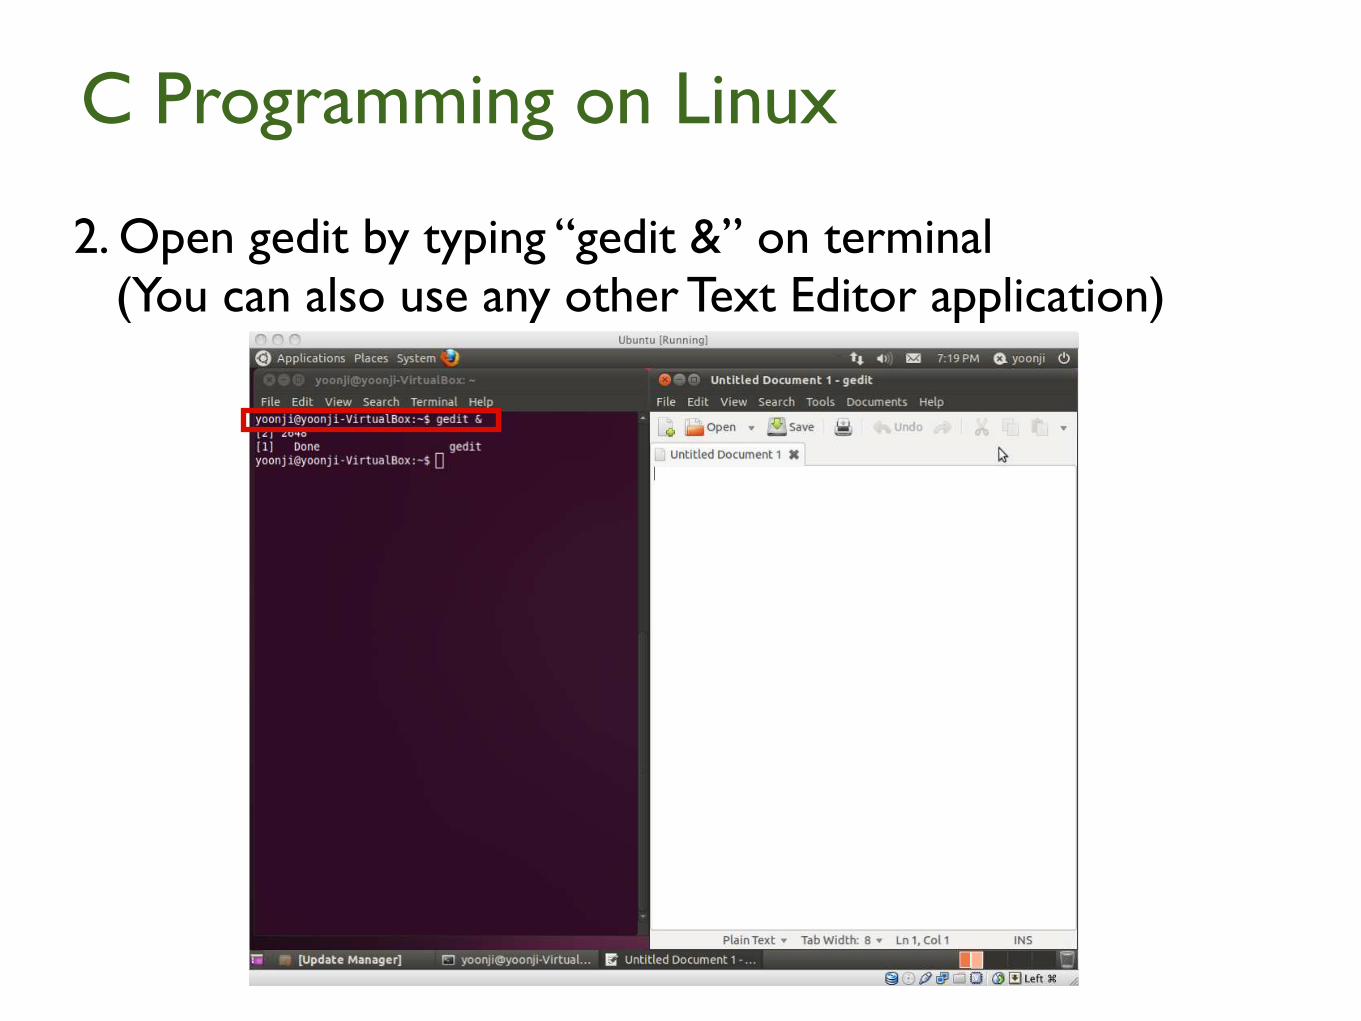
2. Open gedit by typing “gedit &” on terminal (You can also use any other Text Editor application)

3. Type the following on gedit (or any other text editor)
#include<stdio.h>
main()
{
printf("Hello World\n");
}
4. Save this file as “helloworld.c”
C Programming on Linux
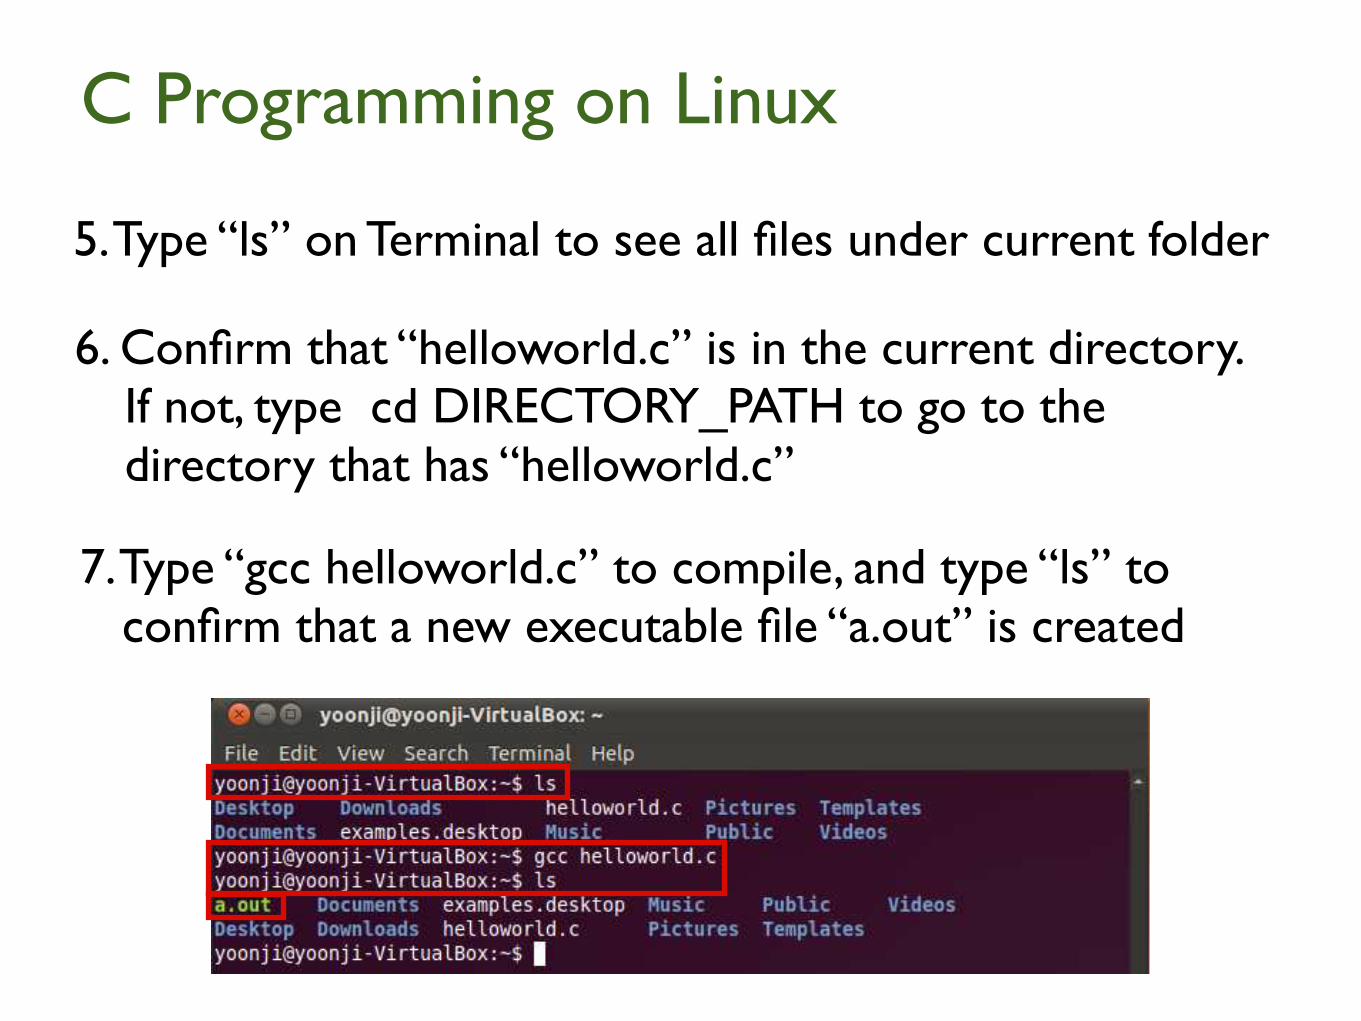
5. Type “ls” on Terminal to see all files under current folder
6. Confirm that “helloworld.c” is in the current directory. If not, type cd DIRECTORY_PATH to go to the directory that has “helloworld.c”
C Programming on Linux
7. Type “gcc helloworld.c” to compile, and type “ls” to confirm that a new executable file “a.out” is created
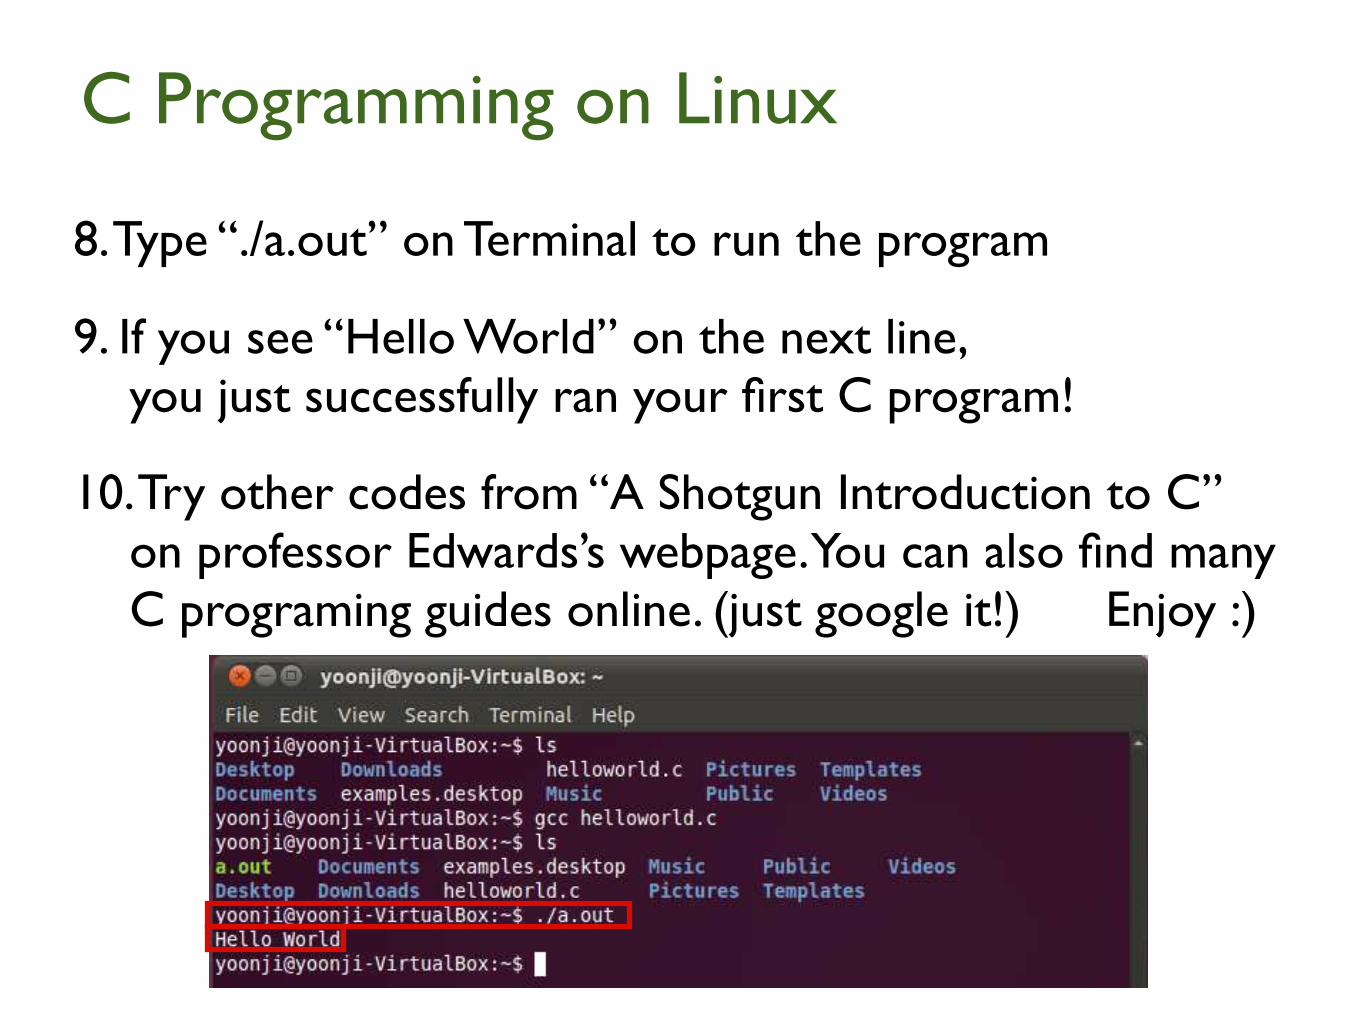
8. Type “./a.out” on Terminal to run the program
9. If you see “Hello World” on the next line, you just successfully ran your first C program!
C Programming on Linux
10. Try other codes from “A Shotgun Introduction to C” on professor Edwards’s webpage. You can also find many C programing guides online. (just google it!) Enjoy :)


