SETTING UP PREMIERE FOR STOP-MOTION ANIMATION 1. Create a new Premiere project, or, open an existing blank template project 2. Select Premiere Pro CC > Preferences > General 3. For ‘Still Image Default Duration’ select either a) 2 frames (for stop-motion animation), or, b) 1 frame (for timelapse). Selecting 2 frames for ‘Still Image Default Duration’ will give you animation at 12 fps when using a 24fps sequence / timeline. 4. Create a new sequence: File > New Sequence. Select a preset with appropriate video settings. E.g Digital SLR > 1080p > DSLR 1080p24 5. Create a separate bin for images in the project panel if you don’t already have one: File > New Bin 6. Import folder of images: File > Import… Either, a) Select the whole folder of images for your animation, which you have previously prepped, by just selecting the folder icon and selecting Import, or, b) If you have your images numbered sequentially e.g. beginning with ‘1’ for the first image, then you can select the first image in the folder and then tick ‘Image Sequence’ at the bottom of the Import window:
Transcript
SETTING UP PREMIERE FOR STOP-MOTION ANIMATION
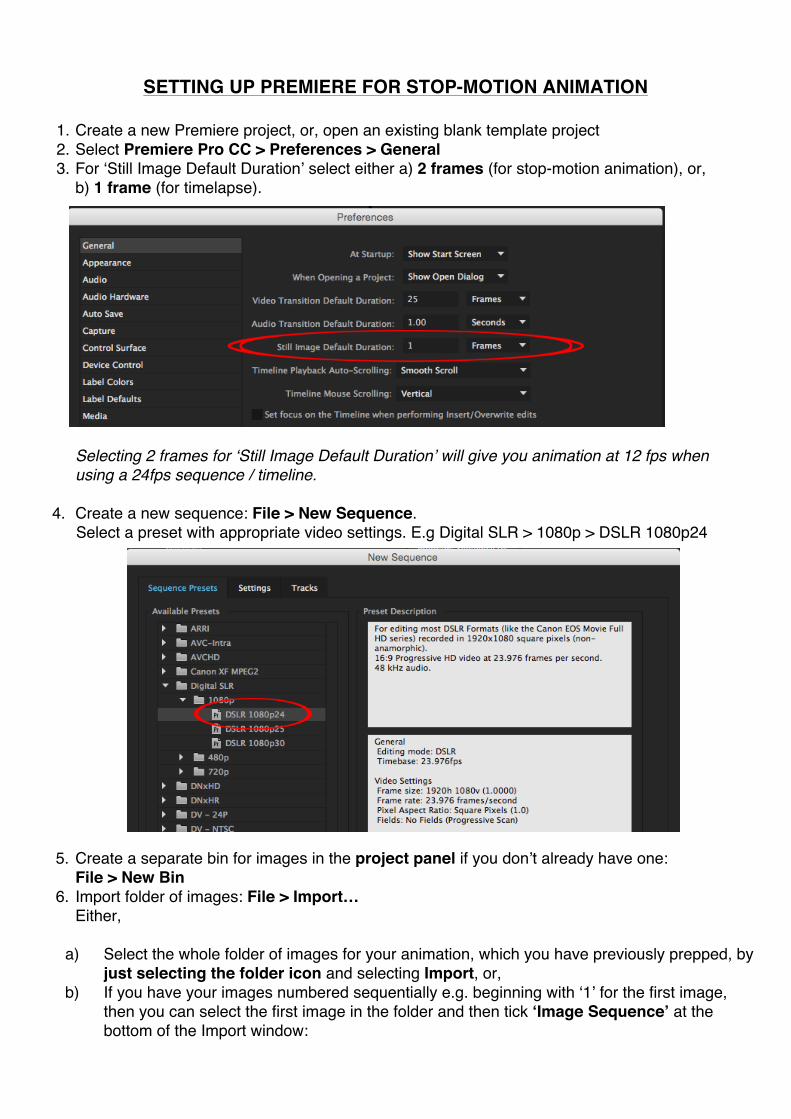
1. Create a new Premiere project, or, open an existing blank template project 2. Select Premiere Pro CC > Preferences > General 3. For ‘Still Image Default Duration’ select either a) 2 frames (for stop-motion animation), or,
b) 1 frame (for timelapse).
Selecting 2 frames for ‘Still Image Default Duration’ will give you animation at 12 fps when using a 24fps sequence / timeline.
4. Create a new sequence: File > New Sequence. Select a preset with appropriate video settings. E.g Digital SLR > 1080p > DSLR 1080p24
5. Create a separate bin for images in the project panel if you don’t already have one:
File > New Bin 6. Import folder of images: File > Import…
Either,
a) Select the whole folder of images for your animation, which you have previously prepped, by just selecting the folder icon and selecting Import, or,
b) If you have your images numbered sequentially e.g. beginning with ‘1’ for the first image, then you can select the first image in the folder and then tick ‘Image Sequence’ at the bottom of the Import window:
Importing as an image sequence will automatically join your images together sequentially so that they will become a single clip in Premiere. This means you will have less control as you no longer have access to individual images – e.g. cannot edit / delete any, however, you may find playback is smoother – and the sequence is easier to handle and work with as one single clip.
7. Edit to timeline.
If you’ve imported as an image sequence, then you can now just drag your image sequence clip on to V1 in the timeline. If you have imported the whole folder of images individually, then within that folder, select the List View in the Project Panel – this should ensure they are listed in the order they were originally. Now select all the images in the folder and drag on to V1 in the timeline. If Premiere is struggling to play back the images smoothly then try lowering the playback resolution in the pull-down menu bottom right of the Program monitor to 1/2 or 1/4:
In any case, you may find Premiere cannot play back the sequence completely stutter-free, however, once exported, the sequence should play smoothly.
8. Add titles, audio, effects etc If you’ve imported all the images in individually, you may want to convert these into a single clip which will make it easier to work with / move around / add effects to etc. You can do this by, first creating a new blank sequence: File > New Sequence Next, select the ‘Edit Sequence as nest’ button in the top left of the timeline: Now drag the icon in the project panel that represents the original sequence into V1 of your new sequence. The individual clips are now consolidated into one clip. You can always go back to your original sequence of images to edit them, and the new nested sequence should update with any changes.
9. Export When you have finished editing you can export your sequence in the same manner as you would a video sequence. File > Export Media…