ARC SPACESHOP – SEWING MACHINE TUTORIAL Page 1 of 53 User Training Manual SEWING MACHINE ARC SPACESHOP April 2013 Rev. A National Aeronautics and Space Administration Ames Research Center Moffett Field, CA
Transcript
ARC SPACESHOP – SEWING MACHINE TUTORIAL
Page 1 of 53
User Training Manual
SEWING MACHINE ARC SPACESHOP
April 2013 Rev. A National Aeronautics and Space Administration Ames Research Center Moffett Field, CA
ARC SPACESHOP – SEWING MACHINE TUTORIAL
Page 2 of 53
Table Of Contents
I. Introduction……………………………………………………………… 4
II. Janome 3000 HD Sewing Machine..……..……………………………... 4
III. Safety Precautions……………………………………………………….. 5
IV. Step-by-Step Tutorial……………………………………………………. 6
ARC SPACESHOP – SEWING MACHINE TUTORIAL
Page 3 of 53
I. Introduction This document is for the user qualification training of the Sewing Machine, located at the Ames SpaceShop facility on the 2nd floor in Building 220. Before a user operates the machine, he/she must have signed the required documentation as described in the “SpaceShop Standard Operating Procedures”. For additional information, please see a SpaceShop staff member.
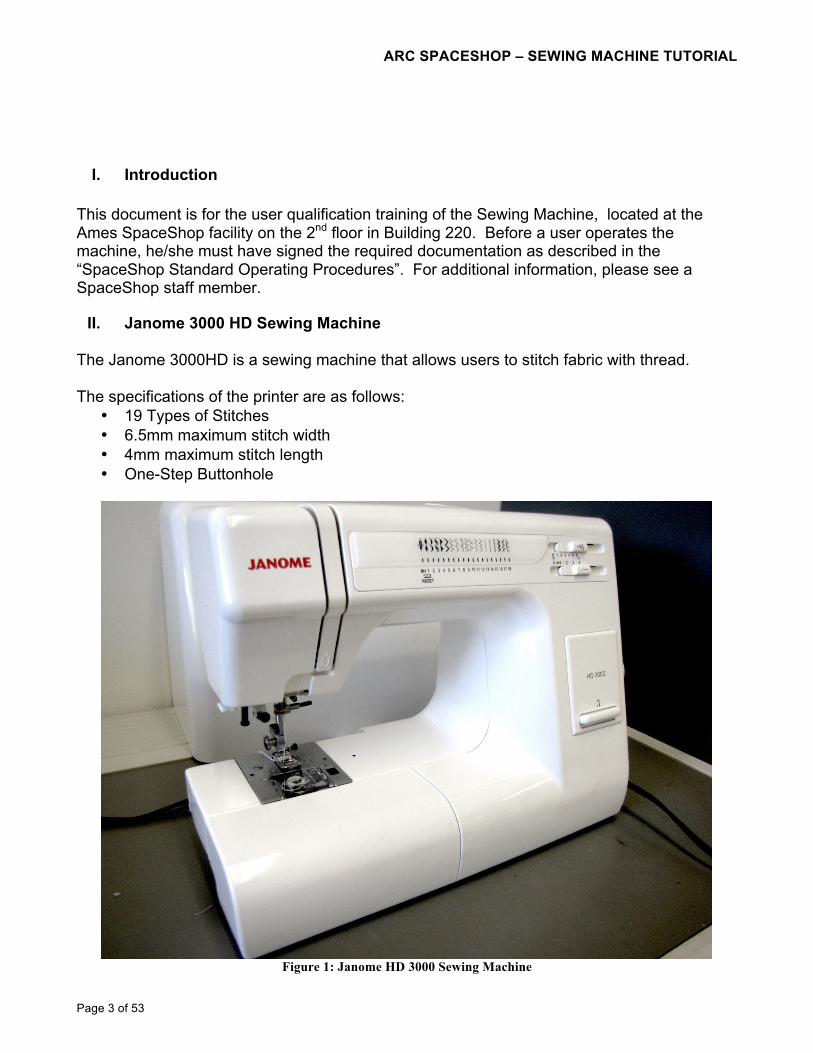
II. Janome 3000 HD Sewing Machine The Janome 3000HD is a sewing machine that allows users to stitch fabric with thread. The specifications of the printer are as follows:
• 19 Types of Stitches • 6.5mm maximum stitch width • 4mm maximum stitch length • One-Step Buttonhole
Figure 1: Janome HD 3000 Sewing Machine
ARC SPACESHOP – SEWING MACHINE TUTORIAL
Page 4 of 53
III. Safety Precautions
a. Sewing Machine Safety
SHALL…
• You SHALL notify SpaceShop staff prior to running any job. • You SHALL wear closed-toe shoes at all times. • You SHALL wear eye protection when working with tools and processes
that involve chemicals, metal shards, wood chips or sawdust. • You SHALL clean up your space after every job session, and leave 10-15
minutes for cleanup prior to shop closure. • You SHALL secure badge and any loose items that might get caught in
moving machinery. • You SHALL only use attachments recommended by the machine
manufacturer. • You SHALL disconnect by turning all the controls to the OFF position and
then removing plugs from the outlet. • You SHALL remove plug by grasping the plug and not the cord. • You SHALL keep fingers away from all moving parts. • You SHALL notify SpaceShop Staff if sewing lamp bulb is burned out. • You SHALL always pay attention to the machine while it is running. • You SHALL switch off the main switch of the machine when leaving the
sewing machine unattended. • You SHALL always disconnect machine from the power supply when you
are servicing or removing parts from the machine. • You SHALL operate the machine slowly and use caution. • You SHALL consult SpaceShop staff regarding fabric and thicknesses you
intend to use in this machine. • You SHALL manually test if your material is sewable. • You SHALL consult SpaceShop staff if the machine is making a loud noise,
starts to smell, has a tight HandWheel or has bad threading.
SHALL NOT… • You SHALL NOT leave a machine unattended while in operation. • You SHALL NOT work alone while in the SpaceShop. • You SHALL NOT operate the sewing machine if it has a damaged cord or
plug. • You SHALL NOT operate this machine where aerosol products are being
used. • You SHALL NOT place any item that may obstruct access to the foot
control, including leaving items on the foot control. • You SHALL NOT use thick fabric else you will break the sewing machine. • You SHALL NOT use fiberglass, wood, metal, glass or other hard materials
in this machine.
ARC SPACESHOP – SEWING MACHINE TUTORIAL
Page 5 of 53
IV. Step-by-Step Tutorial
a. Tools Required
• Sewing Machine • Material to Sew • Thread • Bobbin(s) • Needle(s) • Paper and pen/pencil • Hem Gauge, ruler, chalk, other fabric markers
b. Getting Started
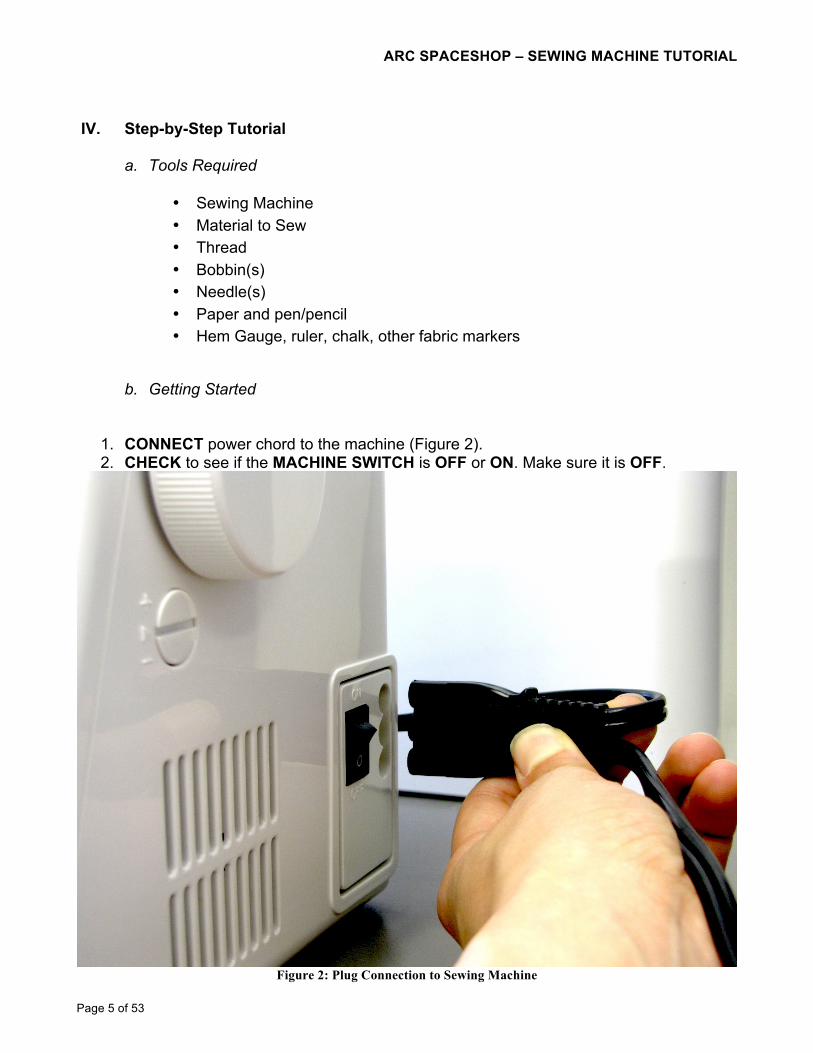
1. CONNECT power chord to the machine (Figure 2). 2. CHECK to see if the MACHINE SWITCH is OFF or ON. Make sure it is OFF.
Figure 2: Plug Connection to Sewing Machine
ARC SPACESHOP – SEWING MACHINE TUTORIAL
Page 6 of 53
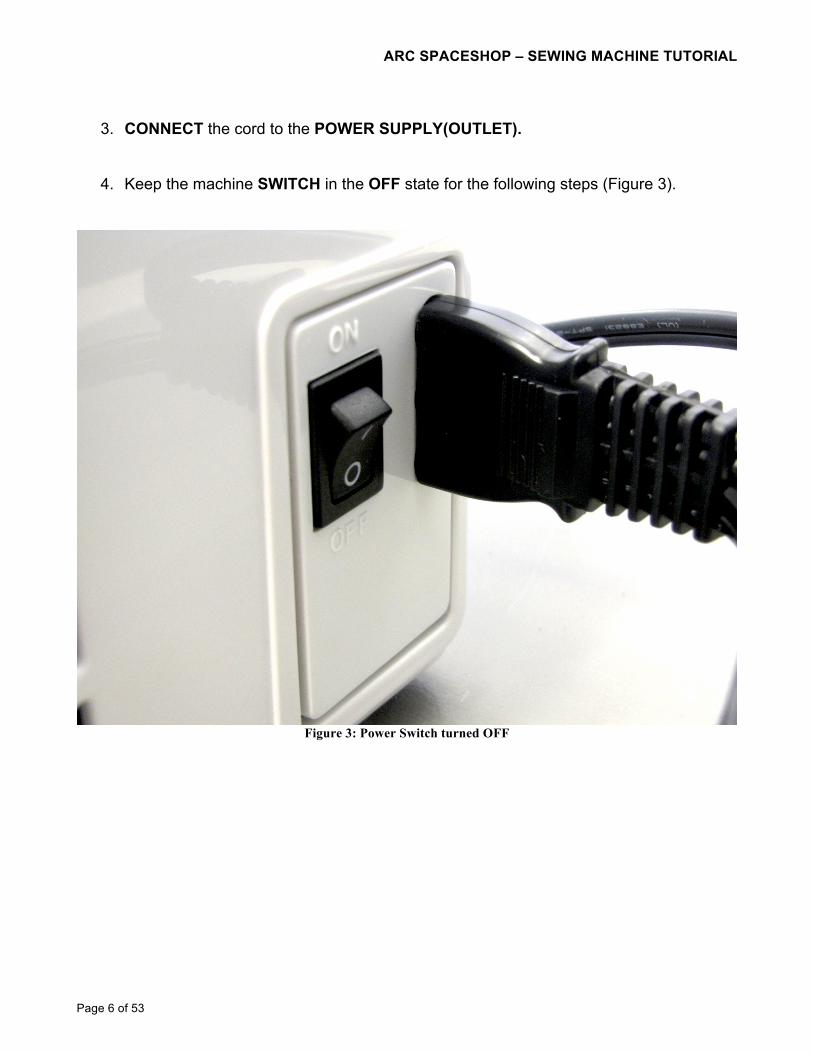
3. CONNECT the cord to the POWER SUPPLY(OUTLET).
4. Keep the machine SWITCH in the OFF state for the following steps (Figure 3).
Figure 3: Power Switch turned OFF
ARC SPACESHOP – SEWING MACHINE TUTORIAL
Page 7 of 53
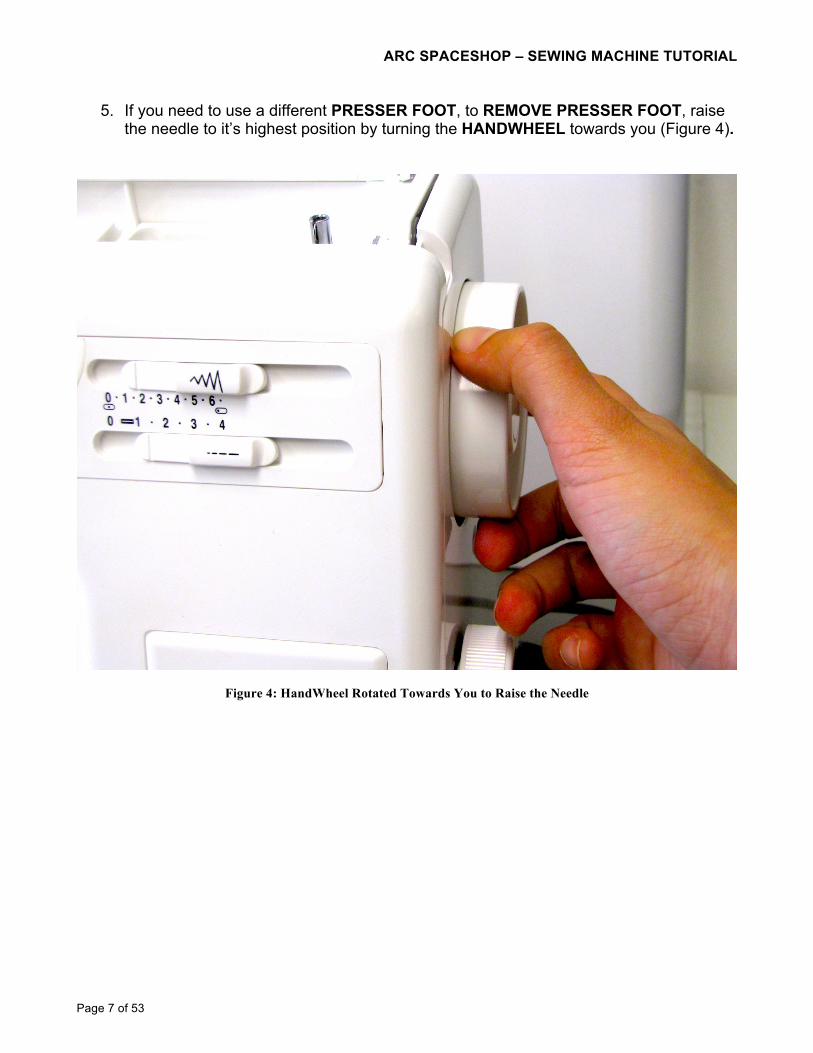
5. If you need to use a different PRESSER FOOT, to REMOVE PRESSER FOOT, raise the needle to it’s highest position by turning the HANDWHEEL towards you (Figure 4).
Figure 4: HandWheel Rotated Towards You to Raise the Needle
ARC SPACESHOP – SEWING MACHINE TUTORIAL
Page 8 of 53
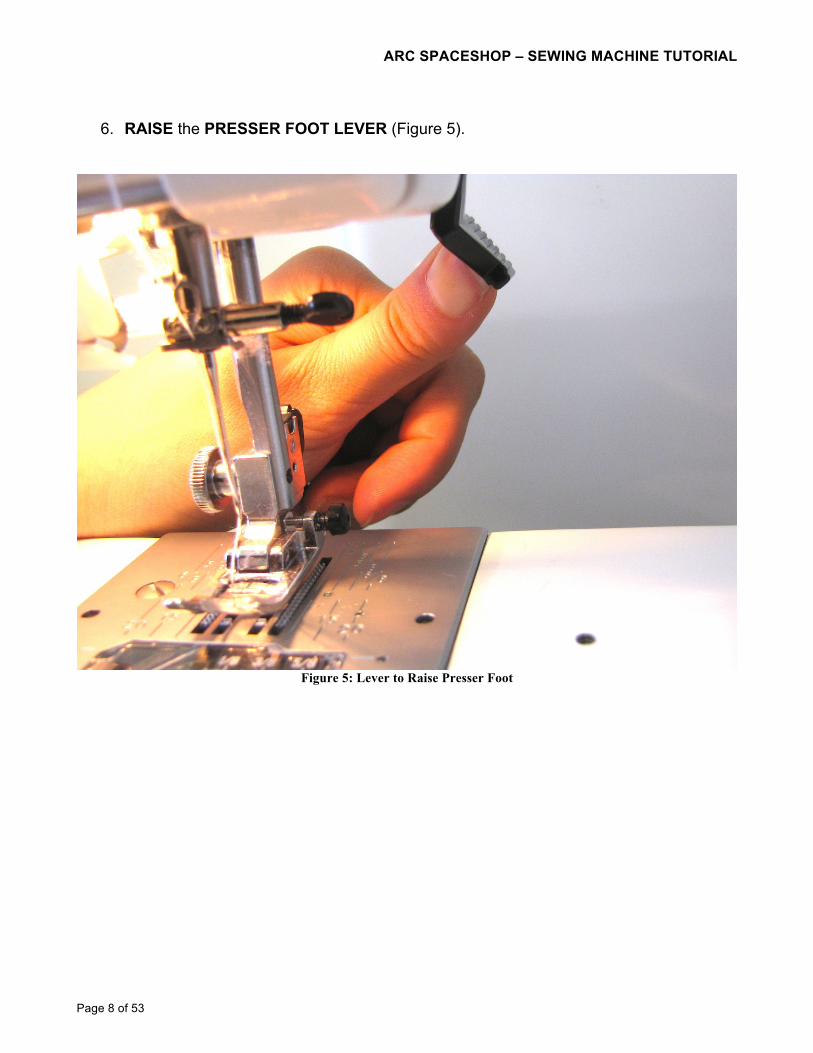
6. RAISE the PRESSER FOOT LEVER (Figure 5).
Figure 5: Lever to Raise Presser Foot
ARC SPACESHOP – SEWING MACHINE TUTORIAL
Page 9 of 53
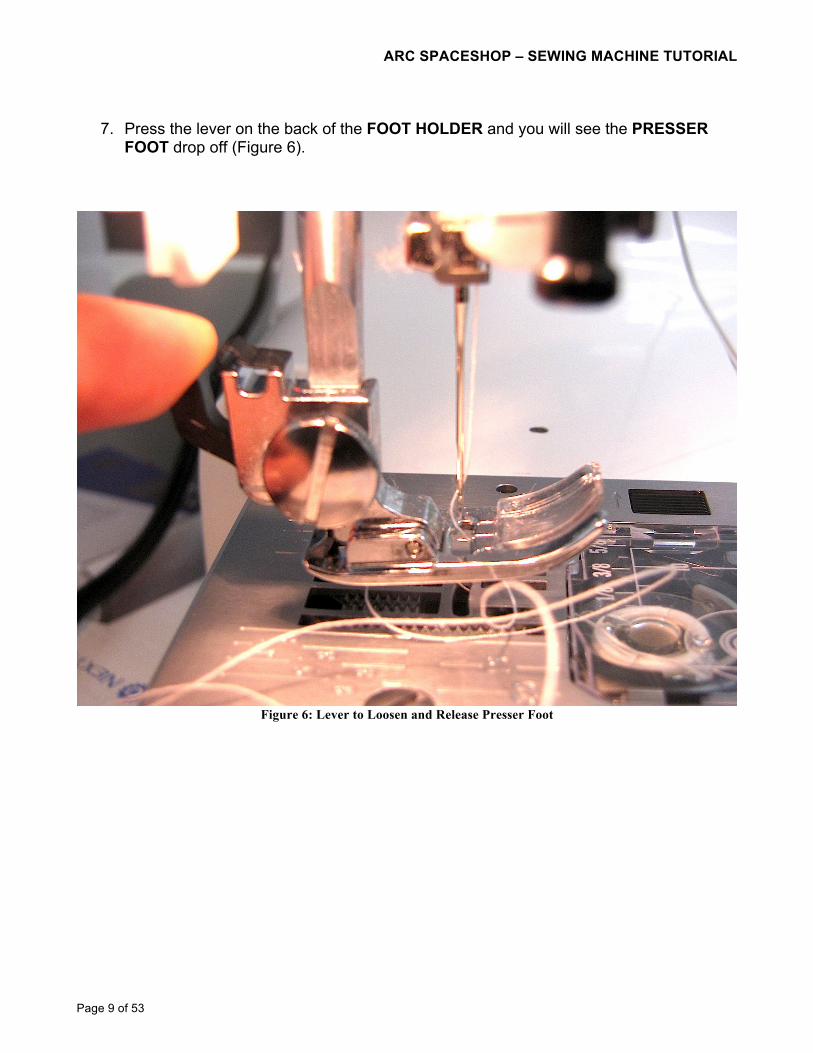
7. Press the lever on the back of the FOOT HOLDER and you will see the PRESSER
FOOT drop off (Figure 6).
Figure 6: Lever to Loosen and Release Presser Foot
ARC SPACESHOP – SEWING MACHINE TUTORIAL
Page 10 of 53
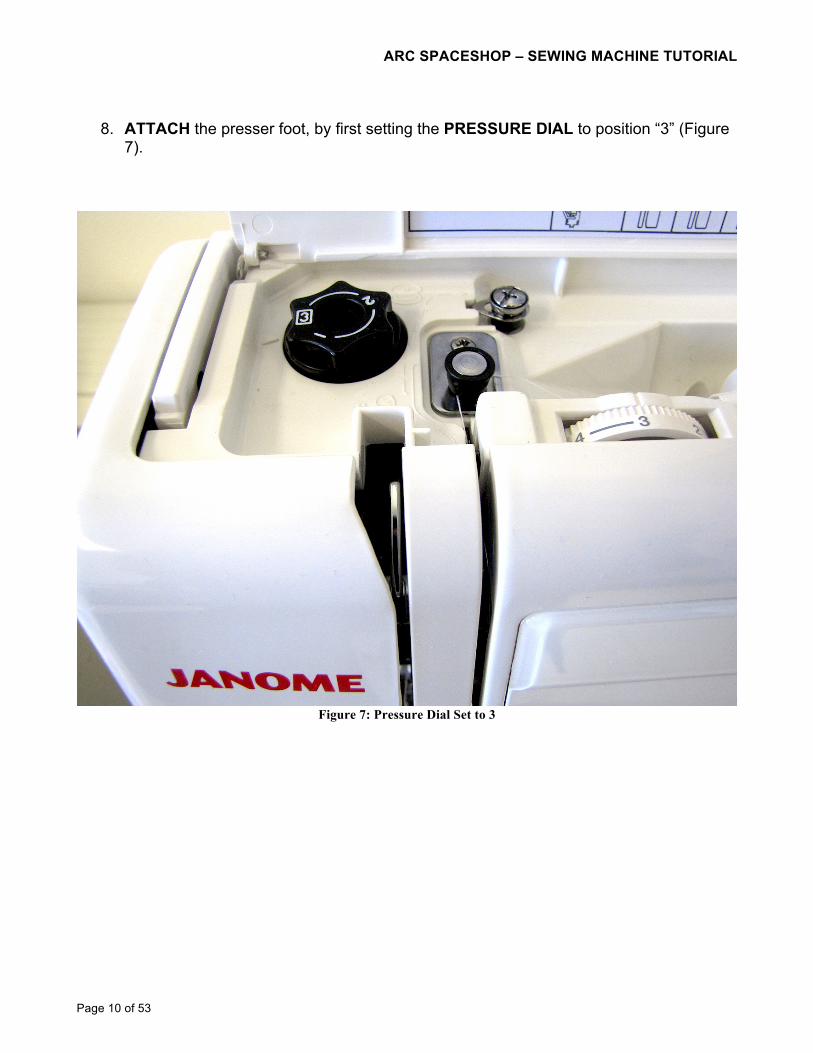
8. ATTACH the presser foot, by first setting the PRESSURE DIAL to position “3” (Figure
7).
Figure 7: Pressure Dial Set to 3
ARC SPACESHOP – SEWING MACHINE TUTORIAL
Page 11 of 53
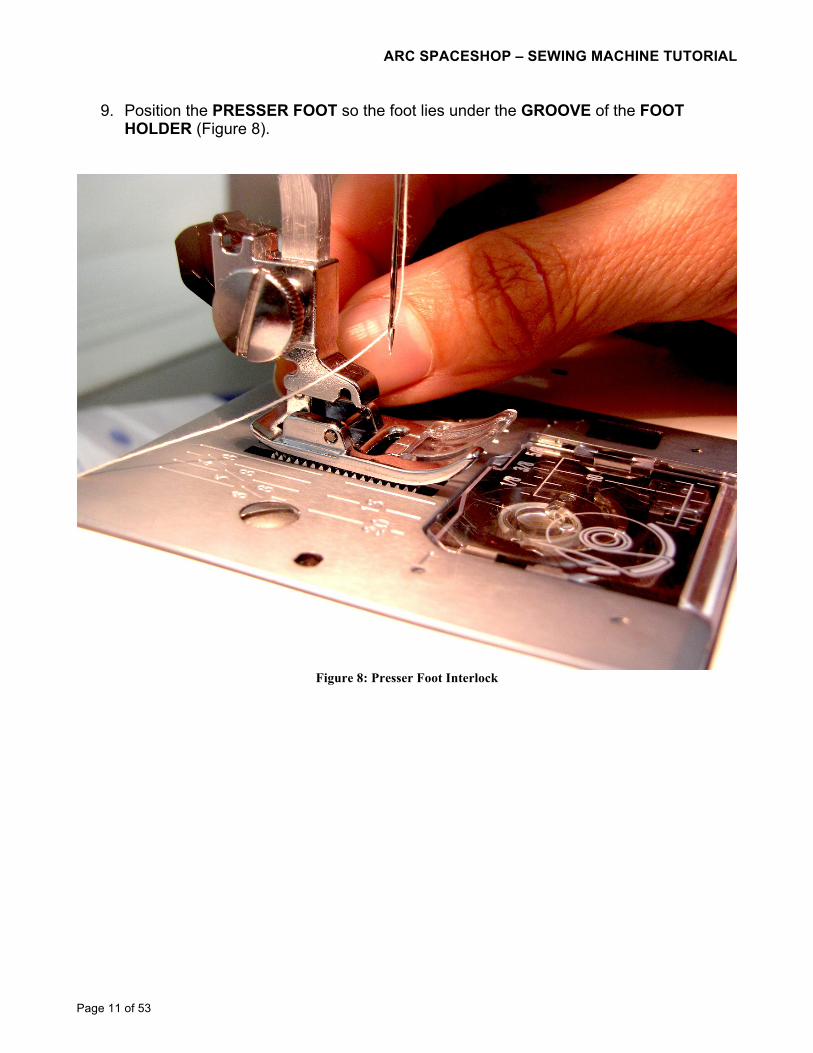
9. Position the PRESSER FOOT so the foot lies under the GROOVE of the FOOT HOLDER (Figure 8).
Figure 8: Presser Foot Interlock
ARC SPACESHOP – SEWING MACHINE TUTORIAL
Page 12 of 53
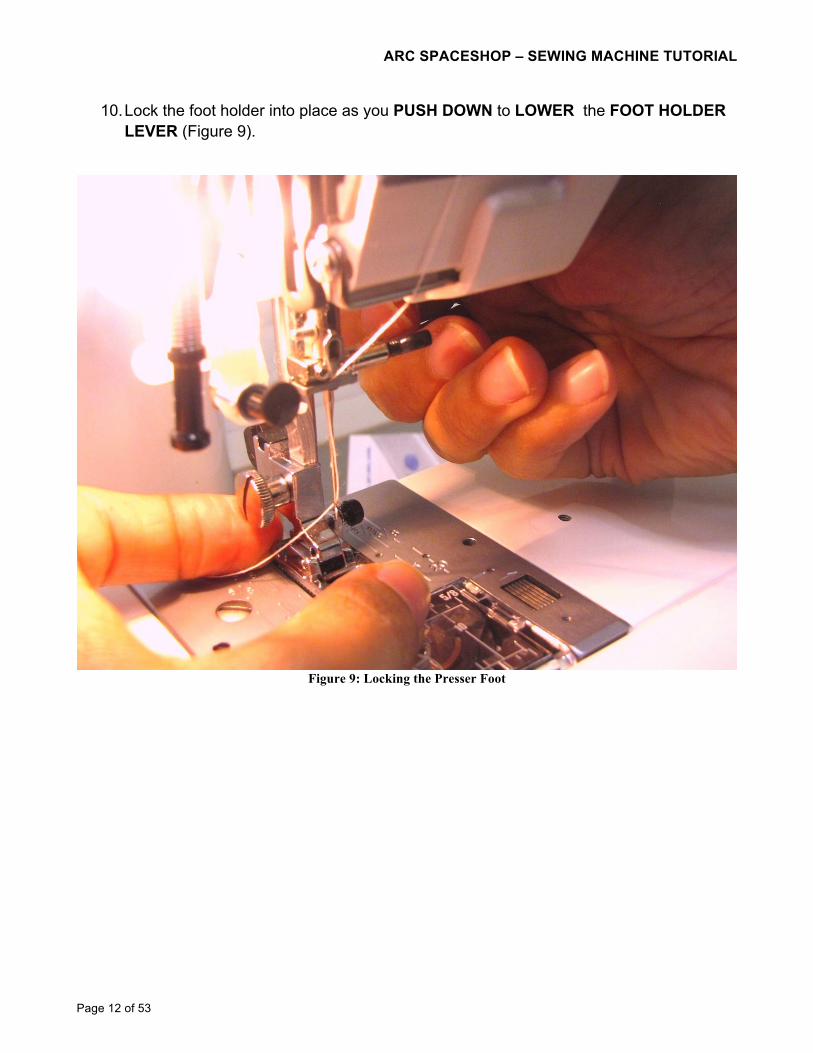
10. Lock the foot holder into place as you PUSH DOWN to LOWER the FOOT HOLDER LEVER (Figure 9).
Figure 9: Locking the Presser Foot
ARC SPACESHOP – SEWING MACHINE TUTORIAL
Page 13 of 53
11. Now we will learn how to change the needle.Turn the HandWheel toward you to RAISE the NEEDLE (Figure 4).
12. Lower the PRESSER FOOT by pressing the lever in Figure 5 down such that it is
perpendicular to the table surface.
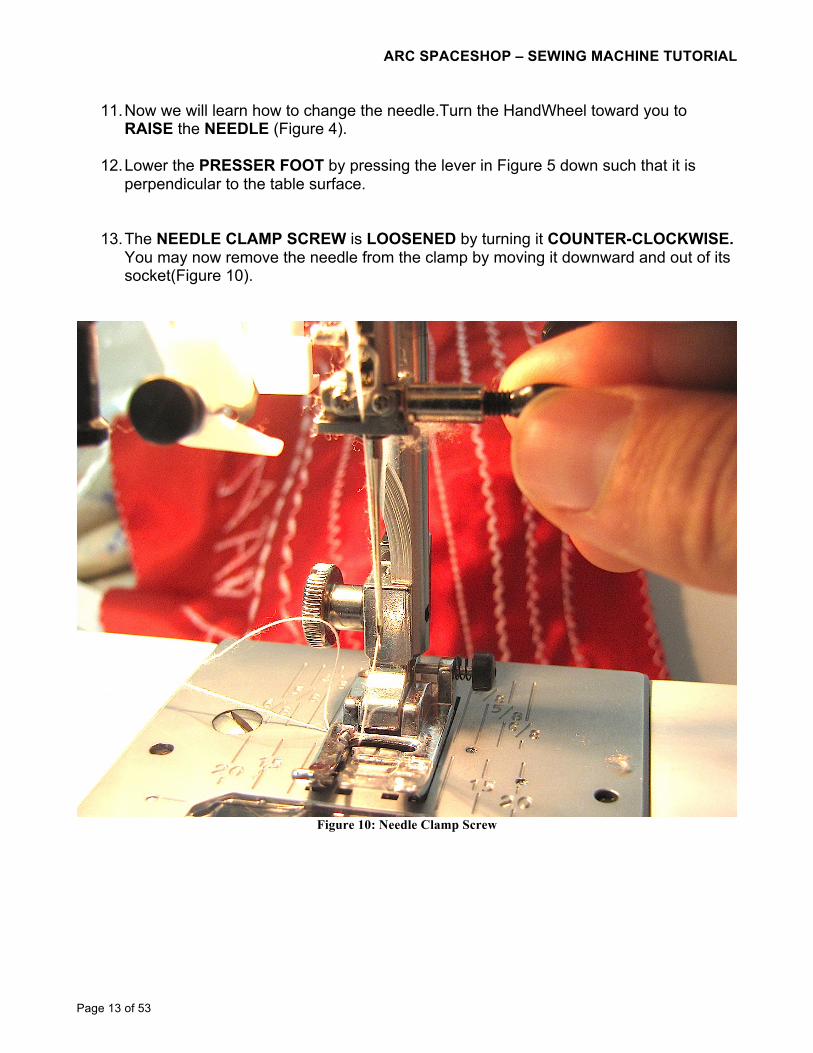
13. The NEEDLE CLAMP SCREW is LOOSENED by turning it COUNTER-CLOCKWISE. You may now remove the needle from the clamp by moving it downward and out of its socket(Figure 10).
Figure 10: Needle Clamp Screw
ARC SPACESHOP – SEWING MACHINE TUTORIAL
Page 14 of 53
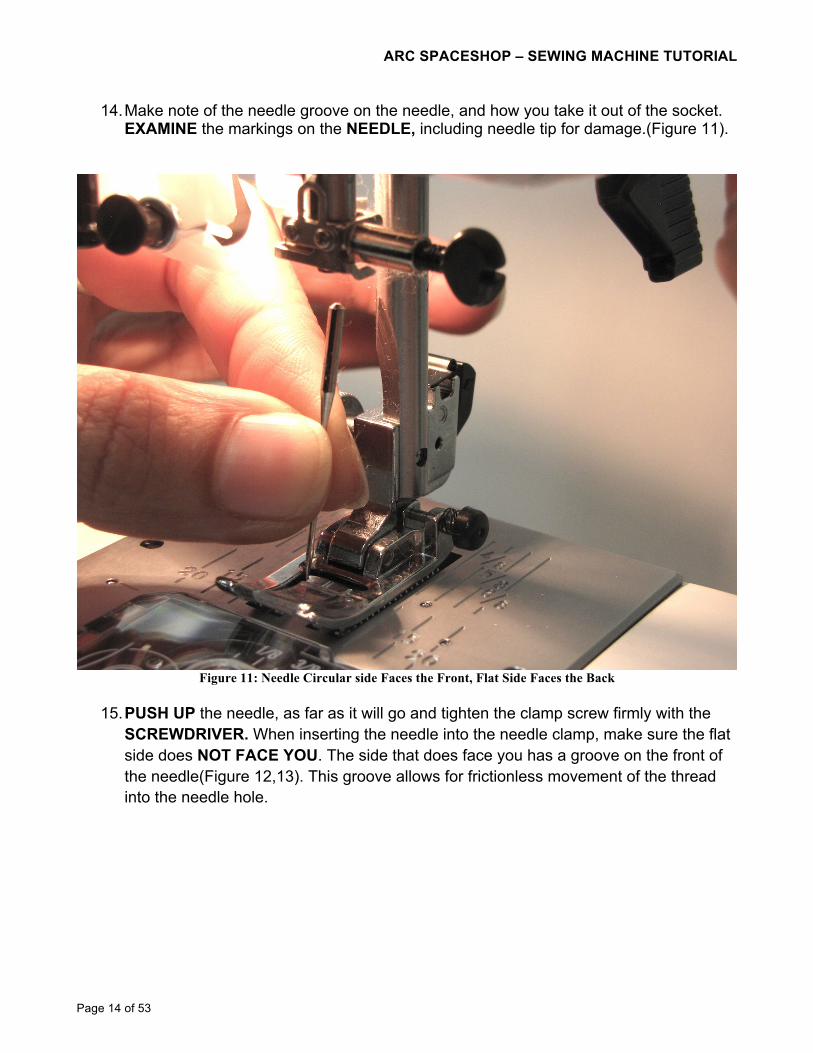
14. Make note of the needle groove on the needle, and how you take it out of the socket. EXAMINE the markings on the NEEDLE, including needle tip for damage.(Figure 11).
Figure 11: Needle Circular side Faces the Front, Flat Side Faces the Back
15. PUSH UP the needle, as far as it will go and tighten the clamp screw firmly with the
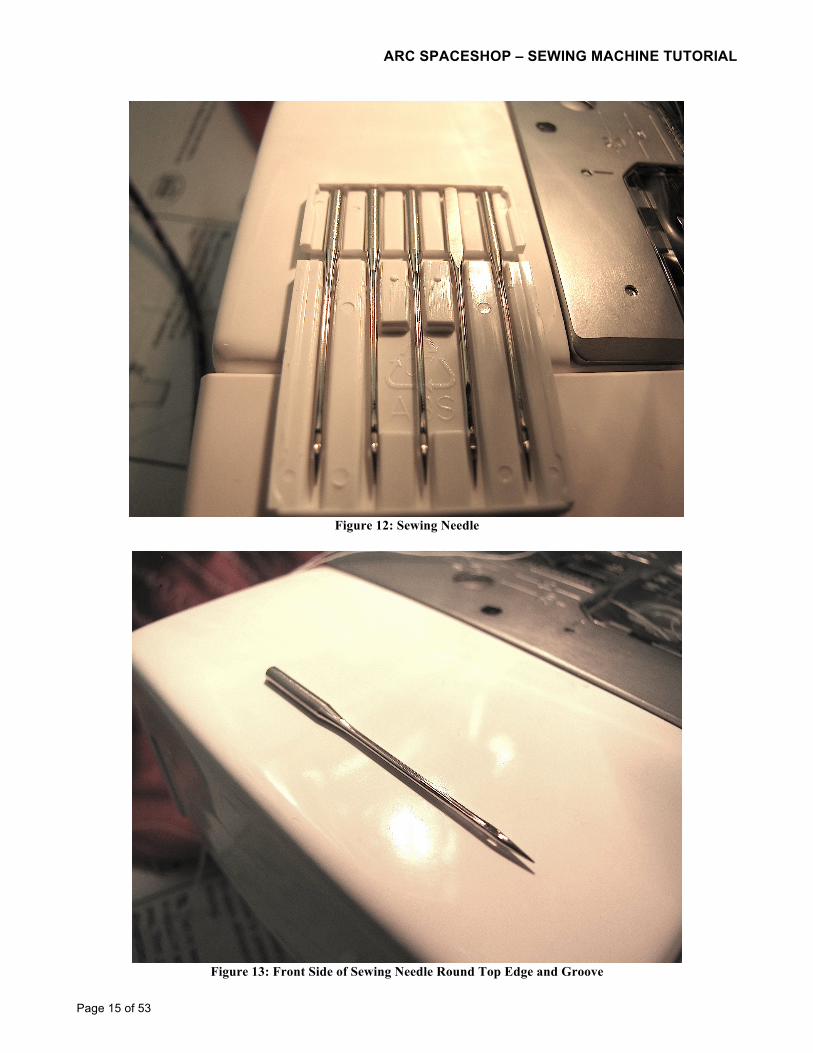
SCREWDRIVER. When inserting the needle into the needle clamp, make sure the flat side does NOT FACE YOU. The side that does face you has a groove on the front of the needle(Figure 12,13). This groove allows for frictionless movement of the thread into the needle hole.
ARC SPACESHOP – SEWING MACHINE TUTORIAL
Page 15 of 53
Figure 12: Sewing Needle
Figure 13: Front Side of Sewing Needle Round Top Edge and Groove
ARC SPACESHOP – SEWING MACHINE TUTORIAL
Page 16 of 53
Note:Check the needle for straightness, by placing the needle onto something flat. The gap between the needle and the flat surface should be consistent from one side to the other(Figure 13).
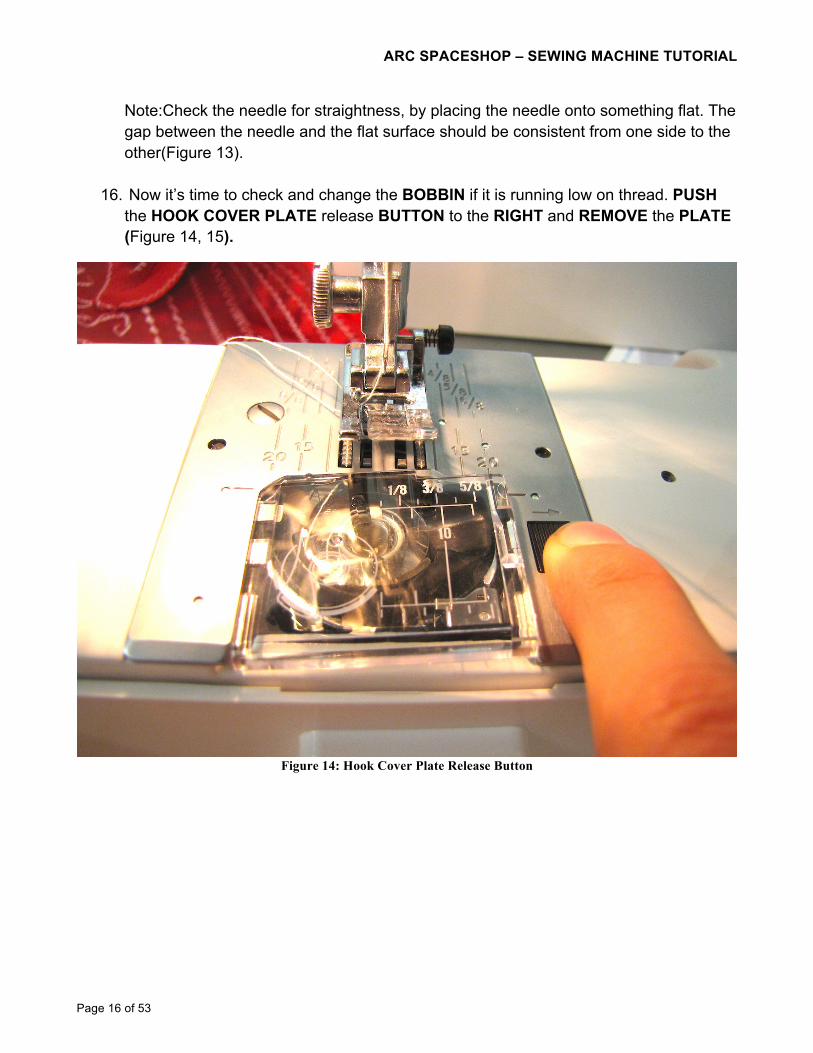
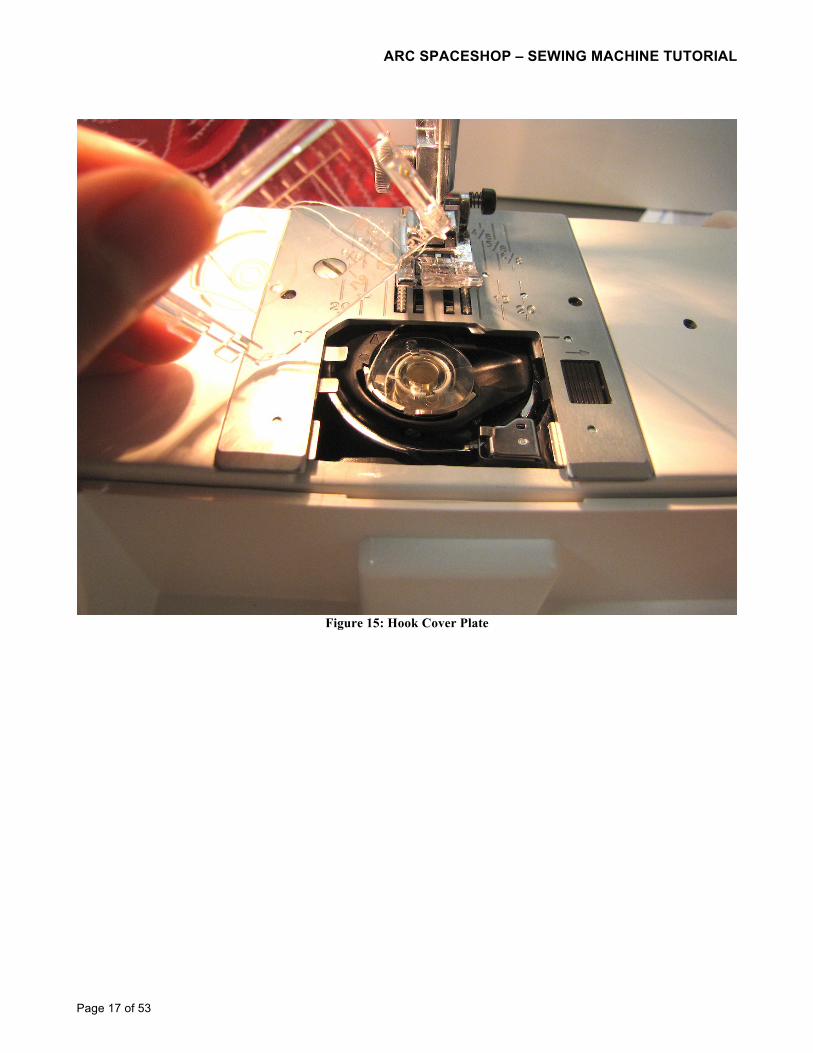
16. Now it’s time to check and change the BOBBIN if it is running low on thread. PUSH the HOOK COVER PLATE release BUTTON to the RIGHT and REMOVE the PLATE (Figure 14, 15).
Figure 14: Hook Cover Plate Release Button
ARC SPACESHOP – SEWING MACHINE TUTORIAL
Page 17 of 53
Figure 15: Hook Cover Plate
ARC SPACESHOP – SEWING MACHINE TUTORIAL
Page 18 of 53
17. LIFT out the BOBBIN (Figure 16).
Figure 16: Bobbin Removal
18. Now we are ready to FILL the BOBBIN.
19. POWER ON the sewing machine.
ARC SPACESHOP – SEWING MACHINE TUTORIAL
Page 19 of 53
20. PULL OUT the HANDWHEEL to DISENGAGE the CLUTCH. Pull the smaller circle
offset within the HandWheel (Figure 7).
Figure 17: HandWheel Clutch Disengagement
ARC SPACESHOP – SEWING MACHINE TUTORIAL
Page 20 of 53
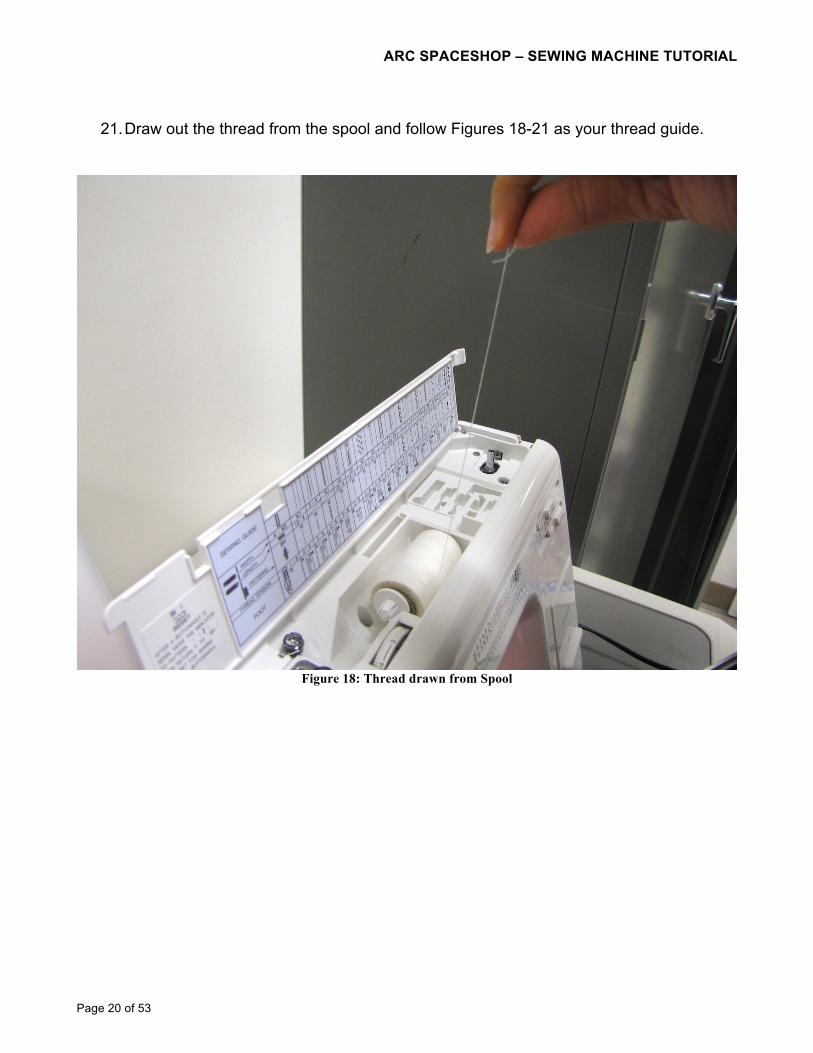
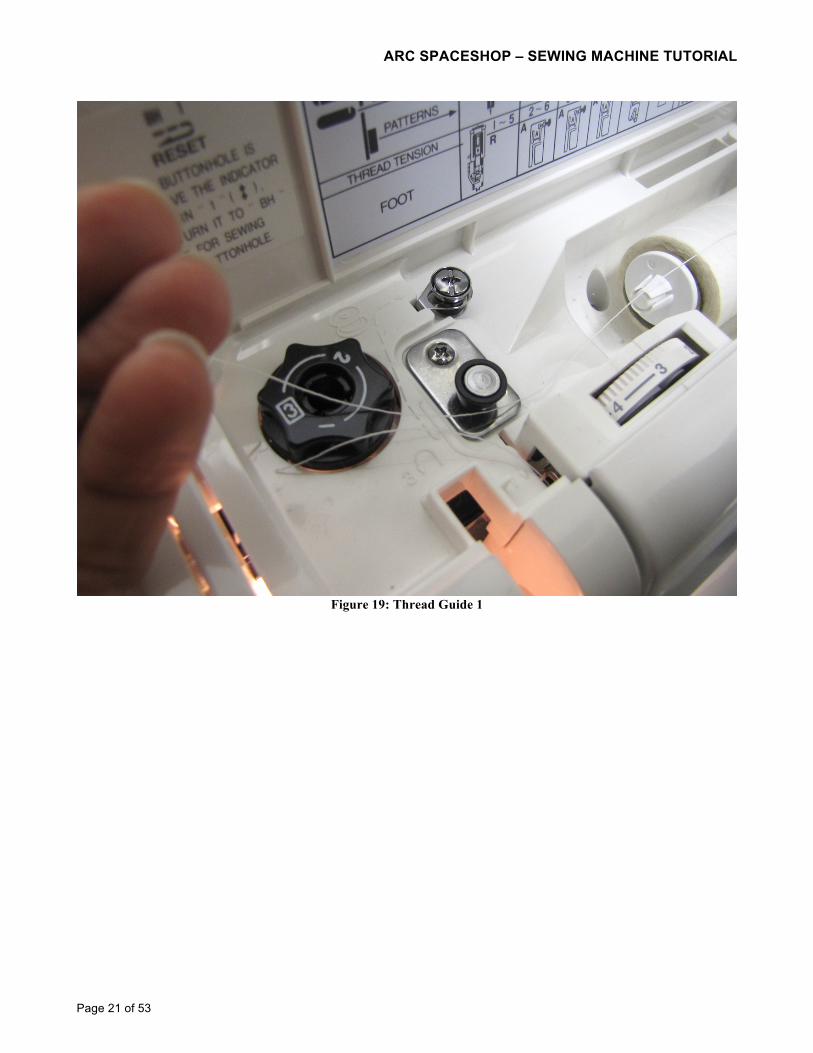
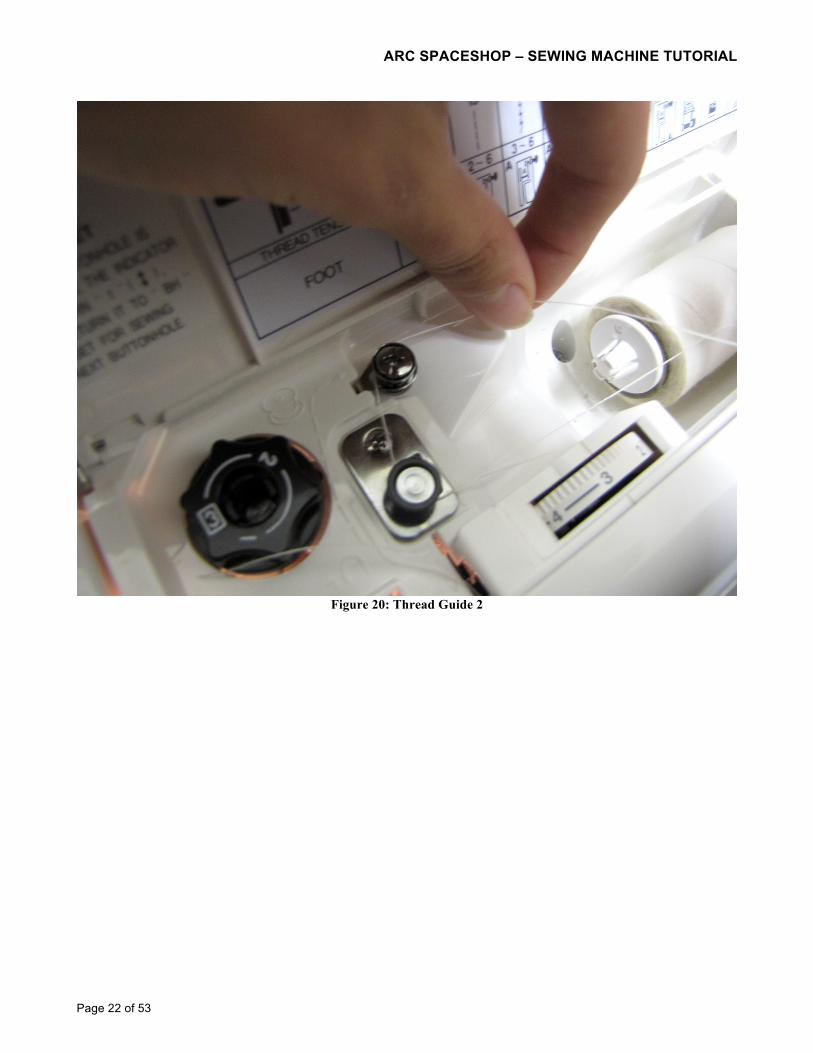
21. Draw out the thread from the spool and follow Figures 18-21 as your thread guide.
Figure 18: Thread drawn from Spool
ARC SPACESHOP – SEWING MACHINE TUTORIAL
Page 21 of 53
Figure 19: Thread Guide 1
ARC SPACESHOP – SEWING MACHINE TUTORIAL
Page 22 of 53
Figure 20: Thread Guide 2
ARC SPACESHOP – SEWING MACHINE TUTORIAL
Page 23 of 53
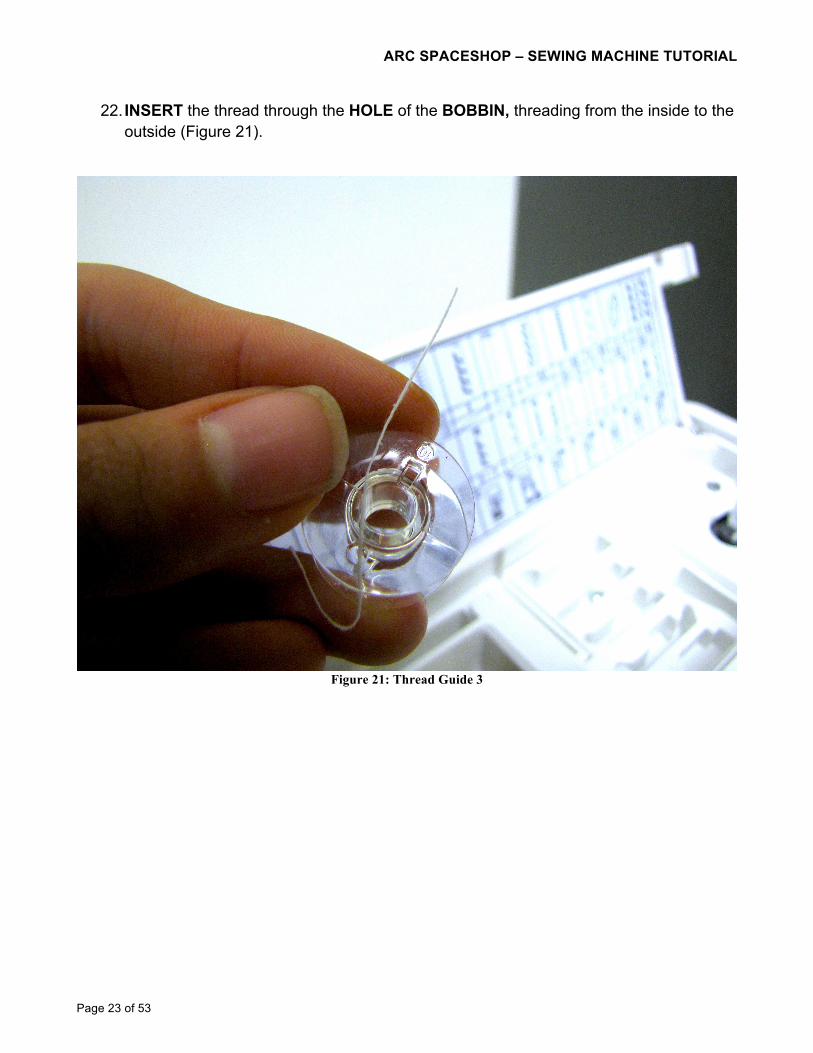
22. INSERT the thread through the HOLE of the BOBBIN, threading from the inside to the outside (Figure 21).
Figure 21: Thread Guide 3
ARC SPACESHOP – SEWING MACHINE TUTORIAL
Page 24 of 53
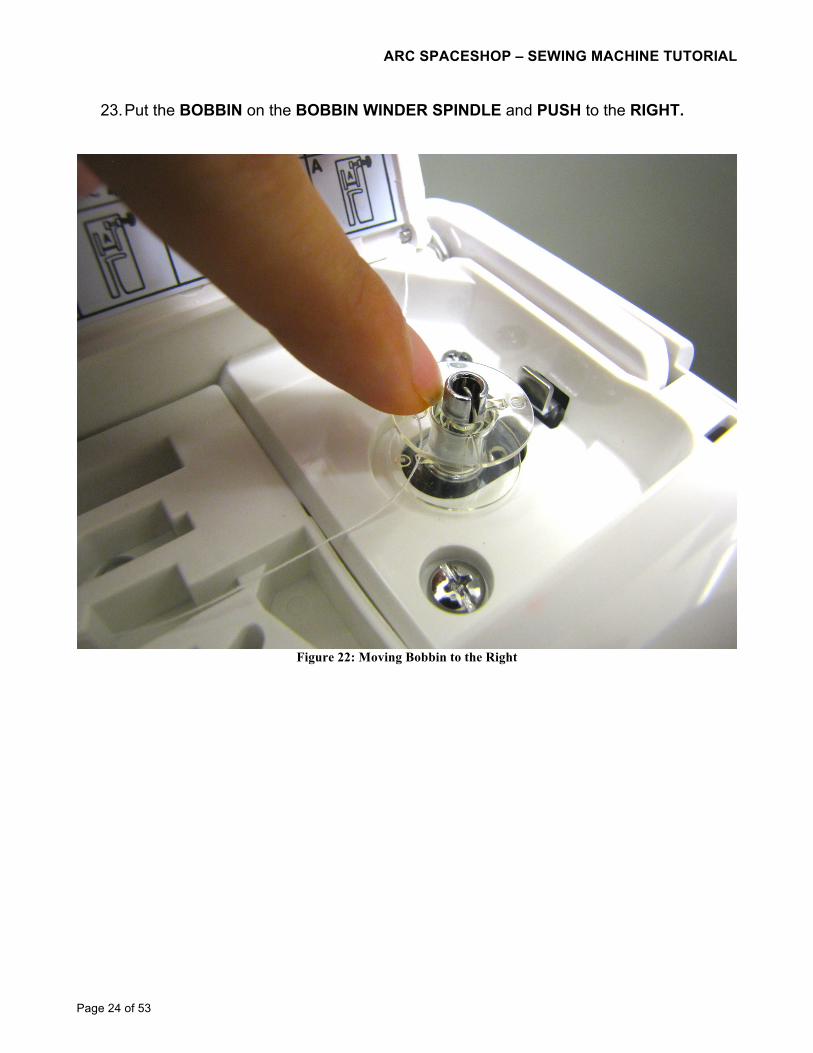
23. Put the BOBBIN on the BOBBIN WINDER SPINDLE and PUSH to the RIGHT.
Figure 22: Moving Bobbin to the Right
ARC SPACESHOP – SEWING MACHINE TUTORIAL
Page 25 of 53
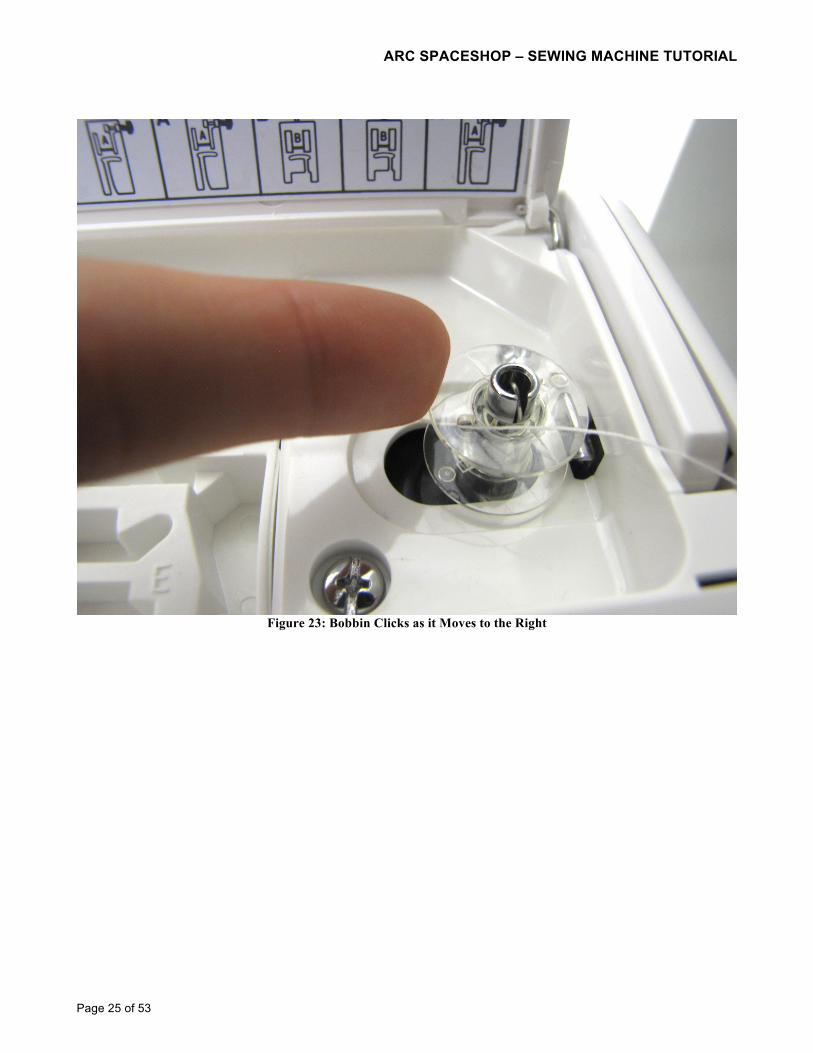
Figure 23: Bobbin Clicks as it Moves to the Right
ARC SPACESHOP – SEWING MACHINE TUTORIAL
Page 26 of 53
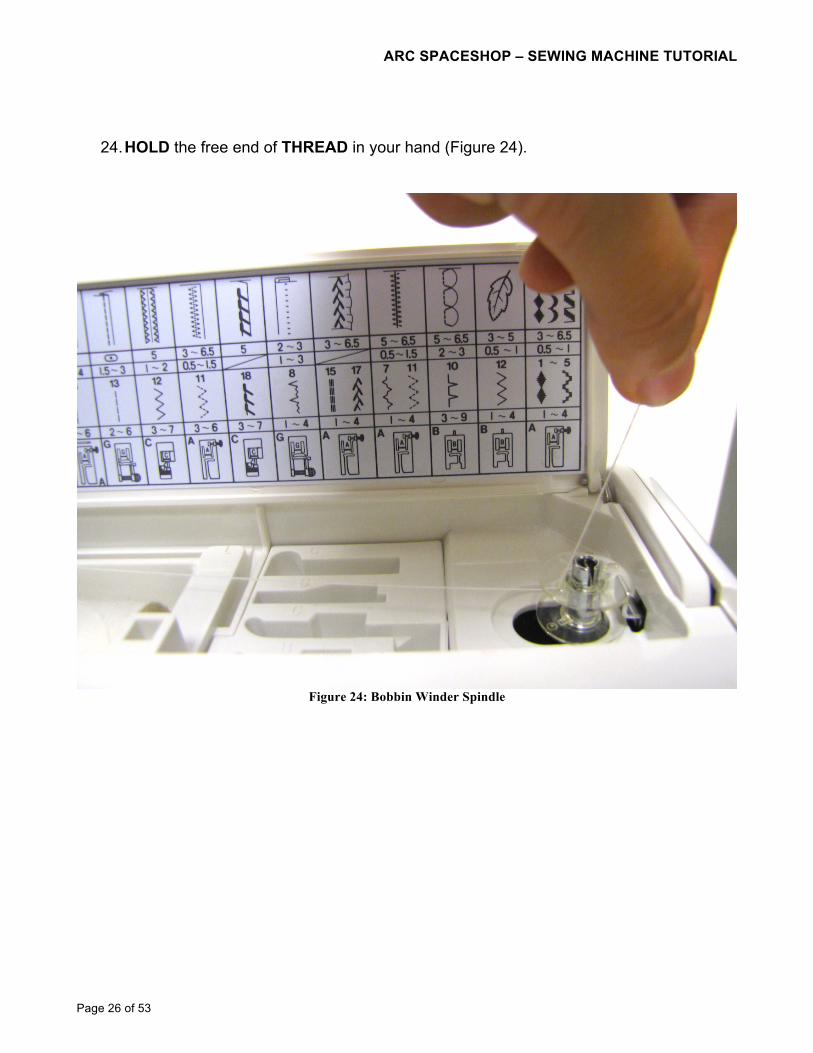
24. HOLD the free end of THREAD in your hand (Figure 24).
Figure 24: Bobbin Winder Spindle
ARC SPACESHOP – SEWING MACHINE TUTORIAL
Page 27 of 53
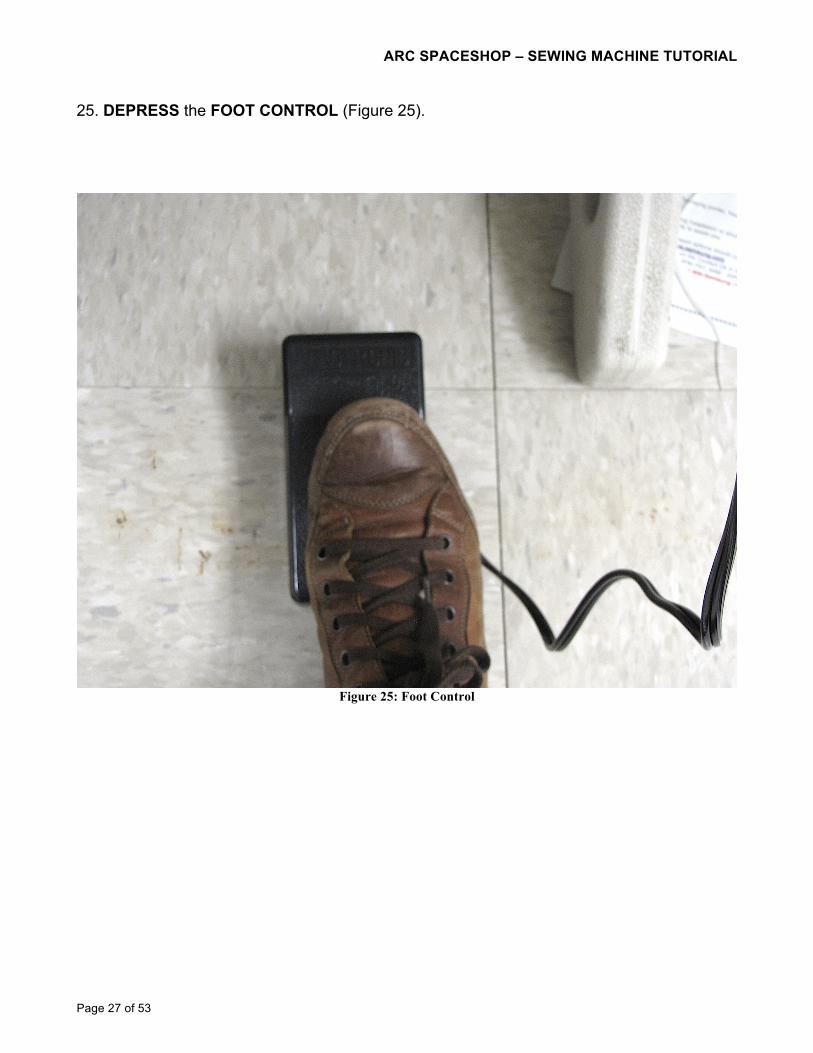
25. DEPRESS the FOOT CONTROL (Figure 25).
Figure 25: Foot Control
ARC SPACESHOP – SEWING MACHINE TUTORIAL
Page 28 of 53
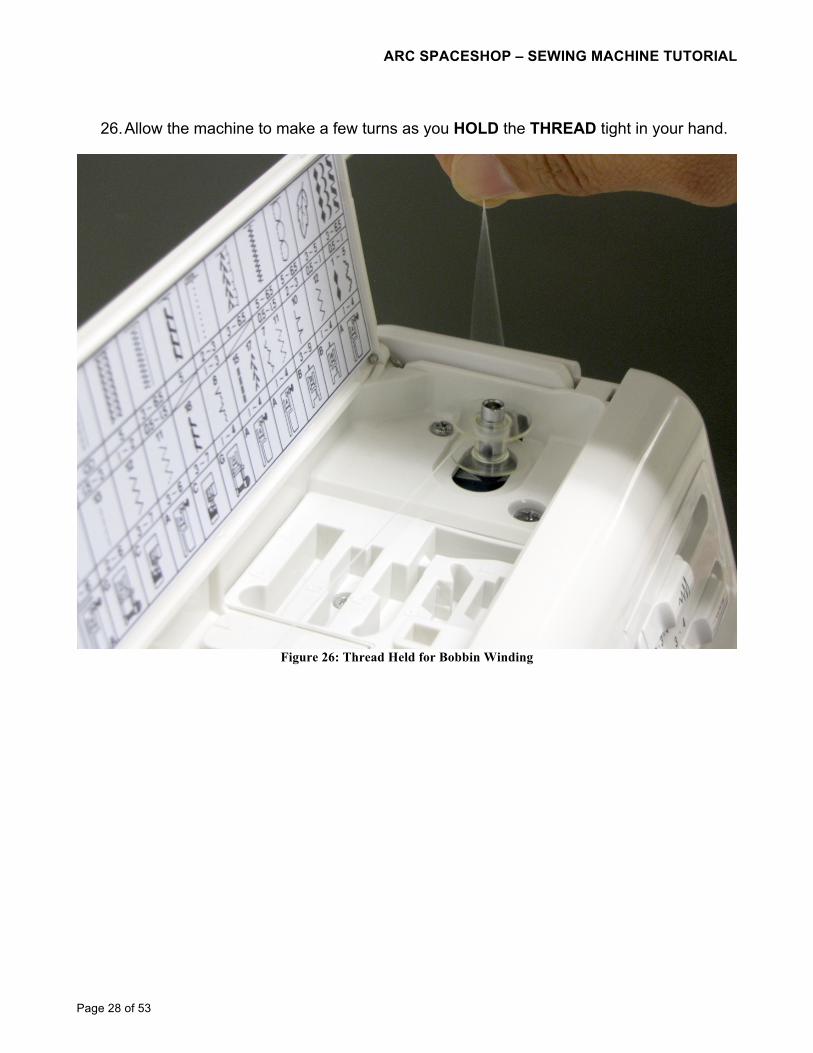
26. Allow the machine to make a few turns as you HOLD the THREAD tight in your hand.
Figure 26: Thread Held for Bobbin Winding
ARC SPACESHOP – SEWING MACHINE TUTORIAL
Page 29 of 53
27. After a few turns, take your foot OFF the FOOT CONTROL and CUT the THREAD
YOU ARE HOLDING close to the BOBBIN HOLE (Figure 27).
Figure 27: Extra Thread Cut
ARC SPACESHOP – SEWING MACHINE TUTORIAL
Page 30 of 53
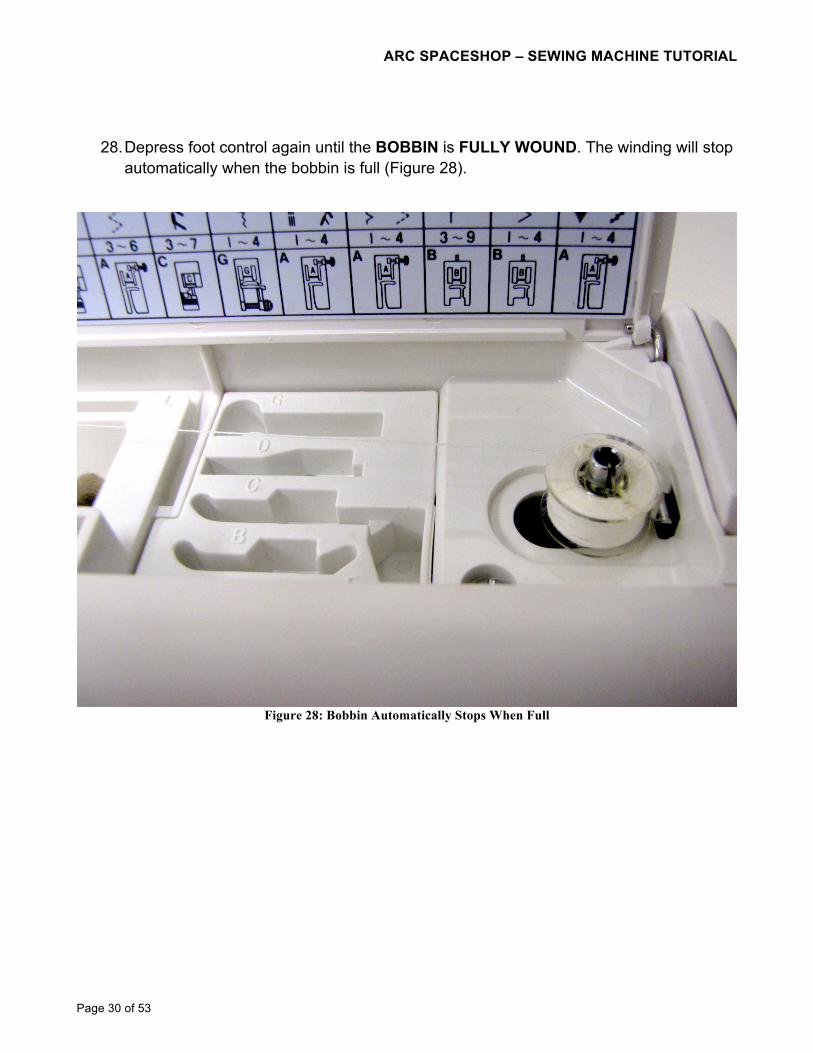
28. Depress foot control again until the BOBBIN is FULLY WOUND. The winding will stop automatically when the bobbin is full (Figure 28).
Figure 28: Bobbin Automatically Stops When Full
ARC SPACESHOP – SEWING MACHINE TUTORIAL
Page 31 of 53
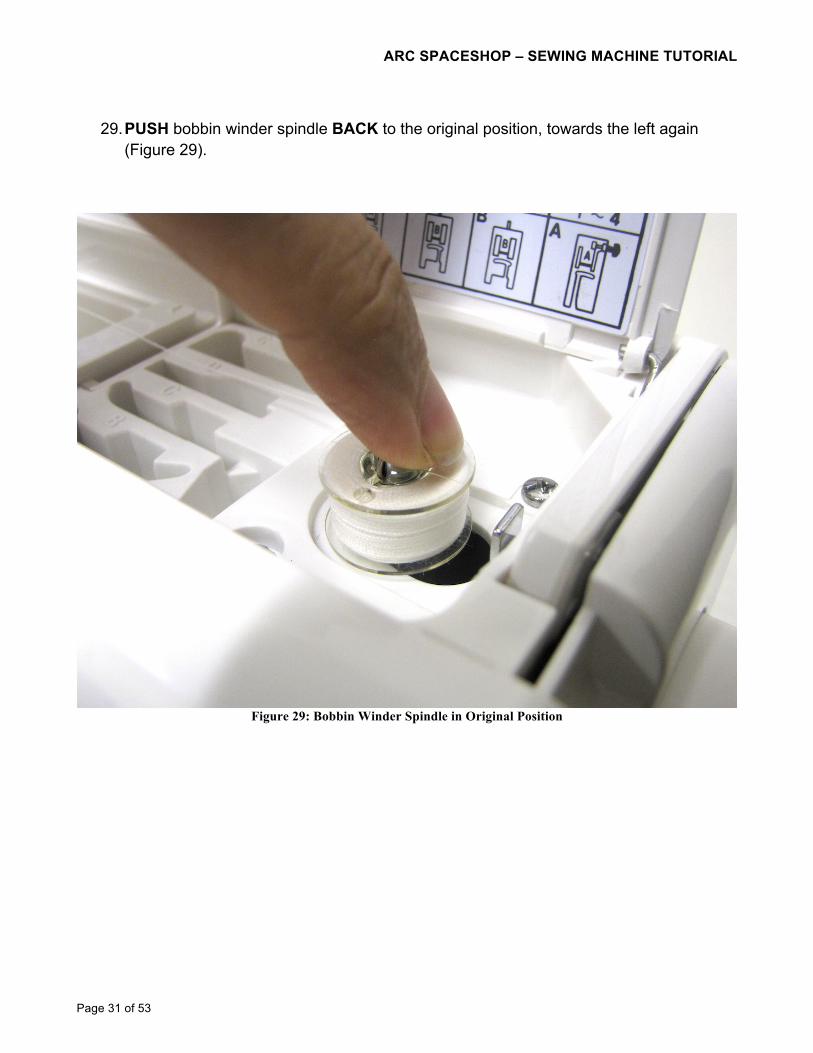
29. PUSH bobbin winder spindle BACK to the original position, towards the left again
(Figure 29).
Figure 29: Bobbin Winder Spindle in Original Position
ARC SPACESHOP – SEWING MACHINE TUTORIAL
Page 32 of 53
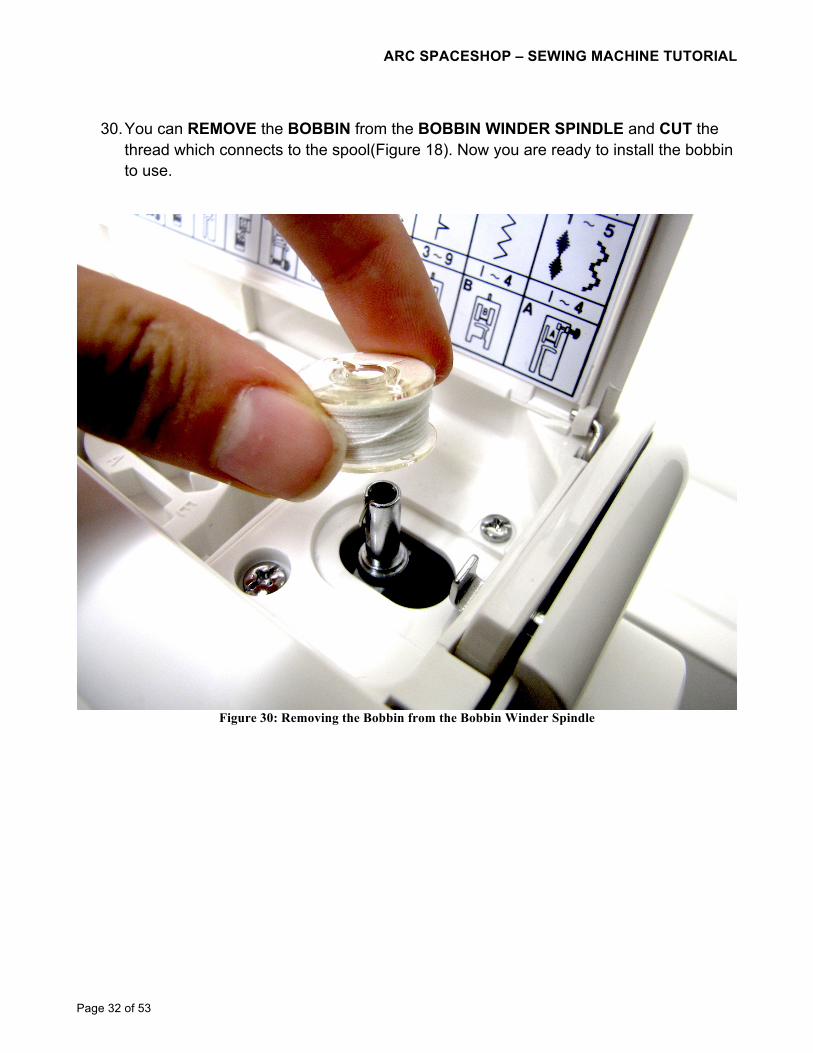
30. You can REMOVE the BOBBIN from the BOBBIN WINDER SPINDLE and CUT the
thread which connects to the spool(Figure 18). Now you are ready to install the bobbin to use.
Figure 30: Removing the Bobbin from the Bobbin Winder Spindle
ARC SPACESHOP – SEWING MACHINE TUTORIAL
Page 33 of 53
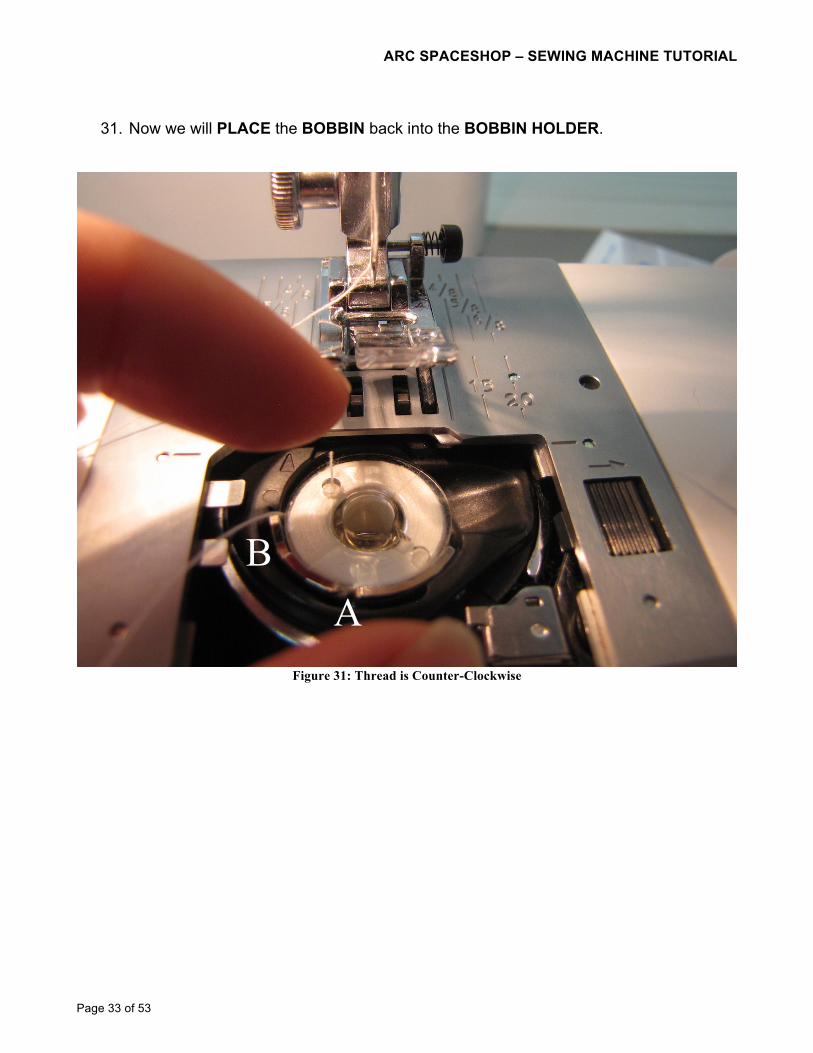
31. Now we will PLACE the BOBBIN back into the BOBBIN HOLDER.
Figure 31: Thread is Counter-Clockwise
A B
ARC SPACESHOP – SEWING MACHINE TUTORIAL
Page 34 of 53
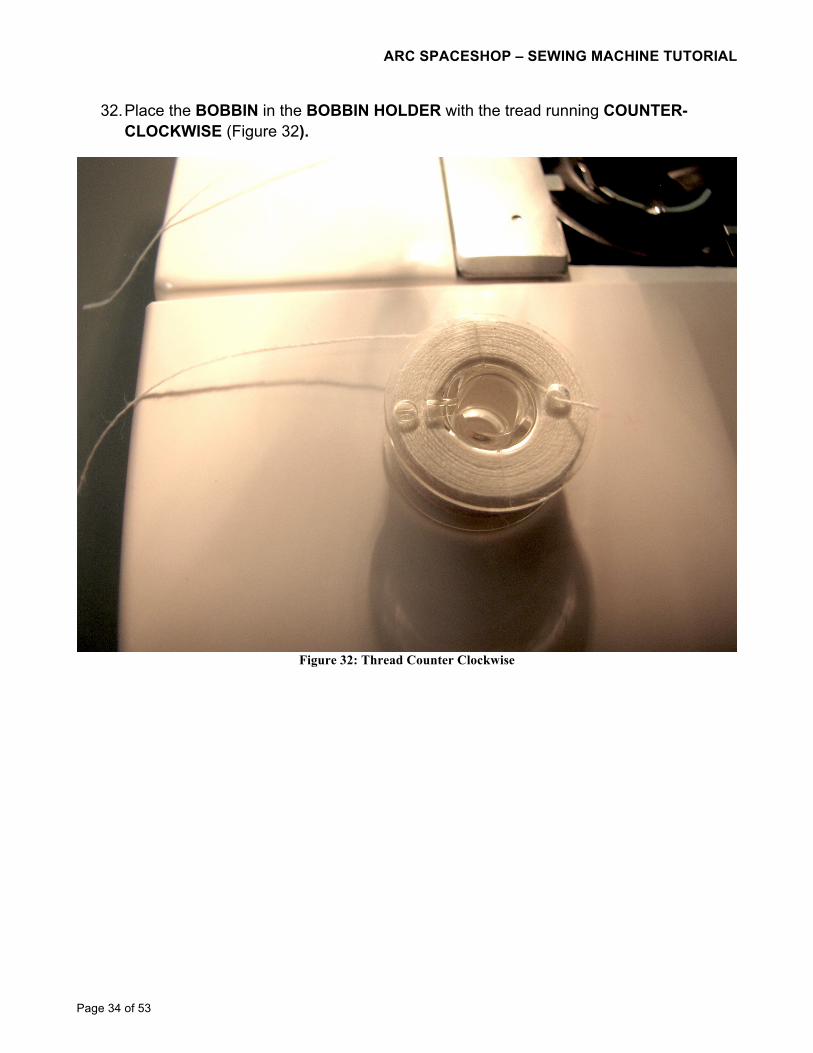
32. Place the BOBBIN in the BOBBIN HOLDER with the tread running COUNTER-CLOCKWISE (Figure 32).
Figure 32: Thread Counter Clockwise
ARC SPACESHOP – SEWING MACHINE TUTORIAL
Page 35 of 53
33. As you guide the thread down into the NOTCH A, DRAW the THREAD to the LEFT sliding it between the tension spring blades (Figure 33).
Figure 33: Thread ready to be pulled down for insertion into Notch A.
34. Continue to draw the thread lightly until the thread slips into NOTCH B (Figure 33).
35. PULL OUT 6” of thread and now attach the HOOK COVER PLATE.
A B
ARC SPACESHOP – SEWING MACHINE TUTORIAL
Page 36 of 53
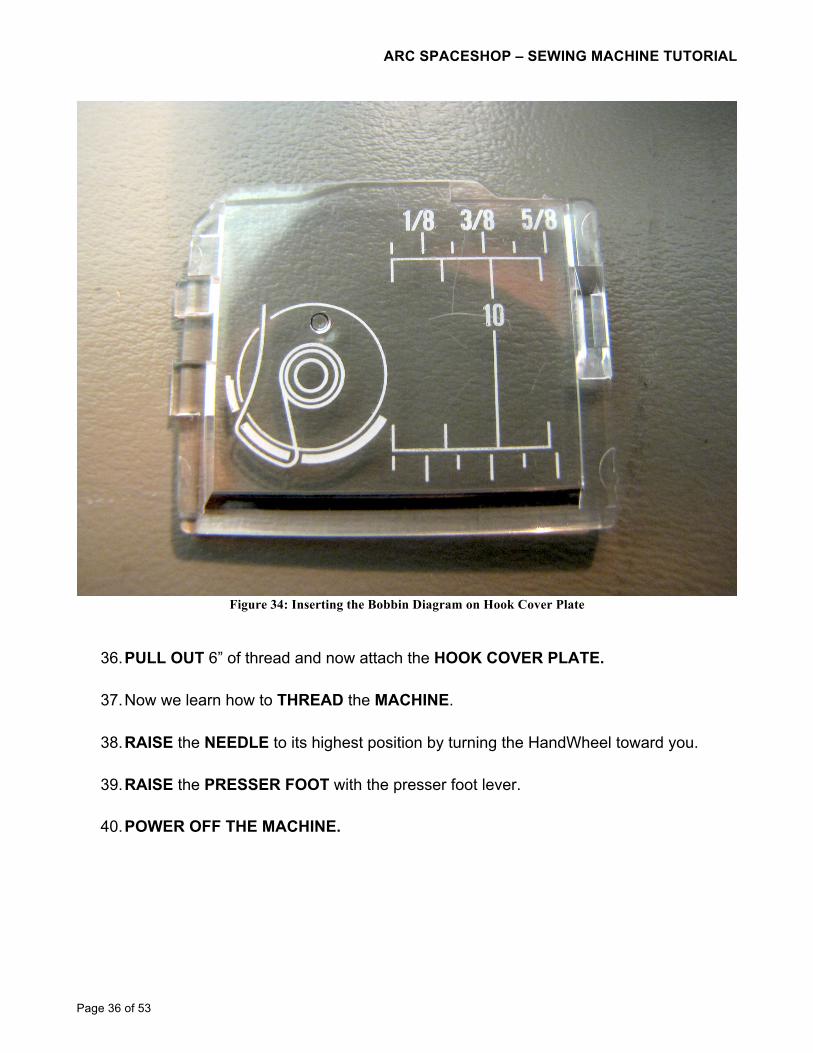
Figure 34: Inserting the Bobbin Diagram on Hook Cover Plate
36. PULL OUT 6” of thread and now attach the HOOK COVER PLATE.
37. Now we learn how to THREAD the MACHINE.
38. RAISE the NEEDLE to its highest position by turning the HandWheel toward you.
39. RAISE the PRESSER FOOT with the presser foot lever.
40. POWER OFF THE MACHINE.
ARC SPACESHOP – SEWING MACHINE TUTORIAL
Page 37 of 53
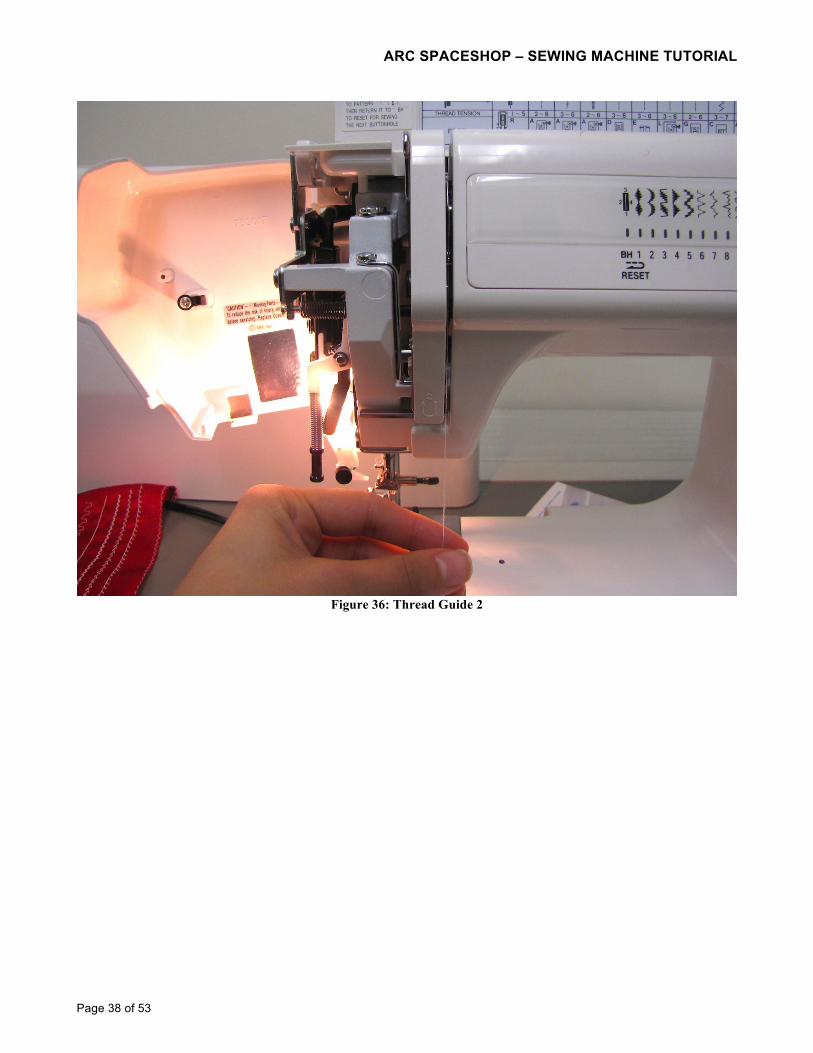
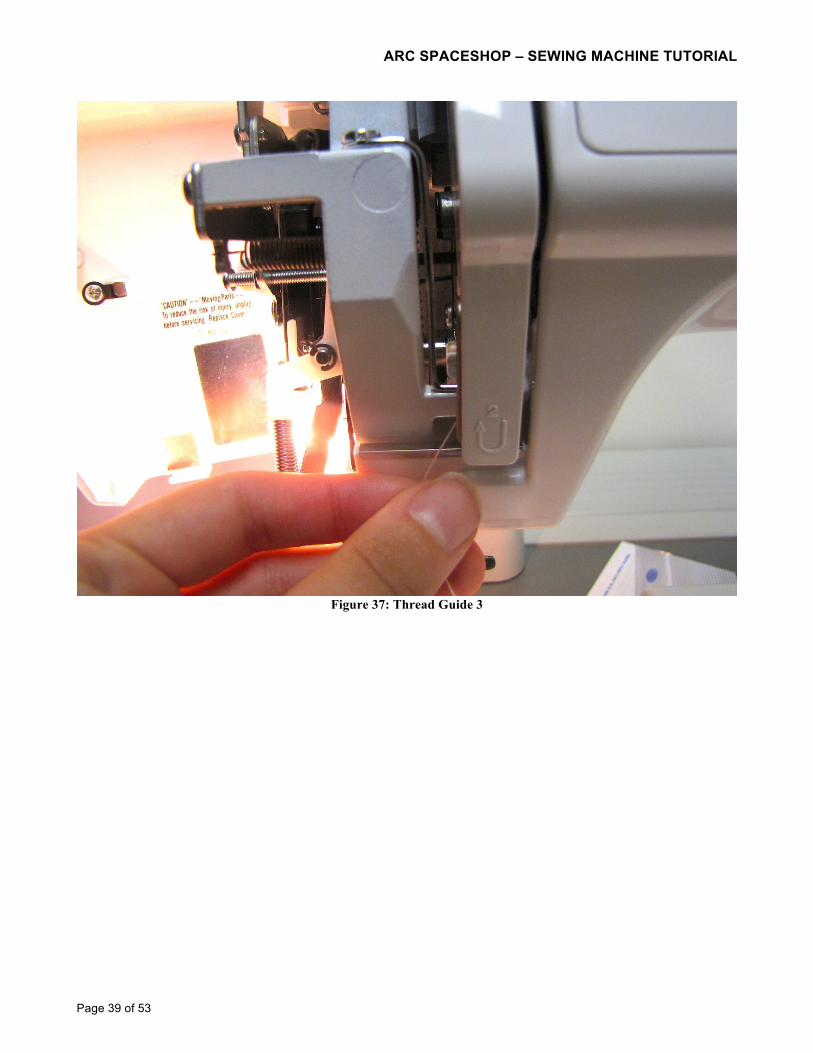
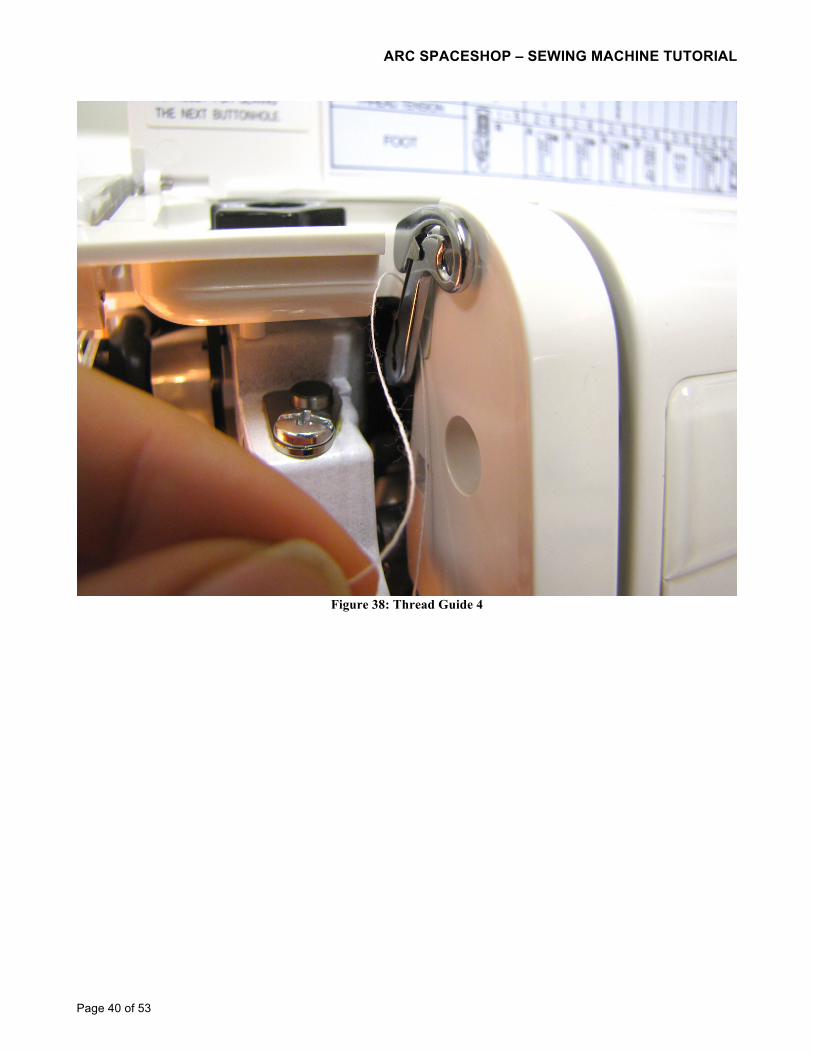
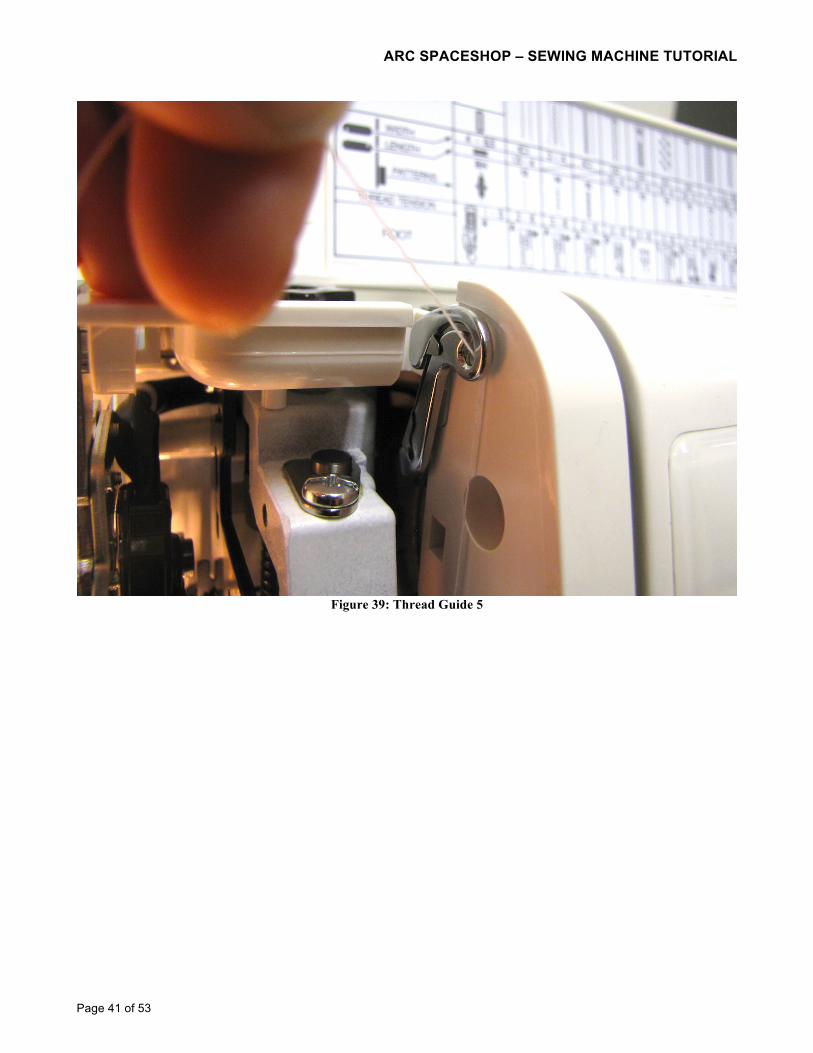
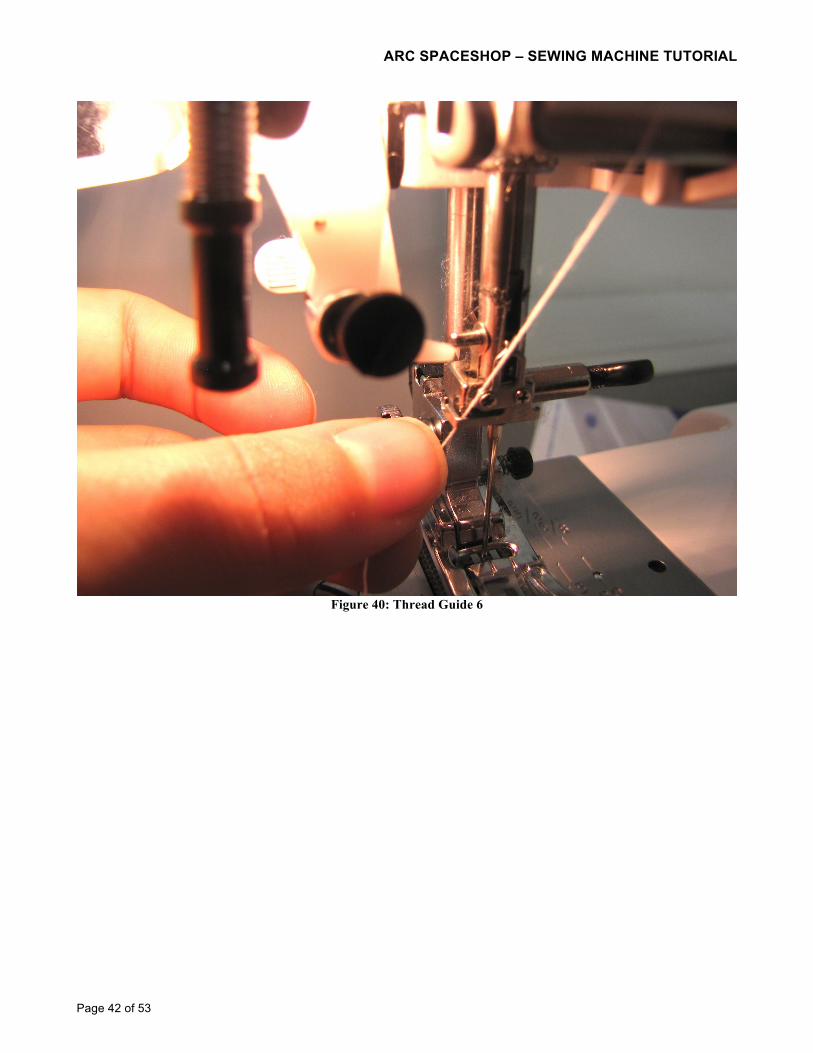
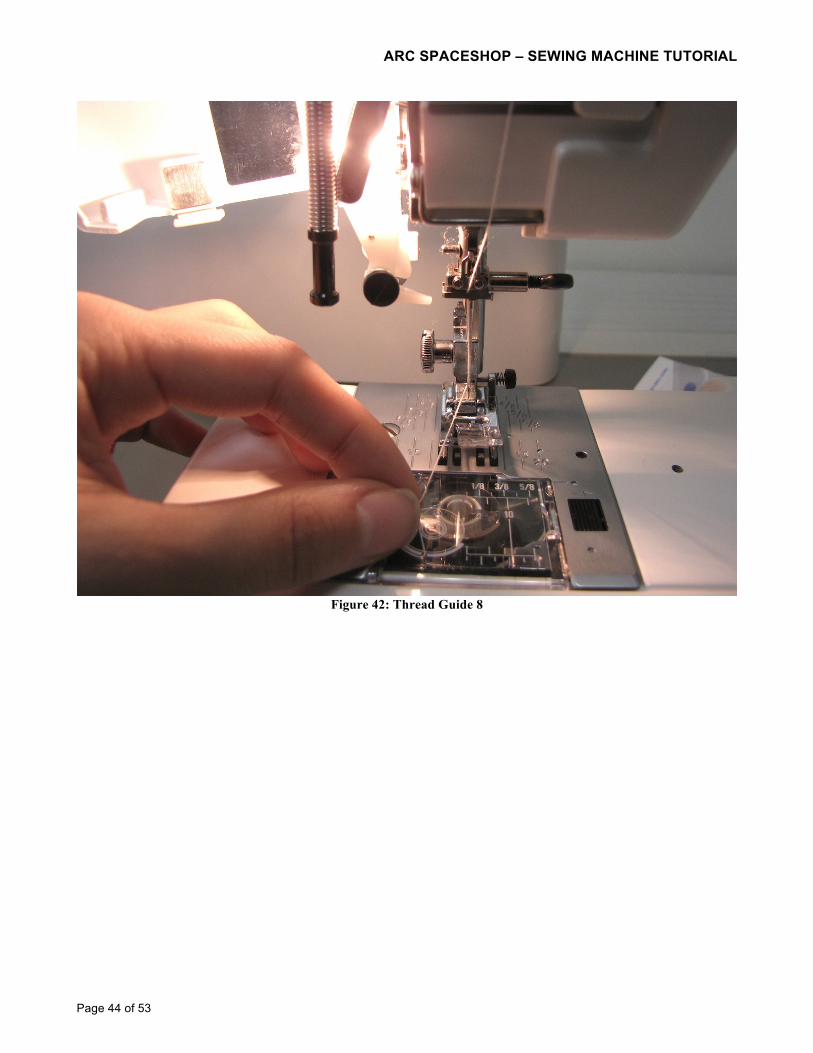
41. Lead the THREAD from the SPOOL and PASS THROUGH the thread guide illustrated in Figures 35-42.
Figure 35: Thread Guide 1
ARC SPACESHOP – SEWING MACHINE TUTORIAL
Page 38 of 53
Figure 36: Thread Guide 2
ARC SPACESHOP – SEWING MACHINE TUTORIAL
Page 39 of 53
Figure 37: Thread Guide 3
ARC SPACESHOP – SEWING MACHINE TUTORIAL
Page 40 of 53
Figure 38: Thread Guide 4
ARC SPACESHOP – SEWING MACHINE TUTORIAL
Page 41 of 53
Figure 39: Thread Guide 5
ARC SPACESHOP – SEWING MACHINE TUTORIAL
Page 42 of 53
Figure 40: Thread Guide 6
ARC SPACESHOP – SEWING MACHINE TUTORIAL
Page 43 of 53
Figure 41: Thread Guide 7
ARC SPACESHOP – SEWING MACHINE TUTORIAL
Page 44 of 53
Figure 42: Thread Guide 8
ARC SPACESHOP – SEWING MACHINE TUTORIAL
Page 45 of 53
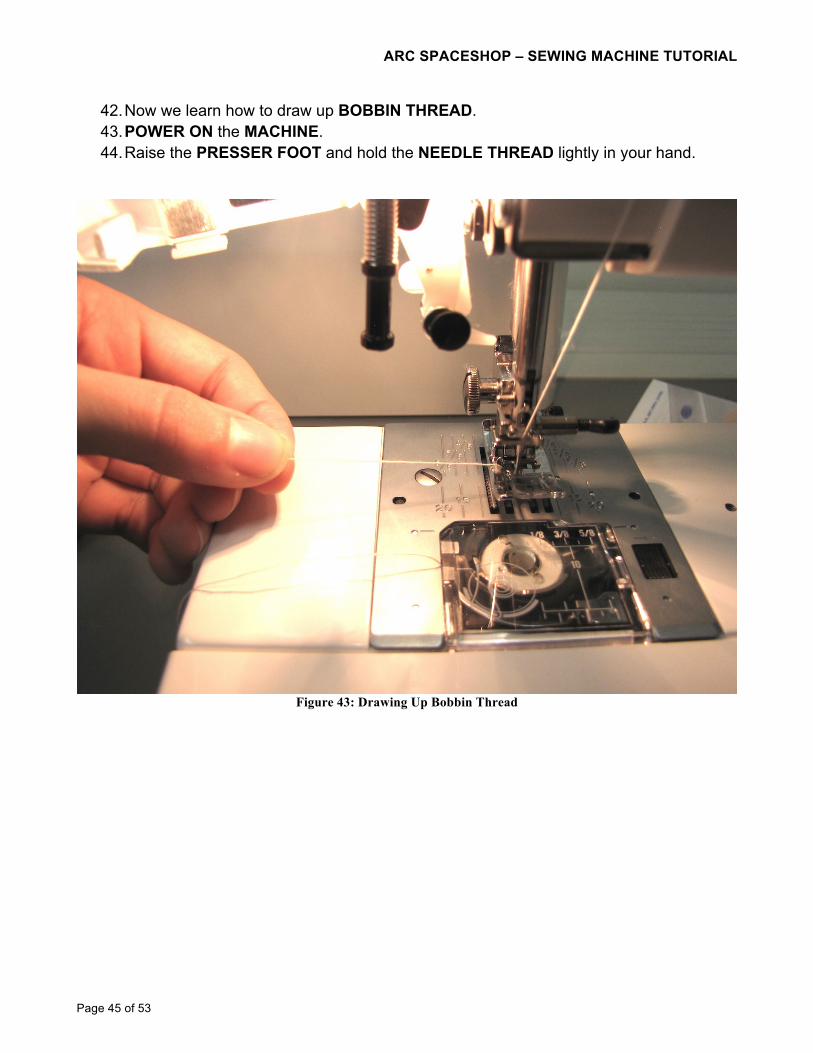
42. Now we learn how to draw up BOBBIN THREAD. 43. POWER ON the MACHINE. 44. Raise the PRESSER FOOT and hold the NEEDLE THREAD lightly in your hand.
Figure 43: Drawing Up Bobbin Thread
ARC SPACESHOP – SEWING MACHINE TUTORIAL
Page 46 of 53
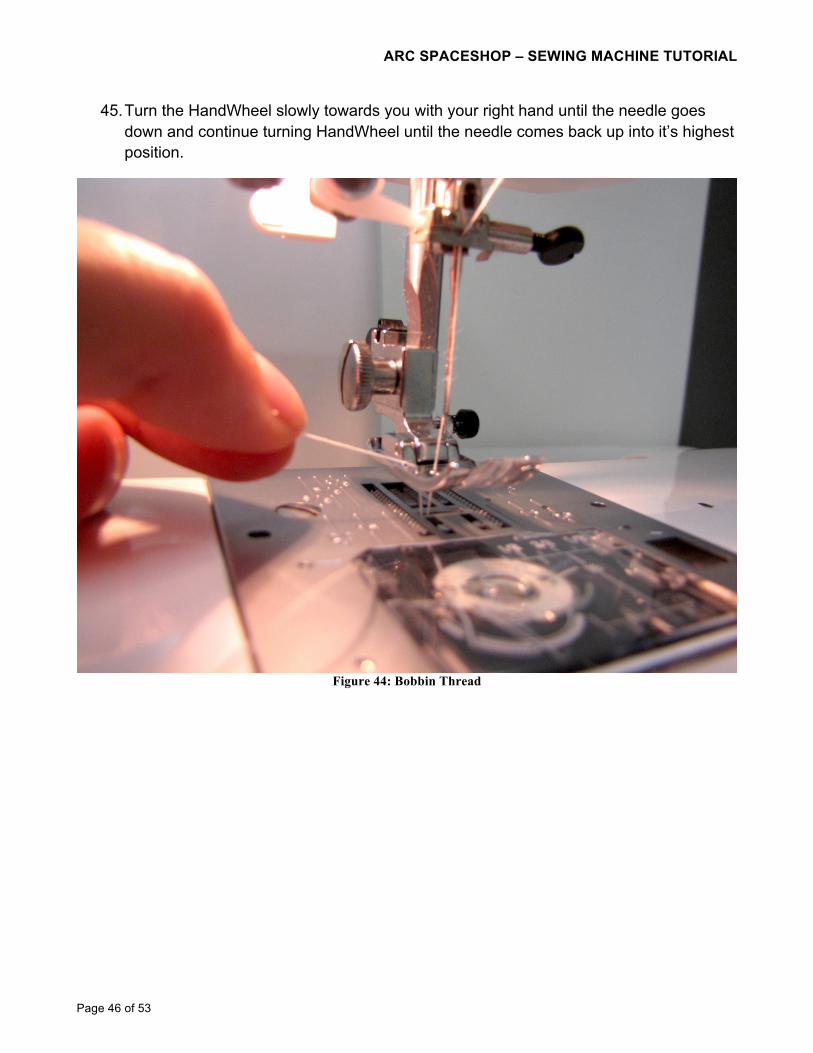
45. Turn the HandWheel slowly towards you with your right hand until the needle goes down and continue turning HandWheel until the needle comes back up into it’s highest position.
Figure 44: Bobbin Thread
ARC SPACESHOP – SEWING MACHINE TUTORIAL
Page 47 of 53
46. It has now formed a loop. Lightly draw up the needle thread forming a loop of bobbin thread.
Figure 45: Bobbin Thread Loop
ARC SPACESHOP – SEWING MACHINE TUTORIAL
Page 48 of 53
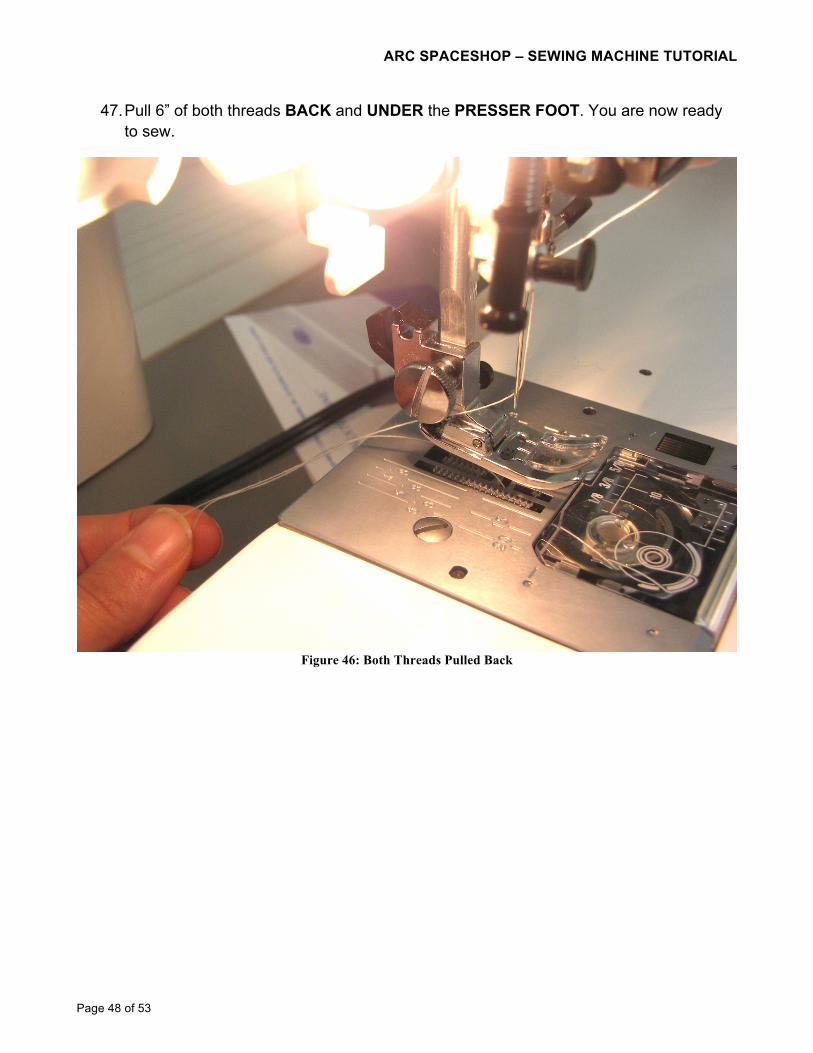
47. Pull 6” of both threads BACK and UNDER the PRESSER FOOT. You are now ready to sew.
Figure 46: Both Threads Pulled Back
ARC SPACESHOP – SEWING MACHINE TUTORIAL
Page 49 of 53
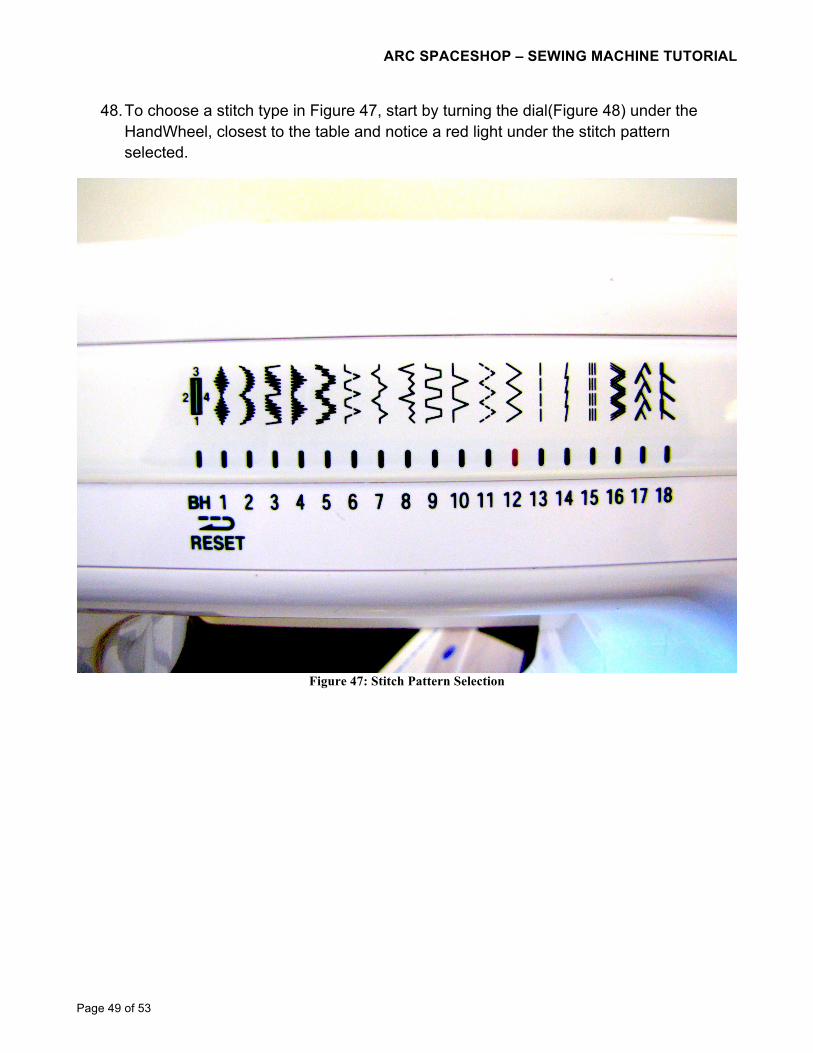
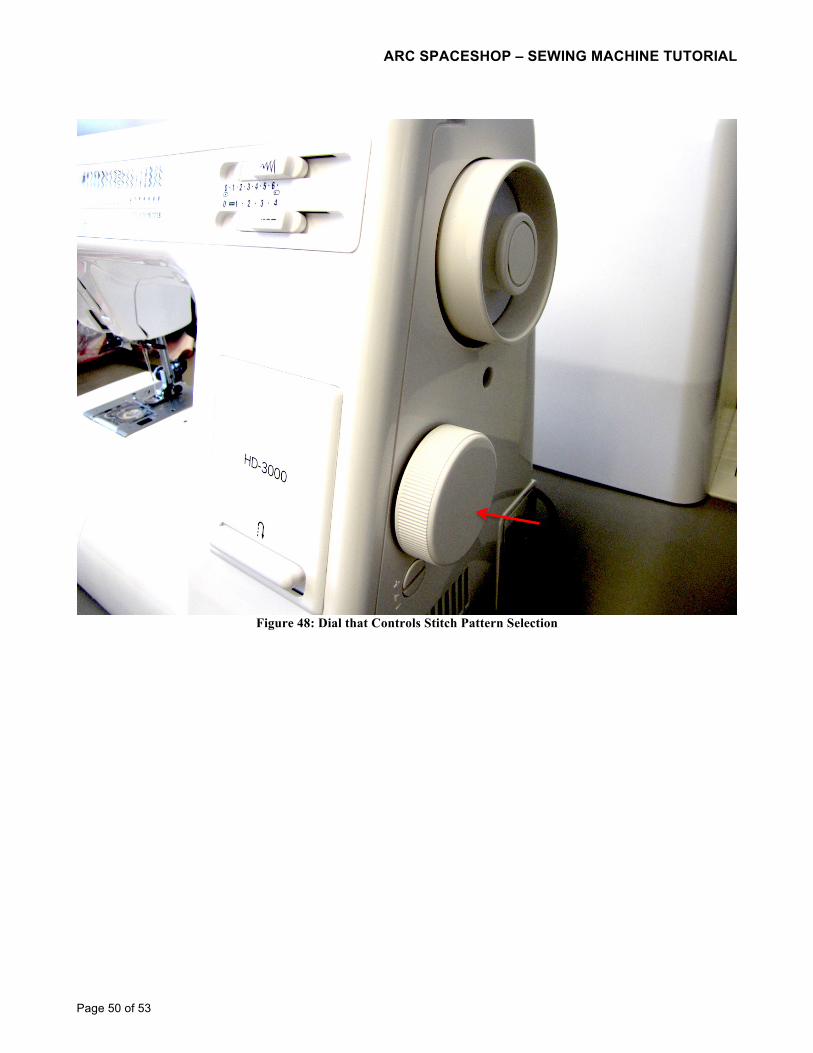
48. To choose a stitch type in Figure 47, start by turning the dial(Figure 48) under the HandWheel, closest to the table and notice a red light under the stitch pattern selected.
Figure 47: Stitch Pattern Selection
ARC SPACESHOP – SEWING MACHINE TUTORIAL
Page 50 of 53
Figure 48: Dial that Controls Stitch Pattern Selection
ARC SPACESHOP – SEWING MACHINE TUTORIAL
Page 51 of 53
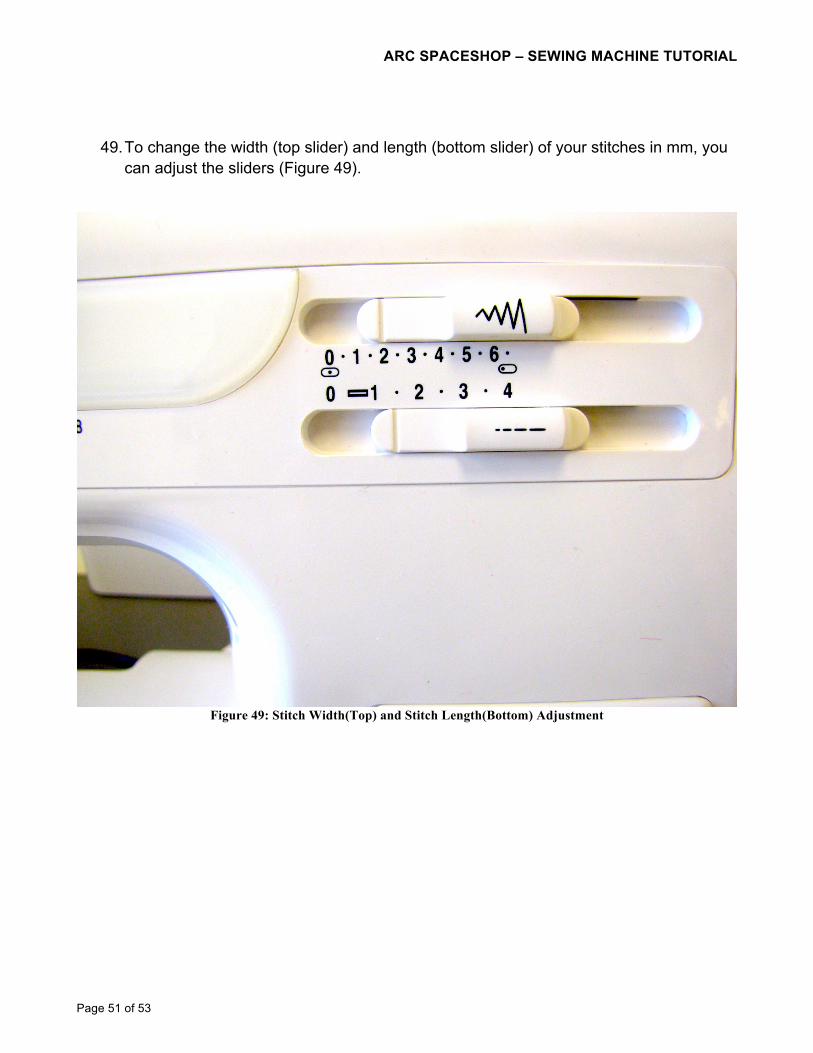
49. To change the width (top slider) and length (bottom slider) of your stitches in mm, you can adjust the sliders (Figure 49).
Figure 49: Stitch Width(Top) and Stitch Length(Bottom) Adjustment
ARC SPACESHOP – SEWING MACHINE TUTORIAL
Page 52 of 53
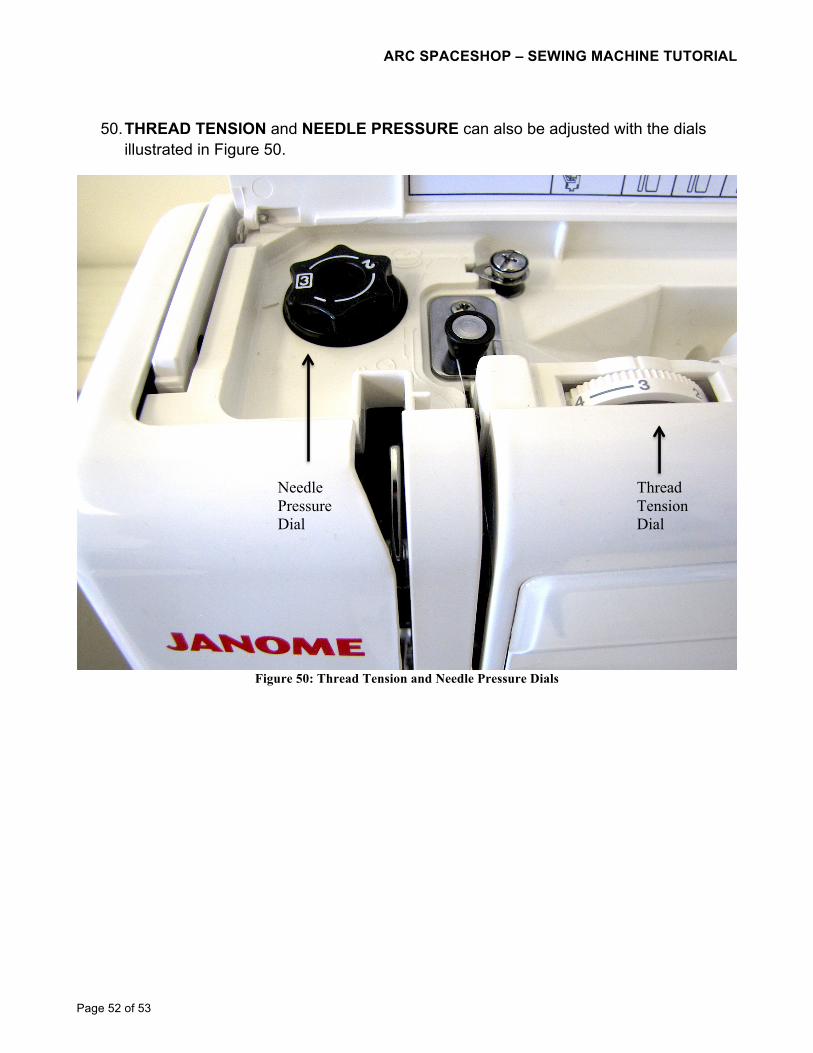
50. THREAD TENSION and NEEDLE PRESSURE can also be adjusted with the dials
illustrated in Figure 50.
Figure 50: Thread Tension and Needle Pressure Dials
Needle Pressure Dial
Thread Tension Dial
ARC SPACESHOP – SEWING MACHINE TUTORIAL
Page 53 of 53
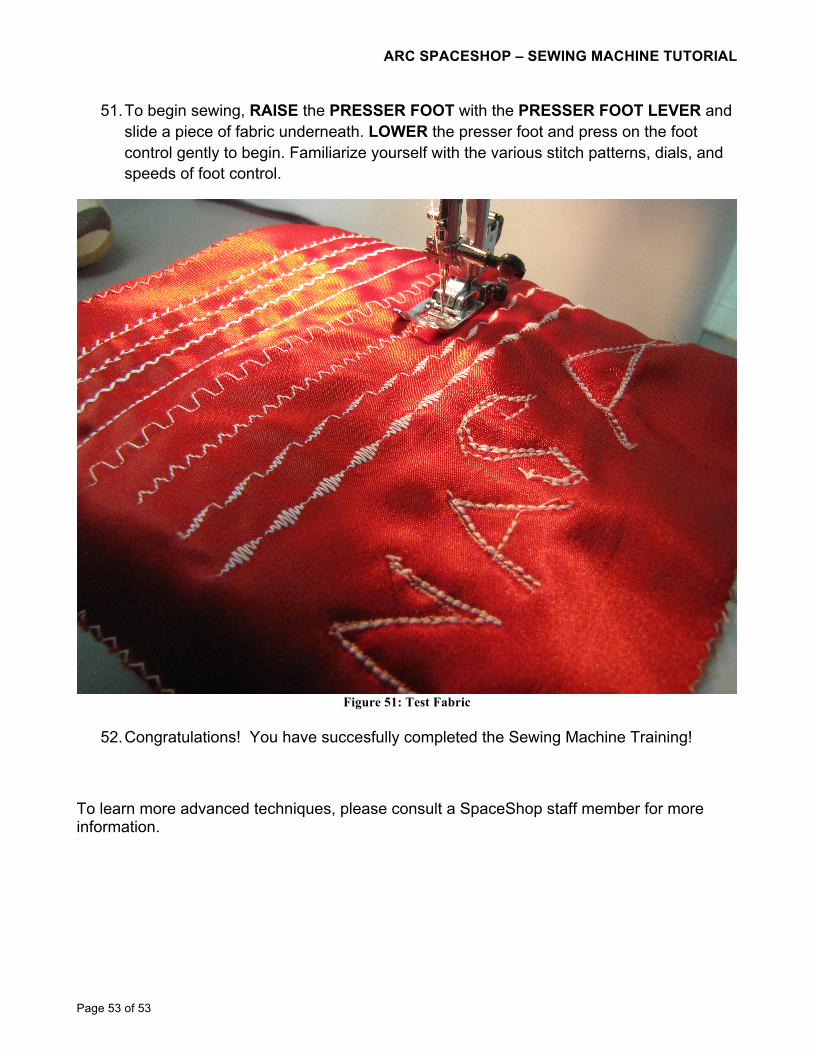
51. To begin sewing, RAISE the PRESSER FOOT with the PRESSER FOOT LEVER and slide a piece of fabric underneath. LOWER the presser foot and press on the foot control gently to begin. Familiarize yourself with the various stitch patterns, dials, and speeds of foot control.
Figure 51: Test Fabric
52. Congratulations! You have succesfully completed the Sewing Machine Training!
To learn more advanced techniques, please consult a SpaceShop staff member for more information.


![MySewingMall.com [Sewing Machine Parts & Sewing Jargons]](https://static.documents.pub/doc/80x56/587a415b1a28ab00148b4837/mysewingmallcom-sewing-machine-parts-sewing-jargons.jpg)


