26
Page 1 of 26 SHAC Day Camp Program V.1.0
Page 1 of 26
SHAC Day Camp Program
V.1.0
Page 2 of 26
Table of Contents Overview ............................................................................................................................................. 3
BEAR PROGRAM ................................................................................................................................... 4
Bear Adventure: Bear Claws ....................................................................................................................................... 4
1. Learn about three common designs of pocket knives. ....................................................................................... 4
2. Learn knife safety and earn your Whittling Chip. ............................................................................................... 4
Whittling Chip ..................................................................................................................................................... 6
3. Using a pocketknife, carve two items ................................................................................................................. 7
Item 1 – Ivory Soap ............................................................................................................................................. 7
Item 2 – Soap Stone ............................................................................................................................................ 7
Bear Elective Adventure: Baloo the Builder ................................................................................................................ 8
1. Discover which hand tools are the best ones to have in your tool box. ............................................................. 8
2. Learn the steps of planning a building project and how to read the instructions or drawings. ....................... 10
3. Select and build one useful project and one fun project using wood. ............................................................. 10
First Project Option : Make a Toolbox .............................................................................................................. 10
Second Project Option: Pinewood Derby Stand ............................................................................................... 11
Third Project Option: Recipe Card Holder ......................................................................................................... 11
4. Learn how to finish a wood project. ................................................................................................................. 11
Bear Elective Adventure: Make It Move ................................................................................................................... 13
1. Create an “exploding” (Cobra Weave) craft stick reaction. .............................................................................. 13
2. Make two simple pulleys, and use them to move objects. ............................................................................... 16
3. Make a lever by creating a seesaw using a spool and a wooden paint stirrer. ................................................ 17
4. Do the following: ............................................................................................................................................... 19
a. Draw a Rube Goldberg – type machine. Include at least six steps to complete your action. ....................... 19
b. Construct a real Rube Goldberg – type machine to complete a task assigned by your den leader. ............ 19
Bear Elective Adventures: Super Science .................................................................................................................. 20
1. Make static electricity by rubbing a balloon or a comb on a fleece blanket or wool sweater. ........................ 20
2. Conduct a balloon or other static electricity investigation. .............................................................................. 20
3. Conduct one other static electricity investigation. ........................................................................................... 22
4. Do a sink - or - float investigation. .................................................................................................................... 23
5. Do a color - morphing investigation. ................................................................................................................. 24
6. Do a color - layering investigation. .................................................................................................................... 25
Page 3 of 26
Overview (Guide for Day Camp Chairs and Program Directors)
Day Camp is an organized program conducted by the council under certified
leadership. Day Camp is “the camp that comes to the boy.” Sites are located in
districts around the council convenient for maximum participation by Scouts
(Camping and Outdoor Program Guide, page 6). Day Camp has a direct impact
on Sam Houston Area Council’s Strategic Plan and on District and Council
Journey to Excellence (JTE) goals:
Cub Scout Camping: Increase the percentage of Cub Scouts attending day camp, family camp, and/or resident camp
Cub Scout Advancement: Increase the percentage of Cub Scouts earning rank advancements.
Youth Retention: Improve retention rate of traditional members.
Membership/Youth Growth: Increase number of registered youth.
Projects developed are based on Scouting literature (i.e., Cub Scout Handbooks, How-To Book, Webelos’ Leader
Guide) in order to be age appropriate, advancement based and easily implemented by current and future camp
Program Directors delivering the program across the Council. Each Day Camp should offer a minimum of the
following for each rank:
Six to Ten 45 minute Craft/Skills Sessions (or equivalent time equaling approximately 270 minutes)
Two (2) Field or Indoor Sports as permitted by facility
Shooting Sports (Archery, BBs, Wrist Rockets) as permitted by facility.
The 270 minutes of Craft and Skills that are to be offered are outlined in this document. Choose the number of
Craft and Skills Sessions based on the amount of time your camp has to deliver the program. The delivery and
instruction method is left up to the individual camp as long as it covers the outlined achievements for that specific
rank along with the Projects/Crafts during the sessions.
Field Sports offered are left up to the discretion of each Camp depending on facilities available. Shooting Sports
(i.e., BBs, Archery, Wrist Rockets) are highly encouraged as Cubs may only participate in these activities at a
District/Council event but again, are left up to the discretion of the Camp depending on facilities available. If a
Camp needs to fill more time, use the provided program aide materials to enhance the topic in the advancements
listed, but do not add or change from what is listed.
Page 4 of 26
BEAR PROGRAM
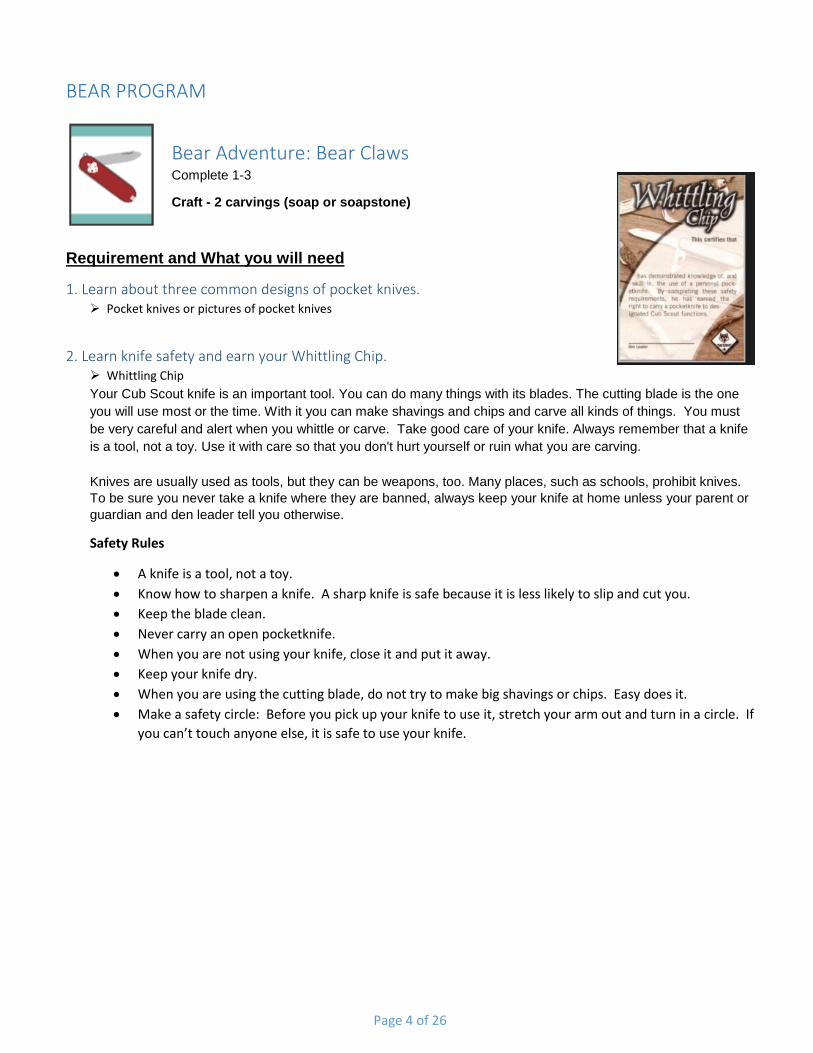
Bear Adventure: Bear Claws Complete 1-3
Craft - 2 carvings (soap or soapstone)
Requirement and What you will need
1. Learn about three common designs of pocket knives. Pocket knives or pictures of pocket knives
2. Learn knife safety and earn your Whittling Chip. Whittling Chip
Your Cub Scout knife is an important tool. You can do many things with its blades. The cutting blade is the one
you will use most or the time. With it you can make shavings and chips and carve all kinds of things. You must
be very careful and alert when you whittle or carve. Take good care of your knife. Always remember that a knife
is a tool, not a toy. Use it with care so that you don't hurt yourself or ruin what you are carving.
Knives are usually used as tools, but they can be weapons, too. Many places, such as schools, prohibit knives.
To be sure you never take a knife where they are banned, always keep your knife at home unless your parent or
guardian and den leader tell you otherwise.
Safety Rules
A knife is a tool, not a toy.
Know how to sharpen a knife. A sharp knife is safe because it is less likely to slip and cut you.
Keep the blade clean.
Never carry an open pocketknife.
When you are not using your knife, close it and put it away.
Keep your knife dry.
When you are using the cutting blade, do not try to make big shavings or chips. Easy does it.
Make a safety circle: Before you pick up your knife to use it, stretch your arm out and turn in a circle. If
you can’t touch anyone else, it is safe to use your knife.
Page 5 of 26
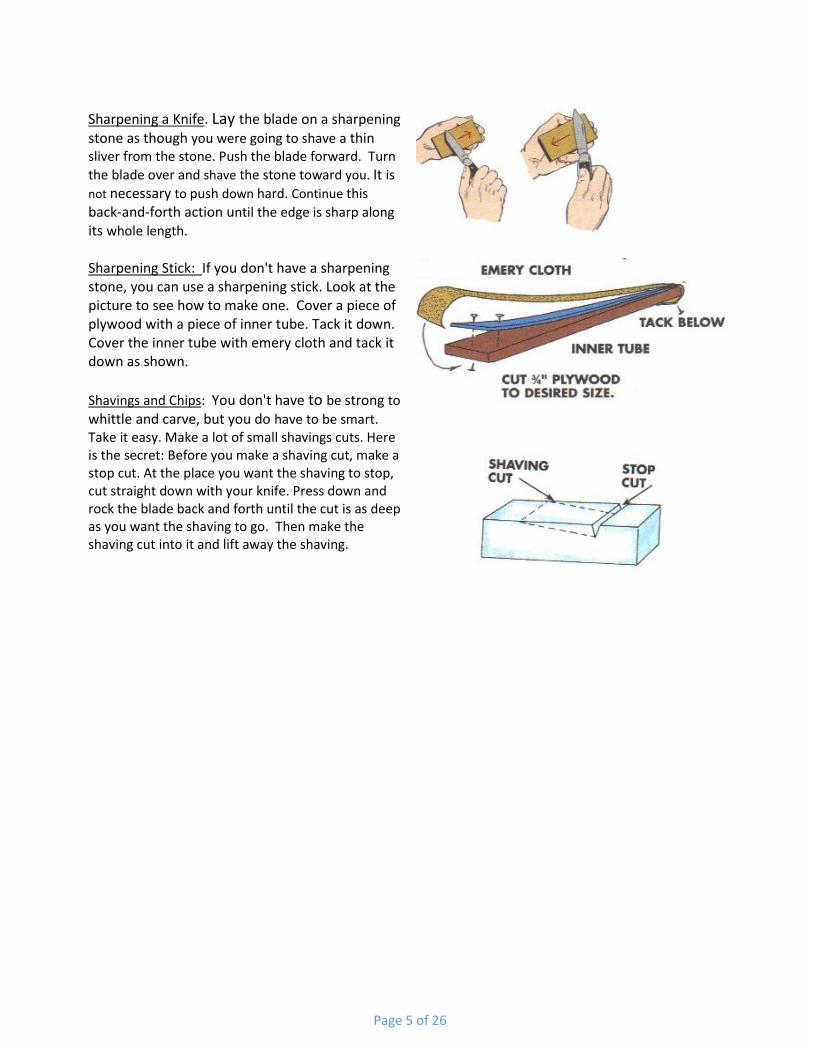
Sharpening a Knife. Lay the blade on a sharpening stone as though you were going to shave a thin sliver from the stone. Push the blade forward. Turn
the blade over and shave the stone toward you. It is
not necessary to push down hard. Continue this
back-and-forth action until the edge is sharp along
its whole length.
Sharpening Stick: If you don't have a sharpening stone, you can use a sharpening stick. Look at the picture to see how to make one. Cover a piece of plywood with a piece of inner tube. Tack it down. Cover the inner tube with emery cloth and tack it down as shown.
Shavings and Chips: You don't have to be strong to
whittle and carve, but you do have to be smart. Take it easy. Make a lot of small shavings cuts. Here is the secret: Before you make a shaving cut, make a stop cut. At the place you want the shaving to stop, cut straight down with your knife. Press down and rock the blade back and forth until the cut is as deep as you want the shaving to go. Then make the shaving cut into it and lift away the shaving.
Page 6 of 26
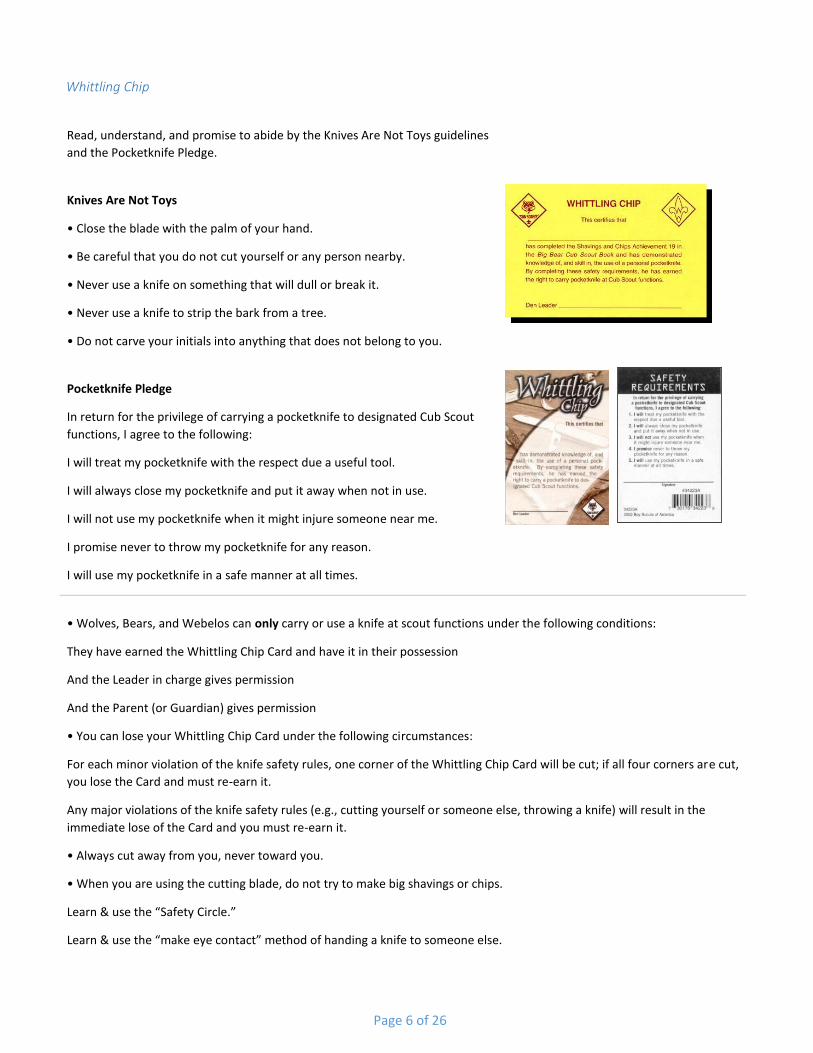
Whittling Chip
Read, understand, and promise to abide by the Knives Are Not Toys guidelines
and the Pocketknife Pledge.
Knives Are Not Toys
• Close the blade with the palm of your hand.
• Be careful that you do not cut yourself or any person nearby.
• Never use a knife on something that will dull or break it.
• Never use a knife to strip the bark from a tree.
• Do not carve your initials into anything that does not belong to you.
Pocketknife Pledge
In return for the privilege of carrying a pocketknife to designated Cub Scout
functions, I agree to the following:
I will treat my pocketknife with the respect due a useful tool.
I will always close my pocketknife and put it away when not in use.
I will not use my pocketknife when it might injure someone near me.
I promise never to throw my pocketknife for any reason.
I will use my pocketknife in a safe manner at all times.
• Wolves, Bears, and Webelos can only carry or use a knife at scout functions under the following conditions:
They have earned the Whittling Chip Card and have it in their possession
And the Leader in charge gives permission
And the Parent (or Guardian) gives permission
• You can lose your Whittling Chip Card under the following circumstances:
For each minor violation of the knife safety rules, one corner of the Whittling Chip Card will be cut; if all four corners are cut,
you lose the Card and must re-earn it.
Any major violations of the knife safety rules (e.g., cutting yourself or someone else, throwing a knife) will result in the
immediate lose of the Card and you must re-earn it.
• Always cut away from you, never toward you.
• When you are using the cutting blade, do not try to make big shavings or chips.
Learn & use the “Safety Circle.”
Learn & use the “make eye contact” method of handing a knife to someone else.
Page 7 of 26
3. Using a pocketknife, carve two items
Item 1 – Ivory Soap
Ivory Soap Bars – other soap is too hard and will crumble so avoid
Plastic Knives
Instructions:
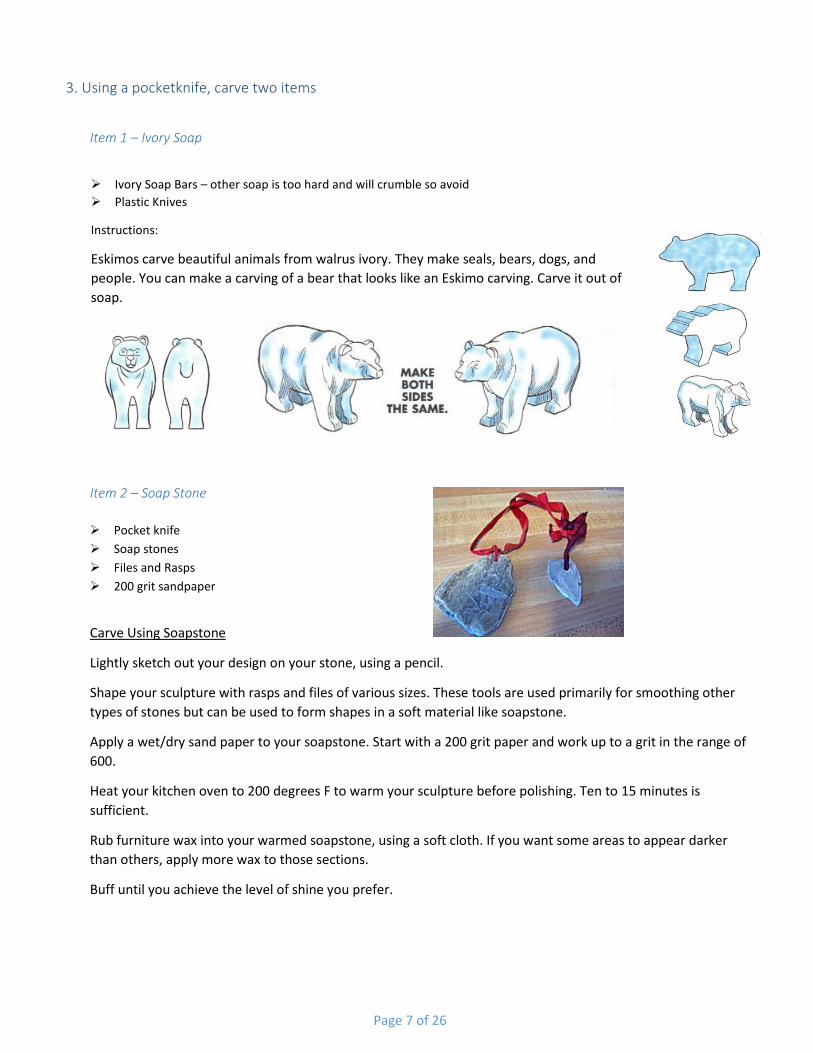
Eskimos carve beautiful animals from walrus ivory. They make seals, bears, dogs, and
people. You can make a carving of a bear that looks like an Eskimo carving. Carve it out of
soap.
Item 2 – Soap Stone
Pocket knife
Soap stones
Files and Rasps
200 grit sandpaper
Carve Using Soapstone
Lightly sketch out your design on your stone, using a pencil.
Shape your sculpture with rasps and files of various sizes. These tools are used primarily for smoothing other
types of stones but can be used to form shapes in a soft material like soapstone.
Apply a wet/dry sand paper to your soapstone. Start with a 200 grit paper and work up to a grit in the range of
600.
Heat your kitchen oven to 200 degrees F to warm your sculpture before polishing. Ten to 15 minutes is
sufficient.
Rub furniture wax into your warmed soapstone, using a soft cloth. If you want some areas to appear darker
than others, apply more wax to those sections.
Buff until you achieve the level of shine you prefer.
Page 8 of 26
Bear Elective Adventure: Baloo the Builder
Complete 1-4
Craft
Tool box (Scout Shop 7046)
Mosaic Box (S&S WD50X12)
Requirement and What you will need
1. Discover which hand tools are the best ones to have in your tool box. Learn the rules for using these tools safely. Practice with at least four of these tools before beginning a project.
Note: Power tools are not appropriate for use by Cub Scouts. Review the Age-Appropriate Guidelines for
Scouting activities (www.scouting.org/HealthandSafety/Resources/AgeAppropriateGuidelines).
Materials:
Pliers
Philips head screwdriver
Standard screwdriver
Hammer
Three more tools ( such as C-clamp, coping saw, claw hammer, hacksaw, file, plane, adjustable wrench, awl, hand saw)
Philips head screws
Standard screws
Nails (suggest small and/or thick nails for easier hammer)
Boards for nailing (and removal of nails)
Soap for screwing (and removal of screws)
Safety glasses
Hint: Set up 4 stations (naming tools, using pliers, using
screwdriver, and use a hammer) that the Bears can rotate
through as a round robin style.
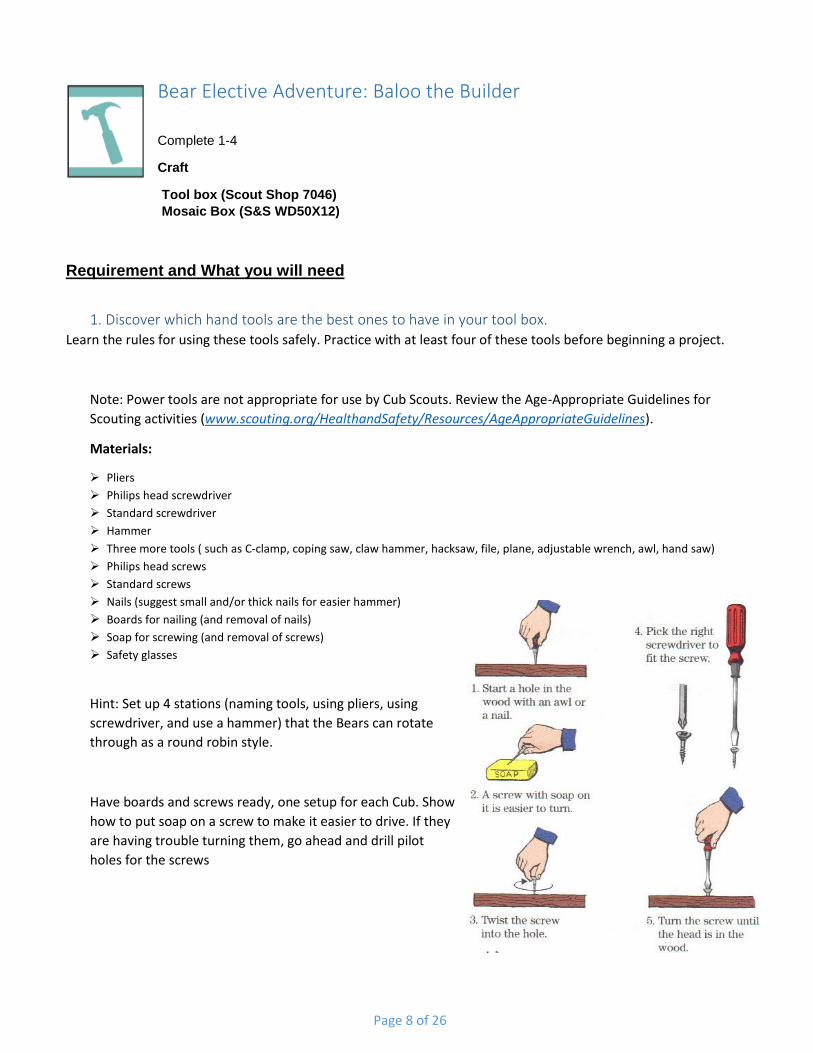
Have boards and screws ready, one setup for each Cub. Show
how to put soap on a screw to make it easier to drive. If they
are having trouble turning them, go ahead and drill pilot
holes for the screws
Page 9 of 26
How to use a hammer properly.

Page 10 of 26
2. Learn the steps of planning a building project and how to read the instructions or drawings. Have the boys read
3. Select and build one useful project and one fun project using wood.
First Project Option : Make a Toolbox
Materials:
Handybox Woodcraft Kit from the Scout Shop
Hammer
Wood Glue (Optional)
Kit includes precut wood parts. Measures 11 ½” X 5” X 3 ½”
1. Check all parts for proper placement. For best results, sand and paint before
assembly..
2. Assemble D to A and B, glue A, B and D together as shown.
3. Nail both sides A to both sides B as shown; make sure that they are all flush at
the bottom.
4. Nail and glue the handle C to the top of both pieces B.
Note – the nails that come with the project bend. Either substitute better nails
that you buy from the hardware store or use wood glue to assemble (use
masking tape to hold it together while it dries if needed)

Page 11 of 26
Second Project Option: Pinewood Derby Stand
Materials:
1"x4" for the base
2"x4" for the upright
1"x2" for the top to hold the car.
Four wood screws
Paint or stain
Paint brushes
Water to clean brushes
Bowl to hold paint
Instructions:
1. Cut the 1"x4"to make a base 6" long.
2. Cut the 1"x2" to make a 4" top on which the car will rest.
3. Cut the 2"x4" into a 4" upright. One end will be a square cut. The other end
will be at a slight an angle
4. Use two screws each to attach base and top to upright.
5. Paint or stain.
Third Project Option: Recipe Card Holder
Materials:
Wood base
Wood upright
2 wood screws
Screwdriver
Clothes pin
Wood glue
Decorations, optional
Preparation: Adult cuts upright piece of wood before camp.
Instructions: Use one or two screws to attach the upright to the base and use wood glue (or equivalent) to attach
clothes pin to upright. Paint or decoupage.
4. Learn how to finish a wood project. Sand and use wood stain or poly to finish your projects. You can also have the boys paint it or decoupage it like the
recipe card holder shows.
Page 12 of 26
Other Supporting Material
_____ HAMMER. Used for driving nails, for prying boards apart, and for pulling nails.
_____ SCREWDRIVER. Sets screws.
_____ PLIERS. Slip-joint pliers have wide and normal jaw openings to grip things of different sizes. (Don't use
pliers on nuts-use a crescent wrench instead.)
_____ HAND SAW. There are two kinds: one for crosscutting, and another for ripping lengthwise along the grain of
wood.
_____ COPING SAW. Lets you cut curves.
_____ CRESCENT WRENCH. This open-end wrench can be adjusted to fit many sizes or nuts.
_____ DRILL BIT. Corkscrew-shaped drills are called drill bits. They are used to drill holes in wood.
_____ HAND DRILL. Uses drill bits to bore holes in wood and metal.
_____ CLAMP. Holds pieces of wood together after gluing
_____ WOOD PLANE. Smoothes rough boards.
_____ BENCH VISE. Holds wood in place for sawing or planing.

Page 13 of 26
Bear Elective Adventure: Make It Move Complete 1-4
Craft
Exploding Stick reaction
Rube Goldberg from recycled stuff
Requirements and What you will need
1. Create an “exploding” (Cobra Weave) craft stick reaction.
Step 1: Materials
What you need:
-a big ol' pile of popsicle sticks
- string (optional)
- your hands and maybe a buddy's hands too
Step 2:
Cross two sticks into an "x" shape like in the
picture. You want it to be a little slantly so that
there are two obtuse and two acute angles. The
stick on top will be stick 1 and the stick on
bottom will be stick 2, see picture for note.
.

Page 14 of 26
Step 3:
Add a Stick 3 by tucking one
end under the end of Stick 2.
The new stick should go over
Stick 1.
Step 4:
Add another stick by tucking it's
end under Stick 2 and letting
the rest lay over Stick 3.
Page 15 of 26
Step 5:
Continue adding sticks by tucking the end under the opposite color stick and letting the rest go over the other stick
until you've reached the desired length. Just remember that patience will pay off and the longer the stick bomb you
make the longer explosion show you'll have.
Step 6:
For safety you want to be able to trigger the stick bomb from a
distance. Simply tie a piece of string to a stick then use that to bind the
working end.
Step 7:
When your ready for the action, give the pull string a nice tug and
stand back. If all goes well your cobra weave should rise up like a wave
while sticks are wildly thrown across the room. Enjoy!
Page 16 of 26
2. Make two simple pulleys, and use them to move objects.
The pulley is really a wheel and axle with a rope or chain attached. A pulley makes work seem easier because it
changes the direction of motion to work with gravity. Let's say you have to lift a heavy load, like a bale of hay, up to
the second floor of a barn. You could tie a rope to the bale of hay, stand on the second floor, and pull it straight up.
Or you could put a pulley at the second floor, stand at the first floor, and lift the bale of hay by pulling straight down. It
would be the exact amount of work in either case, but the action of pulling down feels easier because you're working
with the force of gravity.
Show the difference in work required by using a simple pulley and a block and tackle pulley.
You will need:
Two-three empty spools
Two wire coat hangers
String (thick)
Have boys work in pairs to build a single pulley. See how much work is required by having one boy hold the hanger
with the pulley while the other one lifts the load by pulling on the string.
Have them add a second pulley and build a moving pulley (also called block and tackle.) The amount of work
needed should be less (cut in half) but they will need twice as much rope. If you want to take it further, have them
add a third spool and see what happens (work will be cut to a third but they will have to pull even further (more string
will be needed.)
Tie to Hanger
Tie to Hanger
Page 17 of 26
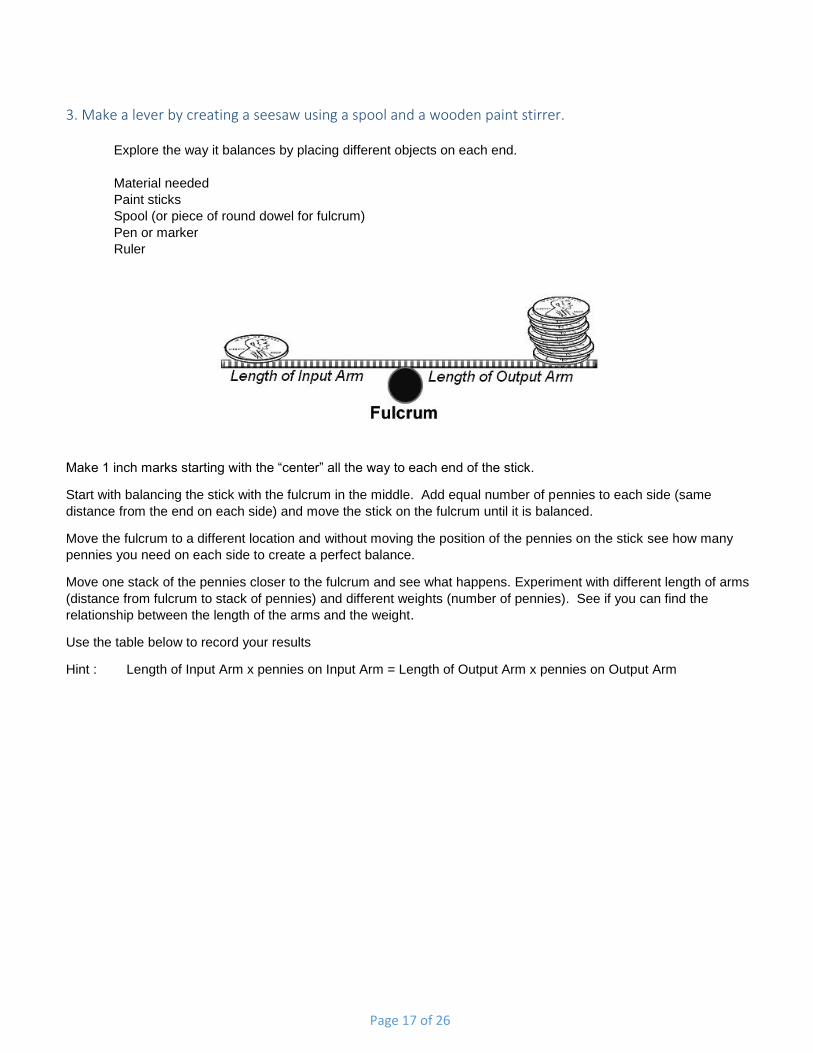
3. Make a lever by creating a seesaw using a spool and a wooden paint stirrer.
Explore the way it balances by placing different objects on each end.
Material needed
Paint sticks
Spool (or piece of round dowel for fulcrum)
Pen or marker
Ruler
Make 1 inch marks starting with the “center” all the way to each end of the stick.
Start with balancing the stick with the fulcrum in the middle. Add equal number of pennies to each side (same
distance from the end on each side) and move the stick on the fulcrum until it is balanced.
Move the fulcrum to a different location and without moving the position of the pennies on the stick see how many
pennies you need on each side to create a perfect balance.
Move one stack of the pennies closer to the fulcrum and see what happens. Experiment with different length of arms
(distance from fulcrum to stack of pennies) and different weights (number of pennies). See if you can find the
relationship between the length of the arms and the weight.
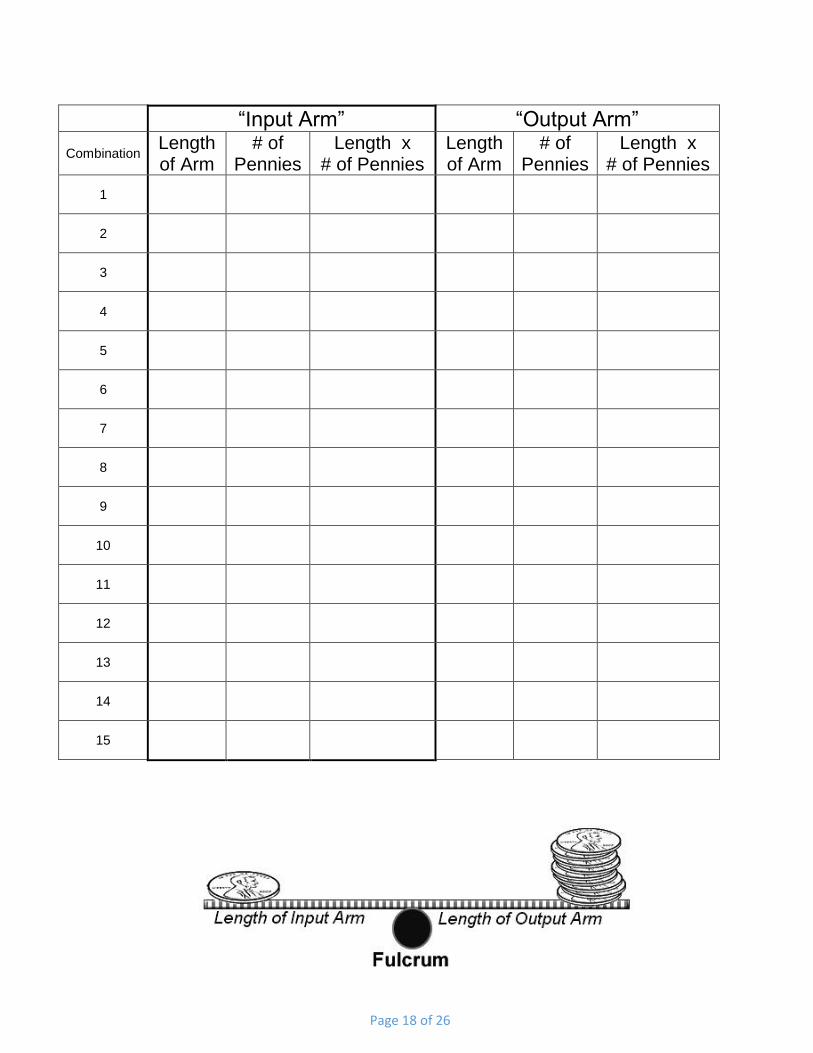
Use the table below to record your results
Hint : Length of Input Arm x pennies on Input Arm = Length of Output Arm x pennies on Output Arm
Page 18 of 26
“Input Arm” “Output Arm”
Combination Length of Arm
# of Pennies
Length x # of Pennies
Length of Arm
# of Pennies
Length x # of Pennies
1
2
3
4
5
6
7
8
9
10
11
12
13
14
15

Page 19 of 26
4. Do the following:
a. Draw a Rube Goldberg – type machine. Include at least six steps to complete your action.
b. Construct a real Rube Goldberg – type machine to complete a task assigned by your den leader. Use at least two simple machines and include at least four steps.
Give the kids “stuff” and have them build the machine – don’t forget duct tape!.
Have them work as a den. Here are examples.

Page 20 of 26
Bear Elective Adventures: Super Science Complete 1-6
Note – The experiments for static electricity may not work if the weather is very humid.
Requirements and What you will need
1. Make static electricity by rubbing a balloon or a comb on a fleece blanket or wool sweater.
2. Conduct a balloon or other static electricity investigation. Explain what you learned.
Supplies Needed:
2 balloons
sweater
assorted materials
tissue paper {we used 2 different sizes}
aluminum foil
cardboard scrap
paper scrap
yarn/string
pom pom
pipe cleaner
ribbon
cloth
foam
Gather a random assortment of materials. See the suggestions in the materials list.
Blow up the balloons.
Touch a balloon to each of different materials including the other balloon. {Notice none of the materials is
attracted to the balloon.}
Rub one balloon onto the sweater. {This will add electrons to the balloon and cause it to become negatively
charged.}
Now touch the balloon again to each of the materials. Observe what happens.
What is Static Electricity?
Static electricity is a stationary electric charge that is built up on a material. A common example of static
electricity is the slight electrical shock that we can get when we touch a doorknob during dry weather. The static
electricity is formed when we accumulate extra electrons (negatively-charged particles which we rub off
carpeting) and they are discharged onto the doorknob.
Page 21 of 26
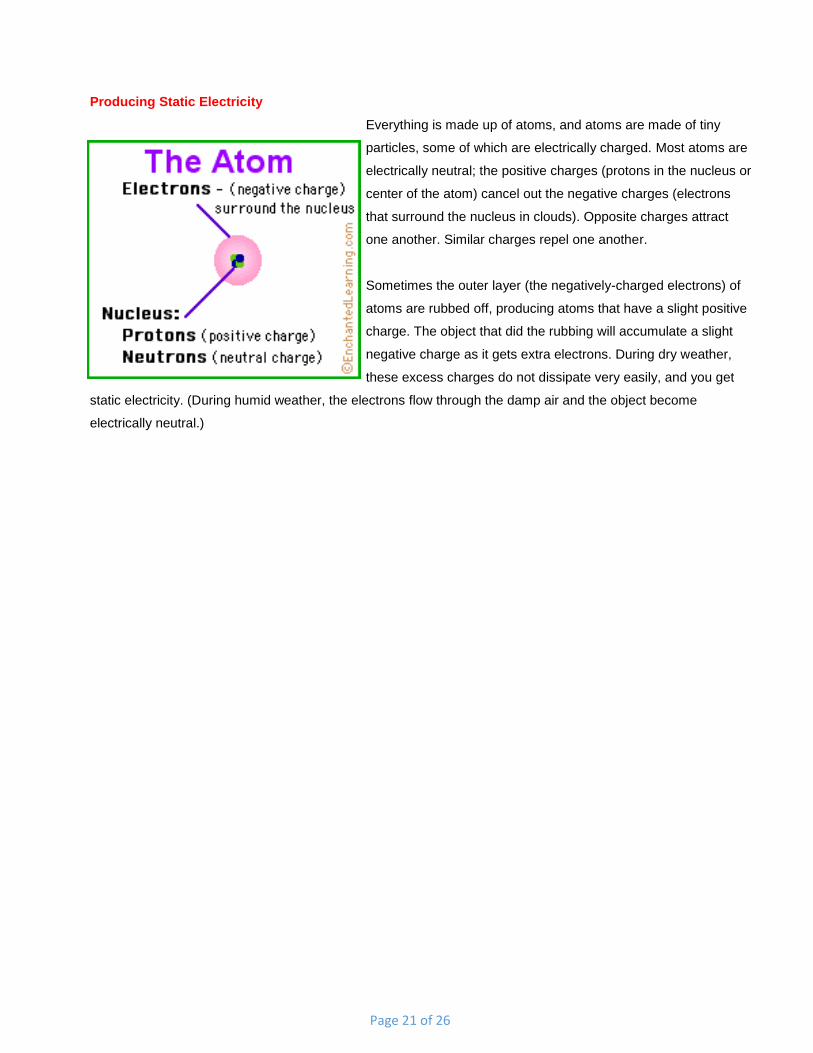
Producing Static Electricity
Everything is made up of atoms, and atoms are made of tiny
particles, some of which are electrically charged. Most atoms are
electrically neutral; the positive charges (protons in the nucleus or
center of the atom) cancel out the negative charges (electrons
that surround the nucleus in clouds). Opposite charges attract
one another. Similar charges repel one another.
Sometimes the outer layer (the negatively-charged electrons) of
atoms are rubbed off, producing atoms that have a slight positive
charge. The object that did the rubbing will accumulate a slight
negative charge as it gets extra electrons. During dry weather,
these excess charges do not dissipate very easily, and you get
static electricity. (During humid weather, the electrons flow through the damp air and the object become
electrically neutral.)

Page 22 of 26
3. Conduct one other static electricity investigation.
Page 23 of 26
4. Do a sink - or - float investigation. Explain what you learned.
Suggested materials for activity include:
Rock
Pumice Stone (this stone will actually float)
Wood
Metal
Plastic
Aluminum
Foil
Apples
Oranges
plastic bottles
toy blocks
paper
bathtub toys
plastic forks
rubber balls
soda-bottle caps
pencils
erasers
sponges.
Brainstorm on what it means to sink or float. Ask boys to describe things that they have seen sink or float.
Ask for ideas on what kinds of things they think will sink or float, for example: Can people float?
Extend the ideas in this lesson by having the boys explore the question, "Can we change something from a
sinker to a floater?"
Here’s a cool demonstration.
You’ll need
water
a clear glass or plastic cup or some other shallow vessel
a small piece of paper. Optionally, a piece of newspaper or paper towel.
Create it
1. Fill a cup or shallow vessel with water. Demonstrate that the clip will actually sink by placing it on the surface of the water, not perfectly flat, and letting go.
2. Retrieve the clip and wait for the water to settle and be still. 3. Cut a small piece of newspaper or paper towel and put the clip on the strip. Place the strip with the clip on
the surface of the water and let go. The paper will keep the clip afloat, but once the paper soaks up water, it will sink, leaving the clip floating on the surface of the water.
The paperclip floats because of surface tension, which you can read more about on Wikipedia or a variety of science-related websites. Surface tension is the force that causes the molecules on the surface of a liquid to be pushed together and form a layer
Page 24 of 26
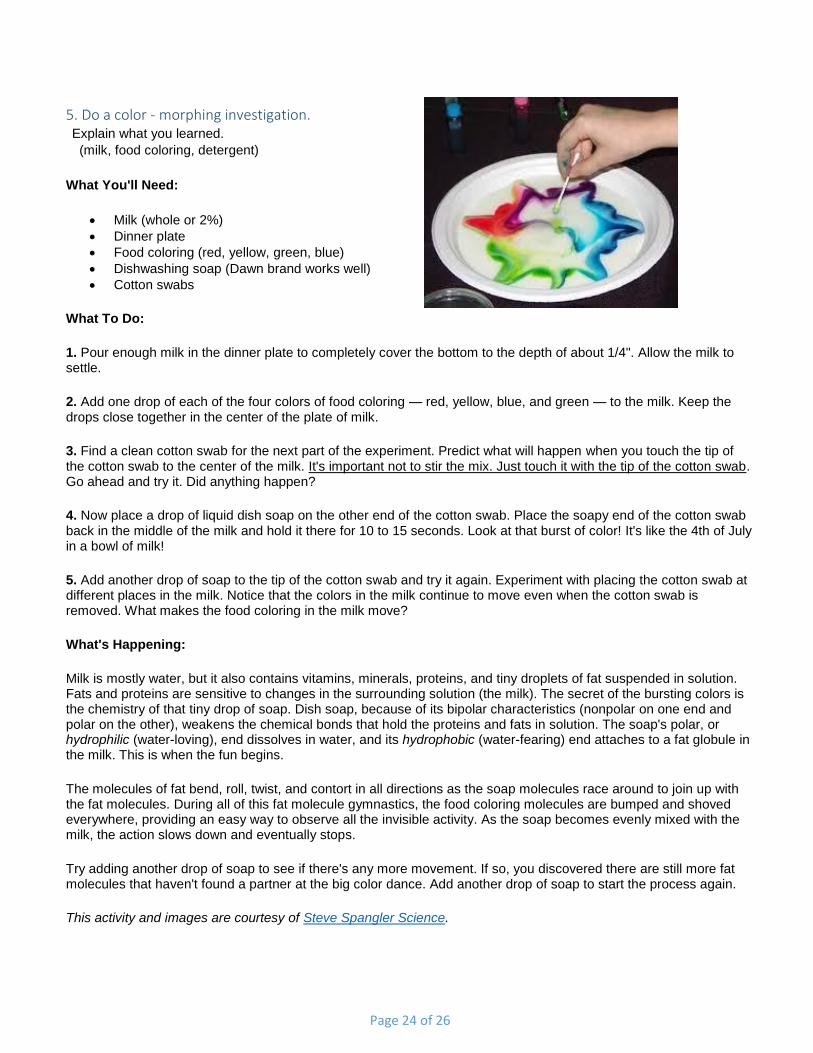
5. Do a color - morphing investigation. Explain what you learned.
(milk, food coloring, detergent)
What You'll Need:
Milk (whole or 2%)
Dinner plate
Food coloring (red, yellow, green, blue)
Dishwashing soap (Dawn brand works well)
Cotton swabs
What To Do:
1. Pour enough milk in the dinner plate to completely cover the bottom to the depth of about 1/4". Allow the milk to settle.
2. Add one drop of each of the four colors of food coloring — red, yellow, blue, and green — to the milk. Keep the drops close together in the center of the plate of milk.
3. Find a clean cotton swab for the next part of the experiment. Predict what will happen when you touch the tip of the cotton swab to the center of the milk. It's important not to stir the mix. Just touch it with the tip of the cotton swab. Go ahead and try it. Did anything happen?
4. Now place a drop of liquid dish soap on the other end of the cotton swab. Place the soapy end of the cotton swab back in the middle of the milk and hold it there for 10 to 15 seconds. Look at that burst of color! It's like the 4th of July in a bowl of milk!
5. Add another drop of soap to the tip of the cotton swab and try it again. Experiment with placing the cotton swab at different places in the milk. Notice that the colors in the milk continue to move even when the cotton swab is removed. What makes the food coloring in the milk move?
What's Happening:
Milk is mostly water, but it also contains vitamins, minerals, proteins, and tiny droplets of fat suspended in solution. Fats and proteins are sensitive to changes in the surrounding solution (the milk). The secret of the bursting colors is the chemistry of that tiny drop of soap. Dish soap, because of its bipolar characteristics (nonpolar on one end and polar on the other), weakens the chemical bonds that hold the proteins and fats in solution. The soap's polar, or hydrophilic (water-loving), end dissolves in water, and its hydrophobic (water-fearing) end attaches to a fat globule in the milk. This is when the fun begins.
The molecules of fat bend, roll, twist, and contort in all directions as the soap molecules race around to join up with the fat molecules. During all of this fat molecule gymnastics, the food coloring molecules are bumped and shoved everywhere, providing an easy way to observe all the invisible activity. As the soap becomes evenly mixed with the milk, the action slows down and eventually stops.
Try adding another drop of soap to see if there's any more movement. If so, you discovered there are still more fat molecules that haven't found a partner at the big color dance. Add another drop of soap to start the process again.
This activity and images are courtesy of Steve Spangler Science.

Page 25 of 26
6. Do a color - layering investigation. Explain what you learned.
(Experiment from Steve Spangle Science)
Materials
Light Karo syrup
Water
Vegetable oil
Dawn dish soap (blue)
Rubbing alcohol
Lamp oil
Honey
Graduated cylinder
Food Coloring or True Color Coloring Tablets
Food baster
9 oz portion cups
Experiment
1. Measure 8 ounces of each type of liquid into the 9 ounce portion cups. You may want to color each of the liquids to make a more dramatic effect in your column. Light Karo syrup is easier to color than dark syrup. The only liquids that you may not be able to color are the vegetable oil and the honey.
2. Start your column by pouring the honey into the cylinder. Now, you will pour each liquid SLOWLY into the container, one at a time. It is very important to pour the liquids slowly and into the center of the cylinder. Make sure that the liquids do not touch the sides of the cylinder while you are pouring. It’s okay if the liquids mix a little as you are pouring. The layers will always even themselves out because of the varying densities. Make sure you pour the liquids in the following order:
o Honey o Karo syrup o Dish soap o Water o Vegetable oil o Rubbing alcohol o Lamp oil
3. As you pour, the liquids will layer on top of one another. After you pour in the liquids you will have a seven-layer science experiment - a science burrito!
Magic colors
Materials
Vegetable Oil
Water
Food coloring (red, yellow, blue)
Powdered Tempera Paint (re, yellow, blue)
Small soda bottles with labels removed.
1. Prepare 3 small glasses full of water that has been dyed with regular food coloring –red, yellow, blue.
2. Prepare 3 small glasses of vegetable dies with powdered tempera paint – red yellow, blue.
3. Mix two different colors - one water and one oil is a small soda bottle. Example- use the blue water and
the yellow oil.
4. Secure the cap on and shake it. The new color will appear.
5. Let it sit for a while and the colors will return back to their original color with the oil on top of the water.

Page 26 of 26
How Does It Work?
The same amount of two different liquids will have different weights because they have different masses. The liquids that weigh more (have a higher density) will sink below the liquids that weigh less (have a lower density).
To test this, you might want to set up a scale and measure each of the liquids that you poured into your column. Make sure that you measure the weights of equal portions of each liquid. You should find that the weights of the liquids correspond to each different layer of liquid. For example, the honey will weigh more than the Karo syrup. By weighing these liquids, you will find that density and weight are closely related.
** NOTE: The numbers in the table are based on data from manufacturers for each item. Since each manufacturer has its secret formula, the densities may vary from brand to brand. You’ll notice that according to the number, rubbing alcohol should float on top of the lamp oil, but we know from our experiment that the lamp oil is the top layer. Chemically speaking, lamp oil is nothing more than refined kerosene with coloring and fragrance added. Does every brand of lamp oil exhibit the same characteristics? Sounds like the foundation of a great science fair project.
The table shows the densities of the liquids used in the column as well as other common liquids (measured in g/cm
3 or g/mL).
Density is basically how much "stuff" is smashed into a particular area... or a comparison between an object's mass and volume. Remember the all-important equation: Density = Mass divided by Volume. Based on this equation, if the weight (or mass) of something increases but the volume stays the same, the density has to go up. Likewise, if the mass decreases but the volume stays the same, the density has to go down. Lighter liquids (like water or rubbing alcohol) are less dense than heavy liquids (like honey or Karo syrup) and so float on top of the more dense layers.
Material Density
Rubbing Alcohol .79
Lamp Oil .80
Baby Oil .83
Vegetable Oil .92
Ice Cube .92
Water 1.00
Milk 1.03
Dawn Dish Soap 1.06
Light Corn Syrup 1.33
Maple Syrup 1.37
Honey 1.42


