57
Shoulder 1
| Date post: | 02-Jan-2016 |
| Category: |
Documents |
| Upload: | ethel-barton |
| View: | 214 times |
| Download: | 0 times |
Shoulder
1
Intended Learning Outcomes
• The student should be able to recognize clinical radiographic technical principles of the shoulder

3
Shoulder Radiography
• To evaluate the glenohumeral joint, the scapula must be parallel to the film.
• Shoulder views can be taken with suspended respiration
• The Clavicle and A C joints will have the patient in a true A-P position with mid sagittal plane perpendicular to film.
4
Shoulder Radiography
• A-C Joint view are taken with full inspiration to help open the joint space.
• A-C Joint views are taken weighted and non-weighted when looking for a separation. The weights must be 10 to 15 pounds and strapped around the wrists to avoid the use of the arm muscles.

5
Shoulder Radiography
• A-C Joints views can also be taken to detect metabolic or drug induced bone loss. The view need not be taken with and without weights.
• The Clavicle can be taken A-P or P-A. The P-A view will have less magnification distortion but is more difficult to position.
6
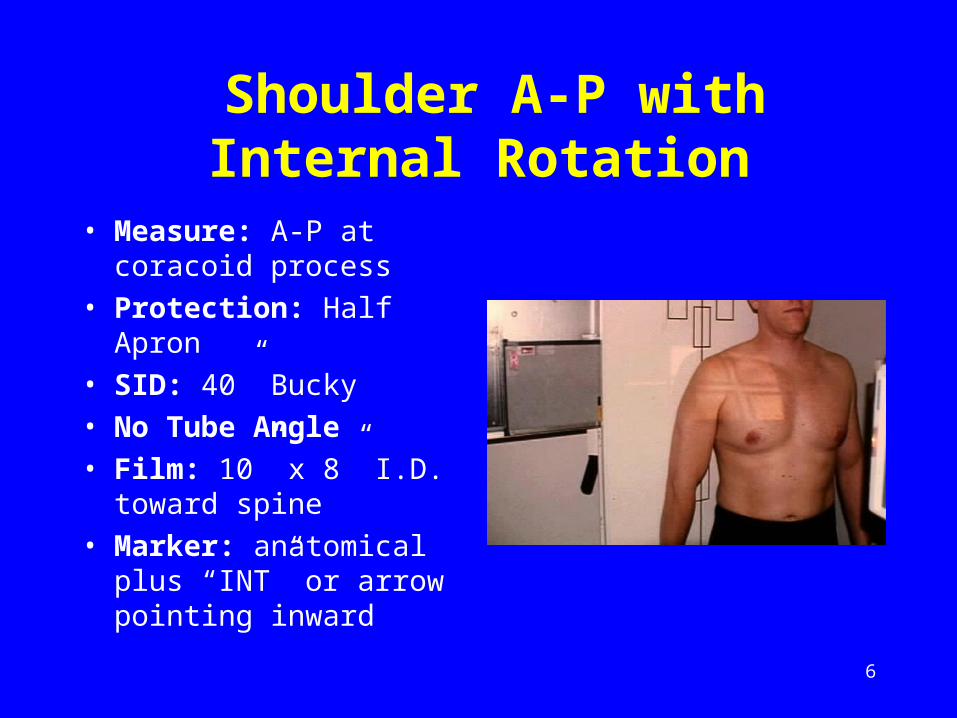
Shoulder A-P with Internal Rotation
• Measure: A-P at coracoid process
• Protection: Half Apron
• SID: 40” Bucky
• No Tube Angle
• Film: 10” x 8” I.D. toward spine
• Marker: anatomical plus “INT” or arrow pointing inward

7
Shoulder A-P with Internal Rotation
• Patient stands facing tube.
• The patient is rotated 15 to 45 degrees until the scapula is parallel to the film.
• The patient internally rotates humerus until the epicondyles are perpendicular to the film.
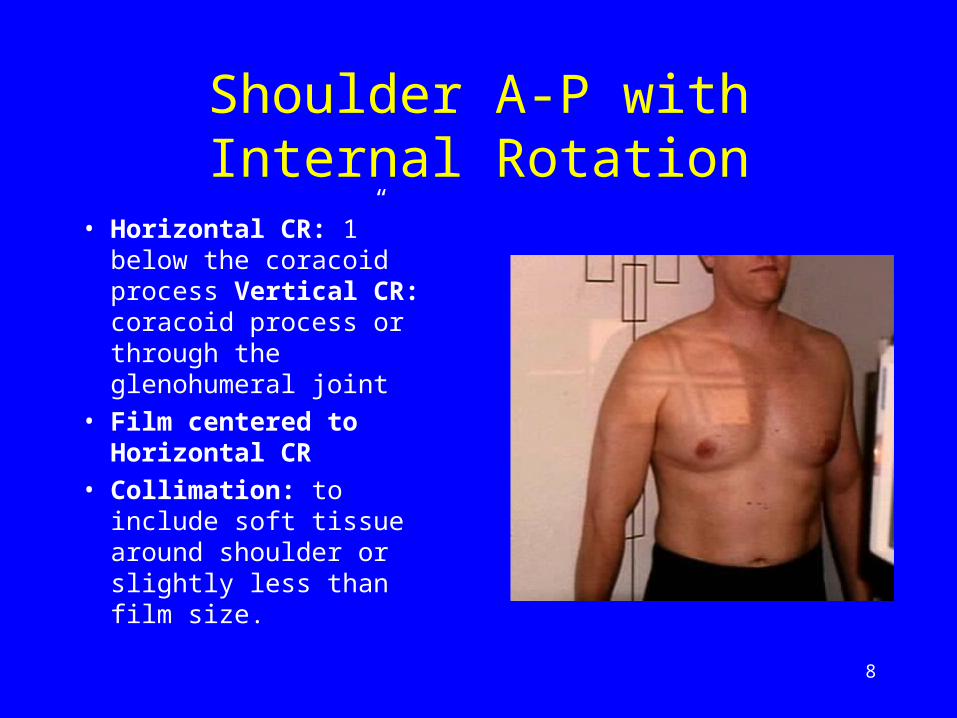
8
Shoulder A-P with Internal Rotation
• Horizontal CR: 1” below the coracoid process Vertical CR: coracoid process or through the glenohumeral joint
• Film centered to Horizontal CR
• Collimation: to include soft tissue around shoulder or slightly less than film size.

9
Shoulder A-P with Internal Rotation
• Breathing Instructions: suspended respiration
• Make exposure and let patient breathe and relax.
• Some facilities will use a 12” x 10 cassette
10
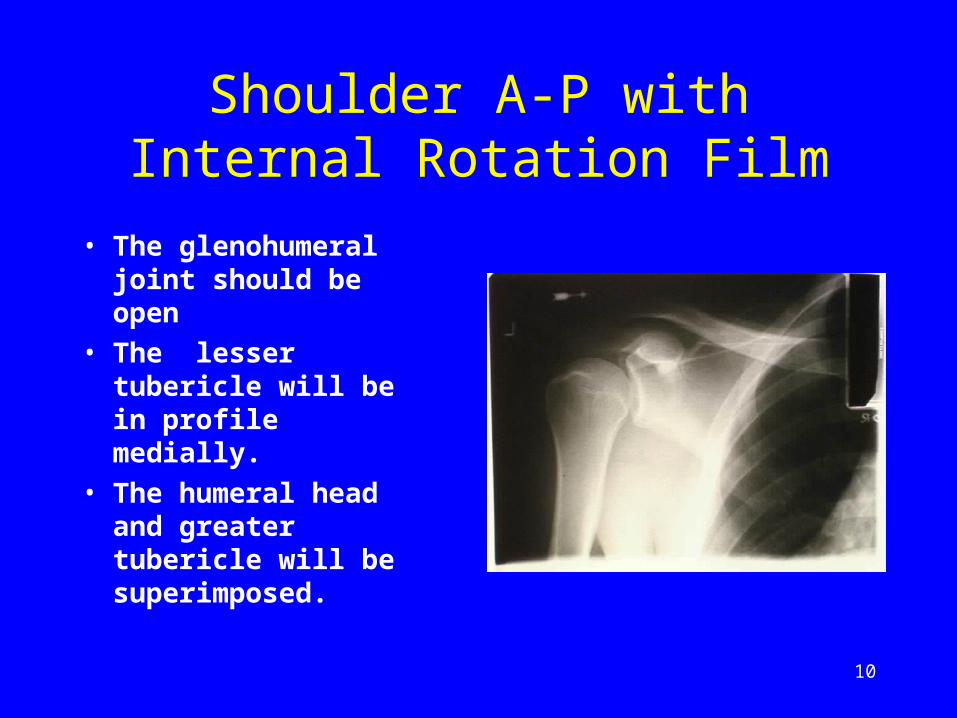
Shoulder A-P with Internal Rotation Film
• The glenohumeral joint should be open
• The lesser tubericle will be in profile medially.
• The humeral head and greater tubericle will be superimposed.
11
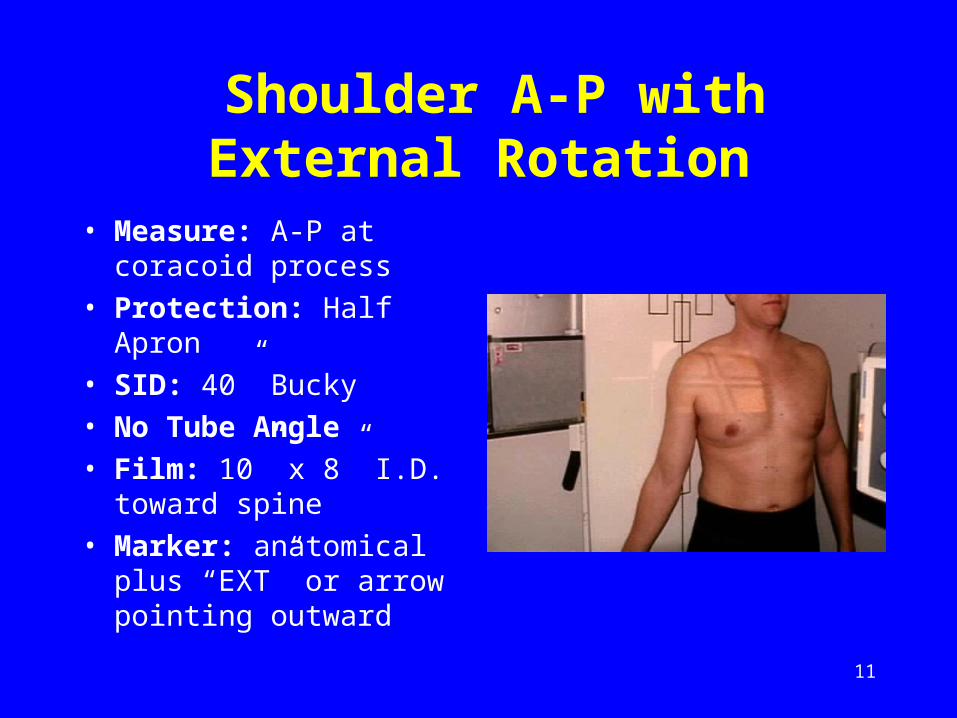
Shoulder A-P with External Rotation
• Measure: A-P at coracoid process
• Protection: Half Apron
• SID: 40” Bucky
• No Tube Angle
• Film: 10” x 8” I.D. toward spine
• Marker: anatomical plus “EXT” or arrow pointing outward
12
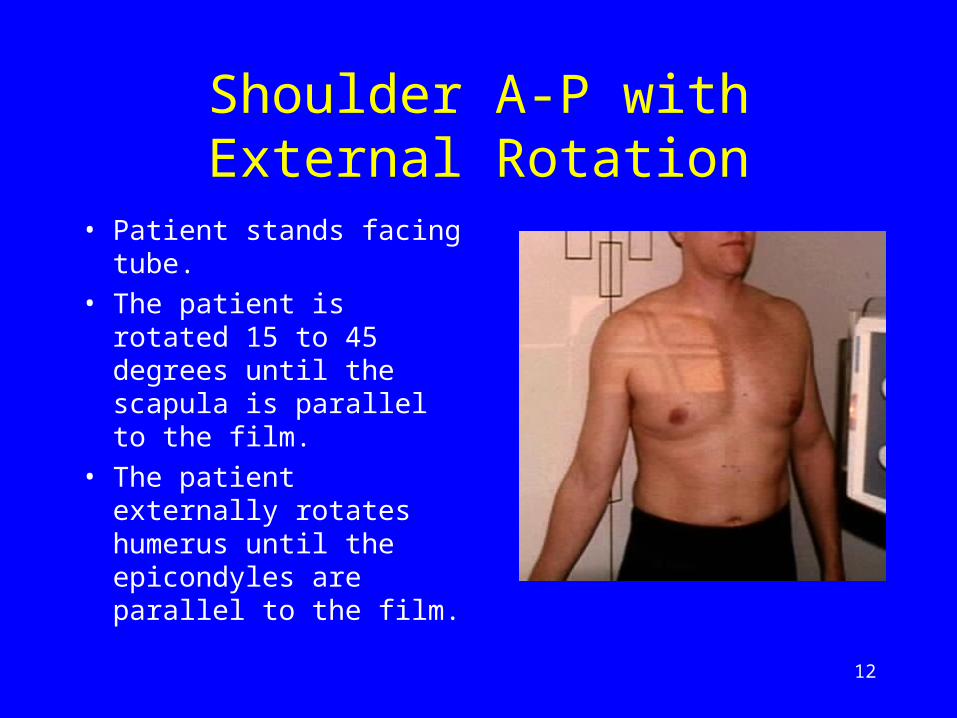
Shoulder A-P with External Rotation
• Patient stands facing tube.
• The patient is rotated 15 to 45 degrees until the scapula is parallel to the film.
• The patient externally rotates humerus until the epicondyles are parallel to the film.
13
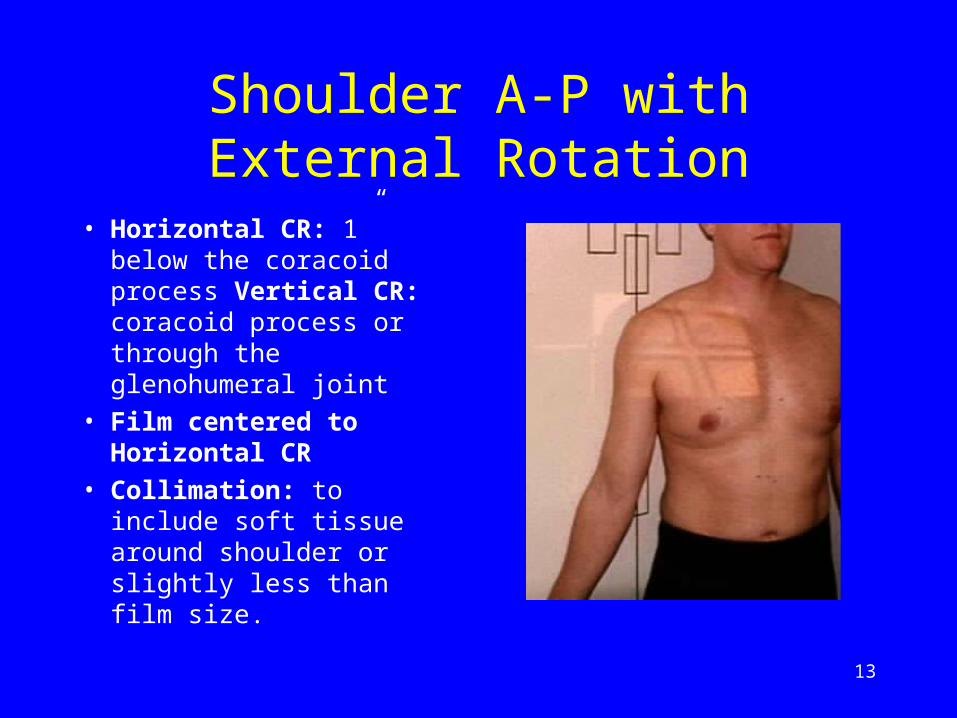
Shoulder A-P with External Rotation
• Horizontal CR: 1” below the coracoid process Vertical CR: coracoid process or through the glenohumeral joint
• Film centered to Horizontal CR
• Collimation: to include soft tissue around shoulder or slightly less than film size.

14
Shoulder A-P with External Rotation
• Breathing Instructions: suspended respiration
• Make exposure and let patient breathe and relax.
• Some facilities will use a 12” x 10 cassette

15
Shoulder A-P with External Rotation Film
• The glenohumeral joint should be open
• The greater tubericle and humeral head will be in profile .
16
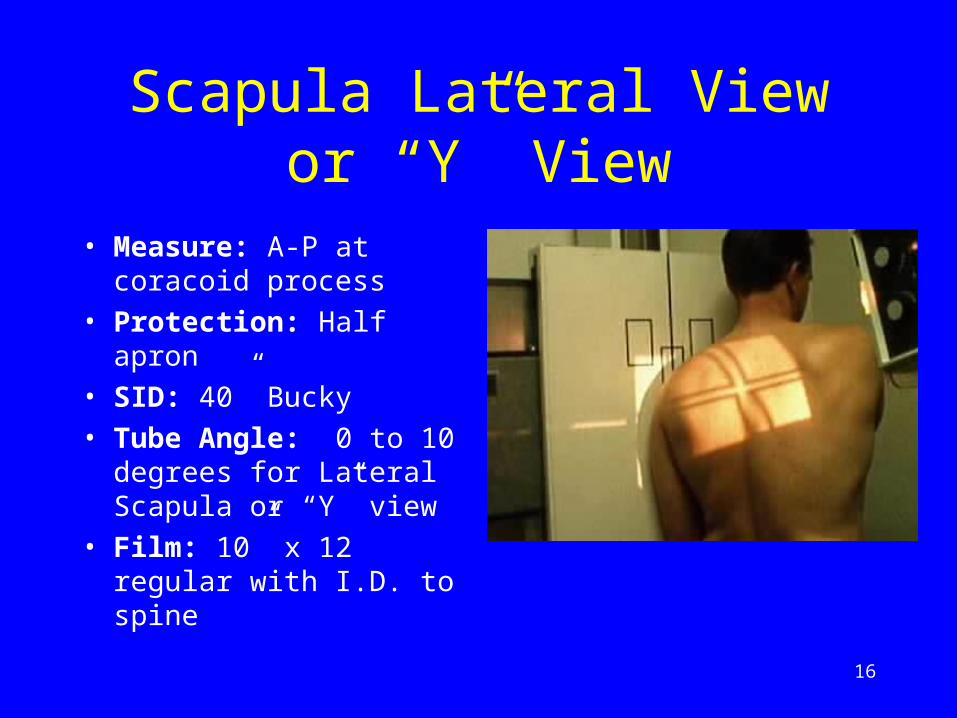
Scapula Lateral View or “Y” View
• Measure: A-P at coracoid process
• Protection: Half apron
• SID: 40” Bucky
• Tube Angle: 0 to 10 degrees for Lateral Scapula or “Y” view
• Film: 10” x 12 regular with I.D. to spine

17
Scapula Lateral View• Patient is placed in a sixty
degree anterior oblique.
• The arm of the affected shoulder is left in a neutral position or in the sling.
• The head of the affected shoulder aligned with the center line if the Bucky.
• By feeling the scapula, adjust position to get scapula perpendicular to film.
18
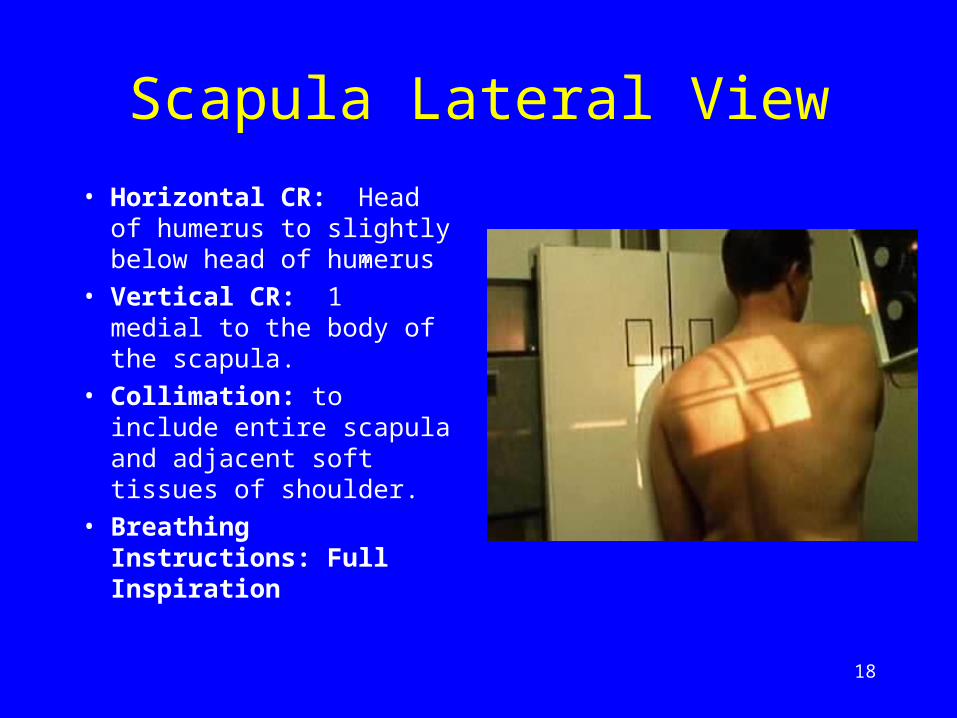
Scapula Lateral View
• Horizontal CR: Head of humerus to slightly below head of humerus
• Vertical CR: 1” medial to the body of the scapula.
• Collimation: to include entire scapula and adjacent soft tissues of shoulder.
• Breathing Instructions: Full Inspiration

19
Scapula Lateral View
• This is one of the best views to be taken when fracture or dislocation of shoulder is suspected.
• You should see the true relationship of the humerus head and the glenoid fossa. Very useful when detecting a dislocation or fracture.
20
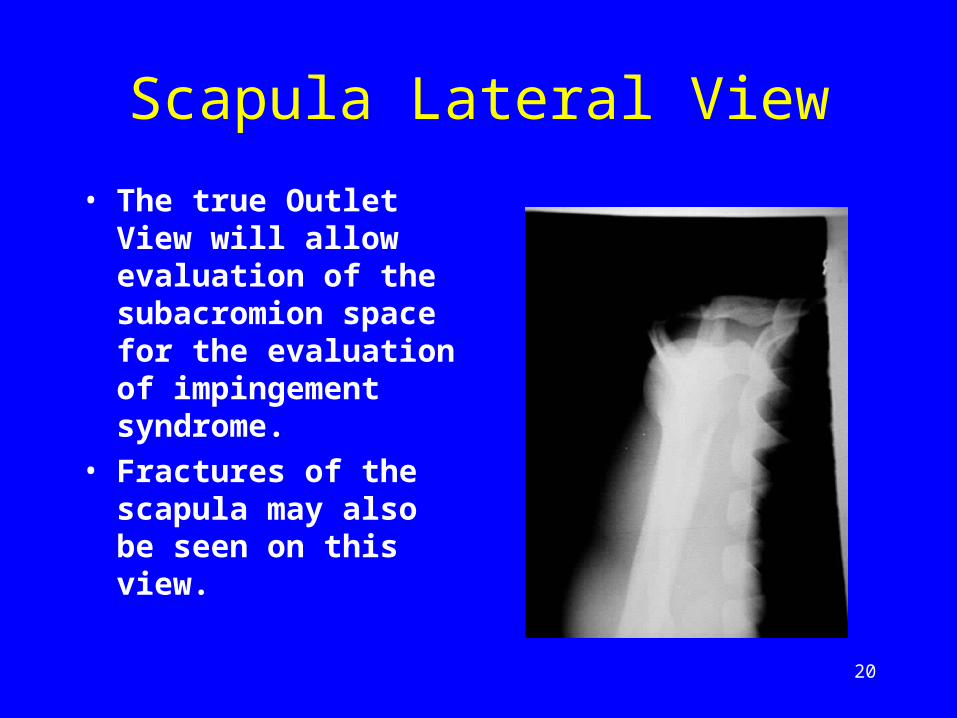
Scapula Lateral View
• The true Outlet View will allow evaluation of the subacromion space for the evaluation of impingement syndrome.
• Fractures of the scapula may also be seen on this view.
21
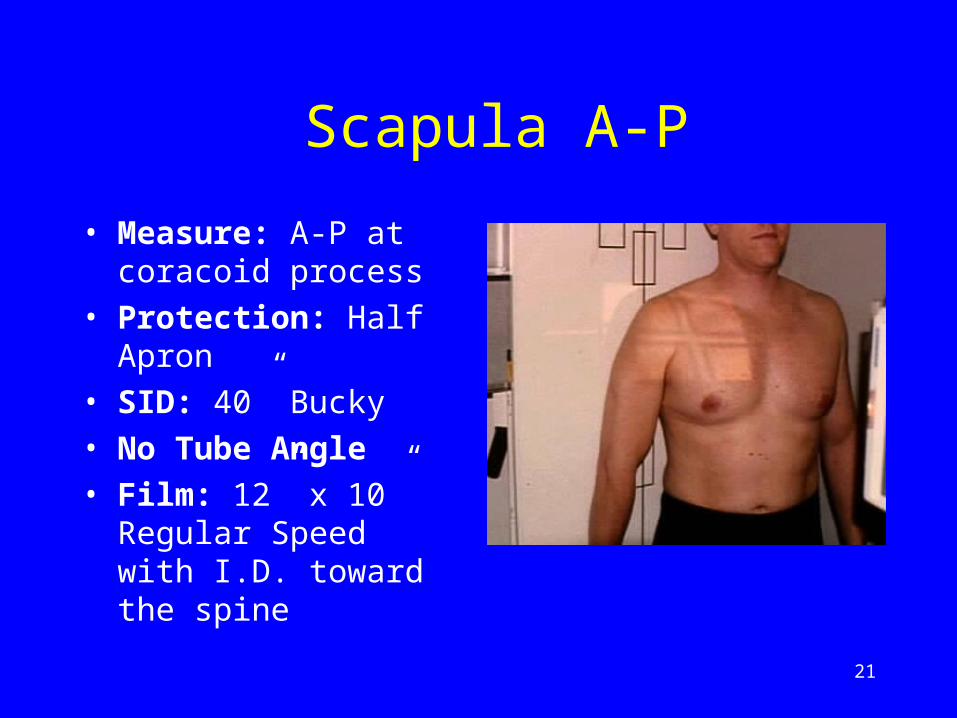
Scapula A-P
• Measure: A-P at coracoid process
• Protection: Half Apron
• SID: 40” Bucky
• No Tube Angle
• Film: 12” x 10” Regular Speed with I.D. toward the spine
22
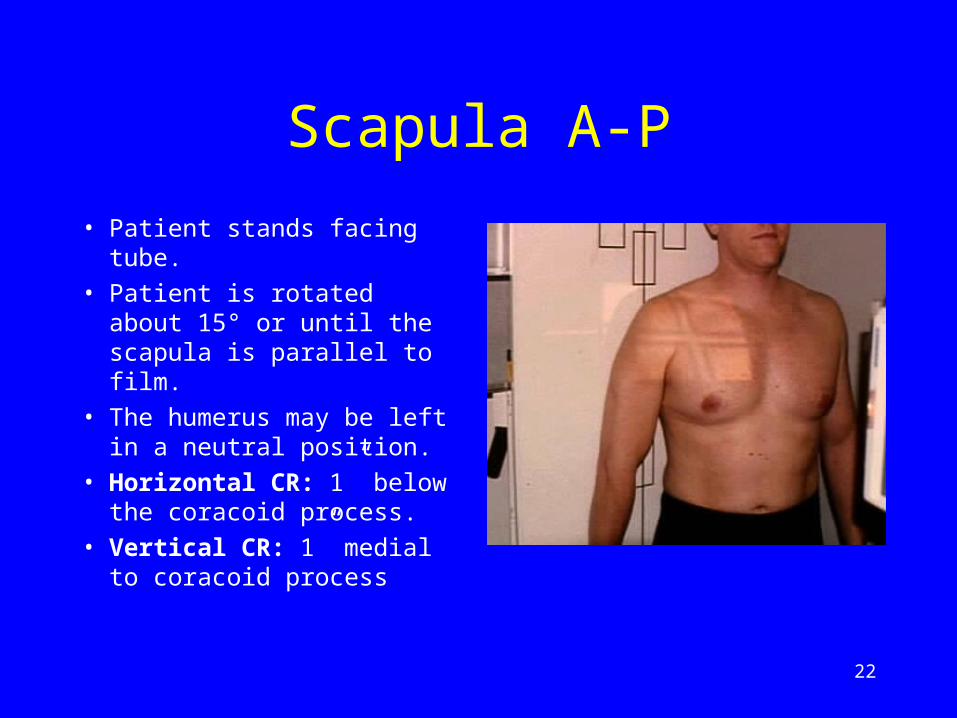
Scapula A-P
• Patient stands facing tube.
• Patient is rotated about 15° or until the scapula is parallel to film.
• The humerus may be left in a neutral position.
• Horizontal CR: 1” below the coracoid process.
• Vertical CR: 1” medial to coracoid process
23
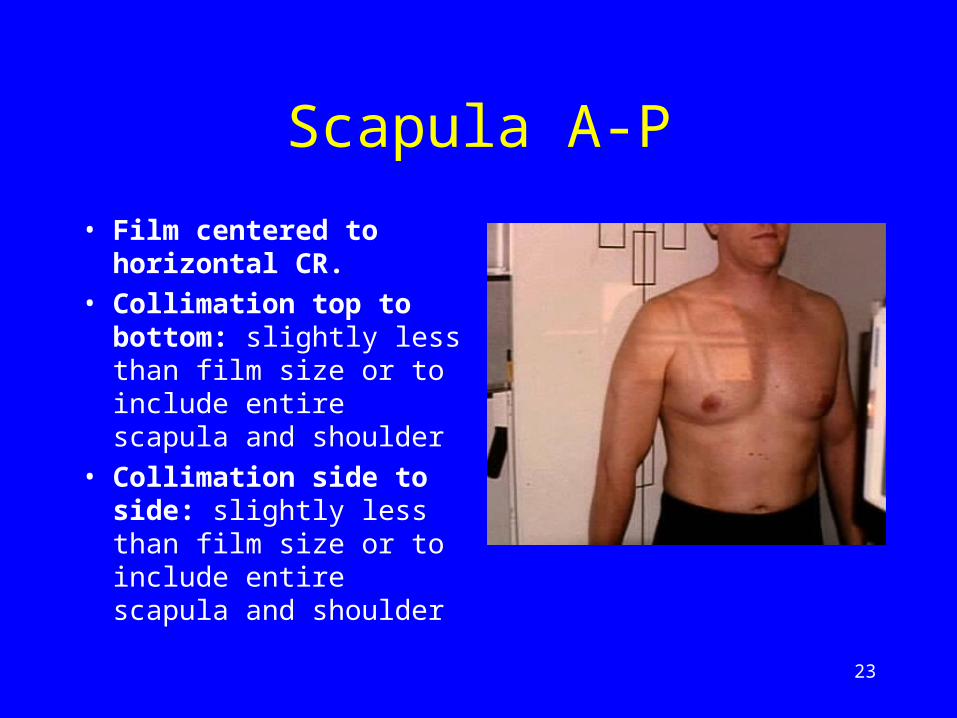
Scapula A-P
• Film centered to horizontal CR.
• Collimation top to bottom: slightly less than film size or to include entire scapula and shoulder
• Collimation side to side: slightly less than film size or to include entire scapula and shoulder
24
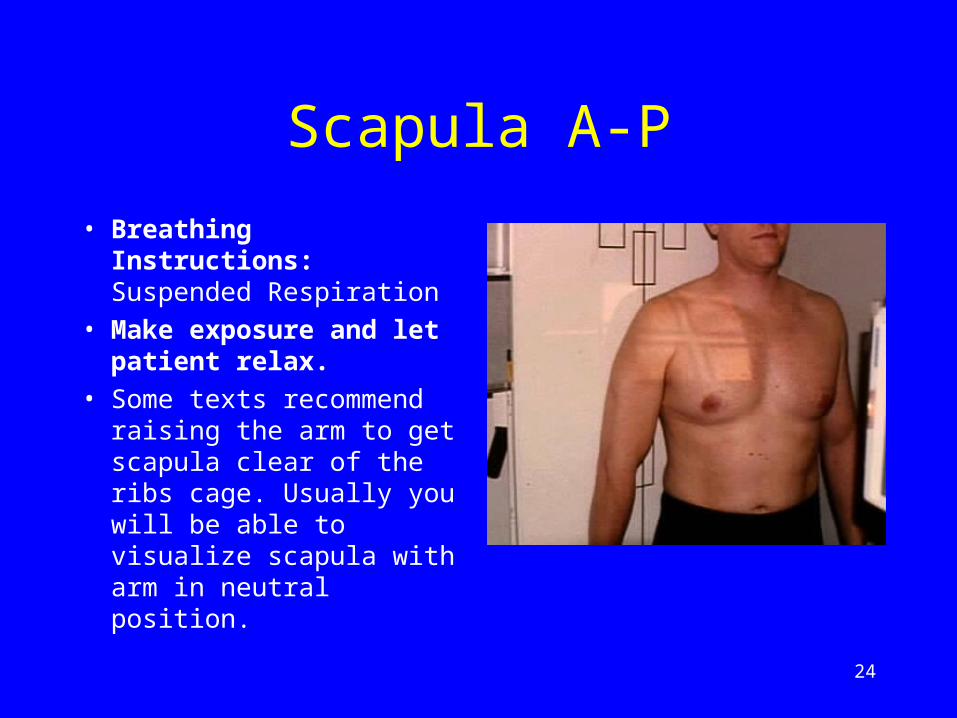
Scapula A-P
• Breathing Instructions: Suspended Respiration
• Make exposure and let patient relax.
• Some texts recommend raising the arm to get scapula clear of the ribs cage. Usually you will be able to visualize scapula with arm in neutral position.

25
Scapula A-P Film
• Glenohumeral joint and entire scapula should be seen.
• Soft tissues of shoulder should be seen.
26
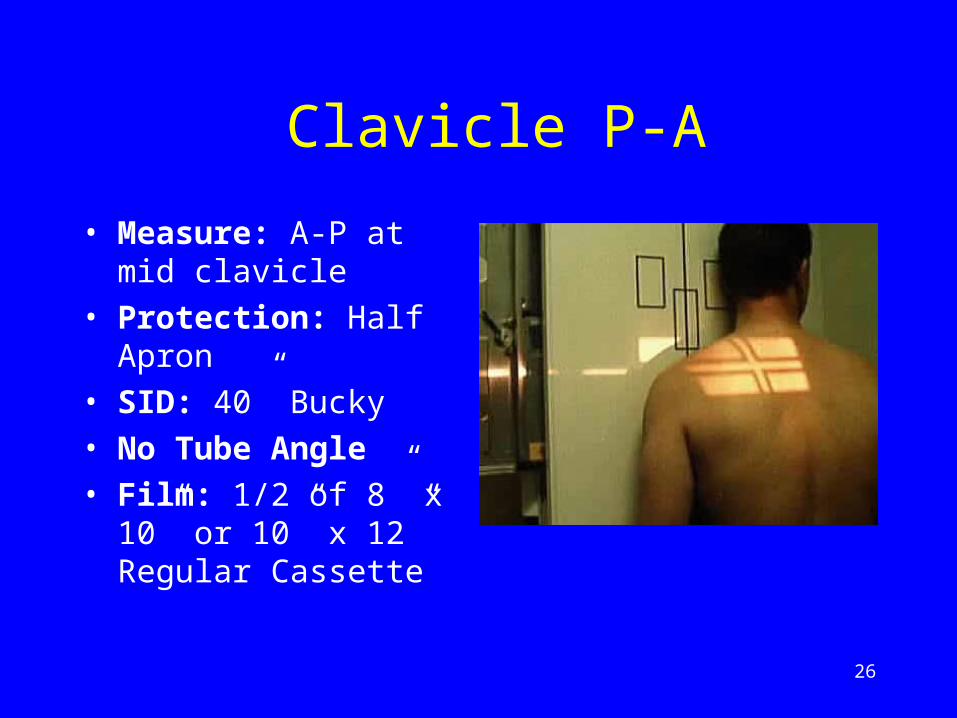
Clavicle P-A
• Measure: A-P at mid clavicle
• Protection: Half Apron
• SID: 40” Bucky
• No Tube Angle
• Film: 1/2 of 8” x 10” or 10” x 12” Regular Cassette
27
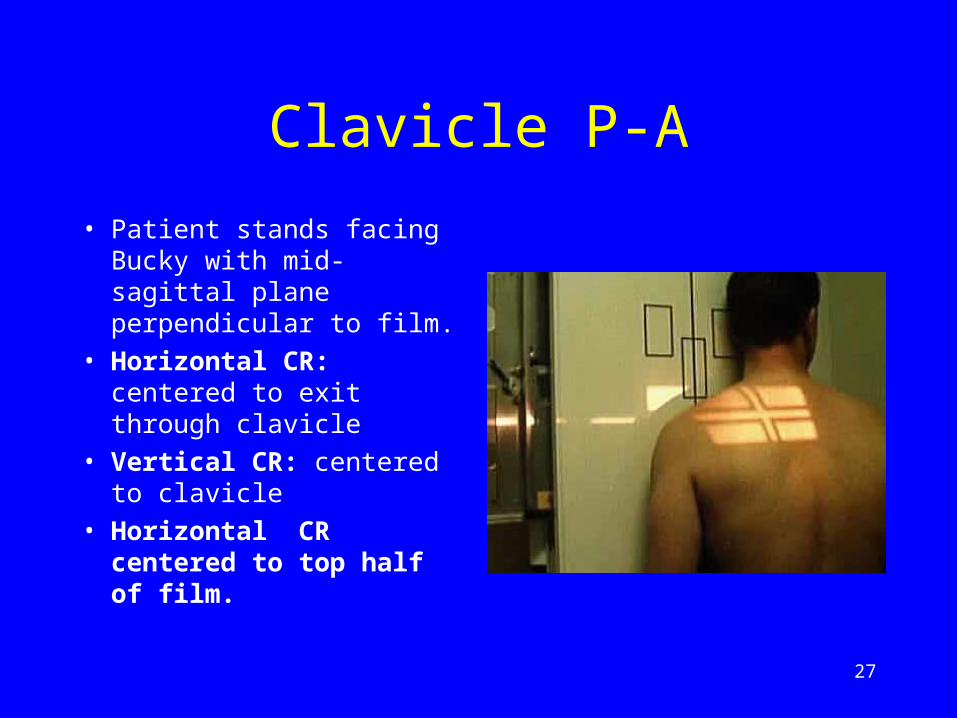
Clavicle P-A
• Patient stands facing Bucky with mid-sagittal plane perpendicular to film.
• Horizontal CR: centered to exit through clavicle
• Vertical CR: centered to clavicle
• Horizontal CR centered to top half of film.
28
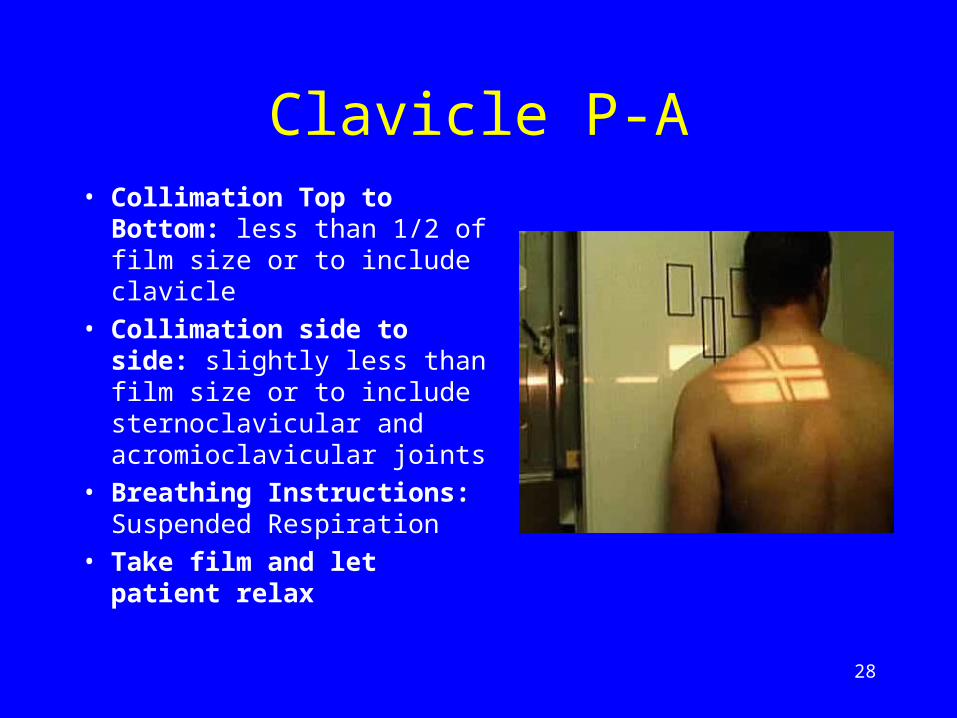
Clavicle P-A• Collimation Top to
Bottom: less than 1/2 of film size or to include clavicle
• Collimation side to side: slightly less than film size or to include sternoclavicular and acromioclavicular joints
• Breathing Instructions: Suspended Respiration
• Take film and let patient relax

29
Clavicle P-A Film
• On this example, the A-P or P-A view is on the bottom of film.
• Must see the sternoclavicular and acromioclavicular joints and entire clavicle.

30
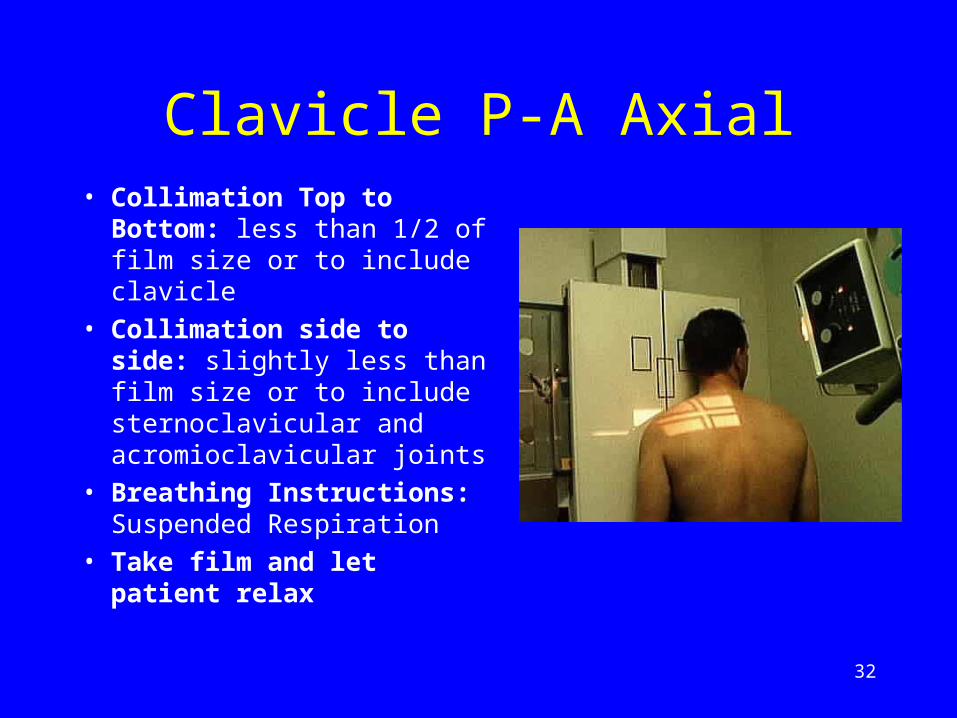
Clavicle P-A Axial
• Measure: A-P at mid clavicle
• Protection: Half Apron
• SID: 40” Bucky
• Tube Angle : 10 to 15 degrees caudal
• Film: 1/2 of 8” x 10” or 10” x 12” Regular Cassette
31
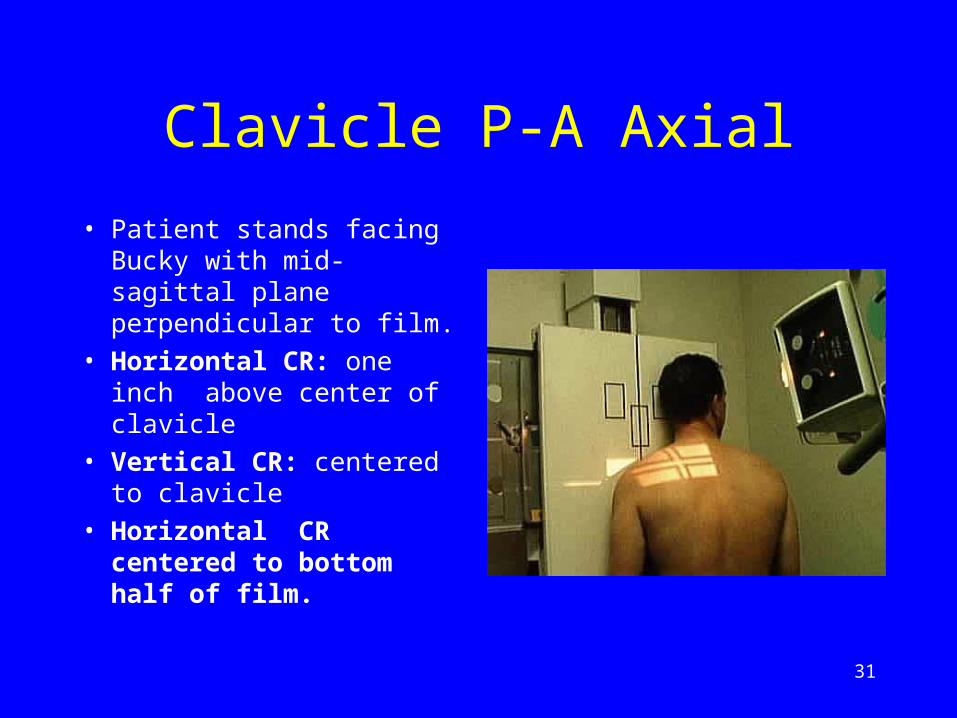
Clavicle P-A Axial
• Patient stands facing Bucky with mid-sagittal plane perpendicular to film.
• Horizontal CR: one inch above center of clavicle
• Vertical CR: centered to clavicle
• Horizontal CR centered to bottom half of film.
32
Clavicle P-A Axial• Collimation Top to
Bottom: less than 1/2 of film size or to include clavicle
• Collimation side to side: slightly less than film size or to include sternoclavicular and acromioclavicular joints
• Breathing Instructions: Suspended Respiration
• Take film and let patient relax

33
Clavicle P-A Axial Film
• On this example, the A-P or P-A axial view is on the top of film.
• Must see the sternoclavicular and acromioclavicular joints and entire clavicle.
• The P-A views will have less magnification but are more difficult to position.
34
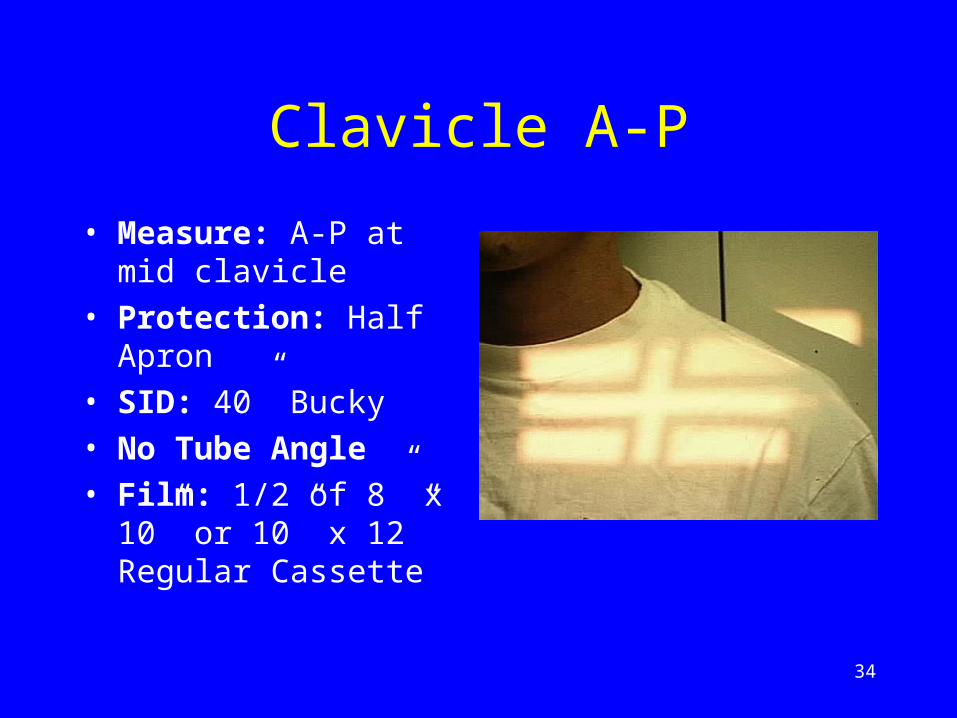
Clavicle A-P
• Measure: A-P at mid clavicle
• Protection: Half Apron
• SID: 40” Bucky
• No Tube Angle
• Film: 1/2 of 8” x 10” or 10” x 12” Regular Cassette

35
Clavicle A-P
• Patient stands facing tube with mid-sagittal plane perpendicular to film.
• Horizontal CR: centered to clavicle
• Vertical CR: centered to clavicle
• Horizontal CR centered to top half of film.
36
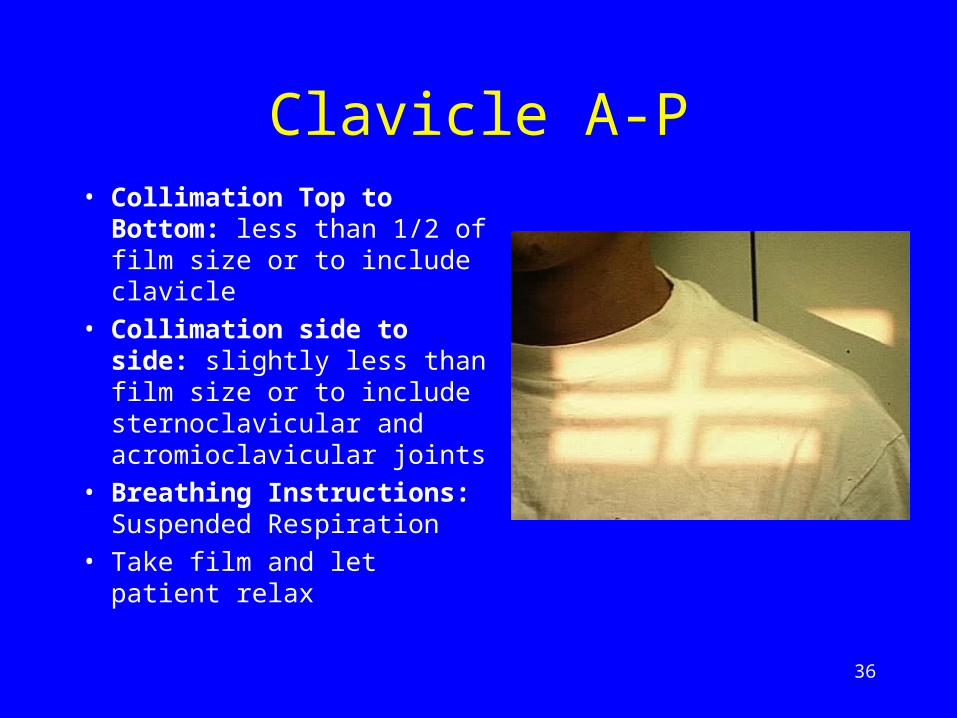
Clavicle A-P• Collimation Top to
Bottom: less than 1/2 of film size or to include clavicle
• Collimation side to side: slightly less than film size or to include sternoclavicular and acromioclavicular joints
• Breathing Instructions: Suspended Respiration
• Take film and let patient relax
37
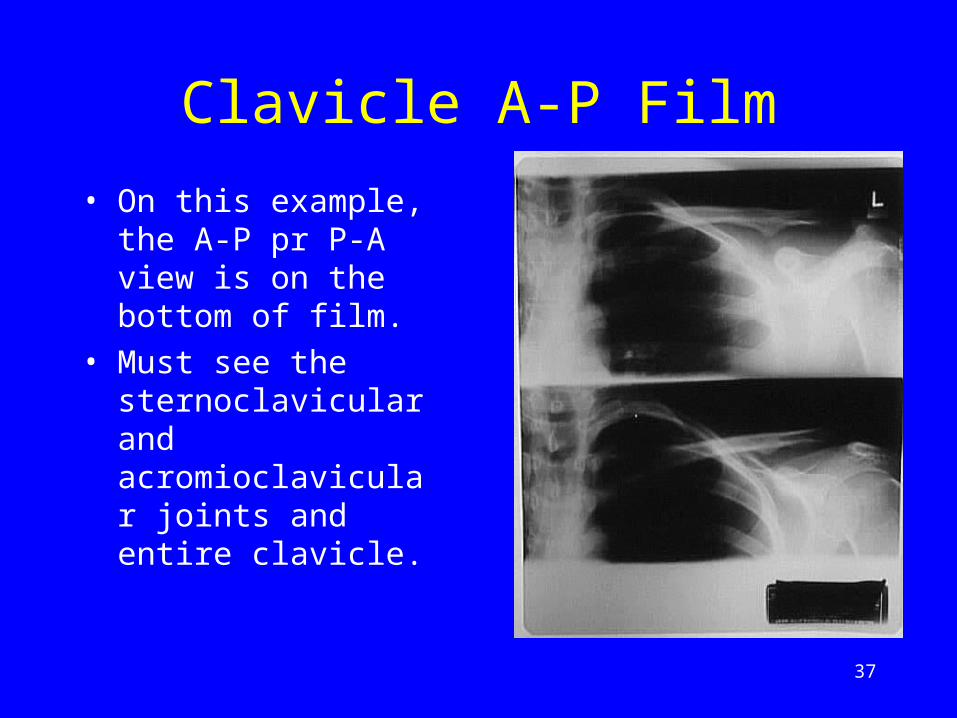
Clavicle A-P Film
• On this example, the A-P pr P-A view is on the bottom of film.
• Must see the sternoclavicular and acromioclavicular joints and entire clavicle.
38
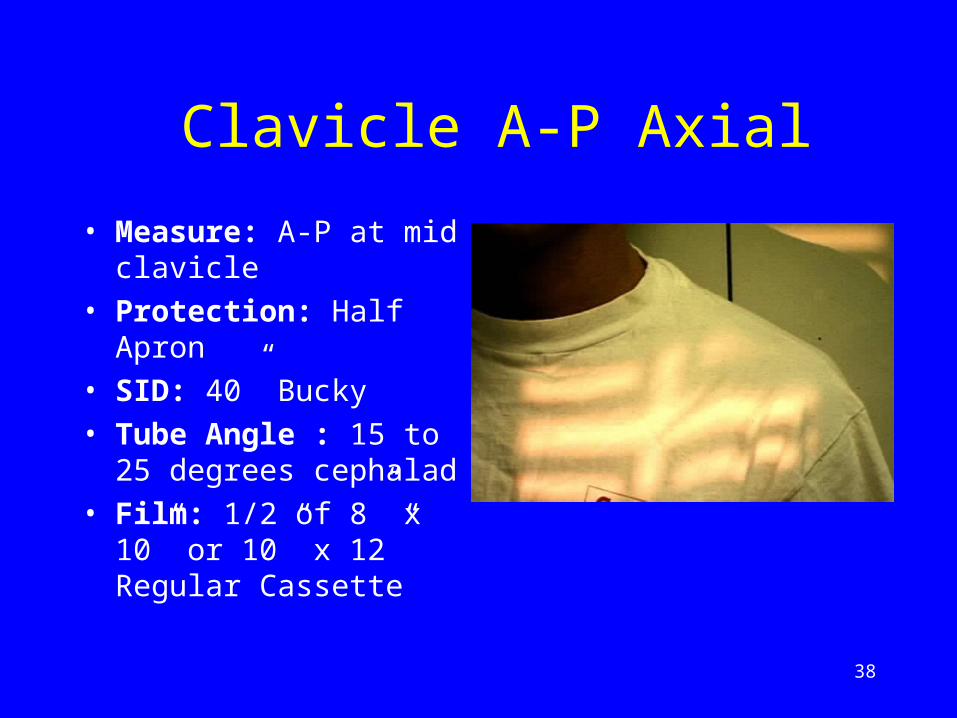
Clavicle A-P Axial
• Measure: A-P at mid clavicle
• Protection: Half Apron
• SID: 40” Bucky
• Tube Angle : 15 to 25 degrees cephalad
• Film: 1/2 of 8” x 10” or 10” x 12” Regular Cassette
39
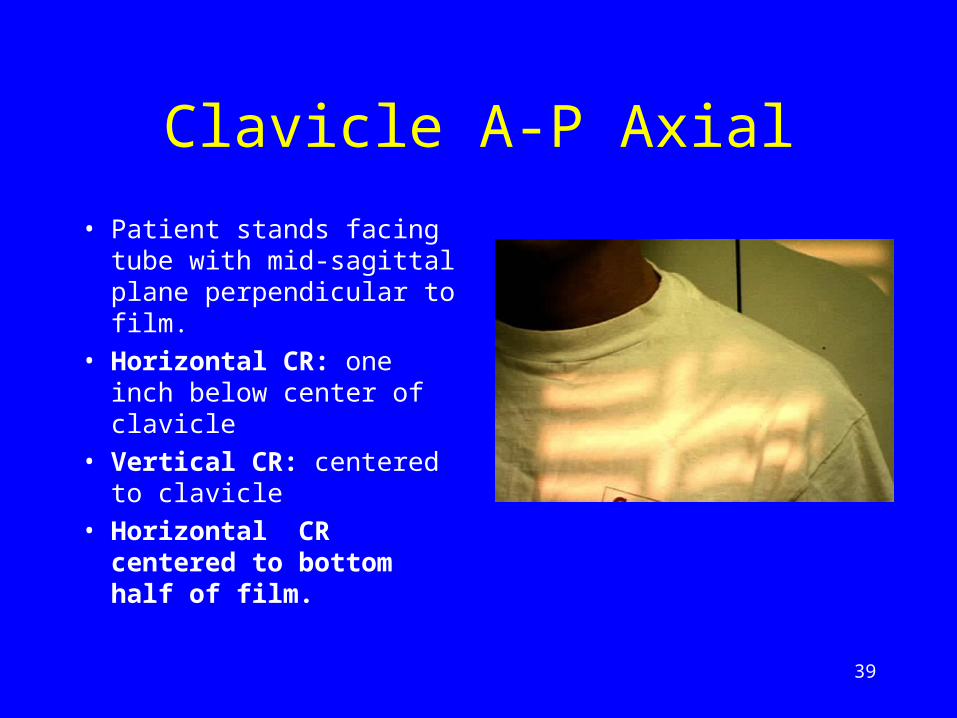
Clavicle A-P Axial
• Patient stands facing tube with mid-sagittal plane perpendicular to film.
• Horizontal CR: one inch below center of clavicle
• Vertical CR: centered to clavicle
• Horizontal CR centered to bottom half of film.

40
Clavicle A-P Axial• Collimation Top to
Bottom: less than 1/2 of film size or to include clavicle
• Collimation side to side: slightly less than film size or to include sternoclavicular and acromioclavicular joints
• Breathing Instructions: Suspended Respiration
• Take film and let patient relax

41
Clavicle A-P Axial Film
• On this example, the A-P or P-A axial view is on the top of film.
• Must see the sternoclavicular and acromioclavicular joints and entire clavicle.
• The P-A views will have less magnification but are more difficult to position.

42
Acromioclavicular Joint Unilateral
• Measure: A-P at coracoid
• Protection: Half Apron
• SID: 40” Bucky
• Tube Angle : None
• Film: 2 views on 10” x 12” Regular Cassette
• Special equipment: 10 to 15 pounds of weight that can be strapped to wrists
43
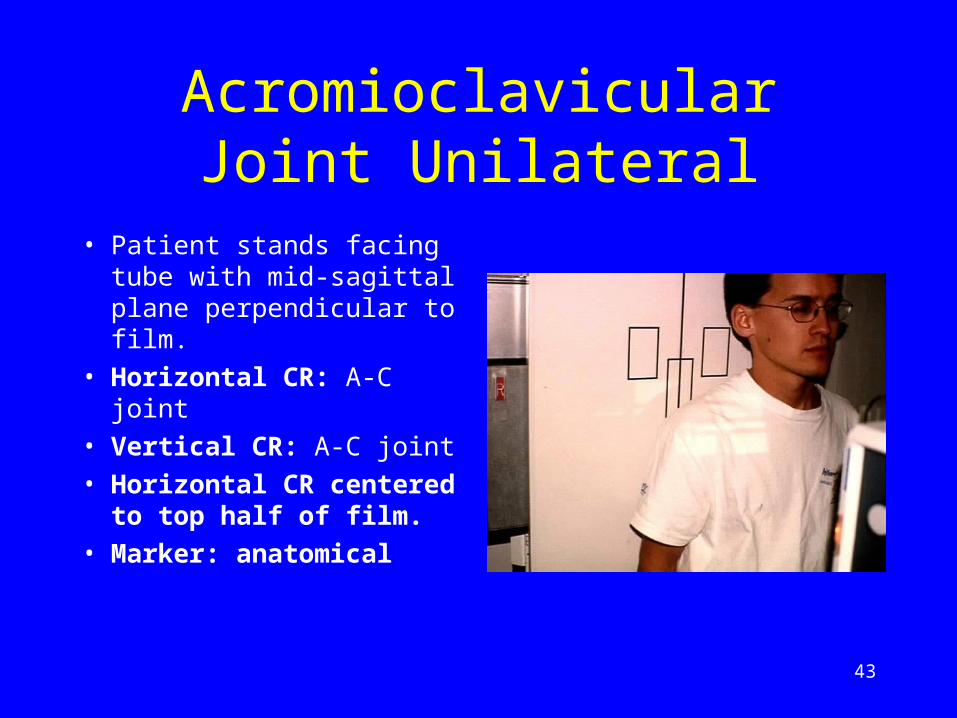
Acromioclavicular Joint Unilateral
• Patient stands facing tube with mid-sagittal plane perpendicular to film.
• Horizontal CR: A-C joint
• Vertical CR: A-C joint
• Horizontal CR centered to top half of film.
• Marker: anatomical
44
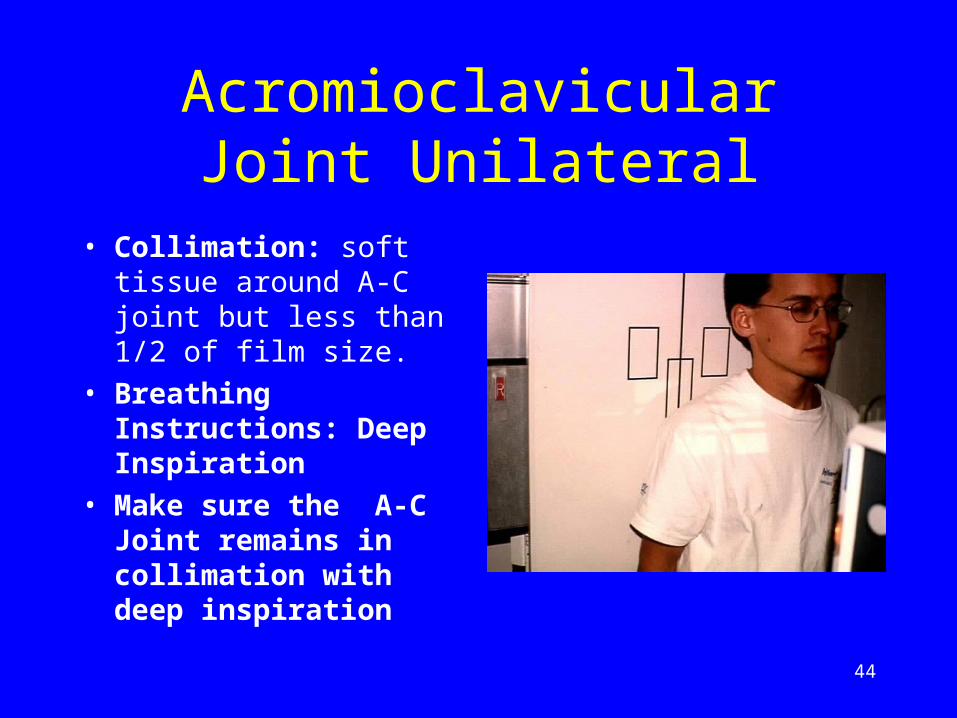
Acromioclavicular Joint Unilateral
• Collimation: soft tissue around A-C joint but less than 1/2 of film size.
• Breathing Instructions: Deep Inspiration
• Make sure the A-C Joint remains in collimation with deep inspiration

45
Acromioclavicular Joint Unilateral
• Make exposure and let patient breathe but remain in position.
• Strap weights to both wrists.
• Marker: arrow pointed down or “weighted marker on bottom half of film
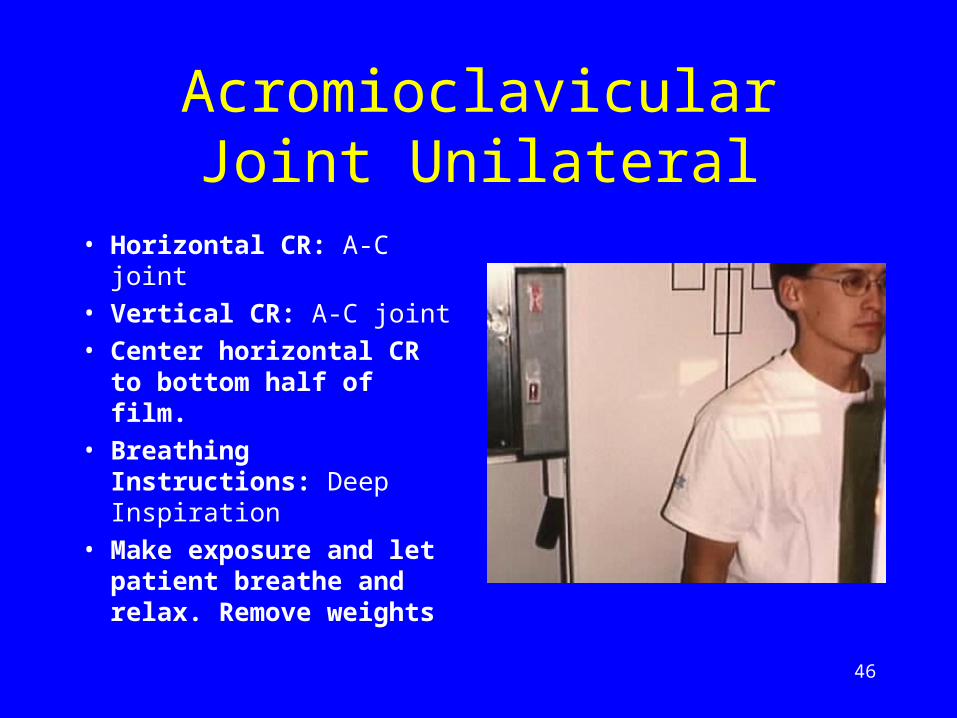
46
Acromioclavicular Joint Unilateral
• Horizontal CR: A-C joint
• Vertical CR: A-C joint
• Center horizontal CR to bottom half of film.
• Breathing Instructions: Deep Inspiration
• Make exposure and let patient breathe and relax. Remove weights

47
Acromioclavicular Joints Bilateral A-P
• Measure: A-P at coracoid
• Protection: Half apron
• SID: 72” Non-Bucky
• Tube Angle: none 15 degree cephalad angle
• Film: 17” x 14” I.D. to unaffected side
48
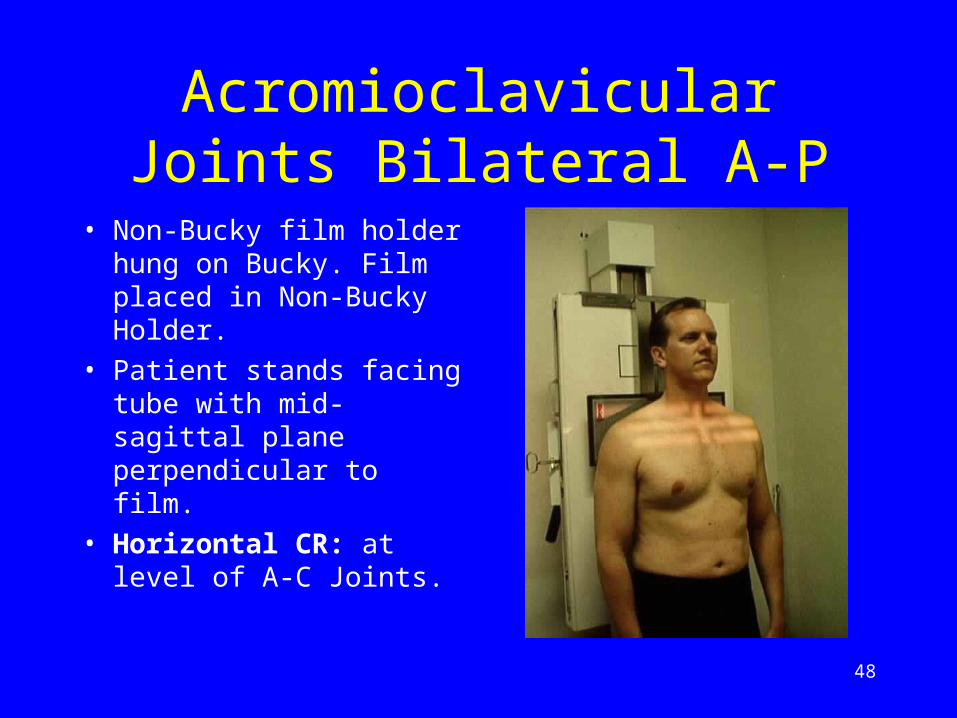
Acromioclavicular Joints Bilateral A-P
• Non-Bucky film holder hung on Bucky. Film placed in Non-Bucky Holder.
• Patient stands facing tube with mid-sagittal plane perpendicular to film.
• Horizontal CR: at level of A-C Joints.

49
Acromioclavicular Joints Bilateral A-P
• Vertical CR: mid-sagittal
• Collimation: to include both A-C joints and adjacent soft tissue and slightly less than film size Breathing Instructions: Deep Inspiration
50
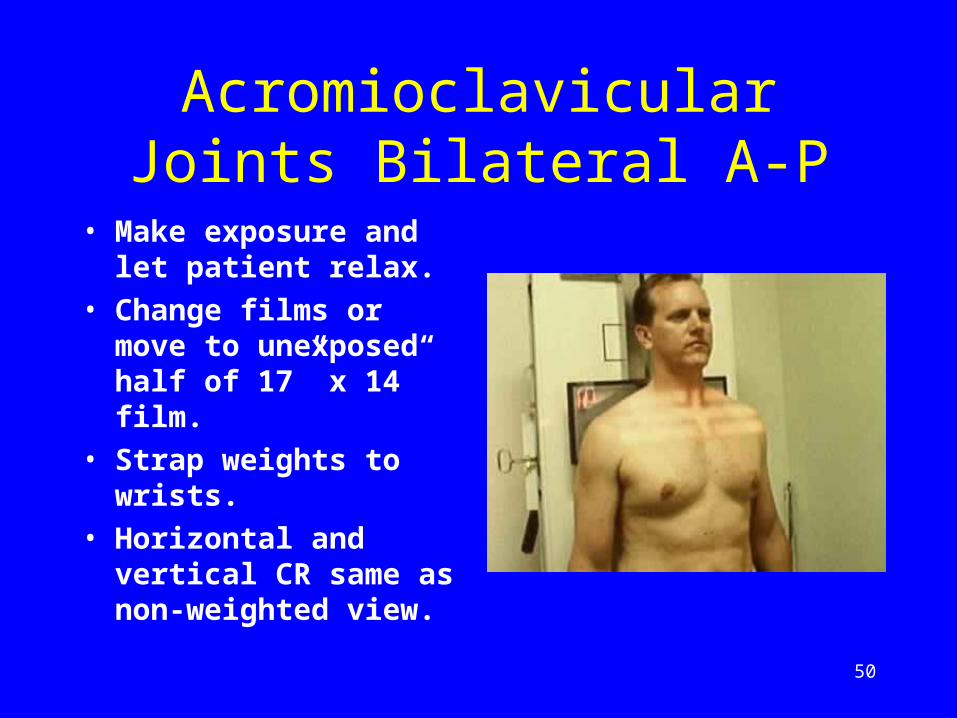
Acromioclavicular Joints Bilateral A-P
• Make exposure and let patient relax.
• Change films or move to unexposed half of 17” x 14” film.
• Strap weights to wrists.
• Horizontal and vertical CR same as non-weighted view.
51
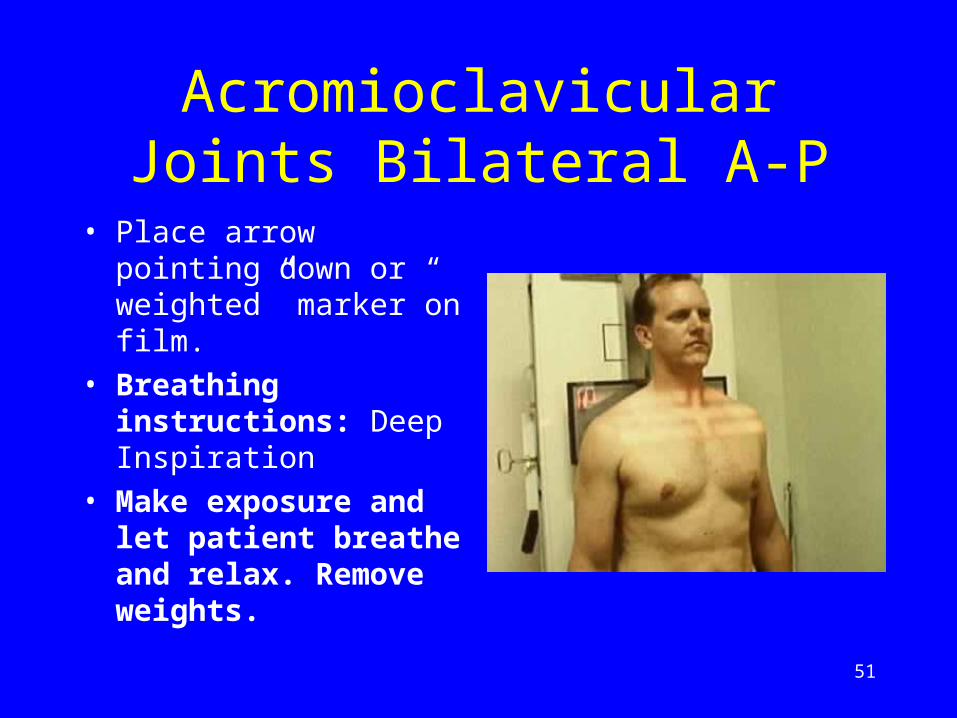
Acromioclavicular Joints Bilateral A-P
• Place arrow pointing down or “ weighted” marker on film.
• Breathing instructions: Deep Inspiration
• Make exposure and let patient breathe and relax. Remove weights.
52
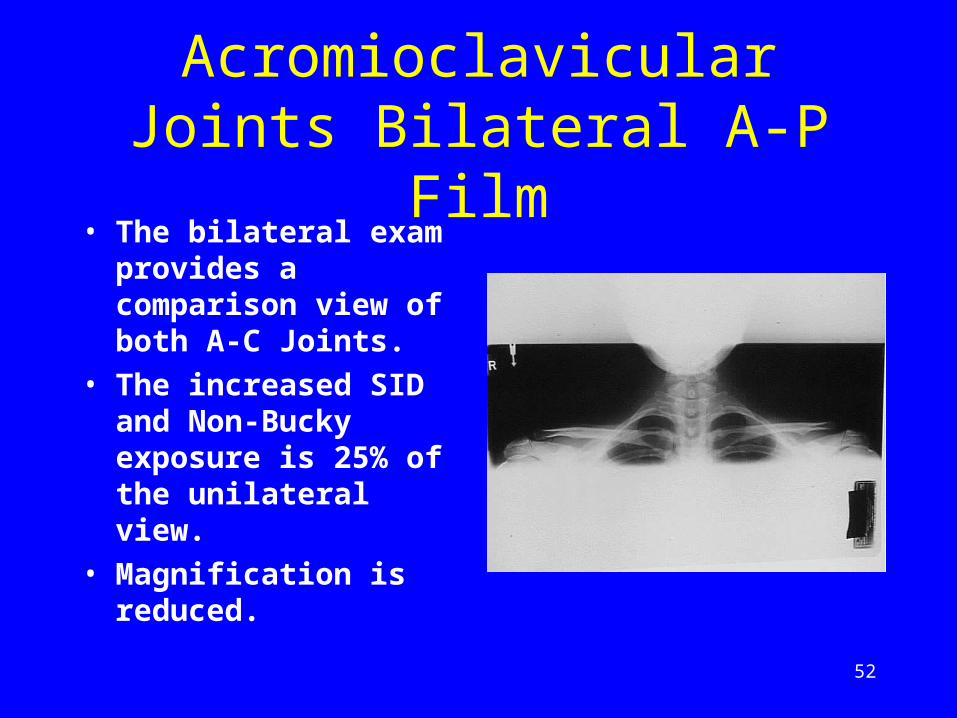
Acromioclavicular Joints Bilateral A-P Film
• The bilateral exam provides a comparison view of both A-C Joints.
• The increased SID and Non-Bucky exposure is 25% of the unilateral view.
• Magnification is reduced.
ASSIGNMENT
One student will be selected for assignment

Question
Mention routine radiographic positioning of the wrist joint

Suggested Readings
Clark’s radiographic positioning and techniques

Thank You

57
The End
Return to the Lecture Index


