SIIT CHAPTER-1 INTRODUCTION OF COMPUTER The word “computer” originates from the word “compute” which means to calculate. Mor e accura tely, we can defin e a computer as a devic e that operates upon data. Data can be of different types. Hence, data comes in various shapes and size depending upon the type of computer. A computer can store, process, retrieve as and when we desired. The fact that computers pro cess data is so fundamental that many people have started calling it a data processor. Computer can perform arithmetic operation at enormous speed. But now a day, amazingly 85% of work is done with the help of computers even of non- numerical nature like music composin g, spe cia l ef fec ts, resume sor tin g, nuclear research etc. EVOLUTION OF COMPUTER In 1642, Blaise Pascal invented the first mechanical adding machine . Later in 1671, Baron Gattfries Wilhelm von Leibniz of Germany invented the first calculator for multiplication. In 1822 a professor of Cambridge University, Charles Babbage, invented “Difference Engine” which can produce reliable table and it is very much prone to prone to errors. In 1842, he designed a new machine “Analytical Engine” which was planned to be fully automatic and can perform all the basic arithmetical calculation. Somehow this machine is not produced. But his idea layer down basic principles of computer design, which has been the fundamental to the design of digital compute r. On the other side, in 1937 Ho wa rd A. Ai ken of Howard Universi ty in collaboration with IBM Corporation designed the first fully calculating machine known as automatic sequence controlled calculator. These computers are known as Mark I computer. In 1943 ENIAC (Electronic Numerical Integratorand calculator) was developed by a design team headed by a professorProsper Eckert and John Mauchly of Moore College of engineering , university of Pennsylvania. ENIAC was very complex to be programmed but it was capable of performing calculations more than 200 times of “Mark I”. In 1946 pr of essor john von Neuman n de veloped EDVAC (Electronic Di scre te Variable Automatic Computer). This computer stored the data and instruction sequ entially in the memory in binary form (0 & 1), that is why modern computer are known as digital computers. Thereafter, UNIVAC (Universal Automati c Computer) was the first digital computer ins tal led in cen sus Bureau in 1951. By this time the evolution was carried out at different places, - 1 -
The word “computer” originates from the word “compute” which means tocalculate. More accurately, we can define a computer as a device thatoperates upon data. Data can be of different types. Hence, data comes invarious shapes and size depending upon the type of computer.A computer can store, process, retrieve as and when we desired. The factthat computers process data is so fundamental that many people havestarted calling it a data processor.Computer can perform arithmetic operation at enormous speed. But now a
day, amazingly 85% of work is done with the help of computers even of non-numerical nature like music composing, special effects, resume sorting,nuclear research etc.
EVOLUTION OF COMPUTER
In 1642, Blaise Pascal invented the first mechanical adding machine. Later in1671, Baron Gattfries Wilhelm von Leibniz of Germany invented the firstcalculator for multiplication. In 1822 a professor of Cambridge University,Charles Babbage, invented “Difference Engine” which can produce reliable
table and it is very much prone to prone to errors. In 1842, he designed anew machine “Analytical Engine” which was planned to be fully automaticand can perform all the basic arithmetical calculation. Somehow this machineis not produced. But his idea layer down basic principles of computer design,which has been the fundamental to the design of digital computer.
On the other side, in 1937 Howard A. Aiken of Howard University incollaboration with IBM Corporation designed the first fully calculating machineknown as automatic sequence controlled calculator. These computers areknown as Mark I computer . In 1943 ENIAC (Electronic Numerical Integrator
and calculator) was developed by a design team headed by a professor Prosper Eckert and John Mauchly of Moore College of engineering, universityof Pennsylvania. ENIAC was very complex to be programmed but it wascapable of performing calculations more than 200 times of “Mark I”. In 1946professor john von Neumann developed EDVAC (Electronic DiscreteVariable Automatic Computer). This computer stored the data and instructionsequentially in the memory in binary form (0 & 1), that is why moderncomputer are known as digital computers. Thereafter, UNIVAC (UniversalAutomatic Computer) was the first digital computer installed in censusBureau in 1951. By this time the evolution was carried out at different places,
but IBM (International Business Machine) become the first machine producedfor business problems.
GENERATIONS OF COMPUTER
“Generation” of computer means the technological evolution over the periodof time, which is categorized into generations. There are five generations of computer.
FIRST GENERATION
In this generation vacuum tubes were used to store and process the data incomputer. These vacuum tubes were made up of breakable glass that couldcontrol and amplify electronic signals. The ENIAC, EDVAC etc. were the
computers of that generation. Over the advantage of that time, it also havesome disadvantages just like they are bulky in size produce lot of heat,consume lot of energy, their results are not reliable, they had limitedcommercial use due to difficult programming.
SECOND GENERATION
The second generation computers were manufactured using transistorsinstead of vacuum tubes. Transistors were small switching device, whichwere assembled to full functional circuits and hence the size of computer
being reduced. These computers have smaller size than first generation of computers. They generate less heat, was less prone to hardware failure,used in commercial area. It also have the disadvantage of using air condition,frequent maintenance and expensive commercial production..
THIRD GRNERATION
These computers built by using Integrating circuits. Earlier ones SSI (smallscale integration) technology and later MSI (medium scale integration)technology used. This integrated circuit made up of silicon known as “siliconchip”. These computers are more reliable; generate less heat, faster than firstand second generation. It was used for general purpose and consumes lesspower. These computers made affordable for smaller companies. In thesecomputer time sharing also allowed. But it also required air condition.
In this generation LSI (Large Scale Integration) used and when it waspossible VLSI (Very Large Scale Integration). In VLSI, it is possible tointegrate about one million electronic components on a single chip. Thisprogress led to a dramatic development – creation of microprocessor. A
microprocessor contains all circuits needed to perform logical andarithmetical operations. During this revolution personal computers (PC) takesplace. These computers are smaller and cheaper. Consume less power thanthird generation. These has faster and larger primary and secondary storagedevice. It was used for general purpose and consumes less power. Thesecomputers made affordable for smaller companies. In these computer timesharing also allowed. But it also required air condition.
CHARACTERISTICS OF COMPUTERS
1. SPEED
Computer is a fast device; it can perform millions of calculations in a fragmentof second. Speed of computer is not measured in seconds but in fraction of second i.e. a microsecond or a nanosecond or a picoseconds. These unitsare used to measure the speed in execution of the arithmetic instruction bythe computer.
2. ACCURACY
In the computer the accuracy of calculation is very high. It can depict largefractional values very accurately. In computation of scientific data may varybut that variation is negligible. Computer may produce malicious result but itsaccuracy cannot be questioned because it is human who commit mistakewhile operating. Calculations performed by the computer is fully error free,the errors may be either due to inappropriate data provided by the user, or logical mistakes committed by the programmer. Computer works on aprinciple, it is Garbage in Garbage Out.
3. STORAGE
Like human brain, the computer has its own memory, which can retain verylarge amount of data until we desire to loose it. Human can remember apiece of information and forget after some time. In case of computer storagemedia, it can store bulk of data and can retrieve it as and when required. Tostore one character, it consumes one byte. These days you can store
approximately 21474836480 characters in any one detachable computer storage media.
4. DILIGENCE
Computer, unlike human being, is free from exhaustion or lack of concentration. It can work continuously without being tires unlike humanbeings. It can do repeated work with same speed and accuracy. Thisproperty of computer overrides human being.
5. VERSATILITY
The computer is very much flexible in performing the jobs provided to it. Itcan do different kind of jobs provided to it in logical sequence. At onemoment it can prepare account statement and in another it can be used to
draft a letter and in between the two it can instruct the printer to print adesign. This means it can perform all the jobs, the instructions of which canbe logically serialized.
ADVANTAGES AND DISADVANTAGES OF COMPUTER
ADVANTAGES• It can perform repetitive work and calculation rapidly and accurately.• Computer can store large amount of data and information for
subsequent manipulation.• The memory of computer can hold a program which can be explored in
different ways.• Computers can make decision based on different conditions.• It can provide information to the user.• If any error occurs in the program file, computer can automatically
detect these errors and allow the user to correct them.• It can draw and print graphics.• The computer can converse with user through input and output
devices.
DISADVANTAGES
• A computer has no brain or intelligence of its own.• It can perform operations as instruct by user.• It can not learn with experience.• It has no common sense, due to which it carry out the instructions only
• It can understand instructions no matter whether they are right or wrong.
BASIC COMPUTER ORGANIZATION
INPUT UNIT
Data and instructions must enter a computer system before the computer canperform any computation on the supplied data. Data and instruction enter acomputer through an input unit in a form that depends upon the input deviceused. For example, data can be entered using a keyboard in manner similar to typing and these are different from data entered through scanner.
OUTPUT UNIT
An output unit performs the reverse operation of that of input unit. It suppliesinformation obtained from data processing to outside world. Hence, it linkscomputer with its external environment. It converts these coded results tohuman acceptable form.
CENTRAL PROCESSING UNIT
CPU is the basic framework of functionality of computer. CPU constitutes of CU (Control Unit), ALU (Arithmetical & Logical Unit) and MU (Memory Unit).These all are integrated units perform their jobs coordinating with each other.CPU is the major part of the computer system; it is also responsible tocoordinate with the other parts of the computer.
ARITHMETIC LOGIC UNIT
Arithmetic logic unit (ALU) of a computer system is place where actual
execution of instruction takes place during processing operation. Calculationsare performed and all comparison is made in ALU. Data and instructionsstored in primary storage before processing are transferred as and whenneeded to the ALU where processing takes place. Results generated in theALU are temporarily transferred back to primary storage unit needed later.
CONTROL UNIT
Control unit (CU) is the manager of CPU. It controls all the devices built-in or attached with the computer. According to the instruction given, CU judges the
type of work and to what device it is to be directed, and then it sendsinstructions to that particular device. Cu keeps the track of each and everyexecution. It retrieves instruction, interprets it and sends signals to thespecified device. It does not perform processing by itself.
STORAGE UNIT
Data and instruction entered into a computer system through input unit haveto be stored inside computer before actual processing starts. Resultproduced by a computer after processing should be stored somewhere insidethe computer system before being passed to the output unit. Storage unit of all computers is comprised of following two types of storage: -
1. PRIMARY STORAGE
Primary storage of computer is also known as main memory , used to holdpieces of program instruction and data, intermediate result of processing andrecently produced results of jobs on which computer is currently working.However primary memory can hold the information only while computer is on.As soon as computer is switched off, the result held in main memory iserased. Main memory has limited capacity.
2. SECONDARY STORAGE
Secondary storage of computer, is known as auxiliary storage, is used to takecare of the limitations of primary storage. Secondary storage is muchcheaper than primary memory and it can retain information even whencomputer is switched off. In secondary storage the data and instructionstored for latterly use. Magnetic disk is the most commonly used secondarystorage medium.
The important secondary storage devices are:
i) Magnetic Tapeii) Magnetic Disk\ Hard Diskiii) Floppy Diskiv) Compact Disk
{1} MAGNETIC TAPE: Magnetic tape is like audio device or video tape. Itis a thin plastic ribbon coated with magnetic ferric oxide, usually ½ inch wider.This ribbon is reeled in a small cartridge or cassettes approximately 50 to
3600 feet. The data is stored on this tape sequentially in blocks. To separateone block from another, there are inter block gaps. A set of block is called afile, which has a header record and a trailer record labels denoting startingand ending of the file respectively. It is the chipset storage device available inthe market and is used for taking large backup.
{2} MAGNETIC DISK/ HARD DISK : Magnetic disk is a circular platter made up of a Mylar plastic or very smooth metal coated with magnetic ferricoxide on both sides. There is conducting coil, like audio tape head, which isvery small in size for reading and writing data on disk. This is called head,which can be movable or static. These disks are attached with a shaft whichrotates these disks and the head moves to & fro for reading and writing. Eachside of the disk has its separate head. This makes reading and writing veryfast. Normally eight or more disks are centrally attached with the shaft. Thewhole assembly with all required electronic parts is called disk pack. This disk
pack is also known as Hard Disk.
How it stores data: Each surface of the disk is divided into invisible tracks andsectors to locate or address data stored on to the surface. According to thesetracks and sectors data is written or retrieved from the disk. There areapproximately 16,834 tracks and 80 sectors on single surface of 10 GB HardDisk. Collectively each track of every surface is known as cylinder , so it canbe said that there are approximately 16,834 cylinders. Each intersection of track and sector is of 512 bytes. Therefore size of hard disk can be calculatedas no. of cylinders × no. of heads × no. of sectors × bytes per sectors.
{III} FLOPPY DISK: It is a small circular disk made of Mylar plastic coated
with a fine layer of magnetic ferric oxide, protected with hard plastic cover,which guards the surface of the disk. These days’ 3.5 inch floppies are inuse. The capacity of floppy disk is 1.44 MB. The floppy disk has 80 tracksand 18 sectors per side. It has 512 bytes per sector.
{IV} COMPACT DISK: Compact disk are formed from resin such aspolycarbonate and coated with highly reflected surface. The laser technologyis used to write data on these disks. To write data laser beams are focusedon the surface of the disk, which makes small microscopic pits. To read thesedata laser beams are again focused which when reflected in sensed by the
drive, the intensity of reflection changes as pits are encountered. Thesechanges are detected by the photo sensor and converted into digital signals.Data once written on Compact Disk can not be erased. There is different kingof drive for writing on these disks. The mechanism is similar to floppy disk.
INPUT OUTPUT DEVICESA computer system needs to communicate with user’s external environment.The input –output devices provide this capability to a computer system. Theyare also known as peripheral devices because they surround a computer’sCPU and memory.
The role of input – output devices in a computer system.
INPUT DEVICES
An input device is an electromechanical device that accepts data fromoutside world. Or we can say that input device is used to enter data into a
computer system. There are several input devices are available today. Fewimportant devices are discussed below:
1. KEYBOARD
Keyboard devices are the most important used input devices today. Theyallow data entry into a computer system by pressing a set of keys neatlymounted on a keyboard connected to a computer system. There are 101keys in standard keyboard but now a days keyboard with more than 101 keysare also available.
2. MOUSE
The mouse is an input device and is used to position the pointer on thescreen. It is a small palm size box. Its movement on a plane surface movesthe pointer in the same direction as the movement of the mouse. The boxcontains a ball underneath, which senses the movement and transmits it tothe computer. Computer process the input and places the mouse pointer
accordingly. There are two buttons in standard mouse, used to givecommands.
3. SCANNER
It is one of the device used in designing etc., provides input to computer.Further, these inputs are used for processing and manipulation. There aresome specific scanners built for special purpose like OCR, MICR or BCR.Some of them are explained below.
(i) OPTICAL CHARACTER READER (OCR): Optical character reader is an input device used to read any printed text. OCR scanstext optically character by character, converts them into a machinereadable code and store the text on the system memory. It can readat a rate of up to 1,400 characters per second.
(ii) MAGNETIC INK CHARACTER READER (MICR): MICR can
identify the character printed with a special ink that contains particlesof magnetic materials; MICR is used mainly in the banking industriesto read chouse. Since the MICR system can recognize only certaincharacter styles, the character have to be accurately framed.
(iii) BAR CODE READER (BCR): bar code reader is a device whichreads light and dark lines of different thickness. Bar Codes are usedto label different products. Bar Code is the method of coding booksetc. uniquely. BCR is used to decode these lines and identify theproducts.
OUTPUT DEVICES
An output device is an electromechanical device that accepts data fromcomputer and translates them into a form suitable for use by users. Severaloutput devices are available today. They can be broadly classified intofollowing categories:
MONITER
This is a device which looks like TV and is used to display output. It uses
cathode ray tube (CRT) to display text, images and drawings etc. When a keyis pressed CU gets intimated and send instructions for drawing that character on monitor, this is the simplest example of Visual Display Unit functionality.Another type of monitor used is LCD (Liquid Crystal Display). LCD flat panelmonitors are thinner, lighter and are used commonly with portable computer system like notebook computers. They are also preferred because theyoccupy less table space.
Printers are most popular output devices used today for producing hard copyoutput. Different types of printers are described below:
DOT MATRIX PRINTER (DMP)
It is the most popular versatile printer. This printer is of low cost. This printer uses hammers of a pin size, integrated in a printing head assembly whichhas nine or twenty four pins. According to the instructions given by thecomputer it strikes on the ribbon giving impression on the paper creatingdesired output.
Dot matrix printers are normally slow with printing speeds ranging from 30 to600 characters per second.
INKJET PRINTERS
Inkjet printers are character printers that form character and all kind of images by spraying small drops of ink on a paper. These printers uses smallcompact device, which controls the flow of water base ink through nozzles,known as Cartridge. The print head of an inkjet printer contains up to 64nozzles that can be heated up selectively in a few microseconds by anintegrated circuit resistor. This gives high quality graphic print, with best blend
The main components of a laser printer are a laser beam source, a multi-sided mirror, a photoconductive drum, and a toner (tiny particles of oppositely
charged ink). To print a
Page of output, the laser beam is focused on the electro statically chargeddrum by spinning multi-sided mirror. The mirror focuses the laser beam onthe surface of the drum in a manner to create patterns of character andimages to be printed on the page. Finally the page is passes through aheating chamber which fuses the ink particles with the paper permanently.
Operating system is a set of control programs which coordinates betweenuser & hardware and forms an interface between them.
An operating system (OS) is system software which communicates with thehardware of computer. It accepts commands in simple English language andconverts it to signals or machine language which computer hardware canunderstand. Computer hardware is electronic components whichcommunicate among themselves in electronic signals for performing task.User of the computer does not understand electronic signals so it is next toimpossible for a person to operate computer without OS.
Operating system performs lots of jobs. The jobs are defined in smallcomputer programs. These computer programs are collectively known as OS.OS resides in main memory and monitors the activities of the computer.Operating system ensures the smooth functioning and continuous operation
OS is like a manager of company who manages all the different functioning of the company. Likewise OS handles different jobs viz. managing memory,process, storage etc. and helps application software to perform its tasks. Withthe help of OS, application does not have to manage storage, memory,mouse etc.
All the computers are operated with the help of OS. Either it may be apersonal computer or super computer.
TYPES OF OPERATING SYSTEM
Operating system can be classified into two major parts:
1. User Based2. Interface Based
USER BASED
In this classification, operating system is studied accordingly to the capacity
or serving users. Computer can be designed to serve one or more then oneuser. In this context, operating system can be classified into two parts:
1. Single User System2. Multi User System
SINGLE USER SYSTEM
Single user system is designed for computers tend to serve single person ata time. This operating system is widely used with personal computer installedin home, offices etc. e.g. Windows98, Dos, Mac OS etc.
MULTIUSER SYSTEM
The operating system that serves multiple users at a time is referred as Multi User System. To implement this design it uses some sort of technique. Oneof the technique is time sharing. With the help of this technique processor time is divided into a number of time slices. These time slices are allotted tousers’ tasks and these tasks are scheduled one after the other at a givenpriority. This switching between the tasks is so fast that each user has the
illusion that all the resources are available to him only. These time slices areallotted to each piece of processes of different jobs, scheduled one after another. Therefore each job is executed for fraction of second, it is saved and
Another job starts. This cycle is continued for jobs until the jobs are finished.
This gives the illusion to both users that system resources are available tothem all the time. Example of Multi User System is UNIX.
INTERFACE BASED
There are two types of interfaces:• Character User Interface• Graphical User Interface
CUI: CUI stands for Character User Interface. The CUI based system
interacts with the user only through the commands type from the keyboard. Itdoes not support any other input device to communicate with it. The user isrequired to remember the exact syntax of commands to get its task executedby the system e.g. UNIX & DOS.
GUI: GUI stands for Graphical User Interface. The GUI is a picture basedway of interacting with computer. Instead of typing commands, we selectoption from menus and pictures to tell computer what we want to do. Themost popular example of GUI id Windows, Linux, Mac OS etc.In GUI, all the utilities or commands are represented by the icons. In GUI the
user does not have to remember each and every command, as they areeasily available in hand. The GUI environment provides us all the desktopfacilities.
FEATURES OF GUI
1. In GUI we use secondary user input device usually a pointing device,called mouse.
2. All files, directories, application and system entities are represented byicons.
3. Windows displays graphically what the computer is doing & how muchwork is in progress.
4. In Windows, a user can perform multiple tasks at a time i.e. user canwork on more than one application.
5. In GUI the user does not have to remember each and every command,as they are easily available in menu bar.
DIFFERENCE BETWEEN GUI & CUI
GUI CUI1. It stands for Graphical User Interface.2. The screen comes in graphics3. Here one need not remember allthe commands as theyare easily available at the desktop.
4. Here keyboard and mouse workas input device.5. e.g. Windows.
1. It stands for Character User Interface.2. Does not come in graphics.3. Here one needs to remember allthe commands as theyare easily available at the desktop.
4. Only Keyboard can be used asinput device.
5. e.g. Dos
INTRODUCTION TO WINDOWSXP
Windows XP brims with new features, improved programs, and tools. Seewhat’s new; take an entertaining tour; learn about the programs Windows XPcontains, including systems, accessories, and communications and
entertainment programs. Read articles containing full descriptions for performing key tasks from start to finish. Look up unfamiliar terms in theglossary. Learn the benefits of registering your copy of Windows XP online.
FACILITIES OF WINDOWS XP:• Any operating system that manages your hardware & software
interface.• A graphical user interface that enables you to:• Start any program.• Go online.•
Control hardware graphically.
• Total web integration provides web based desktop environment whereyou can place Web Page right on your desktop.
• A network management system that helps to network the workenvironment.
• A safer system security that protects from virus.
• A more efficient disk storage system (FAT 32) that makes your harddisk to hold twice the data stored earlier.
Windows XP gets loaded automatically as soon as we switch on our computer. Immediately after all kind of processing we get a view on thescreen which contains the following parts:
1. Desktop2. Wallpaper
3. Taskbar 4. Icons5. Start Button
DESKTOP
It is the base of window XP screen where all the icons & folders are stored &displayed.
To decorate or to make our desktop much more effective & attractive we canuse different kind of wallpapers and can create our own wallpaper in paint.
ICON
It is a pictorial representation of any application, file, folder, tool /utility. Byclicking on it, it will start will start that application and open that particular file/folder etc.
TASKBAR
By default it is visible at the bottom of the windows xp screen. Taskbar showsany application started by the user. It also displayed date and time at the rightmost side along with setting icons of different devices or software. By defaultthere is quick launch toolbar displayed beside the start button.Also more toolbars can be addedto the taskbar .
1. It contains the start button.
2. It provides easy access tothe tools those appearingon the taskbar.
3. Currently opened Windowsapplications and foldersappear as buttons on thetaskbar.
4. We can arrange or minimize the windows of open items and selectingoptions on a shortcut menuby right clicking on thetaskbar.
5. If modem is active or weare taking print out, iconsfor these process willappear at the respectivearea of taskbar.
6. We can drag the taskbar to change its size and position.
This button always appears at the left side of the taskbar. This button is theonly entry point on windows XP application. If we click on Start button thefollowing options will appears.
PROGRAMS
It contains list of application and shortcut for them andalso contains the application sub folder such asaccessories folder or Ms-Office folder.
DOCUMENTS
Document contains the list of recently useddocuments.
SETTINGS
Setting allows us to do the different kind of systemsetting for control panel folder, Printers folder and
other sub folder setting like Display, Mouse etc.
SEARCHSearch allows us to find files, folders etc. It will show the full path of thematching files or folders.
Help provides the necessary online help for windows.
RUN
Run allows us to open files or to launch applications. You can directly openthe executable files by specifying the path of that file.
SHUT DOWN
When a window is started it loads number of files in the memory, so it isrequired to unload or save these files for next error free startup. Not doing so,the data will be lost and computers will not start with the previous setting. It isvery necessary to first turn off the computer and then it should be switchedoff. When turn off is clicked from start menu the following screen appears,from where select the turn off.
Windows XP contains a special folder called Accessories that a person canuse to make their task easier and simple. By using Accessories you canperform calculations, create text documents, edit pictures and playgames.
The Accessories folder contains the following programs:
Calculator NotepadWordPad
PaintWindows Explorer
CALCULATOR
You can use Calculator in Standard view to do simple calculations, or inscientific view to do advanced scientific and statistical calculations.
• To open Calculator, click Start, point to All Programs, point toAccessories, and then click Calculator .
Calculator is of two types:1. Standard Calculator 2. Scientific Calculator
The Standard Calculator contains some features like clear memory, recall,store and memory add.The Scientific Calculator supports many advance features and advanceoperations.
Steps to Perform CalculationsStep 1: Open Calculator and select the Calculator type.Step 2: From calculator click on any number by using the mouse
pointer or keyboard.Step 3: Click on any symbol that you need i.e. (+) addition, (-)
subtraction, (*) multiplication, (/) division.Step 4: Now click on the next number.Step 5: If needed, click on another operator.Step 6: Click on (=) equal sign.Step 7: You can also use numeric keypad to enter numbers and
operators.
WORKING WITH NUMBERS STORED IN THE MEMORY
• MS is used to store the number in the memory, if it is stored, M willappear in the box above the Memory buttons.
• To recall the previously stored number, click MR.• If we want to store another number in memory using MS, it will replace
the number previously stored in the memory.• To clear the memory click MC.• To add the displayed number with the number already stored in the
memory, click M+.
NOTEPAD
Notepad is a basic text editor you can use for simple documents or for creating Web pages. To create or edit files that requires formatting, useWordPad.
• To open Notepad, click Start, point to All Programs, point toAccessories, and then click Notepad.
PARTS OF NOTEPAD
Title bar Top most part of notepad contains the application nameand the file name on which you are working. It alsocontains three buttons Minimize button, Maximize/Restorebutton and close button. Finally, it also contain controlmenu.
Menu bar As discussed previously in GUI user need not remember any command because they are available in menus. Allnotepad commands are available on menu bar.Accordingly you can select any option.
Scroll bar Notepad contains scroll bars to move around thedocuments. It contains two types of scroll bar:
Vertical Scroll Bar: Used to move up and down in the text document.
Horizontal Scroll Bar: Used to move left and right side in the textdocument.
Client area Client Are is the area where user can type text.
HOW TO WORK ON NOTEPAD
Using Menu Bar : This can be activated by two ways(I) By clicking on specific option using mouse pointer.(II) By pressing Alt key & underlined character of file menu.
E.g. for opening File menu press Alt+F
FINDING SPECIFIC CHARACTERS OR WORDS
• On the Search menu, click Find.• In the find what: box, type the character or word you want to find.• Click Find Next button.
COPYING AND MOVING TEXT
While editing or typing it is required to cut or copy text from some part of thedocument and paste it to the other part of the document. When cut or copyfunction is used on any text, it is placed in the temporary memory calledclipboard. Once the text is placed in the clipboard, it can be pasted anywhereas many times as required. Clipboard can hold only one item at a time. Using
cut or copy operation on another text replaces any item placed previously inthe clipboard. Before copying or moving any text it has to be selected.
TO DELETE, CUT, COPY AND PASTE TEXT
• To delete character to the left of the insertion point, press thebackspace key.
• To delete character to the right of the insertion point, press the deletekey.
• To delete words, select them and then press the backspace or delete
key.• To cut text or move it to another location, select the text. Then, on the
Edit Menu, click Cut.• To copy text or paste a copy of it to another location, select the text.
Then, on the Edit Menu, click Copy.• To paste text placed in the clipboard, move the insertion point where
you want to paste the text. Then from the edit menu, click on Paste.
Word wrap is the facility provided by the many text editor and wordprocessors. In this last word of any line is shifted to next line when it does notfit in the same line. With the facility user need to require pressing return keyevery line to go to next time while typing.
TO WRAP TEXT TO THE WINDOW SIZE
• On the edit menu, click Word Wrap.
TO INSERT THE DATE & TIME IN DOCUMENT
• Move the insertion point where you want to add the date & time.
• On the edit menu, click Time/Date or press F5 function key.
FILE MENU CONTAIN FOLLOWING SUB OPTIONS
New - Used to create a new text file.Open - Used to open an existing text file.Save - Used to save the file with specific name.Save as - Used to create some copy of text file & save it with
different name.
Page Setup - Used to set margins, header & footer etc.Print - Used to take the print out from the printer.Exit - To close the application.
WORDPAD
You can use WordPad to create or edit text files that contain formatting or graphics. Use Notepad for basic text editing or for creating Web pages. Thepreviously used notepad had certain limitations like that text can not beformatted, page formatting can not be done etc. but to overcome these
limitations WordPad is used. In a WordPad document, images and other objects can be inserted.
• To open WordPad, click Start, point to All Programs, point to
Title bar Top most part of WordPad contains the application nameand the file name on which you are working. It alsocontains three buttons Minimize button, Maximize/Restorebutton and close button. Finally, it also contain controlmenu.
Menu bar All the work that user wants to do, can be done byselecting options from menu bar. According to therequirement user can select the appropriate option fromthe menu bar.
Tool bar Almost all the option present in the menu bar are alsopresent in toolbox. These tools are used to do the workquickly. These toolbars can be activated or deactivated.
By default, both standard and formatting toolbars arevisible.
Format bar This bar is used to do the formatting of the text likechanging the font, style, size or color of the text. The text
can also be made bold, italic & underline. The text can bealigned to left, center or right. The bullet tool button can beused to create bulleted list.
Ruler bar It is used to set left & right margins of the page. With thehelp of ruler bar proper adjustment of the page can bedone. The unit of ruler bar is in inches.
Status bar Status bar is present on the bottom of the applicationwindow. The status bar displays the type of work being
done in the application.
Scroll bar Notepad contains scroll bars to move around thedocuments. It contains two types of scroll bar:
Vertical Scroll Bar: Used to move up and down in the text document.Horizontal Scroll Bar: Used to move left and right side in the text
document.
Document windowthis is the area where the user can enter text and objects.
Performing operations on WordPad
Different kind of work can be done using menu bar and toolbar.
a) File menu contains following sub options:New - Used to create a new text file.Open - Used to open an existing text file.Save - Used to save the file with specific name.
Save as - Used to create some copy of text file & save itwith different name.
Page Setup - Used to set margins, header & footer etc.Print - Used to take the print out from the printer Exit - To close the application
b) Edit menu contains following sub options:Select all - To select all the text at a time in current
Document.Find - To search a particular word or character.Replace -To search a word or character and replace it
with other word or character.Cut - To cut a word, character or a number of
Characters.Copy - To copy a word, character or a number of
Characters.Paste - To paste the information placed on
Clipboard.
c) View menu contains following sub options:Toolbar - To display toolbar on the application whenchecked.Format bar - To display format bar on the application when
checked.Ruler - To display the ruler bar on the application
When checked.Status Bar - To display the status bar on the application
When checked.
When any of these sub options is unchecked, then that particular bar wouldnot be displayed in the application window.
d) Insert menu contains following sub options:
Date and Time - To insert date and time in the document.Object - To insert any object like picturesor any other
Objects.
e) Format menu contains following sub options:Format - To change the font size, style or color of the
Text.Bullet style - To insert bullets in the beginning of the lines.Paragraph - To set indentation and alignment of the
paragraph.Tabs - Tabs are used to set tab stop position of different size.
PAINT
It is the most interesting application available in accessories. Paint is adrawing tool you can use to create black-and-white or color drawings that youcan save as bitmap (.bmp) files. It provides different tool for drawing like line
tool to draw line, Ellipse tool to draw circle or ellipse etc. With the help of these tools very good drawing can be done. Paint is used to view or edit anypicture acquired from scanner or any other source. It supports differentformats like JPEG & GIF. You can also use Paint to send your drawing in e-mail, set the image as a desktop background, and save image files using
different file formats.
STEPS TO OPEN PAINT
• To open Paint click Start, point to Programs, point to Accessories,and then click Paint.
• To open Paint click Start, Point to Run, and type MSPAINT, and thenclick on OK.
PARTS OF PAINT SCREEN
Menu Bar :It contains the different options or commands for thepicture on which we are working currently. It has File,Edit, View, Image, Color and Help options.
• Create a text frame by dragging the mouse pointer diagonally, and thenclick the font, size and style you want.
• Click inside the text frame, and then type the text.
• Move or enlarge the text frame as required.
•
To change the color of the text, select a color from the color box.
8. FILL TOOL: With the help of this tool, we can fill any shape or area. Thearea should be bounded by all sides. To fill an area or object with color:
• Click on Fill tool button, and then select a color from the color box.
• Click in the area or shape you want to fill.
• To fill with the foreground color, click in area with the left mouse button.
• To fill with the background color, click in area with the right mouse
button.9. BRUSH TOOL: Brush tool helps us to draw free hand drawing. Different
shapes of brushes can be selected from the property box. To paint withbrush:
• Click Brush tool button, and then choose a brush shape from bottom of the tool button.
• Select any color from the color box.
• To paint, drag the mouse pointer.10. AIRBRUSH TOOL: Airbrush tool helps us to spray on the canvas. To
create an airbrush effect:
• Click Airbrush tool button.
• To change the size of the spray are, select a size from the property box.
• To choose the spray color, select a color from the color box.
• To spray, hold down left mouse button and drag the mouse pointer. Usethe left mouse button to spray with foreground color, or use the rightmouse button to spray with the background color.
11.ERASER TOOL: Eraser tool can be used to erase any drawing. Eraser will leave the color selected for background. To erase:
• Click Eraser tool button.
• Select shape and size of the eraser from property box.• The eraser will leave color selected for background. Any color can be
selected for background from color box by using right mouse button.
• Drag the mouse pointer over the area you want to erase.
12.SELECT TOOL: Select tool used to select a part of a picture or wholepicture.
Word processing is the way of producing document in effective and efficientmanner, which includes the preparing and formatting documents. i.e.
• Aligning• Pagination•
Header / Footer • Margins etc.
Initially this work is done manually with the help of typewriter which was timeconsuming and can not be modified or used again.
Now this work can be done with the help of computer, which is more efficient,can be reused and modified accordingly and can produce multiple copies.
A word processor is application software for word processing. The variousword processor packages that are being used are Word Perfect, Word Star,and Ms-Word etc.
FEATURES OF WORD PROCESSOR
• Efficient mode of text editing.• Facility of cut, copy and paste.• Search and replace text.• Justification and indentation.• Pagination.
• Spelling and Grammar checking.• Importing and exploring text.• Mail merge.• Recording of repetitive work.
WHAT IS MS- WORD
It is a window based Electronic- Word processing application software. Alongwith the features common to other Word Processors, it is equipped with other powerful features such as:
• FONT STYLE• GRAPHIC DRAWING• DOCUMENT TEMPLATE• DOCUMENT WIZARD• WEB PAGE DESIGN• HYPER LINKING
• Located at the top of word window application.• Displays the name of document currently being edited and the name of
application. MENU BAR
• Located below the title bar.• Gives access to all the commands available in the word.• Click on the menu name or press Alt+ Char is the underlined letter in
the menu name.
TOOL BAR
• There are eight different toolbars.• Standard and Formatting toolbars are opened by default. Rest could be
activated whenever required.• These toolbars can be moved, edited, enlarged and deactivated as &
when required.
RULER BAR
• It is used to adjust margins and indents of the document.• It is also used to set the tab stops.
DOCUMENT WINDOW
• It is the editing zone.• It has an insertion point which indicates the position where text,
graphics and other objects will be placed when you type or insert them.This insertion point is a blinking vertical bar.
SCROLL BAR
• It is used to move around the document.• The horizontal and vertical bars are used to scroll in either direction
using the arrow buttons.• The double arrow buttons present on the vertical scroll bar are used to
move to previous or next page.
STATUS BAR
• Displays statistics about the insertion point.• Displays status of important keys.
• It provides online animated help system.• It provides real time tips as we work.
VIEW BUTTONS
• The four view buttons are arranged at the start of horizontal scroll bar.• VIEW provides a different way to look at the document.• The view can be used to perform certain tasks.• The four different views in a MS-Word document are:
i. Normalii. Print layoutiii. Web layoutiv. Outline view
CREATE A DOCUMENT
The following procedure creates a new, blank document.
• On the Standard toolbar, click New Blank Document.
To use templates, wizards, and existing documents as a starting point, doone of the following:
From a template or wizard
1. On the File menu, click New.2. In the New Document task pane, under New from template, click General Templates.
Click the tab for the type of document you want to create, and then double-click the icon for the template or wizard you want.
When a document is saved for the first time, save as dialog box appearswhere the file name can be specified. Word saves all its files with thedefault extension of .DOC. To save a document, perform any one of theactions.
1. On the File menu, click Save.2. In the File name box, enter a new name for the file.3. Click Save.
Save a file to another format
1. On the File menu, click Save as.2. In the File name box, enter a new name for the file.3. Click the Save as type list, and then click the file format that you want
Save a Word document as a Web page or a frames page
1. On the File menu, click Save as Web Page.2. If you want to save the document in a different folder, locate and open
the folder.
3. In the File name box, type a name for the document.4. Click Save.
VIEWS IN WORD
Microsoft Word has different ways for you to get a good view of your work,depending on the task at hand.
PRINT LAYOUT
Work in print layout view to see how text, graphics, and other elements willbe positioned on the printed page. This view is useful for editing headers andfooters, for adjusting margins, and for working with columns and drawingobjects. If you'd like to type and edit text in this view, you can save screenspace by hiding white space at the top and bottom of the page. To switch toprint layout view, click Print Layout on the View menu.
WEB LAYOUT
Work in Web layout view when you are creating a Web page or a documentthat is viewed on the screen. In Web layout view, you can see backgrounds,
text is wrapped to fit the window, and graphics are positioned just as they arein a Web browser. To switch to Web layout view, click Web Layout on theView menu.
NORMAL
Work in normal view for typing, editing, and formatting text. Normal viewshows text formatting but simplifies the layout of the page so that you cantype and edit quickly. In normal view, page boundaries, headers and footers,backgrounds, drawing objects, and pictures that do not have the In line with
text wrapping style do not appear .
To switch to normal view, click Normal on the View menu.
OUTLINE
Work in outline view to look at the structure of a document and to move,copy, and reorganize text by dragging headings. In outline view, you cancollapse a document to see only the main headings, or you can expand it to
see all headings and even body text. Outline view also makes it easy to workwith master documents. A master document makes it easier to organize andmaintain a long document, such as a multipart report or a book with chapters.In outline view, page boundaries, headers and footers, graphics, andbackgrounds do not appear.
To switch to outline view, click Outline on the View menu.
SPLITTING THE SCREEN
Word also offers split screen view, in which the screen is divided into twopanes, each pane can have a different view and can be zoomed to a differentpercentage.
To split the screen:
• Select Split from the Window Menu.• The mouse pointer changes to double headed arrow pointing up and
down and dragging a thick gray line. Move the line up or down thescreen and then click.
• To remove split select remove Split from the Windows Menu.
ZOOMING THE VIEW
The zoom feature of MS-Word allows us to increase or decrease the size of
the display to make the text easily visible. The zoom percentage can be setbetween 10 % and 500 % of full size. To set the zoom percentage, the zoomlist box, on the standard toolbar, can be used.
PREVIEW A PAGE BEFORE PRINTING
Print preview display the document, exactly the way it will appear after printing. It is good practice to always preview before printing. This helps tospot obvious mistakes and avoid reprinting.
1. On the File menu, click Print Preview.
2. To preview, click on the print preview button on the Standard Toolbar.
PRINTING A DOCUMENT
To print the document, perform any one of the following operations:
• Print a document using print button on the standard toolbar.• Print the document using the print button from the print preview toolbar.
• For printing specific pages, click Print from the File Menu or pressCTRL + P
CLOSING A DOCUMENT
• Select Close option from the File menu.• Or you can press CTRL + F4.
MOVING AROUND THE DOCUMENT
As we work on document the cursor is often required to move around thedocument. We can navigate either using the keyboard or mouse.
To move the cursor using keyboard we can use the following keys:
TO MOVE PRESSLeft or Right one character ← Or →Left or Right one word Ctrl + ← or Ctrl + →Up or Down one line ↑ Or ↓Up or Down one paragraph Ctrl + ↑or Ctrl + ↓To the start or end of the line Home or EndUp or Down one screen Page Up or Page DownTo the top or bottom of one screen Ctrl + Page Up or Ctrl + Page DownTo the start of the end of thedocument
Ctrl + Home or Ctrl + End
DOCUMENT MAP
The Document Map is a separate pane that displays a list of headings in thedocument. Use the Document Map to quickly navigate through the documentand keep track of your location in it. When you click a heading in theDocument Map, Microsoft Word jumps to the corresponding heading in thedocument, displays it at the top of the window, and highlights the heading inthe Document Map.
You can choose the level of detail to display in the Document Map. For example, you can display all headings or only top-level headings, or show or hide detail for individual headings. You can also set the font and size of theheadings in the Document Map and change the highlight color of the activeheading.
The Document Map is different from a table of contents frames page for aWeb page. Create a table of contents frames page when you need to publisha document for others to view in a Web browser or in Word.
The term refers to the change you make in your document’s appearance.Formatting is an important part of all the documentation. There are threetypes of formatting in MS-Word.
1. Character Formatting2. Paragraph Formatting3. Page Formatting4.
CHARACTER FORMATTING
The tern character Formatting refers to the attribute that is applicable toindividual characters in the documents. How ever it can be applied to
anything from single character to the entire documents, which includeschanging Style, Size, Color & different effects. Most of the charactersformatting commands are as follows:
USING FONTS
A font is a set of letters and symbols that have a particular design or style.
1. Select the text you want to change.2. Select Format Font.3. Now select suitable font to the text.
PARAGRAPH FORMATTING
In paragraph formatting we can done the spacing between the lines and theparagraphs present in the document. The parameters we can use in theparagraph formatting are as follows:
• Alignment• Indentation• Spacing
ALIGNMENT
1. To insert left-aligned text
Move the mouse pointer to the left margin until you see the Align Lefticon. Double-click, and then start typing your text.
Move the mouse pointer until you see the Center icon. Double-click,and then start typing your text.
3. To insert right-aligned text
Move the mouse pointer until you see the Align Right icon. Double-click, and then start typing your text.
4. justify the text
Move the mouse pointer until you see the Align justify icon. Double-click, and then start typing your text.
Shortcut keys for aligning text are:
LEFT ALIGNMENT : Ctrl + L
RIGHT ALIGNMENT : Ctrl + R
CENTER ALIGNMENT : Ctrl + E
JUSTIFIED : Ctrl + J
INDENT
An indent is the distance that a paragraph is pushed in from to the left or right
margin. The indents are added to margins, by increasing the space anddecreasing the text area of the paragraph. The paragraph indents in thedocuments can be adjusted and can be changed by the indent markers onthe ruler bar.
PARTS OF INDENT
• FIRST LINE INDENT• LEFT INDENT• RIGHT INDENT
• HANGING INDENT
FIRST LINE INDENT
It specifies the position at which first character of the paragraph starts.
LEFT INDENT
It indicates the position at which the left side of all lines starts.
It indicates the position at which the right side of all lines ends.
HANGING INDENT
Paragraph formatting in which the second and subsequent lines of a paragraph are indented more than the first line. Common uses for the hanging indent are bulleted and numbered lists.
HOW TO MAKE INDENTS
To change the indentation of text we can use the four different markers i.e.
Left indent marker, First line indent marker, Right line indent marker andHanging indent.
• Each marker can be selected and dragged left or right to a tab point.• Select Increase indent button for creating indents and further Sub-
Indents to the next tab-stop.• Select Decrease indent button for creating indents to the previous tab-
Box allows you to choose the properties of the columns. Select the number and width of the columns from the dialog box.
Drop Caps
A drop cap is a large letter that begins a paragraph and drop through severallines of text as shown below.
Add a drop cap to a paragraph by following these steps;
• Place the cursor within the paragraph whose first letter will be dropped.• Select Format/Drop Cap from the menu bar.• The Drop cap dialog box allows you want to select the position of the
drop cap, the font, the number of this to drop, and the distance fromthe body text.
• Click OK when all selections have been made.
To modify a drop cap, select Format/Drop Cap again to change theattributes, or click on the letter and use the handles to move and resize theletter.
Adding Clip Art
To add a clip image from the Microsoft library to a document, follow thesesteps:
• Select Insert/Picture/Clip Art from the menu bar.• To find an image, click in the white box following Search for clips.
Delete the words “Type one or more words’ and enter keyboardsdescribing the image you want to use.
• Click once on the image you want to add to the document and thefollowing popup menu will appears:
• Insert Clip to add the image to the documents.• Preview Clip to view the image full-size before adding it to the
document. Drag the button, right corner of the preview window toresize the image and click the “x” close button to end the preview.
• Add Clip to Favorites will add the selected image to your favoritesdirectory that can be chosen from the insert Clip Art dialog box.
• Find Similar Clips will retrieve images similar to the one you havechosen.
• Continue selecting images to add to the document and click the closebutton in the top, right corner of the Insert Clip Art window to stopadding clip art to the document.
Add an Image from a File
Follow these steps to add a photo or graphic from an existing file:
• Select Insert/Picture/From File on the menu bar.• Click the down arrow button on the right of the Look in; window to find
the image on your computer.
•
Highlight the file name from the list and click the Insert button.
Editing a graphic
Activate the image you wish to edit by clicking on it once with the mouse.Nine handles will appear around the graphics. Click and drag these handlesto resize the image. The handles on the corner will resize proportionally whilethe handles on the straight lines will stretch the image. More picture effectscan be changed using the picture toolbar. The Picture Toolbar should appear when you click on the image. Otherwise, select View/Toolbars/picture fromthe menu bar to activate it.
• Insert picture will display the image selection window and allows youto change the image.
• Image Control allows to make the image grayscale, blank and white,or a watermark.
• More/Less Contrast modifies the contrast between the colors of theimage.
Language: Designate the language of the selected text within the body of thetext written in more than one language. When proofing a document. Wordautomatically switches to the dictionary for the language for which the word
does not have a dictionary word uses the dictionary of a related language.
Word Count: Counts the number of pages, words, characters, paragraphsand lines in documents and has the options to include/ exclude the optionsetc.
Auto summarize : It automatically create the summary of the which iscurrently opened by selecting all the sentence whichever it thinks as
important ones and highlighting those sentences in any reserve media color.It also gives him percentage of the summary whether 10%, 20% etc. can beselected.
Auto Correct: It automatically corrects as you type. It is similar to auto spellcheck but auto correct automatically searches for and corrects predefinederrors as you type.
Protect Documents: To product the document with several changes with a
password facility this option is of importance. If the user wants to avoid theunnecessary changes he can use this simple method of protecting thedocuments.
Online collaboration: it is web based function which has been designed for the same purpose. It is available with mainly three options like Meet Now,Schedule and Web Discussion.
Mail Merge: Mail merge allows you to word for more than one documentusing word you can enter sort $ search through list of data the name, address
& item in an inventory. You can merge data list with other word document &print levels, Envelopes &from letters. Word mail merge features are anexcellent tool for managing information. Mail Merge also allows you to impactdata stored in an Excel worksheet or an Access database into a worddocument.
Performing a Mail Merge Involves three basic steps:
Auto correct to speed your work automatically entering long words or phrasesto replace abbreviations you type. For Example, you can specify that everytime you type “co” it be replaced with “computers
Working with table
Creating a Table
When you are create a table you must specify how many rows columns it
should have. You can always add or deleted row and column later, but youhave to start some where.
Step 1 – Move the insertion point to the location at which you wish to placethe table.Step 2 – Clicks on the table option on the menu bar and click the left mousebutton. A pull down menu appears.
Step 3 – inside the pull down menu, click over the insert Option. A second’smenu gets displayed.
Step 4 – In second menu click on the Table option button. An Insert Tablebox appears on screen asking you to specify the row and columns of your proposed table.
OR
Step 1 - Click the insert table button on the standard toolbar. Word displayeda grid below the button.
Step 2 - Point to the box in the upper-left corner of the grid and press and
hold down the mouse button. Drag down and to the right until you highlightingthe desired numbers of rows and columns. (If you reach the lower-rightcorner the grid will expand as needed.)
Step 3 - release the mouse button. Word inserts the table in the documentsat the locution of the insertion point.
Draw Table – Insert a table where you drag in the document. After you dragto insert the table, drag inside the table to add cells, columns, or rows.
Insert table – Inserts a table in the document with the number of columnsand rows you specify.
Delete table – deletes the selected table from the document.
Select Table – Selected the table that contains the insertion point.
Auto Format - In Microsoft word, automatically applies formats, includingpredefined borders and shadings, to a table. Automatically resizes a table tofit the contents of the table cells. In Microsoft Excel applies a built-incombination of formats to a cell range or a pivot table report.
Auto fit to Contents – automatically adjusted the width of columns in thetable, based on the amount of text you type.
Split Cells / Unmerge Cells – In Microsoft word and Microsoft power Point,Splits the selected cells in to the numbers of rows and columns you enter.
Split Table –Divides a table into two separated tables and inserts aparagraph mark above that contents the insertion point.
Convert – Converts a selected table or selected table row to text, separatingthe contents of the cells in each row with the separator character you specify.
Sort- Arranges the information in selected rows or lists alphabetically,numerically, or by date.
Formula- Performs mathematically calculations on numbers.
Gridlines- In a table, the Gridlines commands (table menu) displayed or hidedotted gridlines to help you see which cell you are working in. Table gridlines
don’t’ print; if you want to add printable gridlines to your table.
WINDOWThe users while handing and multiple files mainly use this. It is available withthe following options.
New window – It is an option to open an existing and working file into a newwindow with the same contents where typing one location.
Arrange all – It the user is working with more than one documental thedocument/files can be arranges as a separate window on the same screen byusing this commands.
Split – To split the screen as per required window where you can make
changes or for any kind of professional documentation. Office assistant.
Office Assistant - Provides help topics and tips to help you accomplish your takes. Show or hide the office assistant Displayed and removes the officeAssistant from view Split
This options is used it view two parts of the documents simultaneously,
Step 1 – Select the portion where you want to split.
Step 2- On the window menu bar click on the spite option.
This tutorial teaches Microsoft excel basics. Although knowledge of how tonavigate in a windows environment is helpful this tutorial was created for thecomputer novice. To begin open Microsoft excels.
Then, if necessary, click on the* in the upper right corner of the task pane toclose the task pane.
This lesson will familiarize you with the Microsoft excel screen. You will startwith the title bar, which is located at the very top of the screen. On the title
bar, Microsoft excel displays the name of the workbook you are currentlyusing. At the top of your screen, you should see “Microsoft Excel-Book1” or asimilar name.
The menu Bar
The menu bar is directly below the title Bar. The menu begins with the wordfile and continues with edit, view, insert, format, tools, data, window, andhelp. You use a menu to give instructions to the software. Point with your mouse to a menu option and click the left mouse button. A drop-Down menuopens. You can now use the left and right arrow keys on your keyboard tomove left and right across the menu bar. You can use the up and down arrowkeys to move up and down the drop-down menu7.To choose n option,highlight the item on the drop menu and press Enter. an ellipse after a menuitem signifies additional option; if you choose that option, a dialog box opens.
Do the following exercise, which demonstrates using the Microsoft Excelmenu bar.
1. Point to the word File, which is located on the menu bar.2. Click your left mouse button.3. Press the right arrow key until help is highlighted.4. Press the left arrow key until format is highlighted.5. Press the down arrow key until style is highlighted. Press the up arrow keyuntil cells is highlighted.6. Press enter to choose the Cells menu option.7. Point to cancel and click the left mouse button to close the dialog box.
When using Microsoft Excel, you can set an option to tell Microsoft Excel to
always show full menus or to show only the most frequently and recentlyused options. All the lessons in this tutorial assume you have your menus setto always show full Menus. To set you’re to display full menus.
1. Point to the word tools, which is located on the menu bar.2. Click your left mouse button.3. Press the down arrow until customize is highlighted.4. Press Enter.5. Choose the option Tab by clicking on it.
6. Always show Full Menus does not have a check mark in it, Click in theAlways show Full menus box.7. Click Close to close the dialog box.
Toolbars
THE STANDER TOOL BAR
THE FORMATTING BAR
Toolbars provide shortcuts to menu commands. Toolbars are generallylocated just below the menu bar. Before proceeding with this lesson, makesure the toolbars you will use—Standard and formatting—are available.Follow the steps outlined here.
1. Point to view, which is located on the menu bar.2. Click the left mouse button.3. Press the down arrow key until Toolbars is highlighted.4. Press the right arrow key.
5. Both standard and formatting should have a check mark next to then. If both have a mark next to them, press Esc two times to close the menu. If eater does not have a check mark, press the down arrow key until customizeis highlighted.6. Press Enter. The customize dialog box opens.7. Choose the Toolbars tab.8. Point to the box or boxes next to the unchecked word or word, standardand/or formatting, and click the left mouse button. A check mark shouldappear. Note you turn the check mark on and off by clicking the left mousebutton.9. Point to close and click the left mouse button to close the dialog box.
Microsoft Excel consists of worksheets. Each worksheet contains columnsand rows. The columns are lettered A to IV; the rows are numbered 1 to65536.The Combination of a columns coordinate and a row coordinate makeup a cell address. For example, the upper left corner of the worksheet is cellAlimenting column A, row, Cell E10 is located under column E on row 10.You enter your data into the cells on the worksheet.
The Formula Bar
FORMULA BAR
If the formula bar is turned on, the cell adders displays in the name box onthe left side of the formula bar. Cell entries display on the right side of theformula bar. BeforeProceeding, make sure the formula bar is turned on
Status bar
1. Point to view, which is located on the menu bar.2. Click the left mouse button. A drop-down many open.3. On the drop-down menu, if status bar has a check mark next to it, it is
turned on press the esc key to close the drop-down.4. if status bar does not have a check mark next to it ,press the down
arrow key until status bar is highlighted ;then press enter. The statusbar should now appear at the bottom of the screen.
1. Press the end key.2. Note that “END” appears on the status bar in the lower right corner of
the screen.3. Press the right arrow key.
4. Note that the cursor moves to the farthest right area of the screen.5. Press the END key again.6. Press the down arrow key. Note that cursor moves to the bottom of the
screen.7. Press the END key again.8. Press the left arrow key. Note that the cursor moves to the farthest left
area of the screen.9. Press the END key again.10. Press the up arrow key. Note that the cursor moves to the top of
the screen.
Note: If you have entered data into the worksheet, the End key movesyou to the end the data area.
The Home Key
The home, used in conjuctio9n with the End key, moves you to cell A1—or to the beginning of the data area if you have entered data.
1. Move the cursor to column J.2. Stay in column j and move the cursor to row 20.3. Press the End key.4. Press home.5. You should now be in cell A1.
Moving Quickly Around the worksheet
The following are shortcuts for moving quickly from one cell to a cell in adifferent part of the worksheet.
Go to - F5
The F5 function key is the “go to” key. If you press the F5 key while in theReady mode, you are prompted for the cell to which you wish to go. Enter the cell address, and the cursor jumps to that cell.
1. Press F5.The Go To dialog box opens.2. Type J3.3. Press enter. The cursor should move to cell J3.
2. Press scroll lock. Note “SCRL” appears on the status bar in the lolwer4right corner of the screen.
3. Press the up arrow key several times. Note that the cursor stays in thesame position and the window moves onward.
4. Press the down arrow key several times. Note that the cursor stays in
the same position and the window moves downward.5. Press scroll Lock to turn the Scroll L9ock function off.6. Hold down the Ctrl key press home to move to cell A1.
Selecting Cells
If you wish to perform a functio9n on a group of cells, you must first selectthose cells by highlighting them. To highlighting cell A1 to E1:
1. Press the cursor in cell A1.2. Press the F8 Key. This anchors the cursor.3. Note that “EXT” appears on the status bar in the lo0wer right corner of
the screen. You are in the Extend mode.4. Click in cell E7. Cells A1 to E7 should now be highlighted.5. Press Esc and click anywhere on the worksheet to clear the
You can also highlight an area by holding down the left mouse button anddragging the mouse over the area. in addition, you can select non-contiguous area of the worksheet by doing the following:
1. Place the cursor in cell A1.
2. Hold down the Ctrl key. Do not release it until you re told. Holdingdown the Ctrl key enables you to select noncontiguous areas of theworksheet.
3. Press the left mouse button.4. While holding down the left mouse button, use the mouse to move from
cell A1 to E7.5. Continue to hold down the ctrl key, but release the left mouse button.6. Using the mouse, Place the cursor in cell G8.7. Press the left mouse button.8. While holding down the left mouse button, move to cell I17.Release the
left mouse button.9. Release the Ctrl key. Cells A1 to E7 and cells G8 to I17 are
highlighted.10. Press Esc and click anywhere on the worksheet to remove the
highlighting.
Entering Data.
In the lesson, you are going to learn how to enter date into your worksheet. First, you place the cursor in the cell in which you would like to
enter data. Then you type the data and press enter.
1. Place the cursor in cell A1.2. Type John Jordan.3. The backspace key erases one character at a time. Erase “Jordan” by
pressing the backspace key until Jordan is erased.4. Press enter. They name “John” should appear in cell A1.
Editing a cell
After you enter data into a cell, you can edit it by pressing F2 while youare in the cell you wish to edit.
1. Move the cursor to cell A1.2. Press F2.3. Change “John” to “Jones.”4. Use the backspace key to delete the “n’ and the ‘h”
Alternate Method; editing a cell by using the formula bar
You can also edit the cell by using the formula bar. you can change “Jones’to “Joker” as follows:
1: move the cursor to cell A1.2: Click in the formula area of the formula bar.3: Use the backspace key to erase the “s” “e” and “n”.4: Type
5: Press enter.
Alternate Method: Editing a cell by Double-clicking in the cell
You can change “joker” to “Johnson” as follows:
1. Move the cursor to cell A1.2. Double click in cell A1.3. Press the End key. Your cursor is now at the end of yo7ur text.
4. Type Hanson.5. Press enter
Changing a cell Entry
Typing in a cell while you are in the ready mode replace the old cell entry withthe new information you type.
1. Move the cursor to cell A1.2. Type Cathy.3.
Press Enter. The name “Cathy” should replace “Johnson.”
Wrapping text
When you enter text that is too long to fit in a cell into a cell, it overlaps thetext cell. If you do not want it to overlap the next cell you can wrap thetext.
2. Type text too long to fit.3. Press enter.4. Return to cell A2.5. Choose format > Cells from the menu.6. Choose the Alignment tab.
7. Click wraps Text.8. Click OK. The text wraps.
Deleting a cell Entry
To delete and entry in a cell or a group of cells, you place the cursor in thecell or highlight the group of cells and press Delete.
1. Place the cursor in cell A2.2. Press the delete key.
Entering Numbers as Labels or Values
In Microsoft Excel, you can enter numbers as labels or as values. Labels arealphabetic, alphanumeric, or numeric text on which you do not performmathematical calculations. Values are numeric text on which you performmathematical calculations.If you have a numeric entry, such as an employee number, on which you donot perform, mathematical calculations enter it as a label by typing a singlequotation mark first.
Enter a number:
1. Move the cursor to cell B1.2. Type 100.3. Press Enter.
The number 100 appears in cell B1 as a numeric value. You can performmathematicalCalculations using this cell entry. Note that by default the number is right
aligned.
Enter a value
1. Move the cursor to cell C1.2. Type ‘100’3. Press enter.
The number 100 appears in cell C1 as a label. Note that by default the cellentry is left-aligned and a green triangle appears in the upper left corner of the cell.
Smart Tags
When you make an entry that Microsoft Excel believes you may want tochange, a smart tags ae5ars.smart tags give you the opportunity to makechanges easily. Cells with smart tag in them appear with a green triangle inthe upper left corner. When you place your cursor in the cell, the Trace error icon appears. Click on the Trace Error icon and options appear. When youmade your entry in cell C1 in the previous section, a smart tag should haveappeared.
1. Move to cell C1.
2. Click on the Trace Error icon. An opti9on list appears. You can convertthe label to a number, obtain help, ignore the error etc.
Formatting Text and Performing Mathematical Calculations
In the lesson, you are going to learn how to format text and perform basicmathematical calculations. To start open, blank Microsoft Excel workbook..
Choosing a Default Font
Microsoft Excel enables you to choose a default font. The default font is thestyle of typeface that Excel will use unless you specify a different style. For the exercises in this lesson, you want your font to be set to Arial, Regular,and Size 10.To set your font to Arial, Regular, and Size.10.
1. Choose Format>Cells from the menu.2. Choose the font tab.3. In the font box, choose Arial.4. In the font style box, choose regular.5. In the size box, choose 10.
6. if there is no check mark in the Normal Font box, click to place a checkmark there. Your selections are now the default.7. Click OK.
Adjusting the Standard Column width
When you open Microsoft Excel, the width of each cell is set to a defaultwidth. This width is celled the standard column width. You need to change
4. Click to open the drop-down box associated with the Horizontal field.After the drop-down box is opened, click on left(Indent)
5. Click OK. To close the dialog box. The name “Cathy” is left aligned.
Left- aligning by using the menuto left align the name” Cathy”, follow these steps:1. Move the cursor to cell a1.2. Choose format>cells form the menu .the cell dialog box opens.
Alternate Method: Alignment by Using the Formatting Toolbar
Using the Formatting toolbar, you can quickly perform tasks. you can use theformatting toolbar to change alignment.
Centering by Using the Toolbar
To center the name “Cathy” follow this steps:
1. Move the cursor to cell A1.2. Click on the center icon, which is located on the formatting toolbar.
The red circle designates the align Center icon.
Right-aligning by using the toolbar
You can right-align the name “Cathy” by following these steps:
1: Move the cursor to cell A1.2: Click on the Ali9gn Right icon, which is located on the formatting toolbar.
You can leave-align the name “Cathy” by following these steps:
1. Move the cursor to cell A1.
2. Click on the align left icon, which is located on the formatting toolbar
.The re circle designates the align left icon.
Adding Bold, Underline, and Italic
You can bold, underline, or italicize text in Microsoft Excel. You can also
combine these feature in others words; you can bold, underline, and italicizea single piece of text.
In the exercises that fellow, you will learn three different methods for bolding,italicizing, or underlining text in Microsoft Excel. You will learn to bold,Italicize, or underline by using the menu, the icons, and the shortcut keys.
Adding Bold by using the menu
1. Type bold in cell A2.
2. Click in the check mark located on the formula bar. Clicking on thecheck mark is similar to Pressing enter.
3. Choose format> cells from the menu. The format cells dialog boxopens.
4. Choose the font tab.5. Click on bold in the font style box.6. Click OK. The word “bold” should now be bolded.
Adding italic by using the menu
1. Type Italic in cell B2.2. Click on the check mark located on the formula bar. Clicking on the
check mark is similar to pressing enter.3. Choose format> Cells from the menu. The format cells dialog box
opens.4. Click on italic in the font style box.5. Click Ok. The word “Italic” Is italicized.
Microsoft Excel provides several types on underlines. The exercise thatfollows illustrates some of them.
Single Underline
1. Type Underline in cell C2.2. Click on the check mark located on the formula bar. Clicking on the
check mark is similar to pressing enter.3. Choose Format>cells from the menu. The format cells dialog box
opens.4. Click to open the drop-down menu associated with the underline box.5. Click on single.6. Click OK. The cell entry now has a single underline.
Double underline
1. Type Underline In cell D2.2. Click on the check mark located on the formula bar.3. Choose format >Cells from the menu. The format cells dialog box opens.4. Click to open the drop-down menu associated with the underline field.5. Click on Double.6. Click OK. The cell entry now ha a double underline.
Single Accounting
1. Type underline in cell e2.2. Click on the check mark located on the formula bar.3. Choose format >Cells from the menu. The format cells dialog box will
open.4. Click to open the drop down menu associated with the underline field.5. Click on single Accounting.6. Click Ok. The Cell entry now has a single accounting underline.
Double accounting
1. Type Underline in cell F2.2. Click on the check mark located on the formula bar.3. Choose format>cells from the menu. The format cells dialog will open.4. Click to open the drop-down menu associated with the underline field.5. Click on double Accounting.6. Click Ok. The cell entry now has a double accounting underline.
Adding Bold, Underline, and Italic by using the menu
1. Move the cursor to cell G3.2. Type all three.3. Click on the check mark located on formula bar.4. Choose format>cells from the menu. The format cells dialog box
opens.5. Click the font tab.6. Click on the bold Italic in the font style box.7. Click to open the drop-down menu associated with the underline field.
Then click on single.8. Click Ok. The words “all three” are now bolded, italicized, and
underlined.
Removing Bolding and Italics by using the menu
1. Highlight cells B1 to C1. Place your cursor in cell B1.Press the F8 key.Press the right arrow key once.
2. Choose format>cells from the menu. The format cell dialog box opens.3. Click on regular in the font style box.4. Click OK.Cell B1 is no longer be bolded. Cell C1 is no longer italized.
Removing an Underline by using the menu
1. Move to cell C2.2. Choose format >cells from the menu. The format cells dialog box
opens.3. Click to open the drop-down menu associated with the underline field.Then Click on None.
4. Click OK. The underlined is removed.
Alternate Method: adding Bold by using the icon
1. Type Bold in cell A3.2. Click on the check mark located on the formula bar.
3. Click on the bold icon, which is on the formatting toolbar.4. Click again on the bold icon if you wish to remove the bolding.
Alternate Method: Adding Italic by using the icon
1. Type italic in cell B2.2. Click on the check mark located on the formula bar.
3. Click on the italic icon]. Which is on the formatting bar?
4. Click again on the italic icon if you wish to remove the italics.
Alternate Method: Adding underline by using the icon
1. Type underline in cell C3.2. Click on the check mark located on the formula bar
.
3. Click on the underline icon. Which is on the formatting bar?4. Click again on the underline icon if you wish to remove the underlines.
Alternate Method: Adding Bold, Underline, Italic by using icon
1. Type all Three in cell D3.2. Click on the check mark on the formula bar.3. Click on the bold icon.4. Click on the italic icon.5. Click on the underline icon.
Alternate Method: Adding Bold by using Shortcut keys
1. Type bold in cell A4.2. Click on the check mark located on the formula bar.3. Hold down the Ctrl key while pressing “B” (ctrl-b).4. Press Ctrl-b again if you wish to remove the bolding.
Alternate Method: Adding Italic by using shortcut keys
1. Type Italic in cell B4.2. Click on the check mark located on the formula bar.3. Hold down the Ctrl key while pressing “I” (Ctrl-I).4. Press Ctrl-I again if you wish to remove the italic formatting.
Alternate Method: Adding Underline by using Shortcut keys
1. Type underline in cell C4.2. Click on the check mark located on the formula bar.3. Hold down the Ctrl key while pressing “u” (Ctrl-u).
4. Press Ctrl-U again if you wish to remove the underline.
Alternate Method: Adding bold, underline, and Italic by using shortcutkeys
1. Type all three in cells D4.2. Click on the check mark located on the formula bar.3. Hold down the Ctrl key while pressing “b” (ctrl-b)4. Hold down the Ctrl key while pressing “I” (Ctrl-I).5. Hold down the Ctrl key while pressing “u” (Ctrl-U).
Changing the Font, Font size, Font color
You can change the font, Font size, and Font color of the data you enter.Changing the font
1. Type times new roman in cell A5.2. Click on the check mark located on the formula bar.3. Choose format>cells from the menu. The format cell dialog box opens.4. Choose the font tab. All of the fonts listed in the font box are available
to you.5. Find and click on Times New Roman in the font box.6. Click OK. The font Changes from Arial Times New Roman.
Changing the font size
1. Place the cursor in cell A5.2. Choose format>cells from the menu. The format cells dialog box
opens.3. Choose the font tab.4. Click on 16 in the size box.5. Click OK. The font size changes to16.
Changing the font color 1. Place the cursor in cell A5.
2. Choose format>Cells from the menu. The Format cell dialog boxopens.3. Choose the font tab.
alignment that has been assigned to it, and it borrows space from the blankcells to the right. However, a long text entry will never writ ever cells thatalready contain entries—instead, the cells that contain entries cuts off thelong text .Do the following exercise to see how this works.
1. Move the cursor in the cell A6.2. Type now is the time for all good men to go to the aid of their army.3. Press enter. Everything that does not fit into cell A6 spills over into the
adjacent cell.4. Move the cursor to cell B6.5. Type TEST.6. Press Enter. The entry is cell A6 is cut off.7. Move the cursor to cell A6.8. Look at the formula bar. The text is still in the cell.
Changing a single column Width
Earlier you increased the column width of every column on the worksheet.You can also increase individual column width. If you increase the columnwidth, you will be able to see the long text.
1. Make sure the cursor is anywhere under column A.2. Choose format > column >width from the menu. The column with
dialog box opens.3. Type 55 in the column width field.
4. Click OK.
Column A is set to a width of 55. You should now be able to see all of thetext.
Alternate Method: Changing a single Column width by dragging.
You can also change the column width with the cursor.
1. Place the cursor on the line between the B and C column headings.
The cursor should look like the one displayed here, with two arrows.
2. Move your mouse to the right while holding down the left mousebutton. The width indicator appears on the screen.
3. Release the left mouse button when the width indicator showsapproximately 40.
Moving to a new Worksheet
In Microsoft Excel, each workbook is made up of several worksheets. Beforemoving to the next topic, move to a new worksheet.
1. Click on Sheet 2 in the lower left corner of the screen.
Setting the Enter key Direction
In Microsoft Excel, You can specify which direction the cursor moves when
you press the Enter Key.You can have the cursor move up, down, left, right, or not at all. You will nowmake sure the cursor is set to move down when you press the Enter Key.
1. Choose Tools>Option from the menu. The option dialog box opens.2. Choose the edit tab.3. Make sure there is a check mark in the “Move Selection after Enter”
Box.4. If down is not selected, click to open the direction drop –down box.
Click on down.
5. Click OK.
Making Numeric Entries
In Microsoft Excel, You can enter numbers and mathematical formulas intocells. When a number is entered into a cell, you can perform mathematicalcalculations such as addition, Subtraction, Multiplication, and division. Whenentering a mathematical formula, precede the formula with an equal sign.Use the following to indicate the type of calculation you wish to perform:
+Addition
-Subtraction
*Multiplication/Division
^ExponentialPerforming Mathematical Calculation
The following exercise demonstrate how to perform mathematical calculation
3. Press Enter.4. Type 1 in cell A2.5. Press enter.6. Type =A1+A2 in cell A3.7. Press Enter. Cell A1 has been added to cell A2, and the result is
shown in cell A3.
Press the cursor in cell A3 and look at the formula bar.
Subtraction
1 press F5.the go to dialog box opens
2 type B1 in the reference field.3 type 5 in cells B14 types in cell B1.5 Press enter.6 type 3 in cell b2.7 Press enter 8 type =+b1-b2 in call b3.Press enter. Cell b1 has subtracted from b2, and the result is shows in cellb3.
Place the cursor in cell b3 and look at the formula bar.
Multiplication1. Holds down the ctrl key while you press “g” (ctrl-g). The go to dialog box
open.2. Type c1 in the reference field.3 Press enter .you should now be in cell c1.4 Type 2 in cell c1.5 Press enter.6 Ty7pe 3 in cell c2.7 Press enter.8 Type =c1*c2 in cell c3.9 Press enter cell c1 is multiple by cell c2 and the result is displayed in cell
c3.
Place the cursor in cell C3 and look at the formula bar.
Division
1. Press F5.2. Type D1 in the Reference field.3. Press Enter. You should now be in cell D1.4. Type 6 in cells D1.5. Press Enter.
6. Type 3 in cells D2.7. Press Enter.8. Type =D1/D2 in cell D3.9. Press Enter. Cell D1 is divided by cell D2 and the result is displayed in
cell D3.
Place the cursor in cell D3 and look at the Formula bar.
The Auto sum icon on the standard toolbar automatically adds a column of numbers. The following illustrates the SUM function.
1. Go to cell F1.
2. Type 3. Press enter.3. Type 3. Press enter.4. Type 3.Press Enter.5. Click on the Auto sum button, which is located on the Standard toolbar.
Calculating an Average buy using the sum icon
In Microsoft excel XP; you can use the sum icon to calculate an average.
1. Move your cursor to cell C6.
2. Click ion the drop-down arrow next to the sum icon.3. Click on average.4. Highlight C1 to c3.5. Press enter. The average of cells C1 to C3, which is 100, appears.
Calculation Min
You can use the MIN function to find the lowest numbers in series of numbers.
1. Move your cursor to cell A7.2. Type Min.3. Press the right arrow key to move to cell B7.4. Type = MIN (B1:B2)5. Press Enter. The lowest numbers in the series, which is 12, appears.
Calculation Max
You can use the MAX function to find the highest numbers in a series of numbers.
1. Move your cursor to cell A8.2. Type Max.3. Press the right arrow key to move to cell B8.4. Type =MAX (B1:B2)
• AND (exp 1, exp 2….) It joins two or more conditions and returns TRUE,I if all the conditions are TRUE and FALSE, if any on elf the conditions isfalse.
e.g. = and (true, true) return true=And (true, false) return false=And (2+3=5, 3+3=6) return true
• OR (exp 1 exp 2) this function evaluates the logical expressing andreturns TRUE, if any of the conditions is true and return FALSE, only if allthe conditions are false.
E.g. = or (true, true) return true= Or (true, false) return false
• IF (Logical_ text_ value _value_if_false) It evaluates the expression and
returns the TRUE if _true, value.
TEXT FUNCTIONS
• LEN (text) Return the number of character in the string passed asargument (including) spaces.
E.g. =Len (“Abs”) return 3• EXACT (text1, text2) It compares both the text value and returns TRUE if
they are exactly same (including spaces and case.)• CONCATENATE It joins several text strings, maximum up to 30 text
(Text1, text2) items into single text string.
• RIGHT (text, num _char) It returns right most character from text=RIGHT (“Universe “, 5) returns
Unite
• LEFT (text, num _ char) It return left most characters from text=LEFT (“Universe”5) returns verse
• TRIM (text) it removes all the spaces from text, except those single spacebetween words.
Example: =TRIM (“It is a glass “) return “It is a glass”
• UPPER (text it converts text to upper case.=Upper (“computer “) returns COMPUTER
• LOWER (text) it convert text to Lower case.=Lower (“COMPUTER”) returns computer
You can use Microsoft Excel to fill cells automatically with a series. For Example, you can have Excel automatically fill in time, the days of the weekor months of the year, years. And other types of series. Days of the week andmonths of the year fill in a similar fashion. The following demonstrates fillingthe days of the week.
1. Move to Sheet2.2. Move to cell A1.3. Type sun.4. Move to cell B1.5. Type Sunday.6. Highlight cells A1 to B1.7. Bold cells A1 to B1.8. Find the small black square in the lower right corner of the highlighted
area. This is called the fill handle.
9. Grab the fill handle and drag with your mouse to fill cell A1 to B24.notehow the days of the week fill the cells in a series. Also, note that theAuto Fill option icon appears.
10. Click on the auto fill option icon.11. Choose the copy cells radio button. The entry in cell A1 and B1
are copied to all the cells highlighted12. Click on the auto fill options icon again.13. Choose the fill series radio button. The cells fill as a series from
Sunday to Saturday again.14. Click on the Auto fill option icon again.
15. Choose the fill without formatting radio button. The cells fill as aseries from Sunday to Saturday. But the entries are not bolded.16. Click on the Auto fill options icon again.17. Choose the fill weekdays radio button. The cells fill as aeries firm
Monday to Friday.
Some of the entries in column B are too long to fit in the column. You canquickly adjust the column width to fit the longest entry.
1. Move your cursor over the line that separates column B and C. thewidth indicator appears.2. Double click. The column adjusts to fit the longest entry.
The following demonstrates filling time:
1. Type 1:00 into Cell C1.2. Grab the fill handle and drag with your mouse to highlight cells A1 to
A24. Note that each cell fills using military time.
3. Press Esc and then click anywhere on the worksheet to remove thehighlighting.
To change the format of the time:
1. Select cells C1 to C24.2. Choose format > cells from the menu.3. Choose the numbers tab.4. In the category box, choose time.5. UN the type box chooses 1:30 PM.6. Click OK. The time is no longer in military time.
You can also fill numbers.
1. Grab the fill Handle and drag with your mouse to highlight cells D1 to
D24. The number 1 fills each cell.2. Click on the Auto fill Option icon.3. Choose the fill series radio bu9tton. The cells fill as a series starting
with 1, 2, 3.
Here is another interesting fill feature.
1. Go to cell E1.2. Type lesson 1.3. Grab the fill handle and drag with you mouse to highlight cells E1 to
E24.4. The cells fill in as a series: Lesson 1, lesson 2, Lesson 3, and so on.
Formatting Numbers
You can format them numbers you enter into Microsoft Excel. You can addcommas to separate thousands, specify him number of decimal places, placea dollar sign in front of the number, or display the numbers as a percent inaddition to several other options.
1. Move the cursor to cell A5.2. Type 1234567.3. Press Enter.4. Move the cursor back to cell A5.5. Choose format>cells from the menu. The format cells dialog box will
open.6. Choose the numbers tab.7. Click on the number in the category box.8. Type 2 in the decimal places box.
9. Places a check mark in the use 1000 separator box.10. Click Ok. The number should now display with two decimal
places. The thousands should now be separate by commas.
Adding a Dollar sign to a numeric Entry.
1. Move the cursor to cell A5.2. Choose format>cells from the menu. The format cells dialog box
opens.3. Choose the numbers tab.4. Click on currency in the Category box.5. Make sure there is a “$” in the symbol box.6. Click OK. The numbers display with a dollar sign.
Alternate Method: Formatting numbers by using the Toolbar
1. Move the cursor to cell A6.2. Type 1234567/3. Press Enter.4. Move the cursor back to cell A6.5. Click twice on the increase Decimal icon to change the number format
to two decimal places. Clicking on the decrease Decimal icon decreasethe decimal places.
6. Click once the Comma style icon to add comma to the number.7 To change the numbers to a currency format, click on the currency
style format.8 Move the cursor to cell a7.9 type..35 (note the decimal point).
10 Press enter.11 Move the cursor back to cell a7.12 Click on the percent style icon to turn 3.5 to percent.
More advanced mathematical calculations
When you perform mathematical calculations in Microsoft excel, be careful of precedence. Calculations are performed form left to right with multiplicationsand division performed before addition and subtractions
1. Moves to a new worksheet by clicking on sheet 3 in the lower left corner of the screen.
2. Go to cell a1.3 type =3+3+12/2*4.4 press enter.
Note. Microsoft excel divided 12 by 2 multiplied the answer by 4 added 3,and then added another 3.
The answer, 30, display in cell a1.To change the order of calculations, use parentheses. Microsoftexcel calculates the information in parentheses first.
1. Double click in cell A1.2. Double click the to read = (3+3+12)/2*4.
4. Press Enter.
Note: Microsoft Excel added 3 plus 3 plus 12, divided the answer by 2, andmultiplied the result by 4. The answer, 36, displays in cell A1.
Cell Addressing
Microsoft Excel record cell addresses in formulas in three different ways,
called absolute, relative, and mixed. The way a formula is recorded isimportant when you copy it.
With relative cell addressing, when you copy a formula from one area of theworksheet to another, Microsoft Excel records the position of the cell relativeto the cell that originally contained the formula. The following exercisesdemonstrate.
1. Go to cell A7.2. Type 1. Press Enter.
3. Type 1. Press Enter.4. Type 1. Press Enter.5. Go to cell B7.6. Type 2. Press Enter.7. Type 2. Press Enter.8. Type 2. Press Enter.9. Go to cell A10.
In addition to typing a formula, as you did in Lesson 1, you can also enter formula by using point mode. When you are in point mode, you can enter a
formula either by clicking on a cell with your mouse or by using the arrowkeys.
1. You should be in cell A10.2. Type =.3. Use the up arrow key to move to cell A7.4. Type+.5. Use the up arrow key to cell A8.6. Type+.
7. Use the arrow key to move to cell A9.8. Press Enter.9. Look at the Formula bar while in cell A10.Note that the formula you
entered is recorded i9n cell A10.
Copying by using the menu
You can copy entries from on cell to another cell. To copy the formula you just formula entered, follow these steps.
1. You should be in cell A10.2. Choose edit>copy from the menu. Moving dotted lines appear around
cell A10, indicating the cells to be copied.3. Press the right Arrow key7 once to move to cell B10.4. Choose Edit>Paste from the menu. The formula in cell A10 is copied to
cell B10.5. Press Esc to exit the copy mode.
Compare the formula in cell A10 with the formula in cell B10 (While in therespective cell, look at the formula bar.). The formulas are the same exceptthat the formula in cell A10 sums the entries in a relative fashion. Before proceeding with the next exercise, you must copy the information incell A7 to B9 to cells C7 to D9. This time you will copy by using the formattingtoolbar.
Copying by Using the Formatting Toolbar.
1. Highlight cells A7 to B9.Place the cursor in cell A7.Press F8.Press thedown arrow key twice. Press the right arrow key once.A7 to B9 shouldbe highlighted.
2. Click on the copy icon, which is located on the Formatting toolbar.3. Use the arrow key to move the cursor to cell C7.4. Click on the paste icon, which is located on the formatting bar.5. Press Esc to exit copy mode.
Absolute Cell addressing
An absolute cell address refers to the same cell, no matter where you copythe formula. You make a cell address an absolute cell address by placing adollar sign in front of both the row and column identifiers. You can do thisautomatically by using the F4 keys. To illustrate;
3. Use the up arrow key to move to cell C7.4. Press F4. Dollar signs should appear before the C and before the 7.5. Type +.6. Use the up arrow key to move to cell C8.7. Press f4.
8. Type +.9. Use the up arrow key to move to cell C9.10. Press f4.11. Press Enter. The formula is recorded in cell C10.
Copying by using the keyboard shortcut
Now copy the formula from C10 to D 10. This time, you will copy by using thekeyboard shortcut.
1. Your cursor should be in cell c10.2. Hold down the Ctrl key while you Press “c” (Ctrl-c). This copies the
contents of cell C10.3. Press the right arrow once.4. Hold down the Ctrl key while you press “v” (ctrl-v). This pastes the
contents of cell c10 in cell d10.5. Press Esc to exit the copy mode.
Compare the formula in cell C10 with the formula in cell D10. They are thesame. The formula was copied in an absolute fashion. Both formulas sum
column C.
Mixed Cell addressing
You use mixed cell addressing to reference a cell a cell that is part absoluteand part relative. You can use the F4 key.
1. Move the cursor to cell E1.2. Type =.3. Press the up arrow key once.
4. Press f4.5. Press F4 again. Note that the column is relative and the row isabsolute.
6. Press F4 again. Note that the column is absolute and the row isrelative.
You can delete column from your spreadsheet. To delete column C and D.
1. Click on column C and drag to column D.2. Choose Edit>delete from the menu. Column D is deleted.3. Click anywhere on the spreadsheet to remove your selection.
Deleting rows
You can delete rows from your spreadsheet. To delete row 1 through 4:
1. Click on the row 1 drag to row 4.2. Choose edit> delete from the menu. Rows 1 through 4 are deleted.3. Click anywhere on the spreadsheet to remove your selection.
Inserting Column
There will be times when you will need to insert a column or columns intoyour spreadsheet. To insert a column.
1. Click on A to select column A.2. Choose insert>Column from the menu. A column is inserted to the right
of column A.3. Click anywhere on the spreadsheet to remove your selection.
Inserting Rows
You can also insert rows into your spreadsheet.
1. Click on 2 to select row 2.2. Choose insert> Rows from the menu. A row is inserted above row 2.3. Click anywhere on the spreadsheet to remove you’re your selection.
Creating Borders
You can use borders to make entries on your spreadsheet stand out.
Accountants usually place a single underline above a final number and adouble underline below. The following illustrates;
1. Go to cell B7.2. Choose Format>cells from the menu.3. Choose the Border tab.4. In the style box, Click on the single underline.5. Click on the top of the border box.6. In the style box, Click on the double underline.7. Click on the button of the Border Box.
Alternate Method; Creating Borders by using the icon
1. Go to cell C7. Click on the down arrow beside the borders icon.
2. Select the Top and double button Border. Cell C7 now Has borders.
Merge and Center
You will sometimes want to center a piece of text over several columns. Thefollowing example shows you how.
1. Go to cell B1.2. Type simple spreadsheet.3. Click the check mark on the formula bar.
4. Select5 column B1 to D1.5. Click on the Merge and Center icon on the formatting toolbar. Cells B1,
C1, and D1 are merged and centered.
Adding Background Color
You can add background color to a cell or group of cells.
1. Go to cell B1.2. Choose Format>Cells from the menu.
3. Choose the patterns tab.4. Choose sky Blue.5. Click OK. The background of cell B1 is now sky Blue.
Alternate Method: Adding Background Color by Using the icon
1. Select cells B7 to D7.2. Click on the down-arrow next to the fill Color icon.3. Select Pale Blue. The background of cells B7 to D7 is now Pale Blue.
Using Auto Format
You can format your data manually or you can use one of Microsoft Excel’smany auto Formats.
1. Select cell B1 to D7.2. Choose Format> Auto Format from the menu. Several formats are
listed from which you can choose.3. Choose the Accounting 2 format.
4. Click OK. Your data is formatted in the Accounting 2 style.
Printing
The simplest way to print is to click on the print icon located on the Standard
toolbar. Dotted lines will appear on your screen after you click on the printicon. The doted lines indicate the right, Left, top, and bottom edges of your printed pages.
Print Preview
There are many print options. You can select print options in page setup or inPrint preview. In Print preview, you can see the results of your selectiononscreen. You can use print options to:
• Determine whether to print landscape or portrait. If you print portrait on an8 ½ by 11 select sheet of paper, the length across the top of your pagewill be 8 ½ inches. If you print landscape on an 8 ½ by 11 sheet of paper,the length acres the top of your page will be 11 inches.
• Scale your document. If your data is small in comparison to the page, youmay want to scale downward.
• Specify how many pages wide and how many pages long you want your printed document to be.
• Select the paper size and print quality.• Set the first page numbers.
If you choose the Margin tab, you can:
• Set the size of your margins including your header and footer margins.• Center your spreadsheet horizontally and/or vertically on the page.
If you choose the Header/footer tab, you can select headers and footers. Aheader is text that appears at the top of every page. Footer is text thatappears at the bottom of every page. You can use headers and footers to
i9nsert page numbers, dates, and other information.
To choose a header
1. Choose the header/Footer tab.2. Click on the down arrow next to the header field to open the down-
draw box of the header field.3. Choose a header from the list.
1. Choose the Header/Footer tab.2. Click on the down arrow next to the Footer field to open the drop-down
box for the footer field.
3. Choose footer from the list.
Click on the Custom header or Custom Footer button to customize your headers and footers.
Use the left Section to place your options on the left side of the page, theCenter section to place your option in the center of the page, and the RightSection to place your options 9 on the right side of the page.
The sheet tab has options that allow you to choose which rows and columnwill repeat at the left and the top of the page. It also has options that allowyou to determine whether gridlines and/or row column heading print.To preview and print your spreadsheet:
T by1. Choose File>Preview from the menu. star 2. Click on set up.3. Choose the page tab.4. Choose portrait.5. In the adjust to the field, type 110% to set the size to 110%.
6. Choose the Margins tab.7. Click the horizontally box in the center on page frame to center your Spreadsheet horizontally.
8. Click on OK.9. Click on print. The Print dialog box opens.10. Click on OK to print the file.
Creating Charts
Using Microsoft Excel, you can represent numbers in a chart. You can
choose from a variety of chart types. And, as you change your data, your chart will automatically update. You can use Microsoft Excel’s Chart Wizardto take you through the process step-by-step.
Creating a column Chart
To create the column chart shown above, start by creating the spreadsheetbelow exactly as shown.
After you have created the spreadsheet, you are ready to create your chart.
1. Highlight cells A3 to D6. You must highlight all the cells containing thedata you want in your chart. You should also include the data labels.
2. Choose insert>Chart from the menu.
3. Click on column to select the type of chart you want to create.4. In the chart Sub-type box, choose the clustered Column icon to select
the chart sub-type.5. Click on Next.6. To place the product names on the x-axis, select the Columns radio
button.7. Click on Next.8. Type toy sales in the chart Title field. Toy sales will appear as the title
of your chart.9. Type product in the category(x) Axis field. Product will appear your x-
axis title.10. Type units sold in the value (y) Axis field. Unit sold will appear as
your y-axis title.11. Choose the data Labels Tab.12. Select value in the Labels Contain frame to display the data
labels as values.13. Choose the data table tab.14. Select show data table. The data table will appear below your
chart.15. Click on Next.
16. Choose as objects in sheet 1 to make your chart an embeddedobject and part of the worksheet.17. Click on finish.18. Your chart will appear on the spreadsheet.
When your select a chart, handle appears on the right and left sides, the topand bottom, and corners of the chart. You can drag the handle on the top andbottom of the chart to increase or decrease the height of the chart. You candrag the handle on the left and right sides of the chart to increase or decrease the width of the chart. You can drag the handle on the corners of
the charts to increase or decrease the size of the chart proportionally.
You can change the position of a chart by clicking on the chart anddragging
• Uses the handles to adjust size of the chart.• Click on the chart and drag to position the chart under the data.
You can modify your chart by using the chart toolbar .if the chart toolbar isnot already available, Choose view >toolbar >chart the menu.
To change the data area font size:2. Click on the down arrow on the chart toolbar, a drop down menu
opens.3. Choose data table from the drop down menu.4. Click on the option icon choose the font tab.5. In the size box type 86. Click on the ok. Your font size is now 8.
To change the angle of the data labels
1. Click on the down arrow on the chart toolbar. A drop down menuopens.
2. Choose “region” data label from the drop down menu.3. Click on the angle counter clockwise icon. The regions 1 Data Labels
are angled counter-clockwise.4. Repeat this process for Regions 2 and 3.
To change the font size of the Region data labels:
1. Click on the down arrow on the Chart toolbar. A drop-down menuopens.2. Choose “Region 1” Data Labels from the drop-down menu.3. Click on the Options icon. Choose the font tab.4. In the size box, type 6.5. Click on OK. Your font size is now 6.6. Repeat this process for Region 2 and 3. 3
You can also make change by double-clicking on the item you want tochange.
AUDITING
Worksheet auditing is a feature that checks a worksheet for error. Auditingcan be used to relate formulas in different cells and identify errors. It containsthe following options.
1. TRACE PRECEDENTS: To find the cells that provides data to aformula. Select the cell that contents the formula and choose traceprecedents.
2. TRACE DEPENDENTS: To find out which formula refers to a cell?Select the cell and choose trace dependents.
3. TRACE ERROR: Error like #Div/0 can be traced by clicking on thisbutton as it locates all cells reference by the formula trace error = traceprecedent + trace dependents.
GOAL SEEK
It is used to adjust the value in a specified cell until a formula this isdependent on that cell reaches to a target value.Steps are:-
• Select the cell, having the formula, whose value is to be edited.• Click on Goal seek. From tools ->Goal seek dialog will be displayed.• Click in To Value text box and type the new value.• Click on by changing cell box and type cell address of cell where
relative value is to be changed.• Click on OK goal seek status dialog box appears giving the result.• Click on OK to change the value and cancel to ignore the result.
SCENERIO
What if analysis is the most powerful feature of Excel?It helps in automatic recalculation of formulas when any of source datachange. These are the sets of data that can be viewed to see the result of what –if analysis.
To create a scenario
• Select scenario …… from tool menu and click on Add… button, Addscenario dialog box appears.
• Type a name in scenario name: text box.• Enter the reference for the cells, that you what to change cells.• Enter the value that you want, for the changing cells.• Click Ok. Scenario Manager Dialog box appears.• Click on show to see the value on Worksheet for selected Scenario
Suppose you are looking for a house & narrowed you choice to two: one for &2, 00,000 & other for $3, 00,000. The interest rate is 7% &20% downpayment is required. The term of the loan can be either 15 years or 30 years.Therefore 4 Different scenario are there, Either the $3,00,000 house or the
1. Click the scenario button on the scenario manager dialog box. Thescenario summary dialog box will appear.
2. Select the scenario Summary option and result cell is $B $8(the celldisplay the payment).
3. Click on OK. A new sheet named scenario Summary will be added tothe worksheet.
PIVOT TABLE
A pivot table is a great reporting tool that sorts and sums independent of theoriginal data layout in the spreadsheet. If you never used one, this demo maybe of interest.
First, set up a create some data, in A1:D50, like this, with 4 or 5 differentnames, 4 or 5 different activities and a little variety of week numbers andexpenses:
Add as many rows as you can stand-around 50 will do.
Now choose any cell ion this table and choose pivot Table. If you expect toadd data in the future, set the data range to include as many rows as you7think will ever need. Rather than a1:D50, you may want to specify $a$1:$D$500.
Now comes the layout wizard, show below.
Drag the headers Who, Week and What into the ROW area, and theAMOUNT header into the Data area. (Leave the column area blank for now.)If the amount tag does not show “Sum of amount “, double-click it and choose
the sum option. Finally Excel asks if the table should be placed in a newworksheet. Click OK.
Now you have your table, and it look very mu7ch like a sorted version of theoriginal data list, except from the automatic subtotals. Now comes the coolstuff:
Grab what header in the table and drag it all the way to the left. When youdrop it here, the table re-sorts and resumes; you have a table of beer costs
by person instead. Now drag the Week header to the left and you haveweekly reports.
Double – clicking the headers gives options of showing/hiding specific data(like Empty and Beer, may come in handy) and removing subtotaling for this
column. Right-Clicking gives others them hide and Show Details for readingtotals only.
Here comes another useful Pivot, made from the same list. Select any itemsin the original data list and choose pivot table wizard again. This time, dragwho in to the Row field. What into the column field and Amount into the datafield.
The only tricky thing is this; you have etui updates the table manually fromthe data menu. A pivot table does not update itself. If this becomes boring,here is some macrocode that tables update on selecting the worksheet.
DATA VALIDATION
Data validation aims to reduce the mechanical Errors. For example, if the
value in a cell must be greater than 100 you should select the cell and choseData/Validation. In the “Setting’ Tab complete the field as follow: “Allow:’ –Whole Number, “data:’- Greater than, “minimum:”-100.
Data Validation can also be used in more sophisticated situations when tooselect the custom option of the “Allow:” field. This allows the user to enter aformula that should return either True or false4. The value entered in the cellwill only be accepted as long as the formula returns true. An example is theillustration below which shows how data validation can be used to preventduplicate values in alit. To do this, select range A2:A11, Choose
Data/Validation. Custom (Allow field) and enter the following formula in theFormula Field.
=COUNTIF ($A$2:$an$11, A2) =1.
Note that A2 is in absolute reference (without the dollar sign) so that in eachcell of the range A2:A11 the reference will change to the reference of its owncell (e.g. in A3 the formula will read as =COUNT IF ($A$2:$11, A3) =1.
If you want to display is specific message, select the “Error Alert” Tab of the“Data Validation” window and enter your error message.
DATA FILTER
Filtering is a quick way to find a subset of data in a list. There are two filteringmethods. The AutoFilter, which was introduced later and is simple to use andthe Advanced Filter, which was introduced with the earliest versions of exceland it’s a bit more difficult to use. The illustration below shows an example of auto filters where only the records with the “AAB” product are displayed. Todo that, select a cell in the Database, select data /filter/Auto filter and fromthe arrow next to the product field select “AAB”. A limitation of auto Filter isthat you can filter the data by only one criterion of the same field (e.g. either product6 AAB orb etc you can also use the Advanced Filter method that can
cope with even more complex situations.
The illustration below shows how the advanced Filter can be used to displayall the records in the region of Nicosia and Limas sol, which have theproducts AAB, ABB, ABC
The following are the steps to do this
1. Enter the Criteria range as follow:
In G4 enter.
=NOT (ISNA (MATCH ($B3:$I$3:4I$6, 0)))
In H4 enter.
=NOT (ISNA (MATCH ($c3, $j$3:$j$6, 0)))
2. Select a cell in the database and chose data/Filter/Advanced Filter.Complete the window as shown at the right and press OK.
SUBTOTAL
Subtotal Reports is another one technique (apart from Pivot reports) that canbe used to summarize lists. This method summaries data by level of detailand provides also subtotal for each level. To understand this, see the figurebelow which show three subtotal reports. The Level of details is selected byclicking on the buttons at the left of the worksheet.
The above subtotal repots summarize data by the first (total) and second(product) level of details
The above subtotal report summarizes data by the first (total) second(product) and third (region) leve4l of details.
The above subtotal report summarize data by the first (total), second(product) third (region) and fourth (date) level of detail.
CHAPTER - 6 POWER POINT
INTRODUCTION:- You must have thoroughly completed other packages of Microsoft Office,now it this the turn of a very-powerful tool that is Microsoft PowerPoint, whichis used to create interactive self-running of speaker Controlled visual display.
These can be reproduced on transparency sheets, 35mm slides, photo printsor on screen presentations. These presentations can also be used toaccompany lectures or as the basics for web sites. A presentation can be thecollections of following materials:
The term sliders in the context of PowerPoint are images that make up apresentation. Each slide can contain text, graphics, charts, should, videosand organization charts.
ORGANIZATION CHARTS
These charts are used to display the things in a structural order, for e.g. if youwant to display the company working structure, management or the productmanufacture process then for that choosing organization chart is the bestoption.
GRAPHS
Graphs are pictorial representation of the data. One cab easily understandsthe data, analyze it and take an output by seeing graph and its criteria.
CLIPART
It is very important to give some image effect to the presentation withoutwhich the presentation meant nothings. The clip art consist of various
images, audio and video effect that can be added to the presentation. Evenone can easily imports clips from outside also using internet, CD or someFloppy disk.
WEB PAGES
It looks difficult to create a website, but using PowerPoint in becomes easy tocreate a WWW (World Wide Web). Once the presentation is created you cansave it as HTML i.e. as a Web page.
SPEAKER NOTES
When some one is going to give the presentation then some notes arerequired that can be the research or text related to that particular presentation, termed as speaker notes. These notes are not visible to the
audience.
HANDOUTS/ PAMPLETS
Handouts are paper copies of all or some of the slide to be given to theaudience. They can be one per page or reduced to three or six per page.
MEDIA CLIPS
The term media clips include sound, animation and video clips, you may want
to insert into your presentation. The media clips make the presentation morepresentable and easy understand.
The PowerPoint 2000 Normal view allows you to view your presentationoutline, slides, and notes. With this view you are able to organize your presentation, add slides, and add content to slides.
STARTING POWERPOINT
TO START POWERPOINT1. Click on start-> programs->Microsoft PowerPoint or 2. Click on start-> run-> Type PowerPoint (press Enter)
STARTING WITH A PRESENTATION
As you start PowerPoint, it would show a dialog box showing four different options as discussed below:
The first time when you create a presentation then it can be little difficult. Thisfeature of PowerPoint makes the works easy and presentable. Just selectAuto Content Wizard from they dialog box shown and clock on OK.
As you click on OK. a dialog box appears which show step by working of thewizard,
1) Click on next to continue.2) From their select the type of presentation you want to use.3) Choose an output type (Onscreen for displaying it on your
computer)4) Then click on Next, Give the title of the presentation and footer
text5) Click on finish
DESIGN TEMPLATE
If you want to create a new presentation using one of the severalpresentation templates included with PowerPoint or perhaps, using atemplate of your own, choose template on startup. This choice is ideal for those who get writer’s block when looking at a blank piece of paper.
BLANK PRESENTATION
Just as the name implies, there are no templates, master slide, notes or slides included in a blank presentation. You might want to use this option if you have a new approach or if none of the templates suits your need.
OPEN AN EXISITNG PRESENTATION
Make this choice if you want to work with an exiting presentation for instance,if someone gives a presentation file to edit or if you have already set up apresentation and want to continue working with it.
THE POWERPOINT VIEWS
PowerPoint can display a presentation in different views that make it easier toperform certain tasks. To change views, open the view Menu-> Click onDesired View. A quicker way to change view is to click on the view button for the desired view at the button of the presentation window.
It is used to create and edit slide and immediately show the impact of thechanges. This is default view and all the menus and toolbars are availablehere to use.
Slide SORTER VIEW
It gives a miniature picture of each slide. You can move slide around and addtransition and animation effects. Here you also get a preview of the effects asyou choose them.
OUTLINE VIEW
It is used to display an outline format of your presentation showing the slidenumber and text contents. Here it is very easy to edit the displayed text,delete slides, and even cut and paste from one location to another. You can
also collapse/expand items to see just the name of each slide.
NOTES PAGE VIEW
It is used to create and see notes for the slides within a presentation. Alsoyou can create speaker notes for the slides.
SLIDE SHOW VIEW
It shows how each slide will look in full-screen mode. Use this view to actually
show or simply preview your slide presentation: -
HOW TO OPEN
Select view option from the menu bar. Or Click on any view button i.e. just above drawing toolbar.
PRESENTATION AND SLIDES
Creating a new presentation using as blank presentation
Choose blank presentation from the startup dialog box & then click on theOK button.
ADDING NEW SLIDE
Once you have chosen a blank format for your new presentation, the newslide dialog box appears on the screen. In this dialog box, you are asked tochoose how want the first slide of your presentation to appear. There are 24
If the slide layout includes text boxes, simply click on the text box to add text.To add a text box to the slide, select Insert/Text Box from the menu bar anddraw the text box with the mouse. Set text editing options by selectingtools/Option from the menu bar and clicking the edit tab.
Select the text that will be formatted by highlighting the text either on theoutline or on the slide. Choose Format/Font from the menu bar or right-clickon the highlighted selection and select Font from the popup shortcut menu or.Select a font face, size, style, effect, and color from the font dialog box. Clickthe Preview button to see how the changes will appears on the slide beforemaking a decision.
Replace Font
Edison templates have preset font that you may want to changes or you
many want to changes the font used on for the entire presentation for anumber of reasons. This can be accomplished quickly using the ReplaceFont feature. Select Format/Replace Font from the menu bar. Choose thefont you want to Replace from the first drop-down Manu and the font it shouldbe replaced with from the second menu, and click the replace button.
Change the amount of space between lines in a text box by selectingFormat/Line Spacing from the Menu bar.
• Line Spacing – Select the amount of vertical space between lines. Avalue of “1” is equal to single spacing and “2” is double spacing.Values between and above these numbers are valid as well.
• Before paragraph and after paragraph – The value will determine theamount of vertical space before and after each paragraph in a text
box.
Change case
Change the case of the characters in a paragraph by selectingFormat/Change case from the menu bar without having to retype the text.
Sentence case – Capitalizes the first letter of the first word in eachsentence.
Lowercase and uppercase – Changes the case of all the letters. Title case – Capitalizes the first letter of every word and reduces the
rest to lowercase. Toggle case- The opposites of title case, it makes the first letter of
every word lowercase and capitalizes the remaining letters.
Spell Check
Correct the spelling in the presentation by selecting Tools/Spelling fromthe menu bar or by pressing the f7 key on the click keyboard.
The spell checker will prompt you to make corrections of the firstword that is spelled wrong.
If the word is spelled correctly, click Ignore or Ignore All if the sameword appears several times during the presentation. If this word willappears in many presentation (such as your name), Click ADD to addthe word to the dictionary and you won’t be prompted by amisspelling again.
If the word is spelled wrong, highlight one of the Suggestions or typeyour own revision in the Change to box. Click Change to correct thisoccurrence of the word or change all to correct all occurrence of the
word in the presentation. Click close to abort the spelling check early. When the spell checker has read through the entire presentation, a
window telling you that the spelling check is complete will promptyou. Click OK.
Select Tool/option from the menu bar and click the Spelling and Style tab.
Check spelling as you type – If this box is checked, power point will
check the spelling of every word as you type. Misspelled words will beunderlines with wavy red lines. Hide spelling errors in the documents – Check this box to remove the
wavy red lines from works that are spelled wrong. Always suggest corrections – If this box is checked suggestion for
misspelled words wills appears when you activate the spell checker. Ignore words in UPPERCASE – Power point recommends that you
don’t type slide title in all uppercase letters so it will treat words like this
and other all-uppercase acronyms as misspelled. Check this box toignore this suggestion and acronyms that are typically typed in all caps.
Ignore words with numbers – Check to ignore words that arecombination of letters and numbers.
Bulleted Lists on Design templates
Bulleted lists allow you to clearly display the main points of your presentation on slides. The text boxes on design templates already includebulleted lists. Click the place holder on the slide to begin adding text andpress the ENTER key to return to the t5ext line and add anew bulleted item.To go to the text line without adding another bullet, hold down the SHIFT keywhile pressing ENTER.
Bulleted List from a Text Box
If you are not creating a bullet list from an exiting placeholder on a designtemplate, or if you would like to add an additional bulleted list, fellow thesesteps to create a new list:
• In slide view, create a text box by selecting Insert/Text box from themenu bar.
• “Draw” the text box on the slide but holding down the left mouse buttonwhile you move the mouse until the box is the size you want it.
• Choose formatting/Bullets and Numbering from the menu bar
• Change the size of the bullet by changing the percentage in relation tothe text.
• Choose a color for the bullet from the color menu. Click more color for
a larger selection.• Select one of the seven bullet type shown and click OK.
OR
Click the Picture button to view the picture Bullet window. Select one of thebullets and click OK.
OR
• Click the Character button to select any character from the fonts on thecomputer. Select a symbol font such as Windings or Webdings fromthe button from drop-down menu for the best selection of icons. Clickon the character in the grid to see them larger. Click OK when youhave chosen the bullet you want to use.
• Click OK on the Bullets and Numbering window and use the samemethods described in the “Bullets lists on Design templates” to enter text into the bulleted list
In normal or Outline view text can easily be entered in the outline window andnew slides are automatically added. Follow the steps below to becomefamiliar with adding slide content in outline view:
Next to Slide 1 icon, type the title of the slide. The text youtype beside the slide icon will be the large type titles on each slide.Press ENTER to type the text line. This will automatically create a newslide. The create a bullets list for the first slide, press the TAB key or clickthe demote button -> on the More Buttons menu accessibly by clicking the“triple arrow” buttons at the end of the formatting toolbar.
ORPress ALT+SHIFT+RIGHT Arrow to demote the selection to a bulleted list
item.
Continue entering text for the bulleted list. Pressing ENTER atthe end of each line to create a new bullet. Create a multilevel list by executing the demote action againto create a bullet sub list. Press the promote button<- on The Morebutton menu or press ALT+SHIFT+Left arrow to return to the original list. Create a new slide by executing the promote action until anew slide icon appears. Continue creating new slides and bulleted lists by using the
demote and promote action until the presentation is completed. Use theformatting instructions below to format the list.
If there is more than one bulleted list on the slide, the lists will be designatedby numbers enclosed in black boxes. The example below show the slidescreated from the outline on the left. The bulleted list on the left side of theslide is labeled list “1” on the outline and the list on the right is labeled list “2”.When typing the outline, begin typing in the new list by pressingCTRL+ENTER. In this example, CTRL+ENTER was pressed after typing“Access”.
Numbered List
Follow these steps to create a numbered list:
Create a text box. With the text box selected, Choose Format/Bullets andNumbering from the menu bar.
Click the Numbered tab at the top of the Bullets andNumbering window.
Change the size of the numbers by changing the percentagein relation to the text. Choose a color for the numbers from the color menu. ClickMore Color for a large selection. Change the start at value if the numbers should not beginwith 1. Select one of the seven list types shown and click OK.
Resizing a Text Box
Select a text box by clicking on it with the mouse. A border with ninehandles will appears around the text box. The four handles on the corners willresize the length and the width of the box at once while the handles on thesides will resize only in one direction. Click one of the handles and drag itwith the mouse. Release the mouse button when it is the size you want it to
Under the color and lines tab, select a Fill color that will fill the background of the text box. Check the semitransparent box if you want the slide backgroundto show through the color.Select a Line color with surround the box as well as a Style or weight for thethickness of the line and a dashed property if the line should not be solid.
Click the Text Box tab
.
Change the Text anchor point to reposition the text within the text box.Set Internal margins to the distance the text should be to the text box edges.Click OK to add the change to the text box.
Delete a Text Box
To delete a text box from a template, simply click the border of the textbox and press the DELETE key on the keyboard.
Adding notes
From normal view, notes can be added to the slide. These notes will notbe seen on your presentation, but they can be printed out on paper alongwith the slide the notes refer to by selecting print what: Notes pages on theprint menu
To add a video to your presentation select Insert/Movies and Sounds/Moviefrom File or to insert an animation from Microsoft’s gallery chooseInsert/Movies and Sounds/Movies from gallery. Select the video file and clickOK.
GRAPHICS
The Drawing Toolbar provides many commands for creating and editinggraphics. The toolbar is located at the bottom of the power Point screen or selecting View/Toolbars/Drawings from the menu bar can activate it
Menu –
Grouping – Image can be grouped together so they become one image andcan be moved together or the same formatting changes can be applied toboth at once. Select all the images that will be grouped but holding down theSHIFT key and clicking once on each image. Then select group from theDraw menu. The image can be ungrouped by selecting Ungroup from thesame menu. The rectangle in the image to the left is separate image withtheir own set of handles and they are grouped together in the image it theright:
Order – the order of overlapping images can be changed using this feature.
In the example of two rectangles below, the green rectangle is selected andthe sent backward command was used to move the image below the bluerectangle. Send Backward and bring forward will move elements by onelayer. Send to back and bring to front Move the elements to the back or top of a series of several overlapping graphics.
Nudge – use the nudge actions to move an object slightly in one direction.
Align or Distribute – Select a group of objects and choose one of thecommands from the align or distribute menu to change the position of theobjects in relation to one another.
Rotate or Flip – Rotate object 90 degrees or flip the object over its x- or y-
axis.
Select objects – Deactivate all drawing functions.
Free rotate – This button with place green handles on certain object to themcan be arbitrarily rotated. Click a d drag the handles to rotate the objects.AutoShapes menu – Click the small down arrow to the right of the“AutoShapes” text to select a shape. [More….]
Line and Arrow – Click and drag the mouse on the slide to add lines. Hold
down the SHIFT key to draw a straight line. Use the end points of thecompleted line to stretch and reposition the line.
Rectangle and Oval – Click and drag the mouse on the slide to addrectangle and ovals. Hold down the SHIFT key to add squares and circles.
Text Box – Click to draw a text box on the slide.
Word art – click to add word art. [More.]
Picture – Click to add a clip art image to the slide.
Fill color – Choose a fill color for rectangle, ovals, and clip arts.
Line color – Select a border color for shapes and pictures.
Font color – Highlight text on the slide and click the small down arrow nextto the Font color icon to select a color.
Line style – Highlight a line or arrow that has been drawn and click this
button to select a thickness or style for the line.
Dashy style – Highlight a line or arrow and select a dash style.
Arrow style – Change the arrow head style for an existing arrow or change aline to an arrow.
Shadow – select a text box to add shadow to text or choose any other objecton the slide to add a drop shadow.
• Preview Clip to view the image full-size before adding it to the slide.Drag the button right corner of the preview window to resize the imageand click the “x” close button to end the preview.
• Add Clip to favorites will add the selected image to your favorite’sdirectory that can be chosen from the Insert Clip Art dialog box.
• Find Similar Clips will retrieve images similar to the one you havechosen.
• Click the close button in the top, right corner of the Insert Clip windowto stop adding clip art to the slide.
Add an Image from a file
To add a photo or graphics from a file:
• Select Insert/picture/From file the menu bar.• Click the down arrow button on the right side of the Look In: window to
find the image on your computer.• Highlight the file name from the list and click the Insert button.
• Enter the text in the Edit WordArt Text box and choose the font, size ,and style for the text.
Click OK.
• Use the white box handles around the word art to resize it on theslide.
• Drag the yellow diamond handles to change the shape of the text.To revert back to no shape double-click the diamond.
Color Schemes
The colors of predestined slide templates can be changed and a color scheme can be added to blank presentations. This page explains how to addcolor schemes and background images to slide.
• Select Format/Slide Color Scheme from the menu bar.• Click one of the present color scheme thumbnail images in the Color Scheme Box
.
• Click the preview button to see how the scheme will appears on theslide.• To make changes to the color scheme, click the custom tab on thedialog box.
• Changes the color of the slide elements by selecting the color swatchbeside the name of the element and clicking the Change color button.• Highlight one of the colors from the text and Line color window or select the Custom tab to view more color choices and click OK whenfinished.
• When you have finished all color formatting click apply to all to apply tocolor scheme to all the slides in the presentation or Apply to add thescheme only to the current slide.
BackgroundsFollow these steps to add background colors and pattern to a slide:
• Select Format/background from the menu bar.
• Select a color from the drop-down menu below the Background fillpreview or choose More Color…. For a larger selection.• Select Fill Effects from the drop-down menu to add gradients,texture, patterns, or a picture to the background.
• Gradient tab
• Select one color if the color chosen will fade in to the backgroundand select the color from the Color 1 drop-down menu. Choose two colorsif the gradient ill use two color and select those colors from the color 1 and
Color 2 drop-down menus. Present provides a selection of color combinations. Select one from the Present colors drop-down menu.
• Select the type of gradient from shading styles.
• Click one of the four variants of the styles chosen.
Texture tab
From the texture window, select a repeating background but scrolling throughthe thumbnail images or click other texture. To select and image from a file.
• Click the select picture button to choose a picture from a file. After thepicture is selected, a preview and description will be shown in this window.• Click OK to apply the changes made from the Fill Effects windows.• Click applies to all to add the changes to every slide or Apply to makechanges only to the current slide.
SLIDE AND OBJECT ANIMATION
Action Buttons
• Use the action button toolbar to add functioning button to slides in apresentation.
• Select Slide Show/action Buttons from the menu bar. Click the bar across the top of the button menu and drag it off the menu so it becomesa floating toolbar
• Click one of the button faces and draw the button on the slide using themouse. The action Setting menu will then appear.
• Set the action under either the Mouse Click or Mouse Over tabs. Actionspecified for mouse click will execute when the button is clicked on the
slide while actions for Mouse over will occur when the mouse pointer hovers over the button.• Select an Action for the button by choosing a hyperlink to destination.• If you want a sound to be played when the button is clicked\, check thePlay sound box and choose a sound from the drop-down menu.• Click OK when finished.
• The button on the slide can be resized using the white box handles anddragging the yellow diamond can change the depth of the button can bechanged by dragging the yellow diamond.
Several animations for slide objects are available through the drop-downmenus on the menu bar. First, select the text box or graphics that will beanimated. Select Slide show/Present animation and choose from one of theoptions. To select a different animation or turn the animation off, select the
appropriate choice from the same menu. For more options, follow theprocedure below:
Select slide show/Custom animation from the menu bar. Select the object on the slide that will be animated from the Check to
animate slide objects list. Under the Effects tab, select the animation type (or select “No effect” to
turn an animation off) and direction from the drop-down menu andselect a sound if you wish.
Select an After animation affect if the text should change color after the
animation executes. Color palette – Select one of the color swatches or click More Colorsfor a larger selection. The text will change to the selected color whenthe mouse is clicked during the slide show.
Don’t Dim – This option erases all after animation effects. Hide After Animation – Text will be immediately erases after the
animation is completed. Hide on Next Mouse Click – The text will be erases when the mouse is
• Choose the style of displaying the text under the Introduce text section.The drop-down menu provides option for displaying the character for each buttered item. Select “All at once” for the text to appear immediately, “by Word” for the text to appears on word at time. For atypewriter affect that display one letter at time.
• Click the order & timing tab to alter the order that the objects appear onthe highlight the object in the animations order box and click the movearrows to move the objects position within the animations sequence.Under start animations choose on mouse click to active the animationsby clicking the mouse or automatically for the animations to executeafter a set number of seconds.
• Click the preview button at any time to preview the animations on theslide and click ok when finds.
Animations preview
Select Slide Show/Animation Preview from the menu bar to view theAnimation Preview Window. Click anywhere within this window with themouse to preview the animation that have been sec. To hide the window,click the x close button in the top, Right corner.
• Select View/master/slide Master from the menu bar.
• Format the master slide just as you would format a regular slide byformatting text, formatting lists, adding background patterns andeffects, and setting footers.
Headers and footers
Add the date and time, Slide numbers, and other footer text to the master slide from the Header and Footer window.
•
Select View/Header and Footer…. From the menu bar.
To add the slide numbers in a fixed position on the slide, use the Header andFooter window detailed above. The slide number can otherwise be addedanywhere on the slide by placing the cursor where the slide number should
appears and selecting insert/Slide Number from the menu bar. The text of theslide number cans the formatting just as regular text style is changed.
Date and Time
A date and/or time can also be added using the header and Footer window or anywhere else on the slide. Place the cursor where the date and time shouldappear on the slide and select insert/date and Time from the menu bar.Select a format from the Available formats box and click Update automaticallyif this feature should always be updated to reflect the current date and time.
The internet World Wide Web (WWW) and information super highway have penetrated into lives of millions of people all over the world.The internet is a network made up of thousand of networks worldwide.Obviously, these networks are composed of computers and other intelligentand active devices .In fact, internet is an example of self regulatingmechanism and there is no one in-charge of the Internet. There areOrganization which are entrusted to develop technical aspects of thisnetwork, this network, but no governing body is in control. Private companiesown the Internet backbone, through which Internet traffic or data flows in theform of text, video, graphics, sound image etc. All computers on the Internetcommunicate with one another using the Transmission Controlprotocol/internet Protocol architecture, abbreviate to TCP/IP, based onclient/server architecture. This means that the remote server machineprovides files and services to the user’s local client machine. Software can be
installed on a client computer to take advantage of the latest accesstechnology.
A wide variety of services, namely, electronic mail, file transfer, vastinformation resources, internet group membership, interactive collaboration,multimedia displays, real-time broadcasting, shopping opportunities, andmany more are available on the Internet. To provide all these services, theInternet consists primarily of a variety of access protocols. Many of theseprotocols feature programs that allow users to search for and retrievematerial made available by the protocol.
Transmission Control protocol/Internet protocol (TCP/IP) is the protocol suitsdeveloped for the Internet. In this chapter we describe how the Internet wasformed, how it developed and how it is likely to develop on the future. Wealso look at the basic properties of TCP/IP
HISTORY OF THE INTERNET
The Internet, www and information super Highway are term which have deepimpact in the lives of millions of people all over the world. The widespread
impact of Internet across the globe could not be possible without thedevelopment of Transmission Control Protocol/Internet protocol (TCP/IP).This is the protocol suite developed specifically for the internet. Theinformation Technology revolution of today cannot be achieved without thisvast network of networks. This has become a fundamental part of life of
millions of people all over the world. All the aforesaid services, basically,provide us the necessary backbone for information sharing in organizationand within common interest groups. That information may be in severalforms. It can be notes and documents, data to be processed by another computer, files sent to colleagues, and even more exotic forms of data.
During late1960s and 1970s, organizations were inundated with manydifferent LAN and WAN technologies such as packet switching technology,collision-detection local area networks, hierarchical enterprise networks, andmany other excellent technologies. The major drawbacks with all these
technologies were that they could not communicate to each other withoutexpensive deployment of communication devices. These were not onlyexpensive but also put users at the mercy of the monopoly of the vendor theywould be dealing with. Consequently, multiple networking models wereavailable as a result of the research and development efforts made by manyinterest groups. This paved the way for development of another aspect of networking known as protocol layering. This allows application tocommunicate with each other. A complete range of architectural models wasproposed and implemented by various research teams and computer manufacturers. The result of all this great know-how is that today, any group
of users can find a physical network and an architectural model suitable for their specific needs. This includes cheap asynchronous lines with no other error recovery than a bit-per-bit parity function, through full-function wide areanetworks (public or private) with reliable protocols such as public packetswitching networks or private SNA networks, to high-speed but limited-distance local area networks.
WORLD WIDE WEB
The www is so large and complex but no one controls it or owns it, but, tokeep an eye on the standards of web technology World Wide Webconsortium or W3C was formed by Burners-Lee in 1994.
In W3C, an international group of industry and university representativespromotes the Web by developing common protocols for transmittinginformation over the Internet.
The consortium provides information, reference code, and prototype andsample applications to developers and users.
It is hosted by the Massachusetts institute of technology’s Laboratory for thecomputer Science in the United States, the institute National de Recherché
en Information en Automatique in Europe, and the Keio University ShoranFujisawa Campus in Japan.
APPLICATIONS OF INTERNET
The Internet was started as a military project, but currently Internet’s mainuse is in the education/research activities and in business application.
Some of the uses and advantage of the internet are:
1. It can be used to sell products and services online.
2. It helps to reduce advertisement and promotion expenses.
3. It helps to reduce customer service cost.
4. It helps to do business round the clock.
5. It helps to do business round the clock
6. It helps in immediate feedback receiving7. It helps in enhanced customer service
E-MAIL
E-Mail or electronic-mail is one of the fastest and most convenient mailsystems. One can send an E-mail anywhere in the world, in a fraction of time and cost, Compared to the time and cost of the ordinary postal mail.
E-mail involves sending a message from one computer to another computer, On the Internet. It can be used for business as wall as for personal communication. With the text mail, graphic images, music files,program files etc. can be sent as attachment.
MAILING LIST
Mailing list is a way for a group of peoples with common interest to havediscussions. For this each member of the mailing list will have a list of all
other member of the mailing list. When a person wants to submit amessage for discussion, he will send the message to everyone on the list.
Disadvantage of mailing list is everyone on the list need to remember toass or delete members from the list, if there is any change in the
membership. Also, the machine of the person sending a message is tieddown, while the message is sent to everyone on the list.
There are several programs available to automate the e-mailreading/replying process. E-mail addresses can be kept on a hostcomputer that runs the mailing list program. All request for information, tosubscribe (participate) and unsubscribe (drop out) of the list are handledautomatically by the mailing list. Software.
Most of the mailing list consists of people who have agreed to discuss aparticular topic, so there is no need to restrict distribution of mail to eachof the subscriber. Some mailing list that discuss controversial subjectskeep a moderator, the moderator reads every message to make sure thatthe content of message is within agreed upon guideline, If the message isnot within the guideline then it is deleted, otherwise it is sent to themembers.
Using E-Mail
There are many e-mail standards developed for different networks, over aperiod.
These variety of standards make it difficult to have a general purposeapplication to read and sent E-Mail
To send and receive E-Mail between different standards an e-mailgateway is used.
These gateways allow you to send and receive e-mail to the people onthis variety of standards as easily as you send e-mail to another Internetuser.
E-Mail is currently one of the most popular way to conduct business over long distance. Using e-mail to contact a business or personal associatecan be better than using telephone, as he can answer it at a convenienttime.
Care must be taken when sending sensitive information through Internet,as Internet is not very secure medium.
E-mail programs are called E-mail clients because they receive mail fromMail server computers on the Internet.
1. Some E-mail clients can only send and receive E-mail’s with text andattachments. Attachments are binary files encoded into alphanumericcharacter by the sending client and are decoded into binary format by thereceiving client.
2. Some clients use filtering rules to check incoming message for specified sender or some specific text in the message and send themessage into different folders according to what they find.
3. Some client software can respond automatically to the incomingmessage containing specified text based on some set of rules.
4. Some clients that use rules, first file all message to a central in-box andrefill them only after you have viewed them. If you receive only few dozenmessages per day then you can manually keep track of them. But, if youreceive hundreds of messages then you would want them to beautomatically filed to different folders according to their content, where youdon’t have to see them unless you wish.
The basic text message send as E-mail reach its destination without anyproblem, but if you send attachment with the text message, the recipient
may not get the attachment in proper form.The gateway joining your computer and recipient’s computer may discardthe attachment or it could strip off message header, if it could notrecognize it
Currently the older uuencode and Mac bin-hex encoding standards areslowly being replaced by more robust MIME standard. Mime is supportedby all modem mail client
PROTECTING YOUR E-MAIL
E-Mail provides a simple and convenient method for sending andreceiving mail, but it also provides an easy route to the computer virus toinfect the computer system.
Two types of solution are available to protect the computer from this typeof viral attack
• First one is a server based solution, in which a program scans thee-mail attachments as they pass through the e-mail gateway.
• In the second approach, the e-mail is scanned by anti-virussoftware on the client machine.
E-Mail client program features
• Easy installation and setup
E-mail client should be able to install and setup easily. It shouldpermit multiple accounts, allow scheduled retrieval and be able torecognize signature files.
• Mail creation optionShould have facility to add a new list and create a mailing list. Thepackage should also accept aliases. It should support MIME andother popular mail attachment formats.
• Mail managementThe package should have facility to schedule regular mail checkand create folders for sorting and storing your mail. It should havefiltering capability and rule based message handling facility to routeyour mail to proper folder.
• Off-line facilitiesE-mail package should have facility to respond to messages withoutbeing connectedTo a server. It should be able to integrate with the address book,
while off-line.
How viruses spread by e-mail?
A Trojan horse virus can secretly carry often damaging software in ane-mail file attachment from someone you may or may not know. Thefile attachment name itself can also be very misleading.
When you run the attachment, it can do all sorts of things, from erasingfiles to changing your desktop.
It then sends itself along to other people in your address book so that itcan propagate itself.
World Wide Web (WWW) is a service on the internet that connectsvarious documents available on the internet with links to each other and to various other documents.Form one document you can jump to another related document, whichin turn ma6y be linked to many other documents.
WWW has information on almost any imaginable subject. It is a clientserver based internet service. A client application can read theinformation available on various WWW servers.
The documents are stored in a special HTML format on the web. Thisformat puts a tag fir each passage of text. This tagging allows variousWWW clients to format the HTML text in a way that is suitable for thedisplay, the client computer is using.
HTML also allows you to include in-line graphic in documents, whichcan be displayed by graphic based client software. One can also inserthypertext links into the WWW document. These links enable oneHTML document to load another HTML document on your request,when the user clicks on these links.
A document could contain link to many other related documents, andthose related documents can further contain link so many other documents. The linked document could be on the same computer or itcould be on a computer halfway around the world
You can make your own WWW page on many of the WWW serversthat provide free space to store a web page. To make your own webpage you should know the HTML language or you can make your pageon many of the page design software with facility to export into HTMLformat and then upload the HTML file to server that provide free space.
Gopher
Gopher is a simple menu system that you can use to connect to fileson the internet.
This easy to use system introduced many users to the internet beforethe World Wide Web became popular.
Using the University of Minnesota’s gopher which was the first gopher,you can connect to gophers worldwide
You can search gophers using a program called veronica.
Clinking on this icon reload the information from the wwwsite that you
Are visiting.
This will take you to your default starting page. This homePage could be set up to be any page on any web site.
Click on this icon to search WWW for sites, containingInformation that of interest to you.
Click on this icon to bookmark your favorite www sites, sothat you can
Easily revisit them later on.
Click on this icon to see a list of the www pages you’ve visitedin the
Last few days.
Click on this icon to access E-mail and newsgroup program.
Click on this icon to print the web page displayed on thescreen.
Visiting a www site
A WWW site is simply a collection of information stored on a WWWserver computer this data can be easily accessed by people surfing the net.
To access a www site you should know the address of that site, in much thesame way as if you want to phone someone you have to know his phonenumber. The address of a www site is given by something called URL or uniform Resource locator. To visit a www site, type the site’s URL at theaddress bar of the internet Explorer and click on the Go button or presses the[Enter] key.
If you do not known the URL of the www site that you want to visit, you canalso use something called search engines to look for the required information
In the search engines you can type a words or a phrase related to theinformation you want to fine.
The search of the internet sites they have a starting page known as the homepage of that particular www site.
Home PageIn most of the internet sites they have starting page known as the
home page of that particular www site.
The www sites related to this home site will have a button displaying a wordhome on it, clicking on this will take you to the starting page, i.e. the home
page of the site.Home page for the internet explorer is different. For internet explorer thehome page is that page which explorer opens by default, every time you startthe internet explorer.
When you log on to your e-mail account and download your messages, theyare stored in your personal folder file in your inbox folder.Reading E-mail Message
Once the outlook explorer is properly setup, you can read e-mail
massages by clicking on send/receive button.
This will send all e-mail’s that you have written offline, and also this will readnew e-mail messages from the internet.
All new massages read will be shown in the inbox. Double click on the inboxto view these massages.
In the outlook is not connected to the internet, and then it will automaticallyconnect to the internet using the default dial-up connection.
When a new massage is displayed by the outlook express, it shows thevarious icons to the left of the message. These icons indicate the status of the e-mail.
Opening a E-mail Message
To check for new message in the outlook express
• Open the inbox folder by clicking on send and receive icon on the
standard toolbar
Or
• Press [F5] key
Double click on the message you wish to read to open the message dialogbox. The message header contains following information
• Form – this field contains the name or e-mail address of the personwho has sent the message
• To – the names or e-mail address of the recipient of the messageare listed here, each address are separated by a semicolon
• Cc- the names and e-mail addresses of persons receiving a copy of the message are listed here, each value separated by semicolon.
• Subject- this header contains a short description of the messagetopic
• Sent – the data when the message was sent.
Once the message is read, close the message dialog box by
The following site can be used to search for any information available on theweb. Once the site comes on the screen, type the search word into the placeprovided on the screen and press the enter key.
Yahoo ! – http :// www.Yahoo.com
Msn - http : // www.msn.com
Lycos - http : // www.lycos.com
Netscape – http : // www.netscape.com
Google - http : // www.google.com
All the web – http :// www.alltheweb.com
Hotbot - http :// www.hotbot.com
Indian Search Sites
Following are some Indian WWW sites, that have search facility


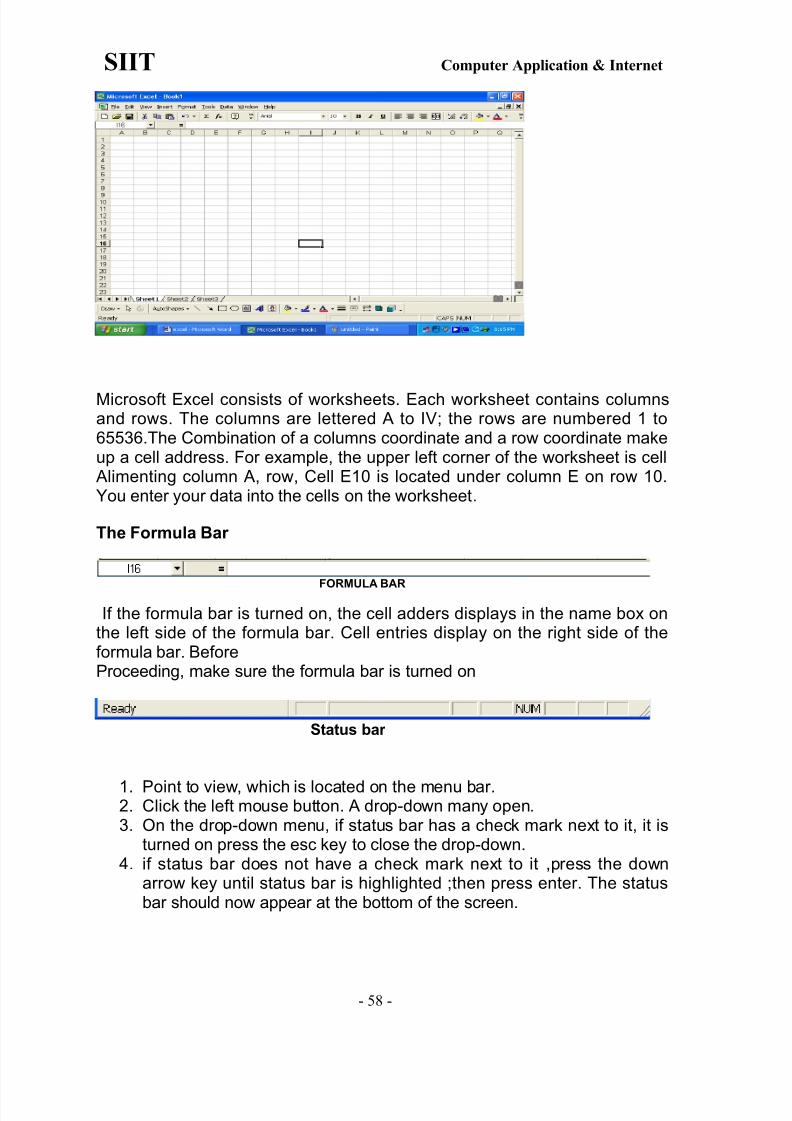


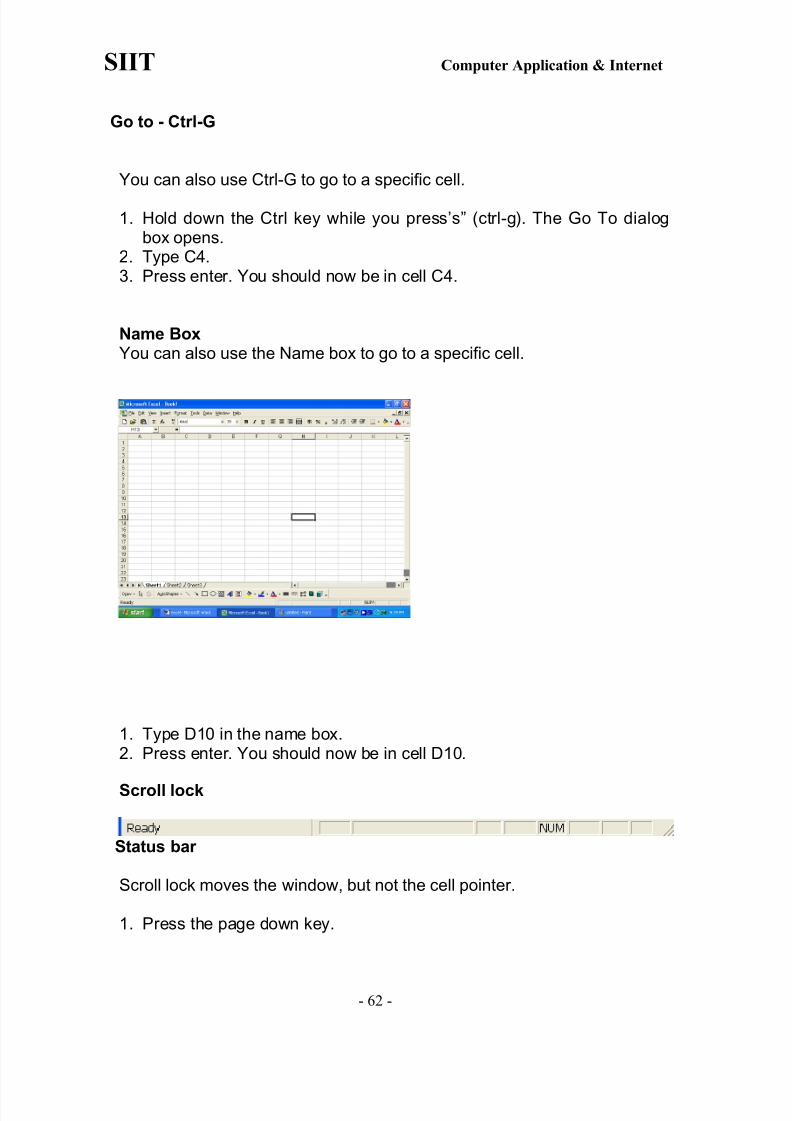


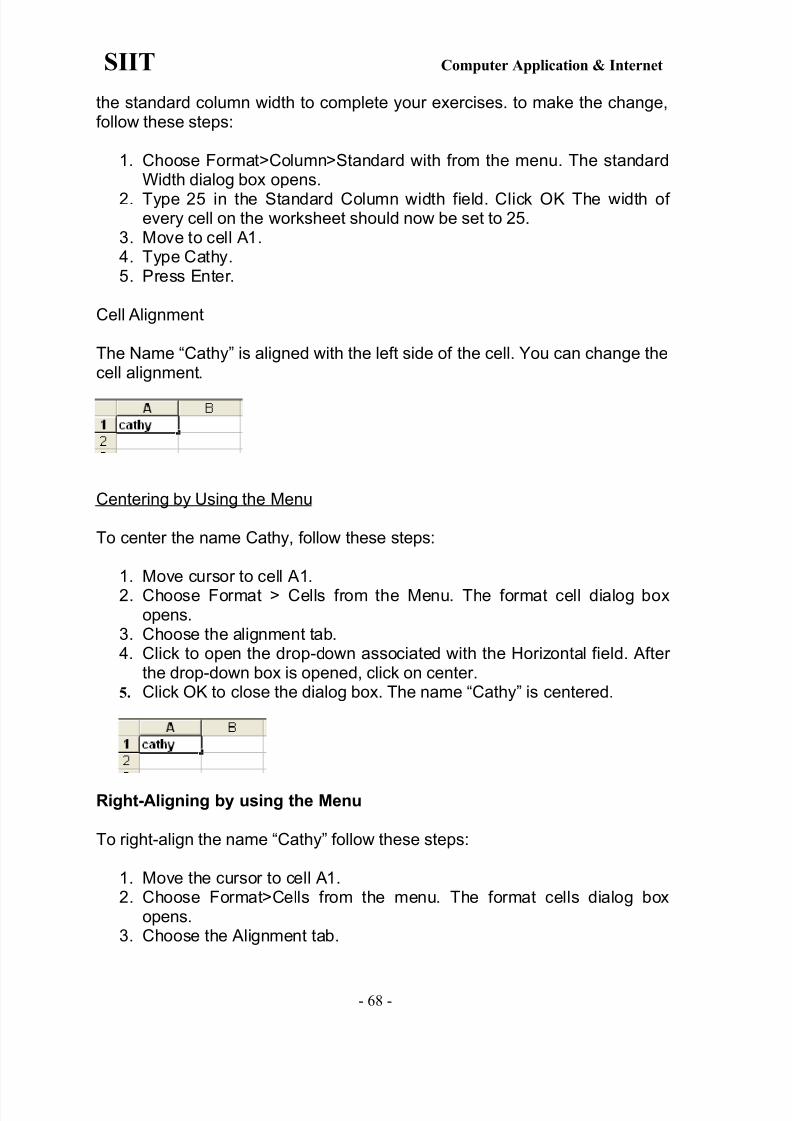


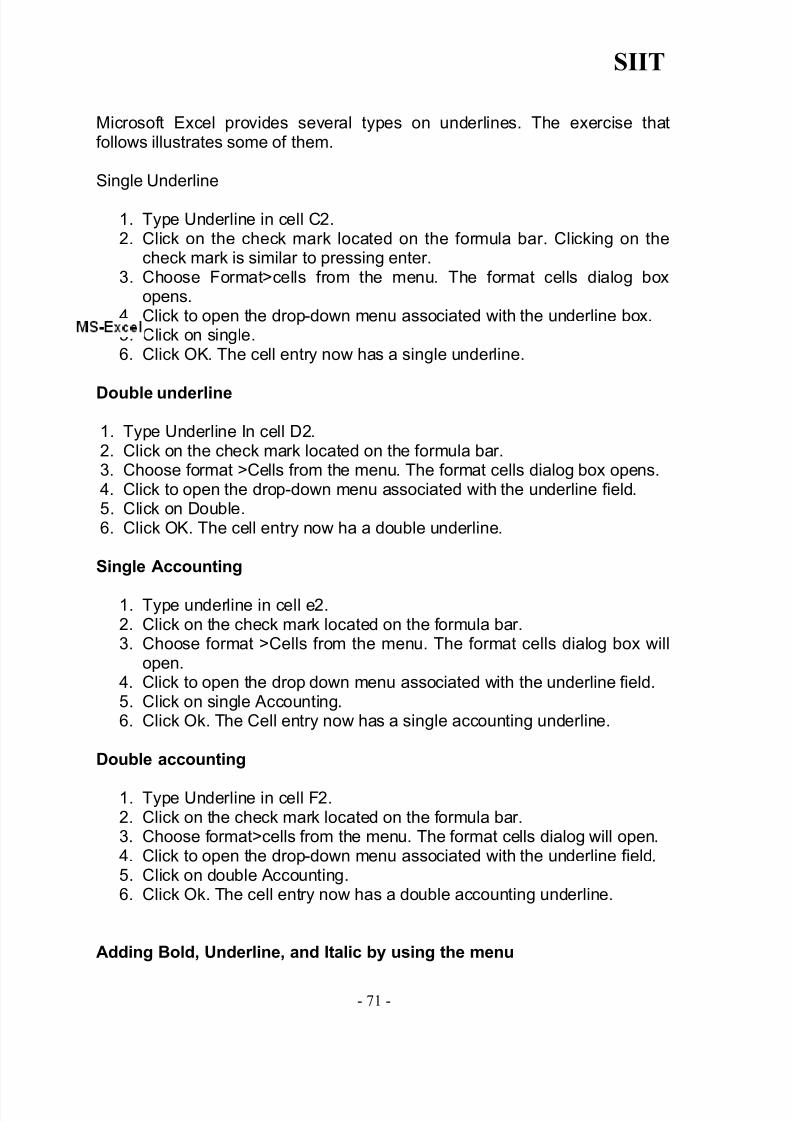


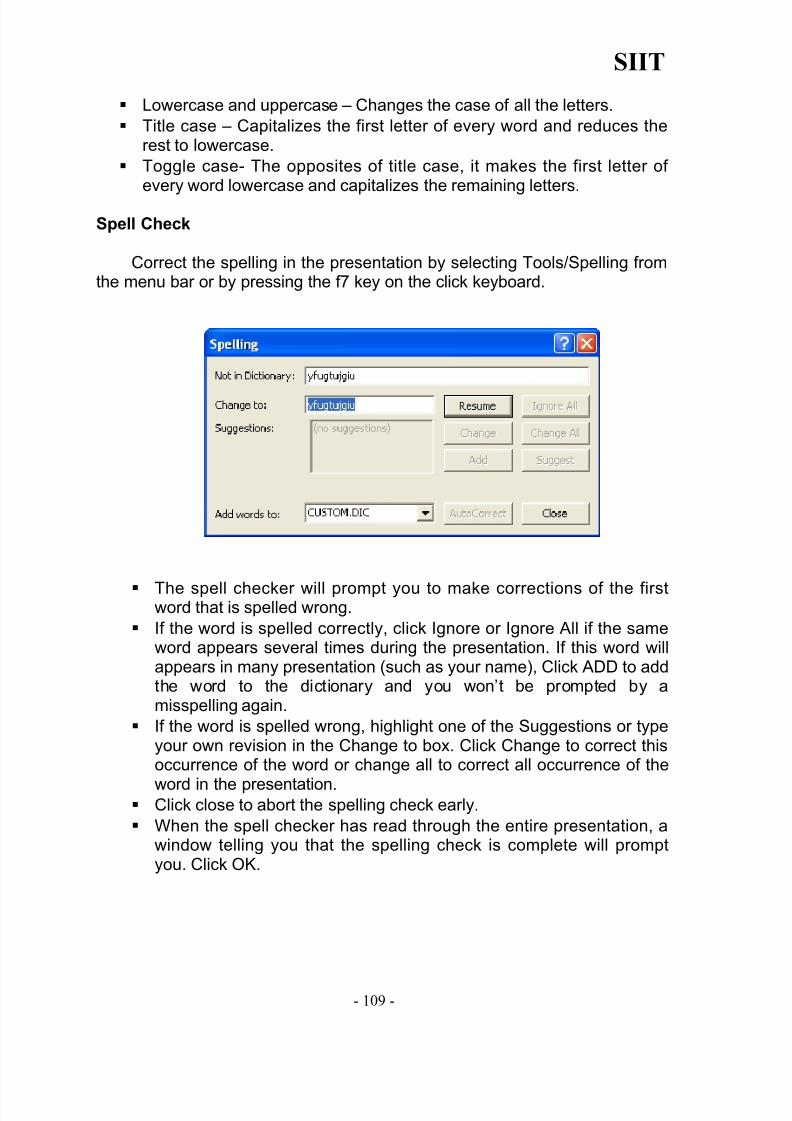


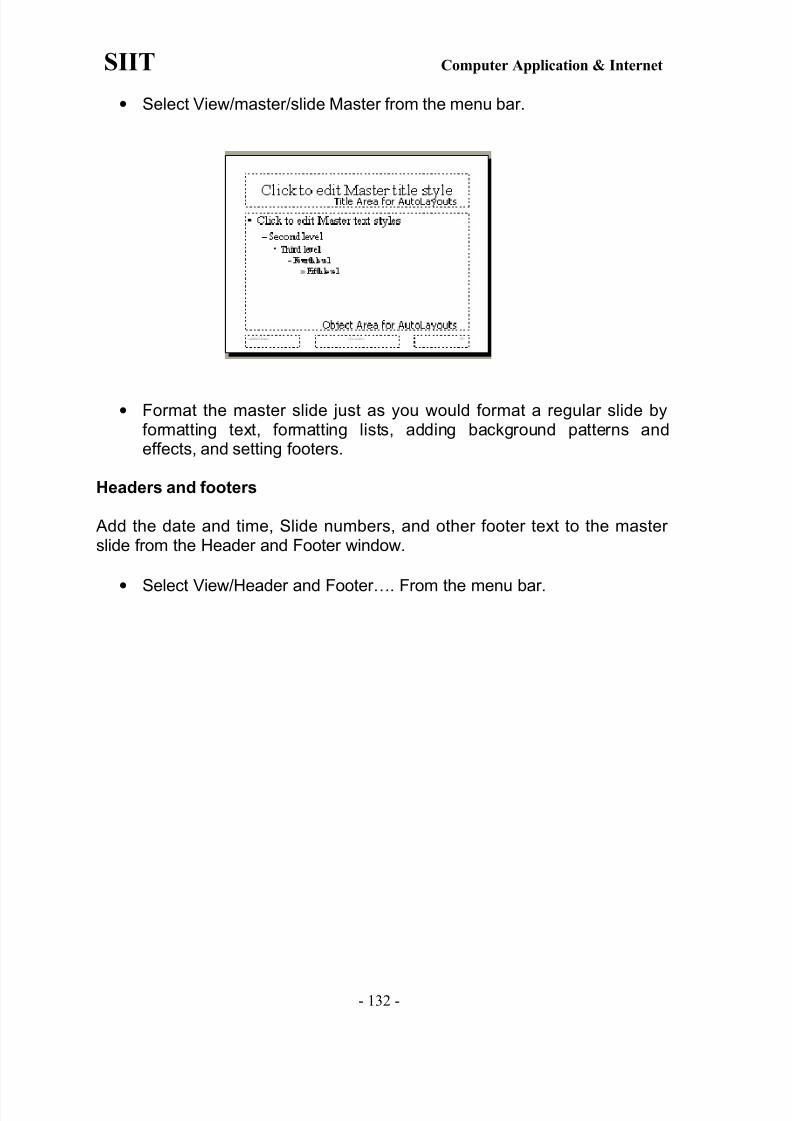


![PARTIDO SUSPENSO EN AMOR E]i - hemeroteca …hemeroteca-paginas.mundodeportivo.com/./EMD02/HEM/1941/06/09/MD... · Siit~sor~ Er~e~1~Willy 1~rtíc~lo~para Depe.rt~s ... —-~Hoy tenía](https://static.documents.pub/doc/80x56/5c00e9f209d3f20a538bdac3/partido-suspenso-en-amor-ei-hemeroteca-hemeroteca-siitsor-ere1willy.jpg)
![Commented [R1] - SIIT · (1) Thesis Title DISSERTATION TITLE DISSERTATION TITLE DISSERTATION TITLE DISSERTATION TITLE Author Mr. International Institute Degree Doctor of Philosophy](https://static.documents.pub/doc/80x56/5f15f57a7867284d112eafe5/commented-r1-siit-1-thesis-title-dissertation-title-dissertation-title-dissertation.jpg)

