50
Skagit Fisheries Enhancement Group Lesson Plan 2016
Skagit Fisheries
Enhancement Group Lesson Plan 2016
Junior Stream Stewards Lesson Plan Introduction
Skagit Fisheries Enhancement Group
www.skagitfisheries.org
Table of Contents
1. Goals and Objectives
2. Institutional Partners and Learners
3. Location
4. Theme
5. Rules and Expectations
6. Risk Management
7. Emergency Contacts
8. Schedule
9. Lesson Plans
1. Our Watershed
2. Salmon Biology
3. Water Quality
4. Salmon Lifecycle
5. Riparian Zones
6. Stewardship
7. Salmon Species
8. Macroinvertebrates
9. Review

Junior Stream Stewards Lesson Plan Introduction
Skagit Fisheries Enhancement Group
www.skagitfisheries.org
Goals and Objectives
1. Middle school students in the Skagit and Samish River watersheds will build a lifelong connection be-
tween individuals, communities, and the natural world.
A. Identify parallels between their own lives and the natural world.
B. Acknowledge complexity of individuals and communities, both natural and human (systems
thinking).
2. Middle school students in the Skagit and Samish River watersheds will gain a sense of place while ex-
periencing different facets of learning.
A. Confidently express ideas through artistic, written, verbal and physical expression.
B. Demonstrate comprehension of topics through creative expression in individual field journal.
C. Identify local Pacific Northwest flora and fauna.
3. Middle school students in the Skagit and Samish River watersheds will cultivate an ethic that values
sustainable practices and stewardship.
A. Appreciate the environment while being socially conscious and environmentally literate about
sustainability and stewardship.
B. Gain self-appreciation for the stewardship each individual student accomplishes during their
projects.
Junior Stream Stewards Lesson Plan Introduction
Skagit Fisheries Enhancement Group
www.skagitfisheries.org
Institutional Partners and Learners
Skagit Fisheries Enhancement Group (SFEG) is a non-profit organization located in Mount
Vernon, Washington. SFEG is one of 14 Regional Fisheries Enhancement Groups (RFEGs) in Washing-
ton State, developed in 1990. With each enhancement group focusing on a different watershed, habitat res-
toration projects are funded by private and public competitive grants, fundraising, and private donors.
SFEG’s mission is to build partnerships that educate and engage community in habitat restoration and
watershed stewardship opportunities in order to enhance salmon populations.
The Junior Stream Stewards (JSS) program started in 2006, piloted at Concrete Middle School.
The program is funded in large part by Washington State Department of Fish and Wildlife’s Aquatic Land
Enhancement Account (ALEA) grant. This funding is specifically for aquatic lands enhancement which
engages community volunteers, and funds many local educational programs. There are also many other
grants that help this program including grants from Skagit County, Department of Ecology, Skagit Com-
munity Foundation, and more.
The students that take part in the Junior Stream Stewards program come from a wide range of
backgrounds. Their ages generally range from 12-14 and they are in grades 6-8. The students also come
from a diverse area speaking several languages. Since SFEG serves the Skagit Watershed (including Dar-
rington), Samish Watershed, San Juan Islands and Northern Whidbey Island, there is a great opportunity
to work with many schools and many students.

Junior Stream Stewards Lesson Plan Introduction
Skagit Fisheries Enhancement Group
www.skagitfisheries.org
Location
The locations of the program vary depending on the school. There are a total of 9 class visits, 7 of
which take place in the classroom. There are two field trips: the first, in November, is a watershed tour in
which the students visit different sites where they can evaluate water quality and salmon habitat in their
local watershed. The second field trip is a service-learning project in which the students go to a local ri-
parian area and restore the salmon habitat, typically by planting trees. These field trips add to the overall
goals, expectations, and experiences of the program. All field trips are funded through the program.
Theme
Stewardship!
The students will go on a journey to learn what it means to be a steward of their local watershed.
They will learn what comprises a healthy watershed including animals, plants, insects, water, and much
more. They will learn what a watershed is and how they can personally help keep it healthy and happy
for future generations. Through classroom learning and field trips the students will experience what it
means to be a stream steward.
Rules and Expectations
Students and Teachers of the JSS program
Be respectful to all people, animals, plants, and property
Be present emotionally, physically, and mentally
Come to activities prepared and on time
Closed-toed shoes are required at all times on field trips
Students of the JSS program
All school rules apply in class and on field trips
Listen and be respectful to all teachers and facilitators
Junior Stream Stewards Lesson Plan Introduction
Skagit Fisheries Enhancement Group
www.skagitfisheries.org
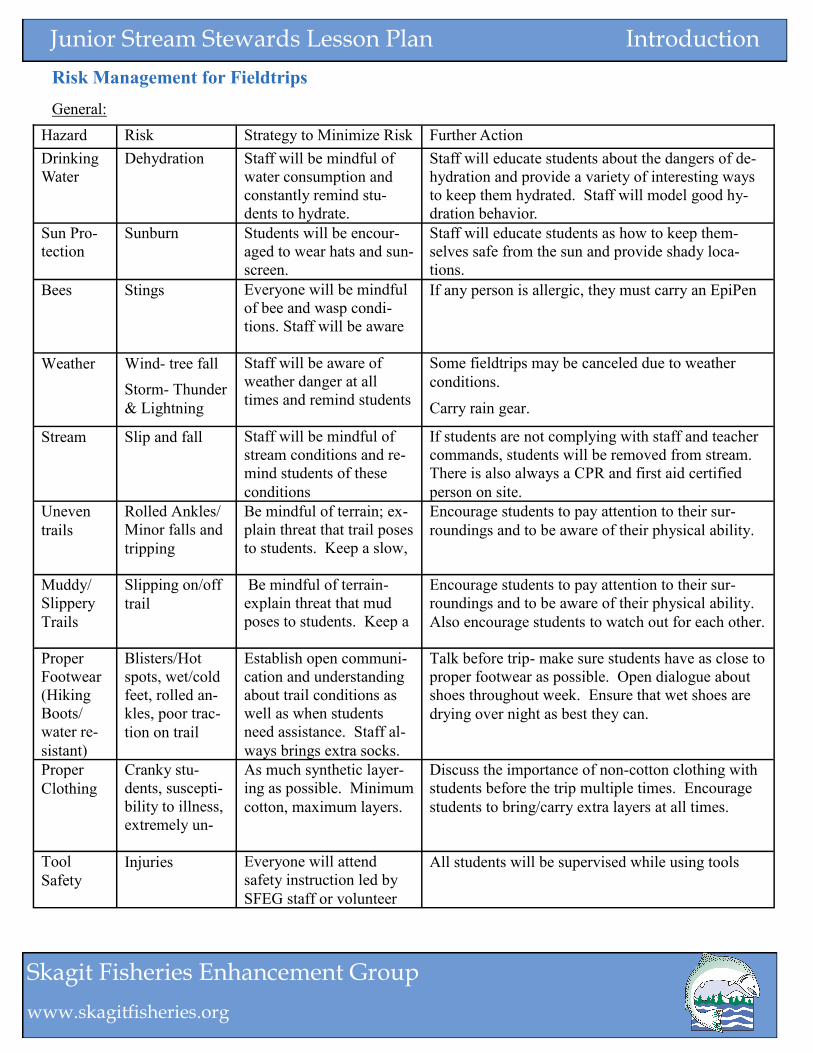
Risk Management for Fieldtrips
General:
Hazard Risk Strategy to Minimize Risk Further Action
Drinking
Water
Dehydration Staff will be mindful of
water consumption and
constantly remind stu-
dents to hydrate.
Staff will educate students about the dangers of de-
hydration and provide a variety of interesting ways
to keep them hydrated. Staff will model good hy-
dration behavior.
Sun Pro-
tection
Sunburn Students will be encour-
aged to wear hats and sun-
screen.
Staff will educate students as how to keep them-
selves safe from the sun and provide shady loca-
tions.
Bees Stings Everyone will be mindful
of bee and wasp condi-
tions. Staff will be aware
If any person is allergic, they must carry an EpiPen
Weather Wind- tree fall
Storm- Thunder
& Lightning
Staff will be aware of
weather danger at all
times and remind students
Some fieldtrips may be canceled due to weather
conditions.
Carry rain gear.
Stream Slip and fall Staff will be mindful of
stream conditions and re-
mind students of these
conditions
If students are not complying with staff and teacher
commands, students will be removed from stream.
There is also always a CPR and first aid certified
person on site.
Uneven
trails
Rolled Ankles/
Minor falls and
tripping
Be mindful of terrain; ex-
plain threat that trail poses
to students. Keep a slow,
Encourage students to pay attention to their sur-
roundings and to be aware of their physical ability.
Muddy/
Slippery
Trails
Slipping on/off
trail
Be mindful of terrain-
explain threat that mud
poses to students. Keep a
Encourage students to pay attention to their sur-
roundings and to be aware of their physical ability.
Also encourage students to watch out for each other.
Proper
Footwear
(Hiking
Boots/
water re-
sistant)
Blisters/Hot
spots, wet/cold
feet, rolled an-
kles, poor trac-
tion on trail
Establish open communi-
cation and understanding
about trail conditions as
well as when students
need assistance. Staff al-
ways brings extra socks.
Talk before trip- make sure students have as close to
proper footwear as possible. Open dialogue about
shoes throughout week. Ensure that wet shoes are
drying over night as best they can.
Proper
Clothing
Cranky stu-
dents, suscepti-
bility to illness,
extremely un-
As much synthetic layer-
ing as possible. Minimum
cotton, maximum layers.
Discuss the importance of non-cotton clothing with
students before the trip multiple times. Encourage
students to bring/carry extra layers at all times.
Tool
Safety
Injuries Everyone will attend
safety instruction led by
SFEG staff or volunteer
All students will be supervised while using tools
Junior Stream Stewards Lesson Plan Introduction
Skagit Fisheries Enhancement Group
www.skagitfisheries.org
Contacts
SFEG Office: (360) 336- 0172
Lucy DeGrace, Outreach Manager: (360) 336- 0172 ext 301; cell: (360) 853- 5893
Alison Studley, SFEG Executive Director: (360) 336- 0172 ext 302
WSC, Education Associate: Varies by year
WSC, Outreach Associate: Varies by year
Education Interns: Varies by year
Schedule
September- Watersheds
October- Salmon Biology
November- Watershed Tours (Water Quality)
December- BREAK (optional art project)
January- Salmon Lifecycle
February- Riparian Zones
March- Stewardship Projects
April- Salmon Species
May- Macroinvertebrates
June- Review
Junior Stream Stewards Lesson Plan Unit 1: Our Watershed
Skagit Fisheries Enhancement Group
www.skagitfisheries.org
What is a Watershed?
Objectives:
Students will be able to explain
what a watershed is, its parts, and
in which watershed their school is
located.
Method:
Students will participate in a Pow-
erPoint based discussion, answer
questions in their journal, and then
participate in an activity where they
can create their own watershed.
Materials:
PowerPoint presentation
Blank sheets of copy paper (one
per student)
Water based markers (three
different colors per student)
2-3 spray bottles filled with wa-
ter
Junior Steam Stewards (JSS)
journal with watershed map
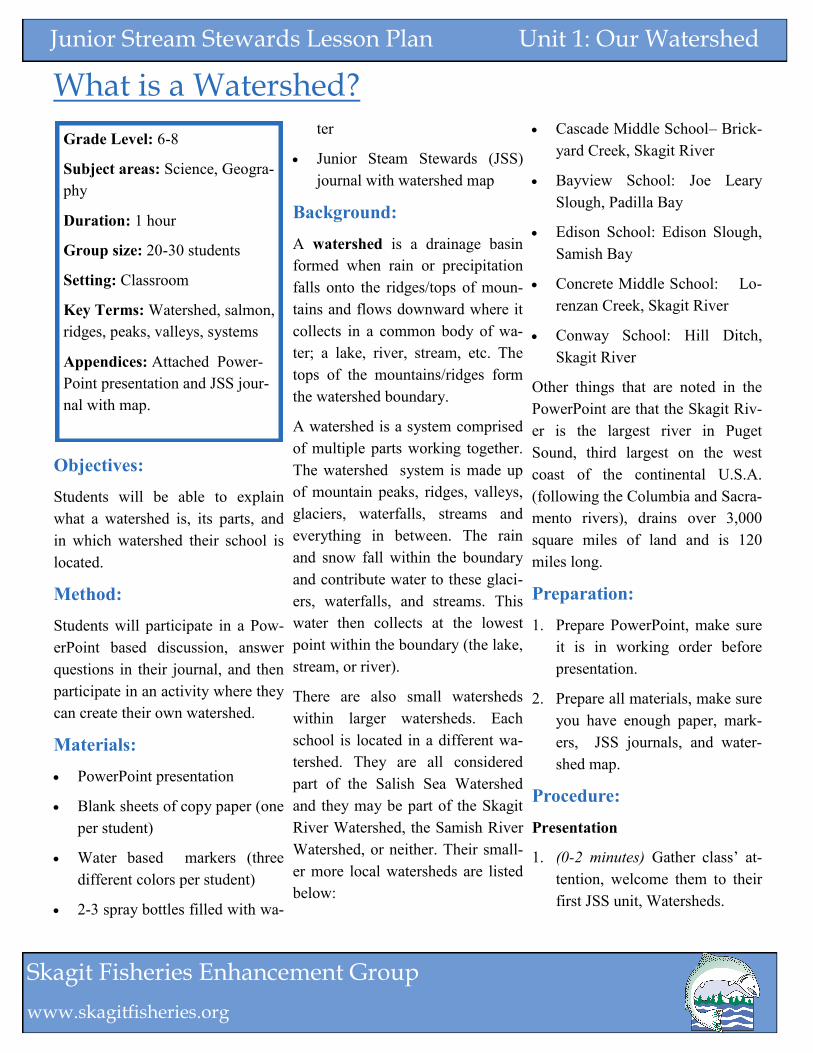
Background:
A watershed is a drainage basin
formed when rain or precipitation
falls onto the ridges/tops of moun-
tains and flows downward where it
collects in a common body of wa-
ter; a lake, river, stream, etc. The
tops of the mountains/ridges form
the watershed boundary.
A watershed is a system comprised
of multiple parts working together.
The watershed system is made up
of mountain peaks, ridges, valleys,
glaciers, waterfalls, streams and
everything in between. The rain
and snow fall within the boundary
and contribute water to these glaci-
ers, waterfalls, and streams. This
water then collects at the lowest
point within the boundary (the lake,
stream, or river).
There are also small watersheds
within larger watersheds. Each
school is located in a different wa-
tershed. They are all considered
part of the Salish Sea Watershed
and they may be part of the Skagit
River Watershed, the Samish River
Watershed, or neither. Their small-
er more local watersheds are listed
below:
Cascade Middle School– Brick-
yard Creek, Skagit River
Bayview School: Joe Leary
Slough, Padilla Bay
Edison School: Edison Slough,
Samish Bay
Concrete Middle School: Lo-
renzan Creek, Skagit River
Conway School: Hill Ditch,
Skagit River
Other things that are noted in the
PowerPoint are that the Skagit Riv-
er is the largest river in Puget
Sound, third largest on the west
coast of the continental U.S.A.
(following the Columbia and Sacra-
mento rivers), drains over 3,000
square miles of land and is 120
miles long.
Preparation:
1. Prepare PowerPoint, make sure
it is in working order before
presentation.
2. Prepare all materials, make sure
you have enough paper, mark-
ers, JSS journals, and water-
shed map.
Procedure:
Presentation
1. (0-2 minutes) Gather class’ at-
tention, welcome them to their
first JSS unit, Watersheds.
Grade Level: 6-8
Subject areas: Science, Geogra-
phy
Duration: 1 hour
Group size: 20-30 students
Setting: Classroom
Key Terms: Watershed, salmon,
ridges, peaks, valleys, systems
Appendices: Attached Power-
Point presentation and JSS jour-
nal with map.

Junior Stream Stewards Lesson Plan Unit 1: Our Watershed
Skagit Fisheries Enhancement Group
www.skagitfisheries.org
2. (2- 7 minutes) Have teacher or
assistant pass out JSS journals
and maps. Continue onto slide
two of the PowerPoint. Explain
to the class what Skagit Fisher-
ies Enhancement Group is. It is
a non-profit organization dedi-
cated to restoring wild salmon
populations through education,
community involvement and
habitat restoration.
3. (7– 10 minutes) Have students
turn to page 1 in journal and
continue onto next slide. Ex-
plain to the students that SFEG
is in their class today to teach
them what a watershed is,
which one their school is locat-
ed in, and why it is relevant
(this information is listed in the
“background” section). Share
with the class what you are go-
ing to be doing over the school
year. A SFEG staff person will
come in once a month and
teach a different unit. There
will be two fieldtrips for each
school (except Cascade), a wa-
tershed tour in November and
service project in March.
4. (10– 14 minutes) Continue to
next slide of PowerPoint. De-
fine watershed (refer to
“Background” section) and go
through some of the key words
listed on the slide: ridges, wa-
tershed boundary, etc. Have the
students write the definition in
the space provided in their jour-
nals.
5. (14- 20 minutes) Pick five vol-
unteer students, a range of
heights, one being the tallest
person in the class. In front of
the class arrange these students
in a horseshoe shape with the
tallest person in the middle of
the curve of the horseshoe.
Have the students stick their
arms out in front of them creat-
ing a basin. The students have
now made themselves into a
watershed with the tallest per-
son being the tallest mountain
and all other students being sur-
rounding mountains. Their
heads are now creating the wa-
tershed boundary of their new
watershed. Ask the students to
explain what would happen if
you dumped a bucket of water
on the volunteer mountains’
heads. If you did dump the
bucket, most water would pour
over their heads and down their
arms. This is how a watershed
works. You can also explain
that some water would hit their
heads and go down their backs
and this would be flowing out-
side their watershed boundary,
into another watershed. You
can now have the volunteers sit
down.
6. (20-22 minutes) Continue onto
the next slide. Use the water-
shed picture as another form of
communicating to the students
what a watershed is, i.e. a visu-
al representation of a water-
shed. Point out the watershed
boundary, ridges, streams,
where is the water flowing
(blue lines), etc. Introduce the
concept of little watersheds in-
side bigger watersheds, Like
the picture shows. You can
compare it to a dart board, one
circle inside another is like one
watershed inside another. Ask
the class if the bear is in the
watershed or outside the water-
shed (he is outside), how about
the sasquatch/orangutan (he is
also outside).
7. (22– 25 minutes) Go to the next
slide. Ask the students to give
you an example of a system.
(solar system, respiratory sys-
tem, nervous system, ecosys-
tem, etc). Give them some ex-
amples if they need some nudg-
ing. Define what a system is in
science, basically multiple parts
working together to function as
a whole. Machines are good
examples too.
Junior Stream Stewards Lesson Plan Unit 1: Our Watershed
Skagit Fisheries Enhancement Group
www.skagitfisheries.org
7. Continued… Explain how a
watershed is a system. The
mountains peaks, ridges, glaci-
ers, water, weather, all work
together to create and maintain
a watershed.
8. (25– 29 minutes) Step 8 only
applies to schools in Skagit
River Watershed. If school is
not part of Skagit River water-
shed skip to Step 9. If the
school is part of the Skagit Riv-
er then show the three facts
listed on the next slide. Skagit
River is the third largest water-
shed on the west coast of the
continental U.S. Ask if anyone
knows what the other two are?
Then ask the class if anyone
knows where the Skagit River
starts. Did they know that it
starts in British Columbia, Can-
ada? The next slide is a picture
of the Skagit River watershed.
Have the students tell you what
the red line represents
(watershed boundary), what
about the blue lines (water,
streams, rivers)?
9. (29- 34 minutes) Now ask the
students what watershed they
are in. Many will say Skagit,
which for some is correct. Ask
them if they remember you
saying earlier that there are
smaller watersheds inside big-
ger ones? The class is in the
Salish Sea watershed, and then
further Cascade, Concrete, and
Conway are in Skagit River,
Bay View in Padilla Bay, and
Edison in Samish Bay. What is
the smallest watershed they are
in? What is their nearest body
of water? Go to the next slide
and it will reveal the watershed
they are in (dependent on
school, listed in “background
information”). Have the class
write their watershed in their
journals in the space provided.
Ask the students if they have
seen the body of water, and
have them share some stories if
time allows.
10. (34- 38 minutes) Have the stu-
dents pull out the watershed
map from their journals and
flip to the next slide. Show
them their watershed on the
map. Have them label their
school, house, or whatever they
recognize on the map.
11. (38- 40 minutes) Continue to
next slide. Ask the class if they
have seen the objects in the
pictures before (storm drains,
decals, stencils, etc.). Where
have they seen them? Ask them
to tell you where the water that
flows into the storm drains
goes to? The nearest body of
water is correct. Let them know
that all the water (containing
oil, chemicals, pollution, etc.)
from their parking lot and prop-
erty is going through their
storm drains and into their
watershed, untreated! What
effect does that have?
Activity
12. (40– 42 minutes) Have class
put away everything on their
desk and ask teacher or assis-
tant to pass out one piece of
paper and three markers per
student.
13. (42- 45 minutes) While demon-
strating, have the students
lightly crumple up their piece
of paper. Then have them very
slightly uncrumple it so it looks
like the paper is now mountains
and valleys.
14. (45– 47 minutes) Have the stu-
dents use one marker, prefera-
bly the darkest color, and high-
light only the ridges and peaks
of the mountains or the highest
points of their paper. They
don’t have to highlight all of
them, just the largest most no-
ticeable ones.
15. (47– 49 minutes) Now take a
second color and highlight all
of the valleys or indents/ lowest
parts of their paper.
16. (49– 51 minutes) For their last
color marker, have them draw
buildings, school, offices,
houses, people, anything they
want wherever they want.
Junior Stream Stewards Lesson Plan Unit 1: Our Watershed
Skagit Fisheries Enhancement Group
www.skagitfisheries.org
18. (51– 55 minutes) Now that their
watershed is complete, take a
spray bottle (prefilled with wa-
ter) and tell them a storm is
coming. Go around and lightly
spray the students’ paper with
water.
19. (55– 60 minutes) Once all of the
students’ papers have been
sprayed, discuss what happened.
Have them raise their hands and
tell the class what they observed
once the storm hit their water-
shed. Did some of their build-
ings flood? Have them write
their observations in their jour-
nals. There are some prompts to
some questions in their journals
to help them participate in the
discussion.
Extension:
As an extension, you can review
the five species of Pacific salmon
(chum, coho, Chinook, sockeye,
pink). You can also discuss how
the watersheds now compare to
100 years ago.
Evaluation:
Before the first unit of the JSS
program, a pre-survey is handed
out to each student. On this survey
there are questions pertaining to
this unit. There will be a post–
survey handed out to the students
at the end of the JSS program.
This survey will have the same
questions as the pre-survey. You
can see if the students retained the
information if the scores of each
student increase from the time of
the pre-survey to the post-survey.
Next Generation Science Standards
Performance Expectations
MS-ESS2-4. Develop a model to describe the cycling of water through Earth’s systems driven by energy from
the sun and the force of gravity.
MS-ESS3-3. Apply scientific principles to design a method for monitoring and minimizing a human impact
on the environment.
Developing and Using Models
Constructing Explanations and
Designing Solutions
Asking Questions and Defining
Problems
ESS2.A: Earth’s Materials and
Systems
ESS2.C: The Roles of Water in
Earth’s Surface Processes
ESS3.C: Human Impacts on
Earth
ESS3.D: Global Climate
Change Systems
Cause and Effect
Systems and System Models
Connections to Engineering,
Technology, and Applications
of Science Engineering, and
Technology on Society and the
Natural World.
Connections to Nature of Sci-
ence, Science Addresses Ques-
tions About the Natural and
Material World
Disciplinary Core Ideas Science and Engineering Practices Crosscutting Concepts
Junior Stream Stewards Lesson Plan Unit 2: Salmon Biology
Skagit Fisheries Enhancement Group
www.skagitfisheries.org
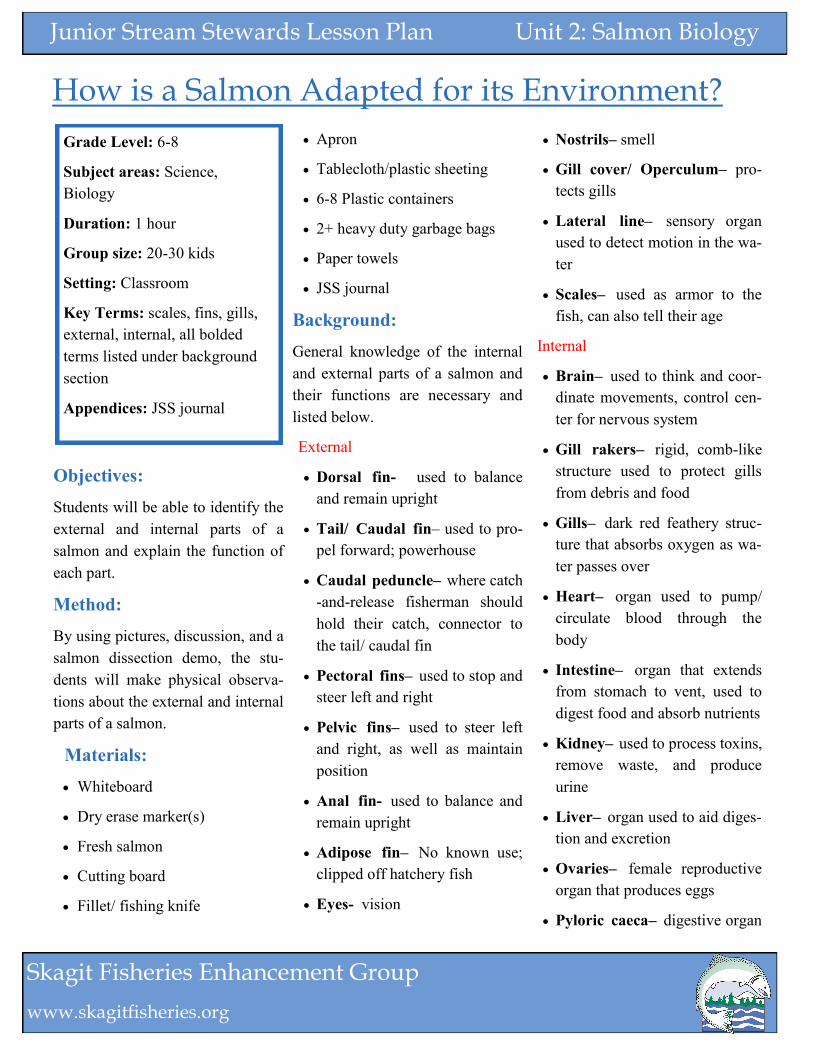
How is a Salmon Adapted for its Environment?
Objectives:
Students will be able to identify the
external and internal parts of a
salmon and explain the function of
each part.
Method:
By using pictures, discussion, and a
salmon dissection demo, the stu-
dents will make physical observa-
tions about the external and internal
parts of a salmon.
Materials:
Whiteboard
Dry erase marker(s)
Fresh salmon
Cutting board
Fillet/ fishing knife
Apron
Tablecloth/plastic sheeting
6-8 Plastic containers
2+ heavy duty garbage bags
Paper towels
JSS journal
Background:
General knowledge of the internal
and external parts of a salmon and
their functions are necessary and
listed below.
External
Dorsal fin- used to balance
and remain upright
Tail/ Caudal fin– used to pro-
pel forward; powerhouse
Caudal peduncle– where catch
-and-release fisherman should
hold their catch, connector to
the tail/ caudal fin
Pectoral fins– used to stop and
steer left and right
Pelvic fins– used to steer left
and right, as well as maintain
position
Anal fin- used to balance and
remain upright
Adipose fin– No known use;
clipped off hatchery fish
Eyes- vision
Nostrils– smell
Gill cover/ Operculum– pro-
tects gills
Lateral line– sensory organ
used to detect motion in the wa-
ter
Scales– used as armor to the
fish, can also tell their age
Internal
Brain– used to think and coor-
dinate movements, control cen-
ter for nervous system
Gill rakers– rigid, comb-like
structure used to protect gills
from debris and food
Gills– dark red feathery struc-
ture that absorbs oxygen as wa-
ter passes over
Heart– organ used to pump/
circulate blood through the
body
Intestine– organ that extends
from stomach to vent, used to
digest food and absorb nutrients
Kidney– used to process toxins,
remove waste, and produce
urine
Liver– organ used to aid diges-
tion and excretion
Ovaries– female reproductive
organ that produces eggs
Pyloric caeca– digestive organ
Grade Level: 6-8
Subject areas: Science,
Biology
Duration: 1 hour
Group size: 20-30 kids
Setting: Classroom
Key Terms: scales, fins, gills,
external, internal, all bolded
terms listed under background
section
Appendices: JSS journal

Junior Stream Stewards Lesson Plan Unit 2: Salmon Biology
Skagit Fisheries Enhancement Group
www.skagitfisheries.org
Spinal cord– bundle of nerves
that transmit messages from
brain to rest of the body
Spleen– organ in which white
blood cells are produced and
red blood cells are recycled
Stomach– sac like organ that
breaks down food before it
moves on to the intestine
Swim Bladder– sac
located just below
the spine that fills
and releases gas,
used to control
buoyancy
Testes- male repro-
ductive organ that
produces and stores milt
Urinary bladder– sac to store
urine
Vent– external opening of di-
gestive system in which urine,
feces, eggs and milt exit the
body
Preparation:
1. Depending on which hatchery
has fish (Samish or Marble-
mount), the morning of the unit,
you must go get one fresh, dead
salmon per class. Place fish in
cooler for the day.
2. Arrive to school at least 10
minutes early for set-up.
3. Cover table used for dissection
with tablecloth or plastic sheet-
ing.
4. Place clean cutting board,
knife, and containers on the ta-
ble.
5. Person dissecting may want to
put apron on.
6. Draw salmon outline on white-
boards with lines pointing to all
external parts of fish. DO NOT
LABLE YET. Should look
something like this:
Procedure:
1. (0– 2 minutes) Welcome class
back to JSS and introduce them
to unit 2 Salmon Biology. Ask
them if they can remember the
SFEG staff and/or if they can
guess what we are going to do?
2. (2– 5 minutes) Start with a re-
view on what you covered last
time. Ask the class what is a
watershed, what watershed are
they in, any questions relating
to the watershed lesson.
3. (5– 30 minutes) Now, refer to
the whiteboard salmon diagram
and have the students raise their
hands and label the body parts.
Have them write the body parts
in the appropriate spot in their
JSS journal. Have them tell you
the function of each body part
they name and write the func-
tions in the appropriate spot in
their journal. Once they cannot
name any more organs, go over
the remaining missing labels
with the class. Make sure they
are writing all parts and func-
tions in their journals.
4. (30– 35 minutes) Get
the fresh, dead fish out
of the cooler and go over
the external body parts
and their functions again
using the real fish as a
reference. Have the class
tell you what the parts
and functions are as you point
them out on the fish. Ask them
if the fish is hatchery or wild?
They should know by the pres-
ence or absence of the adipose
fin. See if they can identify the
salmon species.
5. (35– 36 minutes) Place fish on
cutting board. Ask the class if
they think it is a male or fe-
male, and why. Once all stu-
dents have made their guesses
cut the fish from the pectoral
fins to the vent; at this point the
gender may become immediate-
ly obvious, if eggs/milt spill out
(on very ripe fish). Cut the fish
by gently slicing away at the
layers of skin so as not to punc-
ture or sever the organs.
Junior Stream Stewards Lesson Plan Unit 2: Salmon Biology
Skagit Fisheries Enhancement Group
www.skagitfisheries.org
6. (36– 50 minutes) Pulling out
one organ, piece, or internal
part of the fish at a time, iden-
tify all parts and either let the
students tell you the function,
or you tell them the function.
Go into detail, how is human
activity effecting the fish
physically? Place each organ,
piece, or internal part sepa-
rately (including milt/testes
and eggs/ovaries) into the pro-
vided containers.
7. (50- 60 minutes) Once all
parts have been removed from
fish and discussed as a class,
pass out all containers to the
class. Allow them to see and
touch the fish pieces in the
containers. In small groups ,
allow students to come up and
view and touch the salmon
body.
Extension
You can also pull out a lens from
the eye and give students time to
ask more questions.
Directions to access brain: Hold
fish firmly with its belly down and
dorsal fin towards the ceiling. Cut
about a half inch straight down
over the back of the gill covers.
Slice at an angle from just behind
the nostrils to the bottom of your
first cut. Remove the wedge of the
head created. The brain should
appear as a pink blob inside an
opening in the skull. If you can't
see the brain check the chunk you
removed in case you cut too deep.
If it isn't in that section, slowly
slice away at the head until the
brain is exposed. It is usually the
size of a large pea.
Evaluation
Before the first unit of the JSS
program, a pre-survey is handed
out to each student. On this survey
there are questions retaining to
this unit. There will be a post–
survey handed out to the students
at the end of the JSS program.
This survey will have the same
questions as the pre-survey. You
can see if the students retained the
information if the scores of each
student increase from the time of
the pre-survey to the post-survey.
Junior Stream Stewards Lesson Plan Unit 2: Salmon Biology
Skagit Fisheries Enhancement Group
www.skagitfisheries.org
MS-LS1-3. Use argument supported by evidence for how the body is a system of interacting subsystems com-
posed of groups of cells.
MS-LS1-4. Use argument based on empirical evidence and scientific reasoning to support an explanation for
how characteristic animal behaviors and specialized plant structures affect the probability of successful repro-
duction of animals and plants respectively.
MS-LS1-5. Construct a scientific explanation based on evidence for how environmental and genetic factors
influence the growth of organisms.
MS-LS4-4. Construct an explanation based on evidence that describes how genetic variations of traits in a
population increase some individuals’ probability of surviving and reproducing in a specific environment..
Performance Expectations
Constructing Explanations and
Designing Solutions
Obtaining, Evaluating, and
Communicating Information
LS1.B: Growth and Develop-
ment of Organisms
LS4.B: Natural Selection
LS4.C: Adaptation
Cause and Effect
Systems and System Models
Connections to Nature of Sci-
ence, Science is a Human En-
deavor
Connections to Nature of Sci-
ence, Scientific Knowledge As-
sumes an Order and Consisten-
cy in Natural Systems
Connections to Nature of Sci-
ence, Science Addresses Ques-
tions About the Natural and
Material World
Disciplinary Core Ideas Science and Engineering Practices Crosscutting Concepts
Next Generation Science Standards
Junior Stream Stewards Lesson Plan Unit 2: Salmon Biology
Skagit Fisheries Enhancement Group
www.skagitfisheries.org
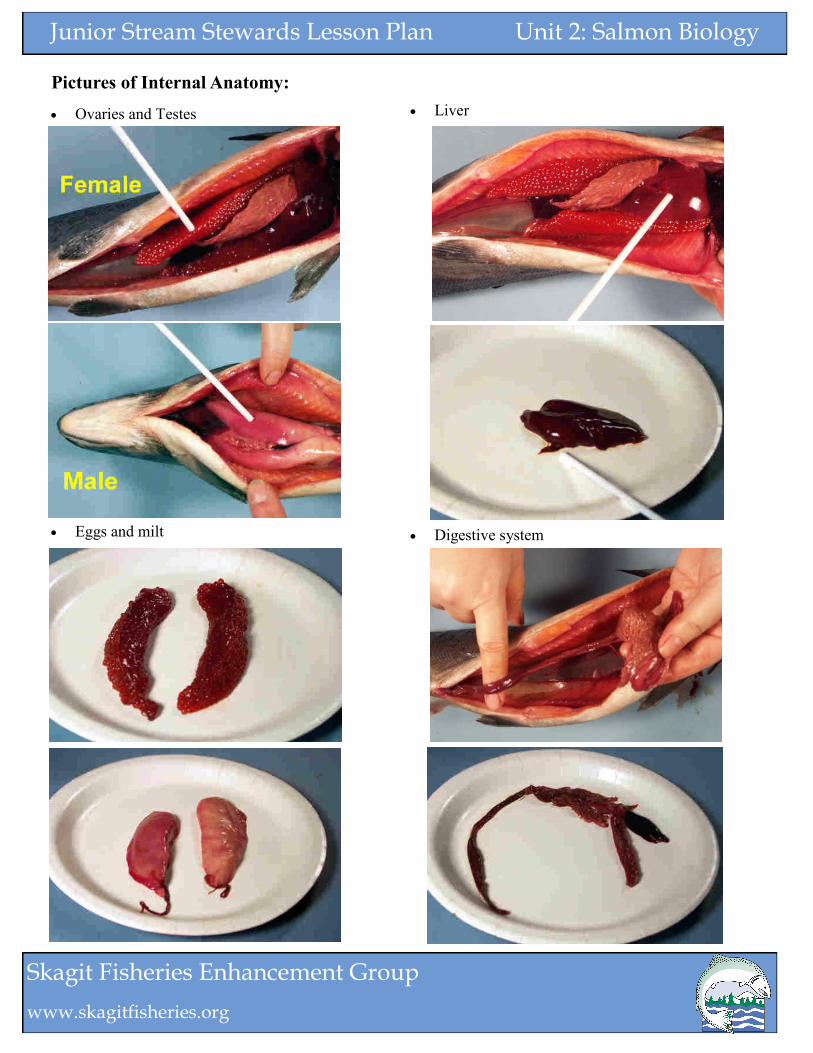
Pictures of Internal Anatomy:
Ovaries and Testes
Eggs and milt
Liver
Digestive system

Junior Stream Stewards Lesson Plan Unit 2: Salmon Biology
Skagit Fisheries Enhancement Group
www.skagitfisheries.org
Pictures of Internal Anatomy Continued:
Stomach
Pyloric Cecea
Spleen
Heart

Junior Stream Stewards Lesson Plan Unit 2: Salmon Biology
Skagit Fisheries Enhancement Group
www.skagitfisheries.org
Pictures of Internal Anatomy Continued:
Swim Bladder
Kidney
Gill rakers and Gills
Eye
Brain

Junior Stream Stewards Lesson Plan Unit 3: Water Quality
Skagit Fisheries Enhancement Group
www.skagitfisheries.org
How is the Water Quality in Your Watershed?
Objective:
By the end of the watershed tour
field trip the students should be
able to determine the quality of the
water at multiple sites while ex-
ploring their local watershed.
Method:
The class(es) will load onto a bus
and go to multiple locations within
the same watershed as their school.
At each site the students will split
into three groups (same groups
each site) and measure the dis-
solved oxygen, temperature, pH,
and turbidity of the water at each
site. They will also assess the habi-
tat by looking for other signs of
good or bad salmon habitat.
Materials:
Bus
Clipboards (one per student)
Pencil (one per student)
Water quality data sheet (one per
student)
Dissolved oxygen test kit
pH test kit
Turbidity test kit
Two thermometers (one Fahren-
heit and one Celsius)
Water scoop
Background:
Traditional testing sites for each
school are listed below:
Bayview– Port of Skagit (three
sites) and Joe Leary Slough
Cascade– Done in class
Conway– Lake Sixteen, Starbird,
and Fisher Creek
Concrete– Multiple sites on Lo-
renzan Creek
Edison– Ennis Creek, Silver
Creek, Friday Creek, and Edison
Slough
The definitions of the characteris-
tics being tested in the water and
why these are important to salmon
and other wildlife, is listed below:
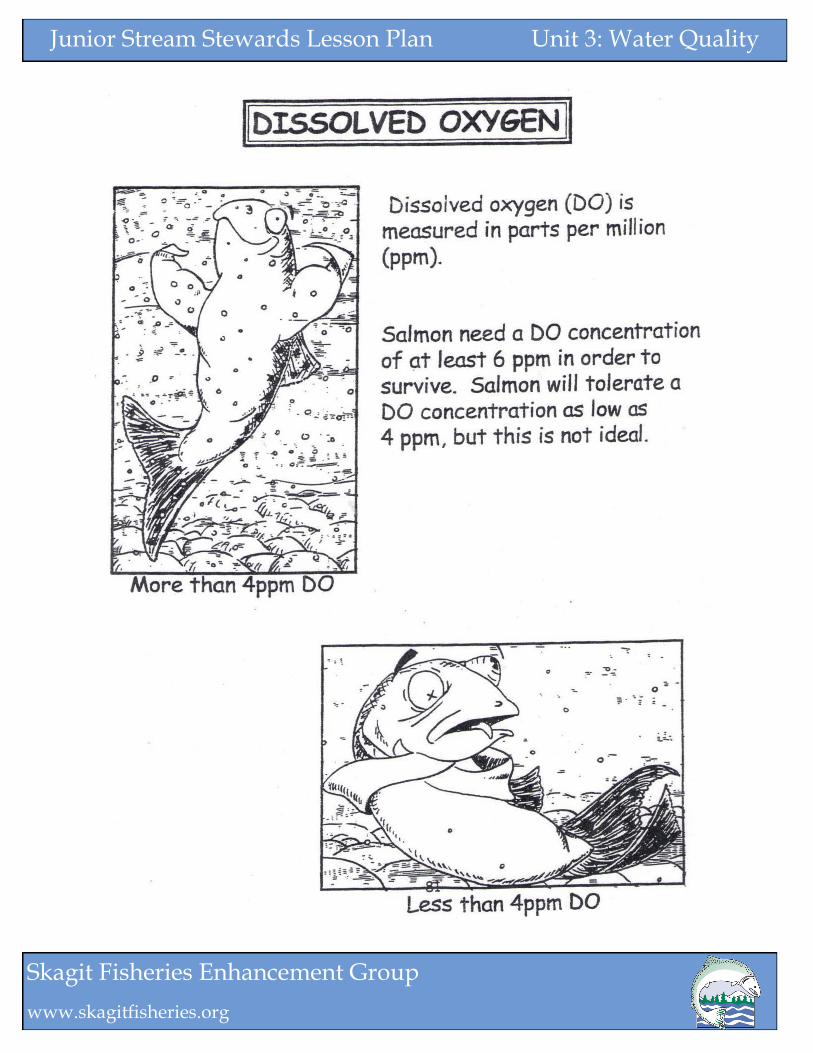
Dissolved oxygen- (DO) refers to
microscopic bubbles of gaseous
oxygen (O2) that are mixed in water
and available to aquatic organisms
for respiration—a critical process
for all organisms that need oxygen
to breathe.
Salmon need at least 6 parts per
million (ppm) DO
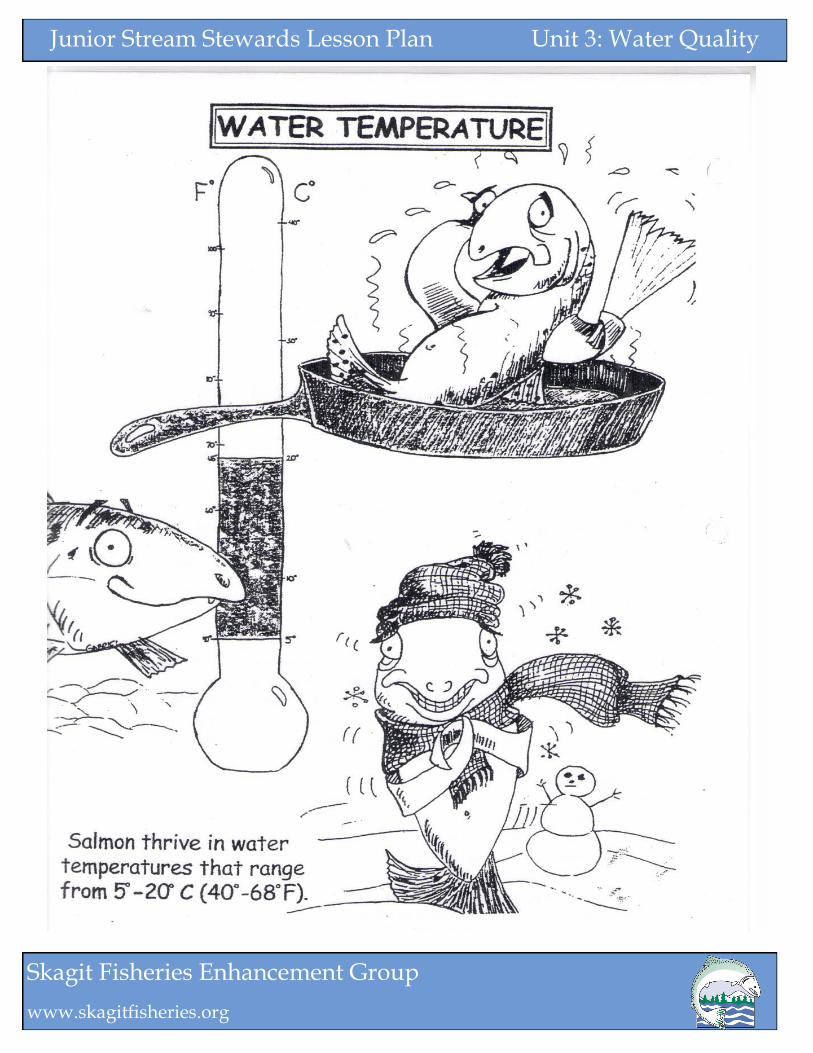
Temperature- the degree or inten-
sity of heat present in a substance
or object, especially as expressed
according to a comparative scale
and shown by a thermometer or
perceived by touch— all organisms
need specific temperature range for
optimal health.
Salmon need between 5-20 de-
grees Celsius/ 40-68 degrees
Fahrenheit.
pH- a figure expressing the acidity
or alkalinity of a solution on a loga-
rithmic scale on which 7 is neutral;
lower values are more acidic, and
higher values more alkaline. Too
low or too high can kill aquatic life
Salmon need a pH between 6.5
-8.2
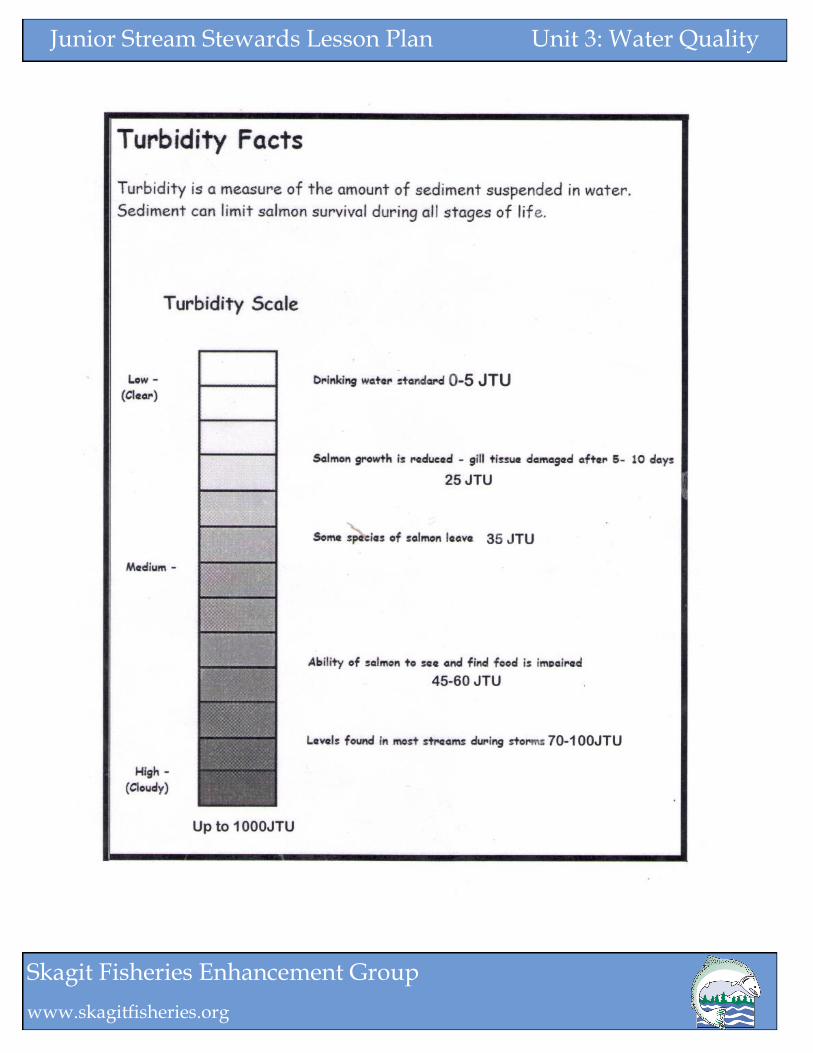
Turbidity- the cloudiness or hazi-
ness of a fluid caused by large
numbers of individual particles that
are generally invisible to the naked
eye, similar to smoke in the air—
Grade Level: 6-8
Subject areas: Science,
Environmental Education
Duration: 1-3 hours
Group size: 20-30 kids
Setting: Outside, multiple sites
Key Terms: Dissolved oxygen,
temperature, pH, turbidity, ppm,
and JTU
Appendices: Dissolved Oxygen,
pH, temperature (Fahrenheit and
Celsius), and turbidity test kits
and visual aids, and JSS journal
Junior Stream Stewards Lesson Plan Unit 3: Water Quality
Skagit Fisheries Enhancement Group
www.skagitfisheries.org
If turbidity is too high fish cannot
see or breathe because particles
are clogging their eyes and gills.
Salmon need less than 25
Jackson Turbidity Units
(JTU)
Preparation:
1. Bus must be reserved ahead of
time by teachers.
2. A permission slip must be sent
home with students and returned
prior to field trip. The parental
permission slip must inform par-
ents and students about appro-
priate weatherproof clothes,
closed-toe shoes, and instruct
them to bring a pencil, a sack
lunch and plenty of drinking wa-
ter.
3. Make sure you have enough
chemicals in each test kit, if not,
order more ahead of time.
4. Make sure you have enough
clipboards, extra pencils, and
data sheets for each student to
have one.
5. Have teacher split the class(es)
into three groups (each group
will be together for the entire
field trip).
Procedure:
1. (Time varies) While still in
classroom, welcome students to
unit 3 and their first field trip,
Watershed Tours and Water
Quality. Have them review what
they learned and observed dur-
ing the previous unit, Salmon
Biology.
2. (Time varies) Have students
gather their things for the field
trip, use restrooms, and load on-
to the bus.
(Travel time varies)
3. (Time varies) Once you arrive
at first location, hand out clip-
board and data sheet as the stu-
dents exit the bus. Once off the
bus have them split into their
three groups. One group will go
with one SFEG volunteer or
staff member to test dissolved
oxygen and temperature, one
group will go with another vol-
unteer or staff member to test
pH, and the last group will go
with the remaining volunteer or
staff member to test turbidity.
These groups will not change
throughout the day.
4. (15- 20 minutes) Volunteers
and staff members follow the
test kit directions and lead each
group. (Directions for each kit
are at the end as well as on lami-
nated sheets with kits)
5. (5-10 minutes) Once chemistry
tests are done at each site, have
students flip to the back side of
their data sheet and complete the
Visual Habitat Assessment.
This involves documenting hab-
itat conditions such as substrate,
water color, and presence/
absence of pollutants, and aquat-
ic plants and animals.
6. (Time varies) Clean test kits,
pack up, and load kids back onto
bus. Repeat tests and habitat as-
sessment at each site until you
arrive back at the school.
7. (Time varies) Once back in the
classroom, have each group
share their results with the class.
Make sure all students write
down results for all tests on data
sheets. Ask the class if the quali-
ty of water is good for salmon or
bad for salmon. Why?
Extra Notes:
For longer trips, one site will in-
clude time for lunch.
Evaluation:
Before the first unit of the JSS
program, a pre-survey is handed
out to each student. On this sur-
vey there are questions pertain-
ing to this unit. There will be a
post–survey handed out to the
students at the end of the JSS
program. This survey will have
the same questions as the pre-
survey. You can see if the stu-
dents retained the information if
the scores of each student in-
crease from the time of the pre-
survey to the post-survey.
Junior Stream Stewards Lesson Plan Unit 3: Water Quality
Skagit Fisheries Enhancement Group
www.skagitfisheries.org
Directions for Dissolved
Oxygen and Temperature:
***When doing this test, wear
safety glasses and latex gloves
when possible. ***
To ensure all students participate,
have a different student do each
step of the test.
1. First put both thermometers in
the body of water being tested
to start the temperature meas-
urement process.
2. Rinse the BOD bottle (round
bottle with glass stopper) with
the sample water before test-
ing.
3. Fill the BOD bottle with sam-
ple water by allowing the sam-
ple water to overflow the bot-
tle for 2-3 seconds. Avoid tur-
bulence and bubbles if possi-
ble in the sample while fill-
ing.
4. Stopper the bottle carefully
(underwater if possible) to
avoid trapping air bubbles. If
bubbles become trapped, dis-
card the sample and repeat the
filling process.
5. Remove the stopper and add
one Dissolved Oxygen 1 Rea-
gent Powder foil pouch and
one Dissolved Oxygen 2 Rea-
gent Powder foil pouch. Use
the nail clippers to open each
pouch if needed. Stopper the
bottle carefully to avoid trap-
ping air bubbles.
6. Invert the bottle several times
until the powders are dis-
solved. Flocculent (floc) pre-
cipitate will form. Brownish-
orange color indicates oxygen
is present.
7. Wait for floc to settle to ap-
proximately half the bottle
volume (below the white line
on the bottle). It may take 4-5
minutes for floc to settle;
while waiting, discuss chemi-
cal reactions students may
have seen or done, such as
Mentos candy in cola, or vine-
gar and baking soda.
8. Invert the bottle again to mix.
9. Wait for floc to settle again.
10. While waiting for floc to set-
tle, grab thermometers to get
temperature reading. Record
findings.
11. Remove the stopper and add
one Dissolved Oxygen 3 Rea-
gent Powder Pillow. Use the
clippers to open the plastic
pillow.
12. Replace bottle stopper and
invert the bottle several times.
The reagent will dissolve, and
the precipitate will look differ-
ent from before. Instead of
cloudy fuzz, it should turn into
rust-colored flakes.
13. Fill small plastic tube com-
pletely full of sample.
14. Add the full plastic measur-
ing tube of sample to the
square bottle.
15. Add Sodium Thiosulfate So-
lution one drop at a time.
Count the drops until the color
changes from yellow to color-
less. Swirl to mix after each
drop.
16. The number of drops needed
to turn the sample completely
clear corresponds with the
amount of dissolved oxygen in
the water sample in parts per
million (ppm).
17. Dump sample water into
chemical bucket or the nearest
sink; rinse all bottles and
tubes. Put empty powder pil-
lows into nearest trash recepta-
cle.
18. Record all data onto data
sheet.
Like us, salmon need oxygen
to breathe, which they absorb
from the water through their
gills. Dissolved oxygen, the
amount of oxygen in water, is
measured in parts per million
(ppm). To be healthy, salmon
need a DO concentration of at
least 6 ppm, though they will
tolerate concentrations as low
as 4 ppm.
Junior Stream Stewards Lesson Plan Unit 3: Water Quality
Skagit Fisheries Enhancement Group
www.skagitfisheries.org
Directions for pH:
1. Fill test tube with sample wa-
ter to the 5 mL line
2. Add 10 drops of reagent
3. Cover with blue lid and mix
for 10 seconds
4. Insert tube and compare. The
number of the closest color
match corresponds with the
pH value
5. Dump water into chemical
bucket or nearest sink; rinse
test tube
6. Record all data collected on
data sheet
pH, literally “parts Hydro-
gen”, is a measure of the con-
centration of Hydrogen ions
in a solution, which deter-
mines if a solution is basic
(like bleach) or acidic (like
lemon juice). Extremes in
either direction on the loga-
rithmic pH scale of 1-14 will
kill aquatic life, as most life
has a narrow pH range in
which it can survive. Most
life can tolerate a range of pH
6.5-8.2. A pH of 7.5 is ideal
for salmon.
Extension:
Have the students test the pH of
bleach, lemon juice, and/or vine-
gar and watch the colors change.
It is fun to add the sample of an
acid straight into the already test-
ed water sample. The color will
change immediately.
Directions for turbidity:
1. Fill one turbidity column
(plastic tube) to the 50 mL
line with sample water.
2. Fill second turbidity column
to 50 mL line with distilled or
tap water.
3. Place the two tubes side by
side on a flat surface. Com-
pare difference in clarity. If
the black dot at the bottom of
the tube is equally clear in
both tubes, the turbidity of
your sample water is zero.
4. If you cannot see the black
dot at all in your creek water
sample, dump both tubes so
the water line is at 25 mL in-
stead of 50mL and continue
test as normal.
If there is a difference in the two
tubes (it will usually be pretty
subtle)…
4. Shake the Standard Turbidity
Reagent (7520) vigorously.
Add 0.5 mL to the distilled
water tube. Stir both tubes
with the stirring rod. Check
visibility of black dot in both
tubes. If the black dot is more
visible in the sample water
than in the distilled water,
continue to add Standard Tur-
bidity Reagent in 0.5 mL in-
crements to the distilled water
tube until both tubes are
equally turbid (meaning the
black dots in both tubes are
equally visible). The number
of times you had to add rea-
gent to make the cloudiness of
the sample and control equal
corresponds to your JTU val-
ue.
5. Record all data collected on
data sheet
Junior Stream Stewards Lesson Plan Unit 3: Water Quality
Skagit Fisheries Enhancement Group
www.skagitfisheries.org
Next Generation Science Standards
MS-LS2-1. Analyze and interpret data to provide evidence for the effects of resource availability on organ-
isms and populations of organisms in an ecosystem.
MS-LS2-4. Construct an argument supported by empirical evidence that changes to physical or biological
components of an ecosystem affect populations.
MS-ESS3-3. Apply scientific principles to design a method for monitoring and minimizing a human impact
on the environment.
Performance Expectations
Analyzing and Interpreting Data
Constructing Explanations and
Designing Solutions
Engaging in Argument from
Evidence
Connections to Nature of Sci-
ence Scientific Knowledge is
Based on Empirical Evidence
LS2.A: Interdependent Rela-
tionships in Ecosystems
ESS3.C: Human Impacts on
Earth Systems
Cause and Effect
Stability and Change
Connections to Engineering,
Technology, and Applications
of Science Influence of Sci-
ence, Engineering, and Tech-
nology on Society and the Nat-
ural World
Disciplinary Core Ideas Science and Engineering Practices Crosscutting Concepts
Other appendices on next pages...
Junior Stream Stewards Lesson Plan Unit 3: Water Quality
Skagit Fisheries Enhancement Group
www.skagitfisheries.org
Junior Stream Stewards Lesson Plan Unit 3: Water Quality
Skagit Fisheries Enhancement Group
www.skagitfisheries.org

Junior Stream Stewards Lesson Plan Unit 3: Water Quality
Skagit Fisheries Enhancement Group
www.skagitfisheries.org
Junior Stream Stewards Lesson Plan Unit 3: Water Quality
Skagit Fisheries Enhancement Group
www.skagitfisheries.org

Junior Stream Stewards Lesson Plan Unit 3: Water Quality
Skagit Fisheries Enhancement Group
www.skagitfisheries.org
Junior Stream Stewards Lesson Plan Unit 3: Water Quality
Skagit Fisheries Enhancement Group
www.skagitfisheries.org
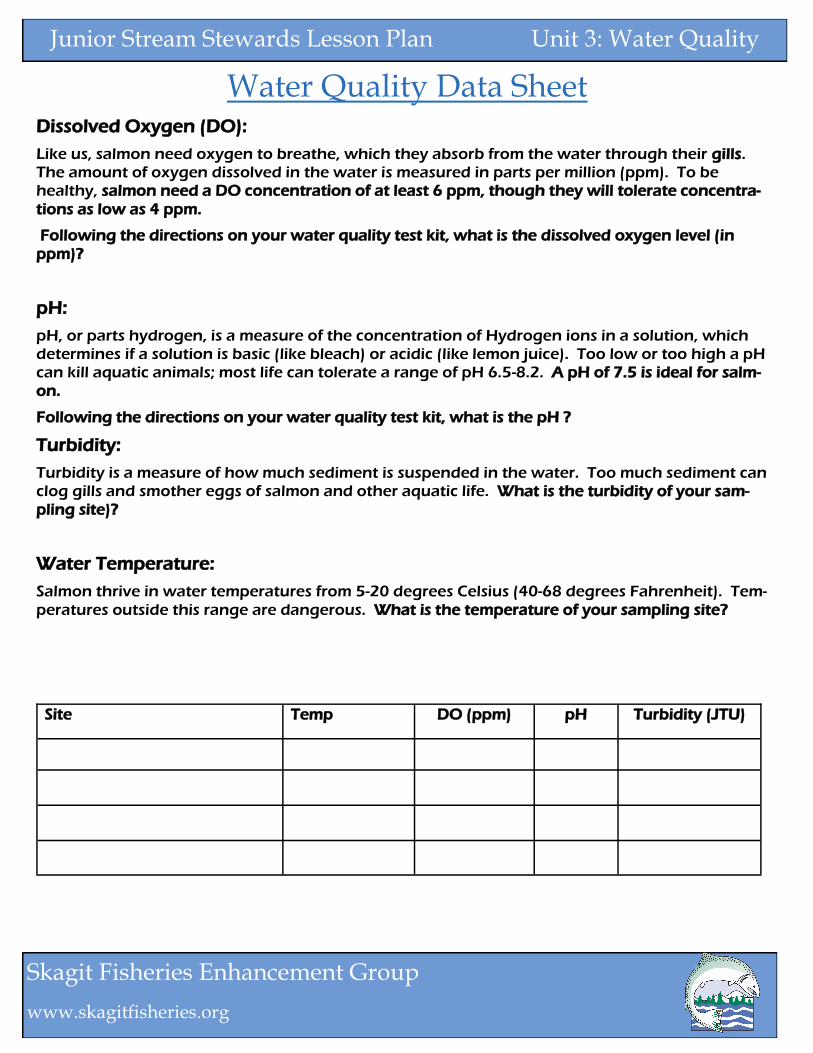
Water Quality Data Sheet Dissolved Oxygen (DO):
Like us, salmon need oxygen to breathe, which they absorb from the water through their gills. The amount of oxygen dissolved in the water is measured in parts per million (ppm). To be healthy, salmon need a DO concentration of at least 6 ppm, though they will tolerate concentra-
tions as low as 4 ppm.
Following the directions on your water quality test kit, what is the dissolved oxygen level (in
ppm)?
pH:
pH, or parts hydrogen, is a measure of the concentration of Hydrogen ions in a solution, which determines if a solution is basic (like bleach) or acidic (like lemon juice). Too low or too high a pH can kill aquatic animals; most life can tolerate a range of pH 6.5-8.2. A pH of 7.5 is ideal for salm-
on.
Following the directions on your water quality test kit, what is the pH ?
Turbidity:
Turbidity is a measure of how much sediment is suspended in the water. Too much sediment can clog gills and smother eggs of salmon and other aquatic life. What is the turbidity of your sam-
pling site)?
Water Temperature:
Salmon thrive in water temperatures from 5-20 degrees Celsius (40-68 degrees Fahrenheit). Tem-
peratures outside this range are dangerous. What is the temperature of your sampling site?
Site Temp DO (ppm) pH Turbidity (JTU)

Junior Stream Stewards Lesson Plan Unit 3: Water Quality
Skagit Fisheries Enhancement Group
www.skagitfisheries.org
Habitat Assessment
Gravel: Salmon need gravel for spawning. By laying their eggs in gravel their young will be pro-
tected from predators and being carried down stream.
What is the nature of the stream bed?
Vegetation: Streamside plants are crucial for salmon. Trees and bushes next to streams provide shade to keep the water cool and places for both adults and juvenile salmon to hide, while their
roots hold the bank together.
What is the vegetation like at the side of the stream at each site?
Pollution: Do you see any signs of pollution at your site (for example, garbage, film on the wa-
ter, etc.)? What is the color of the water? Is it clear? Do you see any aquatic life?
Conclusion: Looking at all the water quality factors, does your site have good enough water
quality and habitat to support salmon? Why/Why not?
Site Gravel size (circle the size that describes the gravel at each site)
silt/mud small (pea-sized) medium (golf ball size) large gravel (fist
size)
silt/mud small (pea-sized) medium (golf ball size) large gravel (fist
size)
silt/mud small (pea-sized) medium (golf ball size) large gravel (fist
size)
Site Vegetation Observations (Are there any plants? Can you name any?)
Site Pollution? Water color? Aquatic life?

Junior Stream Stewards Lesson Plan Unit 4: Salmon Lifecycle
Skagit Fisheries Enhancement Group
www.skagitfisheries.org
What is the Salmon Lifecycle?
Objective:
By the end of this unit, students
should be able to explain the
salmon lifecycle. They should be
able to list elements necessary for
a successful lifecycle and name all
life stages of a salmon.
Method:
Through a presentation via Power-
Point and a hands-on activity the
students will get a multimedia les-
son great for all learning types.
They will also receive either a
salmon lifecycle bracelet or key-
chain as a take home piece.
Materials:
PowerPoint presentation
JSS journal
Pictures of all five species of
Pacific salmon
Keychain rings
Baggie of salmon lifecycle
bracelet/Keychain materials
-stretchy string about 9
inches long
-2 pony beads each of the fol-
lowing colors; black, orange,
red, green, clear and light
blue
-1 pony bead each of the fol-
lowing colors, dark blue and
pink
Background:
Knowledge of the salmon lifecy-
cle is necessary for this lesson.
Salmon start as eggs that the fe-
male lays in a gravel nest called a
redd. Alevin emerge from the sur-
viving eggs. Alevin are very small
fish with an attached yolk sac.
Once they consume all of their
yolk sac, they become fry. Then
they migrate to the estuary and
become smolts. Once they reach
the ocean they grow to their adult
stage and remain at sea for 2-5
years, species dependent. They
return to their original stream
where they were “born”. Then
they change to their to their
spawning colors as they journey to
their home stream. The female
builds her redd, or nest, and lays
her eggs. The male hovers next to
her and sprays his milt over the
eggs, fertilizing them.
There are many factors that are
necessary for a successful salmon
lifecycle. First, the water that they
live in must be made up of the 4
Cs, (clean, cold, clear and con-
sistent). Second, the stream must
have a healthy riparian area.
These trees, shrubs, and other
plants provide necessary shade,
food, and shelter for the salmon.
Third, there must be a healthy
food source for the salmon and
their young to eat. Fourth and last,
there must be appropriate gravel
for salmon to make their redds.
Some other helpful things to know
for this lesson are the five species
of Pacific salmon: Chinook,
chum, coho, sockeye, and pink.
Salmon are anadromous which
means they start life in fresh wa-
ter, mature in salt water and then
reproduce back in fresh water.
Salmon also need good rearing
habitat, a habitat for the young
salmon until they are fully grown,
usually an estuary. There are also
many predators to the salmon in
the river (eagles, bears, other
birds, humans) and the ocean
(whales, seals, other fish, hu-
mans).
Preparation:
1. Before the lesson, prepare the
salmon lifecycle bracelet/
keychain kits. Cut the stretchy
string into 9-inch lengths.
Grade Level: 6-8
Subject areas: Science,
Environmental Education
Duration: 1 hour
Group size: 20-30 kids
Setting: Classroom
Key Terms: Anadromous, ale-
vin, fry, smolt and redd
Appendices: JSS PowerPoint
and JSS journal
Junior Stream Stewards Lesson Plan Unit 4: Salmon Lifecycle
Skagit Fisheries Enhancement Group
www.skagitfisheries.org
1.Continued… Tie a black bead
tightly onto the stretchy string at
one end. Make sure there is about
1.5” on one side of the bead and
then the rest of the string on the
other end of the bead. Place the
string with bead in a Ziploc bag.
Along with the string and the at-
tached bead, place two beads of
each of the following colors, or-
ange, red, green, clear and light
blue. Then place a single bead of
pink, dark blue and one more
black bead in the bag. Now close
the bag and repeat as many times
as needed to have one prepared
bag per student.
2. Before the lesson, prepare Pow-
erPoint and make sure it is in
working order. The day of presen-
tation, make sure PowerPoint
works on classroom computer.
3. Before the start of lesson, prepare
all materials, make sure you have
enough baggies, keychain rings,
and paper handouts.
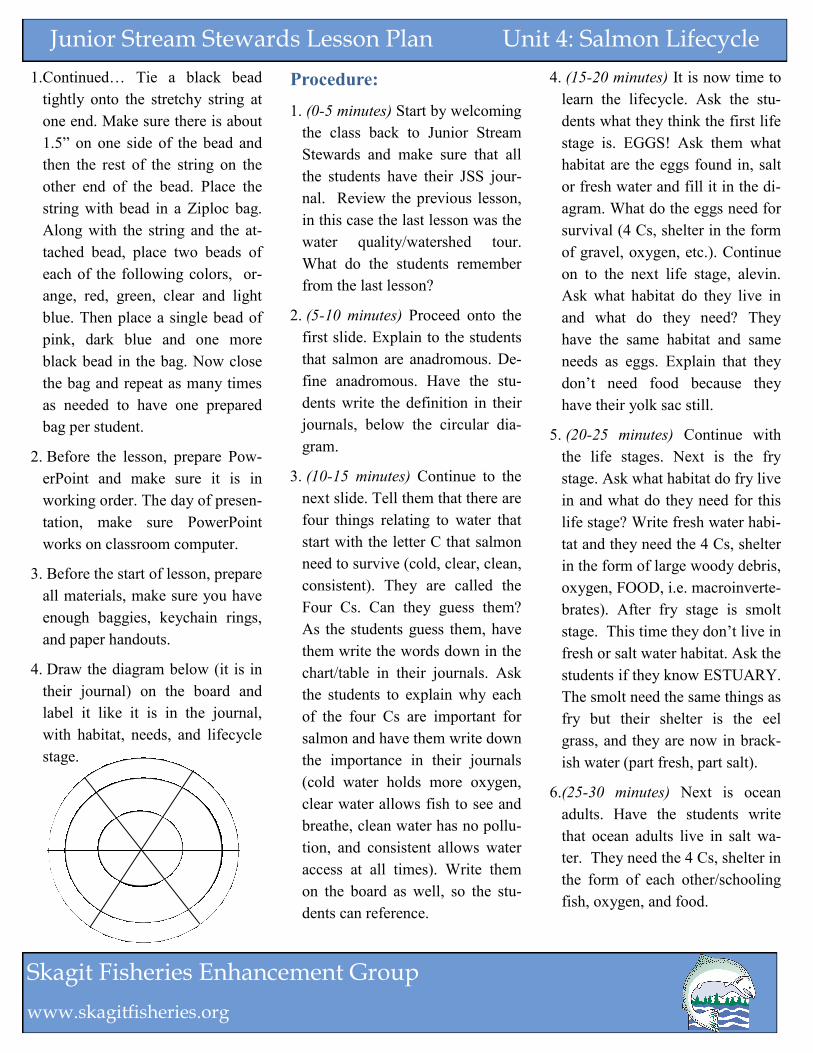
4. Draw the diagram below (it is in
their journal) on the board and
label it like it is in the journal,
with habitat, needs, and lifecycle
stage.
Procedure:
1. (0-5 minutes) Start by welcoming
the class back to Junior Stream
Stewards and make sure that all
the students have their JSS jour-
nal. Review the previous lesson,
in this case the last lesson was the
water quality/watershed tour.
What do the students remember
from the last lesson?
2. (5-10 minutes) Proceed onto the
first slide. Explain to the students
that salmon are anadromous. De-
fine anadromous. Have the stu-
dents write the definition in their
journals, below the circular dia-
gram.
3. (10-15 minutes) Continue to the
next slide. Tell them that there are
four things relating to water that
start with the letter C that salmon
need to survive (cold, clear, clean,
consistent). They are called the
Four Cs. Can they guess them?
As the students guess them, have
them write the words down in the
chart/table in their journals. Ask
the students to explain why each
of the four Cs are important for
salmon and have them write down
the importance in their journals
(cold water holds more oxygen,
clear water allows fish to see and
breathe, clean water has no pollu-
tion, and consistent allows water
access at all times). Write them
on the board as well, so the stu-
dents can reference.
4. (15-20 minutes) It is now time to
learn the lifecycle. Ask the stu-
dents what they think the first life
stage is. EGGS! Ask them what
habitat are the eggs found in, salt
or fresh water and fill it in the di-
agram. What do the eggs need for
survival (4 Cs, shelter in the form
of gravel, oxygen, etc.). Continue
on to the next life stage, alevin.
Ask what habitat do they live in
and what do they need? They
have the same habitat and same
needs as eggs. Explain that they
don’t need food because they
have their yolk sac still.
5. (20-25 minutes) Continue with
the life stages. Next is the fry
stage. Ask what habitat do fry live
in and what do they need for this
life stage? Write fresh water habi-
tat and they need the 4 Cs, shelter
in the form of large woody debris,
oxygen, FOOD, i.e. macroinverte-
brates). After fry stage is smolt
stage. This time they don’t live in
fresh or salt water habitat. Ask the
students if they know ESTUARY.
The smolt need the same things as
fry but their shelter is the eel
grass, and they are now in brack-
ish water (part fresh, part salt).
6.(25-30 minutes) Next is ocean
adults. Have the students write
that ocean adults live in salt wa-
ter. They need the 4 Cs, shelter in
the form of each other/schooling
fish, oxygen, and food.
Junior Stream Stewards Lesson Plan Unit 4: Salmon Lifecycle
Skagit Fisheries Enhancement Group
www.skagitfisheries.org
6 Continued... Their flesh is pink be-
cause of the food they eat in
this life stage such as shrimp
and krill. Also discuss the
predators that salmon have in
the ocean like orcas and hu-
mans.
7. (30-35 minutes) Last life stage,
spawning adults. When the
fish are ready, they return back
to the stream where they
hatched. The fish don’t eat on
their journey back to their
home stream, instead they
spend all of their energy on
reproduction and the formation
of their eggs or milt. If you
refer back to the salmon dis-
section, there wasn't any food
in their stomach. Discuss the
predators on salmon in the riv-
ers, because they are very dif-
ferent than in the ocean. They
include eagles, bears, people,
etc.
8. (35-38 minutes) Conclude the
discussion and prepare to do
the salmon lifecycle bracelets.
Have someone hand out one
life cycle kit (baggie) to each
student.
Salmon Lifecycle Bracelets
9. (38– 40 minutes) Ask the stu-
dents to open their baggies but
don’t pour the contents, they
WILL lose the beads. Also tell
them not to swing their strings
around with beads on it, they
will fly. Ask them what they
think the first black bead rep-
resents. Switch to the first
slide of the activity. It is grav-
el. Confirm with the students
that salmon need the right type
of gravel to make a nest. The
gravel size changes depending
on the species of salmon.
10. (40– 42 minutes) Ask the stu-
dents what they think comes
next. Once they guess tell
them it is red. Pull up red
slide. What do they think that
the red bead represents? It rep-
resents a redd of course, the
nest that the salmon make in
the gravel. The size of the redd
depends on the gravel size and
the species of salmon. Explain
how a female salmon builds a
redd (if you haven't showed
them already).
11. (42– 44 minutes) The next
slide color is orange. What do
the students think this repre-
sents? Orange represents eggs.
The eggs are orange in color
and are deposited in the gravel
that makes the redd.
12. (44– 46 minutes) Next is
green, which stands for...?
Trees and the riparian area.
Trees provide shade which
keeps the water cool and pro-
vides cover from predators.
The trees and plants also pro-
vide leaf litter for bugs to eat,
the bugs that the salmon feed
on. The big branches that
come off the trees also pro-
vides large woody debris
(LWD) in which the salmon
can hide and rest.
13. (46– 48 minutes) Next is the
clear bead. What does it repre-
sent? Cool, clean, clear and
consistent water that the salm-
on need to live. The water
needs to be clear and clean be-
cause the dirt will get stuck in
their gills and impede respira-
tion. The water must also be
cold so there is more dissolved
oxygen that the salmon need to
breathe.
14. (48– 50 minutes) Next is the
light blue bead and slide: Es-
tuary habitat. Does anyone in
the class know what an estu-
ary is? Estuaries provide rear-
ing habitat where the salmon
can transition from fresh wa-
ter to salt water or visa versa.
When estuaries are healthy
they provide lots of food and
shelter for salmon too.
15. (50– 52 minutes) Next is dark
blue, only one in the bag. It is
the ocean stage. In this phase
of their lives they spend a lot
of time eating, but they are
also food for many predators.
Junior Stream Stewards Lesson Plan Unit 4: Salmon Lifecycle
Skagit Fisheries Enhancement Group
www.skagitfisheries.org
16. (52– 54 minutes) Next is the
single pink bead, represent-
ing the food that the salmon
get in the ocean. It is their
main food source for their
ocean phase. They generally
eat shrimp, krill, and small
fish. This also gives salmon
meat its pink color, like fla-
mingos!
17. (54– 56 minutes) Now ask
the class if they know what
happens now. What happens
to the salmon when they are
at the ocean phase of their
life? They go back. So the
beads and the PowerPoint
slides now go in reverse or-
der because that is what hap-
pens in the lifecycle. Re-
verse order until the green
bead at least. The salmon
cannot have eggs or redds
without gravel, so black is
next. Then they can’t have
eggs without their redd, so
the red is next. Followed
lastly by the orange bead.
That’s it.
18. (56– 60 minutes) Now you,
the teacher, or any adult
helpers can help the students
tie their bracelets or key-
chains so they don’t fall
apart. Also this is the time to
clean up and finish activity.
Extension:
If time allows, go into more de-
tail about the five species of Pa-
cific salmon, including ways to
remember the names. There is
so much information out there!
Evaluation:
Before the first unit of the JSS
program, a pre-survey is handed
out to each student. On this sur-
vey there are questions retaining
to this unit. There will be a post–
survey handed out to the stu-
dents at the end of the JSS pro-
gram. This survey will have the
same questions as the pre-
survey. You can see if the stu-
dents retained the information if
the scores of each student in-
crease from the time of the pre-
survey to the post-survey.
Junior Stream Stewards Lesson Plan Unit 4: Salmon Lifecycle
Skagit Fisheries Enhancement Group
www.skagitfisheries.org
Disciplinary Core Ideas Science and Engineering Practices Crosscutting Concepts
Next Generation Science Standards
Performance Expectations
MS-LS4-4. Construct an explanation based on evidence that describes how genetic variations of traits in a
population increase some individuals’ probability of surviving and reproducing in a specific environment.
MS-LS1-5. Construct a scientific explanation based on evidence for how environmental and genetic factors
influence the growth of organisms.
MS-ESS3-3. Apply scientific principles to design a method for monitoring and minimizing a human impact
on the environment.
Obtaining, Evaluating, and
Communicating Information
Asking Questions and Defining
Problems
LS4.B: Natural Selection
ESS3.C: Human Impacts on
Earth Systems
Cause and Effect
Stability and Change
Connections to Engineering,
Technology, and Applications
of Science Influence of Sci-
ence, Engineering, and Tech-
nology on Society and the Nat-
ural World
Junior Stream Stewards Lesson Plan Unit 5: Riparian Zones
Skagit Fisheries Enhancement Group
www.skagitfisheries.org
What is a Healthy Riparian Zone?
Objectives:
Students will be able to explain
what a riparian forest is, why they
are important to salmon, and how
these forests become and remain
healthy.
Method:
Through a PowerPoint presenta-
tion and activity the students will
gain a greater understanding of
riparian zones.
Materials:
PowerPoint presentation
Markers, paper
Background:
A riparian zone is the area of
land that borders a body of water.
A forested area that is adjacent to
a body of water is a riparian for-
est.
These forested areas are extreme-
ly important to the health of these
bodies of water. For streams and
salmon specifically, trees and
shrubs shade the stream, keeping
the water cool; the roots stabilize
the soil, reducing erosion and
keeping the water clearer; the
roots filter pollutants and other
chemicals to keep the stream
clean; the leaves fall off of the
plants and provide food for ma-
croinvertebrates, and last but not
least these trees and shrubs even-
tually die or fall creating large
woody debris in the water that
provides cover for fish.
Dense, diverse forests make
healthy riparian zones. Dense for-
ests can shade out nonnative
plants and prevent invasive spe-
cies takeover, and diversity allows
many native plants and animals to
thrive there. These native plants
are plants that are indigenous to
our forests, provide habitat, and
create balance in the riparian
zone.
There are two types of trees that
live in the riparian zone, ever-
green and deciduous. Evergreens
keep their leaves throughout the
year. Deciduous trees lose their
leaves during the fall and winter
months and grow new ones in
spring and summer. Some native
evergreen trees that you can see in
our riparian zones are Douglas fir,
Sitka spruce, and Western redce-
dar. Some examples of deciduous
are big leaf maple and red alder.
There are also many native shrubs
in riparian zones. Shrubs are de-
fined as woody plants somewhat
smaller than trees. Some native
shrubs are ninebark, salmonberry,
snowberry, and spirea.
Along with our native plants are
invasive plants. An invasive plant
is a plant that is originally from
someplace else, was brought to
our forest, and then TAKES
OVER the forest, making it diffi-
cult for native plants to grow.
Some examples of invasives in
our area are Himalayan blackber-
ry, English ivy, and Japanese
knotweed.
What can we do to help keep our
riparian zones healthy? We can
plant native trees and shrubs cre-
ating dense and diverse ecosys-
tems, remove invasive species,
and build barriers to keep cattle
our of our streams and..?
Grade Level: 6-8
Subject areas: Science,
Environmental Education
Duration: 1 hour
Group size: 20-30 kids
Setting: Classroom
Key Terms: Riparian area/
forest/zone, conifer, deciduous,
shrub, invasive, native
Appendices: Attached Pow-
erPoint presentation , plant cheat
sheets, and JSS journal
Junior Stream Stewards Lesson Plan Unit 5: Riparian Zones
Skagit Fisheries Enhancement Group
www.skagitfisheries.org
Procedure:
Presentation
1. (0– 3 minutes) Review last unit.
Ask the class to go over the
salmon life cycle, define anad-
romous, explain the 4 Cs, go
over some things salmon need
to live, and ask any other ques-
tions relating to unit 4 Salmon
Lifecycle.
2. (3– 6 minutes) Start with the
first slide in the PowerPoint.
Ask the class to define a Ripari-
an Forest. Have the students
take a few guesses and lead
them in the right direction. Then
define. Ask them what bodies of
water they have been to and re-
late what they say by telling
them all of those bodies of wa-
ter have riparian zones. Make
sure they write the definition of
a riparian forest in their jour-
nals.
3. (6– 10 minutes) Ask the class,
“Why are we talking about
plants? How are these riparian
zones important? What do they
have to do with salmon?”
4. (10– 15 minutes) Next Power-
Point slide. Click the slide one
by one and discuss the four
main ways native plants help
salmon. Make sure they write
down two of the four.
A. Trees provide shade
which cools the water and
creates cover from preda-
tors.
B. Logs and branches fall
into the water creating
shelter and slow moving
water for fish to rest.
C. Many macroinverte-
brates eat fallen leaves;
macroinvertebrates are
food for salmon.
D. Plant roots stabilize the
soil and filter pollutants
from the water.
6. (15– 20 minutes) Continue to
the next slide. Explain to the
class that a healthy riparian area
doesn't just help salmon, it helps
all organisms that live and use
the riparian zone. Explain that
healthy riparian forests are
dense and diverse. Ideas on oth-
er species?
7. (20– 27 minutes) Go through
the next five slides one by one.
Tell the class that you are all
going to identify a few plants in
a riparian forest. Explain the
difference between deciduous
and conifer trees and have them
write one example of each in
their journal. Also explain what
a shrub is and have them write
an example.
8. (27– 32 minutes) Continue to
the next slide. Now let’s talk
about invasive species. Ask the
class if anyone knows what an
invasive species is. If not ex-
plain to them and give them
some examples which are listed
in the few slides. Again make
sure they write the definition
down.
9. (32– 35 minutes) Now it is time
to go over some things we all
can do to keep our riparian for-
ests healthy. Have the class try
to name a few things they can
do and add on to what they say.
They must write down two ways
in their journals.
10. (35-38 minutes) Now, discuss
with the class what they are go-
ing to do next month with
SFEG. They will be doing one
of the things discussed to help
keep and make the forests
healthy. Go over proper attire
and what to bring, and what to
expect on the field trip. We go
rain or shine!!
Junior Stream Stewards Lesson Plan Unit 5: Riparian Zones
Skagit Fisheries Enhancement Group
www.skagitfisheries.org
Activity
11. (38-42 minutes) Now it is
time for the activity. The stu-
dents can be in groups or they
can be solo, its up to them and
the teacher.
12. (42– 45 minutes) Hand out the
directions to each group. They
will now become planners. A
landowner has asked them to
plan an appropriate riparian
forest on their property. They
are given $500 to plant the as-
sorted trees and shrubs in an
appropriate way according to
the rules. They are also given a
cheat sheet to the types of
plants they can use and what
levels of sun and moisture
these plants prefer.
13. (45-55 minutes) For the rest of
the time have the students plant
their riparian forest.
Extension:
If you finish early, have the stu-
dents share their planting plan
with the class. Why did they
choose those trees and shrubs?
Why did they choose to place
the plants in those areas?
Evaluation:
Before the first unit of the JSS
program, a pre-survey is hand-
ed out to each student. On this
survey there are questions re-
taining to this unit. There will
be a post–survey handed out to
the students at the end of the
JSS program. This survey will
have the same questions as the
pre-survey. You can see if the
students retained the infor-
mation if the scores of each
student increase from the time
of the pre-survey to the post-
survey.
Junior Stream Stewards Lesson Plan Unit 5: Riparian Zones
Skagit Fisheries Enhancement Group
www.skagitfisheries.org
MS-LS1-4. Use argument based on empirical evidence and scientific reasoning to support an explanation for
how characteristic animal behaviors and specialized plant structures affect the probability of successful repro-
duction of animals and plants respectively.
MS-LS2-1. Analyze and interpret data to provide evidence for the effects of resource availability on organ-
isms and populations of organisms in an ecosystem.
MS-LS2-5. Evaluate competing design solutions for maintaining biodiversity and ecosystem services.
MS-ESS3-3. Apply scientific principles to design a method for monitoring and minimizing a human impact
on the environment.
Performance Expectations
Analyzing and Interpreting Data
Engaging in Argument from
Evidence
Asking Questions and Defining
Problems
Constructing Explanations and
Designing Solutions
LS1.B: Growth and Develop-
ment of Organisms
LS2.A: Interdependent Rela-
tionships in Ecosystems
LS2.C: Ecosystem Dynamics,
Functioning, and Resilience
LS4.D: Biodiversity and Hu-
mans
ETS1.B: Developing Possible
Solutions
ESS3.C: Human Impacts on
Earth Systems
Cause and Effect
Stability and Change
Connections to Engineering,
Technology, and Applications
of Science Influence of Sci-
ence, Engineering, and Tech-
nology on Society and the Nat-
ural World
Connections to Nature of Sci-
ence, Science Addresses Ques-
tions About the Natural and
Material World
Disciplinary Core Ideas Science and Engineering Practices Crosscutting Concepts
Next Generation Science Standards
Junior Stream Stewards Lesson Plan Unit 6: Stewardship
Skagit Fisheries Enhancement Group
www.skagitfisheries.org
How did you Improve your Watershed?
Objectives:
By the end of the fieldtrip the stu-
dents should give examples of
land stewardship and feel like
they have successfully accom-
plished one form of stewardship.
Method:
Students will go to a riparian area
and help restore it in some way
depending on what is needed at
available sites; usually planting or
invasive species removal.
Materials:
Tools (Shovels, hand pruners,
loppers, dibble bars)
Gloves (one pair per student)
Boots (one pair per student)
Porta Potty, if needed
Background:
The background may vary de-
pending on the site.
Some safety that always applies:
Shovels– never place shovel
with blade up, if someone steps
on the blade the handle could
fly up and hit the person. Never
drag the shovel or push the
shovel into hard ground for
storage, this dulls the blade.
Never carry a shovel with the
blade over your shoulder; you
may accidentally hit someone
in the face.
Hand pruners and loppers– Al-
ways watch what you are cut-
ting, so you don’t cut some-
thing accidentally. When walk-
ing, never running, they need to
be in the locked position at
your side. They should never be
raised above your shoulders.
Dibble bars– Walk with these,
never run. They are not pogo
sticks, when in use, one foot
must remain on the ground at
all times. Always be aware of
where you set these, they are
heavy and could break toes if
dropped.
Preparation:
1. Before the day of the fieldtrip
go to the site and examine. See
what exactly the class will be
doing and where they will be
doing it.
2. Call volunteers to help with the
project. Make sure you have at
least 2 other volunteers.
Procedure:
1. (Time varies) Arrive at stew-
ardship site early. Meet volun-
teers and go over the agenda for
the day.
2. (Time varies) Prepare the site if
needed. (i.e. place plants, get
out tools, organize gloves,
boots, etc.)
3. (Time varies) When bus arrives
to site, go onto the bus and wel-
come the students to the site
and review what they did last
time you saw them during the
riparian unit. Connect what
they are doing at the site with
the riparian unit concepts,
whether that be planting native
plants or removing invasive
species. Then unload the stu-
dents from the bus.
4. (Time varies) Gather the stu-
dents in a circle and introduce
the students to the site and to
any new volunteers. Explain
what you all are going to do
and how that will positively
affect the riparian zone.
5. (Time varies) Divide students
into groups (the number of
groups will vary depending on
how many volunteers and staff
you have to lead them.
Grade Level: 6-8
Subject areas: Science,
Environmental Education
Duration: 2+ Hours
Group size: 20-30 kids
Setting: In the Field
Key Terms: Stewardship
Appendices: None
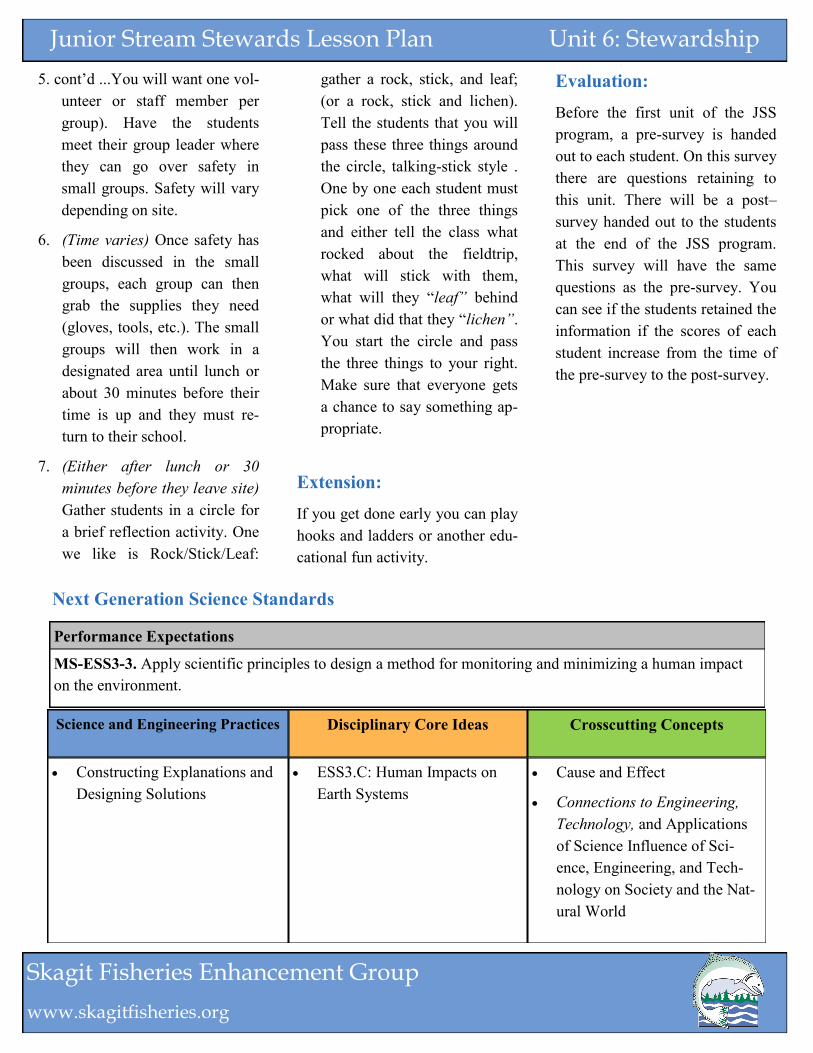
Junior Stream Stewards Lesson Plan Unit 6: Stewardship
Skagit Fisheries Enhancement Group
www.skagitfisheries.org
5. cont’d ...You will want one vol-
unteer or staff member per
group). Have the students
meet their group leader where
they can go over safety in
small groups. Safety will vary
depending on site.
6. (Time varies) Once safety has
been discussed in the small
groups, each group can then
grab the supplies they need
(gloves, tools, etc.). The small
groups will then work in a
designated area until lunch or
about 30 minutes before their
time is up and they must re-
turn to their school.
7. (Either after lunch or 30
minutes before they leave site)
Gather students in a circle for
a brief reflection activity. One
we like is Rock/Stick/Leaf:
gather a rock, stick, and leaf;
(or a rock, stick and lichen).
Tell the students that you will
pass these three things around
the circle, talking-stick style .
One by one each student must
pick one of the three things
and either tell the class what
rocked about the fieldtrip,
what will stick with them,
what will they “leaf” behind
or what did that they “lichen”.
You start the circle and pass
the three things to your right.
Make sure that everyone gets
a chance to say something ap-
propriate.
Extension:
If you get done early you can play
hooks and ladders or another edu-
cational fun activity.
Evaluation:
Before the first unit of the JSS
program, a pre-survey is handed
out to each student. On this survey
there are questions retaining to
this unit. There will be a post–
survey handed out to the students
at the end of the JSS program.
This survey will have the same
questions as the pre-survey. You
can see if the students retained the
information if the scores of each
student increase from the time of
the pre-survey to the post-survey.
Next Generation Science Standards
MS-ESS3-3. Apply scientific principles to design a method for monitoring and minimizing a human impact
on the environment.
Performance Expectations
Constructing Explanations and
Designing Solutions
ESS3.C: Human Impacts on
Earth Systems
Cause and Effect
Connections to Engineering,
Technology, and Applications
of Science Influence of Sci-
ence, Engineering, and Tech-
nology on Society and the Nat-
ural World
Disciplinary Core Ideas Science and Engineering Practices Crosscutting Concepts
Junior Stream Stewards Lesson Plan Unit 7: Salmon Species
Skagit Fisheries Enhancement Group
www.skagitfisheries.org
How are the 5 Pacific Salmon Species Different?
Objectives:
By the end of the unit students will
be able to name the five species
of Pacific salmon. They will be
able to tell you how these species
are similar and different and be
able to name human and natural
factors that positively and/or neg-
atively effect salmon.
Method:
Students will play a board game
where they become one of the
five species of salmon. They
must try to spawn even though
they have many obstacles.
Materials:
Salmon Game board
Salmon Game pieces and cards
Dice
Rules
Background:
Before you lead and play the game
it is good to know the five spe-
cies of Pacific Salmon. Chinook/
King, coho/silver, chum/dog,
sockeye/red, and pink/humpy.
You will also need to know the
rules, which are as follows:
Goal of the game: Migrate from
the Salish Sea (START) to the
spawning grounds in one of the
tributaries of the Skagit or Sam-
ish rivers. Only certain species of
salmon can spawn in certain trib-
utaries, just like in the real Skagit
and Samish Rivers. The winner is
the first player to successfully
spawn.
Colors on the bottom of the play-
ing piece correspond to the colors
on the tributaries. They want to
make it to one of the tributaries
whose spawning grounds match
the color of their game piece.
Roll both dice, move your game
piece the amount on the dice,
then draw a Fishy Scenario card.
Whatever is stated on the card
now affects some or all of the
players.
Pink salmon only roll every other
turn. This may seem like a disad-
vantage, but they are NOT affect-
ed by Fishy Scenario cards dur-
ing their unrolled turn.
If the card says watershed (it is
underlined), it refers to both the
main stem of the river (Skagit or
Samish) and all the tributaries on
that river.
If you are not in a tributary
(Friday Creek, Day Creek, Sauk
River, or Cascade River) you are
in the main stem of either the
Skagit or Samish River.
If you draw a card that cuts your
roll in half and you roll an odd
number, round up (example if
you roll a seven, move 4 spaces).
If you draw a card that says to
place a dam or culvert, place a
dam or culvert piece on that
space.
If the card tells you to roll 11 or
12 times, only roll 1 di.
There is a card with a blank on it
(____). This will be an estimated
space where their school would
be on the board. Have them try to
guess why the space is that spe-
cific space.
If you get cut off by a dam, or
draw a card that says you must
find a new place to spawn, you
must retrace your way back to the
Salish Sea and go back up the
other river or a different tributary.
Grade Level: 6-8
Subject areas: Science,
Environmental Education
Duration: 1 hour +/-
Group size: 20-30 kids
Setting: Classroom
Key Terms: Chinook/King, co-
ho/silver, chum/dog, sockeye/
red, pink/humpy
Appendices: Salmon board
game and rules

Junior Stream Stewards Lesson Plan Unit 7: Salmon Species
Skagit Fisheries Enhancement Group
www.skagitfisheries.org
Preparation:
1. Make sure you have all the
pieces of the game. There
should be enough games for
each class (5 students per
game).
Procedure:
1. (0- 5 minutes) Review steward-
ship fieldtrip.
2. (5– 7 minutes) List the 5 spe-
cies of Pacific salmon and ex-
plain that this lesson goes into
how humans impact them indi-
vidually. However, they are go-
ing to learn this in a unique way.
They are going to play a board
game.
3. (7– 15 minutes) Let the students
know that before we start the
game, we should go over the 5
species. Go over the 5 finger
remembering trick (Thumb-
chum/dog- they rhyme, pointer
finger-Sockeye/red– sock your-
self in the eye your eye turns
red, Middle finger– Chinook/
King– Largest salmon is the
largest finger, Ring finger– Sil-
ver/coho– You put a silver ring
on your ring finger, Pinkie fin-
ger– Pink/humpy– They sound
the same).
4. (15– 18 minutes) Now we will
play the game. Tell the students
that they can pick their own
groups but they must be strate-
gic. If they are not on task their
groups will be rearranged. Have
the students get into groups of 5,
(fewer is ok, but not more). You
want as many groups of 5 as
possible.
5. (18– 25 Minutes) Explain the
rules of the game that are listed.
Go over every rule with the
class as a whole, one by one.
6. (25– 50 minutes) Now let the
class play the game. Observe
how the game is going, and an-
swer questions as they come up.
7. (50– 60 minutes) Now gather
the students back together as a
whole group. Ask them what
they thought of the game. Ask
them some questions. What hu-
man impacts are there on salm-
on? What natural impacts are
there on salmon? What are some
differences you noticed between
the species? Do they spawn in
the same places or different
places? Are they the same? How
are they different?
Extension:
If you get done early you can play
the game for longer by having
the students switch the species
of fish they are after someone
wins/spawns.
Evaluation:
Before the first unit of the JSS
program, a pre-survey is handed
out to each student. On this sur-
vey there are questions retaining
to this unit. There will be a post
–survey handed out to the stu-
dents at the end of the JSS pro-
gram. This survey will have the
same questions as the pre-
survey. You can see if the stu-
dents retained the information if
the scores of each student in-
crease from the time of the pre-
survey to the post-survey.
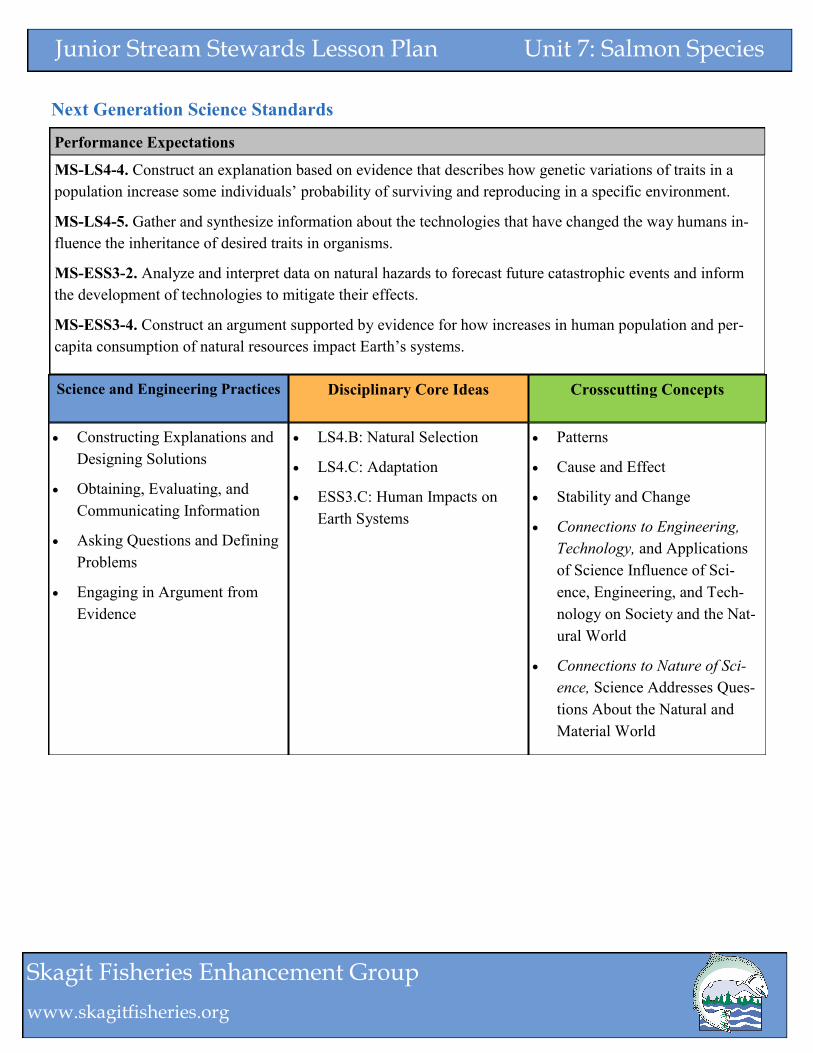
Junior Stream Stewards Lesson Plan Unit 7: Salmon Species
Skagit Fisheries Enhancement Group
www.skagitfisheries.org
MS-LS4-4. Construct an explanation based on evidence that describes how genetic variations of traits in a
population increase some individuals’ probability of surviving and reproducing in a specific environment.
MS-LS4-5. Gather and synthesize information about the technologies that have changed the way humans in-
fluence the inheritance of desired traits in organisms.
MS-ESS3-2. Analyze and interpret data on natural hazards to forecast future catastrophic events and inform
the development of technologies to mitigate their effects.
MS-ESS3-4. Construct an argument supported by evidence for how increases in human population and per-
capita consumption of natural resources impact Earth’s systems.
Performance Expectations
Constructing Explanations and
Designing Solutions
Obtaining, Evaluating, and
Communicating Information
Asking Questions and Defining
Problems
Engaging in Argument from
Evidence
LS4.B: Natural Selection
LS4.C: Adaptation
ESS3.C: Human Impacts on
Earth Systems
Patterns
Cause and Effect
Stability and Change
Connections to Engineering,
Technology, and Applications
of Science Influence of Sci-
ence, Engineering, and Tech-
nology on Society and the Nat-
ural World
Connections to Nature of Sci-
ence, Science Addresses Ques-
tions About the Natural and
Material World
Disciplinary Core Ideas Science and Engineering Practices Crosscutting Concepts
Next Generation Science Standards

Junior Stream Stewards Lesson Plan Unit 8: Macroinvertebrates
Skagit Fisheries Enhancement Group
www.skagitfisheries.org
What do Macroinvertebrates Tell us about our Streams?
Objectives:
Students will be able to define and
identify macroinvertebrates and
they will be able to categorize
stream heath based on the macroin-
vertebrates they see.
Method:
Students will watch a short Power-
Point and then identify live ma-
croinvertebrates in their classroom.
Materials:
PowerPoint presentation
Tupperware/tubs
Bucket (s)
Macroinvertebrate posters
Macroinvertebrates
Background:
A macroinvertebrate is an organ-
ism that is large enough to be seen
with a naked eye and has no back-
bone. In streams these are mostly
insects that have an exoskeleton
and go through a lifecycle called
metamorphosis.
There are two types of metamor-
phosis, complete and incomplete.
Complete metamorphosis has four
life stages (egg, larva, pupa, and
adult) while incomplete has three
stages (egg, nymph, and adult).
During the fry stage of a salmon’s
lifecycle they eat macroinverte-
brates. Macroinvertebrates eat leaf
litter provided by the nearby vege-
tation, algae on the rocks, or each
other.
There are many types of macroin-
vertebrates in and near our streams
including mayflies, stoneflies, cad-
disflies, dobsonflies, planarians,
damselflies, aquatic worms, etc.
Different types of macros tell us
different things about the quality of
water in our streams. There are
three groups of macroinvertebrates.
Group one contains macros that
cannot tolerate pollution. If you
find macros in this group in your
stream that means your stream has
good water quality. Group two
contains macros that can tolerate
some water pollution. Macros in
this group indicate moderate
stream water quality. Group three
macros are much more tolerant of
poor water quality. Just because
you have macros from group three
doesn't mean that the quality is
poor unless there is a predomi-
nance of group three. The abun-
dance of the macros from each
groups give you the quality of
stream water. Macros are indicator
species that directly tell us the
health of a stream.
Preparation:
1. At least an hour before the
class starts, go to a stream near
the school and collect macroin-
vertebrates.
2. Go to the streambank, with rain
boots on, lift rocks and look on
the bottom of the rocks. You
will see the macros moving.
You can also lift a rock and
swish it around in the bucket of
water. This will help you loos-
en the macros grip on the
rocks. Put all the collected
macros in a bucket and take to
the class.
3. Once you get to the classroom,
put a few macroinvertebrates in
tubs. Make sure that each tub
has a diversity of macroinverte-
brates so the students can see
the many types of macros we
have here. There should be
about 6-8 tubs of macros total.
4. Last, set up the PowerPoint.
Grade Level: 6-8
Subject areas: Science,
Environmental Education
Duration: 1 hour
Group size: 20-30 kids
Setting: Classroom
Key Terms: Macroinvertebrate,
dominance, and indicator species
Appendices: Attached Pow-
erPoint presentation , macro
posters, and JSS journal
Junior Stream Stewards Lesson Plan Unit 8: Macroinvertebrates
Skagit Fisheries Enhancement Group
www.skagitfisheries.org
Procedure:
1. (0– 5 minutes) Review the last
unit and the salmon game. Re-
view the 5 Pacific salmon spe-
cies/ hand remembering trick.
Also ask them to name one hu-
man and/or natural impact on
salmon.
2. (5– 10 minutes) Intro: Ask them
to try to define what a macroin-
vertebrate is. Pull the word
apart. What does macro– mean?
What about invertebrate? Macro
– means “large” it sounds like
micro– but micro means
“small”. Tell them we aren’t
looking at huge bugs the size of
elephants right?! Let them know
size is relative. Macroinverte-
brates are just large enough to
be seen with your naked eye. A
vertebrate is an organism with a
backbone, so an invertebrate is
an organism without a back-
bone. Have them come up with
some examples of vertebrates
and invertebrates. Have them
write in their JSS journals that a
macroinvertebrate is an organ-
ism with no backbone that is
large enough to be seen with the
naked eye. Ask them, “why are
these macros important? Why
are we, fish people, teaching
about bugs?” Tell them its be-
cause these bugs are the main
food source for the salmon be-
fore they migrate to salt water.
3. (10– 13 minutes) Move onto the
next slide. Let them know that
most of the macros that we are
going to look at today go
through a process known as
metamorphosis. Ask them to
give an example of an organism
that goes through this process
(i.e. caterpillar). Pull out the
metamorphosis poster and ex-
plain to the class the two types
of metamorphosis: complete and
incomplete.
4. (13– 22 minutes) Now let’s go
over some of the macros we will
see. The next three slides give
examples. Go over mayfly,
stonefly, and caddisfly with the
class and explain the differences
between them. Stoneflies have
gills that look like little hairs,
emerging from the joints in the
body segments, and where legs
join the body. Sometimes we
see them appear to be doing
push-ups, whereas mayflies
have their gills on their abdo-
mens, and resemble feathers
along their sides. Most caddisfly
larvae we catch have casings
made out of silk and materials
from the stream (pebbles, fir
needles, etc.). Some artists use
caddisflies to create gold and
gem jewelry. Make sure they
write two macros in their jour-
nals. Can students think of
more?
5. (22– 27 minutes) Move to the
next slide. Have the class look
at the picture provided. Does
this stream look like good salm-
on habitat or bad salmon habi-
tat? Why?. Explain it is good
habitat because it has the 4Cs,
gravel, and lots of vegetation. It
is important to note that because
it is good habitat for salmon, it
is good habitat for macroinver-
tebrates too. It is a predator and
prey relationship, and they need
the same things to survive.
6. (27– 30 minutes) Explain what
an indicator species is. It is a
species whose presence or ab-
sence tells us about the health of
the ecosystem. Macros are a bi-
ological indicator of the health
of our streams. They are
grouped into three groups. Pull
out the macroinvertebrate index
poster (looks similar to the one
in their journals). Go over the
three groups with the class.
7. (30– 50 minutes) Explain what
the students need to do in the
next 20 minutes. Have the stu-
dents draw and identify two ma-
croinvertebrates and circle all
the ones they see on their ma-
croinvertebrate index. Pass out
the tubs with macros, one tub to
each group of students (the stu-
dents are usually grouped al-
ready). Give them time to ob-
serve.

Junior Stream Stewards Lesson Plan Unit 8: Macroinvertebrates
Skagit Fisheries Enhancement Group
www.skagitfisheries.org
8. (50– 60 minutes) Collect the tubs
of macroinvertebrates and set
them aside. Ask the class who
saw a dominance of macros from
group 3? Group 2? How about
group 1? Ask them if the stream is
healthy based on the macros they
saw. The answer will almost al-
ways be good water quality.
Extension:
If you get done earlier than ex-
pected have the students share
their drawings and give them
more time to look at the macros.
Evaluation:
Before the first unit of the JSS pro-
gram, a pre-survey is handed out
to each student. On this survey
there are questions retaining to
this unit. There will be a post–
survey handed out to the students
at the end of the JSS program.
This survey will have the same
questions as the pre-survey. You
can see if the students retained the
information if the scores of each
student increase from the time of
the pre-survey to the post-survey.
MS-LS2-1. Analyze and interpret data to provide evidence for the effects of resource availability on organ-
isms and populations of organisms in an ecosystem.
MS-LS2-4. Construct an argument supported by empirical evidence that changes to physical or biological
components of an ecosystem affect populations.
MS-ESS3-3. Apply scientific principles to design a method for monitoring and minimizing a human impact
on the environment.
Performance Expectations
Analyzing and Interpreting Data
Engaging in Argument from
Evidence
Constructing Explanations and
Designing Solutions
Connections to Nature of Sci-
ence Scientific Knowledge is
Based on Empirical Evidence
LS2.A: Interdependent Rela-
tionships in Ecosystems
LS2.C: Ecosystem Dynamics,
Functioning, and Resilience
ESS3.C: Human Impacts on
Earth Systems
Cause and Effect
Stability and Change
Connections to Engineering,
Technology, and Applications
of Science, Influence of Sci-
ence, Engineering, and Tech-
nology on Society and the Nat-
ural World
Disciplinary Core Ideas Science and Engineering Practices Crosscutting Concepts
Next Generation Science Standards
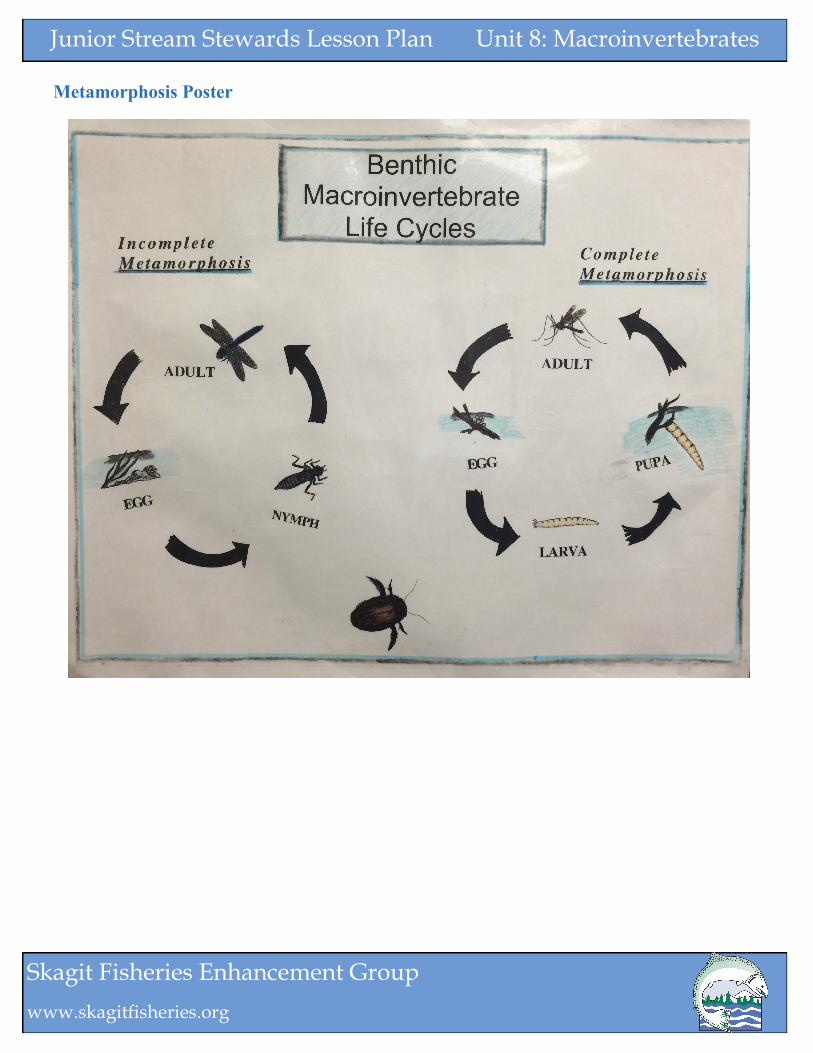
Junior Stream Stewards Lesson Plan Unit 8: Macroinvertebrates
Skagit Fisheries Enhancement Group
www.skagitfisheries.org
Metamorphosis Poster
Junior Stream Stewards Lesson Plan Unit 9: Review
Skagit Fisheries Enhancement Group
www.skagitfisheries.org
What Have We Learned?
Objectives:
The students will be able to de-
scribe and analyze key terms and
ideas from all of the lessons that
SFEG has taught the class over the
past year.
Method:
Students will complete the post-
program survey, review the lessons
in their student journal, and partici-
pate in a Kahoot review game.
Materials:
Kahoot website
Student surveys (one per stu-
dent)
Background:
Not much background for this les-
son since it is a review over the last
year. Briefly review lessons:
1. Watershed
2. Salmon Biology
3. Water quality
4. Salmon lifecycle
5. Riparian zones
6. Stewardship
7. Salmon species
8. Macroinvertebrates
Preparation:
Before the lesson, print enough
surveys for all the students in each
class.
Review and change the Kahoot
game as needed for the year at
create.kahoot.it. There will be two
Kahoots per class one as a review
of JSS content and one as a review
of the year as a whole. Make sure
both of these Kahoots are updated!
Procedure:
1. (0– 10 minutes) Students com-
plete the post-program surveys
immediately without consulting
student journals. Collect the sur-
veys as the students complete
them.
2. (10– 15 minutes) Review the
last unit (macros). Ask them to
tell you some of the macroinver-
tebrates they saw. What group
were they in? What did they tell
us about the stream they live in?
3. (15– 25 minutes) Now comes
the fun part. Have the class di-
vide themselves into groups of
less than 5. Each group MUST
have a working smart phone
with access to internet. Tell
them for the next 10 minutes
they have time to review their
JSS journals and log into the
game. Have them go to kahoot.it
and log in the code (which you
get once you, as admin, start the
game).
4. (25– 26 minutes) After they
have reviewed, refresh with
them how Kahoot works. There
will be a question on the screen.
Then it will give you multiple
choice answers that have a color
and shape associated with each
answer. These shapes and colors
will show up on the students
phones. The students must be
the fastest group to click the
right answer to get the most
points. Tell them not to be to
fast though, some of the answers
may trick them.
5. (26– 45 minutes) Run through
the Kahoot game. Encourage the
teams and have fun.
6. (45– 58 minutes) Once The first
Kahoot game is done, repeat step
4-5 with the second Kahoot
game.
Grade Level: 6-8
Subject areas: Science,
Environmental Education
Duration: 1 hour
Group size: 20-30 kids
Setting: Classroom
Key Terms: None
Appendices: JSS journal

Junior Stream Stewards Lesson Plan Unit 9: Review
Skagit Fisheries Enhancement Group
www.skagitfisheries.org
Extension:
If you get done early, ask them
what they thought of the JSS
program?
Evaluation:
Before the first unit of the JSS
program, a pre-survey is handed
out to each student. On this sur-
vey there are questions retain-
ing to this unit. After this last
unit you will collect the post–
survey. Now you have to pair
each students pre-survey and
their post-survey and staple
them together. Grade all the
surveys (pre and post) and rec-
ord the scores in an excel sheet.
Then calculate the % change.
MS-ESS3-3. Apply scientific principles to design a method for monitoring and minimizing a human impact
on the environment.
Performance Expectations
Analyzing and Interpreting Data
Engaging in Argument from
Evidence
ESS3.C: Human Impacts on
Earth Systems
Stability and Change
Connections to Engineering,
Technology, and Applications
of Science, Influence of Sci-
ence, Engineering, and Tech-
nology on Society and the Nat-
ural World
Disciplinary Core Ideas Science and Engineering Practices Crosscutting Concepts
Next Generation Science Standards


