24
SKF Endoscopes TKES 10 series Instructions for use

SKF EndoscopesTKES 10 series
Instructions for use

2 SKF Endoscope TKES 10 series
EC Declaration of conformity ....................................................................................3
Safety recommendations ..........................................................................................4
1. Introduction .....................................................................................................5
2. Description .......................................................................................................6
3. Technical data ..................................................................................................73.1 Kit content ....................................................................................................................... 73.2 Standard insertion tubes .............................................................................................. 83.3 Display Unit..................................................................................................................... 9
4. Operating instructions ....................................................................................104.1 Prepare for irst use ....................................................................................................104.2 Use of articulated tube (standard supply with TKES 10A only) ...........................124.3 Standard functions – Camera Mode .........................................................................154.4 Photo recording ...........................................................................................................154.5 Video recording ............................................................................................................154.6 Side view adapter ........................................................................................................164.7 Advanced settings and functions ...............................................................................164.8 Viewing and deleting recorded photos and videos .................................................194.9 Video output .................................................................................................................194.10 Transferring images and videos to the PC ...............................................................20
5. Maintenance...................................................................................................21
6. Spare parts and accessories ...........................................................................22
Table of contents
Original instructions

3SKF Endoscope TKES 10 series
EC Declaration of conformity
We, SKF Maintenance Products Kelvinbaan 16 3439 MT Nieuwegein The Netherlands
herewith declare that the following product:
SKF Endoscope TKES 10 series
has been designed and manufactured in accordance with:EMC DIRECTIVE 2004/108/EC as outlined in the harmonized norm for
EN 61000-4-2:1995+A1:1998+A2:2000EN 61000-4-3:2006EN 61326-1:2006 Class BEN 61326-2-2:2006
EUROPEAN ROHS DIRECTIVE 2011/65/EU
Nieuwegein, The Netherlands, January 2014
Sébastien DavidManager Product Development and Quality
4 SKF Endoscope TKES 10 series
Safety recommendations
Warning• This device must not be used for medical or veterinary purposes. • Do not modify or disassemble the unit.• Do not use this item in explosive atmospheres.
Caution• Keep the device out of the reach of children. • Do not look directly into the LED’s at the end of the insertion tube, your
eyesight may be seriously damaged.• Do not forcibly bend twist or elongate the insertion tube.• Strong impact of the instrument and insertion tube may result in
breakage of the objective lens (made of glass) at the tip of the insertion tube.
• Do not use or store the device at a temperature higher than 60 °C or lower than -20 °C.
• Do not use in a manner not speciied in this instruction for use.• Do not use the device in direct sunlight.• Store the device in a dry and adequately ventilated environment.• Keep away from acid or alkaline solutions and do not use in an
atmosphere containing their vapours.• Do not remove the SD Memory Card while data is being saved to the
card. This may cause the data loss or damage to the card.• The instrument contains no user serviceable parts. Opening the
endoscope voids warranty. All service work must be carried out by an authorized SKF workshop. Only use genuine SKF spares and accessories. Other spares and accessories may damage the endoscope.
5SKF Endoscope TKES 10 series
1. Introduction
The SKF Endoscopes TKES 10 series are compact handheld instruments that allow the user to view applications in restricted spaces that could not normally be seen with the naked eye.The TKES 10 series are supplied in a sturdy carrying case and consists of a display unit, insertion tube, mains adapter and side view adapter. The display unit, with a 3.5” wide angle TFT LCD screen, has the capacity of viewing, storing and reviewing photos and video images. Images can also be displayed directly on a TV screen or stored and transferred to a PC for viewing later. The display unit is powered by rechargeable Li-Ion battery and a universal charger is included. To facilitate easy handling, the display unit has powerful magnets on the back allowing it to be afixed to suitable surfaces. The TKES 10 series are available with three different types of insertion tubes of 1 metre (3.3 ft) length. All insertion tubes are equipped with powerful adjustable LED lighting.
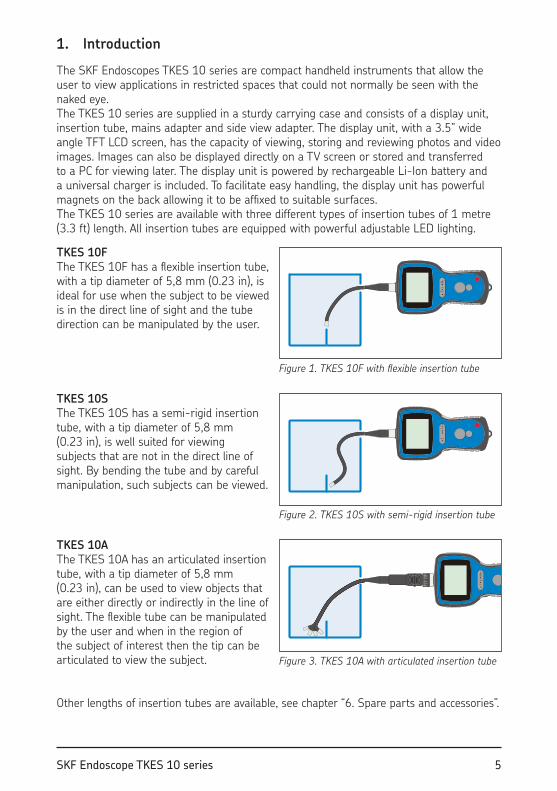
TKES 10FThe TKES 10F has a lexible insertion tube, with a tip diameter of 5,8 mm (0.23 in), is ideal for use when the subject to be viewed is in the direct line of sight and the tube direction can be manipulated by the user.
Figure 1. TKES 10F with lexible insertion tube
TKES 10SThe TKES 10S has a semi-rigid insertion tube, with a tip diameter of 5,8 mm (0.23 in), is well suited for viewing subjects that are not in the direct line of sight. By bending the tube and by careful manipulation, such subjects can be viewed.
Figure 2. TKES 10S with semi-rigid insertion tube
TKES 10AThe TKES 10A has an articulated insertion tube, with a tip diameter of 5,8 mm (0.23 in), can be used to view objects that are either directly or indirectly in the line of sight. The lexible tube can be manipulated by the user and when in the region of the subject of interest then the tip can be articulated to view the subject. Figure 3. TKES 10A with articulated insertion tube
Other lengths of insertion tubes are available, see chapter “6. Spare parts and accessories”.

6 SKF Endoscope TKES 10 series
2. Description
345
7
6 9
12
1314
8
10
11
2
1 15
15
16
Figure 4. TKES 10 Endoscope
1. Display unit 9. Escape button
2. Insertion tube 10. USB connector
3. POWER button 11. LED intensity control
4. Video REC button 12. SD slot
5. PHOTO button 13. TV OUT connector
6. DOWN button 14. DC IN connector
7. UP button 15. Magnets (3x)
8. OK button 16. Tripod connector
7SKF Endoscope TKES 10 series
3. Technical data
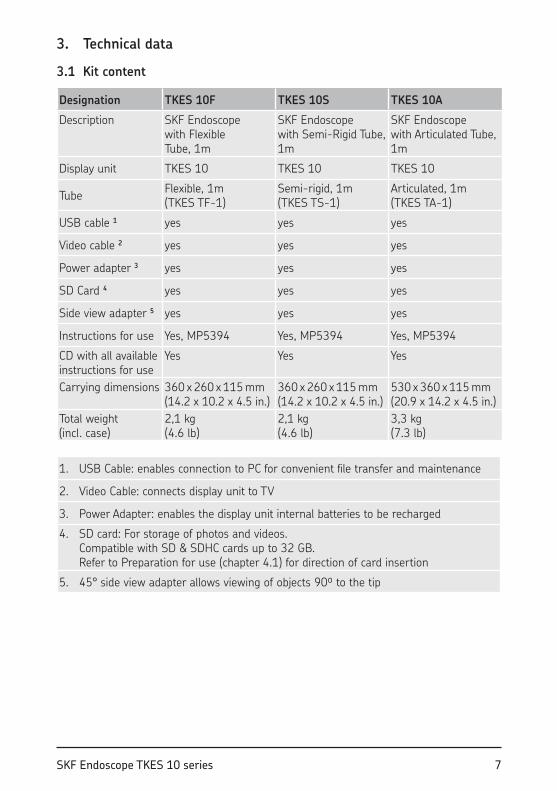
3.1 Kit content
Designation TKES 10F TKES 10S TKES 10A
Description SKF Endoscope with Flexible Tube, 1m
SKF Endoscope with Semi-Rigid Tube, 1m
SKF Endoscope with Articulated Tube, 1m
Display unit TKES 10 TKES 10 TKES 10
TubeFlexible, 1m (TKES TF-1)
Semi-rigid, 1m (TKES TS-1)
Articulated, 1m (TKES TA-1)
USB cable 1 yes yes yes
Video cable 2 yes yes yes
Power adapter 3 yes yes yes
SD Card 4 yes yes yes
Side view adapter 5 yes yes yes
Instructions for use Yes, MP5394 Yes, MP5394 Yes, MP5394
CD with all available instructions for use
Yes Yes Yes
Carrying dimensions 360 x 260 x 115 mm(14.2 x 10.2 x 4.5 in.)
360 x 260 x 115 mm(14.2 x 10.2 x 4.5 in.)
530 x 360 x 115 mm (20.9 x 14.2 x 4.5 in.)
Total weight (incl. case)
2,1 kg (4.6 lb)
2,1 kg (4.6 lb)
3,3 kg (7.3 lb)
1. USB Cable: enables connection to PC for convenient ile transfer and maintenance
2. Video Cable: connects display unit to TV
3. Power Adapter: enables the display unit internal batteries to be recharged
4. SD card: For storage of photos and videos. Compatible with SD & SDHC cards up to 32 GB. Refer to Preparation for use (chapter 4.1) for direction of card insertion
5. 45° side view adapter allows viewing of objects 90º to the tip
8 SKF Endoscope TKES 10 series
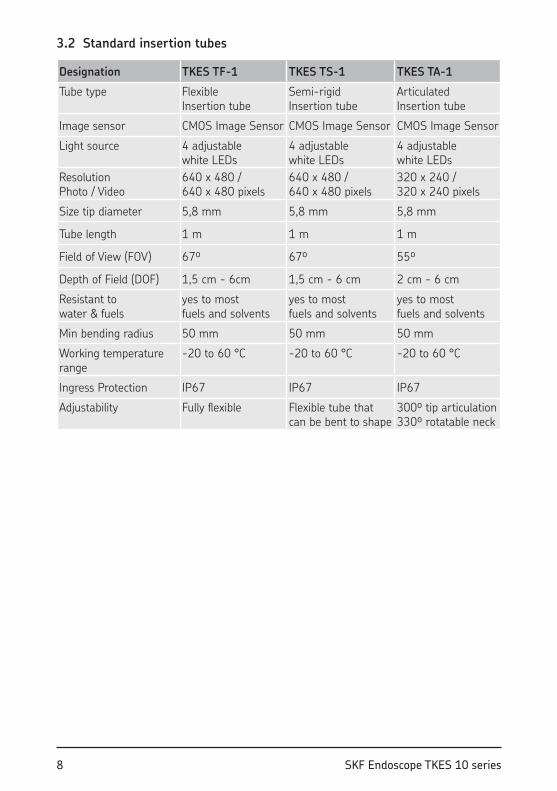
3.2 Standard insertion tubes
Designation TKES TF-1 TKES TS-1 TKES TA-1
Tube type Flexible Insertion tube
Semi-rigid Insertion tube
Articulated Insertion tube
Image sensor CMOS Image Sensor CMOS Image Sensor CMOS Image Sensor
Light source 4 adjustable white LEDs
4 adjustable white LEDs
4 adjustable white LEDs
Resolution Photo / Video
640 x 480 / 640 x 480 pixels
640 x 480 / 640 x 480 pixels
320 x 240 / 320 x 240 pixels
Size tip diameter 5,8 mm 5,8 mm 5,8 mm
Tube length 1 m 1 m 1 m
Field of View (FOV) 67º 67º 55º
Depth of Field (DOF) 1,5 cm - 6cm 1,5 cm - 6 cm 2 cm - 6 cm
Resistant to water & fuels
yes to most fuels and solvents
yes to most fuels and solvents
yes to most fuels and solvents
Min bending radius 50 mm 50 mm 50 mm
Working temperature range
-20 to 60 °C -20 to 60 °C -20 to 60 °C
Ingress Protection IP67 IP67 IP67
Adjustability Fully lexible Flexible tube that can be bent to shape
300º tip articulation330º rotatable neck

9SKF Endoscope TKES 10 series
3.3 Display Unit
Designation TKES 10
Display 3,5” TFT LCD, 320 x 240 Pixels
Interface Mini USB 1,1 / AV out
Battery (not user serviceable) Rechargeable Li-Polymer Battery (3,7V)
Power adapter 100 - 240 V AC in / 5,5 V DC out.Included: US, UK, EU and Australian plugs
Recording medium SD card (2GB minimum supplied), SDHC compatible
Photo Storage Format JPEG (640 x 480)
Storage capacity Up to 50 000 pictures or 120 min. of video on a 2 GB card
Video Recording Format ASF (320 x 240 or 640 x 480 depending insertion tube type)
Video Out Format NTSC & PAL
Frame rate 30 fps
Compression Format MPEG4
Video size 10 min. = 150 MB
Working & Storage / Battery charging temperature range
-20 °C to 60 °C / 0 to 40 °C
Functions Snapshot, Video recording, Picture & video review on LCD screen, TV Out, transfer of picture & video from SD card to PC, Digital zoom, relecting & mirroring
Magnets 3 x
Battery life 4 hours (average)
Tripod connection 1/4 in x 20 UNC x 8 mm
Ingress Protection IP 55

10 SKF Endoscope TKES 10 series
4. Operating instructions
4.1 Prepare for irst use
On irst use it is important that the SD card is inserted as shown in igure 5.
(The SD card slot can be found underneath a rubber cap):
Connect the insertion tube to the display unit as shown in igure 6 and tighten the locking collar. Be careful not to over-tighten it. Remove the protective cap on the tip of the insertion tube.
For use of the articulated insertion tube, see 4.2 Use of articulated tube (Standard supply with TKES 10A only).
When used with side view adapter, see 4.6 side view adapter.
Unscrew the ring from the tube tip, place the ring in the side view adapter box. Screw the side view adapter into the tube tip.
Figure 5. Insert SD card
Figure 6. Connect tube
Figure 7. Side view adapter
11SKF Endoscope TKES 10 series
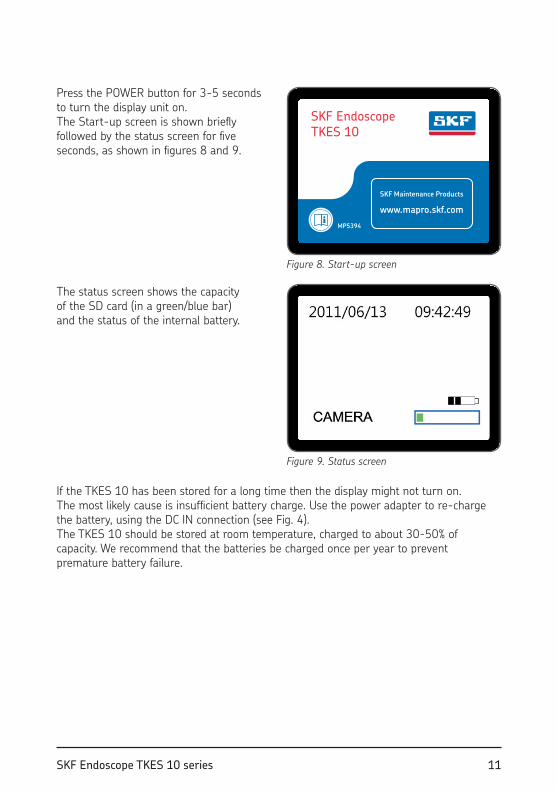
Press the POWER button for 3-5 seconds to turn the display unit on. The Start-up screen is shown briely followed by the status screen for ive seconds, as shown in igures 8 and 9.
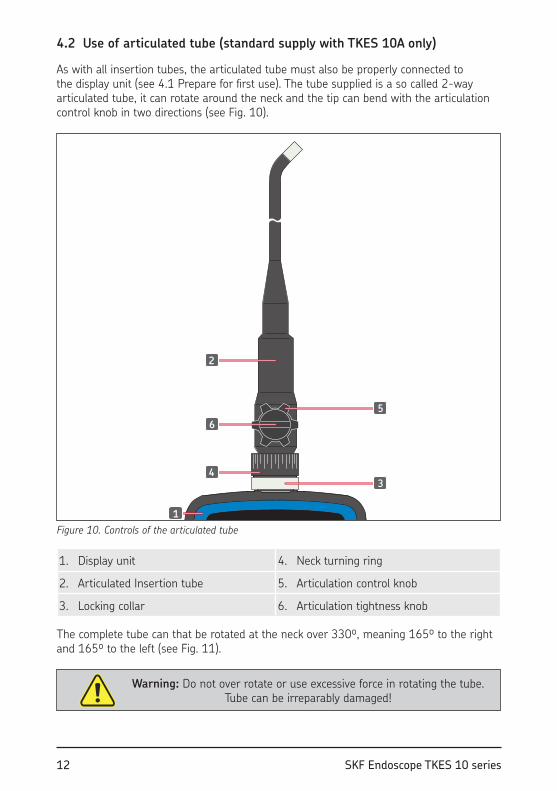
The status screen shows the capacity of the SD card (in a green/blue bar) and the status of the internal battery.
SKF Maintenance Products
www.mapro.skf.com
MP5394
SKF Endoscope TKES 10
Figure 8. Start-up screen
Figure 9. Status screen
If the TKES 10 has been stored for a long time then the display might not turn on. The most likely cause is insuficient battery charge. Use the power adapter to re-charge the battery, using the DC IN connection (see Fig. 4).The TKES 10 should be stored at room temperature, charged to about 30-50% of capacity. We recommend that the batteries be charged once per year to prevent premature battery failure.
12 SKF Endoscope TKES 10 series
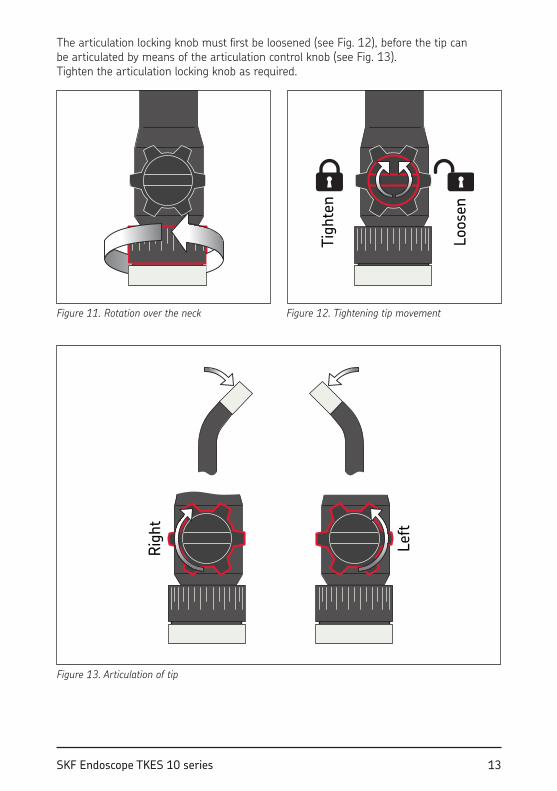
4.2 Use of articulated tube (standard supply with TKES 10A only)
As with all insertion tubes, the articulated tube must also be properly connected to the display unit (see 4.1 Prepare for irst use). The tube supplied is a so called 2-way articulated tube, it can rotate around the neck and the tip can bend with the articulation control knob in two directions (see Fig. 10).
3
56
2
1
4
Figure 10. Controls of the articulated tube
1. Display unit 4. Neck turning ring
2. Articulated Insertion tube 5. Articulation control knob
3. Locking collar 6. Articulation tightness knob
The complete tube can that be rotated at the neck over 330º, meaning 165º to the right and 165º to the left (see Fig. 11).
Warning: Do not over rotate or use excessive force in rotating the tube. Tube can be irreparably damaged!
13SKF Endoscope TKES 10 series
The articulation locking knob must irst be loosened (see Fig. 12), before the tip can be articulated by means of the articulation control knob (see Fig. 13). Tighten the articulation locking knob as required.
Figure 11. Rotation over the neck
Loos
en
Tigh
ten
Figure 12. Tightening tip movement
Left
Righ
t
Figure 13. Articulation of tip
14 SKF Endoscope TKES 10 series
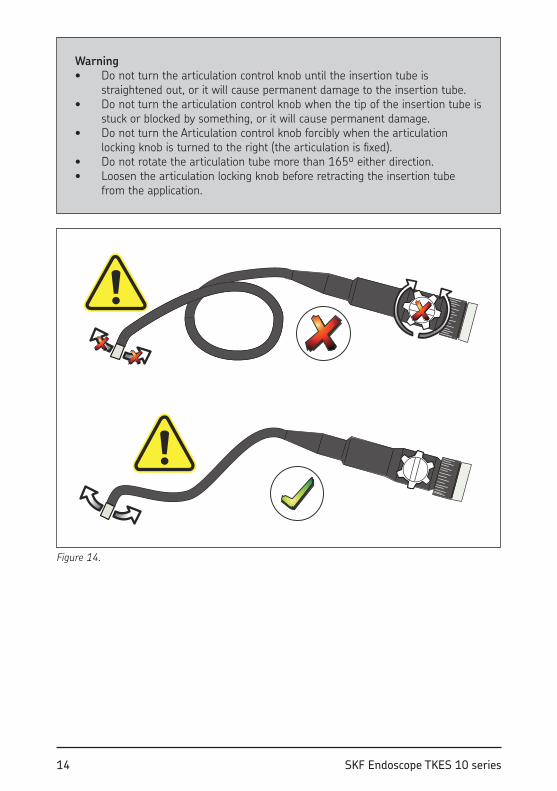
Warning• Do not turn the articulation control knob until the insertion tube is
straightened out, or it will cause permanent damage to the insertion tube.• Do not turn the articulation control knob when the tip of the insertion tube is
stuck or blocked by something, or it will cause permanent damage.• Do not turn the Articulation control knob forcibly when the articulation
locking knob is turned to the right (the articulation is ixed).• Do not rotate the articulation tube more than 165º either direction.• Loosen the articulation locking knob before retracting the insertion tube
from the application.
Figure 14.

15SKF Endoscope TKES 10 series
4.3 Standard functions – Camera Mode
Press the POWER button for 3-5 seconds to turn the display unit on. After the status screen has disappeared then a “live” image can be seen. This is the camera mode.
It is strongly advised to properly set-up the TKES 10 before irst use. In particular “Date & Time”, “Language” and “Video Format” (see 4.7 Advanced settings and functions). The indexing of saved photos and videos is based on date and time only. Proper set-up of other parameters, before irst use, can make the operation of the TKES 10 easier in the future.
Use the LED intensity control (see Fig. 4) to adjust the brightness of the LED’s.
To turn the TKES 10 off: press the POWER button for 3-5 seconds.
Note: After use, do not forget to place the protective rubber cap on the tip of the insertion tube.
4.4 Photo recording
PHOTO button
Video REC button
OK or Conirm button
Escape button
UP button
DOWN button
In camera mode, press the PHOTO button to record a still image. The photo is stored to the SD card in .jpg format with a ile name in the form of a running number (e.g. IMG00001.jpg).
This is conirmed by a brief display of the icon on the screen.
4.5 Video recording
In preview mode, press the Video REC button will start the recording of a video. The video icon is shown in the top right corner also the duration (see Fig. 15). To stop recording, press the Video REC button again. The video icon disappears. The display goes back to preview mode. The video is automatically stored to the SD card in .asf format with a ile name in the form of a running number (eg. IMG00002.asf).
Figure 15. Recording a video
16 SKF Endoscope TKES 10 series
4.6 Side view adapter
The side view adapter allows viewing at 90º to the insertion tube tip axis. This is ideal for viewing pipe walls. To mount the side view adapter, unscrew the chrome tip of the insertion tube and replace it with the side view adapter (see 4.1 Prepare for irst use, Fig. 7).
Note: The articulating tube has a different tip thread size to the lexible and semi-rigid insertion tubes
4.7 Advanced settings and functions
Switch the unit on. Ensure that camera mode is active (i.e. a “live” picture can be seen). Press the OK button to access the menus. Use UP or DOWN button to navigate. Press OK to conirm.
A. Delete all
Warning: Be careful using this option, as everything will be deleted from the SD card!Navigate to DELETE ALL in the menu, press the OK button. Select YES or NO using the UP or DOWN buttons. Conirm with the OK button.
B. Video outputSee “4.9 Video output” for more details.
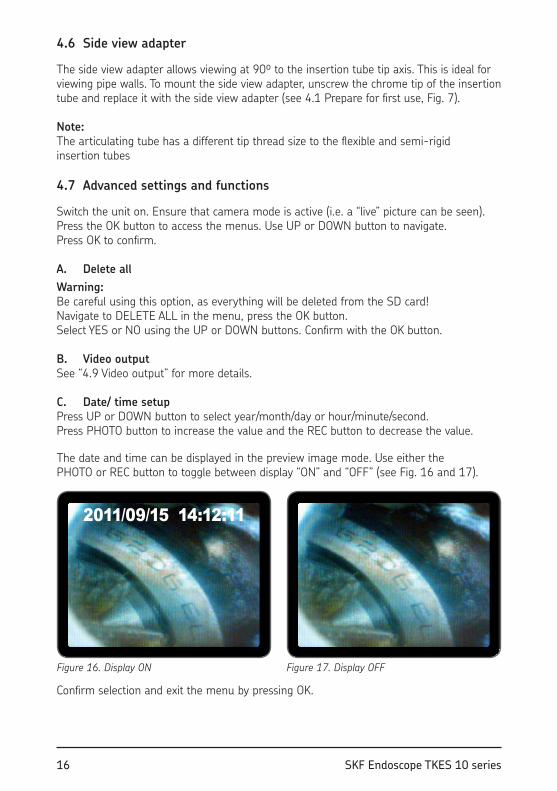
C. Date/ time setupPress UP or DOWN button to select year/month/day or hour/minute/second. Press PHOTO button to increase the value and the REC button to decrease the value.
The date and time can be displayed in the preview image mode. Use either the PHOTO or REC button to toggle between display “ON” and “OFF” (see Fig. 16 and 17).
2011/09/15 14:12:11
Figure 16. Display ON Figure 17. Display OFF
Conirm selection and exit the menu by pressing OK.
17SKF Endoscope TKES 10 series
D. LanguageNavigate to LANGUAGE in the menu, press the OK button. Select the required language using the UP or DOWN buttons and conirm with the OK button.
E. Video formatNavigate to VIDEO FORMAT in the menu, press the OK button. Select the required video format (NTSC or PAL) using the UP or DOWN buttons. Conirm with the OK button.
F. Auto power offNavigate to AUTO POWER OFF in the menu, press the OK button. Select the required auto power off time (5, 10, 15, 30 minutes or Disable) using the UP or DOWN buttons. Conirm with the OK button.
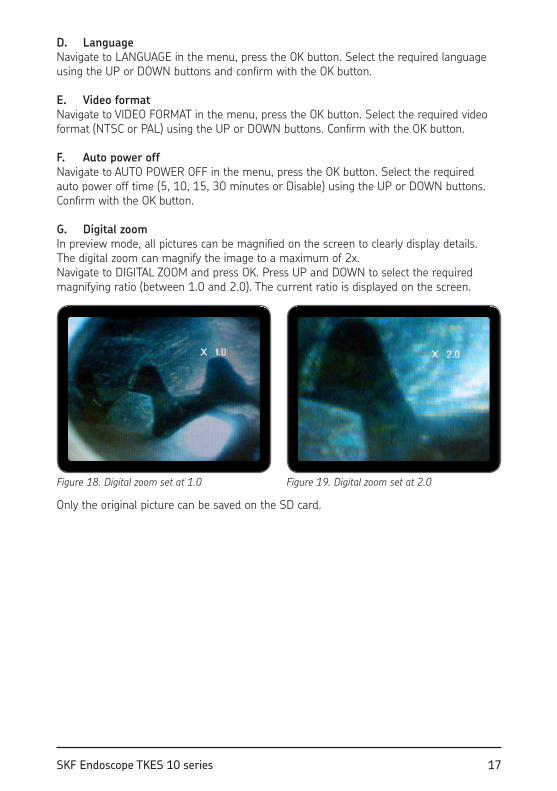
G. Digital zoomIn preview mode, all pictures can be magniied on the screen to clearly display details. The digital zoom can magnify the image to a maximum of 2x. Navigate to DIGITAL ZOOM and press OK. Press UP and DOWN to select the required magnifying ratio (between 1.0 and 2.0). The current ratio is displayed on the screen.
Figure 18. Digital zoom set at 1.0 Figure 19. Digital zoom set at 2.0
Only the original picture can be saved on the SD card.
18 SKF Endoscope TKES 10 series
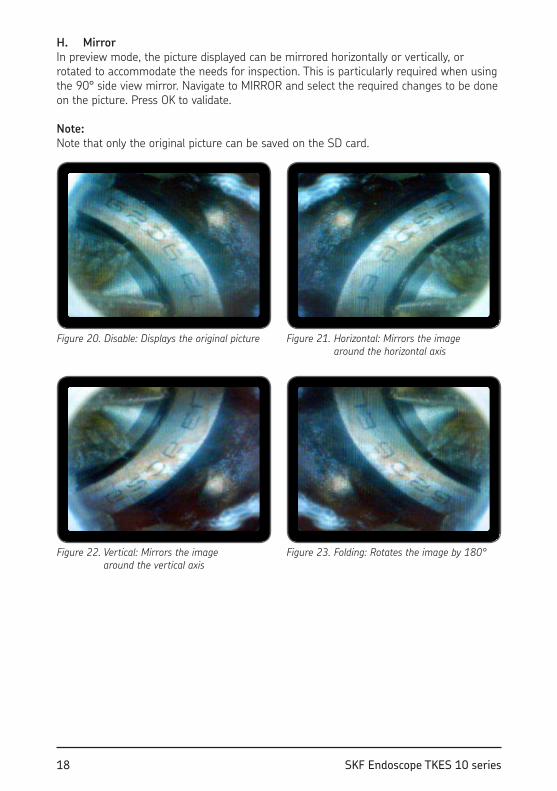
H. MirrorIn preview mode, the picture displayed can be mirrored horizontally or vertically, or rotated to accommodate the needs for inspection. This is particularly required when using the 90° side view mirror. Navigate to MIRROR and select the required changes to be done on the picture. Press OK to validate.
Note: Note that only the original picture can be saved on the SD card.
Figure 20. Disable: Displays the original picture Figure 21. Horizontal: Mirrors the image
around the horizontal axis
Figure 22. Vertical: Mirrors the image
around the vertical axis
Figure 23. Folding: Rotates the image by 180°
19SKF Endoscope TKES 10 series
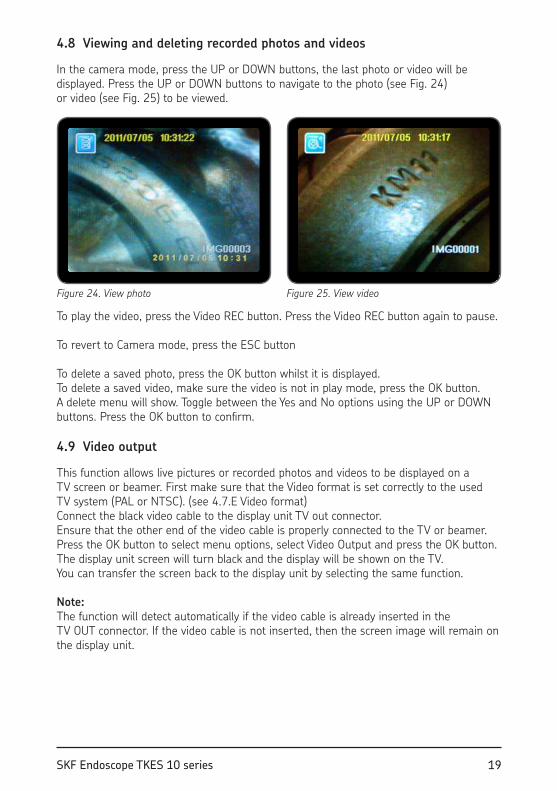
4.8 Viewing and deleting recorded photos and videos
In the camera mode, press the UP or DOWN buttons, the last photo or video will be displayed. Press the UP or DOWN buttons to navigate to the photo (see Fig. 24) or video (see Fig. 25) to be viewed.
Figure 24. View photo Figure 25. View video
To play the video, press the Video REC button. Press the Video REC button again to pause.
To revert to Camera mode, press the ESC button
To delete a saved photo, press the OK button whilst it is displayed. To delete a saved video, make sure the video is not in play mode, press the OK button. A delete menu will show. Toggle between the Yes and No options using the UP or DOWN buttons. Press the OK button to conirm.
4.9 Video output
This function allows live pictures or recorded photos and videos to be displayed on a TV screen or beamer. First make sure that the Video format is set correctly to the used TV system (PAL or NTSC). (see 4.7.E Video format)Connect the black video cable to the display unit TV out connector. Ensure that the other end of the video cable is properly connected to the TV or beamer. Press the OK button to select menu options, select Video Output and press the OK button. The display unit screen will turn black and the display will be shown on the TV. You can transfer the screen back to the display unit by selecting the same function.
Note: The function will detect automatically if the video cable is already inserted in the TV OUT connector. If the video cable is not inserted, then the screen image will remain on the display unit.

20 SKF Endoscope TKES 10 series
4.10 Transferring images and videos to the PC
The computer must be running MS Windows™ 2000 or later, Mac OS X.Turn the endoscope on. Connect the USB cable to the endoscope and the computer.Look for the drive with the SD card iles (see Fig. 26).
IMG00001.JPG
IMG00009.ASF 100DSCIMDCIM
Figure 26. File storage
The iles can then transferred and viewed on the PC. Alternatively the SD card can be removed and inserted into an SD card reader to retrieve the iles.In general, on a PC running MS Windows™ 2000 or later with Windows Media player, no special software is required to display JPG and ASF iles.

21SKF Endoscope TKES 10 series
5. Maintenance
CleaningThe display unit can be cleaned with a cotton cloth moistened with a mild soap solution. The camera can be cleaned using a cotton brush and or lens-cleaning cloth to gently remove any dirt and dust. Soap, alcohol or another lens cleaning luid can be sprayed over the lens directly. Use a lens-cleaning cloth to wipe it off. Use of acetone is prohibited.
Trouble shooting Solution
No image on the display after turning the power on:
Battery is exhausted. Connect the display unit to the power adapter supplied and recharge batteries. The TKES 10 can be used when connected to ac power.
No image, only words on the LCD monitor after turning the power on:
Check that the insertion tube is correctly connected to the display unit.
Unable to take photos or record video:
SD card not present, wrongly inserted, full or faulty. Check SD card is present, check SD card insertion, check SD capacity, check if SD card is faulty (check if SD card works in other devices).
Shut down: When all functions freeze or fail, insert an insulated needle into the hole on the back of the main unit. The system will restart automatically (see Fig. 27).
RESET
Figure 27. Resetting the TKES 10
22 SKF Endoscope TKES 10 series
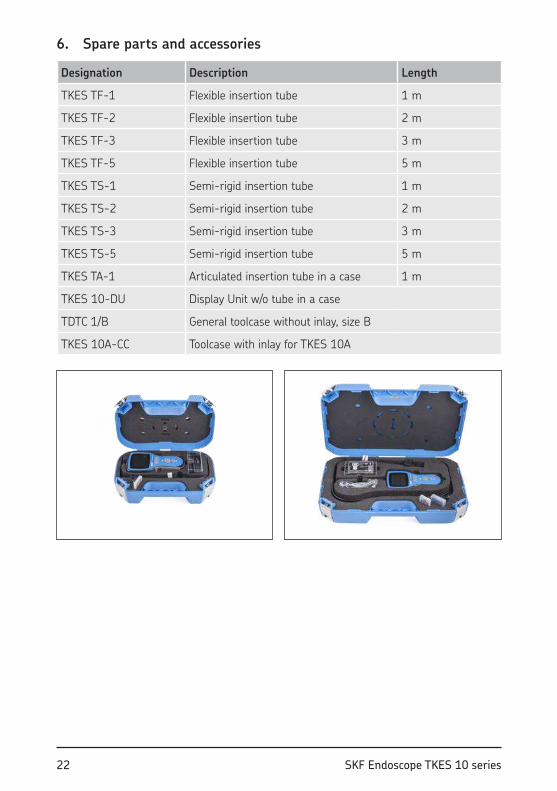
6. Spare parts and accessories
Designation Description Length
TKES TF-1 Flexible insertion tube 1 m
TKES TF-2 Flexible insertion tube 2 m
TKES TF-3 Flexible insertion tube 3 m
TKES TF-5 Flexible insertion tube 5 m
TKES TS-1 Semi-rigid insertion tube 1 m
TKES TS-2 Semi-rigid insertion tube 2 m
TKES TS-3 Semi-rigid insertion tube 3 m
TKES TS-5 Semi-rigid insertion tube 5 m
TKES TA-1 Articulated insertion tube in a case 1 m
TKES 10-DU Display Unit w/o tube in a case
TDTC 1/B General toolcase without inlay, size B
TKES 10A-CC Toolcase with inlay for TKES 10A

23SKF Endoscope TKES 10 series
skf.com | mapro.skf.com | skf.com/mount
® SKF is a registered trademark of the SKF Group.
© SKF Group 2017The contents of this publication are the copyright of the publisher and may not be reproduced (even extracts) unless prior written permission is granted. Every care has been taken to ensure the accuracy of the information contained in this publication but no liability can be accepted for any loss or damage whether direct, indirect or consequential arising out of the use of the information contained herein.
MP5394EN · 2017/12


