34
4/99 , SMART ASH MODEL 100 ASSEMBLY .AND OPERATING INSTRUCTIONS

4/99
,
SMART ASH MODEL 100
ASSEMBLY .AND OPERATING INSTRUCTIONS

IMPORTANT: Read and understand
operating instructions before using this unit.
WARNING:
NOT FOR USE WITH MATERIALS
CONTAINING LIQUIDS SUCH AS
GASOLINE OR PAINT THINNERS. ALL
MATERIALS MUSr HAVE A FLASH POINT
HIGHER THAN 100 DEGREES FAHRENHEIT.
IMPORTANT SAFETY INSTRUCTIONS
BEFORE USING YOUR REFUSE COMBUSTION SYSTEM, BASIC SAFETY PRECAUTIONS SHOULD ALWAYS BE FOLLOWED TO REDUCE THE RISK OF FIRE, ELECTRIC SHOCK AND INJURY TO PERSONS, INCLUDING THE FOLLOWING:
1. Read and understand all instructions.
2. Follow all warnings and Instructions marked on the product.
3. Care should be taken to ensure this product is disconnected from the power source when there is a chance water may come in contact with the electrical connections.
4. Operator must ensure that the combustion system Is on stable ground and in no danger of failing or tipping.
5. The combustion system must stand free and clear of surrounding buildIngs, vegetation or other combustible material, and care should be taken that there are no flammable items above the emission screen.
6. Never touch the combustion chamber (steel drum), or lid while Incinerating refuse.
7. Refer servicing to qualified personnel under the following conditions: a. When the power supply cord is frayed or damaged. b. If liquid has been in contact with the electrical system. c. If the product has been damaged and exhibits a distinct change in per
formance.
8. Do not operate this product in the vicinity of flammable gases.
9. Aerosol or other pressurized cans cannot be Incinerated in this system.
10. If operator is unsure if certain items can be safely incinerated in this system, consult the manufacturer for details and instructions. Elastec Inc. 618-382-2525
Elastec Inc., 121 Council St., Carmi, IL 62821 USA,618-382-2525
2
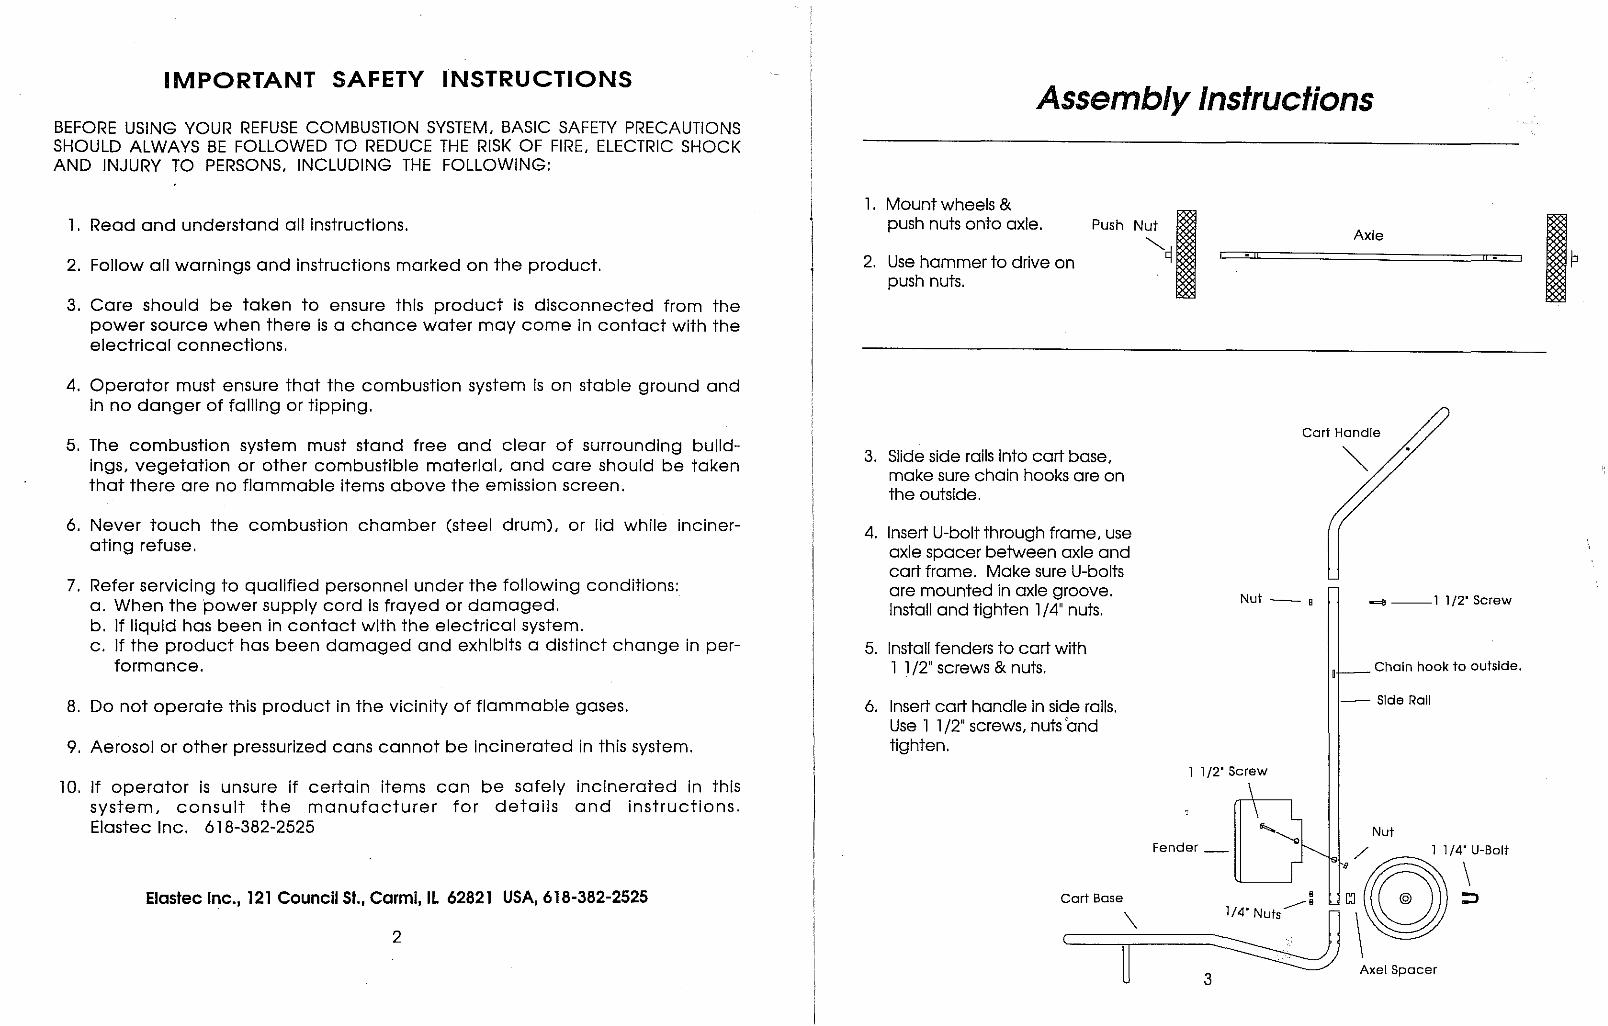
Assembly Instructions
1. Mount wheels & push nuts onto axle. Push Nut
2. Use hammer to drive on push nuts.
3. Slide side rails into cart base, make sure chain hooks are on the outside.
4. Insert U-bolt through frame, use axle spacer between axle and cart frame. Make sure U-bolts are mounted in axle groove. Install and tighten 1/4" nuts.
5. Install fenders to cart with 1 1/2" screws & nuts.
6. Insert cart handle in side rails. Use 1 1 /2" screws, nuts 'and tighten.
""-9 Axle
.. II " ..
Cart Handle
Nut _, -=11--1 1/2· Screw
Chain hook to outside.
- SldeRali
1 1/2· Screw
Nut Fender _ / 1 1/4· U-Bolt
o ----------- \
cart Base ..___= CJ @
\
3 Axel Spacer

II=-
r~
IE
-
7. Install 1/4" bolts into bottom side ralls.
8. Place plenum between rails, resting on bottom bolts.
9. Install top 1/4" bolts.
1 O. Tighten all bolts and nuts.
~--------------------------------i-J ..... I
L
I- I
:\6 I I
I I I I I I I . I I@ I I - CQ[J I
./ I I Plenum I I I I I I I I I "" I I I I I I I I I I I I .1 I I ~-----------------~
j" c
'- '-
1/4' b olt -'
-=Il
1 /4' b olt
---
f--
-
4
11. Assemble Stir Rod. Insert upset ends over straight ends & push together.
CAUTION: STIR ROD IS SPECIALLY DESIGNED TO PREVENT FLAME FROM TRAVELLING THRU ROD DURING STIRRING. DO NOT USE ANYTHING OTHER THAN THIS ROD TO STIR CONTENTS OF BURNER DURING BURNING PROCEDURE.
12. Mount bottom shield on cart, slide over bottom of plenum and behind axle. Then fasten with 1/2' bolt, nut and clamp (see blow up below).
13. Set OPEN HEAD DRUM on cart.
14. Fasten with chain.
15. Set drum lid on drum.
16. Thread hose onto threaded hose connector, then tighten clamp to secure hose.
Drum Lid
r-==========~~/
55 Gal/an Open Head Drum (Nat Included)
Snap Button
Flex Hose
17. Insert flex hose with snap button
lo-c::r-c:r-C I--'O -c::r-c:r-C I--'°trl E~~:::"" Hose Clamp
Into 2" Inlet on drum lid.
18. Install plug in cord lock.
Assembly Is finished see operating Instructions.
Axle
Saf-Start
(cord LOCk'
\
Bottom Shield
_Bottom Shield
~~-___ 1/2' Screw
J Clamp
5

SlT1art Ash Model 1 00 Parts 110 & 220 Volt Units
4 3 23a
2
23
36_[-___ _ 22
13
34
25
19
28 29
REF# PART# OTY. DESCRIPTION
108001 DRUM LID ASSEMBLY
2 108015 TOP BAND SIS
3 108016 SCREEN SPACER
4 108017 SPARK SCREEN
5 108026 4 LID CLAMP ASSEMBLY
6 108030 1 SPARK DEFLECTOR ASSEMBLY
7 108040 STIR PORT COVER
8a 108049 PLENUM BOX ASSEMBLY 110V
8b 108048 PLENUM BOX ASSEMBLY 220 V
9a 108059 1 (KIT) REPLACEMENT MOTORS 110 V
9b 10B05B 1 (KIT) REPLACEMENT MOTORS 220 V 10a 108070 1 TOGGLE SWITCH 11 0 V 10b 10B05B 1 TOGGLE SWITCH 220 V 11 10B066 1 TOGGLE·SWITCH 800T 12 108098 1 AIR SHUTTER CONTROL 13 108085 2 FILTER HOLDER 14 108086 2 FILTER 15 108087 2 FILTER KEEPER 16 10a088 1 8LOWER COVER 17 108120 1 CART HANDLE 1B 108122 2 CART SIDE RAIL 19 108121 CART 8ASE
20a 108076 1 SAFE START PLUG 110 V
20b 108077 1 SAFE START PLUG 220 V
6
REF#
21 22 23 23a 24 25 26 27 28
29
30 31 32 33 34 35 36 37a
37b
38 39
17
\ <.=======0
7
27 32 10-94
PART# OTY. DESCRIPTION
108105 AIR PORT COVER
108107 HOSE CLAMP 108115 FLEX HOSE-STAINLESS STEEL
108116 SNAP BUTTON KIT
108130 DOUBLE LOOP CHAIN 108079 CORD LOCK 108131 2 FENDER
108132 1 AXLE 108133 2 AXLE SPACER 108134 2 AXLE U-BOLT 108135 2 CARTWHEEL 108136 2 AXLE pUSH NUT 108137 1 AXLE CLAMP 108138 1 BOnOMGUARD
108149 1 GRATE COMPLETE (OPTIONAL) 108045 Not Shown STIR R.OD ASSEMBLY 108140 OPEN HEAD DRUM 108175 Not Shown SPARE PARTS KIT 110 V
1 YEAR OPERATION 108176 NolShown SPARE PARTS KIT 220 V
1 YEAR OPERATION 108176 THRD AIR PORT 2 1f4" 108176 THRD AIR PORT 11f4"
0: dclsmartamvpllrlnllW
Elastec~ Inc.
Choosing the correct power supply outlet
First determine electrical power required for your particular unit, 120 volts or 240 volts.
Afteryou have determined the power supply required, you will need to choose the correct electrical outlet for the unit.
In choosing an outlet, a circuit with a 20 amp breaker or greater Is best suited for the unit. When possible the Smart Ash unit must be the only appliance on the circuit, due to the high amperage draw. 120 volt units will draw 14 amps when running and nearly 30 amps at start-up. 240 volt units levels will be about half of that of the 120 volt units.
Saf-Start mechanisms are Installed on Smart Ash units to guard against Improper start of the unit after a power Interruption has occurred.
The Saf-Start Is a very sensitive electrical control device. When there Isa power Interruption or fluctuations In the power supply that are below recommended levels, the unit will disengage. Fluctuations for only a spilt second below recommended levels will cause the Saf-Start to disengage.
What happens when the unit power supply switch Is turned on and the Saf-Start disengages but does not cause the circuit breaker to disengage? This is caused when the voltage drops below recommended levels for a spilt second, because of the high amperage draw made by the unit at start-up. Unplugging of one or more appliances on the circuit if possible may solve this problem, If not, use another outlet on a different circuit If possible.
If you have recurring problems of this nature an electrician may.need to check line voltage drops at start-up, and amperage draw when the unit Is running, to Isolate the problem.
7

SMART ASH OPERATING INSTRUCTIONS
SELECTING A DRUM
Use standard OPEN HEAD 55 GALLON DRUM In good condition with undamaged lip.
Lid will not fit a "de-headed" 011 or chemical drum. Do not pierce holes in drum. Even if drum Is standard, lid still may not fit because drum is out of round. Check drum and correct as follows:
1. Measure across top of drum in several directions. If there is a difference of more than 1/4" in measurements, drum is egg-shaped and needs to be trued up.
2. To true up, place drum on Its side with "long" measurement vertical. Lean on rim and use body weight to depress rim.
3. Re-measure drum and repeat process until correction is made.
Paint on ordinary drum will smoke and possibly burn when drum is first used. Paint will flake off, leaving drum without rust protection. It should always be stored Indoors in clean dry place. Properly cared for, drum will have satisfactory service life.
GETTING ACQUAINTED WITH SMART ASH
study the Smart Ash parts list and Ipentify the major parts which will be referred to in these instructions.
Two blowers behind the motor cover draw air Into the plenum. The air feeds to the drum through the air hose and lid ..
The lid has two elements to block emissions of burning material; the spark screen on top, and an Internal spark deflector which can be seen beneath the exhaust vent in lid.
Four clamps hold the lid in place during burning. Another moveable part on the lid is a porthole cover, which pivots off the porthole to permit observation of the fire and stirring or stoking with the stir rod supplied. It is moved easily from closed to open by rapping its side with the factory supplied stir rod.
Attached to the plenum is a lever which controls airflow to the burn chamber. Air reaching the burn chamber is regulated by this control latch which controls the blowers output.
8
Variation in air flow can be felt by holding your hand near the exhaust vent while changing throttle position.
Before the first Smart Ash burn, the operator should practice mounting lid on drum and securing it with clamps. The manufacturer highly recommends the operator to walk through the Ignition procedure a few times prior to the first burn to fully acquaint him with the system operation.
The SmartAsh is equipped with a Saf-Start Unit. This safety precaution prevents the Smart Ash from restarting automatically after a power interruption, even if the equipment switch Is left in the "on" position. Such a restart could cause damage to eqUipment and Injury to persons. Note: The Saf-Start unit button must be reset every time the unit is plugged In. As with the beginning of a burn.
SMART ASH OPERATION
Required accessories: three-wire outdoor electric extension cord, safety glasses, high temperature gloves (ie. welding gloves) lighter and several sections of newspaper or cardboard. Cord wire should be no lighter than 18 GA. under 25 ft. or 16 GA. under 50 ft.
PREPARING TO BURN
1. Select a site removed from buildings, hedges and trees. Place Smart Ash on bareground, gravel, or concrete. Do not burn on new blacktop, lawn or ground with dry vegetation.
2. Position Smart Ash so cart and air supply (and operator) are upwind and drum downwind. Place lid on ground.
3. Connect Smart Ash plug to extension cord and cord to grounded electrical outlet. Depress the reset button on Saf-Start plug.
To prevent accidental interruption of burning install cord lock and arrange slack in cord beneath plug in.
NOTE: If there is a power in)erruption during the operation of your Smart Ash Unit follow the steps below for restart.
A. Turn Smart Ash toggle switch to OFF position. B. Move control latch to start position. C. Allow the unit to cool down for 10 minutes. D. Reset Saf-Start. E. Remove lid and repeat Ignition procedure as normal.
9

Failure to observe these cautions may result in internal combustion when air returns which can damage the drum lip or lid, or cause possible personnel injury.
STARTING TO BURN CAUTION: OPERATOR SHOULD ALWAYS WEAR SAFETY GLASSES AND GLOVES WHEN OPERATING THE SMART ASH COMBUSTION SYSTEM.
1. Place a layer of unused absorbents In the drum first, (this will absorb any free liquids that drain from oily materials during burn). Next load the oily materials, (do not burn materials that contain oils with a flash point lower than 100 degrees F.) then an ample layer of dry paper or cardboard on top. The paper supplies a fast, easy initial fuel source for start up. Note the drum has two expanded rings which encircle it. These are called rolling hoops. Do not put In more material than it takes to cover top hoop. Ample head room encourages good start-up and efficient burn.
2. Prepare load for ignition by crumpling top layer of paper or cardboard. Do this In forward area of drum where it will be accessible for lighting when lid Is placed over rear area of drum, as directed below. If load appears difficult to Ignite in that fashion, lay section of newspaper on top of load with one corner in forward area. Do not use liquid fuel.
3. Place lid on drum with Inlet pipe pOinting to rear, and clamps resting on top of lid. Lift lid and slide it to rear between arms of cart handle, leavll')g front part of drum uncovered.
4. Insert air hose in lid.
5. Light prepared segment of paper section. Turn on power.
6. When fire is established, grasp front and back lid handles and close lid on drum.
7. Apply clamps as follows: a. Lower all clamps to rim of lid. b. Push all clamps inward toward drum. c. If clamp encounters resistance It Is because screw attached to hand
wheel is sticking out below clamp too far and obstructing clamp movement.
d. Correct by spinning hand wheel counterclockwise to retract screw. e. When clamps are in position against drum, tighten all clamps evenly, so lid
fits properly and ensures a good seal.
10
g. Clamp can be seen to be in correct closed position when back end of clamp is flush with back end of clamp mounting bracket.
h. When applying clamps, walk around back of unit from clamp to clamp to avoid exhaust stream If wind is blowing.
8. Note unit may briefly smoke until it reaches operating temperature.
9. Take pOSition behind cart. Turn control latch slowly from start to run, until visible and audible signs Indicate fire has taken hold.
SUMMARY OF KEY STEPS IN START-UP
CAUTION: Have safety glasses and gloves on at all times while unit is in use.
1. Position cart and drum with wind at back of cart.
2. Make certain extension cord is plugged into live outlet and connected to Smart Ash with cord lock.
3. Set control latch to start.
4. Turn on air after load has been Ignited.
5. Make sure all clamps are in contact with drum body.
TENDING BURN
CAUTION: Have safety glasses and gloves on at all times while unit is in use.
1. Smart Ash air control setting should be checked periodically during burn.
2. Advance control latch as far as possible without causing gusting or turbulence. If these conditions arise, turn control latch back slowly to start position.
3. Optimum control latch setting produces vigorous yet smooth combustion. Control latch setting usually may be advanced during burn as load is consumed.
11

TERMINATING BURN
CAUTION: Have safety glasses and gloves on at all times while unit is in use.
1. Progress of burn toward termination can be jsUTdIRgReodDbYthobse~va~~~~I~ou9h porthole or by insertion of FACTORY SUPPLIED roug p .
2. If drum interior is completely dark, or if probe rod reaches bottom of drum without obstruction, burn usually is complete.
3. Termination of burn frequently Is indicated by dusting or smoking episode.
If observation through porthole reveals that fire is stili present, but o~ly in part 4. of drum, termination of burn can be expedited by breaking up remaining clots
of flame with stir rod.
When burn Is complete, unit should be allowed to cool for a few minutes, then 5. lid may be removed with gloves. Care also shOUld be taken not to touch clamps
or porthole cover prematurely.
BURNING ABSORBENT MATERIALS
DO NOT BURN ABSORBENTS THAT CONTAIN VOLATILE LIQUIDS, SUCH AS GASOLINE.
DO NOT BURN MATERIALS WITH A FLASH POINT LOWER THAN 100 DEGREES FAHRENHEIT.
Before loading oily absorbents, load drum with a layer of new absorbent ma~erla.1. Enough to cover the bottom of the drum, approx. 1 to 3 inches deep, thiS Will absorb any liquids that may leak during the burn.
Do not burn absorbents that are over saturated with oil. Allow them to drain. If 011 liquids are present add more absorbent material.
Do not attempt to burn absorbents that are water soaked, even if they are mostly soaked with oil. Allow the water to drain dry.
An ample amount of paper or cardboard must be used (as starter fuel) to generated the heat required substain fast quality burn.
OBSERVE SAFETY RULES
1. Do not burn close to buildings, vegetation, or flammable ground cover.
2. Use only outdoor 3 wire electric cord, connected to grounded outlet. Do not
12
run cord over wet ground. Keep cord away from drum. If cord becomes damaged, replace at once.
3. Do not leave burning unit unattended In unfenced area. Keep aerosol cansout of load.
4. If there Is a power interruption during the operation of your Smart Ash Unit do the following for restart. 1. Turn Smart Ash toggle switch to OFF position. 2. Move control latch to start position. 3. Allow the unit to cool down for 10 to 15 minutes. 4. Reset Saf-Start. 5. Remove lid and repeat Ignition procedure as normal.
Failure to observe these cautions may result in internal combustion when air returns which can damage drum lip, lid or possible personnel injury.
5. Wear safety glasses and gloves at ALL times. Allow ashes to cool, dispose of In a safe place.
6. Caution should be taken at all times during burning to insure that clothing does not come in contact with drum or lid. (Temperatures at top of drum lid can exceed 2000 degrees F. when unit is in operation. Drum surface temperature may reach 1,400 degrees.)
7. Unit should be used in a controlled area only and should be monitored by a trained attendant during use. NOTE: For obvious reasons unauthorized personnel should not be in close prOXimity during operation of unit.
8. DO NOT USE PIPE OR CONDUIT FOR A STIR ROD. The factory stir rod Is specially deSigned to prevent flame from travelling thru rod during stirring.
CAUTION: Extreme temperatures can cause serious burns if unit is used incorrectly.
TROUBLE SHOOTING
1. Excess Smoke. a. Poor start.
Remove lid, if fire is smoldering 9r burning weakly, restart with newspaper section on top of load.
b. Unsuitable or wet material. Remove or dump and re-start with proper load.
c. Too much free oil has leaked from sorbents. Stop burn and add new absorbent materials to soak up excess oil.
13

2. Lid Leaks. a. Clamps loose or not seated properly.
Re-seat and tighten. b. Bent drum lip.
If severe, replace drum. If bent only on underside, rotate drum so clamp fastens on unbent section. Eventually replace drum.
c. Lid warped. Leaking area usually may be sealed by Vise Grip welding clamp model 9 R, / or equivalent, available in hardware outlets. Eventually replace lid.
3. Weak air flow. a. Air control not working properly.
Check air control latch for proper operation. b. Motor failure. .
Can be determined by removing motor cover, filter harness, and filter to expose motor. Failed motor will not turn with power on. Replace motor. Replacing motor brushes is not recommended because resulting life extension usually is short lived and Is not worth brush cost and work involved In replacing brushes. Both motors should be replaced when one falls.
4. Lid sticks on drum. Drum probably Is out of round. Pull upward on one lid handle while tapping side of drum immediately below with hammer. Proceed to next handle and repeat until lid pulls free. To correct drum condition see "SELECTING DRUM."
MAINTENANCE AND SERVICE
Removing Motors: 1. Lay air supply on flat surface, motor side up. Remove motor cover.
2. Unscrew nuts holding switch in place and drop switch back through mounting hole into air supply Interior.
3. Remove screws holding motor mounting plate in place on air supply. Remove motor assembly, consisting of motor plate, two motors, switch and wiring.
4. Remove from motor plate long screw attached to plate which supports motor cover. To do so, hold nut on screw with needle nose pliers or 3/8" open wrench. Loosen screw with screwdriver and turn nut off screw with fingers. Remove screw from motor plate and attach nut to screw.
Air Filters: 1. Check conditions of air filters on motors frequently. To do so, remove motor
cover on back of air supply by removing wing nut holding it in place.
14
2. To remove filter, pry retaining harness off pegs and lift out filter.
3. To clean filter, hold clean side against turned on air hose and blow dirt away. Replace if clogged or damaged. External Spark Screen: Remove three screws holding screen housing to top of lid and remove Inner parts. Order replacement spark screen If needed.
Internal Spark Deflector Deflector Is held in position by toes on two of its three legs which trap inner edge of drum lid, and cotter pin which attaches third leg to drum lid. To. remove deflector, pry points of cotter pin up straight. hold them together with pliers, and tap cotter pin down through deflector leg. Pull pin free with pliers.
ADDENDA
1. Always store Smart Ash indoors or cover unit. Insert stir rod through porthole Into drum for storage.
2. Load drum at burning site rather than wheel loaded drum to site.
3. When drum is off cart, store chain in accessories tray.
4. Tap center of spark screen to remove encrusted ash.
5. Never use pipe or conduit for a stir rod. Only use factory supplied unit which is specially designed to prevent flame from travelling thru rod during stirring.
6. Important reminder: If air is shut off during burn, do not simply res.tore power but remove lid and repeat ignition procedure see Page 5 for preparmg to burn.
7. Ask your local officials about steps necessary to comply with clean air regulations, such as procurement of an operating permit.
If you have any questions please call your local dealer or Elastec at 618-382-2525.
15

ELASTE~A POLLUTION CONTROL SYSTEMS For a Cleaner World
121 Council SI. • Carmi. Illinois 62821 618-382-2525 • FAX 618-382-3610
ELASTEC, INC. WARRANTY
Elastec, Inc. wm'rants the products against defects in material and wOl'kmanship zwdel' n01'1naluse and sel'vice fOl' a pel'iod of six months.
Elastec, Inc. 's obligation zwdel' this warranty is limited solely to repairing or l'eplacing pm'ts which, in its judgement, m'e defective in material and/or w01'kmanship.
We shall not be liable for expenses incurl'ed in l'epairs or altel'ations made outside our factol'Y in Carmi, Illinois 01' licensed Dealel' Locations, without OU1' pl'ior auth01'ization, nor shall we be responsible fOl' the pelformance of this product to which any l'evisions or alterations have been made by othel's.
We shall not be, in any event, liable fOl' damages 01' delays, nOl' for any consequential, special, or contingent damages fOl' bl'each of wa1'1'anty.
To validate the wa1'1'anty, it is necessary to fill out and return the wa1'1'anty l'egistl'ation cm'd that is supplied with each tn'oduct.
34
REF II PARTII
~ 108001 2 108018
3 108016
4 108017
5 108026
6 108030
7 108040
80. 108049
810 108048
90. 108059
910 108058
100. 108070
1010 108071 11 1080-66 12 108101 13 108085 14 108084 15 108087 16 108088 17 108124 18 108124 19 108124
200. 108073
20b 108074
Ash Model 110 ~ 220 Vol t
3 230.
23
16
3
1'-0-_- 25
30 31
OTY, DESCRIPTION REF II
~ DRUM LID ASSEMBLY 21 ~ TOP BAND SIS 22 ~ SCREEN SPACER 23 ~ SPARK SCREEN 230. 4 LID CLAMP ASSEMBLY 24 ~ SPARK DEFLECTOR ASSEMBLY 25 ~ STIR PORT COVER 26 ~ PLENUM BOX ASSEMBLY 1I0V 27 ~ PLENUM BOX ASSEMBLY 220 V 28 ~ (KIT) REPLACEMENT MOTORS 110 V 29 ~ (KIT) REPLACEMENT MOTORS 220 V 30 ~ TOGGLE SIJITCH IIO V 31 ~ TOGGLE SVITCH 220 V 32 ~ TOGGLE SIJITCH BOOT 33 ~ AIR SHUTTER CONTROL 34 2 FILTER HOLDER 35 ~ fllllRKIl 36 2 FILTER KEEPER 370. ~ BLOIJER COVER ~ CART HANDLE 37b 2 CART SIDE RAIL ~ CART BASE 38 ~ SAFE START KIT 110 V 39
~ SAFE START KIT 220 V 40
100 PQrts Units
17
\
12
23.
10 21
11 38
14 39 18
15
26 33
27
PARTII OTY. DESCRIPTION
108105 ~ AIR PORT COVER
791069 ~ HOSE CLAMP 108120 ~ FLEX HOSE-STAINLESS STEEL 4~
108116 ~ SNAP BUTTON KIT 108130 ~ DOUDLE LOOP CHAIN 6FT 108079 ~ CORD LOCK 108131 2 FENDER 108132 ~ AXLE 108133 2 AXLE SPACER 108134 2 AXLE U-BOLT 108135 2 CART IJHEEL 108136 2 AXLE PUSH NUT 108137 ~ AXLE CLAMP 108138 ~ BOTTOM GUARD
108149 ~ GRATE COMPLETE (OPTIONAL 108045 Not Shown STIR ROD ASSEMBLY 108004 ~ OPEN HEAD DRUM 108175 Not Shown SPARE PARTS KIT 110 V
1 YEAR OPERATION 108176 Not Shown SPARE PARTS KIT 220 V
1 YEAR OPERATION 108109 THRD AIR PORT 2 1/4' 108104 THRO AIR PORT I 1/4' 108107 AIR PORT KIT - lea
II: dc/snllrtnsh/plIrtnl!.
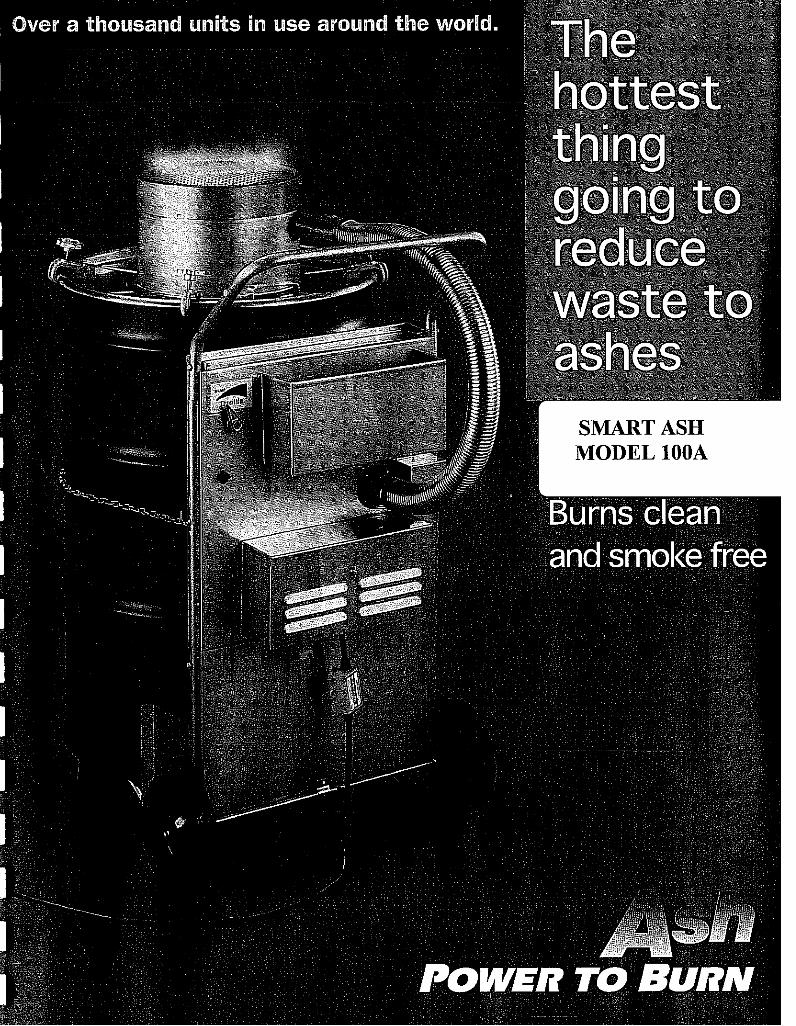
SMART ASH MODELIOOA

DISTRIBUTED BY: SPILL SHIELD INT'L.
ANCHORAGE, AK. (907) 561-6033 FAx 561-4504

SMART ASH HELPFUL
KLET SPILL SHIELD INTERNATIONAL P.O. Box 93009 • Anchorage, AK 99509
(907) 561-6033· Fax: 561-4504
JERRY HARMS VICE PRESIDENT
Natural Fiber Absorbents· Water Polishing Systems Mirachem Degreasers, Parts Washers & Equipment
Smart Ash Burners· Smart Heat Recovery Units Containment & Spill Response Products

IMPORTANT:
Read and understand operating instructions before using this unit.
WARNING: NOT FOR USE WITH MATERIALS
CONTAINING LIQUIDS SUCH AS
GASOLINE OR PAINT THINNERS. ALL
MATERIALS MUST HAVE A FLASH POINT
HIGHER THAN 100 DEGREES FAHRENHEIT.
(SEE NEXT PAGE FOR MORE INFORMATION REGARDING TIDS WARNING.)

LIST OF BURNABLES FOR SMART ASH
1. ABSORBENT TVeES 4. eAeER eRODIIr:TS a) Cellulose base types a) Newspapers b) Cotton b) Office wastes c) Polypropylene & cotton mix c) Cardboards d) Corn cob d) Fast food paper wastes e) Saw dust e) Computer papers f) Peat moss f) Sensitive documents
2. HVDROr:ARRONS 5. WOOD eRODII'-TS a) All types of crudes a) Saw dust b) Waste oils b) Scrap at construction sites c) Used motor oils c) Tree limbs & leaves d) Transmission oils d) Shipping pallets
(all types and weights) e) Any type of wood products e) Lubricating greases will fit this category f) Hydraulic oils g) Diesel fuels # 1 and #2 6. PLASTICS h) Kerosenes This unit will incinerate a wide i) Jet fuels (flash point above variety of plastics. The volatile
100 degrees Fahrenheit) emissions emitted by these types See (appendix 1) for disposal of material are sometimes not of above liquids acceptable. (see section 6)
3. FILTERS 7. MISr:ELLANEOIIS a) Spin on and cartridge oil a) Clothing
filters from cars, trucks and b) Gloves heavy equipment c) Oily rags
b) Air filters of all types (car, d) Packaging material truck & industrial types)
c) Poly & fiberglass filters d) Natural gas pipeline filters
(glycol filters)
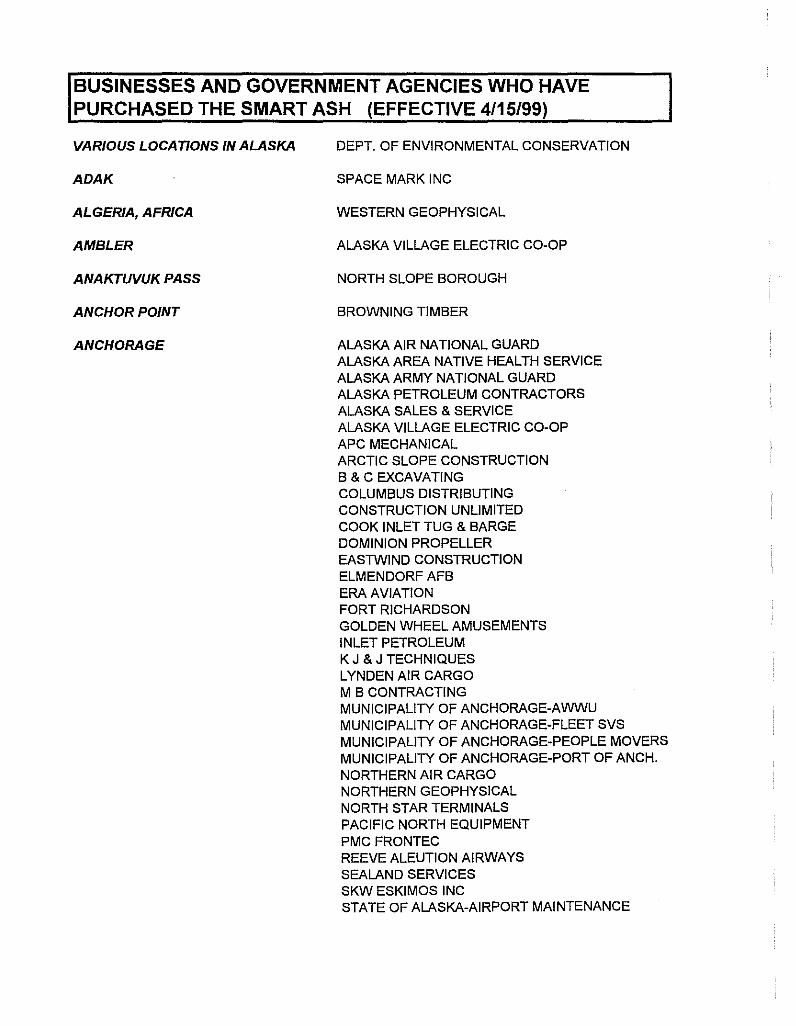
BUSINESSES AND GOVERNMENT AGENCIES WHO HAVE PURCHASED THE SMART ASH (EFFECTIVE 4/15/99)
VARIOUS LOCATIONS IN ALASKA
ADAK
ALGERIA, AFRICA
AMBLER
ANAKTUVUK PASS
ANCHOR POINT
ANCHORAGE
DEPT. OF ENVIRONMENTAL CONSERVATION
SPACE MARK INC
WESTERN GEOPHYSICAL
ALASKA VILLAGE ELECTRIC CO-OP
NORTH SLOPE BOROUGH
BROWNING TIMBER
ALASKA AIR NATIONAL GUARD ALASKA AREA NATIVE HEALTH SERVICE ALASKA ARMY NATIONAL GUARD ALASKA PETROLEUM CONTRACTORS ALASKA SALES & SERVICE ALASKA VILLAGE ELECTRIC CO-OP APC MECHANICAL ARCTIC SLOPE CONSTRUCTION B & C EXCAVATING COLUMBUS DISTRIBUTING CONSTRUCTION UNLIMITED COOK INLET TUG & BARGE DOMINION PROPELLER EASTWIND CONSTRUCTION ELMENDORF AFB ERA AVIATION FORT RICHARDSON GOLDEN WHEEL AMUSEMENTS INLET PETROLEUM K J & J TECHNIQUES LYNDEN AIR CARGO M B CONTRACTING MUNICIPALITY OF ANCHORAGE-AWWU MUNICIPALITY OF ANCHORAGE-FLEET SVS MUNICIPALITY OF ANCHORAGE-PEOPLE MOVERS MUNICIPALITY OF ANCHORAGE-PORT OF ANCH. NORTHERN AIR CARGO NORTHERN GEOPHYSICAL NORTH STAR TERMINALS PACIFIC NORTH EQUIPMENT PMCFRONTEC REEVE ALEUTION AIRWAYS SEALAND SERVICES SKW ESKIMOS INC STATE OF ALASKA-AIRPORT MAINTENANCE

Smart Ash Users
RE: Flash point detennination
Extensive testing was completed to detennine a safe flash point for materials to be burned in the Smart Ash.
Flash point is defined as: The lowest temperature known where a flammable liquid or solid will give off vapors sufficient enough to ignite and multiply, when all other conditions are favorable.
The Smart Ash is often used where ambient temperatures can be 90 to 100 degrees F. Since gasolines and thinners have flash points well below 0 degrees F., ambient temperatures can cause sufficient vapor release for the material to ignite easily, unlike fuel oils and crudes which have much higher flash points, typically above ambient air temps. For this reason, it is determined that materials must have a flash point above 100 degrees F.
Any liquids which are classified as Class IA, m or IC are flammable liquids which Dll\Y. llilt be burned in the Smart Ash. ie: alcohol, blazo fuel, white gas, gasoline etc. (Note - The above liquids are listed only as examples, this illustration is not intended to be a complete list of Class I liquids. Proper determination of classification of liquids or solids to be burned in the Smart Ash is solely the responsibility of the user.)
NOTE: According to the 1991 Unifonn Fire Code (section 9.105) it appears that liquids falling under the classifications of Class II (having a flash point at or above 100 degrees F to 140 degrees F), Class III-A (having a flash point at or above 140 degrees F to 200 degrees F) and Class III-B (having a flash point above 200 degrees F) would be suitable for burning in the Smart Ash.
CAUTION: When burning liquids that are classified as Class II liquids it is solely the responsibility of the user to insure that the specific liquid being burned has a flash point above 100 degrees F. Liquids or solids that have a flash point of exactly 100 degrees F are not suitable for burning in the Smart Ash (as per manufacturers instructions) and should be disposed of by other means in accordance with Local, State and Federal regulations.
Please call Elastec, Inc. or your local authorized dealer if you have any questions.
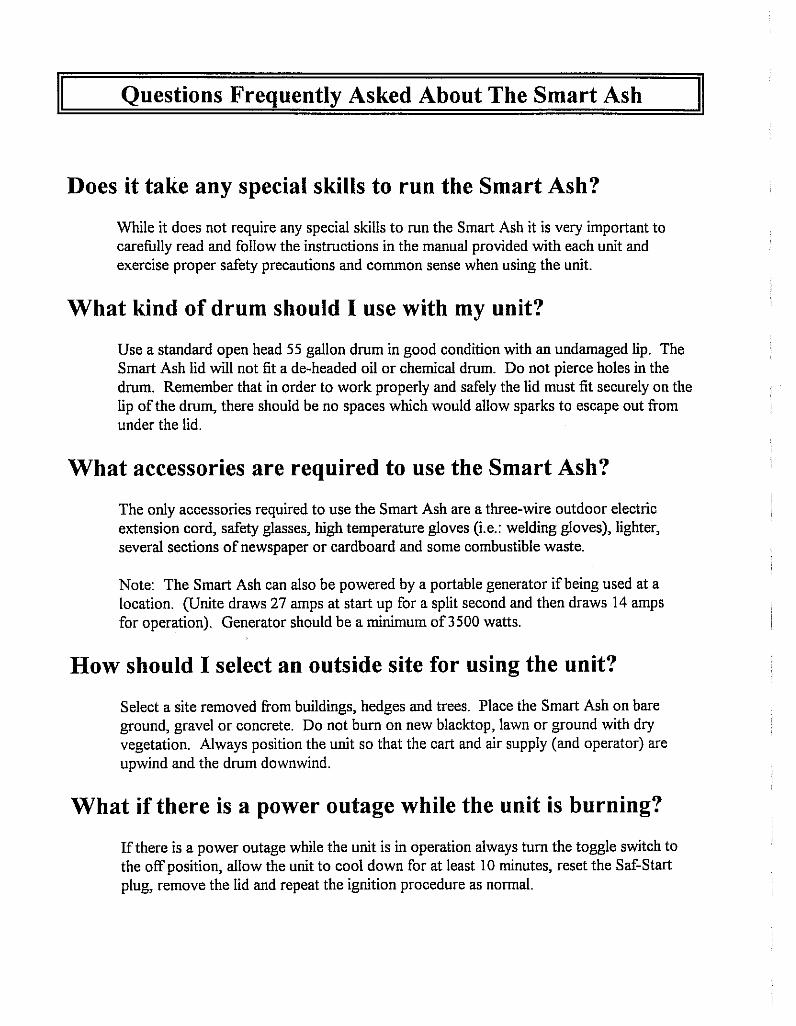
Questions Frequently Asked About The Smart Ash
Does it take any special skills to run the Smart Ash?
While it does not require any special skills to run the Smart Ash it is very important to carefully read and follow the instructions in the manual provided with each unit and exercise proper safety precautions and common sense when using the unit.
What kind of drum should I use with my unit?
Use a standard open head 55 gallon drum in good condition with an undamaged lip. The Smart Ash lid will not fit a de-headed oil or chemical drum. Do not pierce holes in the drum. Remember that in order to work properly and safely the lid must fit securely on the lip ofthe drum, there should be no spaces which would allow sparks to escape out from under the lid.
What accessories are required to use the Smart Ash?
The only accessories required to use the Smart Ash are a three-wire outdoor electric extension cord, safety glasses, high temperature gloves (i.e.: welding gloves), lighter, several sections of newspaper or cardboard and some combustible waste.
Note: The Smart Ash can also be powered by a portable generator ifbeing used at a location. (Unite draws 27 amps at start up for a split second and then draws 14 amps for operation). Generator should be a minimum of3500 watts.
How should I select an outside site for using the unit?
Select a site removed from buildings, hedges and trees. Place the Smart Ash on bare ground, gravel or concrete. Do not bum on new blacktop, lawn or ground with dry vegetation. Always position the unit so that the cart and air supply (and operator) are upwind and the drum downwind.
What if there is a power outage while the unit is burning?
If there is a power outage while the unit is in operation always tum the toggle switch to the off position, allow the unit to cool down for at least 10 minutes, reset the Saf-Start plug, remove the lid and repeat the ignition procedure as normal.

Failure to observe tbese precautions may result in internal combustion when air returns which can damage drum lip, lid or may result in possible injurv to the operator or nearby personnel.
How important is it for me to wear protective glasses and high temperature gloves while using the unit?
It is important to remember at all times that the Smart Ash is a serious disposal unit. The operator should wear safety glasses and high temperature gloves at ALL times while starting, tending or terminating the bum. It should also be noted that it is advisable, for safety reasons to avoid wearing loose fitting clothing while using the unit. Extreme temperatures can cause serious bums.
Can I burn flammable items in the unit?
Under NO circumstances should anything with a flash point ofless than 100 degrees Fahrenheit by put in your Smart Ash unit! DO NOT attempt to bum any liquid which is classified as Class IA, 1B or IC flammable liquid. i.e.: alcohol, blazo fuel, white gas, gasoline, most solvents, etc. (Note) The aforementioned are listed only as examples of Class 1 liquids. This illustration is not intended to be a complete list of Class 1 liquids. Proper determination of classification ofliquids to be burned in the Smart Ash is solely the responsibility of the user.
Can I burn clay or dirt in my unit?
NO. The Smart Ash cannot bum non-combustible items.
Can I burn cans and bottles in the unit?
Cans and bottles should be removed from the load as they will interfere with the airflow in the drum. They may also cause damage to the unit. CAUTION: Aerosol cans should NEVER be placed in the Smart Ash.
How do I dispose of oil filters in the unit?
The proper procedure for disposal of oil filters is a follows: Place the oil filters in a container filled with natural fiber absorbents and allow the remaining oil to drain out into the absorbent. After the bulk ofthe oil has drained out, punch several holes in the filters, place the filters and the saturated sorbent in the load and bum as normal. (5 to 6 filters per bum). Use filter rack for best results.

Does the Smart Ash meet current air emission standards?
YES. The Smart Ash is the only machine of its type in the marketplace which has been tested and successfully passed air emission standards as defined by the EPA. These tests were conducted at facilities in several states by qualified air emission testing firms. The summary test results are in this booklet for your review. The complete test data is on file at your authorized dealer offices and is available should you wish to review it.
Can I use my burn drum as a storage drum also?
We recommend not using the bum drum for collecting products to be burned. Transferring product from a storage drum to a bum drum allows the operator to visually inspect the bum load for aerosol cans and any other items which are not suitable for burning in the unit. An operator should allows know exactly what is in the drum prior to attempting to bum it. It also allows oversaturated product to drain properly.
How important is it to check the condition of the motor filters after each use of the Smart Ash?
VERY IMPORTANT! The smart Ash is no different than any other piece of operating equipment, it requires a certain amount of maintenance to insure trouble free operation. Specific instructions for cleaning the filters are given in the operations manual. Failure to clean filters will cause damage to armatures on the blower motors and will void manufacturers warranty! Replacement filters are available through your dealer should you need them.
Why is it that I can burn freestanding oils in the Smart Ash, but am instructed not to burn oversaturated sorbents?
Burning freestanding oils (using the proper loading technique) creates a wicking action. When trying to bum oversaturated sorbents you do not have a wicking action taking place inside the drum. The sorbents are on top of the excess liquid. Because the Smart Ash bums from the top down and no wicking action is taking place the load will not bum correctly and will tend to smoke excessively. This situation can easily be corrected by lining the bottom of the drum with a layer (2 to 4 inches) of clean natural fiber particulate prior to loading the drum with oily sorbents.
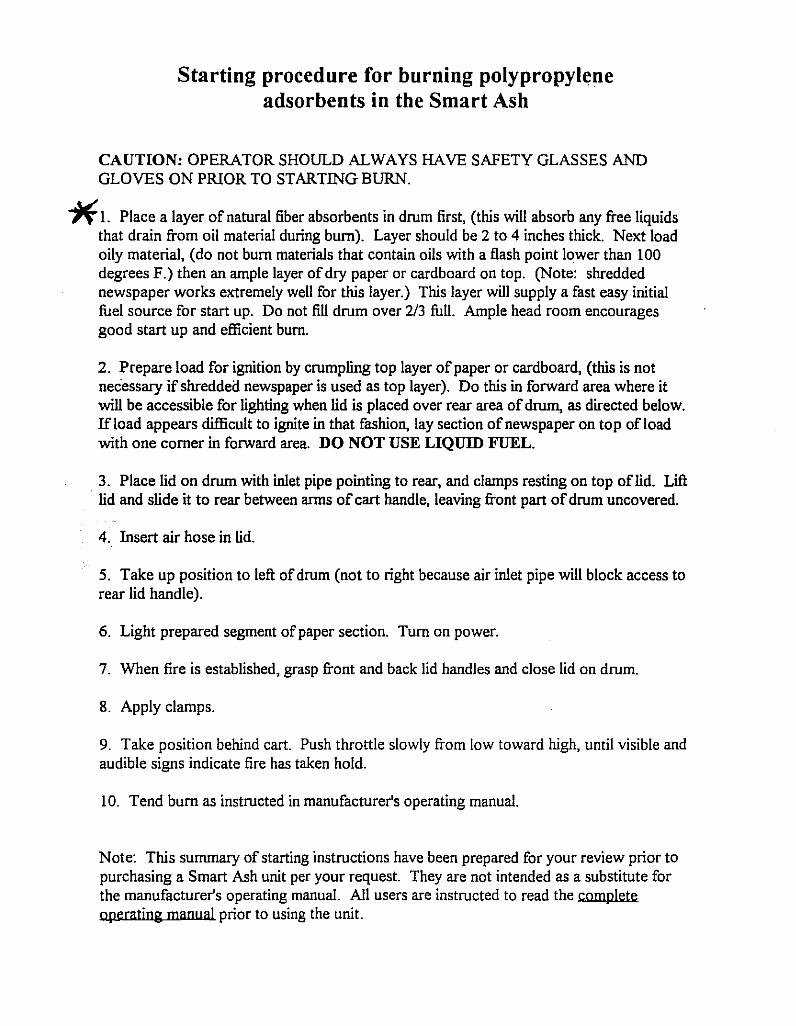
Starting procedure for burning polypropylene adsorbents in the Smart Ash
CAUTION: OPERATOR SHOULD ALWAYS HAVE SAFETY GLASSES AND GLOVES ON PRIOR TO STARTING BURN.
-If 1. Place a layer of natural fiber absorbents in drum first, (this will absorb any free liquids that drain from oil material during bum). Layer should be 2 to 4 inches thick. Next load oily material, (do not bum materials that contain oils with a flash point lower than 100 degrees F.) then an ample layer of dry paper or cardboard on top. (Note: shredded newspaper works extremely well for this layer.) This layer will supply a fast easy initial fuel source for start up. Do not fill drum over 2/3 full. Ample head room encourages good start up and efficient bum.
2. Prepare load for ignition by crumpling top layer of paper or cardboard, (this is not necessary if shredded newspaper is used as top layer). Do this in forward area where it will be accessible for lighting when lid is placed over rear area of drum, as directed below. Ifload appears difficult to ignite in that fashion, lay section of newspaper on top ofload with one comer in forward area. DO NOT USE LIQUID FUEL.
3. Place lid on drum with inlet pipe pointing to rear, and clamps resting on top of lid. Lift lid and slide it to rear between arms of cart handle, leaving front part of drum uncovered.
4. Insert air hose in lid.
5. Take up position to left of drum (not to right because air inlet pipe will block access to rear lid handle).
6. Light prepared segment of paper section. Tum on power.
7. When fire is established, grasp front and back lid handles and close lid on drum.
8. Apply clamps.
9. Take position behind cart. Push throttle slowly from low toward high, until visible and audible signs indicate fire has taken hold.
10. Tend bum as instructed in manufacturer's operating manual.
Note: This summary of starting instructions have been prepared for your review prior to purchasing a Smart Ash unit per your request. They are not intended as a substitute for the manufacturer's operating manual. All users are instructed to read the complete operating manual prior to using the unit.

ALTERNATIVE STARTING PROCEDURE FOR SMART ASH BURNER
1. Fill drum as instructed in manual.
2. Clamp lids on. ·see note below
3. Open stir port cover.
4. Light newspaper through the stir port cover with a long fireplace type match. (a small propane type torch may also be used)
5. Reach down and tum machine on with air flow on low.
6. Close stir port cover.
7. Gradually increase air flow until an even bum is reached.
CAUTION: THE SMART ASH SHOULD NEVER BE STARTED OR USED UNLESS THE OPERATOR IS WEARING SAFETY GLASSES AND HEAT PROTECTIVE GLOVES. Sl'<Il'\\ZT 1'\5\-1 1'<\\.l"ST ~e.. LIT \ l'<\\Y\e:t:>I P.T'C..cJ IF '-lC,1 NG., 1\-\\ S PRoC.f'"Du.RE.. DO JUOT f'rLLDu..) ()frPOi~S \Z)
\3LlIL\) UP JNSluf.... 01=' \)~v..!Y\.
HELPFUL HINT: It is not necessary to run the machine on full air. Air flow should be adjusted so that you produce an even bum at the top of about 2 to 3 inches. If the machine is making a whoofing or gusting noise you have more than the necessary air flow and the air flow should be adjusted downward. (Burning with too much air flow will cause the screens and other parts to bum out at a rapid rate.)
NOTE: When applying clamps on the drum lid, tighten clamps evenly so lid fits properly and ensures a good seal. It is not advisable to tighten clamps with excessive force as this can cause damage to the threading of the clamp or breakage of the clamp handle.

SmartAsh Electrical Operational Parameters
110Y.J.HUis.
Amp';:
Volta~,.:.
Start Up 27
110\'
Run 14
Ii0v
Electrical usage .8 Kilowatts p/br
]\.ote: If voltage falls below 102 volts dl.lTing start up or anytime during operation, saf start WIll disengage.
Minimym breaker or fuse should be..lO am..I!. Remove other electrical devices from a circuit that may cause low voltage disengagement of Saf-Start units.
Ifvoltage is lower than 102 volts for 1 millisecond, saf-start will disengage.
Always use heavy duty cord and as short as possible, to insure a proper amount of voltage.
220y units
Amps: Start Up
13.5 Run
7
Voltag:!: 220v 220v
Electrical usage .5 kilowatts p/hr
r..; ate: If voltage falls below 200 volts during start up or anytime during operation, saf start will disengage.
MiDiml!nt.1!r.~lLlill:.QrJ'usulu!llliLbe 20 amps. Remove other electrical devices from the circuit that may cause low voltage disengagement of Saf-Start unit.
Ifvoltage is lower than 200 volts for 1 millisecond, saf-start will disengage.
Voltage that taUs below the minimums listed above during start up will experience Saf-start disengagement. To over come this hold saf-start button in while turning on the unit. After start up unit should continue to operate, if it does not check for lowvob.ge.

HELPFUL HINTS FOR BURNING MATERIALS IN THE SMART ASH
SECTION 1 - ABSORBENT TYPES
A) CELI.ULOSE
These types of absorbents burn very well. They bum clean and leave very little ash.
B) 100% COTTON
These types also burn well. Some types absorb water as well as hydrocarbons so the moisture content must be low for a clean burn.
C) pm,YPROPYI,ENE & COTTON MIX
This material will repel water commonly so moisture content is not a problem. Some states will allow only 20% by volume of poly products to be incinerated.
D) CORNCOB
This material does very well if it is not overly saturated with fluid.
E) PEAT MOSS
This is a very hot clean burning absorbent that works well when it is saturated with diesel or oils.
All of the above items work well with the Smart Ash. Their burning characteristics are the same. When burning these materials (particularly poly sorbents), lining the bottom of the drum with clean dry cellulose absorbents is helpful. This will catch any fluids that leach out during operation of the unit as well as cutting burn time significantly. Always load the drum 2/3 full (do not overfill) and add a proper amount (6 to 10 pages) of newspaper to start the burning process. The Smart Ash will, 'on average, bum 50 Ibs per hour. The burn time of the unit will depend on the absorbent type and volume loaded in the drum.

SECTION 2 - HYDROCARBON (OIL) SATURATED SORBENTS
A) CRr JOE OILS
When mixed with cellulose, cotton, poly cotton mixes and peat moss the absorbents burn extremely hot and clean. Sometimes the lid assembly and dnun will glow red from extreme heat. (Do not be alanned - this is common with these type offuels.) NOTE: Full throttle air flow which can also cause this condition and should be avoided as it will cause the lid assembly & parts to burn out rapidly.
B) lISED MOTOR 011 ,S
When mixed with cellulose, cotton, poly and cotton mixes these absorbents will burn hot and clean.
C) TRANSMISSION, HYDRAULIC (DRIVE TRAIN OILS)
The operator should mix these oils with cellulose, cotton, poly cotton mixes and peat moss to obtain best results for a clean burn.
D) LUBRICATING GREASES
Corn cob and saw dust along with cellulose absorbents work best with greases. The operator must thoroughly mix the absorbent with the grease and line the bottom of. the drum with clean dry absorbents to catch and absorb any liquids which form.
E) DIESEL FUELS #1 AND #2, KEROSENE
Cellulose, cotton, polycotton and peat moss absorbents provide the best results with these fuels. Diesel fuels burn very hot and clean.
F) ,lET FUELS (Flash point above JOO degrees Fahrenheit)
These fuels burn with similar characteristics as diesel fuels and kerosenes. The operator can handle these fuels the same as diesel fuels and kerosenes.
All of the above fuels can (but do not have to be) absorbed in a burnable type of absorbent. Materials to be burned mllst have a Dash pojnt of above ] 00 degrees Fahrenheit. The above fuels all bum with similar characteristics. These fuels will bum very hot and typically very clean, depending on the type and amount of absorbent used. The absorbent must not be overly saturated with fuels. This will cause smoking during operation of the unit. One pound of absorbent per pound of fuel is a safe ratio for a clean bum. (If absorbents are oversaturated it is recommended that the operator add clean natural fiber absorbents to the load to insure a clean smoke free bum. If burning any of these fuels without sorbents (ie: freestanding) see appendix # 1 for proper loading technique.

SECTION 3 - FILTERS
A) SPIN ON FILTERS
These types of filters need a fuel source to properly burn the oils and internal parts. Burning of these types offilters is best achieved by burning with a load of used oily absorbents or wood products. These products burn very hot and will achieve the best results. After your burn is complete, the steel canister from the filter is all that remains. This can be disposed of in landfills or recycled.
NOTE: a filter rack should. be. used-for best results. and number of filters shoulcL be limited to 10 - 12 depending on diameter of filters.
B) VEHICLE AIR FILTERS
The burning of these types is simple. Since most of these are a paper base and will sustain a flame of their own, an ample amount of newspapers is all that is required to start the burn process.
C) VENTILATION FII,TERS (pOLY, FIBERGLASS)
These types of filters require the same procedure as vehicle filters. An ample amount of newspaper is all that is required for burning. These filters will sustain a flame of their own for the process.
When burning fiberglass filters, the process is the same only the ash will differ. The ashes from this material will be fist sized clumps instead of a powder.
D) NATURAL GAS PIPELINE FILTERS (GLYCOL FII,TERS)
These filters are long (36") and have a narrow diameter. Filters of this type will burn very hot. The fibers of the filters are impregnated with natural gas. An ample supply of newspapers is all that is required to start and sustain the burn process.

SECTION 4 - PAPER PRODUCTS
A) NEWSPAPERS, OFFICE WASTES
Stacks of newspapers, catalogs and magazines do not work well. The lack of air flow that can be generated around and through the paper stacks results in poor burning performance of the unit. The best results are achieved when these types of papers are shredded.
Office wastes will usually work well with lighting the waste since there is always ample paper in the waste to start the burn process.
Cardboard will work well in all situations. This material burns very hot and fast. Newspapers are helpful in starting the burning process.
Computer paper and sensitive documents, when neatly stacked in the drum with no obstructions will burn well. The air flow in the drums picks up each individual paper and burns it completely.
NOTE: It is usually helpful to use a rack in the bottom of the drum when burning full loads of computer paper.
B) . FAST FOOD PAPER WASTES
The problem with this type of waste is the moisture content from soft drinks and ice. For proper burning the operator must allow this material to dry. After it has dried, then lighting of the waste is all that is required to start the burning process.

SECTION 5 - WOOD PRODUCTS
A) SAW DUST
This material will incinerate on its own. When fuel is added such as diesel fuel or used oils, this will speed up the burn process and also eliminate a disposal problem of your oils. .
NOTE: When burning products which are very dense such as sawdust, it is usually necessary to stir the load more often than normal. This is necessary to insure proper air flow through the unit during the burn. (see instruction manual for proper instruction on stirring.)
B) CONSTRIJCTlON SITE WASTES, SIDPPING PALLETS
Wood from these sites burns very well. A small amount of oil or diesel (no gasolines or paint thinners) along with the newspaper will help start the process rapidly with little smoke at start up. Shipping pallets must be broken up to fit in the unit. After this is done, the same applies as for all wood products.
C) TREE LIMBS AND I,EAVES
When these products are burned the tree limbs and leaves should be mixed if possible. The leaves will insure the proper burning of the tree limbs. Lighting of the leaves is all that is needed to start the process. Any type of yard waste material should be dried (no green material.) The high moisture content of these materials when green does not allow for proper burning.
SECTION 6 - MISCELLANEOIJS
A) Cl.OTHING, GLOYES, OILY RAGS, PACKAGING MATERIALS
These kinds of materials will burn very well also. Moisture content must be low as with any material burned in the unit. An amount of cardboard added along with newspapers on top of the load being burned is needed to start the process.

SECTION 7 - PLASTICS
A) The Smart Ash will incinerate a variety of plastics. An oily absorbent and plenty of newspaper will be required to start the actual burning of the plastic. The plastic will melt dOWll to a molten state, then will burn very hot. (Extreme caution shoilid be lIsed when stirring this type of load to insure that molten plastic which will stick on the end of the stir rod does not drip on or come in contact with the operator}
NOTE: Although the unit will bum plastics with nC} smoke. emissions from plastks other than poly sorbents are often not acceptable with state air quality standards. Plastics (other than poly sC}rbents) should not be burned withOllt approval fmm proper state officials.
APPENDIX #1
USE OF LIQUID OILS! DIESEL FUELS! FUEL OILS
Successful testing has been completed for disposing of free oils containing nQ absorbent materials. Although care in loading the drum must be exercised itis an alternative to mixing absorbent with the oil for disposal in the Smart Ash
A MAXIMUM of20 gallons of liquid per load is recommended. Some small pieces of wood material are required for the disposing of used oils in -this manner. Four to five pieces of2" x 4" material 6" in length is sufficient. The wood pieces are put into the unit and allowed to float on the oil (see illustration on next page). These pieces act as a wick to support the flame. It is also recommended to use a few pieces of cardboard standing upright in the
. drum along the sides and an ample supply of newspaper on the top to insure a good start up. The unit is then ignited in the same fashion as when used for other materials. *- WARNING: DO NOT OVERLOAD THE DRUM. 20 GALLONS IS THE MAXIMUM THAT SHOULD BE BURNED AT ONE TIME. IF THE DRUM IS OVERLOADED THE OIL WILL BECOME HOT AND BOIL OVER DURING THE DISPOSAL PROCESS CAUSING SEVERE DAMAGE TO THE SMART ASH COMPONENTS! WHEN USING THE SMART ASH TO BURN OIL IN THIS MANNER, THE OPERATOR MUST INSURE THAT THE OIL DOES NOT CONTAIN ANY WATER, ANTIFREEZE, OR OTHER WATER SOLUBLE LIQUIDS AS THIS WILL CREATE A BOILER EFFECT INSIDE THE DRUM.
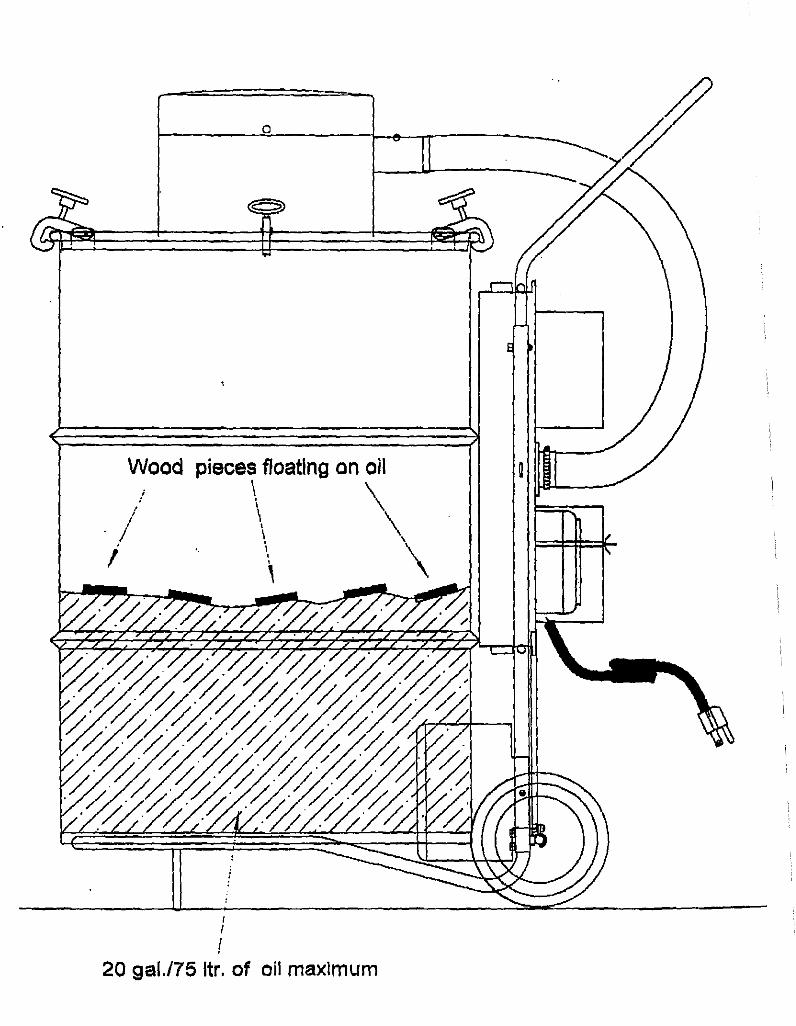
Wood pieces floating on oil
/ -/ ,
/
, I
!
\ \ \ \ \ \ \ \
\ \
20 gal.l75 Itr. of oil maxImum

FILTER RACK FOR THE
SMART ASH MODEL 1 aOA FOR MAXIMUM BURN EFFICIENCY
Spill Shield International P.O. Box 93009, Anchorage, Ak. 99509 Phone (907) 561-6033 FAX (907) 561-4504

Elastec, Inc.
,'i ,I(ansas Test Summary of Results ' ..
T/le following, are results of Stack sampling tests performed on Elastec's. Smart Ash unit. Tests were conducted by Air Source Technologies at the Air Source Technologies facility in Lenexa, Kansas for Eiastec, Inc.
'.'
Parameters Units Run I Run 2 Run 3
Particulate Emissions Uncorrected gr/dscf 0.0437 0.0320 0.0459 Corrected to 7% 02 gr/dscf 0.0490 0.0344 0.0535 Corrected to 12% CO2 gr/dscf 0.0477 0.0349 0.0501 Emission Rate gr/dscf 0.06 0.04 0.05 Emission per 100 Ib of material Ib/lOO Ibs 0.095 0.072 0.080 weight grams 0.0450 0.0476 Om05
Isokinetics % 96.6 93.6 98.3
Stack flow rate Aclual acfm 425 454 451 Standard Conditions dscfin 150 140 138 Velocity fr.lmin 541 579 575
Sampling Results Sampling Volume dscf 15,838 22.916 23.662 Avg. Stack Temp. OF 886 1073 1033 Avg. "p inIH20 0.010 om. 0.010 Avg. "H inlH20 0.53 0.47 .050 Avg. Meter Temperature OF 52 52 60 Oxygen, Orsat % 8.5 8.0 9.0 Carbon Dioxide, Orsat % 11.0 11.0 11.0 Slatic Pressure in/H2O 0.01 0.01 0.01 Moisture Collected mls 28.8 44.9 6605 Percent Water % 7.9 8.4 11.7 Sampling Time min. 40 64 64
THC uncorrected ppm 0- 115 0 0-100
Opacity % <5 <5 <5
Conclusions THC's are shown on the summary at range of 0 ppm to as high as 115 ppm, the high ends were seen as spikes on the chart. These spikes were viewed in the first 5 min. of operation, then dropped off to less than 5 ppm, to finish the test runs.
These results indicate, Elastec's Smart Ash units fall into compliance with all federal mandates for air quality.
This is a condensed version of the actual test results. Complete test results can be supplied upon request.

Elastec, Inc.
Colorado Test SUlnmary of Results The following, are results of Stack sampling tests performed ofElastec's, Smart Ash units. Tests were conducted by Air Pollution Testing, Inc., at Air pollution Testing, Inc. facility located in . Lakewood, CO. Hill enterprises contracted Air Pollution testing, on ~le behalf of Elastec, Inc. for the testing on the Smart Ash unit.
Run # 1 2 3 Average
Start Time 09:14 11:24 13:34 Stop Time .. 10:12 12:24 14:34
Sample Duration (Min) 35.5 60.0 60.0 51.8 02(%) 8.6 10.2 8.2 9.0
C02 (%) 10.9 8.7 8.0 9.2 1-I10 (%) 8.3 5.2 6.8 6.7
Stack Temp (OF) 799 843 894 845 ACFM <448 <455 <467 <457
DSCFM <142 <144 <140 <142
Particulate Emissions Iblhr <0.07 <0.01 <0.01 <0.03
gr/dsef 0.0557 0.0080 0.0080 0.0230 Gr/dsef@ 12% CO2 0.0613 0.0111 0.0119 0.0281
CO Emissions Ib/hr <0.081 <0.030 <0.012 <0.041
ppmvd 131 48 19 66 ppmvd @ 12 % CO2 144 66 29 80
The short run time of sampling test # 1 was due to rapid burning of the cardboard material used for testing purposes. 171bs. of material was stacked in the drum. This was done to fit as much material as possible for the test.
This is a condcnsed version of the actual test results. Complete test results can be supplied upon request.

'"Elastec, Inc.
Texas Test Summary of Results The following, are results of Stack sampling tests performed on Elastec's Smart Ash unit. Tests were conducted by Air Pollution Testing, Inc. of Denver, CO. at facilities of Dar san Inc. of Garland, TX .. Tests were perfonned on the behalfofElastec"Inc.
Run #1 Run #2 Run #3 Run#4 Average Start Time Il:OO 14:40 16:49 18:54
Stop Time 12:06 15:43 17:52 19:56
Load Weight (Ib) 70 70 70 70 Stack Temp (OF) , Il22 1082 1052 II 52 1102 Stack Flow (dscfm) 200 200 200 200 200 0' (%vd) 6.7 7.0 8.8 4.3 6.7 H20 (%vw) 9.9 11.8 9.9 11.9 10.9 Isokinetic Ratio (%) 95 89 90 89 91
Emissions Data
PM (grdscf) , 0.046 0.032 0.025 0.041 0.036 PM (Ib/hr) 0.080 0.045 0.059 0.058 0.060 CPM (gr/dscf) 0.027 0.018 0.Q\5 0.024 0.021 CPM (Iblhr) 0.046 0.032 0.025 0.041 0.036 Opacity (%) 6.3 0.0 0.0 0.0 1.6 CO (ppmv) ,-' 72 62 93 151 94 CO (Ib/hr) 0.062 0.054 0.081 0.132 0.082 VOC (ppmvw as C3Hs) 1.0 1.3 1.1 1.6 1.3 VOC (Iblhr as C3 Hs) 0.0015 0.0020 0.0017 0.0025 0.0019
The values of the averages are for test runs #2 thru #4. Run # 1 demonstrated a post test leak check. However, the data is presented and appears to be representative. This indicates the leak occurring late in the sampling run or immediately following sampling.
This is condensed version of the actual Stack Test results. Complete test results can be supplied upon request.
• I


