29
User’s Manual HS200 1910011729 REV 1.0.0 Smart Wi-Fi Light Switch

User’s ManualHS200
1910011729 REV 1.0.0
Smart Wi-Fi Light Switch
Copyright & TrademarksSpecifications are subject to change without notice. is a registered trademark of TP-LINK TECHNOLOGIES CO., LTD. Other brands and product names are trademarks or registered trademarks of their respective holders.
No part of the specifications may be reproduced in any form or by any means or used to make any derivative such as translation, transformation, or adaptation without permission from TP-LINK TECHNOLOGIES CO., LTD.
Apple and App Store are trademarks of Apple Inc., registered in the U.S. and other countries.
Android and the Google Play logo are trademarks of Google Inc.
© 2016 TP-LINK. All rights reserved.
www.tp-link.com
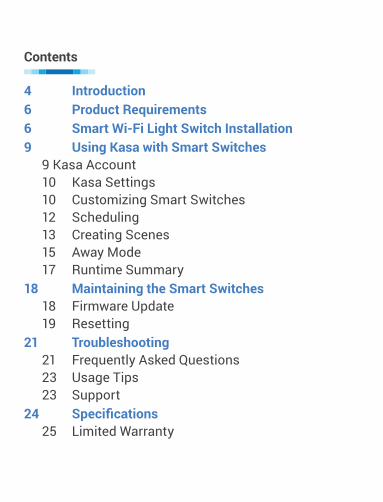
4 Introduction6 Product Requirements6 Smart Wi-Fi Light Switch Installation9 Using Kasa with Smart Switches
9 Kasa Account10 Kasa Settings10 Customizing Smart Switches12 Scheduling13 Creating Scenes15 Away Mode17 Runtime Summary
18 Maintaining the Smart Switches18 Firmware Update19 Resetting
21 Troubleshooting21 Frequently Asked Questions23 Usage Tips23 Support
24 Specifications25 Limited Warranty
Contents
4www.tp-link.com
User’s Manual Smart Wi-Fi Light Switch
IntroductionTP-LINK Smart Wi-Fi Light Switch is a standard, single-pole, wall light switch that can be controlled via your iOS or Android devices. Along with the TP-LINK Kasa mobile app, you can follow an intuitive wiring instructions provided to replace your standard in-wall switch, connect the Smart Switch to your home network, then control your lights and create custom lighting automations from anywhere, at anytime with an Internet connection.The Smart Switch is compatible with incandescent, LED, Halogen, and compact fluorescent light bulbs. The switch also includes a white backlight LED indicator to easily locate the switch at night.

5www.tp-link.com
User’s Manual Smart Wi-Fi Light Switch
Blinking Amber and Green: App-Config mode initiated.Green: Lit up for about 30 seconds when successfully connected to the Wi-Fi network, then turn off. Blinking Amber: Resetting.Red: No Wi-Fi connection.White: Lit up when the light is switched OFF to show the Smart Switch location in the dark. Press to reboot the Smart Switch.Press and hold (about 5 seconds)until the Wi-Fi status LED blinks amber and green alternately to initiate App-Config mode.Press and hold (about 10 seconds)until the Wi-Fi status LED blinks amber rapidly to factory reset the Smart Switch.
RESET
RESTART
6www.tp-link.com
User’s Manual Smart Wi-Fi Light Switch
Product Requirements• In-wall installation with hardwired connections.• Neutral wire required.• Single-pole light switch. The electrical box should
be more than 2 inches deep.• A smartphone or tablet running iOS 8 or higher;
Android 4.1x or higher.• A Wi-Fi connection (supports 802.11b/g/n
standard).
Smart Wi-Fi Light Switch InstallationImportant Safety InformationBefore installing, servicing, or removing the Smart Switch, read and follow all safety precautions, including the following:• WARNING: RISK OF ELECTRIC SHOCK OR FIRE.
Turn OFF power supply at the circuit breaker or fuse. Use a noncontact voltage tester to ensure the power is off.
• The Smart Switch must be installed and used in accordance with the National Electric Code (NEC)
7www.tp-link.com
User’s Manual Smart Wi-Fi Light Switch
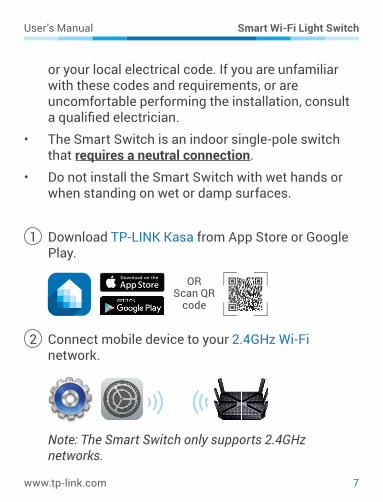
or your local electrical code. If you are unfamiliar with these codes and requirements, or are uncomfortable performing the installation, consult a qualified electrician.
• The Smart Switch is an indoor single-pole switch that requires a neutral connection.
• Do not install the Smart Switch with wet hands or when standing on wet or damp surfaces.
1 Download TP-LINK Kasa from App Store or Google Play.
OR Scan QR
code
2 Connect mobile device to your 2.4GHz Wi-Fi network.
Note: The Smart Switch only supports 2.4GHz networks.
8www.tp-link.com
User’s Manual Smart Wi-Fi Light Switch
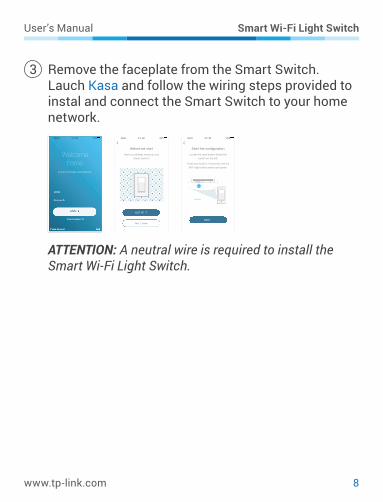
3 Remove the faceplate from the Smart Switch. Lauch Kasa and follow the wiring steps provided to instal and connect the Smart Switch to your home network.
Sketch 9:41 AM 100%
Before we start
Have you already wired up your
Smart Switch?
NOT YE T
Yes, I have
Log in to access your devices.
Welcomehome
Sketch 9:41 AM 100% Sketch 9:41 AM 100%
Start the con guration
Locate the reset button below the
switch on the left.
NEXT
Press and hold for 5 seconds until the
Wi-Fi light blinks amber and green.
RESE T
ATTENTION: A neutral wire is required to install the Smart Wi-Fi Light Switch.
9www.tp-link.com
User’s Manual Smart Wi-Fi Light Switch
Using Kasa with Smart SwitchesKasa AccountWhile you don’t have to have a Kasa account to use TP-LINK Smart Home devices, signing up for an account provides added functionality such as:• Synchronization of settings and configurations to
all your mobile devices.• Ability to control and configure the devices from
outside your home.• Use of third-party services and products such as
Amazon Echo.Devices can only be associated with one Kasa account. To remove the association, turn off Remote Control in the Kasa’s settings, or factory reset the device.After creating your Kasa account, you will need to verify the email associated with your account by clicking a link in an email that Kasa sends you. Until you verify the email, much of the above functionality will not work.

10www.tp-link.com
User’s Manual Smart Wi-Fi Light Switch
Kasa SettingsKasa Settings allows you to set your global preferences such as:• Remote Control to control your Smart Home
devices outside of your home. You need to sign in to your Kasa account first to turn on this function.
• Location and Time to set the location and time of where the Smart Home devices are located so that the Away Mode and Schedules can run on time. You can set your home’s location using your smart device’s GPS function, or manually enter the latitude and longitude coordinates.
• Firmware Update to update your Smart Home devices when there is an update available. Refer to Firmware Update for instructions.
Customizing Smart SwitchesYou can personalize your Smart Switches with a descriptive name, icon, and other information from the switch’s details screen.
11www.tp-link.com
User’s Manual Smart Wi-Fi Light Switch
Time Zone
Device Time
DEVICE TIME
Device Settings
9:41 PM 100%
Device Name Front Porch Switch
San Francisco
Location
Sept 15, 2015 12:00 PM
Model
Firmware Version
DEVICE INFO
MAC Address
Hardware Version
1.0.0
1.0.0
00:01:02:03:04:05
HS220
Device Icon
Delete Device
Remote Control
DEVICE CONTROLS
Disabled
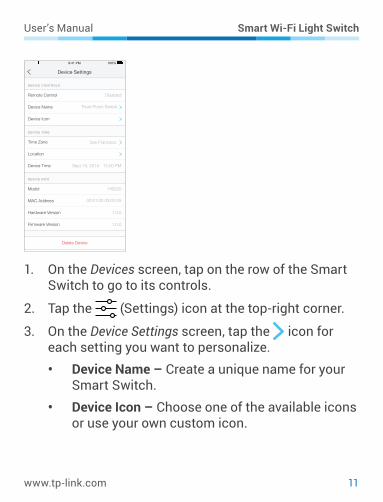
1. On the Devices screen, tap on the row of the Smart Switch to go to its controls.
2. Tap the (Settings) icon at the top-right corner.
3. On the Device Settings screen, tap the icon for each setting you want to personalize. • Device Name – Create a unique name for your
Smart Switch.• Device Icon – Choose one of the available icons
or use your own custom icon.
12www.tp-link.com
User’s Manual Smart Wi-Fi Light Switch
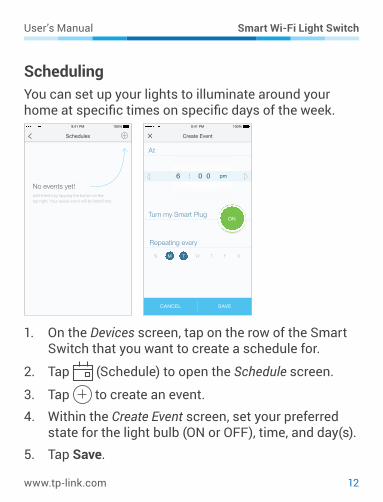
SchedulingYou can set up your lights to illuminate around your home at specific times on specific days of the week.
Schedules
9:41 PM 100%
No events yet!Add Events by tapping the button on the top right. Your saved event will be listed here.
SAVECANCEL
Create Event
9:41 PM 100%
At
Turn my Smart Plug
Repeating every
7 0 18 0 2
am5 5 94 5 8
6 0 0 pm:
S M T W T F S
ON
1. On the Devices screen, tap on the row of the Smart Switch that you want to create a schedule for.
2. Tap (Schedule) to open the Schedule screen.
3. Tap to create an event.4. Within the Create Event screen, set your preferred
state for the light bulb (ON or OFF), time, and day(s).5. Tap Save.
13www.tp-link.com
User’s Manual Smart Wi-Fi Light Switch
You can create as many events as you like and edit them at any time from the Schedule screen.
Creating ScenesTake full advantage of your TP-LINK Smart Home devices in your home with “Scenes”. A scene is a preset group of Smart Devices (such as Smart Plugs and Smart Switches) that can be customized and controlled simultaneously at the touch of a button from your smartphone or tablet to easily set your mood or fit any special occasion. For example, set a customized “Movie Time” to turn on the home theater system plugged into a Smart Plug and dim down the lights in your Entertainment Room to 10% at the same time.Please keep in mind that SCENES can only be set and controlled once you’re signed in to your Kasa account.
14www.tp-link.com
User’s Manual Smart Wi-Fi Light Switch
DevicesScenes
Scenes let you set the mood of your
home in one tap.
Good Morning
Get ready for the day by turning on your devices
Movie Night
Dim the lights for showtime
Good Night
Turn everything off before bedtime
Custom
Create your own scene
9:41 PM 100%
Scenes
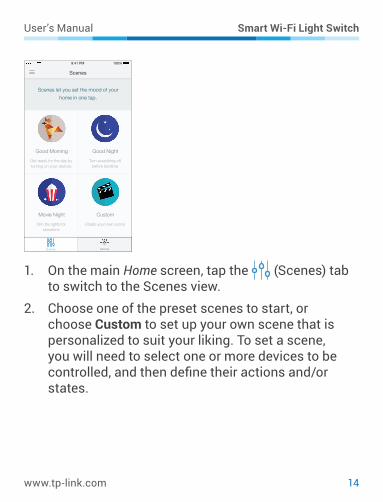
1. On the main Home screen, tap the (Scenes) tab to switch to the Scenes view.
2. Choose one of the preset scenes to start, or choose Custom to set up your own scene that is personalized to suit your liking. To set a scene, you will need to select one or more devices to be controlled, and then define their actions and/or states.
15www.tp-link.com
User’s Manual Smart Wi-Fi Light Switch
Bedroom Lamp
BULBS
PREVIEW
Main Kitchen Lights
Side Kitchen Lights
Christmas Gnome
SWITCHES
PLUGS
60%
Party Bulb
ON
OFF
Next
9:41 PM 100%
Set Scene
!
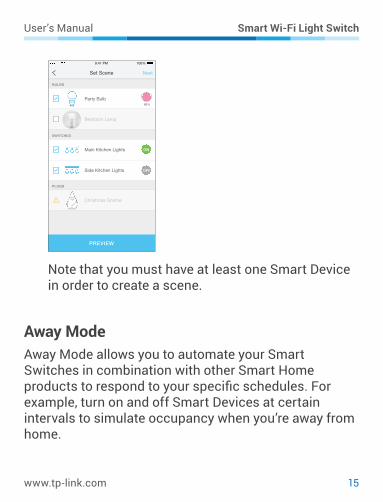
Note that you must have at least one Smart Device in order to create a scene.
Away ModeAway Mode allows you to automate your Smart Switches in combination with other Smart Home products to respond to your specific schedules. For example, turn on and off Smart Devices at certain intervals to simulate occupancy when you’re away from home.
16www.tp-link.com
User’s Manual Smart Wi-Fi Light Switch
Away Mode
9:41 PM 100%
Schedules
Devices
2
3
When you’re Away, your devices will turn on and off to simulate that someone is home.
Select Devices
9:41 PM 100%
How about picking one light from each room?
Christmas Gnome
Garage Light
Party Bulb
Living Room
Bedroom Lamp
!
PLUGS
BULBS
SAVE
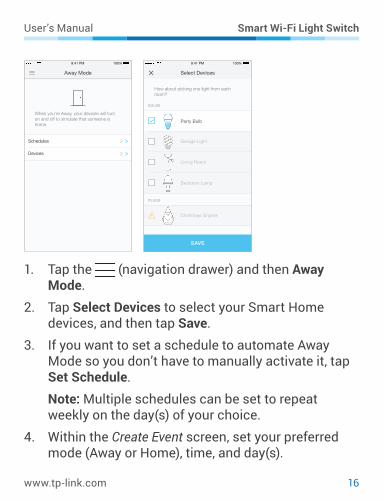
1. Tap the (navigation drawer) and then Away Mode.
2. Tap Select Devices to select your Smart Home devices, and then tap Save.
3. If you want to set a schedule to automate Away Mode so you don’t have to manually activate it, tap Set Schedule.Note: Multiple schedules can be set to repeat weekly on the day(s) of your choice.
4. Within the Create Event screen, set your preferred mode (Away or Home), time, and day(s).
17www.tp-link.com
User’s Manual Smart Wi-Fi Light Switch
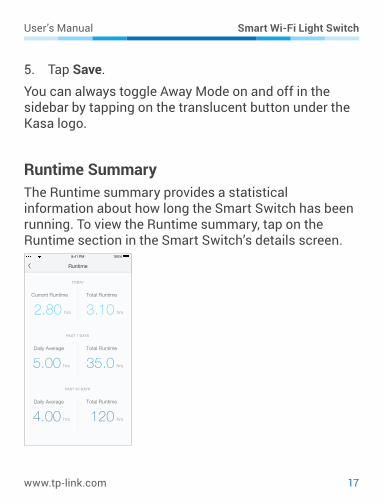
5. Tap Save.You can always toggle Away Mode on and off in the sidebar by tapping on the translucent button under the Kasa logo.
Runtime SummaryThe Runtime summary provides a statistical information about how long the Smart Switch has been running. To view the Runtime summary, tap on the Runtime section in the Smart Switch’s details screen.
Current Runtime
2.80 hrs
Total Runtime
3.10 hrs
Daily Average
5.00 hrs
Total Runtime
35.0 hrs
Runtime
9:41 PM 100%
TODAY
PAST 7 DAYS
Daily Average
4.00 hrs
Total Runtime
120 hrs
PAST 30 DAYS

18www.tp-link.com
User’s Manual Smart Wi-Fi Light Switch
Maintaining the Smart SwitchesFirmware UpdateTo keep the Smart Switches happy and up-to-date with all the latest improvement and fixes, we recommend that you update the firmware when updates are available.
Firmware Update
9:41 PM 100%
New Updates Available
Smart PlugsLatest Version: 1.2.0 UPDATE
We found available firmware updates for your
reachable devices.
4 Available Updates
Smart Bulb HS100Latest Version: 1.2.0 UPDATE
2 Available Updates
Smart Bulb HS120Latest Version: 1.2.0
0 Available Updates
9:41 PM 100%
Updating firmware
Please do not unplug your devices during
the update.
25%
This process may take a few minutes.
1. Launch Kasa.2. Tap the (navigation drawer) and then Settings.3. Tap Firmware Update.4. Within the Firmware Update screen, tap Update.
19www.tp-link.com
User’s Manual Smart Wi-Fi Light Switch
Remember: Only the Smart Switches that are currently reachable and have an available update will be shown in the Firmware Update screen.
It is important to leave the Kasa app running while it finishes updating the Smart Switches. Try not to minimize the app, close the app, or interrupt the update to prevent problems.
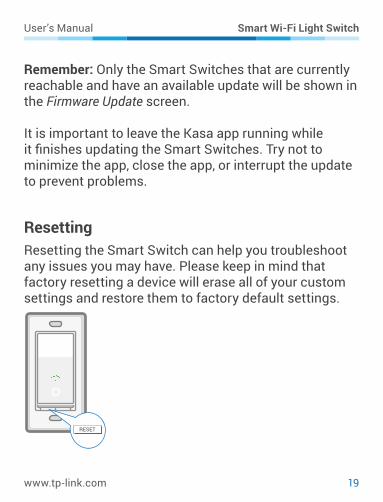
ResettingResetting the Smart Switch can help you troubleshoot any issues you may have. Please keep in mind that factory resetting a device will erase all of your custom settings and restore them to factory default settings.
RESET
20www.tp-link.com
User’s Manual Smart Wi-Fi Light Switch
The RESET button located underneath the Smart Switch has two functions:• Press and hold (about 5 seconds) until the Wi-Fi
status LED blinks amber and green alternately to initiate App-Config mode.
• Press and hold (about 10 seconds) until the Wi-Fi status LED blinks amber rapidly to reset the Smart Switch to factory defaults. Note that factory setting the Smart Switch will erase all of your custom settings, and you’ll have to set it up again.
21www.tp-link.com
User’s Manual Smart Wi-Fi Light Switch
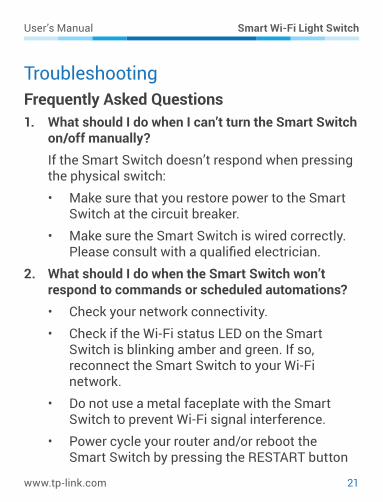
TroubleshootingFrequently Asked Questions1. What should I do when I can’t turn the Smart Switch
on/off manually?If the Smart Switch doesn’t respond when pressing the physical switch:• Make sure that you restore power to the Smart
Switch at the circuit breaker.• Make sure the Smart Switch is wired correctly.
Please consult with a qualified electrician.2. What should I do when the Smart Switch won’t
respond to commands or scheduled automations?• Check your network connectivity.• Check if the Wi-Fi status LED on the Smart
Switch is blinking amber and green. If so, reconnect the Smart Switch to your Wi-Fi network.
• Do not use a metal faceplate with the Smart Switch to prevent Wi-Fi signal interference.
• Power cycle your router and/or reboot the Smart Switch by pressing the RESTART button
22www.tp-link.com
User’s Manual Smart Wi-Fi Light Switch
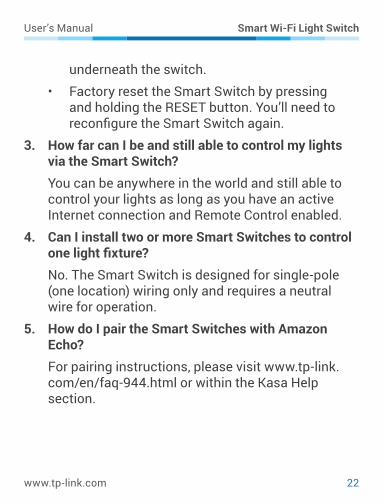
underneath the switch.• Factory reset the Smart Switch by pressing
and holding the RESET button. You’ll need to reconfigure the Smart Switch again.
3. How far can I be and still able to control my lights via the Smart Switch?You can be anywhere in the world and still able to control your lights as long as you have an active Internet connection and Remote Control enabled.
4. Can I install two or more Smart Switches to control one light fixture?No. The Smart Switch is designed for single-pole (one location) wiring only and requires a neutral wire for operation.
5. How do I pair the Smart Switches with Amazon Echo?For pairing instructions, please visit www.tp-link.com/en/faq-944.html or within the Kasa Help section.
23www.tp-link.com
User’s Manual Smart Wi-Fi Light Switch
Usage Tips• Place the Smart Switch within the range of your Wi-
Fi router or access point (approximately 150 feet).• Avoid physical obstructions and radio interference
in the surrounding area.
SupportShould you encounter any issues with the Smart Wi-Fi Light Switch, please visit our support page at www.tp-link.com/support for web support and troubleshooting information.
24www.tp-link.com
User’s Manual Smart Wi-Fi Light Switch
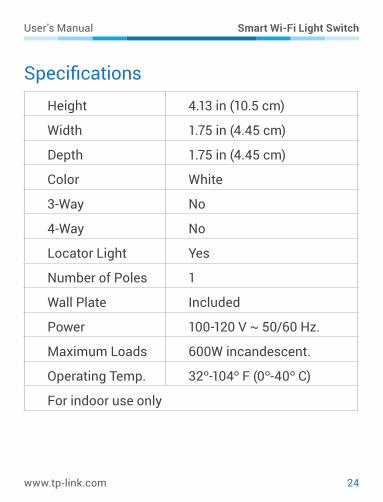
SpecificationsHeight 4.13 in (10.5 cm)
Width 1.75 in (4.45 cm)
Depth 1.75 in (4.45 cm)
Color White
3-Way No
4-Way No
Locator Light Yes
Number of Poles 1
Wall Plate Included
Power 100-120 V ~ 50/60 Hz.
Maximum Loads 600W incandescent.
Operating Temp. 32o-104o F (0o-40o C)
For indoor use only
25www.tp-link.com
User’s Manual Smart Wi-Fi Light Switch
Limited WarrantyTo learn more about the Limited Warranty for TP-LINK products, please visit www.tp-link.us/support/rma.
FCC StatementThis equipment has been tested and found to comply with the limits for a Class B digital device, pursuant to part 15 of the FCC Rules. These limits are designed to provide reasonable protection against harmful interference in a residential installation. This equipment generates, uses and can radiate radio frequency energy and, if not installed and used in accordance with the instructions, may cause harmful interference to radio communications. However, there is no guarantee that interference will not occur in a particular installation. If this equipment does cause harmful interference to radio or television reception, which can be determined by turning the equipment off and on, the user is encouraged to try to correct the interference by one or more of the following measures:
• Reorient or relocate the receiving antenna.
• Increase the separation between the equipment and receiver.
• Connect the equipment into an outlet on a circuit different from that to which the receiver is connected.
• Consult the dealer or an experienced radio / TV technician for help.
This device complies with part 15 of the FCC Rules. Operation is subject to the following two conditions:
1) This device may not cause harmful interference.
2) This device must accept any interference received, including interference that may cause undesired operation.
Any changes or modifications not expressly approved by the party responsible
26www.tp-link.com
User’s Manual Smart Wi-Fi Light Switch
for compliance could void the user’s authority to operate the equipment.
Note: The manufacturer is not responsible for any radio or TV interference caused by unauthorized modifications to this equipment. Such modifications could void the user’s authority to operate the equipment.
FCC RF Radiation Exposure StatementThis equipment complies with FCC RF radiation exposure limits set forth for an uncontrolled environment. This device and its antenna must not be co-located or operating in conjunction with any other antenna or transmitter.
“To comply with FCC RF exposure compliance requirements, this grant is applicable to only Mobile Configurations. The antennas used for this transmitter must be installed to provide a separation distance of at least 20 cm from all persons and must not be co-located or operating in conjunction with any other antenna or transmitter.”
CE Mark Warning
This is a class B product. In a domestic environment, this product may cause radio interference, in which case the user may be required to take adequate measures.
RF Exposure InformationThis device meets the EU requirements (1999/5/EC Article 3.1a) on the limitation of exposure of the general public to electromagnetic fields by way of health protection.
The device complies with RF specifications when the device used at 20 cm from your body.
Canadian Compliance StatementThis device complies with Industry Canada license-exempt RSSs. Operation is subject to the following two conditions:

27www.tp-link.com
User’s Manual Smart Wi-Fi Light Switch
1) This device may not cause interference, and
2) This device must accept any interference, including interference that may cause undesired operation of the device.
Le présent appareil est conforme aux CNR d’Industrie Canada applicables aux appareils radio exempts de licence. L’exploitation est autorisée aux deux conditions suivantes :
1) l’appareil ne doit pas produire de brouillage;
2) l’utilisateur de l’appareil doit accepter tout brouillage radioélectrique subi, meme si le brouillage est susceptible d’en compromettre le fonctionnement.
Radiation Exposure Statement This equipment complies with IC radiation exposure limits set forth for an uncontrolled environment. This equipment should be installed and operated with minimum distance 20cm between the radiator and your body.
Déclaration d’exposition aux radiationsCet équipement est conforme aux limites d’exposition aux rayonnements IC établies pour un environnement non contrôlé. Cet équipement doit être installé et utilisé avec un minimum de 20 cm de distance entre la source de rayonnement et votre corps.
Industry Canada StatementCAN ICES-3 (B)/NMB-3(B)
Korea Warning Statements당해 무선설비는 운용중 전파혼신 가능성이 있음.NCC Notice
28www.tp-link.com
User’s Manual Smart Wi-Fi Light Switch注意! 依據 低功率電波輻射性電機管理辦法
第十二條 經型式認證合格之低功率射頻電機,非經許可,公司、商號或使用者均不得擅自變更頻率、加大功率或變更原設計之特性或功能。
第十四條 低功率射頻電機之使用不得影響飛航安全及干擾合法通行;經發現有干擾現象時,應立即停用,並改善至無干擾時方得繼續使用。前項合法通信,指依電信規定作業之無線電信。低功率射頻電機需忍受合法通信或工業、科學以及醫療用電波輻射性電機設備之干擾。
減少電磁波影響,請妥適使用。
安全諮詢及注意事項• 請使用原裝電源供應器或只能按照本產品注明的電源類型使用本產品。
• 清潔本產品之前請先拔掉電源線。請勿使用液體、噴霧清潔劑或濕布進行清潔。
• 注意防潮,請勿將水或其他液體潑灑到本產品上。
• 插槽與開口供通風使用,以確保本產品的操作可靠並防止過熱,請勿堵塞或覆蓋開口。
• 請勿將本產品置放於靠近熱源的地方。除非有正常的通風,否則不可放在密閉位置中。
• 請不要私自打開機殼,不要嘗試自行維修本產品,請由授權的專業人士進行此項工作。
Продукт сертифіковано згідно с правилами системи УкрСЕПРО на відповідність вимогам нормативних документів та вимогам, що передбачені чинними законодавчими актами України.
Safety Information• When product has a power button, the power button is one of the ways
29www.tp-link.com
User’s Manual Smart Wi-Fi Light Switch
to shut off the product; when there is no power button, the only way to completely shut off the power is to disconnect the product or the power adapter from the power source.
• Don’t disassemble the product, or make repairs yourself. You run the risk of electric shock and voiding the limited warranty. If you need service, please contact us.
• Avoid water and wet locations.
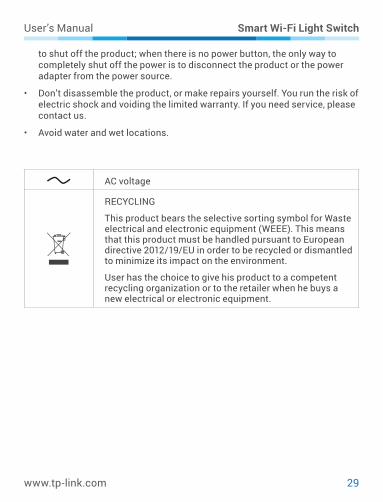
AC voltage
RECYCLING
This product bears the selective sorting symbol for Waste electrical and electronic equipment (WEEE). This means that this product must be handled pursuant to European directive 2012/19/EU in order to be recycled or dismantled to minimize its impact on the environment.
User has the choice to give his product to a competent recycling organization or to the retailer when he buys a new electrical or electronic equipment.


