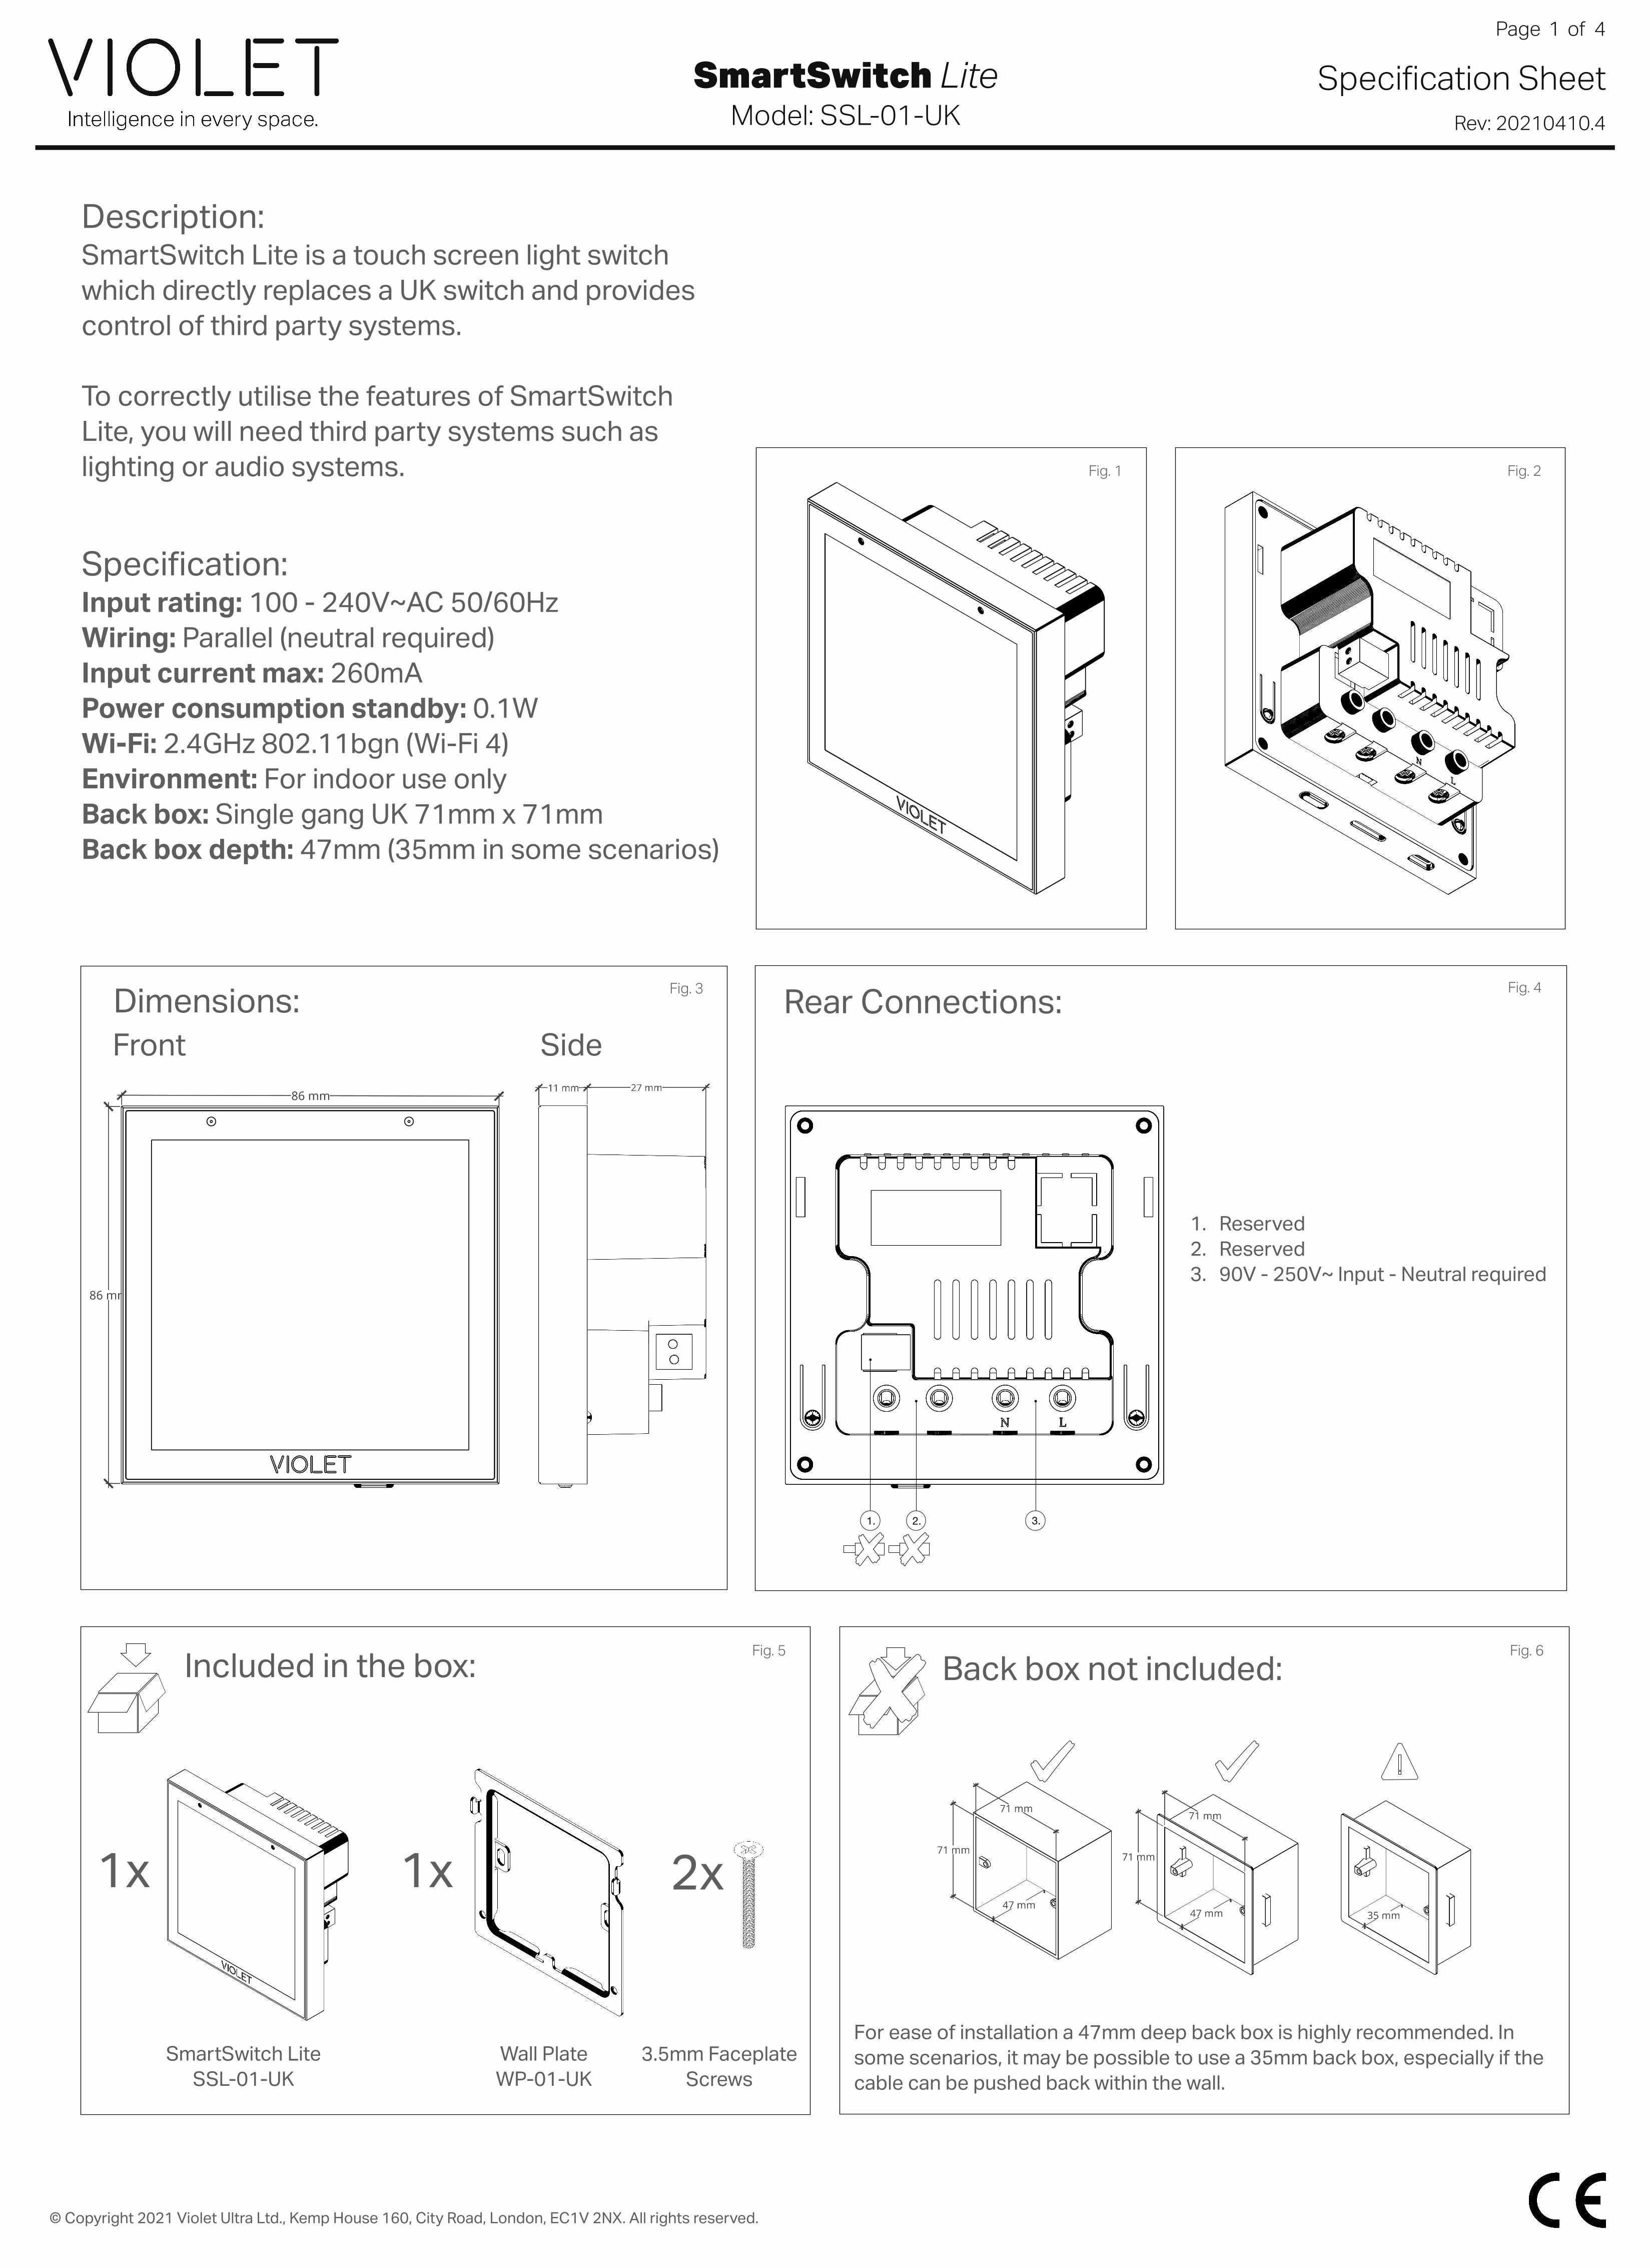
Description: SmartSwitch Lite is a touch screen light switch which directly replaces a UK switch and provides control of third party systems.
To correctly utilise the features of SmartSwitch Lite, you will need third party systems such as lighting or audio systems.
Rear Connections:
Back box not included:
For ease of installation a 47mm deep back box is highly recommended. In some scenarios, it may be possible to use a 35mm back box, especially if the cable can be pushed back within the wall.
1x 1x 2x
Included in the box:
SmartSwitch Lite SSL-01-UK
Wall Plate WP-01-UK
3.5mm Faceplate Screws
Specification: Input rating: 100 - 240V~AC 50/60Hz Wiring: Parallel (neutral required) Input current max: 260mA Power consumption standby: 0.1W Wi-Fi: 2.4GHz 802.11bgn (Wi-Fi 4) Environment: For indoor use only Back box: Single gang UK 71mm x 71mm Back box depth: 47mm (35mm in some scenarios)
System topology: SmartSwitch Lite integrates with third party systems over Wi-Fi. It is important that you have a reliable and strong Wi-Fi signal and upgrading your ISP supplied equipment highly recommended.
Violet currently integrates with Philips Hue bulbs via a Hue Bridge and Sonos audio players.
Multiple SmartSwitch Lites can communicate with these systems over the same network (subject to network limitations).
SONOS
Philips
SONOS
SmartSwitch Lite
Sonos Player Sonos Player Hue Bulbs Up to 50 per bridge
Wiring: SmartSwitch Lite is mains powered and requires a neutral, meaning that it should be wired in parallel with your bulbs rather than in series with them. When utilised with smart bulbs such as those by Philips Hue (as is intended), tweaking your existing setup is relatively straightforward.
The general concept is to permanently energise the smart bulbs and use the original switch wire to send both the live and the neutral back down to the switch.
Most modern UK homes will not have a neutral at the switch location (A), they have a switched-live (usually marked with brown tape). Since SmartSwitch Lite requires a neutral, there is a small change that needs to be made to utilise the existing wiring. [Note: If you do have a neutral at the switch location already, then the same concept discussed below applies just at the switch itself rather than the light location.]
The digram above (B) shows the likely starting point for the wiring within a ceiling rose or downlight. To start with, the switch is in series with the bulbs, making and breaking the circuit as it is switched.
By hooking the incoming power feed directly up to the bulb(s) (C), they will be permanently energised.
Then connect the wire from the switch in parallel (D) to send both a live and neutral back down to the switch location.
This has now converted the switched-live back to a neutral (and so the brown marker tape can be removed) (E).
Note that this is only possible with smart bulbs since the bulbs can be turned on and off through the software meaning the original switch is not necessary.
If you have additional bulbs they should be connected the same as the first bulb: in parallel (F).
If the switch has two cables (i.e. for two circuits), then the live and switched live in the second cable can be connected (G) with a suitable connector to permanently energise that circuit too, only from the switch location rather than the rose.
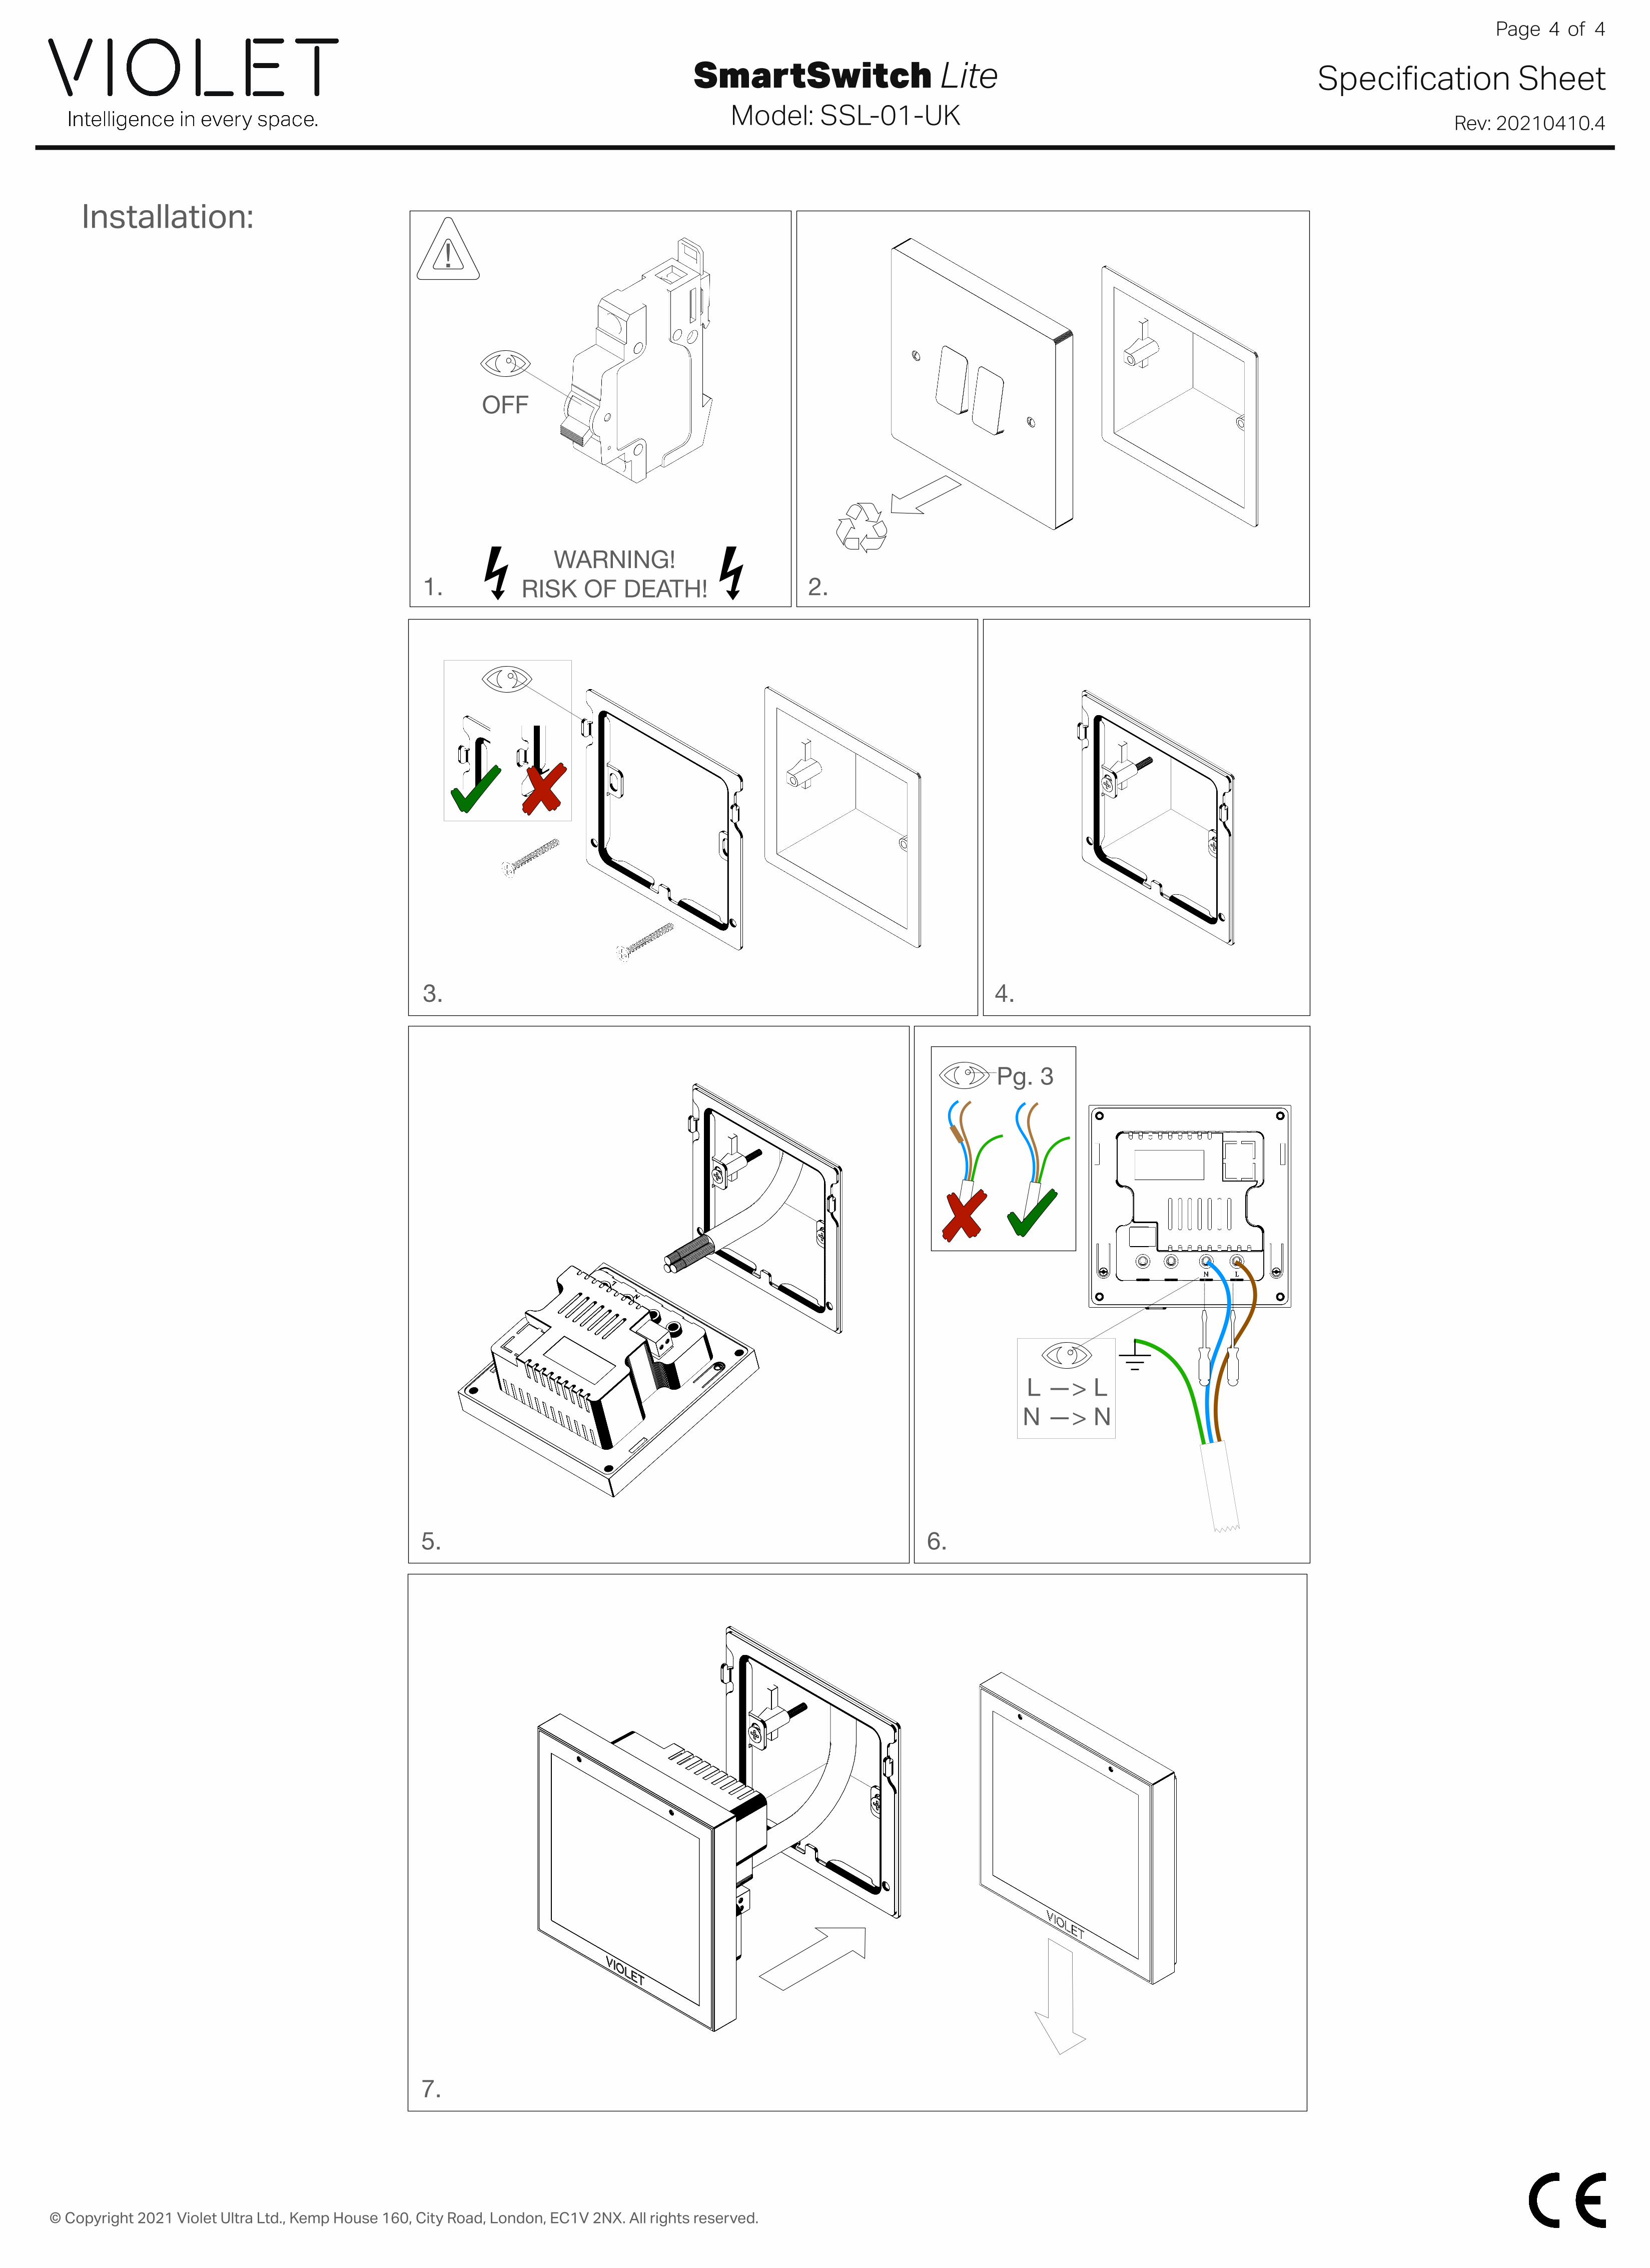
WARNING: Electrics are dangerous and you should seek the help of a professional electrician if you are not 100% sure what you are doing. Always ensure the power is off before working and test any wires before touching them. Risk of fire. Risk of shock. Risk of death.