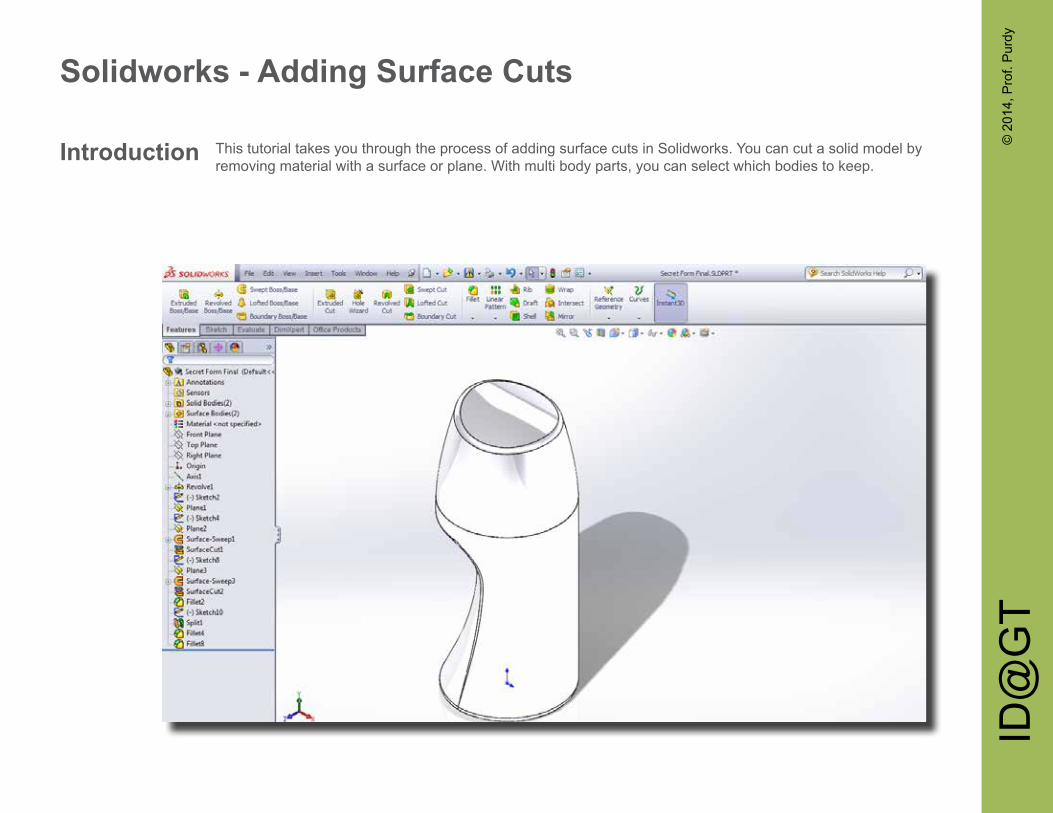
This tutorial takes you through the process of adding surface cuts in Solidworks. You can cut a solid model by removing material with a surface or plane. With multi body parts, you can select which bodies to keep.
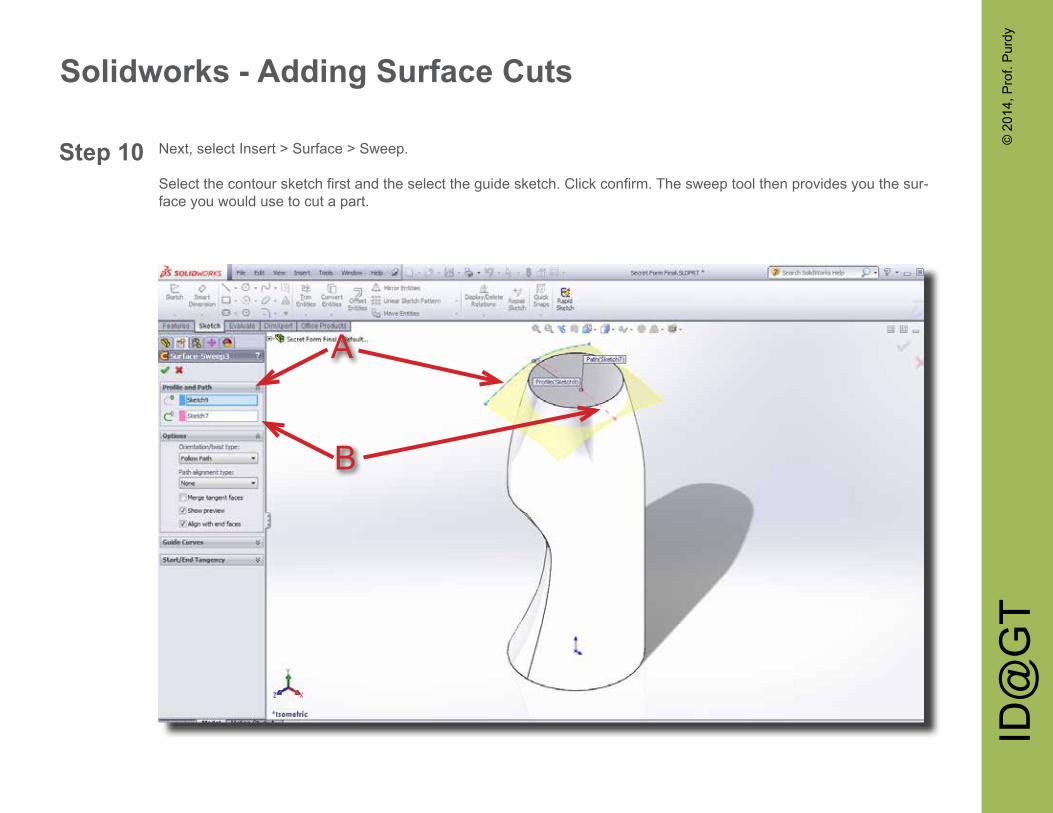
Select the contour sketch first and the select the guide sketch. Click confirm. The sweep tool then provides you the sur-face you would use to cut a part.
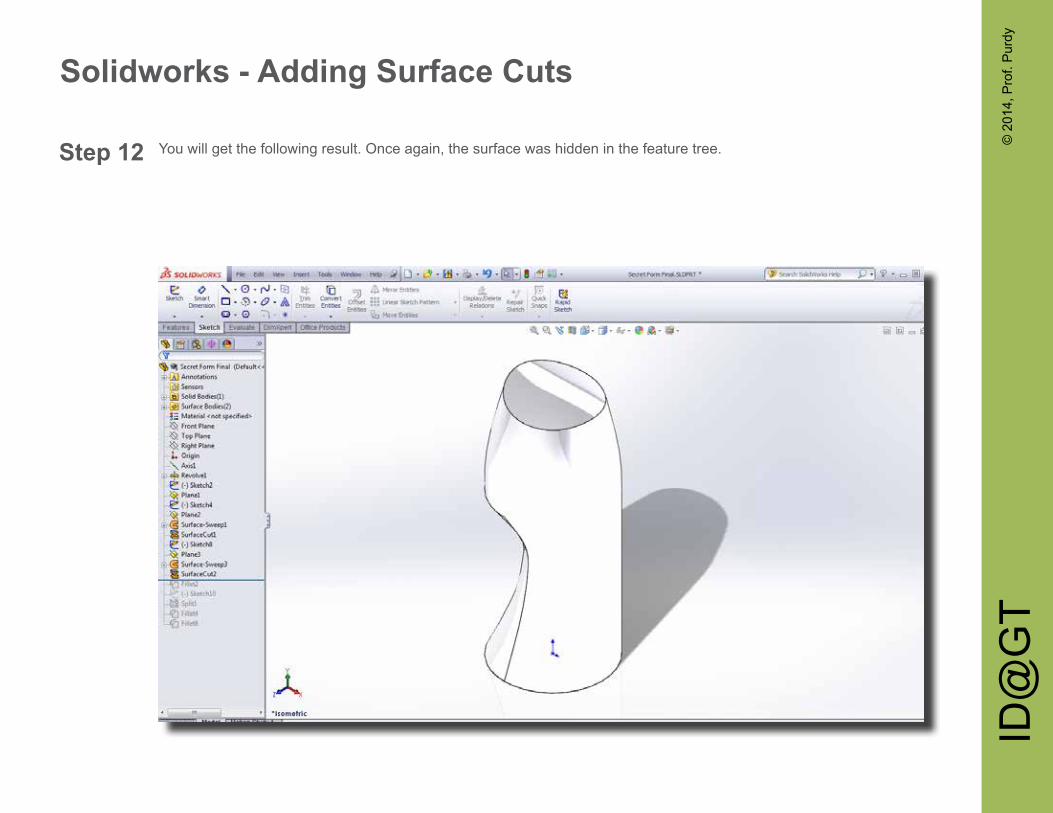
The process mentioned above with give you the following result. The surface is not effected by the Surface Cut opera-tion. Simple hide or suppress it so it is not visible in the file.
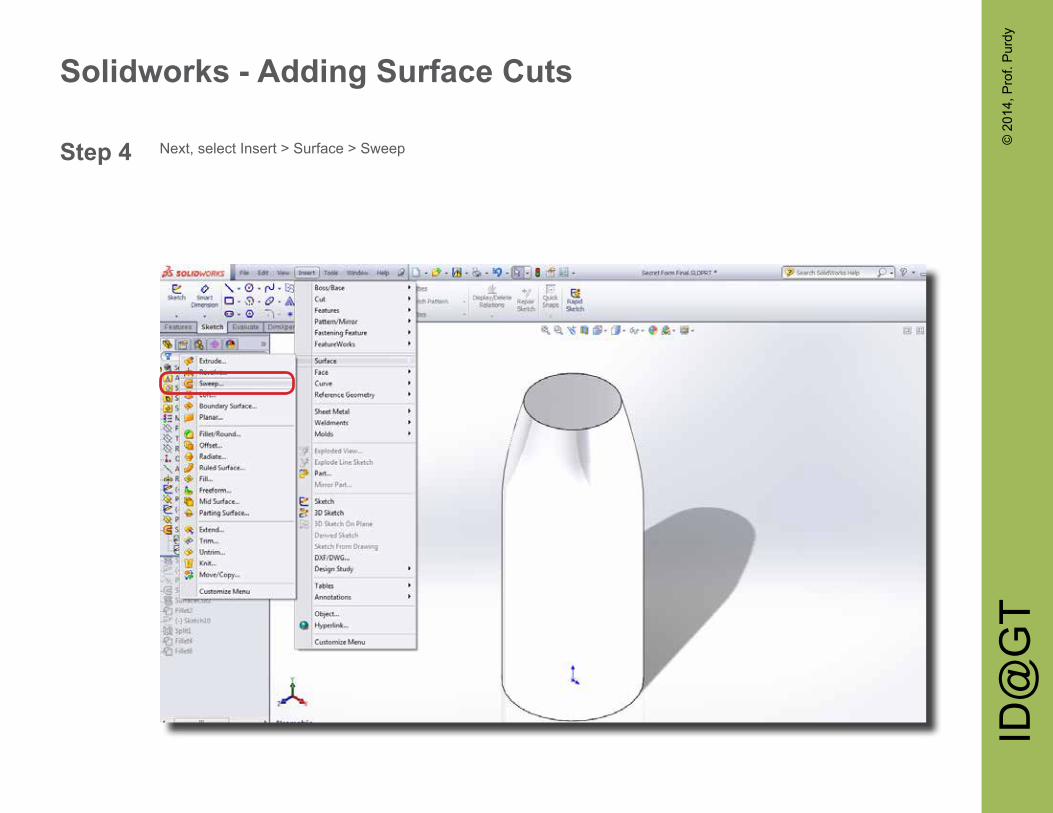
The remaining of the tutorial demonstrates how to model another type of surface and use it to shape the top of the cap. Select a plane to sketch a contour shape which you will use later to add a surface cut.
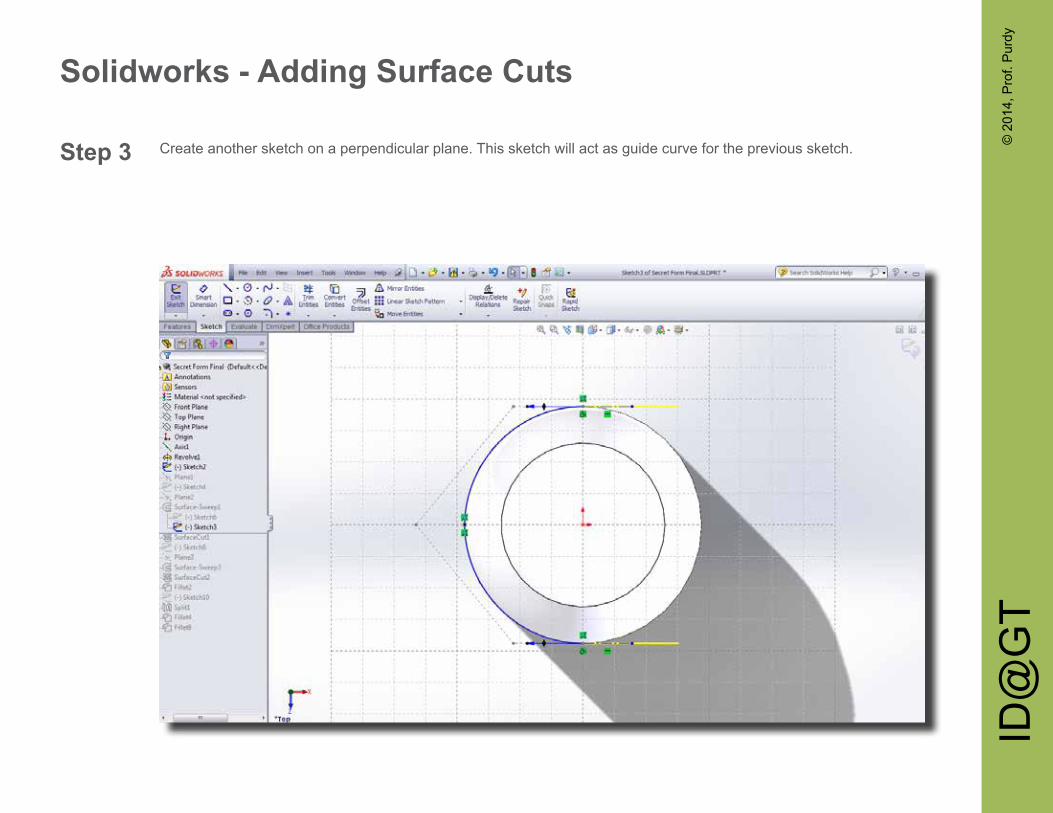
Create another sketch on a perpendicular plane. This sketch will act as guide curve for the previous sketch. The Swept tool requires that the profile curve must be at the end of the path so that a full swept surface is created. If not, then only a partial surface will be created.
Select the contour sketch first and the select the guide sketch. Click confirm. The sweep tool then provides you the sur-face you would use to cut a part.
After using the Surface Cut tool and hiding the surfaces, other features tools such as Split and Fillet are still available to use since the form stays a Solid Body.


![[2019] UKUT 0226 (TCC) Appeal number: UT/2017/0150 UT/2017 ... · [2019] UKUT 0226 (TCC) Appeal number: UT/2017/0150 UT/2017/0151 UT/2017/0151 INCOME TAX AND CORPORATION TAX ––](https://static.documents.pub/doc/80x56/5e16c1abedd96c200604b92c/2019-ukut-0226-tcc-appeal-number-ut20170150-ut2017-2019-ukut-0226.jpg)

