114
COMPREHENSIVE INTERNET SECURITY ™ b SonicWALL CDP Series Appliances SonicWALL CDP 2.1 Administrator's Guide
COMPREHENSIVE INTERNET SECURITY ™
bSonicWALL CDP Series Appliances
SonicWALL CDP 2.1 Administrator's Guide

SonicWALL CDP 2.1 Administrator’s Guide
SonicWALL, Inc. 1143 Borregas Avenue Sunnyvale, CA 94089-1306 Phone: +1.408.745.9600 Fax: +1.408.745.9300 E-mail: [email protected]

Copyright Notice
© 2006 SonicWALL, Inc.
All rights reserved.
Under the copyright laws, this manual or the software described within, cannot be copied, in whole or part, without the written consent of the manufacturer, except in the normal use of the software to make a backup copy. The same proprietary and copyright notices must be affixed to any permitted copies as were affixed to the original. This exception does not allow copies to be made for others, whether or not sold, but all of the material purchased (with all backup copies) can be sold, given, or loaned to another person. Under the law, copying includes translating into another language or format.
Specifications and descriptions subject to change without notice.
Trademarks
SonicWALL is a registered trademark of SonicWALL, Inc.
Microsoft Windows 98, Windows NT, Windows 2000, Windows XP, Windows Server 2003, Internet Explorer, and Active Directory are trademarks or registered trademarks of Microsoft Corporation.
Netscape is a registered trademark of Netscape Communications Corporation in the U.S. and other countries. Netscape Navigator and Netscape Communicator are also trademarks of Netscape Communications Corporation and may be registered outside the U.S.
Adobe, Acrobat, and Acrobat Reader are either registered trademarks or trademarks of Adobe Systems Incorporated in the U.S. and/or other countries.
Other product and company names mentioned herein may be trademarks and/or registered trademarks of their respective companies and are the sole property of their respective manufacturers.

Limited Warranty
SonicWALL, Inc. warrants that commencing from the delivery date to Customer (but in any case commencing not more than ninety (90) days after the original shipment by SonicWALL), and continuing for a period of twelve (12) months, that the product will be free from defects in materials and workmanship under normal use. This Limited Warranty is not transferable and applies only to the original end user of the product. SonicWALL and its suppliers' entire liability and Customer's sole and exclusive remedy under this limited warranty will be shipment of a replacement product. At SonicWALL's discretion the replacement product may be of equal or greater functionality and may be of either new or like-new quality. SonicWALL's obligations under this warranty are contingent upon the return of the defective product according to the terms of SonicWALL's then-current Support Services policies.
This warranty does not apply if the product has been subjected to abnormal electrical stress, damaged by accident, abuse, misuse or misapplication, or has been modified without the written permission of SonicWALL.
DISCLAIMER OF WARRANTY. EXCEPT AS SPECIFIED IN THIS WARRANTY, ALL EXPRESS OR IMPLIED CONDITIONS, REPRESENTATIONS, AND WARRANTIES INCLUDING, WITHOUT LIMITATION, ANY IMPLIED WARRANTY OR CONDITION OF MERCHANTABILITY, FITNESS FOR A PARTICULAR PURPOSE, NONINFRINGEMENT, SATISFACTORY QUALITY OR ARISING FROM A COURSE OF DEALING, LAW, USAGE, OR TRADE PRACTICE, ARE HEREBY EXCLUDED TO THE MAXIMUM EXTENT ALLOWED BY APPLICABLE LAW. TO THE EXTENT AN IMPLIED WARRANTY CANNOT BE EXCLUDED, SUCH WARRANTY IS LIMITED IN DURATION TO THE WARRANTY PERIOD. BECAUSE SOME STATES OR JURISDICTIONS DO NOT ALLOW LIMITATIONS ON HOW LONG AN IMPLIED WARRANTY LASTS, THE ABOVE LIMITATION MAY NOT APPLY TO YOU. THIS WARRANTY GIVES YOU SPECIFIC LEGAL RIGHTS, AND YOU MAY ALSO HAVE OTHER RIGHTS WHICH VARY FROM JURISDICTION TO JURISDICTION. This disclaimer and exclusion shall apply even if the express warranty set forth above fails of its essential purpose.
DISCLAIMER OF LIABILITY. SONICWALL'S SOLE LIABILITY IS THE SHIPMENT OF A REPLACEMENT PRODUCT AS DESCRIBED IN THE ABOVE LIMITED WARRANTY. IN NO EVENT SHALL SONICWALL OR ITS SUPPLIERS BE LIABLE FOR ANY DAMAGES WHATSOEVER, INCLUDING, WITHOUT LIMITATION, DAMAGES FOR LOSS OF PROFITS, BUSINESS INTERRUPTION, LOSS OF INFORMATION, OR OTHER PECUNIARY LOSS ARISING OUT OF THE USE OR INABILITY TO USE THE PRODUCT, OR FOR SPECIAL, INDIRECT, CONSEQUENTIAL, INCIDENTAL, OR PUNITIVE DAMAGES HOWEVER CAUSED AND REGARDLESS OF THE THEORY OF LIABILITY ARISING OUT OF THE USE OF OR INABILITY TO USE HARDWARE OR SOFTWARE EVEN IF SONICWALL OR ITS SUPPLIERS HAVE BEEN ADVISED OF THE POSSIBILITY OF SUCH DAMAGES. In no event shall SonicWALL or its suppliers' liability to Customer, whether in contract, tort (including negligence), or otherwise, exceed the price paid by Customer. The foregoing limitations shall apply even if the above-stated warranty fails of its essential purpose. BECAUSE SOME STATES OR JURISDICTIONS DO NOT ALLOW LIMITATION OR EXCLUSION OF CONSEQUENTIAL OR INCIDENTAL DAMAGES, THE ABOVE LIMITATION MAY NOT APPLY TO YOU.

Guide Conventions
The following Conventions used in this guide are as follows:
Icons Used in this Manual
These special messages refer to noteworthy information, and include a symbol for quick identification:
Alert: Important information that cautions about features affecting device performance, security features, or causing potential problems with your SonicWALL.
Tip: Useful information about security features and configurations on your SonicWALL.
Note: Important information on a feature that requires callout for special attention.
Cross Reference: Provides a pointer to related information in the Administrator’s Guide or other resources.
Convention Use
Bold Highlights items you can select on the SonicWALL security appliance management interface.
Italic Highlights a value to enter into a field. For example, “type 192.168.168.168 in the IP Address field.”
Menu Item > Menu Item Indicates a multiple step Management Interface menu choice. For example, Security Services > Content Filter means select Security Services, then select Content Filter.
SonicWALL Technical Support
For timely resolution of technical support questions, visit SonicWALL on the Internet at <http://www.sonicwall.com/support/support.html>. Web-based resources are available to help you resolve most technical issues or contact SonicWALL Technical Support.
To contact SonicWALL telephone support, see the telephone numbers listed below:
North America Telephone Support
U.S./Canada - 888.777.1476 or +1 408.752.7819
International Telephone Support
Australia - + 1800.35.1642
Austria - + 43(0)820.400.105
EMEA - +31(0)411.617.810
France - + 33(0)1.4933.7414
Germany - + 49(0)1805.0800.22
Hong Kong - + 1.800.93.0997
India - + 8026556828
Italy - +39.02.7541.9803
Japan - + 81(0)3.5460.5356
New Zealand - + 0800.446489
Singapore - + 800.110.1441
Spain - + 34(0)9137.53035
Switzerland - +41.1.308.3.977
UK - +44(0)1344.668.484
Note: Visit <http://www.sonicwall.com/support/contact.html> for the latest technical support telephone numbers.

More Information on SonicWALL Products
Contact SonicWALL, Inc. for information about SonicWALL products and services at:Web: http://www.sonicwall.comE-mail: [email protected]: (408) 745-9600Fax: (408) 745-9300
Current DocumentationCheck the SonicWALL documentation Web site for that latest versions of this manual and all other SonicWALL product documentation.
http://www.sonicwall.com/support/documentation.html

Table of Contents
Table of ContentsAbout this Guide . . . . . . . . . . . . . . . . . . . . . . . . . . . . . . . . . . . . . . . . . . . . . . . . . . . 1SonicWALL CDP Overview . . . . . . . . . . . . . . . . . . . . . . . . . . . . . . . . . . . . . . . . . 2
What Is SonicWALL CDP? . . . . . . . . . . . . . . . . . . . . . . . . . . . . . . . . . . . . . . . 3Why Use SonicWALL CDP? . . . . . . . . . . . . . . . . . . . . . . . . . . . . . . . . . . . . . . 4How Does SonicWALL CDP Work? . . . . . . . . . . . . . . . . . . . . . . . . . . . . . . . . 6
Deployment Restrictions. . . . . . . . . . . . . . . . . . . . . . . . . . . . . . . . . . . . . . . . . . . . 11SonicWALL CDP Hardware . . . . . . . . . . . . . . . . . . . . . . . . . . . . . . . . . . . . . . . . 12
Supported Platforms . . . . . . . . . . . . . . . . . . . . . . . . . . . . . . . . . . . . . . . . . . . . 13Offsite Service . . . . . . . . . . . . . . . . . . . . . . . . . . . . . . . . . . . . . . . . . . . . . . . . 18
SonicWALL CDP Software . . . . . . . . . . . . . . . . . . . . . . . . . . . . . . . . . . . . . . . . . 19Firmware User Interface . . . . . . . . . . . . . . . . . . . . . . . . . . . . . . . . . . . . . . . . . 20Enterprise Manager. . . . . . . . . . . . . . . . . . . . . . . . . . . . . . . . . . . . . . . . . . . . . 22Agent Tool . . . . . . . . . . . . . . . . . . . . . . . . . . . . . . . . . . . . . . . . . . . . . . . . . . . 35
Configuration Task List . . . . . . . . . . . . . . . . . . . . . . . . . . . . . . . . . . . . . . . . . . . . 37Initial Configuration of SonicWALL CDP Using Firmware User Interface . 38Editing Enterprise Manager Administrative Settings . . . . . . . . . . . . . . . . . . . 42Changing the SonicWALL CDP Appliance . . . . . . . . . . . . . . . . . . . . . . . . . . 43Encryption Key Management . . . . . . . . . . . . . . . . . . . . . . . . . . . . . . . . . . . . . 44Checking for Firmware Updates. . . . . . . . . . . . . . . . . . . . . . . . . . . . . . . . . . . 45Checking for Software Updates . . . . . . . . . . . . . . . . . . . . . . . . . . . . . . . . . . . 45Managing Agents in Enterprise Manager . . . . . . . . . . . . . . . . . . . . . . . . . . . . 46Configuring Agent Application Backup . . . . . . . . . . . . . . . . . . . . . . . . . . . . . 53Managing Policies in Enterprise Manager . . . . . . . . . . . . . . . . . . . . . . . . . . . 60Performing Searches in Enterprise Manager . . . . . . . . . . . . . . . . . . . . . . . . . 70
viiSonicWALL CDP 2.1 Administrator’s Guide

Generating Reports in Enterprise Manager . . . . . . . . . . . . . . . . . . . . . . . . . . .73Recovering Your Data Using SonicWALL CDP . . . . . . . . . . . . . . . . . . . . . .75Configuring SonicWALL CDP Agent and Enterprise Manager to Work with Soft-ware Firewalls . . . . . . . . . . . . . . . . . . . . . . . . . . . . . . . . . . . . . . . . . . . . . . . . .84
Troubleshooting SonicWALL CDP . . . . . . . . . . . . . . . . . . . . . . . . . . . . . . . . . . .92SonicWALL CDP Appliance Troubleshooting . . . . . . . . . . . . . . . . . . . . . . . .92SonicWALL CDP Software Troubleshooting . . . . . . . . . . . . . . . . . . . . . . . . .92Backup and Recovery Troubleshooting. . . . . . . . . . . . . . . . . . . . . . . . . . . . . .93
Technical Frequently Asked Questions . . . . . . . . . . . . . . . . . . . . . . . . . . . . . . . . .94Glossary . . . . . . . . . . . . . . . . . . . . . . . . . . . . . . . . . . . . . . . . . . . . . . . . . . . . . . . . .96Related Documents . . . . . . . . . . . . . . . . . . . . . . . . . . . . . . . . . . . . . . . . . . . . . . . .98
User Guides . . . . . . . . . . . . . . . . . . . . . . . . . . . . . . . . . . . . . . . . . . . . . . . . . . .98TechNotes . . . . . . . . . . . . . . . . . . . . . . . . . . . . . . . . . . . . . . . . . . . . . . . . . . . .98
Contributors . . . . . . . . . . . . . . . . . . . . . . . . . . . . . . . . . . . . . . . . . . . . . . . . . . . . . .99
Index
viiiSonicWALL CDP 2.1 Administrator’s Guide

About this GuideThe SonicWALL CDP Administrator’s Guide provides network administrators with an introduction to SonicWALL CDP (continuous data protection), including a high-level overview of SonicWALL CDP, a description of deployment restrictions, hardware and software components, configuration examples and basic troubleshooting.
The SonicWALL CDP Administrator’s Guide contains the following sections:
• “SonicWALL CDP Overview” section on page 2
• “Deployment Restrictions” section on page 11
• “SonicWALL CDP Hardware” section on page 12
• “SonicWALL CDP Software” section on page 19
• “Configuration Task List” section on page 37
• “Troubleshooting SonicWALL CDP” section on page 92
• “Technical Frequently Asked Questions” section on page 94
• “Glossary” section on page 96
• “Related Documents” section on page 98
1SonicWALL CDP 2.1 Administrator’s Guide

SonicWALL CDP Overview
SonicWALL CDP OverviewProtect your network using SonicWALL CDP (continuous data protection), a secure backup solution that runs continuously, archiving file and application data from assigned agents (servers, laptops or PCs intended for backup using SonicWALL CDP).
SonicWALL CDP replicates data in real time, capturing new, changed and deleted information. By storing multiple versions of each file and application revision, SonicWALL CDP can recall data from nearly any point in time.
In the event of local disaster, data can be recovered from the secure SonicWALL CDP Offsite Service. For more routine data recovery needs, the SonicWALL CDP appliance provides instant, onsite data recall. SonicWALL CDP works even when users are on remote laptops connected by IPsec or SSL-VPN connections.
This section contains the following subsections, which provide an introduction to the SonicWALL CDP features and benefits:
• “What Is SonicWALL CDP?” section on page 3
• “Why Use SonicWALL CDP?” section on page 4
• “How Does SonicWALL CDP Work?” section on page 6
– “How the SonicWALL CDP Firmware User Interface Works” section on page 7
– “How the SonicWALL CDP Appliance Works” section on page 8
– “How the SonicWALL CDP Agent Service and Agent Tool Work” section on page 8
– “How the SonicWALL CDP Enterprise Manager Works” section on page 9
– “How SonicWALL CDP Bare Metal Recovery Works” section on page 9
– “How the SonicWALL CDP Offsite Service Works” section on page 10
2SonicWALL CDP 2.1 Administrator’s Guide

SonicWALL CDP Overview
What Is SonicWALL CDP?SonicWALL CDP protects your network from data loss. SonicWALL CDP is a disk-based data backup and recovery system that provides protection for assigned agents, regularly preserving the latest file versions and database revisions locally, and if configured, storing full folder and full database revisions to the secure Offsite Service.
Backups are performed regularly by SonicWALL CDP, ensuring that new versions of files or application revisions are continuously updated. In addition, older versions of each file are stored, allowing recovery from multiple points in time.
SonicWALL CDP comprises the following components: The SonicWALL CDP firmware user interface, appliance, Offsite Service, Enterprise Manager, Agent Tool, Agent Service, and Bare Metal Recovery.
Each SonicWALL CDP component is described below.
• SonicWALL CDP Firmware User Interface—The SonicWALL CDP firmware user interface is a Web browser-based interface that allows the SonicWALL CDP administrator to configure the SonicWALL CDP appliance firmware. For detailed SonicWALL CDP firmware user interface specifications, refer to the “How the SonicWALL CDP Firmware User Interface Works” section on page 7 and “Firmware User Interface” section on page 20.
• SonicWALL CDP Appliance—The SonicWALL CDP appliance is a dedicated disk backup appliance that collects data blocks from agents for storage and for secure transmission to the Offsite Service (if configured). For detailed SonicWALL CDP appliance specifications, refer to the “How the SonicWALL CDP Appliance Works” section on page 8 and the “Supported Platforms” section on page 13.
• SonicWALL CDP Offsite Service—The SonicWALL CDP Offsite Service is a subscription service that provides protection against local disaster. Full file revisions from the SonicWALL CDP appliance are securely transmitted to the Offsite Service and stored for emergency recovery. For detailed SonicWALL CDP Offsite Service specifications, refer to the “How the SonicWALL CDP Offsite Service Works” section on page 10 and the “Offsite Service” section on page 18.
• SonicWALL CDP Enterprise Manager—The SonicWALL CDP Enterprise Manager software is installed by the CDP administrator and used to manage appliance and agent options. Enterprise Manager is the master control panel to set policies for agents connected to a SonicWALL CDP appliance. For detailed SonicWALL CDP Enterprise Manager specifications, refer to the “How the SonicWALL CDP Enterprise Manager Works” section on page 9 and the “Enterprise Manager” section on page 22.
• SonicWALL CDP Agent Tool—The SonicWALL CDP Agent Tool software is installed on every agent (server, laptop or PC intended to be backed up on the SonicWALL CDP appliance), and provides a user interface with options to view backup status and recover lost data. User access to the Agent Tool is configured by the CDP administrator using the Enterprise Manager. For detailed SonicWALL CDP Agent Tool specifications, refer to the “How the SonicWALL CDP Agent Service and Agent Tool Work” section on page 8 and the “Agent Tool” section on page 35.
3SonicWALL CDP 2.1 Administrator’s Guide

SonicWALL CDP Overview
• SonicWALL CDP Agent Service—The SonicWALL CDP Agent Service software is installed automatically with the SonicWALL Agent Tool. By running continuously in the background of each agent, the Agent Service enables backup of folders and application revisions as it performs handshaking with the appliance, transmits data, and listens for Windows Event Notifications. For detailed SonicWALL CDP Agent Service specifications, refer to the “How the SonicWALL CDP Agent Service and Agent Tool Work” section on page 8 and the “Agent Tool” section on page 35.
• SonicWALL CDP Bare Metal Recovery—The SonicWALL CDP Bare Metal Recovery software provides the administrator with the option to create a hard disk image backup. A hard disk image backup is a copy of information stored on a disk, including the operating system, programs, documents and settings. For detailed SonicWALL CDP Bare Metal Recovery specifications, refer to the “How SonicWALL CDP Bare Metal Recovery Works” section on page 9.
Why Use SonicWALL CDP?SonicWALL CDP is a complete and reliable data protection solution that eliminates exposure to threats of data loss, using the same security technology implemented by major financial and government institutions.
Specifically developed for the business and remote office network, SonicWALL CDP is employed in network environments with business requirements that necessitate continuous data backup. SonicWALL CDP also provides real-time, continuous data protection for laptops and remote agents connected by IPsec or SSL-VPN.
By running seamlessly, SonicWALL CDP captures the most recent file and application revisions, maintaining multiple versions of each backed up file. SonicWALL CDP stores backed up data on a local SonicWALL CDP appliance for instant recovery, and if configured, to the secure SonicWALL CDP Offsite Service for protection against local disaster.
You control SonicWALL CDP, specifying which agents will use the appliance, selecting files and applications for automatic backup, and applying custom filters for non mission-critical file types.
SonicWALL CDP provides the following key features:
• Continuous Data Protection—SonicWALL CDP replicates data in real time, capturing new, changed and deleted information. SonicWALL CDP works even when users are on laptops or other remote connections using IPsec or SSL-VPN.
• Offsite Service—SonicWALL CDP Offsite Service protects businesses against power surges, theft, server crashes and other disasters by backing up full files and full database revisions to a secure data center. SonicWALL CDP monitors and recognizes Internet usage patterns so that it completes backups only when network usage is at its lowest.
• Instant Recovery—Because SonicWALL CDP utilizes an onsite appliance for data storage, agents have instant access to old file versions and can recover data at any time. And, agents have the ability to restore their own data without help from an IT administrator.
• Multiple File Versions—SonicWALL CDP saves multiple versions of every file, not just the latest version. Therefore, any user on the network can instantly retrieve a previous version of a document, even after they have saved over it. SonicWALL CDP allows recovery of data from multiple points in time.
• Security—Transmission of data to the SonicWALL CDP Offsite Service is secured by the same 256-bit AES (advanced encryption standard) and SSL (secure socket layer) encryption technologies implemented by major financial institutions and government agencies. SonicWALL CDP also utilizes public-key encryption and digital certificates as an additional layer of protection.
4SonicWALL CDP 2.1 Administrator’s Guide

SonicWALL CDP Overview
• Intelligent Applications—SonicWALL CDP integrates a collection of intelligent software applications. One such application is a backup reporting tool, which provides constant visual data backup verification. The tool places a highlighted SonicWALL stamp on each protected file so the user knows that the SonicWALL CDP is working.
• Application Support—SonicWALL CDP supports most business applications. Supported agent applications include Outlook and Outlook Express, and supported server applications include Microsoft Exchange, Active Directory and SQL Server.
• RAID Support—The SonicWALL CDP 3440i and 4440i appliances support RAID (redundant array of independent disks), providing additional failover protection in the event of a disk failure. The SonicWALL CDP 3440i includes RAID 1, data mirroring from one drive onto another. The SonicWALL CDP 4440i includes RAID 5, block-level data striping with distributed parity across the drive set.s
5SonicWALL CDP 2.1 Administrator’s Guide

SonicWALL CDP Overview
How Does SonicWALL CDP Work?SonicWALL CDP includes the following major components: the SonicWALL CDP firmware user interface, appliance, Agent Tool, Agent Service, Enterprise Manager, Bare Metal Recovery and Offsite Service. Each element of the SonicWALL CDP works synchronously to ensure that data is protected continuously, in real time.
This section provides an overview of the SonicWALL CDP components. This section contains the following subsections:
• “How the SonicWALL CDP Firmware User Interface Works” section on page 7
• “How the SonicWALL CDP Appliance Works” section on page 8
• “How the SonicWALL CDP Agent Service and Agent Tool Work” section on page 8
• “How the SonicWALL CDP Enterprise Manager Works” section on page 9
• “How SonicWALL CDP Bare Metal Recovery Works” section on page 9
• “How the SonicWALL CDP Offsite Service Works” section on page 10
6SonicWALL CDP 2.1 Administrator’s Guide

SonicWALL CDP Overview
How the SonicWALL CDP Firmware User Interface WorksThe operating system inside the SonicWALL CDP appliance is called firmware. The firmware user interface is a Web browser-based interface that allows the SonicWALL CDP administrator to configure the SonicWALL CDP appliance firmware.
The firmware user interface provides the administrator the ability to register the appliance, view and configure system and network settings, and purge data from the appliance.
After initial set up of your SonicWALL CDP appliance using the firmware user interface, which includes setting a static IP and user name and password, you will be prompted to register your appliance using the Enterprise Manager.
Figure 1 provides the system time view within the firmware user interface.
Figure 1 SonicWALL CDP Firmware User Interface
For more information about the SonicWALL CDP firmware user interface, refer to the “Firmware User Interface” section on page 20.
For more information about registration and initial setup of your SonicWALL CDP system, refer to the SonicWALL CDP 1440i/2440i Getting Started Guide or the SonicWALL CDP 3440i/4440i Getting Started Guide.
7SonicWALL CDP 2.1 Administrator’s Guide

SonicWALL CDP Overview
How the SonicWALL CDP Appliance WorksThe SonicWALL CDP appliance performs three main tasks: Data processing, data storage, and if configured, data transmission to the Offsite Service.
The appliance receives data blocks from the Agent Service and compares them to existing blocks in order to discover new or changed information. The appliance stores the new or changed data blocks, and if configured, securely transmits them to the Offsite Service.
The appliance is connected using a standard CAT5 or higher Ethernet cable to your local area network (LAN). The SonicWALL CDP appliance requires configuration of a static IP address in order to communicate with your network, and a client must be connected to the same LAN as the appliance to complete initial installation and to run the Enterprise Manager software. An appliance can be connected manually by typing in its IP address or can be added through auto discovery.
The SonicWALL CDP appliance communicates with the Enterprise Manager, Agent Service and, if configured, to the Offsite Service. The appliance communicates with the SonicWALL CDP Offsite Service for registration and storage using HTTPS (TCP 443), providing enhanced security and greater levels of compatibility with network perimeter devices. As a result, your network must be configured to allow HTTPS (TCP 443) communication.
To ensure that the appliance performs at its peak, it will automatically alert the administrator if it is close to reaching capacity. If the appliance is busy, or if an agent has become disconnected from the network, the agent will continue to attempt communication until a successful backup has been completed. For more information about the SonicWALL CDP appliance, refer to the “SonicWALL CDP Hardware” section on page 12.
How the SonicWALL CDP Agent Service and Agent Tool WorkThe SonicWALL CDP Agent Tool and Agent Service are installed at the same time. The Agent Service runs continuously and in the background as a service, allowing backups of folders and application revisions.
The Agent Tool is a user interface that allows users to control agent backup to and recovery from the CDP appliance. User access to the Agent Tool is configured by the CDP administrator using the Enterprise Manager. Users can manage backup options and restore files and application revisions from the appliance using the Agent Tool.
The Agent Service does the handshaking with the appliance, transmits data to the appliance, and listens for Windows Event Notifications to discover when data has been written to a local disk, triggering the agent to backup the change to the SonicWALL CDP. The Agent Service performs discovery by sending a UDP broadcast to port 10001, and any appliances connected to the local broadcast domain will respond and can be selected for use. It is also possible to manually connect to a different broadcast domain by specifying an appliance’s IP address and leaving the port blank. When changes have been made, the Agent Service transmits 4 KB to 64 KB data blocks (compressed if necessary) to the appliance for backup. For more information about the SonicWALL CDP Agent Tool, refer to the “Agent Tool” section on page 35.
8SonicWALL CDP 2.1 Administrator’s Guide

SonicWALL CDP Overview
How the SonicWALL CDP Enterprise Manager WorksThe SonicWALL CDP Enterprise Manager is used by the SonicWALL CDP administrator for configuration, to obtain logs and reports, set alarms and recover data. Enterprise Manager performs discovery by sending a UDP broadcast to port 10001, and any appliances connected to the local broadcast domain will respond and can be selected for use. It is also possible to manually connect to a different broadcast domain by specifying an appliance’s IP address and leaving the port blank. Administrators control the flow of data from the Agent Tool(s) to the appliance(s) using Enterprise Manager to set default policies for agents, specifying a maximum backup allotment, filtering to omit specific file types, and designating common folders (Desktop, Favorites and My Documents) and applications to be automatically backed up across agents. For more information on the SonicWALL CDP Enterprise Manager, refer to the “Enterprise Manager” section on page 22.
How SonicWALL CDP Bare Metal Recovery WorksThe SonicWALL CDP Bare Metal Recovery software creates a disk image of information stored on a disk, including the operating system, programs and documents, and settings.
Disk imaging includes images of disk partitions and zero track with master boot record (MBR). Disk partitions include files and folders (independent of their attributes), boot record, FAT (file allocation table) and root.
SonicWALL CDP Bare Metal Recovery disk image creation is automatic, which means files and folders do not have to be earmarked for backup. To ensure that the backup and recovery processes are streamlined, Bare Metal Recovery disk images only store hard disk parts that contain data.
Bare Metal Recovery disk images can be created on local hard disks, CD-R/RW, DVD+R/RW, DVD-RW, or removable media such as Firewire (IEEE-1394) and USB (1.0, 1.1, and 2.0) devices. Lost data from the disk image can be retrieved at any time. Additionally, the disk image can be accessed as a virtual drive for browsing and extracting files.
For more information on Bare Metal Recovery, refer to the Bare Metal Recovery and Local Archiving - Workstation User’s Guide.
9SonicWALL CDP 2.1 Administrator’s Guide
SonicWALL CDP Overview
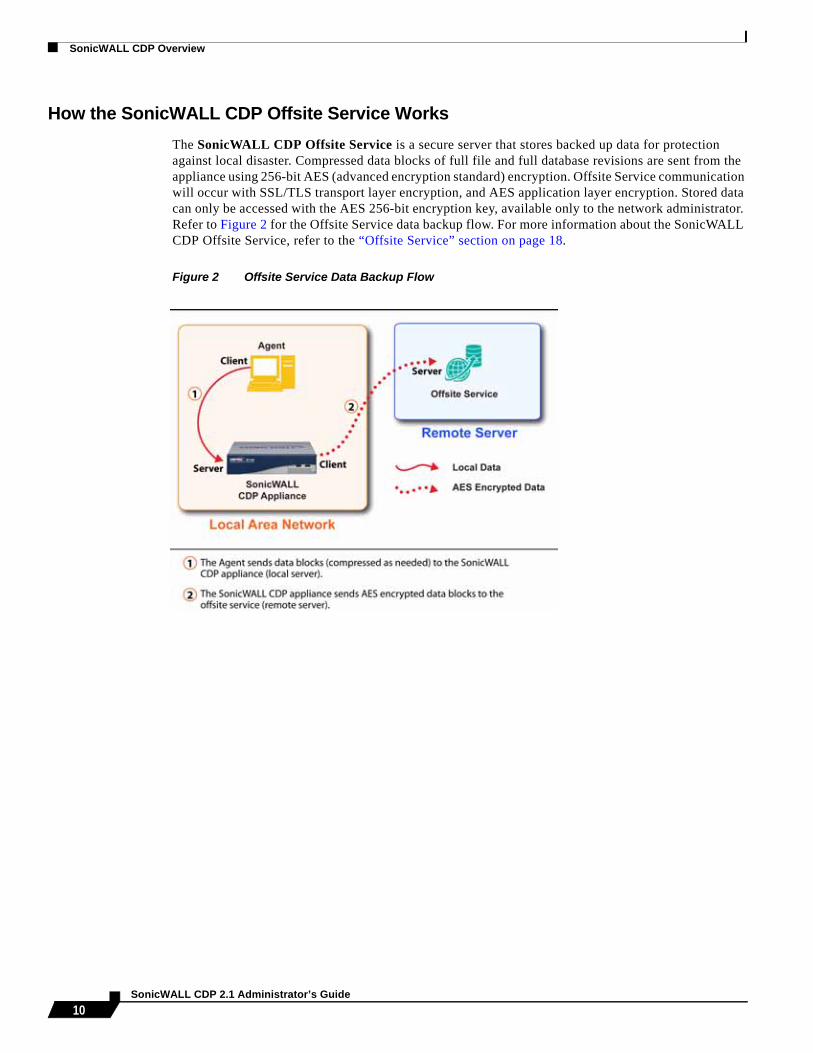
How the SonicWALL CDP Offsite Service WorksThe SonicWALL CDP Offsite Service is a secure server that stores backed up data for protection against local disaster. Compressed data blocks of full file and full database revisions are sent from the appliance using 256-bit AES (advanced encryption standard) encryption. Offsite Service communication will occur with SSL/TLS transport layer encryption, and AES application layer encryption. Stored data can only be accessed with the AES 256-bit encryption key, available only to the network administrator. Refer to Figure 2 for the Offsite Service data backup flow. For more information about the SonicWALL CDP Offsite Service, refer to the “Offsite Service” section on page 18.
Figure 2 Offsite Service Data Backup Flow
10SonicWALL CDP 2.1 Administrator’s Guide

Deployment Restrictions
Deployment RestrictionsThis section provides deployment considerations for your agents (client or server) and network requirements. Table 1 lists the minimum system and network requirements.
Table 1 SonicWALL CDP Deployment Restrictions
Minimum Agent Requirements • Pentium III Processor
• 450 MHZ with at least 256 MB of RAM
• 40 MB of free disk space
• Windows XP (Home and Professional), Windows Server 2003, Windows 2000 Professional
Minimum Server Requirements • Intel Celeron 2.0GHZ Process
• 256 MB DDR
• Windows XP (Home and Professional), Windows Server 2003, Windows 2000 (Professional and Server)
Network Requirements • High speed Internet connection (Serial, DSL, Cable, T1)
• Router or hub with wired Ethernet port
11SonicWALL CDP 2.1 Administrator’s Guide

SonicWALL CDP Hardware
SonicWALL CDP HardwareSonicWALL CDP includes the following hardware:
• SonicWall CDP Appliance—SonicWALL CDP appliances vary in storage size and agent support capacity. For individual product specifications, refer to SonicWALL CDP appliance subsections:
– “Supported Platforms” section on page 13
– “SonicWALL CDP 1440i” section on page 14
– “SonicWALL CDP 2440i” section on page 15
– “SonicWALL CDP 3440i” section on page 16
– “SonicWALL CDP 4440i” section on page 17
• Offsite Service—The SonicWALL CDP Offsite Service is a subscription service that backs up data offsite for disaster protection and recovery. For a list of Offsite Service key features, refer to the “Offsite Service” section on page 18.
12SonicWALL CDP 2.1 Administrator’s Guide

SonicWALL CDP Hardware
Supported PlatformsThe SonicWALL CDP appliance is a dedicated disk backup appliance that collects data blocks from agents for storage and for secure transmission to the Offsite Service storage location (if configured). The SonicWALL CDP series has four appliance models that range in capacity, agent support and additional features. For instructions on restoring files using the SonicWALL CDP Appliance, refer to “Recovering Your Data Using SonicWALL CDP” section on page 75. The SonicWALL CDP appliances provide the following platforms differentiated by hard disk capacity and the recommended amount of agents. Table 2 provides a summary of features by platform for comparison.
Table 2 SonicWALL CDP Platform Comparison
Feature 1440i 2440i 3440i 4440iRecommended number of supported agents
15 30 75 Unlimited
Hard disk capacity 160GB 250 GB 400GB 650GB
Number of supported servers
3 5 Unlimited Unlimited
Ethernet 1x10/100 Base-T Ethernet
1x10/100 Base-T Ethernet
10/100/1000 GIG LAN
10/100/1000 GIG LAN
Chassis model Mini Mini 1U 2U
RAID support Not supported Not supported RAID 1 RAID 5
Encryption AES 256-bit AES 256-bit AES 256-bit AES 256-bit
Continuous Data Protection
Included Included Included Included
File Versioning Included Included Included Included
Central Administration Included Included Included Included
Desktop, Laptop and Server Backup
Included Included Included Included
Remote Administration Included Included Included Included
Open Files Backup Included Included Included Included
Policy Based Backup Included Included Included Included
Active Directory Backup
Not included Included Included Included
SQL Server Support Not included Included Included Included
MS Exchange Support Not included Included Included Included
13SonicWALL CDP 2.1 Administrator’s Guide
SonicWALL CDP Hardware
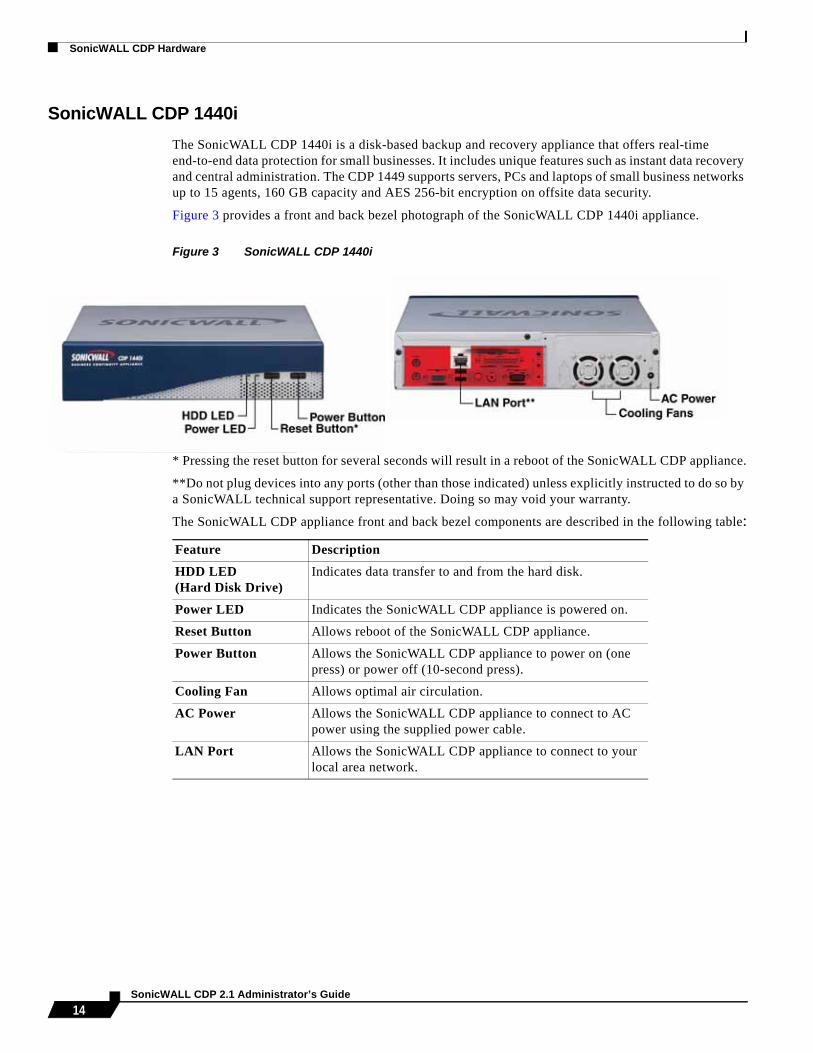
SonicWALL CDP 1440iThe SonicWALL CDP 1440i is a disk-based backup and recovery appliance that offers real-time end-to-end data protection for small businesses. It includes unique features such as instant data recovery and central administration. The CDP 1449 supports servers, PCs and laptops of small business networks up to 15 agents, 160 GB capacity and AES 256-bit encryption on offsite data security.
Figure 3 provides a front and back bezel photograph of the SonicWALL CDP 1440i appliance.
Figure 3 SonicWALL CDP 1440i
* Pressing the reset button for several seconds will result in a reboot of the SonicWALL CDP appliance.
**Do not plug devices into any ports (other than those indicated) unless explicitly instructed to do so by a SonicWALL technical support representative. Doing so may void your warranty.
The SonicWALL CDP appliance front and back bezel components are described in the following table:
Feature Description
HDD LED (Hard Disk Drive)
Indicates data transfer to and from the hard disk.
Power LED Indicates the SonicWALL CDP appliance is powered on.
Reset Button Allows reboot of the SonicWALL CDP appliance.
Power Button Allows the SonicWALL CDP appliance to power on (one press) or power off (10-second press).
Cooling Fan Allows optimal air circulation.
AC Power Allows the SonicWALL CDP appliance to connect to AC power using the supplied power cable.
LAN Port Allows the SonicWALL CDP appliance to connect to your local area network.
14SonicWALL CDP 2.1 Administrator’s Guide

SonicWALL CDP Hardware
SonicWALL CDP 2440iThe SonicWALL CDP 2440i is ideal for small businesses and remote offices. Featuring a 250 GB compressed capacity along with standard throughput and AES 256-bit encryption for offsite data security, it provides continuous real-time data protection for servers, laptops and PCs. Differentiating this solution from many of its competitors is its seamless support of most small business database and applications such as SQL Server and Microsoft Exchange without the need to integrate additional software packages.
Figure 4 provides a front and back bezel photograph of the SonicWALL CDP 2440i appliance.
Figure 4 SonicWALL CDP 2440i
* Pressing the reset button for several seconds will result in a reboot of the SonicWALL CDP appliance.
**Do not plug devices into any ports (other than those indicated) unless explicitly instructed to do so by a SonicWALL technical support representative. Doing so may void your warranty
The SonicWALL CDP appliance front and back bezel components are described in the following table:
Feature Description
HDD LED (Hard Disk Drive)
Indicates data transfer to and from the hard disk.
Power LED Indicates the SonicWALL CDP appliance is powered on.
Reset Button Allows reboot of the SonicWALL CDP appliance.
Power Button Allows the SonicWALL CDP appliance to power on (one press) or power off (10-second press).
Cooling Fan Allows optimal air circulation.
AC Power Allows the SonicWALL CDP appliance to connect to AC power using the supplied power cable.
LAN Port Allows the SonicWALL CDP appliance to connect to your local area network.
15SonicWALL CDP 2.1 Administrator’s Guide

SonicWALL CDP Hardware
SonicWALL CDP 3440iThe SonicWALL CDP 3440i offers enterprise level data backup protection for small-to-medium businesses and remote offices. The high-performance 1U rack-mountable solution is optimized for up to 75 users and unlimited servers. offering 400GB compressed capacity with RAID 1 along with accelerated throughput and AES 256-bit encryption for offsite data security, it provides continuous real-time data protection for servers, laptops and PCs using policy-based backup, central administration and open file backup. It supports most small business databases and applications such as Microsoft Exchange, SQL Server, Quickbooks, PeachTree, Great Plains, and more.
Figure 5 provides a front and back bezel photograph of the SonicWALL CDP 3440i appliance.
Figure 5 SonicWALL CDP 3440i
* Pressing the reset button for several seconds will result in a reboot of the SonicWALL CDP appliance.
**Do not plug devices into any ports (other than those indicated) unless explicitly instructed to do so by a SonicWALL technical support representative. Doing so may void your warranty.
The SonicWALL CDP appliance front and back bezel components are described in the following table:
Feature Description
HDD LED (Hard Disk Drive)
Indicates data transfer to and from the hard disk.
Power LED Indicates the SonicWALL CDP appliance is powered on.
Reset Button Allows reboot of the SonicWALL CDP appliance.
Power Button Allows the SonicWALL CDP appliance to power on (one press) or power off (10-second press).
Cooling Fan Allows optimal air circulation.
AC Power Allows the SonicWALL CDP appliance to connect to AC power using the supplied power cable.
LAN Port Allows the SonicWALL CDP appliance to connect to your local area network.
16SonicWALL CDP 2.1 Administrator’s Guide

SonicWALL CDP Hardware
SonicWALL CDP 4440iThe SonicWALL CDP 4440i is a robust 2U rack-mountable backup and recovery solution for branch offices and mid-size organizations. Offering a 650 GB compressed capacity with RAID 5 along with accelerated throughput and AES 256-bit encryption on offsite data security as well as the features of the CDP 34440i, it provides continuous real-time data protection for unlimited servers, laptops PCs, databases and business applications. IT administrators benefit from central management and file-level visibility into every agent machine connected to the SonicWALL CDP appliance, enabling enforcement of consistent backup policies and control features available to individual end users.
Figure 6 provides a front and back bezel photograph of the SonicWALL CDP 4440i appliance.
Figure 6 SonicWALL CDP 4400i.
* Pressing the reset button for several seconds will result in a reboot of the SonicWALL CDP appliance.
**Do not plug devices into any ports (other than those indicated) unless explicitly instructed to do so by a SonicWALL technical support representative. Doing so may void your warranty
The SonicWALL CDP appliance front and back bezel components are described in the following table:
Feature Description
HDD LED (Hard Disk Drive)
Indicates data transfer to and from the hard disk.
Power LED Indicates the SonicWALL CDP appliance is powered on.
Reset Button Allows reboot of the SonicWALL CDP appliance.
Power Button Allows the SonicWALL CDP appliance to power on (one press) or power off (10-second press).
Cooling Fan Allows optimal air circulation.
AC Power Allows the SonicWALL CDP appliance to connect to AC power using the supplied power cable.
LAN Port Allows the SonicWALL CDP appliance to connect to your local area network.
17SonicWALL CDP 2.1 Administrator’s Guide
SonicWALL CDP Hardware
Offsite Service
Note The SonicWALL CDP Offsite Service is offered as a subscription-based service.
The SonicWALL CDP Offsite Service is a subscription-based service that offers secure offsite backup and recovery, protecting your data from local disaster, including theft, power surges and server crashes.
Data transmitted and stored securely at the Offsite Service is available for retrieval when onsite data has been destroyed or the onsite appliance has been rendered inoperable, enabling an enterprise to be up and running quickly after a disaster event.
Compressed full-database and full-file (with latest revision) data blocks are encrypted and transmitted from the SonicWALL CDP appliance to the Offsite Service. The SonicWALL CDP administrator can recover the data from the Offsite Service using an encryption key, in the event that a local SonicWALL CDP recovery is not viable
Because data backed up using SonicWALL CDP Offsite Service is protected by AES 256-bit encryption, it can only be recovered using an AES 256-bit encryption key. Data stored using the Offsite Service is fully secure, as it cannot be decrypted without the key, even by SonicWALL technical support engineers.
For information about subscribing to the Offsite Service, contact SonicWALL Technical Support.
Configuration ExamplesFor configuration examples of the SonicWALL CDP Offsite Service, refer to the “Recovering Your Data Using SonicWALL CDP” section on page 75.
18SonicWALL CDP 2.1 Administrator’s Guide

SonicWALL CDP Software
SonicWALL CDP Software This section provides information about SonicWALL CDP Software. SonicWALL CDP includes the following software components:
• Firmware User Interface—The firmware user interface is a Web browser-based administrative tool that provides initial system setting configuration for the SonicWALL CDP appliance. The firmware user interface also provides system diagnostics and allows for a full purge of data from the appliance. For a list of firmware user interface key features, refer to the “Firmware User Interface” section on page 20.
• Enterprise Manager—The Enterprise Manager is software used by SonicWALL CDP administrator to control the appliance and connected agents. For a list of Enterprise Manager key features, refer to the “Enterprise Manager” section on page 23.
• Agent Tool—The Agent Tool is software installed on agents intended to be continuously backed up by the SonicWALL CDP appliance. The Agent Tool is the interface that allows users to control backing up to and restoring from the appliance. For a list of Agent Tool key features, refer to the “Agent Tool” section on page 35.
• Agent Service—Agent Service is software that creates folder and application revision backups. The Agent Service is the workhorse of the SonicWALL CDP system, is installed automatically with the Agent Tool, and runs in the background of the agent, controlling communication with the SonicWALL CDP appliance.
• Bare Metal Recovery—Bare Metal Recovery is software that creates a disk image backup. A disk image backup includes a backup of operating systems, applications and configuration files, software updates, personal settings and other data. For more information on Bare Metal Recovery, refer to the Bare Metal Recovery and Local Archiving - Workstation User’s Guide.
19SonicWALL CDP 2.1 Administrator’s Guide
SonicWALL CDP Software
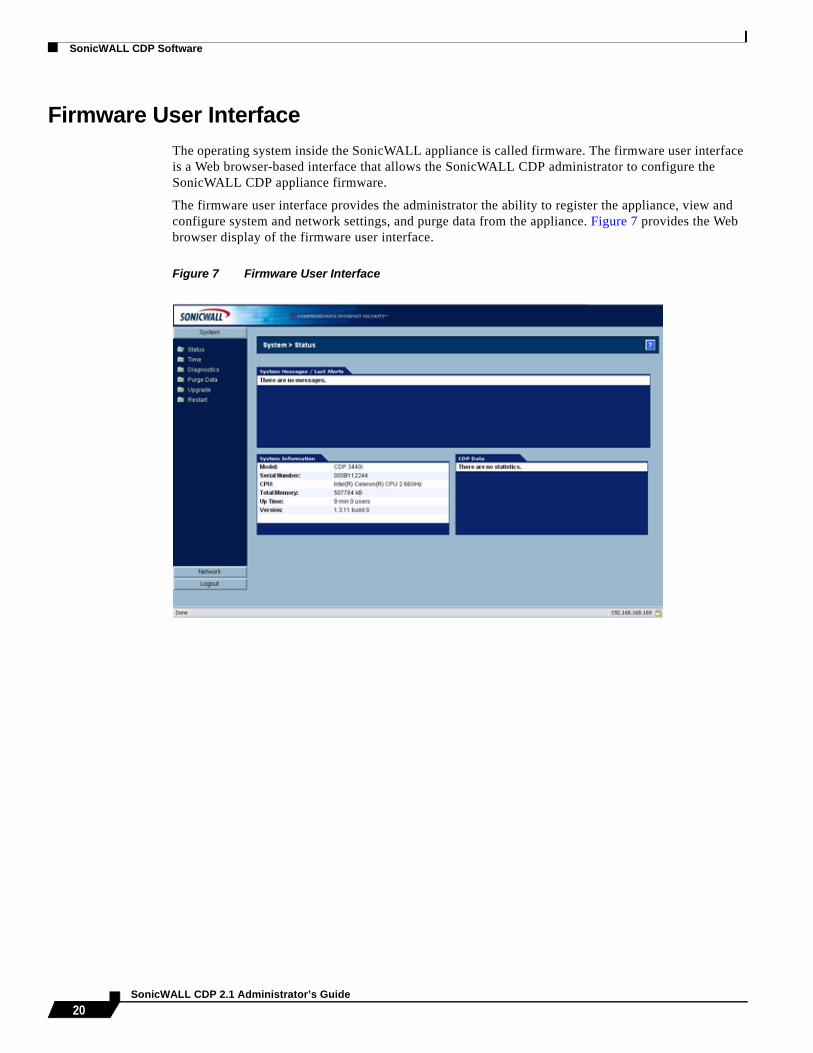
Firmware User InterfaceThe operating system inside the SonicWALL appliance is called firmware. The firmware user interface is a Web browser-based interface that allows the SonicWALL CDP administrator to configure the SonicWALL CDP appliance firmware.
The firmware user interface provides the administrator the ability to register the appliance, view and configure system and network settings, and purge data from the appliance. Figure 7 provides the Web browser display of the firmware user interface.
Figure 7 Firmware User Interface
20SonicWALL CDP 2.1 Administrator’s Guide

SonicWALL CDP Software
The firmware user interface provides the System controls outlined in Table 3, accessible from the tab column on the left side of the user interface.
Table 3 Firmware User Interface System Controls
The firmware user interface provides the Network controls outlined in Table 4, accessible from the tab column on the left side of the user interface.
Table 4 Firmware User Interface Network Controls
Configuration Examples
For configuration examples of the firmware user interface settings, refer to:
• “Initial Configuration of SonicWALL CDP Using Firmware User Interface” section on page 38
• “Editing Enterprise Manager Administrative Settings” section on page 42
• “Purging Data from the SonicWALL CDP Appliance” section on page 82
System Control DescriptionStatus Status provides a display of system messages,
alerts, system information and CDP data. System information includes the appliance model number and serial number, CPU description, total memory, up time (including time and number of users), and version.
Time Time provides the administrator the ability to set the system time and add or delete NTP servers.
Diagnostics Diagnostics provides the administrator with a view of system processes, CPU information, memory utilization, network information and storage statistics.
Purge Data Purge Data provides the administrator the ability to purge all agent information and backed up files on the appliance.
Upgrade Upgrade provides the administrator the ability to upgrade the system.
Restart Restart provides the administrator the ability to restart the system.
Network Control DescriptionSettings Settings provides the administrator with
configuration options, including IP address, subnet mask, default gateway IP address and interface, and hostname and domain.
Name Servers Name Servers provides the administrator with configuration options for name servers and search suffixes.
21SonicWALL CDP 2.1 Administrator’s Guide

SonicWALL CDP Software
Enterprise ManagerThe SonicWALL CDP Enterprise Manager is installed by a network administrator and used to control and monitor the SonicWALL CDP appliance(s) and to administer agent access. Enterprise Manager is the master control panel to set policies for agents connected to a SonicWALL CDP appliance. This section provides information about the SonicWALL CDP Enterprise Manager software features.
This section includes the following subsections, organized to follow the features available in the toolbar of the Enterprise Manager user interface:
• “Enterprise Manager Layout” section on page 23
• “Status Overview” section on page 25
• “Agents Overview” section on page 27
• “Applications Overview” section on page 28
• “Policies Overview” section on page 29
• “Search Overview” section on page 31
• “Reporting Overview” section on page 32
• “Alerts Overview” section on page 34
22SonicWALL CDP 2.1 Administrator’s Guide
SonicWALL CDP Software
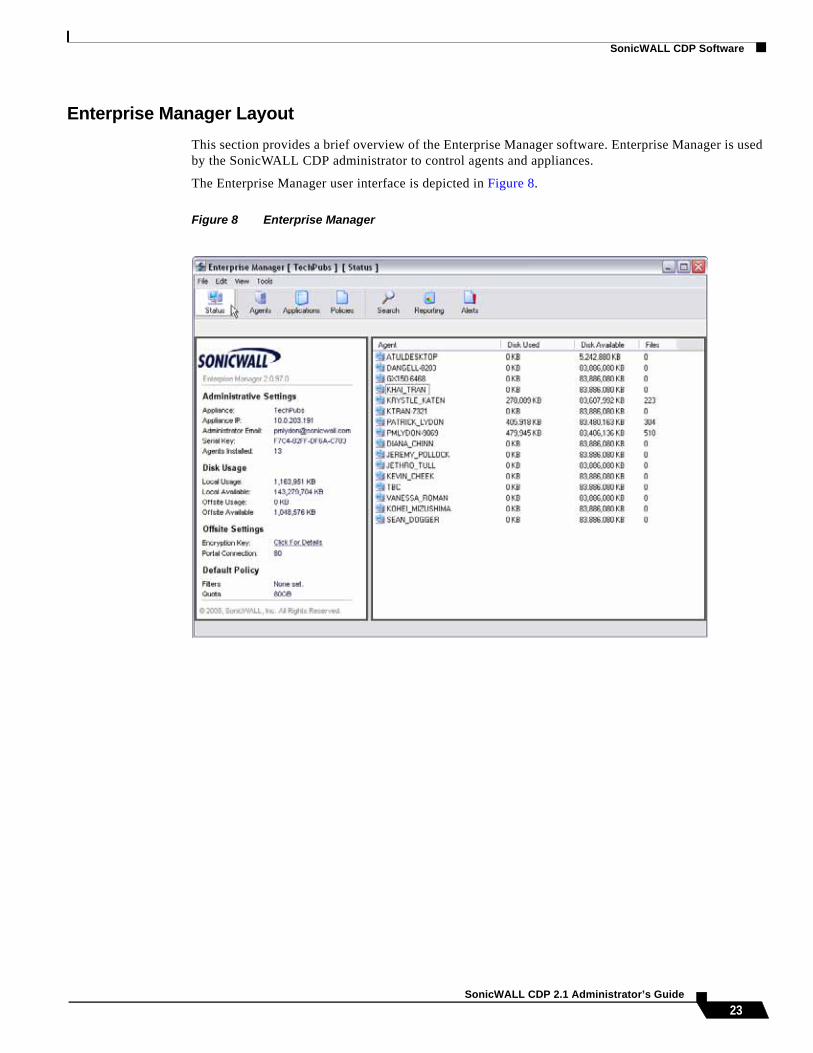
Enterprise Manager LayoutThis section provides a brief overview of the Enterprise Manager software. Enterprise Manager is used by the SonicWALL CDP administrator to control agents and appliances.
The Enterprise Manager user interface is depicted in Figure 8.
Figure 8 Enterprise Manager
23SonicWALL CDP 2.1 Administrator’s Guide

SonicWALL CDP Software
Table 5 provides a list of Enterprise Manager features, accessible using the toolbar at the top of the user interface.
Table 5 Enterprise Manager Features
Setting DescriptionStatus Status provides the administrator with summary of the SonicWALL CDP
Appliance, including disk usage, settings, and default policies for agents. For more information on Status, refer to the “Status Overview” section on page 25.
Agents Agents allows the administrator to control agent functionality, including adding, editing and removing agents and agent applications. For more information on Agents, refer to the “Agents Overview” section on page 27 and “Managing Agents in Enterprise Manager” section on page 46.
Applications Applications allows the administrator to view filtered file types and predefined and common applications, for example, MS Outlook. For more information on Applications, refer to the “Applications Overview” section on page 28.
Policies Policies allows the administrator to establish individual agent policies, default policies and common backup policies that propagate across all agents connected to the SonicWALL CDP Appliance. For more information on Policies, refer to the “Policies Overview” section on page 29 and “Managing Policies in Enterprise Manager” section on page 60.
Search Search provides the administrator with the ability to search for files or applications backed up on the appliance. For more information on Search, refer to the “Search Overview” section on page 31 and “Performing Searches in Enterprise Manager” section on page 70.
Reporting Reporting provides key reports for the administrator to manage SonicWALL CDP. Reporting includes the following reports: Executive Summary, CDP Agent Summary, Disk Space by File Type, Disk Space by Agent, Policy Summary, Agents by Policy, Server Application Backup, Agent Application Backup and Offsite Status. For more information on Reporting, refer to the “Reporting Overview” section on page 32 and “Generating Reports in Enterprise Manager” section on page 73.
Alerts Alerts provides the administrator with an overview of warning messages that are sent when the SonicWALL CDP appliance reaches predefined capacity thresholds. For more information on Alerts, refer to the “Alerts Overview” section on page 34.
24SonicWALL CDP 2.1 Administrator’s Guide
SonicWALL CDP Software
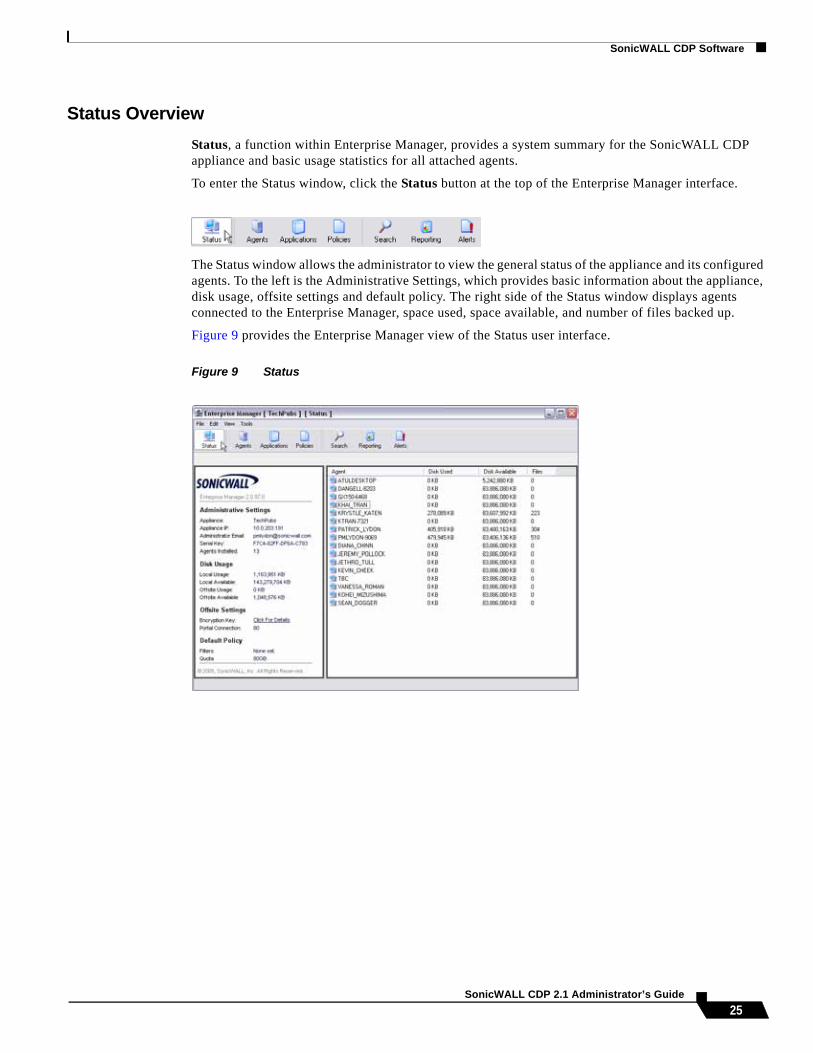
Status OverviewStatus, a function within Enterprise Manager, provides a system summary for the SonicWALL CDP appliance and basic usage statistics for all attached agents.
To enter the Status window, click the Status button at the top of the Enterprise Manager interface.
The Status window allows the administrator to view the general status of the appliance and its configured agents. To the left is the Administrative Settings, which provides basic information about the appliance, disk usage, offsite settings and default policy. The right side of the Status window displays agents connected to the Enterprise Manager, space used, space available, and number of files backed up.
Figure 9 provides the Enterprise Manager view of the Status user interface.
Figure 9 Status
25SonicWALL CDP 2.1 Administrator’s Guide
SonicWALL CDP Software
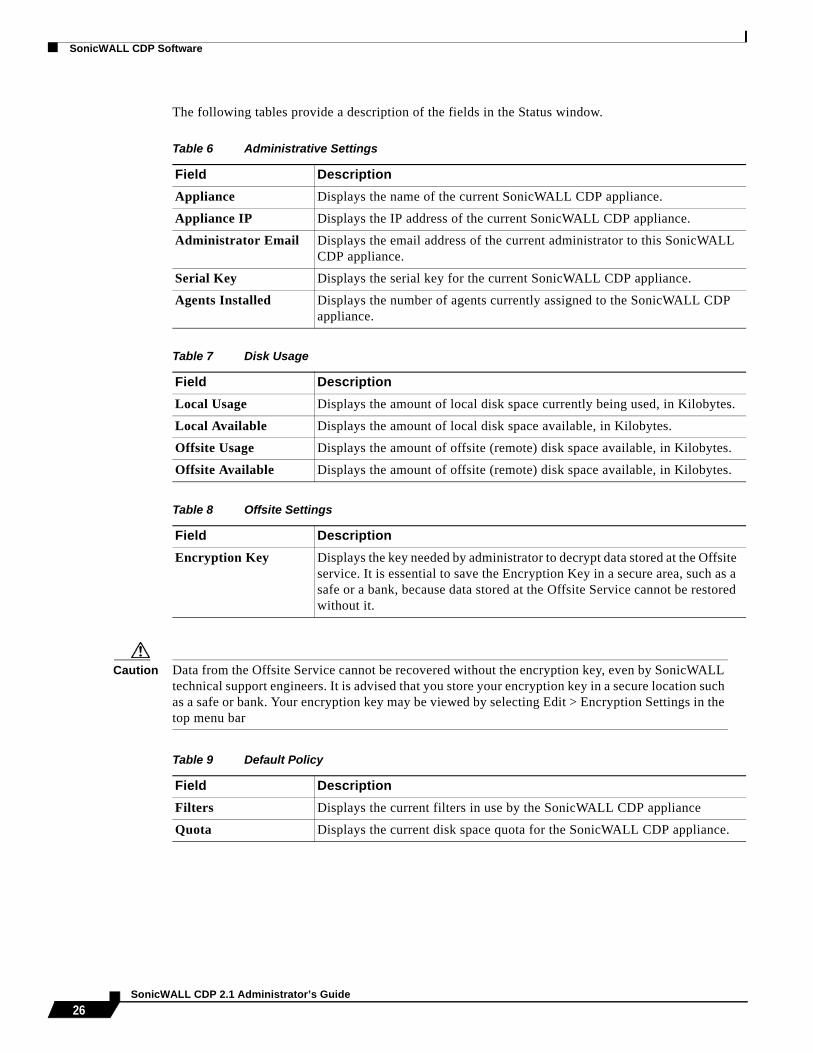
The following tables provide a description of the fields in the Status window.
Table 6 Administrative Settings
Table 7 Disk Usage
Table 8 Offsite Settings
Caution Data from the Offsite Service cannot be recovered without the encryption key, even by SonicWALL technical support engineers. It is advised that you store your encryption key in a secure location such as a safe or bank. Your encryption key may be viewed by selecting Edit > Encryption Settings in the top menu bar
Table 9 Default Policy
Field DescriptionAppliance Displays the name of the current SonicWALL CDP appliance.
Appliance IP Displays the IP address of the current SonicWALL CDP appliance.
Administrator Email Displays the email address of the current administrator to this SonicWALL CDP appliance.
Serial Key Displays the serial key for the current SonicWALL CDP appliance.
Agents Installed Displays the number of agents currently assigned to the SonicWALL CDP appliance.
Field DescriptionLocal Usage Displays the amount of local disk space currently being used, in Kilobytes.
Local Available Displays the amount of local disk space available, in Kilobytes.
Offsite Usage Displays the amount of offsite (remote) disk space available, in Kilobytes.
Offsite Available Displays the amount of offsite (remote) disk space available, in Kilobytes.
Field DescriptionEncryption Key Displays the key needed by administrator to decrypt data stored at the Offsite
service. It is essential to save the Encryption Key in a secure area, such as a safe or a bank, because data stored at the Offsite Service cannot be restored without it.
Field DescriptionFilters Displays the current filters in use by the SonicWALL CDP appliance
Quota Displays the current disk space quota for the SonicWALL CDP appliance.
26SonicWALL CDP 2.1 Administrator’s Guide

SonicWALL CDP Software
Agents OverviewAgents, a function within Enterprise Manager, provides administrators the ability to configure SonicWALL agents assigned to a SonicWALL CDP appliance.
To view the Agent window, click the Agents button at the top of the Enterprise Manager interface.
The Agents function provides configuration options for agents assigned to the appliance, including a display of the agents currently backing up. Agents allows the administrator to add, edit agents, and configure agent applications and agent folders for backup.
Figure 10 provides the Enterprise Manager view of Agents user interface.
Figure 10 Agents
Configuration ExamplesFor configuration examples of Agent settings, refer to “Managing Agents in Enterprise Manager” section on page 46.
27SonicWALL CDP 2.1 Administrator’s Guide

SonicWALL CDP Software
Applications OverviewApplications, a function within Enterprise Manager, allows the administrator to view agent applications and server applications assigned for backup.
Note SonicWALL CDP supports agent applications including Outlook and Outlook Express, and server applications including Microsoft Exchange, Active Directory and SQL Server.
To view the Applications window, click the Applications button at the top of the Enterprise Manager interface.
The Applications function allows administrators to view agent and server applications assigned for backup. It provides a list that includes application name, size and most recent backup date. Archives can be restored or removed within Applications.
Figure 11 provides the Enterprise Manager view of Applications user interface.
Figure 11 Applications
28SonicWALL CDP 2.1 Administrator’s Guide

SonicWALL CDP Software
Policies OverviewPolicies, a function within the Enterprise Manager, allows the administrator to establish common backup policies that propagate across agents connected to a SonicWALL CDP Appliance or for individual agents.
Figure 12 illustrates multiple agents communicating to the SonicWALL CDP Appliance for policy updates.
Figure 12 Multiple Agent Policy Management
To view the Policies window, click the Policies button at the top of the Enterprise Manager interface.
The Policies function provides the administrator with the ability to define and assign default policies to individual agents or to groups of agents. Policies may be added, edited or removed from the Policies window. The Policies window displays policies by name and has options for adding or editing default policies.
29SonicWALL CDP 2.1 Administrator’s Guide

SonicWALL CDP Software
Figure 13 displays the Enterprise Manager view of the Policies user interface.
Figure 13 Policies
Note SonicWALL CDP has a default policy that initiates at installation. This policy has a filter set to exclude .tmp files from backup.
Configuration ExamplesFor configuration examples of Policies settings, refer to “Managing Policies in Enterprise Manager” section on page 60.
30SonicWALL CDP 2.1 Administrator’s Guide
SonicWALL CDP Software
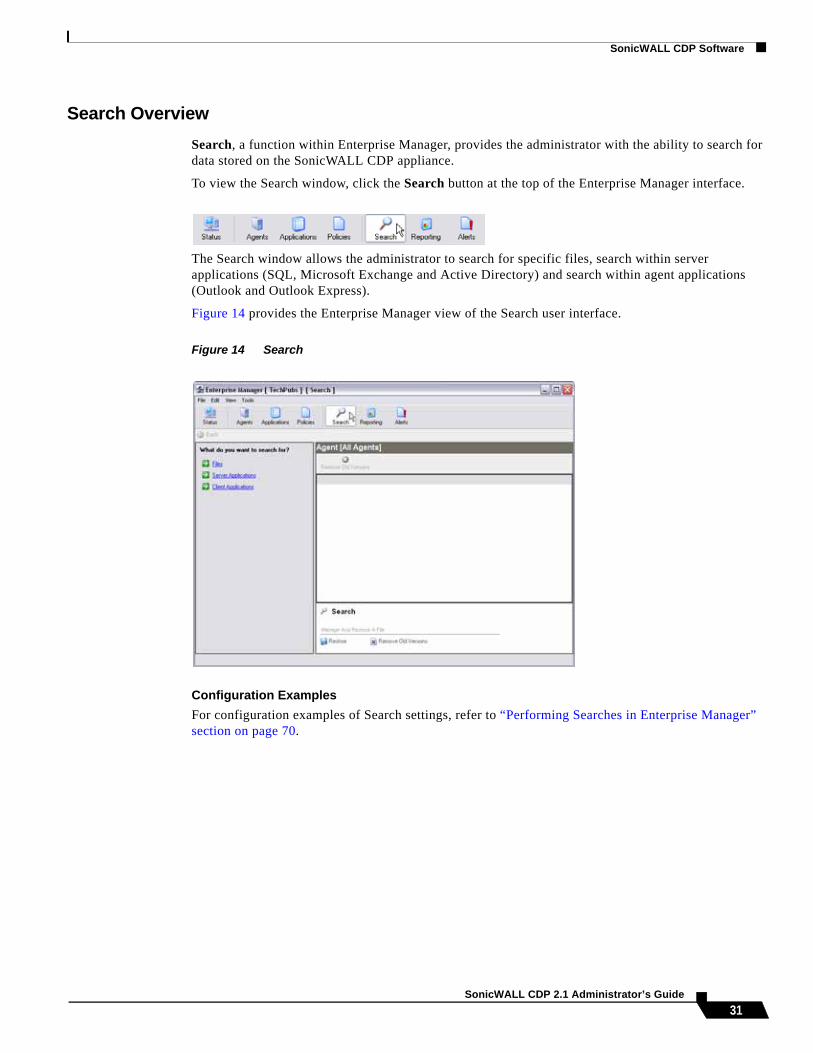
Search OverviewSearch, a function within Enterprise Manager, provides the administrator with the ability to search for data stored on the SonicWALL CDP appliance.
To view the Search window, click the Search button at the top of the Enterprise Manager interface.
The Search window allows the administrator to search for specific files, search within server applications (SQL, Microsoft Exchange and Active Directory) and search within agent applications (Outlook and Outlook Express).
Figure 14 provides the Enterprise Manager view of the Search user interface.
Figure 14 Search
Configuration ExamplesFor configuration examples of Search settings, refer to “Performing Searches in Enterprise Manager” section on page 70.
31SonicWALL CDP 2.1 Administrator’s Guide

SonicWALL CDP Software
Reporting OverviewReporting, a function within Enterprise Manager, provides the administrator with key reports on usage and server status. Summary statistics are listed in detail in Table 10 on page 33.
To view the Reporting window, click the Reporting button in the Enterprise Manager toolbar.
Figure 15 provides the Enterprise Manager view of the Reporting user interface.
Figure 15 Reporting
32SonicWALL CDP 2.1 Administrator’s Guide

SonicWALL CDP Software
The Reporting window allows the administrator to generate the reports listed in Table 10.
Table 10 Report Types
Configuration ExamplesFor configuration examples of Reports settings, refer to “Generating Reports in Enterprise Manager” section on page 73.
Report Type DescriptionExecutive Summary Executive Summary provides a general overview, including
Appliance Information, Agent Summary and Top 10 (file types by disk space used).
Agent Summary Agent Summary provides a summary of agent usage, including file size, size on disk with revisions, server application size and policy name.
Disk Space by File Type Disk Space by File Type provides a summary of disk space usage, both by file size and number of files, sorted by file extension.
Disk Space by Agent Disk Space by Agent provides a summary of disk space usage by agent, including size on disk, percent of total, number of files and number of revisions.
Policy Summary Policy Summary provides a summary of policy usage by policy, including agents assigned to a policy, and backups (including from the desktop, My Documents and Favorites).
Agents by Policy Agents by Policy provides a summary of agents sorted by default policy.
Server Application Backup Server Application Backup provides a summary of server applications selected for backup, including instance, database name, backup size and number of revisions.
Agent Application Backup Agent Application Backup provides a summary of agent applications selected for backup, sorted by agent and including path name, application name, and file size.
Offsite Status Offsite Status provides a summary of data backed up to the Offsite Service, sorted both by appliance and agent. This report includes size of data marked for offsite backup and size of data currently backed up to the Offsite Service.
33SonicWALL CDP 2.1 Administrator’s Guide

SonicWALL CDP Software
Alerts OverviewAlerts, a function within Enterprise Manager, allows the administrator to view a list of alerts that display before the appliance hits predefined capacity thresholds.
To view the Alerts window, click the Alerts button in the Enterprise Manager toolbar.
Figure 16 provides the Enterprise Manager view of the Alerts user interface.
Figure 16 Alerts
The Alerts function allows the administrator to view alerts for the events listed in Table 11.
Table 11 Alert Events
Alert Event DescriptionAgent Quota Warning Agent Quota Warning alerts you when an agent has attempted to
exceed the allotted quota.
Appliance Warning Appliance Warning alerts you when the appliance has reached a pre-set capacity threshold. The Appliance Warning default is 80%.
Appliance Full Appliance Full alerts you when the appliance is full and will not accept further backups.
Offsite Warning Offsite Warning alerts you when the Offsite Service has reached a pre-set capacity threshold. The Offsite Warning default is 80%.
Appliance Offline Appliance Offline alerts you when the appliance has not contacted the Offsite Service for a set period of time, and appears to be offline.
Archive Created Archive Created alerts you when an archive has been created, based on your subscription plan.
34SonicWALL CDP 2.1 Administrator’s Guide

SonicWALL CDP Software
Agent ToolThe SonicWALL CDP Agent Tool is software installed on every agent (server, laptop or PC intended to be backed up on the SonicWALL CDP Appliance).
The Agent Tool is a user interface that allows users of agents to set files and applications for backup (if so configured by the administrator in the Enterprise Manager) and to recover backed up files. The SonicWALL Agent Service is installed at automatically with the Agent Tool and runs in the background, communicating with the CDP appliance.
By default, the Agent Tool includes four controls: Status, Folders, Applications, and Search. These controls are displayed in Figure 17, which depicts the Agent Tool toolbar.
Figure 17 Agent Tool Toolbar
Agent access to these controls is granted and administered by the administrator using the Enterprise Manager. Table 12 provides an overview of the four default Agent Tool controls:
Table 12 Agent Tool Default Controls
Default Control Description
Status Status, a function within the Agent Tool, provides the user with a general overview, including agent information, agent status and policy settings.
Folders Folders, a function within the Agent Tool, provides the user with a list of folders being backed up and folder Offsite Service status.The Folders function also provides the ability to add folders, add common folders and remove old file versions.
Applications Applications, a function within the Agent Tool, provides the user with the backup status of agent and server applications and with the option to add applications for backup.
Search Search, a function within the Agent Tool, provides the user with the ability to search for files, server applications and agent applications. The Search function also provides the option to restore files and remove old file versions.
35SonicWALL CDP 2.1 Administrator’s Guide

SonicWALL CDP Software
Figure 18 provides the Agent Tool view of the user interface.
Figure 18 Agent Tool Interface
Note For more information on using the SonicWALL CDP Agent Tool, refer to the SonicWALL CDP Agent Tool User’s Guide.
36SonicWALL CDP 2.1 Administrator’s Guide

Configuration Task List
Configuration Task ListThis section provides a configuration task list for your SonicWALL CDP appliance using the Enterprise Manager and the firmware user interface.
This section includes the following subsections:
• “Initial Configuration of SonicWALL CDP Using Firmware User Interface” section on page 38
• “Editing Enterprise Manager Administrative Settings” section on page 42
• “Changing the SonicWALL CDP Appliance” section on page 43
• “Encryption Key Management” section on page 44
• “Checking for Firmware Updates” section on page 45
• “Checking for Software Updates” section on page 45
• “Managing Agents in Enterprise Manager” section on page 46
• “Managing Policies in Enterprise Manager” section on page 60
• “Performing Searches in Enterprise Manager” section on page 70
• “Generating Reports in Enterprise Manager” section on page 73
• “Recovering Your Data Using SonicWALL CDP” section on page 75
• “Configuring SonicWALL CDP Agent and Enterprise Manager to Work with Software Firewalls” section on page 84
37SonicWALL CDP 2.1 Administrator’s Guide

Configuration Task List
Initial Configuration of SonicWALL CDP Using Firmware User Interface
To prepare your SonicWALL CDP for first use, it is necessary to add a name server, configure a static IP address and set the local time zone for the SonicWALL CDP appliance using the firmware user interface. The SonicWALL CDP appliance requires at least one valid name server and the correct time zone settings and a static IP address on your local subnet in order to communicate with your network.
For more information on registration and initial setup of SonicWALL CDP, refer to the SonicWALL CDP 1440i/2440i Getting Started Guide or the SonicWALL CDP 3440i/4440i Getting Started Guide.
This section contains the following subsections:
• “Configuring Local Time Zone Using Firmware User Interface” section on page 38
• “Configuring a Static IP Address Using Firmware User Interface” section on page 39
• “Configuring Default Gateway” section on page 40
• “Configuring Domain Name Server (DNS) Address” section on page 41
Configuring Local Time Zone Using Firmware User InterfaceTo configure local time zone settings and a local time zone on your SonicWALL CDP appliance, perform the following steps:
Step 1 Navigate to System > Time in the left-hand navigation menu.
38SonicWALL CDP 2.1 Administrator’s Guide

Configuration Task List
Step 2 Complete the fields as described in the table below:
Step 3 Click the Apply button to save changes.
Step 4 Click the Logout button in the left-hand navigation menu.
Configuring a Static IP Address Using Firmware User Interface
Note Once the IP address of your SonicWALL CDP appliance is changed, you will not be able to access the appliance without this address. Before continuing, make a not of the chosen IP address for your SonicWALL CDP appliance.
To configure a static IP address for your SonicWALL CDP appliance, perform the following steps:
Step 1 Using the supplied crossover cable and the computer you are using to administer the SonicWALL CDP appliance, connect the LAN port the computer to the LAN port on the back of your SonicWALL CDP appliance.
Step 2 Set the computer you use to manage the SonicWALL CDP appliance to have a static IP address of 192.168.168.50 (or another available IP address on the 192.168.0/24 subnet). For help with setting up a static IP address on your computer, refer to the SonicWALL CDP 1440i/2440i Getting Started Guide or the SonicWALL CDP 3440i/4440i Getting Started Guide.
Step 3 Open a Web browser on the computer you are using to administer the SonicWALL CDP appliance.
Step 4 Enter http://192.168.168.169 (the default IP address of the SonicWALL CDP appliance) in the Location or Address bar. The SonicWALL CDP Static IP Management login screen displays.
Field DescriptionTime (hh:mm:ss) Select the time (hours:minutes:seconds) from the drop-down menus
in. The time is in 24 hour format.Date Select the date (month, day, year) from the drop-down menus.Time Zone Select your local time zone form the drop down menu.Set time automatically using NTP
Check this box to allow the time to set automatically using the default NTP server.
NTP Server Click the Add button to add your own NTP server. If you do not add your own NTP server, an internal list of servers will be used by default.
39SonicWALL CDP 2.1 Administrator’s Guide

Configuration Task List
Step 5 Enter “admin” in the User Name field and “password” in the Password field, and click the Login button.
Step 6 Navigate to Network > Settings in the left-hand navigation menu.
Step 7 Click the Configure icon in the Interfaces table.
Step 8 In the IP Address field, enter an unused static IP address that is within the range of your local subnet and click the OK button.
Step 9 Press the Submit button to submit the IP address change.
Step 10 Disconnect your management computer from the CDP. Your SonicWALL CDP appliance is now set to communicate with your network using a static IP address.
For more information on initial setup of your SonicWALL CDP appliance, refer to the SonicWALL CDP 1440i/2440i Getting Started Guide or the SonicWALL CDP 3440i/4440i Getting Started Guide.
Configuring Default Gateway
Step 1 Navigate to Network > Settings in the left-hand navigation menu.
Step 2 Scroll to the Default Gateway section and enter the IP address of your gateway device in the IP Address field.
Step 3 Click the Apply button at the top of the screen to save your settings
40SonicWALL CDP 2.1 Administrator’s Guide

Configuration Task List
Configuring Domain Name Server (DNS) AddressAt least one valid name server must be configured for the SonicWALL CDP appliance to communicate with the portal, registration and time servers. The name server is configured within the firmware user interface.
To configure a name server, perform the following steps:
Step 1 Navigate to Network > Name Servers in the left-hand navigation menu.
Step 2 Click Add... button under Name Servers.
Step 3 In the Add/Entry field, enter a single domain name server and click the OK button. Repeat steps 2 and 3 to add additional DNS entries.
Click the Apply button at the top of the screen to save your settings.
41SonicWALL CDP 2.1 Administrator’s Guide

Configuration Task List
Editing Enterprise Manager Administrative SettingsEdit Administrative Settings is located in the Enterprise Manager. This function allows the administrator to edit the SonicWALL CDP appliance name and edit the user information for the appliance administrator.
To edit your Enterprise Manager administrative settings, perform the following steps:
Step 1 Select Edit > Administrator Settings in the top menu bar.
Step 2 Fill in the fields as described in Table 13.
Table 13 Administrator Settings
Step 3 Click the Save Changes button.
Figure 19 provides the Enterprise Manager view of the Administrator Settings dialog window.
Figure 19 Administrator Settings Dialog Window
Field DescriptionFirst Name Enter your first name into the First Name field.
Last Name Enter your last name into the Last Name field.
Email Address Enter the administrator email address into the Email Address field.
Password Create a password in the Password field.
Confirm Password Re-enter your password in the Password field.
Server Name Enter your server name in the Server Name field.
42SonicWALL CDP 2.1 Administrator’s Guide

Configuration Task List
Changing the SonicWALL CDP ApplianceThe Change SonicWALL CDP Appliance feature allows the administrator to change appliances in a multiple-appliance deployment scenario.
Note If you want to connect to an appliance that is not on the local broadcast domain, you must exit and re-launch the Enterprise Manager, then select “Manual Connection” to specify the IP address of the target SonicWALL CDP appliance.
To change your SonicWALL CDP appliance, perform the following steps:
Step 1 Select Tools > Change Appliance in the top menu bar.
Step 2 Select the desired appliance and click the Connect button to change to that appliance.
43SonicWALL CDP 2.1 Administrator’s Guide

Configuration Task List
Encryption Key ManagementThe Encryption management feature allows the administrator to enable AES 256-bit encryption to protect data securely transmitted to the Offsite Service. The administrator may also view the encryption key using Encryption Key Management. For information on resetting the encryption key, refer to the “Resetting the Encryption Key” section on page 44.
Note Print the encryption key and store it in a secure location, such as a bank or vault. Data stored at the Offsite Service cannot be recovered without the encryption key, even by SonicWALL technical support engineers.
To manage your encryption key, perform the following steps:
Step 1 Select Edit > Encryption Settings in the top menu bar.
Step 2 Click the Enable Encryption button to enable security on the SonicWALL CDP appliance.
Step 3 To save the key locally, click the Print Key button and select a location to save the key.
Step 4 Click the Close button when you are finished.
Resetting the Encryption KeyThe encryption key cannot be reset.
When you click on Reset Encryption button, a message displays directing you to contact technical support.
Contact SonicWALL Technical Support for more information.
44SonicWALL CDP 2.1 Administrator’s Guide

Configuration Task List
Checking for Firmware UpdatesThe SonicWALL CDP automatically searches for and installs firmware updates at startup, and again every six hours. If SonicWALL releases a new firmware version or update, it will be automatically located and installed.
The Update feature allows the administrator to manually check for and download the latest SonicWALL CDP firmware updates.
To manually check for new firmware updates, perform the following steps:
Step 1 Select Tools > Check for Updates in the top menu bar.
Step 2 Click the Yes button at the prompt to search for and download firmware updates.
Step 3 SonicWALL CDP will automatically update if there are new updates.
Checking for Software UpdatesThe SonicWALL CDP e automatically searches for and installs software updates at startup, and again every six hours. If SonicWALL releases a new software version or update, it will be automatically located and installed.
The Update feature allows the administrator to manually check for and download the latest SonicWALL CDP software updates.
To manually check for new software updates, perform the following steps:
Step 1 Select Tools > Check for Updates in the top menu bar.
Step 2 Click the Yes button at the prompt to search for and download software updates.
Step 3 SonicWALL CDP appliance is automatically updated if there are new updates.
45SonicWALL CDP 2.1 Administrator’s Guide

Configuration Task List
Managing Agents in Enterprise ManagerThis section provides a configuration list specific to the Agent tab in Enterprise Manager. This section includes the following subsections:
• “Adding a New Agent” section on page 46
• “Editing an Agent’s Name” section on page 47
• “Editing an Agent’s Policy” section on page 47
• “Removing an Agent” section on page 48
• “Managing Agent Folders” section on page 49
– “Adding a Folder” section on page 50
– “Adding a Common Folder” section on page 50
– “Viewing, Restoring and Removing Old File Versions” section on page 51
– “Backing Up Files to the Offsite Service” section on page 52
– “Retrieving Folders to a Location” section on page 52
– “Viewing Folder Properties” section on page 52
• “Configuring Agent Application Backup” section on page 53
– “Adding an Application for Backup” section on page 55
– “Removing an Application from Backup” section on page 56
– “Backing up Active Directory” section on page 57
– “Backing up Microsoft Exchange” section on page 57
– “Restoring an Application” section on page 59
Adding a New AgentThe Add New Agent feature within the Enterprise Manager allows the administrator to add agents to SonicWALL CDP. Follow the tasks in this section to add a new agent whenever you have a new server, laptop or PC that you would like to backup using SonicWALL CDP.
Adding an agent is a two-step process: It is necessary to add the agent to the Enterprise Manager, and to install the Agent Tool software on the agent computer.
If you do not install the Agent Tool software onto the agent, it will not appear in the Enterprise Manager at the next startup.
This set of instructions provides the instructions for adding an agent using the Add New Agent feature in the Enterprise Manager. For instructions on installing the Agent Tool, refer to the Agent Tool User’s Guide.
To add a new agent, perform the following steps:
Step 1 At the top of the window, click the Agents button to view the Agent Management window.
Step 2 On the Agents page, click the Add New Agent button to open the Add Agent dialog.
Step 3 Enter the name of the agent you want to add in the Enter an Agent Name field.
Step 4 Click the Add button to add the new agent.
Step 5 Install the Agent Tool on the added computer, if it is not already installed.
46SonicWALL CDP 2.1 Administrator’s Guide

Configuration Task List
Editing an Agent’s NameThe Edit Name function allows the administrator to change an inoperable agent’s name in the Enterprise Manager. SonicWALL CDP recognizes agents by agent name, which is the same as Computer Name.
In order to recover backed up data from an agent that has been rendered inoperable, it is necessary to change the name of that agent in Enterprise Manager to match the name of a new agent. The new name must be the same as the Computer Name of the new agent.
Editing an inoperable agent’s name to match a new agent allows Enterprise Manager to recognize the new agent and associate backed up data from the inoperable agent with the newly assigned agent.
Note The Edit Name function should only be used to recover data from disabled agents. An alternate solution is to configure the new agent with the same Computer Name as the disabled agent. To change the Computer Name, right click My Computer and select Properties. Click the Computer Name tab and select Change, then type in the Computer Name of your previous computer.
To edit an agent’s name, perform the following steps:
Step 1 At the top of the window, click the Agents button to view the Agent Management window.
Step 2 Select an agent from the SonicWALL CDP Agents list in the left hand navigation bar.
Step 3 On the Agents page, click the Edit Name button to open the Rename Agent dialog.
Step 4 Enter the desired name in the Rename To field.
Step 5 Click the Rename button to change the agent name.
Editing an Agent’s PolicyThe Edit Policy view is within the Agent view in the Enterprise Manager.
Editing an agent’s policy allows the administrator to assign an agent to a new policy. If an agent is moved from a default policy to a custom policy, the data previously backed up will remain on the appliance. However, if the agent is moved from a custom policy to a different custom policy, the data previously backed up will be purged from the appliance.
To edit an agent’s policy, perform the following steps:
Step 1 At the top of the window, click the Agents button to view the Agent Management window.
Step 2 Select an agent from the SonicWALL CDP Agents list in the left hand navigation bar.
Step 3 Click the Edit Policy button in the Agent window.
Step 4 Select a policy from the Current Policy list and click the Update button to apply changes.
47SonicWALL CDP 2.1 Administrator’s Guide

Configuration Task List
Removing an AgentThe Remove Agent view is within the Agents view in the Enterprise Manager. Removing an agent allows the administrator to remove the rights of an agent to connect to the SonicWALL CDP. If an agent is removed and tries to connect, the agent will be blocked from connecting or backing up to the SonicWALL CDP.
Removing an agent requires the following two steps:
• Removing the agent using the Enterprise Manager.
• Uninstalling the Agent Tool from the agent.
If a user uninstalls the Agent Tool from an agent, or removes the agent from the network, the agent settings will not be changed and previously backed up data will remain on the appliance. Similarly, if an administrator removes an agent, and the Agent Tool remains on the agent, the agent will reappear in the Enterprise Manager at the next startup.
If you do not uninstall the Agent Tool software from the agent computer, the agent will reappear in the Enterprise Manager at the next startup.
Note If you remove an agent from the agents list in the Enterprise Manager, any data associated with the agent will be purged from the appliance.
To remove an agent, perform the following steps:
Step 1 At the top of the window, click the Agents button to view the Agent Management window.
Step 2 In the SonicWALL CPDP Agents list in the left-hand window, select the agent you want to remove.
Step 3 In the Agents page, click the Remove Agent button.
Step 4 A warning screen appears. Click the Yes button to remove the agent from the SonicWALL CDP appliance.
Step 5 Uninstall the Agent Tool software from the agent computer, if you have not already done so.
48SonicWALL CDP 2.1 Administrator’s Guide

Configuration Task List
Managing Agent FoldersThe Folders view is within the Agent view in the Enterprise Manager. The Folders view allows the administrator to administer agent folders for backup.
This section contains the following subsections:
• “Adding a Folder” section on page 50
• “Adding a Common Folder” section on page 50
• “Viewing, Restoring and Removing Old File Versions” section on page 51
• “Backing Up Files to the Offsite Service” section on page 52
• “Retrieving Folders to a Location” section on page 52
• “Viewing Folder Properties” section on page 52
To manage agent folders within the Folders view, perform the following steps:
Step 1 At the top of the window, click the Agents button to view the Agent Management window.
Step 2 Select the Agent you want to view from the SonicWALL CDP Agents list.
Step 3 Click the Folders icon in the Agent window to display the Folders view.
49SonicWALL CDP 2.1 Administrator’s Guide

Configuration Task List
Adding a Folder
Adding a folder allows the administrator to add folders to be automatically backed up from agents.
If a folder is selected for backup that does not exist on the agent, it will not be backed up.
To add an agent folder for backup, perform the following steps:
Step 1 In the Agent window, select the Agent you want to view from the SonicWALL CDP Agents list.
Step 2 Click the Folders button to view Folders View.
Step 3 In the Folders window at the bottom of the Agent screen, click Add Folder.
Step 4 Enter the folder you want to add (<drive_letter>:\<folder>\).
Step 5 Click the Save button. Repeat the process to add more folders.
Adding a Common Folder
Adding a common folder allows the administrator to select common folders (Desktop, Favorites and My Documents) to be backed up across agents in a selected policy.
To add a common folder, perform the following steps:
Step 1 In the Agent view, select the Agent you want to administer from the SonicWALL CDP Agents list.
Step 2 Click the Folders button to view Folders View.
Step 3 In the Folders window at the bottom of the Agent screen, click Add Common Folder.
Step 4 Choose the folder you want to add (folders may only be added one at a time).
Step 5 Check the Set For Offsite Backup option if you want for this folder to be backed up to the Offsite Service.
Step 6 Click the Add button. Repeat the process to add more folders.
50SonicWALL CDP 2.1 Administrator’s Guide

Configuration Task List
Viewing, Restoring and Removing Old File Versions
Multiple versions of each file are archived using SonicWALL CDP. You can view, restore and remove old file versions of a single file. If a newer version of a file gets damaged, it is possible to restore an older version. Because SonicWALL CDP has the option to store unlimited versions of each file, for space considerations it may be necessary to remove outdated versions periodically.
To check for old file versions, perform the following steps:
Step 1 In the Agent view, select the Agent you want to administer from the SonicWALL CDP Agents list.
Step 2 Click the Folders button to view Folders View.
Step 3 In the Folders window at the bottom of the Agent screen, click Restore Old Versions.
Step 4 The Restore File Version will appear, displaying the older versions of the selected file.
To restore an old file version, perform the following steps:
Step 1 In the Agent view, select the Agent you want to administer from the SonicWALL CDP Agents list.
Step 2 Click the Folders button to view Folders View.
Step 3 In the Folders window at the bottom of the Agent screen, click Restore Old Versions.
Step 4 The Restore File Version will appear, displaying the older versions of the selected file.
To remove old file versions, perform the following steps:
Step 1 In the Agent view, select the Agent you want to administer from the SonicWALL CDP Agents list.
Step 2 Click the Folders button to view Folders View.
Step 3 In the Folders window at the bottom of the Agent screen, click Remove Old Versions.
Note You can also choose to remove old file versions from specific folders by first clicking the folder in the agent view, and then clicking Remove Old File Versions.
Step 4 Click the Yes button to remove all old file versions.
51SonicWALL CDP 2.1 Administrator’s Guide
Configuration Task List
Backing Up Files to the Offsite Service
Backup Offsite provides the administrator the ability to select files for backup to the Offsite Service, where they are stored securely and can be recovered in the event of a disaster that renders local data destroyed or otherwise unrecoverable.
Note Backup Offsite will only work if you have a subscription for backup to the Offsite Service.
To backup files to the Offsite Service, perform the following steps:
Step 1 In the Agent view, select the Agent you want to administer from the SonicWALL CDP Agents list.
Step 2 Click the Folders button to view Folders View.
Step 3 Select the folder you want to backup to the Offsite Service.
Step 4 In the Folders window at the bottom of the Agent screen, click Backup Offsite.
Step 5 Select the Check for offsite backup checkbox and click the Set Status button.
Retrieving Folders to a Location
Administrators have the ability to retrieve saved folders and save them to a specified location.
To retrieve saved folders and save them to a specified location, perform the following steps:
Step 1 In the Agent view, select the Agent you want to administer from the SonicWALL CDP Agents list.
Step 2 Click the Folders button to view Folders view.
Step 3 Select the folder you want to save.
Step 4 In the Folders window at the bottom of the Agent screen, click Save to Location.
Step 5 Choose a location to save the folder and click the OK button.
Viewing Folder Properties
Viewing the folder properties provides the administrator with a summary of agent folders, including total folder size and the number of files it contains.
To view folder properties, perform the following steps:
Step 1 In the Agent view, select the Agent you want to administer from the SonicWALL CDP Agents list.
Step 2 Click the Folders button to view Folders view.
Step 3 Select the folder you want to view properties for.
Step 4 In the Folders window at the bottom of the Agent screen, click Properties.
52SonicWALL CDP 2.1 Administrator’s Guide

Configuration Task List
Configuring Agent Application BackupThe Applications view is within the Agent view in the Enterprise Manager, and allows the administrator to add, remove, or restore applications for revision backup.
Applications that can be configured for revision backup using SonicWALL CDP include agent applications Outlook and Outlook Express and server applications Microsoft Exchange, Active Directory and SQL Server.
Note Active Directory, Microsoft Exchange and SQL Server can only be configured for backup or recovery using the Agent Tool. Refer to the “Backing up Active Directory” section on page 57 and the “Backing up Microsoft Exchange” section on page 57.
This section includes the following subsections:
• “Adding an Application for Backup” section on page 55
• “Removing an Application from Backup” section on page 56
• “Adding Server Applications for Backup” section on page 56
– “Backing up Active Directory” section on page 57
– “Backing up Microsoft Exchange” section on page 57
– “Backing up Microsoft SQL” section on page 58
• “Restoring an Application” section on page 59
53SonicWALL CDP 2.1 Administrator’s Guide

Configuration Task List
To navigate to the Applications view for agents, perform the following steps:
Step 1 Click the Agents button in the Enterprise Manager toolbar.
Step 2 Select the agent you want to view from the SonicWALL CDP Agents list in the left-hand navigation toolbar.
Step 3 Click the Applications icon in the agent window.
54SonicWALL CDP 2.1 Administrator’s Guide
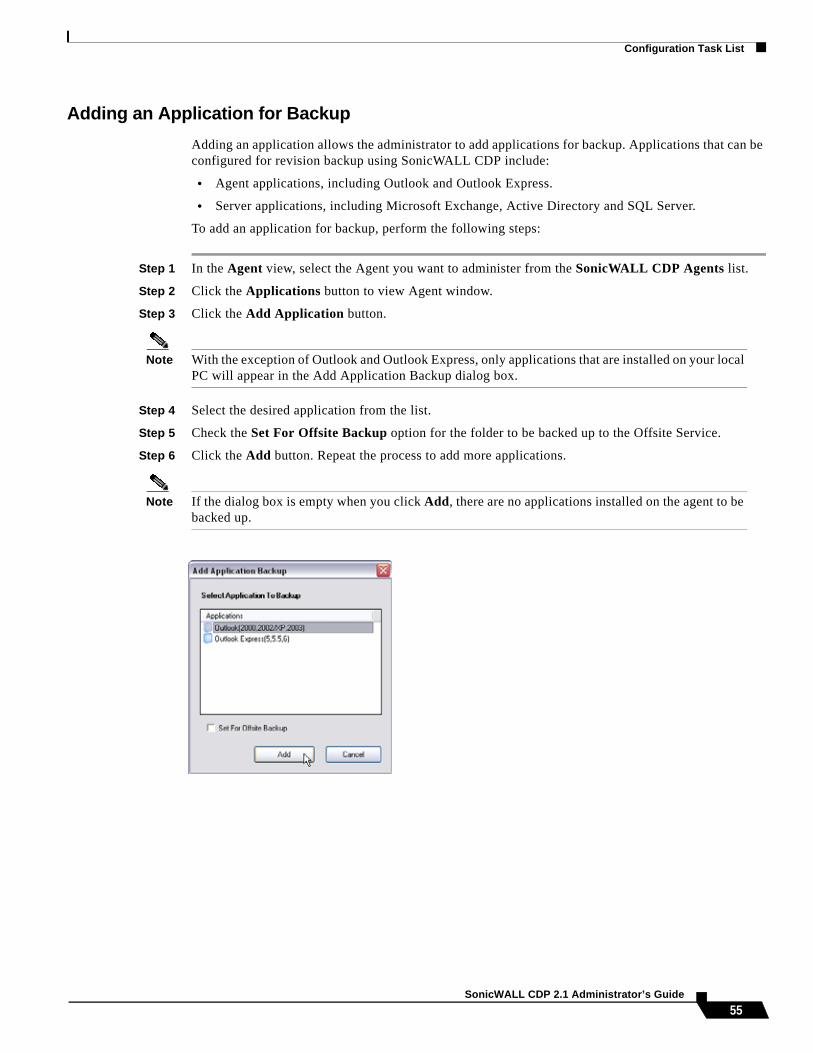
Configuration Task List
Adding an Application for BackupAdding an application allows the administrator to add applications for backup. Applications that can be configured for revision backup using SonicWALL CDP include:
• Agent applications, including Outlook and Outlook Express.
• Server applications, including Microsoft Exchange, Active Directory and SQL Server.
To add an application for backup, perform the following steps:
Step 1 In the Agent view, select the Agent you want to administer from the SonicWALL CDP Agents list.
Step 2 Click the Applications button to view Agent window.
Step 3 Click the Add Application button.
Note With the exception of Outlook and Outlook Express, only applications that are installed on your local PC will appear in the Add Application Backup dialog box.
Step 4 Select the desired application from the list.
Step 5 Check the Set For Offsite Backup option for the folder to be backed up to the Offsite Service.
Step 6 Click the Add button. Repeat the process to add more applications.
Note If the dialog box is empty when you click Add, there are no applications installed on the agent to be backed up.
55SonicWALL CDP 2.1 Administrator’s Guide

Configuration Task List
Removing an Application from BackupRemoving an application from backup allows the administrator to remove previously selected applications from the backup process.
Applications that can be configured for revision backup using SonicWALL CDP include agent applications Outlook and Outlook Express and server applications Microsoft Exchange, Active Directory and SQL Server.
To remove an application from backup, perform the following steps:
Step 1 In the Agent view, select the Agent you wish to administer from the SonicWALL CDP Agents list.
Step 2 Click the Applications button to view Applications View.
Step 3 Select the desired application from the list in the Agent window.
Step 4 Click the Remove Application button.
Step 5 A warning screen appears. Click Yes to remove the application.
Adding Server Applications for BackupServer applications, including SQL, Microsoft Exchange and Active Directory, cannot be configured for backup or recovery using Enterprise Manager.
The following subsections refer to tasks using the Agent Tool:
• “Backing up Active Directory” section on page 57
• “Backing up Microsoft Exchange” section on page 57
• “Backing up Microsoft SQL” section on page 58
56SonicWALL CDP 2.1 Administrator’s Guide

Configuration Task List
Backing up Active Directory
Backing up Active Directory using SonicWALL CDP allows users to store and retrieve Active Directory revisions from agent machines.
Note Active Directory cannot be added from the Enterprise Manager. Active Directory can be added using the Agent Tool.
To add Active Directory using the Agent Tool, perform the following steps:
Step 1 Open the SonicWALL Agent Tool on the Domain Controller.
Step 2 Go to Applications and add Active Directory.
The following options are available to edit for Active Directory using the Agent Tool:
• Configure Authentication - (Trusted Connection or manually specify username/password).
• Configure Backup Interval - (Default or custom).
• Backup Offsite - Send data to the Offsite Service.
• Remove Server Application - Stop backing up Active Directory.
Backing up Microsoft Exchange
Backing up Microsoft Exchange using SonicWALL CDP allows users to store and retrieve Microsoft Exchange revisions from an agent machine. Microsoft Exchange backup cannot be configured using the Enterprise Manager.
Note Microsoft Exchange can only be added using the Agent Tool.
To backup Microsoft Exchange using the Agent Tool, perform the following steps:
Step 1 Open the SonicWALL Agent Tool on the Exchange server
Step 2 Go to Applications and add Microsoft Exchange.
The following options are available to edit for Exchange using the Agent Tool:
• Backup Offsite - Send data to the Offsite Service.
• Remove Server Application - Stop backing up Exchange.
57SonicWALL CDP 2.1 Administrator’s Guide

Configuration Task List
Backing up Microsoft SQL
Backing up Microsoft SQL using SonicWALL CDP allows users to store and retrieve Microsoft SQL revisions from an agent machine. Microsoft SQL backup cannot be configured using the Enterprise Manager.
Note Microsoft SQL can only be added using the Agent Tool.
To backup Microsoft SQL using the Agent Tool, perform the following steps:
Step 1 Open the SonicWALL Agent Tool on the SQL server
Step 2 Go to Applications and add Microsoft SQL.
The following options are available to edit for SQL using the Agent Tool:
• Backup Interval - Default or custom.
• Remove SQL Server Instance - Stop backing up a SQL Server instance.
• Restore Database - Restore a backed up database version.
• Remove Database - Stop backing up the database.
58SonicWALL CDP 2.1 Administrator’s Guide

Configuration Task List
Restoring an ApplicationRestoring an application allows the administrator to restore an application revision to an agent’s computer.
Applications that can be configured for revision backup using SonicWALL CDP include agent applications Outlook and Outlook Express and server applications Microsoft Exchange, Active Directory and SQL Server.
For specific details on recovering data from server applications, refer to “Recovering data from Active Directory” section on page 78, “Recovering data from Microsoft Exchange” section on page 78, and “Recovering data from Microsoft SQL Server” section on page 79.
To restore an old version of an application, perform the following steps:
Step 1 In the Agent view, select the Agent you wish to administer from the SonicWALL CDP Agents list.
Step 2 Click the Applications button to view Applications View.
Step 3 Right-click on the desired application from the list in the Agent window and select Expand Children.
Step 4 Right-click on the archive file and select Restore a Version.
Note When using the Enterprise Manager to restore an agent folder, restore will take place locally (on the Enterprise Manager machine) by default.
59SonicWALL CDP 2.1 Administrator’s Guide

Configuration Task List
Managing Policies in Enterprise ManagerThis section provides a configuration list specific to Policies in the Enterprise Manager. There are two kinds of policies, default and custom. Agents are assigned to the default policy unless they are moved to a custom policy. This section includes the following subsections:
• “Managing the Default Policy” section on page 60
• “Adding a New Policy” section on page 62
• “Applying a Policy” section on page 65
• “Editing a Policy” section on page 66
• “Removing a Policy” section on page 70
Managing the Default PolicyThe default policy is automatically assigned to agents using SonicWALL CDP. Whenever an agent is added to SonicWALL CDP or removed from a custom policy, the agent will be added to the default policy. It is recommended that the default policy backup quota be set to zero, so that agents must be assigned to a custom policy before they can begin the backup process.
Note If an agent is switched from the default policy to a custom policy, the data previously backed up will remain on the appliance. However, if the agent is moved from a custom policy to a different custom policy, the data previously backed up will be purged from the appliance.
To customize policies for agents, refer to the following subsections:
• “Adding a New Policy” section on page 62
• “Applying a Policy” section on page 65
• “Editing a Policy” section on page 66
• “Removing a Policy” section on page 70
60SonicWALL CDP 2.1 Administrator’s Guide

Configuration Task List
To manage the default policy, perform the following steps:
Step 1 At the top of the window, click the Policies button.
Step 2 Select the Default Policy from the policies list in the left hand window.
Step 3 Click the Edit Policy button in the Policy window.
The Edit Policy dialog appears for the default policy. Figure 20 provides the Enterprise Manager view of the Edit Policy dialog for the default policy.
Note You can also edit the default policy by clicking the Policies button and then selecting Edit Default Policy from the Policies main page.
Figure 20 Edit Policy Dialog, Default Policy
61SonicWALL CDP 2.1 Administrator’s Guide
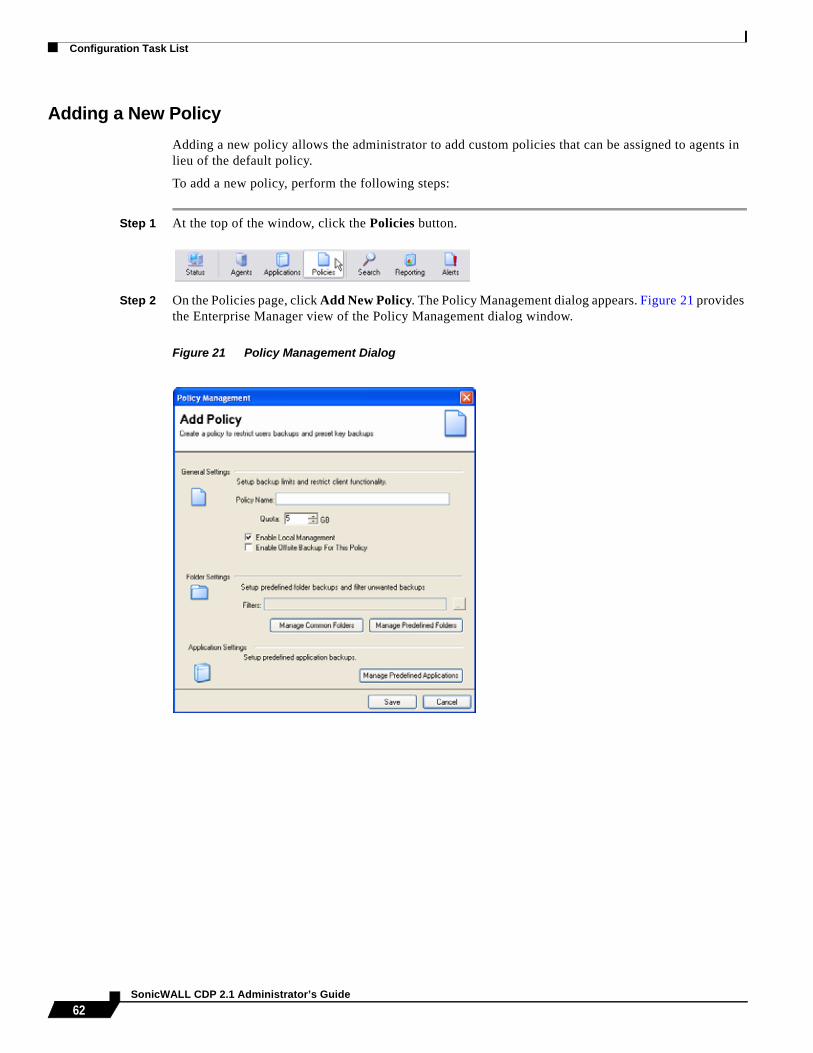
Configuration Task List
Adding a New PolicyAdding a new policy allows the administrator to add custom policies that can be assigned to agents in lieu of the default policy.
To add a new policy, perform the following steps:
Step 1 At the top of the window, click the Policies button.
Step 2 On the Policies page, click Add New Policy. The Policy Management dialog appears. Figure 21 provides the Enterprise Manager view of the Policy Management dialog window.
Figure 21 Policy Management Dialog
62SonicWALL CDP 2.1 Administrator’s Guide

Configuration Task List
Step 3 Edit General Settings for the policy as follows:
Editing General Settings
1. Enter a friendly name for this policy in the Policy Name Field.
2. Enter a maximum backup quota (in Gigabytes) for this policy in the Quota field.
Note A maximum backup quota must be less than the capacity of your SonicWALL CDP appliance. Though you cannot oversubscribe an agent, you will receive an alert when the appliance has reached 80% capacity, and you may wish to recalculate the maximum agent policies.
3. Check the Enable Local Management option to give agents the ability to manage their policy locally.
4. Check the Enable Offsite Backup For This Policy option to allow secure backups to the Offsite Service.
Filtering File Extensions
This feature allows you to filter out (exclude) any file extensions form being backed up once the policy is applied to an agent. Only .tmp files are filtered by default.
Note File extensions may be specified with or without a period. For example, mp3 and .mp3 will both filter mp3 files.
1. Click the button to the right of the Filters field.
2. Click the Add button. The Add Filter Extension dialog appears.
3. Enter the file extension you wish to filter (for example: mp3 or .mp3) in the Filter Extension field and click the Save button.
63SonicWALL CDP 2.1 Administrator’s Guide

Configuration Task List
4. To add another file extension, click the Add button again. Otherwise, click the Apply Changes button to add this file extension to the exclusion list.
Managing Common Folders
This feature allows the administrator to edit common folders (desktop, favorites, my documents) defined for backup.
1. Click the Manage Common Folders button. The Common Folder Management dialog appears.
2. Click the Add button to display the Common Folder Backup dialog.
3. Choose the folder you want to add (folders may only be added one at a time).
4. Check the Set For Offsite Backup option if you want for this folder to be backed up to the Offsite Service.
5. Click the Add button. Repeat the process to add more folders.
6. Click the Apply Changes button to add these folders to the backup policy.
Managing Predefined Folders
This feature allows you to define a folder or set of folders for backup once the policy is applied to an agent. The folder(s) will be backed up on agents to which this policy is applied.
1. Click the Manage Predefined Folders button. The Root Folder Management dialog appears.
2. Click the Add button to display the Root Folder dialog.
3. Enter the folder you want to add (<drive_letter>:\<folder>).
4. Check the Set For Offsite Backup option if you want for this folder to be backed up to the Offsite Service.
64SonicWALL CDP 2.1 Administrator’s Guide

Configuration Task List
5. Click the Save button. Repeat the process to add more folders.
6. Click the Apply Changes button to add these folders to the backup policy.
Managing Predefined Applications
This feature allows you to define applications for revision backup once the policy is applied to an agent. The application revisions will be backed up for agents to which this policy is applied.
1. Click the Manage Predefined Applications button. The Application Management dialog appears.
2. Click the Add button to display a list of applications.
3. Choose the application you want to add (applications may only be added one at a time).
4. Check the Set For Offsite Backup option if you want for this folder to be backed up to the Offsite Service.
5. Click the Add button. Repeat the process to add more folders.
6. Click the Apply Changes button to add these folders to the backup policy.
Applying a Policy Once a policy has been created, it can be assigned to any SonicWALL CDP agent(s).
To apply a policy to an agent, perform the following steps:
Step 1 At the top of the window, click the Agents button.
The Agents window appears.
Step 2 Select an Agent from the SonicWALL CDP Agents list.
Step 3 Click the Edit Policy button in the Agent window.
Step 4 Select a policy from the Current Policy list and click the Update button to apply changes.
65SonicWALL CDP 2.1 Administrator’s Guide
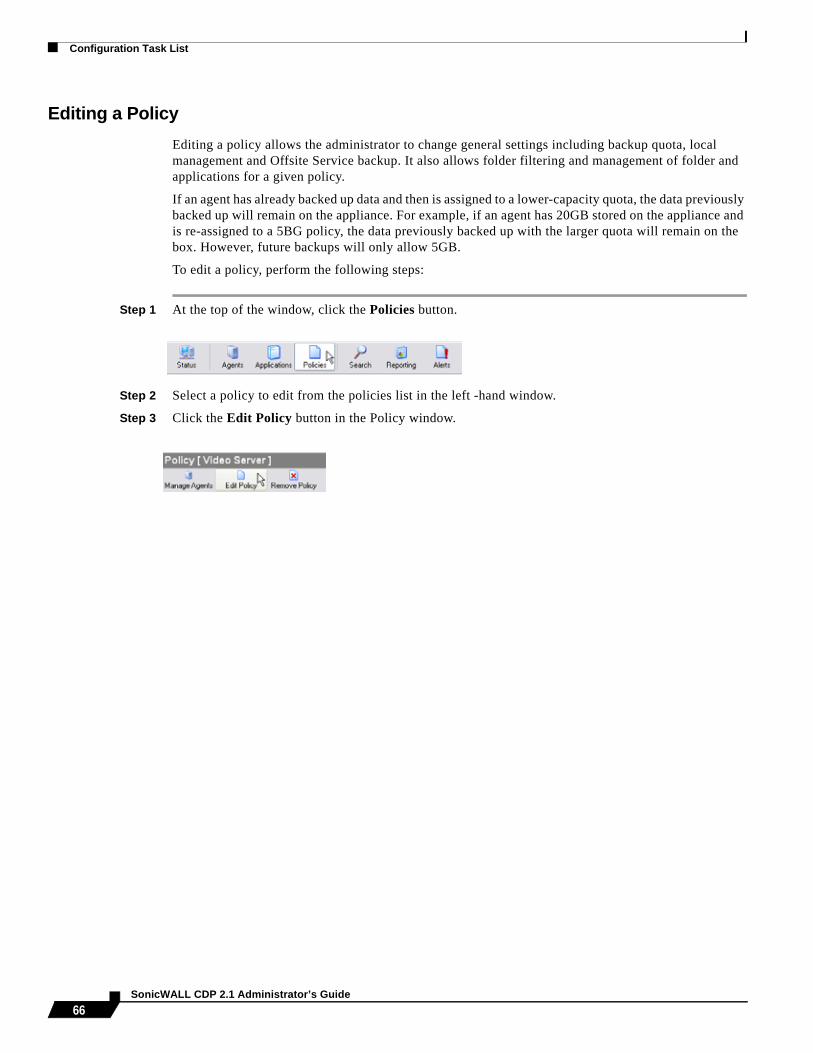
Configuration Task List
Editing a PolicyEditing a policy allows the administrator to change general settings including backup quota, local management and Offsite Service backup. It also allows folder filtering and management of folder and applications for a given policy.
If an agent has already backed up data and then is assigned to a lower-capacity quota, the data previously backed up will remain on the appliance. For example, if an agent has 20GB stored on the appliance and is re-assigned to a 5BG policy, the data previously backed up with the larger quota will remain on the box. However, future backups will only allow 5GB.
To edit a policy, perform the following steps:
Step 1 At the top of the window, click the Policies button.
Step 2 Select a policy to edit from the policies list in the left -hand window.
Step 3 Click the Edit Policy button in the Policy window.
66SonicWALL CDP 2.1 Administrator’s Guide

Configuration Task List
The Policy Management dialog appears. Figure 22 provides the Enterprise Manager view of the Edit Policy dialog window.
Note You can also edit the default policy by clicking the Policies button and then selecting Edit Default Policy from the Policies main page.
Figure 22 Edit Policy Dialog
Step 4 Edit General Settings for the policy as follows:
Editing General Settings
1. Enter a friendly name for this policy in the Policy Name Field.
2. Enter a maximum backup quota (in Gigabytes) for this policy in the Quota field. This is only limited by the maximum capacity of your appliance. You cannot oversubscribe agents and you will receive an alert when your appliance has reached 80% capacity.
3. Check the Enable Local Management option to give agents the ability to manage their policy locally. (If Enable Local Management is unchecked, agents under the policy will be restrained from all management activity and will only be able to restore data from the appliance.)
4. Check the Enable Offsite Backup For This Policy option to allow secure backups to the Offsite Service.
67SonicWALL CDP 2.1 Administrator’s Guide

Configuration Task List
Filtering File Extensions
This feature allows you to filter out (exclude) file extensions form being backed up once the policy is applied to an agent.
Note File extensions may be specified with or without a period. For example, mp3 and .mp3 will both filter mp3 files.
1. Click the button to the right of the Filters field.
2. Click the Add button. The Add Filter Extension dialog appears.
3. Enter the file extension you want to filter (for example, mp3 or .mp3) in the Filter Extension field and click the Save button.
4. To add another file extension, click the Add button again. Otherwise, click the Apply Changes button to add this file extension to the exclusion list.
Managing Common Folders
This feature allows the administrator to edit common folders (Desktop, Favorites and My Documents) set for backup.
1. Click the Manage Common Folders button. The Common Folder Management dialog appears.
2. Click the Add button to display the Common Folder Backup dialog.
3. Choose the folder you want to add (folders may only be added one at a time).
68SonicWALL CDP 2.1 Administrator’s Guide

Configuration Task List
4. Check the Set For Offsite Backup option if you want for this folder to be backed up to the Offsite Service.
5. Click the Add button. Repeat the process to add more folders.
6. Click the Apply Changes button to add these folders to the backup policy.
Managing Predefined Folders
This feature allows you to define a folder or set of folders for backup once the policy is applied to an agent. The folder(s) will be backed up on agents to which this policy is applied.
1. Click the Manage Predefined Folders button. The Root Folder Management dialog appears.
2. Click the Add button to display the Root Folder dialog.
3. Enter the folder you want to add (<drive_letter>:\<folder>).
4. Check the Set For Offsite Backup option if you want for this folder to be backed up to the Offsite Service.
5. Click the Save button. Repeat the process to add more folders.
6. Click the Apply Changes button to add these folders to the backup policy.
Managing Predefined Applications
This feature allows administrators to define common applications for revision backup once the policy is applied to an agent. The application revisions will be backed up on agents to which this policy is applied.
1. Click the Manage Predefined Applications button. The Application Management dialog appears.
2. Click the Add button to display a list of applications.
3. Choose the application you want to add (applications may only be added one at a time).
69SonicWALL CDP 2.1 Administrator’s Guide

Configuration Task List
4. Check the Set For Offsite Backup option if you want for this folder to be backed up to the Offsite Service.
5. Click the Add button. Repeat the process to add more folders.
6. Click the Apply Changes button to add these folders to the backup policy.
Removing a PolicyRemoving a policy allows the administrator to remove previously defined policies. Agents assigned to policies that are removed will be covered under the default policy. If the default policy has a lower quota than the previous policy, the data not covered under the policy will be purged. If the default policy includes different files for backup, the files from the previous policy will be purged.
To remove a policy, perform the following steps:
Step 1 At the top of the window, click the Policies button.
Step 2 Select the policy you want to remove from the policies list in the left -hand window.
Step 3 Click the Remove Policy button in the Policy window.
Step 4 A Warning Screen will appear. Click the Yes button to remove the policy.
Performing Searches in Enterprise ManagerThis section provides a configuration list specific to the Agent in the Enterprise Manager. This section includes the following subsections:
• “Searching for Files” section on page 71
• “Searching Within Server Applications” section on page 72
• “Searching Within Agent Applications” section on page 72
70SonicWALL CDP 2.1 Administrator’s Guide

Configuration Task List
Searching for FilesThis allows the administrator to search for files marked for backup.
To search for files, perform the following steps:
Step 1 In the Search view, select Files form the left-hand window.
Step 2 Select the agent you want to search from the Agent drop-down menu, or select Search All Agents.
Step 3 Select the folder you want to search from the Folder drop-down menu, or select Search All Folders.
Step 4 Enter a search string in the All or part of the file name field.
Step 5 To search a specific date or date-range, select a last modified date from the pre-defined time ranges in the When was it modified drop-down menu, or specify your own dates in the drop down menus below.
Step 6 To search for a specific file size or file size-range, select a size from the What size is it drop-down menu, or specify your own size or size-range below.
Step 7 Select a value from the How many backup versions should exist drop-down menu and enter a number.
Step 8 To search only for folders marked for Offsite Service backup, select Yes from the Marked for offsite backup menu.
Step 9 If searching for folders marked for offsite backup, choose to search only for folders which currently exist at the Offsite Service by selecting Yes from the Exists offsite drop-down menu.
Step 10 Click the Search button to start your search.
71SonicWALL CDP 2.1 Administrator’s Guide
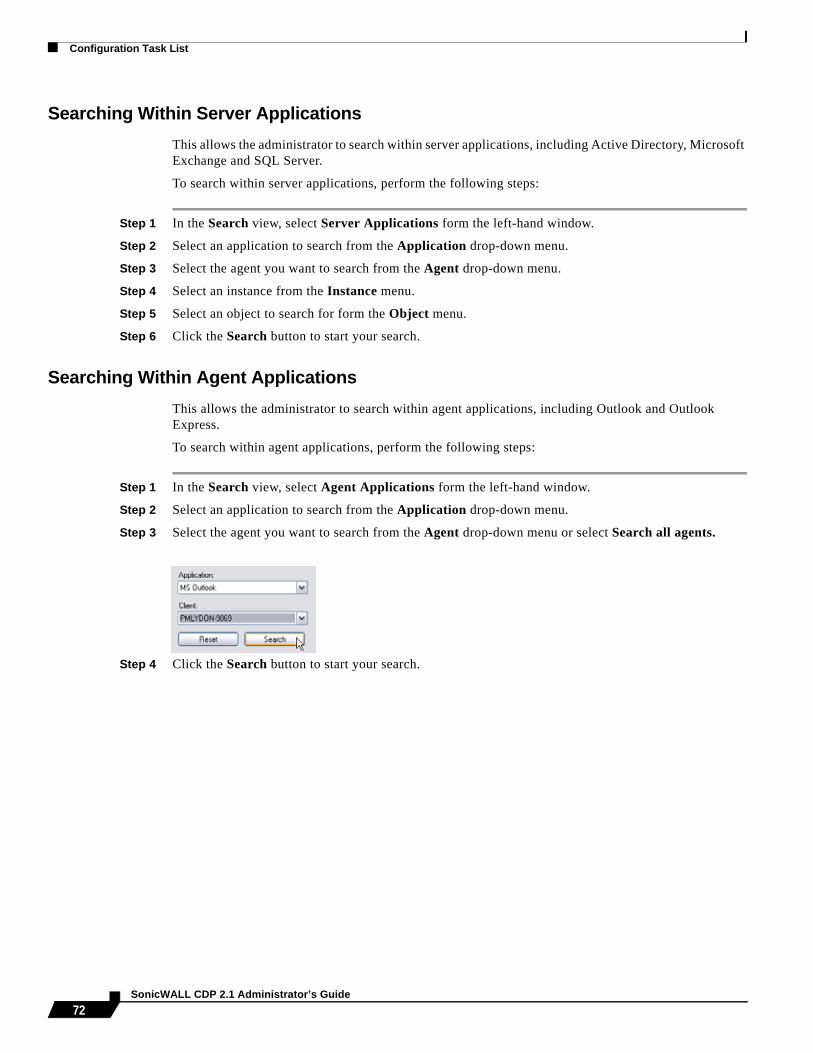
Configuration Task List
Searching Within Server ApplicationsThis allows the administrator to search within server applications, including Active Directory, Microsoft Exchange and SQL Server.
To search within server applications, perform the following steps:
Step 1 In the Search view, select Server Applications form the left-hand window.
Step 2 Select an application to search from the Application drop-down menu.
Step 3 Select the agent you want to search from the Agent drop-down menu.
Step 4 Select an instance from the Instance menu.
Step 5 Select an object to search for form the Object menu.
Step 6 Click the Search button to start your search.
Searching Within Agent ApplicationsThis allows the administrator to search within agent applications, including Outlook and Outlook Express.
To search within agent applications, perform the following steps:
Step 1 In the Search view, select Agent Applications form the left-hand window.
Step 2 Select an application to search from the Application drop-down menu.
Step 3 Select the agent you want to search from the Agent drop-down menu or select Search all agents.
Step 4 Click the Search button to start your search.
72SonicWALL CDP 2.1 Administrator’s Guide

Configuration Task List
Generating Reports in Enterprise ManagerThis section provides a configuration list specific to the Reporting view in the Enterprise Manager. For more information on generating an agent report using the Enterprise Manager, refer to the “Generating CDP Agent Reports” section on page 73.
Generating CDP Agent ReportsThe administrator can generate reports using the Enterprise Manager that provide agent and backup statistics.
To generate reports, perform the following steps:
Step 1 At the top of the window, click the Reporting button.
Step 2 In the Reports list in the left -hand window, double-click the report you want to run (refer to Table 14 for report type descriptions).
Step 3 When the report is complete, you can save the report in HTML format by clicking the Save button and selecting a location to save.
Step 4 If you want to view the report in your browser without saving, click the Browser button.
73SonicWALL CDP 2.1 Administrator’s Guide

Configuration Task List
Table 14 Report Types
Report Type DescriptionExecutive Summary Executive Summary provides a general overview, including
Appliance Information, Agent Summary and Top 10 (file types by disk space used).
Agent Summary Agent Summary provides a summary of agent usage, including file size, size on disk with revisions, server application size and policy name.
Disk Space by File Type Disk Space by File Type provides a summary of disk space usage, both by file size and number of files, sorted by file extension.
Disk Space by Agent Disk Space by Agent provides a summary of disk space usage by agent, including size on disk, percent of total, number of files and number of revisions.
Policy Summary Policy Summary provides a summary of policy usage by policy, including agents assigned to a policy, and backups (including from the desktop, My Documents and Favorites).
Agents by Policy Agents by Policy provides a summary of agents sorted by default policy.
Server Application Backup Server Application Backup provides a summary of server applications selected for backup, including instance, database name, backup size and number of revisions.
Agent Application Backup Agent Application Backup provides a summary of agent applications selected for backup, sorted by agent and including path name, application name and file size.
Offsite Status Offsite Status provides a summary of data backed up to the Offsite Service, sorted both by appliance and agent. This report includes size of data marked for offsite backup and size of data currently backed up at the Offsite Service.
74SonicWALL CDP 2.1 Administrator’s Guide
Configuration Task List
Recovering Your Data Using SonicWALL CDPWhen using SonicWALL CDP, if an agent should experience an event that results in data loss, you will be able to recover any data that you had defined for backup. In the event of agent data loss, data can be recovered directly from the SonicWALL CDP appliance. In the event of a disaster that has rendered local data corrupted or destroyed, data can be recovered from the Offsite Service.
This section contains the following two subsections:
• “File Recovery Using the SonicWALL CDP Agent Tool” section on page 76
• “Server Application Recovery Using the SonicWALL CDP Agent Tool” section on page 77
– “Recovering data from Active Directory” section on page 78
– “Recovering data from Microsoft Exchange” section on page 78
– “Recovering data from Microsoft SQL Server” section on page 79
• “Disaster Recovery Using the Offsite Service” section on page 80
– “Encryption Key Management” section on page 81
– “Purging Data from the SonicWALL CDP Appliance” section on page 82
• “Recovery when RAID Fails” section on page 83
– “If One Disk Fails While Using the SonicWALL CDP 3440i Appliance” section on page 83
– “If Two Disks Fail While Using SonicWALL CDP 3440i” section on page 83
– “If One Disk Fails While Using SonicWALL CDP 4440i” section on page 83
– “If Two Disks Fail While Using SonicWALL CDP 4440i” section on page 83
75SonicWALL CDP 2.1 Administrator’s Guide

Configuration Task List
File Recovery Using the SonicWALL CDP Agent ToolSonicWALL CDP allows you to recover lost data directly from the appliance. Recovery can be performed to replace a folder that has been deleted, or to restore a previous version of a folder that has been changed or otherwise damaged. Recovery can be performed on any agent and recovered files are restored directly from the appliance.
If necessary, before restoring a file, first follow the prescribed restore procedures of the system which may include the re-installation of the operating system, applications or replacement of hardware.
To recover data using the SonicWALL CDP appliance, perform the following steps:
Step 1 Once the system is operable again, reinstall the SonicWALL CDP Agent software on the affected computer using the software provided by SonicWALL. Be sure to enter the same user name and company that you entered during your initial installation for the reinstall.
Note To recover data stored by an agent that is no longer operable, it is necessary to configure a new agent with the same Computer Name as the disabled agent. To change your Computer Name, right click My Computer and select Properties. Click the Computer Name tab and select Change, then type in the Computer Name of your previous computer.
Step 2 Launch the SonicWALL CDP Agent software.
Step 3 Click the Folders button to enter Folders View.
Step 4 Select the folder you want to restore.
Step 5 In the Folders window at the bottom of the Agent screen, click Save to Location.
Step 6 Choose a location to save the folder and click the OK button.
Step 7 Repeat the process to restore additional folders to your computer.
76SonicWALL CDP 2.1 Administrator’s Guide

Configuration Task List
Figure 23 displays the process for registering a new appliance.
Figure 23 Registering a New Appliance
Server Application Recovery Using the SonicWALL CDP Agent ToolServer applications include SQL, Microsoft Exchange and Active Directory. Revisions to server applications can be recovered using the Agent Tool.
This section contains the following subsections:
• “Recovering data from Active Directory” section on page 78
• “Recovering data from Microsoft Exchange” section on page 78
• “Recovering data from Microsoft SQL Server” section on page 79
77SonicWALL CDP 2.1 Administrator’s Guide

Configuration Task List
Recovering data from Active Directory
Recovery from Active Directory using SonicWALL CDP allows users to retrieve Active Directory revisions from agent machines.
Note Active Directory cannot be restored from the Enterprise Manager. Active Directory can be restored using the Agent Tool.
To add Active Directory using the Agent Tool, perform the following steps:
Step 1 Open the SonicWALL Agent Tool.
Step 2 Click Applications in the Agent Tool toolbar.
Step 3 In the left -hand navigation toolbar, expand the Server Applications tree.
Step 4 Highlight Microsoft Active Directory.
Step 5 In the right -hand portion of the window, highlight one of the backup versions and click Restore Active Directory.
Step 6 In the window that appears, select the version you would like to restore. You may want to use the backup type (full, differential) or date of the backup to determine which version to restore.
Step 7 Click Restore to Application.
Step 8 Select a folder to temporarily store the recovered data and click OK.
Recovering data from Microsoft Exchange
Backing up Microsoft Exchange using SonicWALL CDP allows users to store and retrieve Microsoft Exchange revisions from an agent machine. Microsoft Exchange backup cannot be configured using the Enterprise Manager.
Note Microsoft Exchange can only be restored using the Agent Tool.
To backup Microsoft Exchange using the Agent Tool, perform the following steps:
Step 9 Click Applications in the Agent Tool toolbar.
Step 10 In the left -hand navigation toolbar, expand the Server Applications tree.
Step 11 Expand the Microsoft Exchange tree and select the information store you want to restore.
Step 12 In the right -hand portion of the window, highlight one of the backup versions and click Restore Storage Group.
Step 13 In the window that appears, select the version you would like to restore. You may want to use the backup type (full, differential) or date of the backup to determine which version to restore.
Step 14 Click Restore to Application.
Step 15 Select a folder for temporary storage and click OK.
78SonicWALL CDP 2.1 Administrator’s Guide

Configuration Task List
Recovering data from Microsoft SQL Server
Restoring Microsoft SQL using SonicWALL CDP allows users to retrieve Microsoft SQL revisions from an agent. Microsoft SQL recovery cannot be performed using the Enterprise Manager.
Note Microsoft SQL restore an only be performed using the Agent Tool.
To restore a Microsoft SQL database using the Agent Tool, perform the following steps:
Step 1 Click Applications in the Agent Tool toolbar.
Step 2 In the left -hand navigation toolbar, expand the Server Applications tree.
Step 3 Expand the Microsoft SQL tree and select the database you want to restore.
Step 4 In the right -hand portion of the window, highlight one of the backup versions and click Restore Database.
Step 5 In the window that appears, select the version you would like to restore. You may want to use the backup type (full, differential) or date of the backup to determine which version to restore.
Step 6 Click Restore to Application to restore the revision directly to the application, or click Restore to Disk to restore the revision to disk.
Step 7 To restore to disk, select the location to restore the files and click OK.
Step 8 To restore to the application, select a location to restore the files temporarily and click OK.
Step 9 Select a SQL Server Instance and click Add.
79SonicWALL CDP 2.1 Administrator’s Guide

Configuration Task List
Disaster Recovery Using the Offsite ServiceSonicWALL CDP Offsite Service is a subscription service that allows the administrator to perform a disaster recovery when local data have been rendered unrecoverable. Data can only be recovered from the Offsite Service in the event that a disaster renders local data corrupted, destroyed or otherwise unrecoverable.
Note Data cannot be recovered from the Offsite Service without the Encryption Key, even by SonicWALL technical support engineers. It is advised that you store your encryption key in a secure location, such as a safe or bank. Your encryption key may be viewed by selecting Edit > Encryption Settings in the top menu bar. For more information, refer to the “Encryption Key Management” section on page 81.
To recover data from the Offsite Service, perform the following steps:
Step 1 Locate your encryption key, which should be stored in a safe location, such as a vault or bank.
Step 2 Verify that your SonicWALL CDP appliance is under warranty or extended warranty. If it is not under warranty, it will be necessary to purchase a replacement SonicWALL CDP appliance with enough storage to contain the data recovered from the Offsite Service. Contact your SonicWALL Technical Support representative for your replacement appliance.
Step 3 Configure the replacement SonicWALL CDP appliance to match the settings of the original appliance.
Step 4 Replace the encryption key of the replacement appliance with the encryption key of the original appliance.
Step 5 When the replacement appliance is properly configured with the encryption key from the original appliance, it will automatically recover data from the Offsite Service.
80SonicWALL CDP 2.1 Administrator’s Guide

Configuration Task List
Encryption Key Management
Encryption management allows you to view your encryption key. You may need to view your encryption key if you have not already printed or written it down and stored it in a secure location.
To view your encryption key, perform the following steps:
Step 1 Select Edit > Encryption Settings in the top menu bar.
Step 2 Click the Enable Encryption button to enable security on the SonicWALL CDP appliance.
Step 3 To save the key locally, click the Print Key button and select a location to save the key.
Step 4 When you are finished, click the Close button.
Reset Encryption Key
The encryption key cannot be reset.
When you click on Reset Encryption button, a message displays directing you to contact technical support.
Contact SonicWALL Technical Support for more information.
81SonicWALL CDP 2.1 Administrator’s Guide

Configuration Task List
Purging Data from the SonicWALL CDP Appliance
Purge Data is a function within the firmware user interface. In the event that your appliance is damaged and needs to be returned to SonicWALL, you may want to purge its contents, including stored data and agent information.
Caution Purge data erases all agent information, including backup files.
To purge data from the SonicWALL CDP appliance, perform the following steps:
Step 1 Navigate to System > Purge Data.
Step 2 Click Purge Backup Data.
Step 3 Click OK in the Warning screen that displays.
Step 4 A confirmation message will appear upon completion of data purge.
82SonicWALL CDP 2.1 Administrator’s Guide

Configuration Task List
Recovery when RAID FailsIf you are using the SonicWALL CDP 3440i and 4440i appliances, your data will be protected by the additional failover protection of a RAID system in the event that a drive goes down.
SonicWALL CDP 3440i has RAID 1, which involves two disks, with data mirroring from one disk onto another.
SonicWALL CDP 4440i has RAID 5, which involves three or more disks, with block-level data striping with distributed parity across the drive set.
This section contains the following subsections:
• “If One Disk Fails While Using the SonicWALL CDP 3440i Appliance” section on page 83
• “If Two Disks Fail While Using SonicWALL CDP 3440i” section on page 83
• “If One Disk Fails While Using SonicWALL CDP 4440i” section on page 83
• “If Two Disks Fail While Using SonicWALL CDP 4440i” section on page 83
If One Disk Fails While Using the SonicWALL CDP 3440i Appliance
If one disk fails while using the SonicWALL CDP 3440i:
• Contact SonicWALL Technical Support. Though your system will remain operational, it is necessary to correct the disk failure.
If Two Disks Fail While Using SonicWALL CDP 3440i
If two disks fail while using the SonicWALL CDP 3440i:
• Contact SonicWALL Technical Support. Your system will no longer be operational.
If One Disk Fails While Using SonicWALL CDP 4440i
If one disk fails while using the SonicWALL CDP 4440i:
• Contact SonicWALL Technical Support. Though your system will remain operational, it is necessary to correct the disk failure.
If Two Disks Fail While Using SonicWALL CDP 4440i
If two disks fail while using the SonicWALL CDP 4440i:
• Contact SonicWALL Technical Support. Your system will no longer be operational.
83SonicWALL CDP 2.1 Administrator’s Guide

Configuration Task List
Configuring SonicWALL CDP Agent and Enterprise Manager to Work with Software Firewalls
Most software firewalls detect SonicWALL CDP Enterprise Manager and Agent Tool during installation and prompt for permission to open the appropriate ports. If you have a firewall installed you will need to configure it before using the SonicWALL CDP Agent or SonicWALL CDP Enterprise Manager.
This section contains the following subsections:
• “Configuring SonicWALL CDP Agent and Enterprise Manager to Work with a Windows XP SP2 Firewall” section on page 85
• “Configuring SonicWALL CDP Agent and Enterprise Manager to Work with a McAfee Personal Firewall” section on page 85
• “Configuring SonicWALL CDP Agent and Enterprise Manager to Work with a Norton Personal Firewall” section on page 87
• “Configuring SonicWALL CDP Agent and Enterprise Manager to Work with a Zone Alarm Firewall” section on page 90
84SonicWALL CDP 2.1 Administrator’s Guide

Configuration Task List
Configuring SonicWALL CDP Agent and Enterprise Manager to Work with a Windows XP SP2 Firewall
Windows XP SP2 installs and activates a firewall by default. If you applied Service Pack 2 after installing the SonicWALL CDP Agent software, you may need to add CDPAgent.exe and SonicWALL.Agent.exe to Windows XP Internet Connection Firewall settings before the backup service can start again. Microsoft has excellent instructions on how to do this here:
http://www.microsoft.com/windowsxp/using/security/internet/sp2_wfexceptions.mspx
To enable or disable Windows XP Internet Connection Firewall, perform the following steps:
Step 1 Open the Network Connections control panel in Start > Control Panel.
Step 2 In the left window under Network Tasks, click the LAN or high-speed Internet connection that you are using.
Step 3 Click Change Windows Firewall Settings. In this menu you can simply select Off, then click OK.
Configuring SonicWALL CDP Agent and Enterprise Manager to Work with a McAfee Personal Firewall
Note If you are using Windows XP SP2, make sure you have configured XP's firewall first, using the instructions above.
If you are using a McAfee firewall product you will likely see warnings when starting the SonicWALL CDP Agent such as the following. In both cases, select Grant Access. Figure 24 provides the McAfee Firewall configuration.
Figure 24 Configuring McAfee Firewall
To manually add CDPAgent.exe and SonicWALL.Agent.exe to the Allowed Applications list, perform the following steps:
Step 1 Open McAfee Personal Firewall.
Step 2 Select Internet Applications List.
Step 3 Choose New Allowed Application.
Step 4 Navigate to Program Files > SonicWALL > Continuous Data Protection > SonicWALL.Agent.exe.
85SonicWALL CDP 2.1 Administrator’s Guide
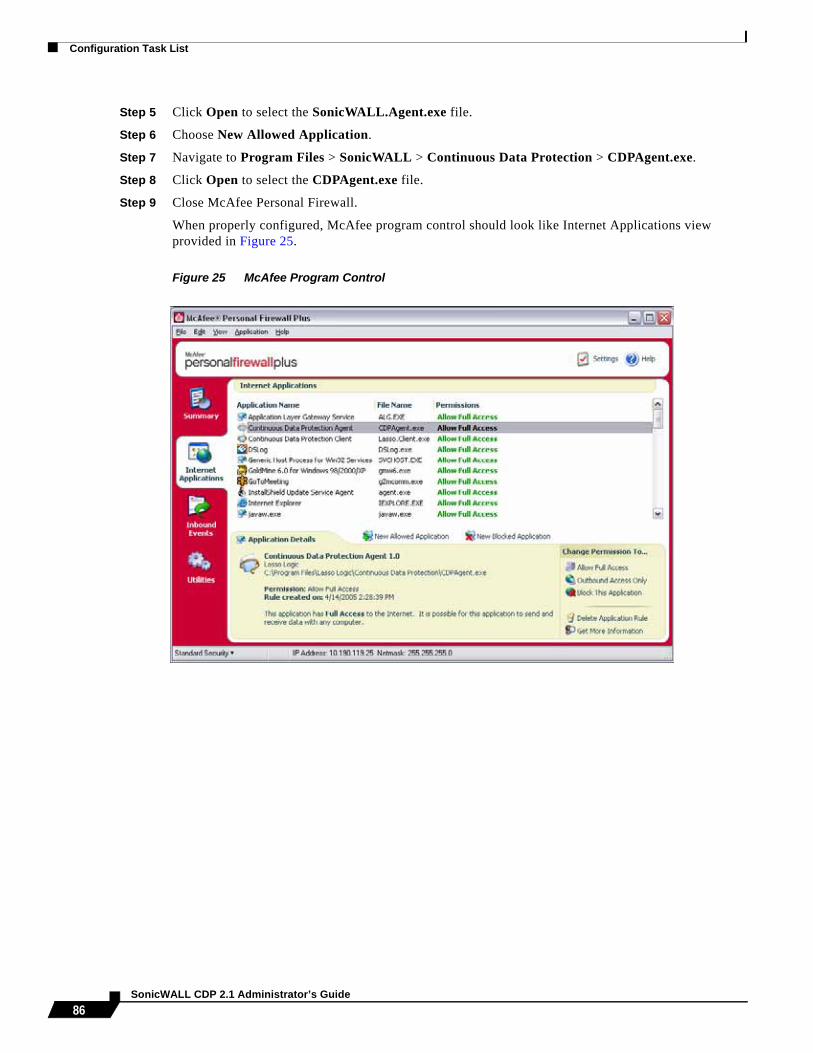
Configuration Task List
Step 5 Click Open to select the SonicWALL.Agent.exe file.
Step 6 Choose New Allowed Application.
Step 7 Navigate to Program Files > SonicWALL > Continuous Data Protection > CDPAgent.exe.
Step 8 Click Open to select the CDPAgent.exe file.
Step 9 Close McAfee Personal Firewall.
When properly configured, McAfee program control should look like Internet Applications view provided in Figure 25.
Figure 25 McAfee Program Control
86SonicWALL CDP 2.1 Administrator’s Guide

Configuration Task List
Configuring SonicWALL CDP Agent and Enterprise Manager to Work with a Norton Personal Firewall
Note If you are using Windows XP SP2, make sure you have opened ports or disabled XP's firewall first, using the instructions above.
If you are using a Norton Internet Security and Norton Personal Firewall product you will likely see warnings when starting the agent such as illustrated in Figure 26. In both cases select Permit Always.
Figure 26 Norton Personal Firewall
87SonicWALL CDP 2.1 Administrator’s Guide

Configuration Task List
To manually configure Norton Internet Security and Norton Personal Firewall, perform the following steps:
Step 1 Open Norton Internet Security (a new window will appear).
Step 2 Double-click Personal Firewall, (or click once to select Personal Firewall, then click the Configure button to the right), as illustrated in Figure 27.
Figure 27 Norton Personal Firewall
Step 3 Click the Program Control tab.
Step 4 Click the Add button.
Step 5 Navigate to Program Files > SonicWALL > Continuous Data Protection > SonicWALL.Agent.exe.
Step 6 Click the Open button.
Step 7 The window should now display “Internet Access Permit All” next to SonicWALL.Agent.exe.
Step 8 Click the Program Control tab again.
Step 9 Click the Add button.
Step 10 Navigate to Program Files > SonicWALL > Continuous Data Protection > CDPAgent.exe.
Step 11 Click the Open button.
Step 12 The window should now display “Internet Access Permit All” next to CDPAgent.exe.
Step 13 Click the OK button.
88SonicWALL CDP 2.1 Administrator’s Guide

Configuration Task List
Figure 28 provides the Programs view within the Norton Personal Firewall program control.
Figure 28 Norton Personal Firewall: Program Control
This adds SonicWALL.Agent.exe and CDPAgent.exe, which should enable you to backup your files. You may need to restart your computer for these changes to take effect.
For online support using Norton Internet Security or Norton Personal Firewall, visit the Symantec Web site: http://www.symantec.com/techsupp/.
89SonicWALL CDP 2.1 Administrator’s Guide

Configuration Task List
Configuring SonicWALL CDP Agent and Enterprise Manager to Work with a Zone Alarm Firewall
If you have Zone Alarm installed you will likely see the following warnings immediately after installing the SonicWALL CDP Agent and attempting to use the CDP service. Figure 29 provides an example of the Zone Alarm Alert.
Figure 29 Zone Alarm Alert
Zone Alarm personal firewall must be configured to grant server rights to SonicWALL.Agent.exe and CDPAgent.exe. By default, Zone Alarm will block applications from connecting to other computers and acting as servers. If you have checked the “Remember this setting” box when receiving the initial warnings, then you will not receive additional ones.
To manually configure Zone Alarm, perform the following steps:
Step 1 Open Zone Alarm and select Program Control.
Step 2 Next, click the Program Wizard button to set the correct permissions for SonicWALL.Agent.exe.
Step 3 In the Program Wizard window, select the Advanced option to manually set server permissions for SonicWALL.Agent.exe then click the Next button to open the Secure Programs window. Click the Add button.
Step 4 Navigate to Program Files > SonicWALL > Continuous Data Protection > SonicWALL.Agent.exe. Click the Open button.
Step 5 In the Secure Programs window, set SonicWALL.Agent.exe with both access and server rights, then click the Finish button.
Step 6 Select Program Control again.
Step 7 Click the Program Wizard button to set the correct permissions for CDPAgent.exe.
Step 8 In the Program Wizard window, select the Advanced option to manually set server permissions for CDPAgent.exe then click the Next button to open the Secure Programs window. Click the Add button.
Step 9 Navigate to Program Files > SonicWALL > Continuous Data Protection > CDPAgent.exe. Click the Open button.
Step 10 In the Secure Programs window, set CDPAgent.exe with both access and server rights, then click the Finish button.
90SonicWALL CDP 2.1 Administrator’s Guide

Configuration Task List
When properly configured, ZoneAlarm program control should look like the ZoneAlarm Program Control displayed in Figure 30.
Figure 30 ZoneAlarm: Program Control
This adds SonicWALL.Agent.exe and CDPAgent.exe, which enable you to backup your files. For online support using Zone Alarm, visit the Zone Labs Web site: http://www.zonelabs.com/support/.
91SonicWALL CDP 2.1 Administrator’s Guide

Troubleshooting SonicWALL CDP
Troubleshooting SonicWALL CDPThis section contains troubleshooting information for the SonicWALL CDP. This section contains the following subsections:
• “SonicWALL CDP Appliance Troubleshooting” section on page 92
• “SonicWALL CDP Software Troubleshooting” section on page 92
• “Backup and Recovery Troubleshooting” section on page 93
SonicWALL CDP Appliance TroubleshootingThis section contains troubleshooting that relates to the SonicWALL CDP appliance.
Symptom: Cannot connect to CDP Appliance • Verify that your workstation/server has network level connectivity to the CDP appliance by
attempting to ping the CDP appliance at its configured address.
• If you are on a separate subnet, you many enter the appliance IP address manually
– Select CDP Manual Connection
– Type in the CDP appliance IP address.
• Ensure that an agent firewall is not blocking the CDP Agent Tool from connecting to the SonicWall CDP appliance.
– Enable firewall exceptions for Lasso.Client.exe, CDPAutoUpdate.exe and CDPAgent.exe.
SonicWALL CDP Software TroubleshootingThis section contains troubleshooting that relates to the SonicWALL CDP software.
Symptom: Agent will not update • Updates to the agent and appliance are downloaded and installed automatically in a process that is
transparent to the user.
– If there is no new update available during a manual update, no update will be made.
• Verify the current version of your product by navigating to the to the System tab in the SonicWALL CDP Agent Tool.
Symptom: Cannot open Enterprise Manager. • Verify that CDP Agent Tool is not running.
– The Enterprise Manager and the Agent Tool cannot be open simultaneously on the same PC.
92SonicWALL CDP 2.1 Administrator’s Guide

Troubleshooting SonicWALL CDP
Backup and Recovery TroubleshootingThis section contains troubleshooting that relates to the SonicWALL CDP backup and recovery process.
Symptom: Initial backup seems slow • Because SonicWall CDP performs file compression and intelligent file management, the initial
backup of files and folders may take some time depending on folder volume and size.
– For example, if you are trying to backup 100,000 files averaging 200 KB, it could take up to 24 hours to complete.
Symptom: Files do not appear to be backing up • Verify that SonicWALL CDP has access to the folders that you are trying to backup.
– Verify that SonicWALL CDP Agent Tool is started in the services tab.
– By default, SonicWall CDP uses the System account to access to the folders that are selected for backup.
– The System account will need to be added to the security settings of any directory that you want to backup.
93SonicWALL CDP 2.1 Administrator’s Guide
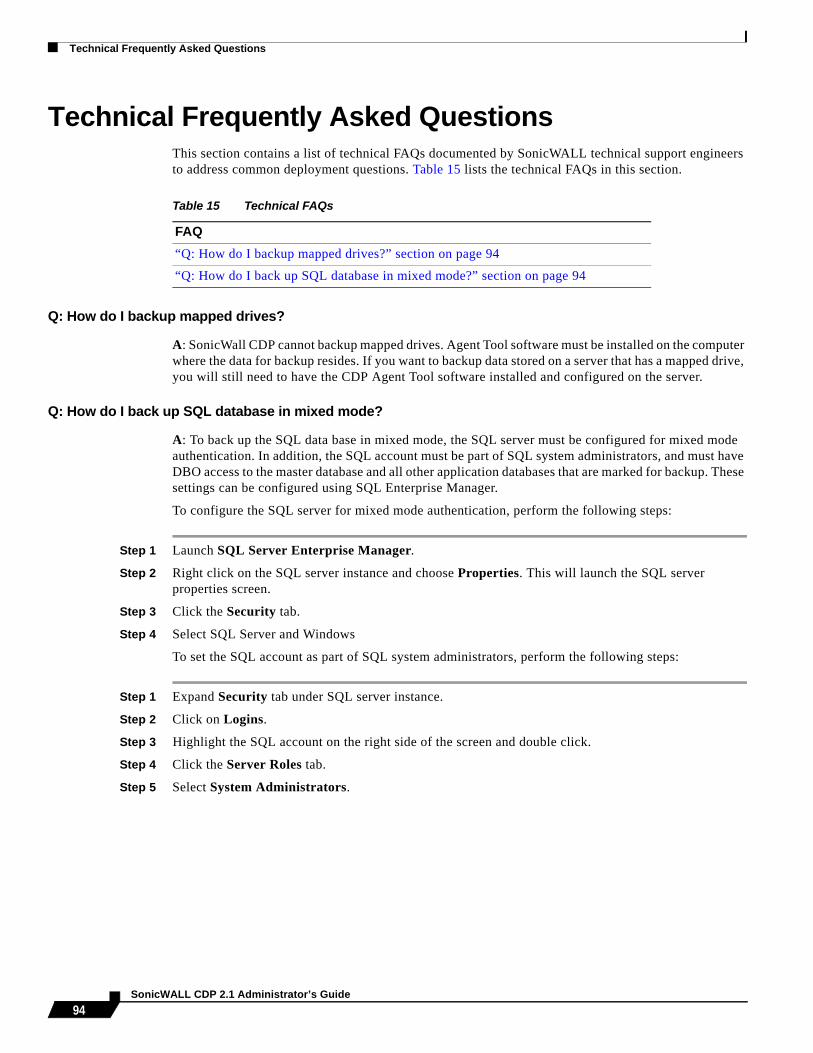
Technical Frequently Asked Questions
Technical Frequently Asked QuestionsThis section contains a list of technical FAQs documented by SonicWALL technical support engineers to address common deployment questions. Table 15 lists the technical FAQs in this section.
Table 15 Technical FAQs
Q: How do I backup mapped drives?
A: SonicWall CDP cannot backup mapped drives. Agent Tool software must be installed on the computer where the data for backup resides. If you want to backup data stored on a server that has a mapped drive, you will still need to have the CDP Agent Tool software installed and configured on the server.
Q: How do I back up SQL database in mixed mode?
A: To back up the SQL data base in mixed mode, the SQL server must be configured for mixed mode authentication. In addition, the SQL account must be part of SQL system administrators, and must have DBO access to the master database and all other application databases that are marked for backup. These settings can be configured using SQL Enterprise Manager.
To configure the SQL server for mixed mode authentication, perform the following steps:
Step 1 Launch SQL Server Enterprise Manager.
Step 2 Right click on the SQL server instance and choose Properties. This will launch the SQL server properties screen.
Step 3 Click the Security tab.
Step 4 Select SQL Server and Windows
To set the SQL account as part of SQL system administrators, perform the following steps:
Step 1 Expand Security tab under SQL server instance.
Step 2 Click on Logins.
Step 3 Highlight the SQL account on the right side of the screen and double click.
Step 4 Click the Server Roles tab.
Step 5 Select System Administrators.
FAQ“Q: How do I backup mapped drives?” section on page 94
“Q: How do I back up SQL database in mixed mode?” section on page 94
94SonicWALL CDP 2.1 Administrator’s Guide

Technical Frequently Asked Questions
To verify that the SQL account has DBO access to master database and all other application databases that are marked for backup, perform the following steps:
Step 1 Expand security tab under SQL server instance.
Step 2 Click on Logins.
Step 3 Highlight the SQL account on the right side of the screen and double click.
Step 4 Click the Database tab.
Step 5 Verify that the account has db_owner selected for all databases intended for backup.
95SonicWALL CDP 2.1 Administrator’s Guide

Glossary
GlossaryActive Directory: A centralized directory service system produced by Microsoft that automates network management of user data, security and resources, and enables interoperation with other directories. Active Directory is designed especially for distributed networking environments.
Advanced Encryption Standard (AES): A recent U.S. government encryption standard designed as the replacement for the aging Data Encryption Standard (DES).
agent: A server, laptop or PC to be backed up using SonicWALL CDP.
Agent Service: A SonicWALL CDP software installed automatically on agents with Agent Tool software. Agent Service communicates with the SonicWALL CDP appliance.
Agent Tool: A SonicWALL CDP software installed on agents. Agent Tool is a user interface for users of SonicWALL CDP agents that allows data backup and recovery configuration, as administered by the SonicWALL CDP Enterprise Manager.
Domain Name System/Service (DNS): An Internet service that translates domain names into IP addresses. Because domain names are alphabetic, they're easier to remember. The internet however, is really based on IP addresses. Every time you use a domain, therefore, a DNS service must translate the name into the corresponding IP addresses.
Dynamic Host Configuration Protocol (DHCP): A Protocol for assigning dynamic IP addresses to devices on a network. With dynamic addressing, a device can have a different IP address every time it connects to the network. In some systems, the device’s IP address can even change while it is still connected. DHCP also supports a mix of static and dynamic IP addresses.
Dynamic addressing simplifies network administration because the software keeps track of IP addresses rather than requiring an administrator to manage the task. This means that a new computer can be added to a network without the hassle of manually assigning it a unique IP address. Many Internet Service Providers (ISPs) use dynamic IP addressing for dial-up users.
Enterprise Manager: A SonicWALL CDP software installed on the SonicWALL CDP administrator’s computer.
File Allocation Table (FAT): A table that the operating system uses to locate files on a disk. Due to fragmentation a file may be divided into many sections that are scattered around the disk. The FAT keeps track of all the pieces.
hardware failover: The capability of a mission-critical device, such as a SonicWALL security gateway, to automatically failover to a backup device in the event of a hardware failure on the primary unit.
Hyper Text Transfer Protocol (HTTP): The underlying protocol used by the World Wide Web. HTTP defines how messages are formatted and transmitted, and what actions Web servers and browsers should take in response to various commands.
IP address (Internet Protocol): An Identifier for a computer device on a TCP/IP network. Networks using the TCP/IP protocol route message based on the IP address of the destination. The format of an IP address is a 32-bit numeric address written as four numbers separated by periods. Each number can be zero to 255. For example, 1.160.10.240 could be an IP address.
Local Area Network (LAN): A computer network that spans a relatively small area. Most LANs are confined to a single building or group of buildings. However, one LAN can be connected to other LANs over any distance using telephone lines and radio waves. A systems of LANs connected in this way is called a wide-area network (WAN).
Master Boot Record (MBR): A small program that is executed when a computer boots up. Typically, the MBR resides on the first sector of the hard disk. The program begins the boot process by looking up the partition table to determine which partition to use for booting. It then transfers program control to the boot sector of that partition, which continues the boot process.
96SonicWALL CDP 2.1 Administrator’s Guide

Glossary
policy: A set of rules administered from the SonicWALL CDP Enterprise Manager. Policies are assigned directly to agents and define backup rights, quota, and other SonicWALL CDP capabilities.
quota: The maximum size of data a SonicWALL CDP agent can back up to the Enterprise Manager.
Redundant Array of Independent Disks (RAID): A failover method used to protect against data loss in the event of disk failure.
static IP address: An IP address that is unique and unchanging. Unlike dynamic IP addresses, a static IP address remains the same when you make a new Internet connection.
User Datagram Protocol (UDP): A connectionless protocol that sends and receive datagrams over an internet protocol (IP) network.
Universal Serial Bus (USB): An external bus standard that supports data transfer rates of 12Mbps. A single USB port can be used to connect up to 127 peripheral devices, such as mice, modems, and keyboard. USB also supports Plug-and-Play installation and hot plugging.
97SonicWALL CDP 2.1 Administrator’s Guide
Related Documents
Related DocumentsThis section contains related documentation specific to SonicWALL CDP solutions.
User GuidesThis section contains URLs to online documentation for SonicWALL user’s guides.
• SonicWALL CDP Agent Tool 2.1 User’s Guide http://www.sonicwall.com/support/pdfs/SonicWALL_CDP_Agent_Tool_2.1_Users_Guide.pdf
• SonicWALL CDP 1440i/2440i Getting Started Guide http://www.sonicwall.com/support/pdfs/SonicWALL_CDP_1440i_2440i_Getting_Started_Guide.pdf
• SonicWALL CDP 3440i/4440i Getting Started Guide http://www.sonicwall.com/support/pdfs/SonicWALL_CDP_3440i_4440i_Getting_Started_Guide.pdf
TechNotesThis section contains URLs to online documentation for SonicWALL TechNote application notes.
• SonicWALL CDP TBD
• SonicWALL CDP TBD
98SonicWALL CDP 2.1 Administrator’s Guide

Contributors
ContributorsJean-Marc Catalaa, SonicWALL Curriculum Developer, holds a B.S in Electrical Engineering from San Jose State University. After graduation, Jean-Marc worked for 5 years as an ASIC designer. At Proxim, he worked for 2 years as a Systems Engineer, and developed Proxim’s Wireless Technical Certification Program from its inception. Jean-Marc has written numerous technical documents and developed curriculum based on topics including multi-processor architecture, networking and wireless communications. He has taught over 40 classes about wireless communication in English, Spanish, Portuguese and Italian, adjusting training style for worldwide audiences and emphasizing hands-on learning.
Kevin Cheek has over 13 years in network security and database technical documentation in the Silicon Valley. Kevin has provided documentation solutions for Microsoft--documenting Macintosh Web software, Oracle--documenting Oracle's secure database server, and RSA Security--documenting the Public Key Infrastructure (PKI) Java Developers Kit. He has also worked at General Magic, where he led formal usability studies for both software design and documentation. Kevin earned a B.A. degree in Technical Writing from the University of New Mexico, and he has completed courses and certifications in Software Engineering, Networking, and Technical Writing at UC Santa Cruz, UC Berkeley, and San Jose State.
Lawrence Chung is a technical account manager for SonicWALL technical support team. He has been designing, implementing and troubleshooting network infrastructures since 1998. Lawrence graduated from University of California, Davis with a B.S. degree in Computer Science. At SonicWALL, he focuses on managing critical network security issues with SonicWALL’s premier partners.
Poul Frederiksen has over 10 years of Information Technology experience in the Silicon Valley at Fortune 50 companies like DuPont, GE, and Sunoco. He has extensive international experience in the United Kingdom, France and Germany. Frederiksen has led teams with project management with multiple sites and systems engineering. He has headed exchange email conversion projects at an international construction company. He is noted for being a Technical Lead for an Enterprise Resource Planning (ERP) project. Frederiksen scored 99+% on the Armed Services Vocational Aptitude Battery (ASVAB) at Drexel University.
Mary Hwang, SonicWALL Product Manager of Secure Wireless Solutions, has over 5 years of network security experience. Mary has been with SonicWALL since 2000 and is currently responsible for setting the direction and strategy for SonicWALL secure wireless solutions. Mary works closely with SonicWALL engineering, partners, and customers to define features running across SonicWALL security appliances as well as best practices to deploying secure wireless solutions. Mary holds a B.S. degree from the University of Texas at Austin.
Krystle Katen is an apprentice technical writer perfecting her craft in graphical design and end user documentation. Krystle has an excellent eye and experience in project management. She manages internal Engineering training video production and facilitates cross-functional meetings. Krystle is attending DeAnza Community College pursuing a B.A. in Business.
Joe Levy, SonicWALL Senior Director of Engineering – Product Architecture and Publications, has worked in the networking and network security industry for 10 years. Years of designing and implementing solutions for SMB to Fortune 100 companies using products and technologies from myriad vendors led to Joe’s drive and determination to enhance the capability, flexibility, and usability of network and security products. Joe has a number of patents pending for innovations in the areas of wireless networking and firewall technologies. Joe holds a B.A. degree in English Literature and Writing from Queens College, New York.
99SonicWALL CDP 2.1 Administrator’s Guide
Contributors
Patrick Lydon has over 7 years of graphical design and networking documentation writing experience. A leading writer in the SonicWALL CDP documentation set, Patrick’s deft stroke has made him one of SonicWALL’s brightest stars. Patrick is currently pursuing an Art degree with a concentration in Design Studies at San Jose State University.
Dave Parry has over 12 years experience in MIS/IT/IT field, and has performed network architecture design and deployment for over 100+ companies worldwide. Prior to SonicWALL, Dave served as the senior systems engineer at Ignyte, a leading ASP/MSSP security integrator, focusing on network security audits and distributed Firewall/VPN deployments. Dave has been at SonicWALL since 2001 and works in the firmware architecture group.
Lauren Pederson, SonicWALL Technical Writer, has over 4 years of professional writing experience in the Silicon Valley. At the San Francisco Business Times newspaper, Lauren was a leading contributing staff writer, authoring newspaper articles on small and medium businesses, including Lyris Technologies, Merador, and Eaton and Associates. Lauren holds a B.A. in Journalism and Media Studies from Menlo College in Atherton.
Vanessa Roman started her apprenticeship in technical writing at SonicWALL documenting Secure Wireless network solutions. Vanessa is attending Foothill Community College. Vanessa is an aspiring writer, network diagram and graphics designer, and an accomplished Webmaster.
Crystal Sorensen, SonicWALL Creative Manager and Webmaster, has over 5 years of Web authoring and graphical design experience. Crystal is responsible for the content management and ongoing enhancements to SonicWALL’s Corporate on-line presence as well as the creative direction of numerous Marketing Communications collateral and graphical projects. Crystal joined SonicWALL in 2001 and works in the Corporate Communications group.
Khai Tran, SonicWALL Documentation Manager, has over 8 years of networking technical documentation experience. Khai has also worked as a Vietnamese bilingual public elementary school teacher in Northern California school districts. Khai holds a B.A. degree in English Pre-and-Early Modern Literature from the University of California, Santa Cruz, a California Bi-lingual Cross-Cultural Language Arts Degree (BCLAD) Teaching Credential from San Jose State University, and an Advanced Project Management (APM) Organizational Mastery certificate from Stanford University.
100SonicWALL CDP 2.1 Administrator’s Guide

Index
Numerics1440i
hardware description 142440i
hardware description 153440i
hardware description 164440i
hardware description 17
AActive Directory 57, 78
authentication 57server backup, configuring 57, 78
administrative settingsEnterprise Manager 42
Agent Tool 8CDP
Agent Tool 3default controls 35
applications 35folders 35search 35status 35
agentsadding 46adding a common folder 50adding a folder 50application backup 53configuration task list 46editing name 47editing names 47editing policy 47folders 49
managing 49management 46–49overview 27removing 48service 8system requirements 11
alerts
eventsagent quota warning 34appliance full 34appliance offline 34appliance warning 34archive created 34offsite warning 34
overview 34applications 54–59, 65, 69, 72, 76
Active Directory 57adding 70backup 53
adding 55removing 56restoring 59
configuring 53overview 28predefined 65removing from backup 56restoring a version 59server backup
Active Directory 57, 78adding 56Microsoft Exchange 57, 78
viewing 59authentication
Active Directory 57
Bbackups
Bare Metal 4, 9offsite 10, 67
Bare Metal 4, 9
CCDP
1440i 142440i 153440i 164440i 17agent service 4, 8Agent Tool 8appliance 3, 8appliance, changing 43Bare Metal 4, 9disaster recovery 75
101SonicWALL CDP 2.1 Administrator’s Guide

file recovery 75–77firewall, configuring 84firmware software 7overview 2platform support 13purging data 82RAID failure 75software components 19troubleshooting 92
checking for updates 45common folders 69
managing 64Configuring 84
Ddata
purging 82database
Active Directory 57, 78SQL 94
mixed mode 94disaster recovery 75disk usage 26drives
mapped 94
Eencryption 81
enabling 44key
managing 44, 81resetting 44, 81
Enterprise Manager 25, 31, 59administrative settings 42administrator settings
confirm password 42email address 42first name 42last name 42password 42server name 42
agents overview 27alerts overview 34applications overview 28default policy 60features 24
layout 23managing agents 46policies overview 29reporting overview 32search overview 31status overview 25
FFAQs 94File 63files
backup to offsite service 52filtering 68folders
viewing properties 52old versions 51recovery 76–77removing versions 51restoring versions 51retrieving folders to a location 52searching 71viewing versions 51
filters 26, 68file extensions 63
firewallMcAfee 85Norton Personal 87Windows XP SP2 85Zone Alarm 90
firmware 7, 19checking for updates 45configuring local time zone 38IP address
configuring static IP address for the appliance 38
purging data 82registrating 7user interface 7
foldersadding 50common 50, 69common, managing 64predefined 64, 69properties 52
102SonicWALL CDP 2.1 Administrator’s Guide

Gglossary 96
Llocal management
enabling 67
Mmanagement
common folders 64local 67predefined applications 69
Microsoft Exchange 57–58, 78–79server backup, configuring 57, 78
Nnetwork
deployment requirements 11
Ooffsite
backups 63, 67policies 63
service 3, 10disaster recovery 80recovering your data 18
settings 26
Ppolicies
adding 62, 84applying 65default 26, 60editing 47, 63, 66local management 63offsite backup 63overview 29removing 70
predefined applications 65purging data 82
Qquota 26, 63, 67
RRAID 83
RAID 1 83RAID 5 83
registration
firmware 7reporting
agent summary 74agents 73agents by policy 74disk space by agent 74disk space by file type 74executive summary 74generating 73offsite status 74overview 32policy summary 74server application backup 74summary 32types 73
Ssearch 72
agent applications 70client applications 72files 70–71overview 31server applications 70, 72
securityAES 44encryption 44, 81
serversystem requirements 11
SQL 94status
administrative settings 26disk usage 26offsite settings 26overview 25
Ttechnical support
International contact information vNorth America contact information vwebsite v
toolschange appliance 43
trouble shootingappliance 92backup and recovery 92software 92
103SonicWALL CDP 2.1 Administrator’s Guide
Uuser interface 19
VVPN 100
WWindows
firewall 85supported versions 11
104SonicWALL CDP 2.1 Administrator’s Guide

© 2005 SonicWALL, I n c . SonicWALL is a registered trademark of SonicWALL, I n c . Other product and company names mentioned herein may bet rademarks and/ or registered trademarks of their respective companies. Specifications and descriptions subject to change with out notice.
T: 408.745.9600F: 408.745.9300
www.sonicwall.comSonicWALL,Inc.1143 Borregas AvenueSunnyvale,CA 94089-1306
P/N 232-000xxx-00Rev A 03/06


