35
1 SOR ® Pricing Program

1
SOR® Pricing Program
2
User Information
• The opening screen on this program, which provides
list pricing for all of current SOR products, works
much the same as the previous program.
• Model number information may be entered as normal
and the prices and specifications will be generated
as before.
• The prices in this program may not exactly match the
previous pricing information due to minor pricing
adjustments to various products. The pricing in this
program supercedes all previous pricing tools.

3
User Information
• This program IS a model validation tool.
• A link to the appropriate product page on sorinc.com
will be provided after a model string is validated for
easy access to product literature.
• Rep Discounts by product are available for download
in the Rep Area under “Pricing Program”.
4
General Information
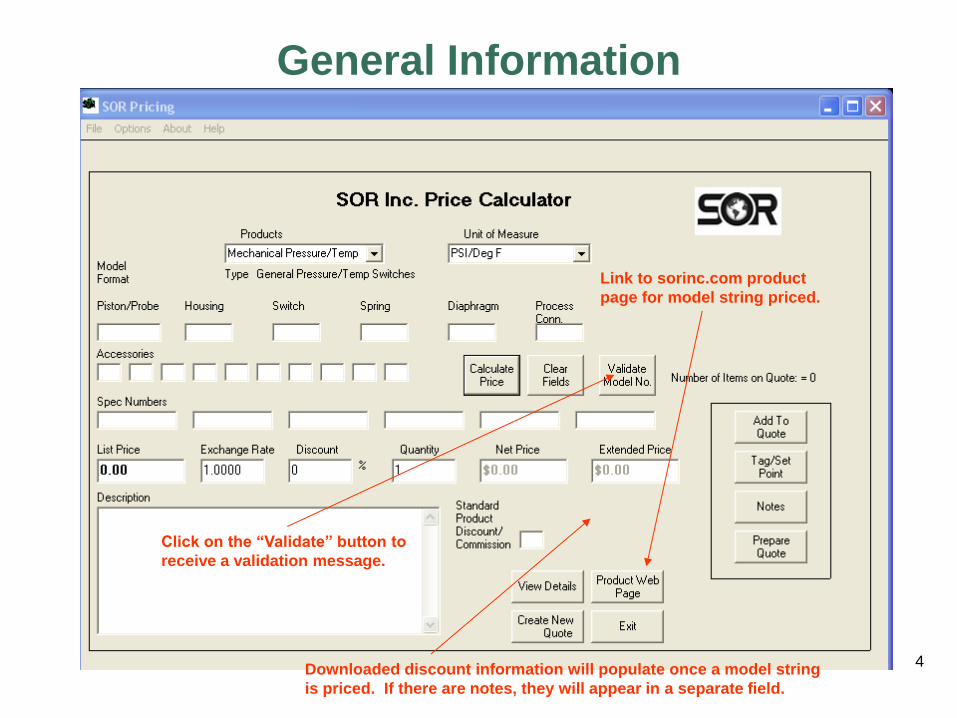
Downloaded discount information will populate once a model string
is priced. If there are notes, they will appear in a separate field.
Link to sorinc.com product
page for model string priced.
Click on the “Validate” button to
receive a validation message.
5
General Information
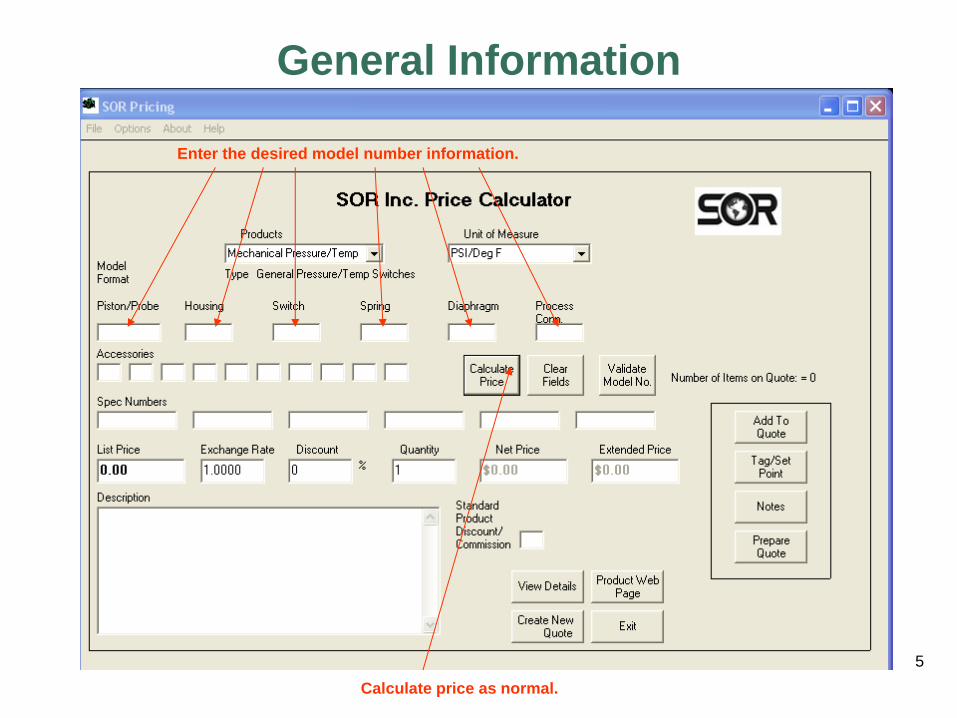
Enter the desired model number information.
Calculate price as normal.

6
General Information
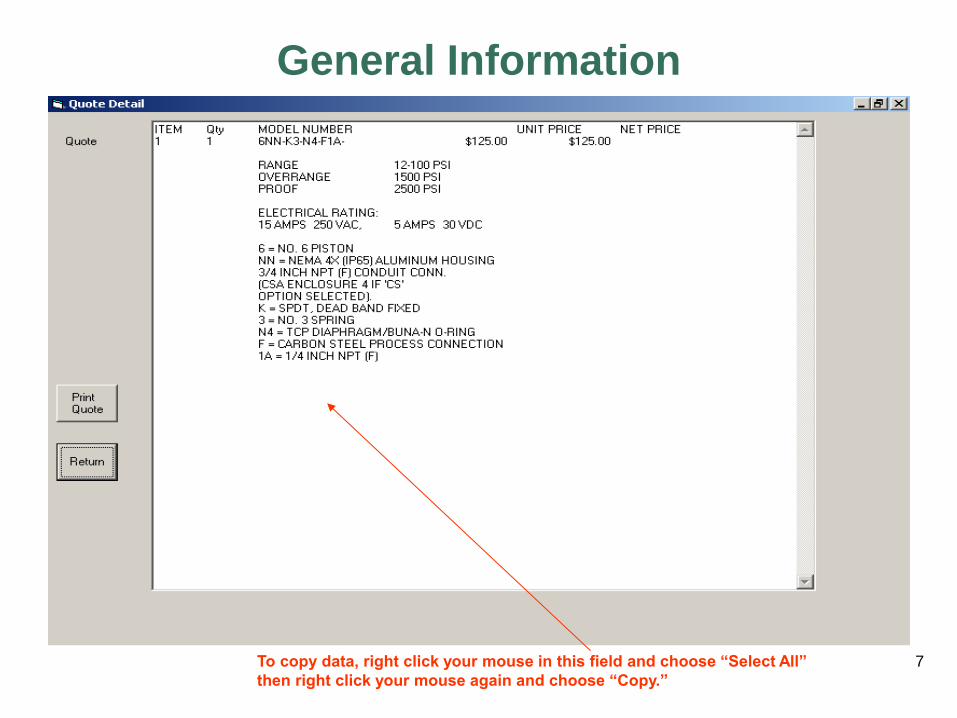
Press the “View Details” button to view the item’s details, or to copy
and paste the data into other software applications.
7
General Information
To copy data, right click your mouse in this field and choose “Select All”
then right click your mouse again and choose “Copy.”

8
• Go to sorinc.com
• Click on the “Rep Login” button at the top right of
the page.
• Log in using your e-mail address and password
previously assigned by SOR.
• Click on “Pricing Program” in the left-side
navigation and follow the instructions on the page.
Downloading Sold To/Ship To Customers
and Discount Tables

Downloading Discounts
Click on ”Pricing Program,”
and then click on
“Continue”
9

10
Downloading Discounts
Click on “Save”

11
Downloading Discounts
Select your “Local Disk (C:)” in the “Save in:” field and then click on the “Save” button.

Downloading Sold To Customers
Click on ”Pricing Program,”
12
and then click on
“Continue”
13
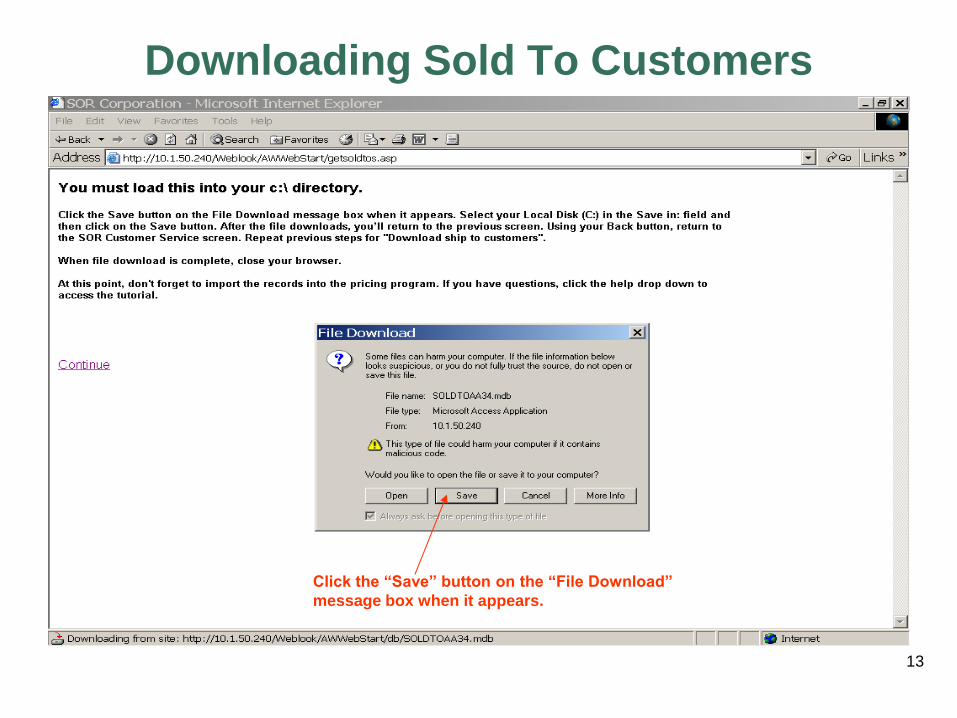
Downloading Sold To Customers
Click the “Save” button on the “File Download”
message box when it appears.
14
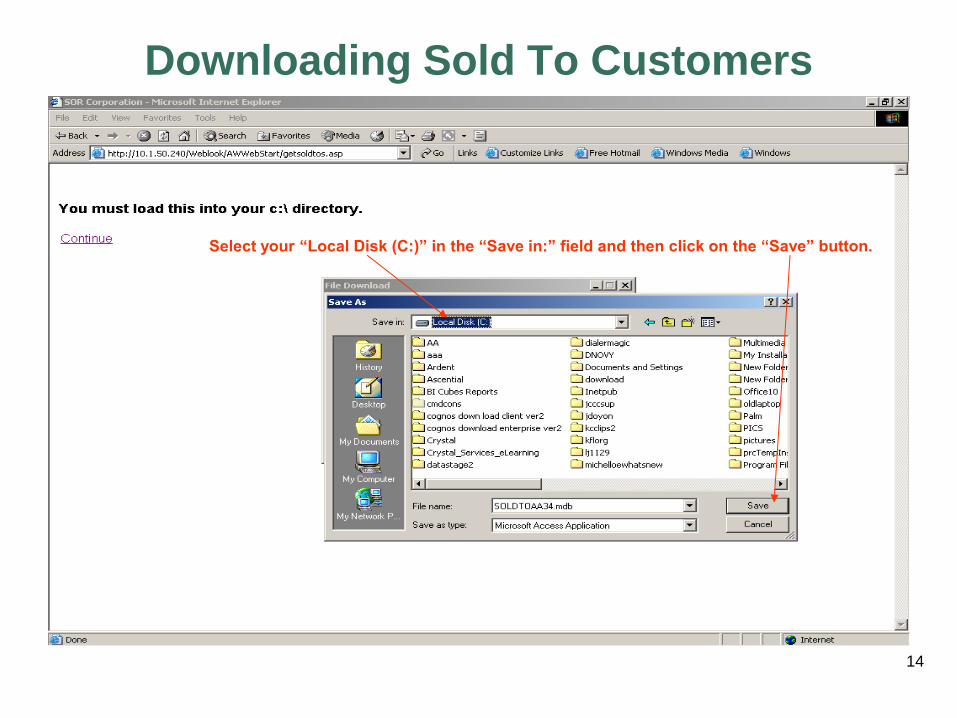
Downloading Sold To Customers
Select your “Local Disk (C:)” in the “Save in:” field and then click on the “Save” button.

15
Downloading Sold To Customers
After the file downloads, click “Close.”
Using your “Back” button, return to the “SOR Customer Service” screen.
16
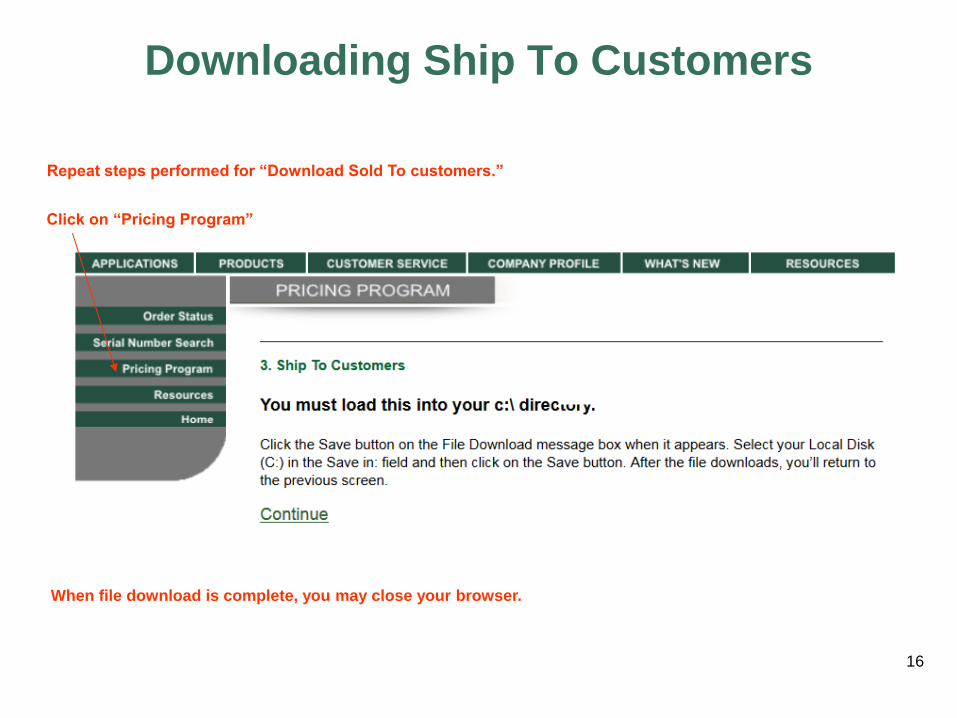
Downloading Ship To Customers
Click on “Pricing Program”
Repeat steps performed for “Download Sold To customers.”
When file download is complete, you may close your browser.
17
Downloading Rep Discounts, Customer
Sold To and Ship To Records
• From the Quote Screen of the pricing program (click
the Prepare Quote button if you’re at the main SOR
Pricing screen), click on Options in the upper left-
hand corner, then select Import.
• Click on the Import button of the Import message
screen. The records are now loaded into the Pricing
Program.
18
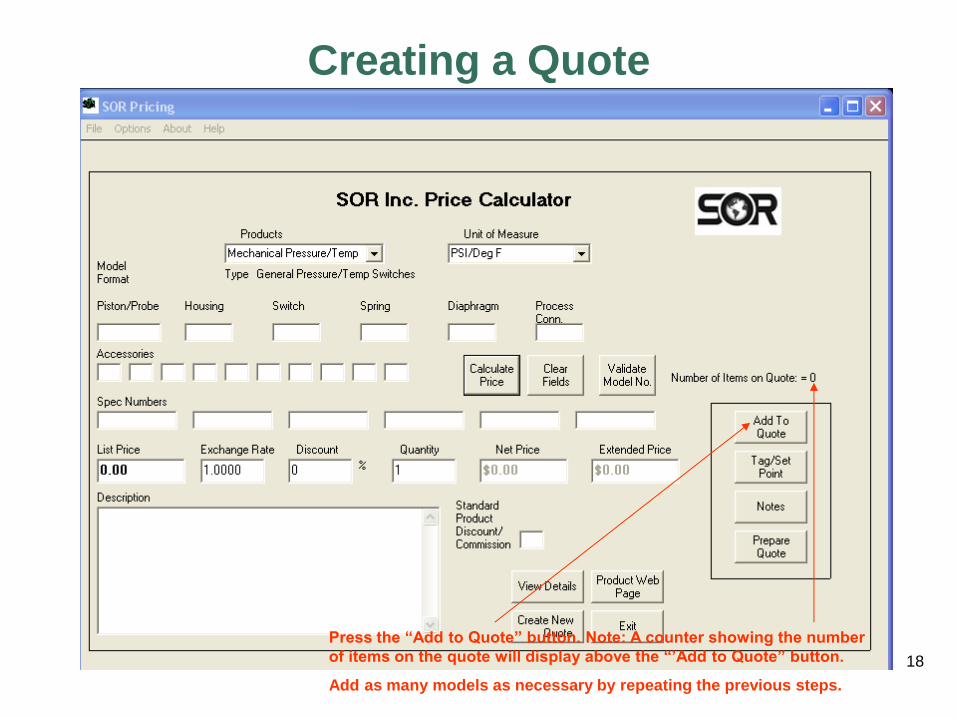
Creating a Quote
Add as many models as necessary by repeating the previous steps.
Press the “Add to Quote” button. Note: A counter showing the number
of items on the quote will display above the “’Add to Quote” button.

19
Creating a Quote
Add tag and set point information by
pressing the “Tag/Set Point” button.

20
Creating a Quote
…then pressing the “Add/Modify” button.

21
Creating a Quote
Enter the “Item No.,” the “Unit No.,” and the
applicable tagging and/or set point information.
Press “Save” to retain the
information.

22
Creating a Quote
Add any notes specific to an item by
pressing the “Notes” button.

23
Enter the “Item #”
and the desired note.
Press “Save” to retain
your information.
Creating a Quote
24
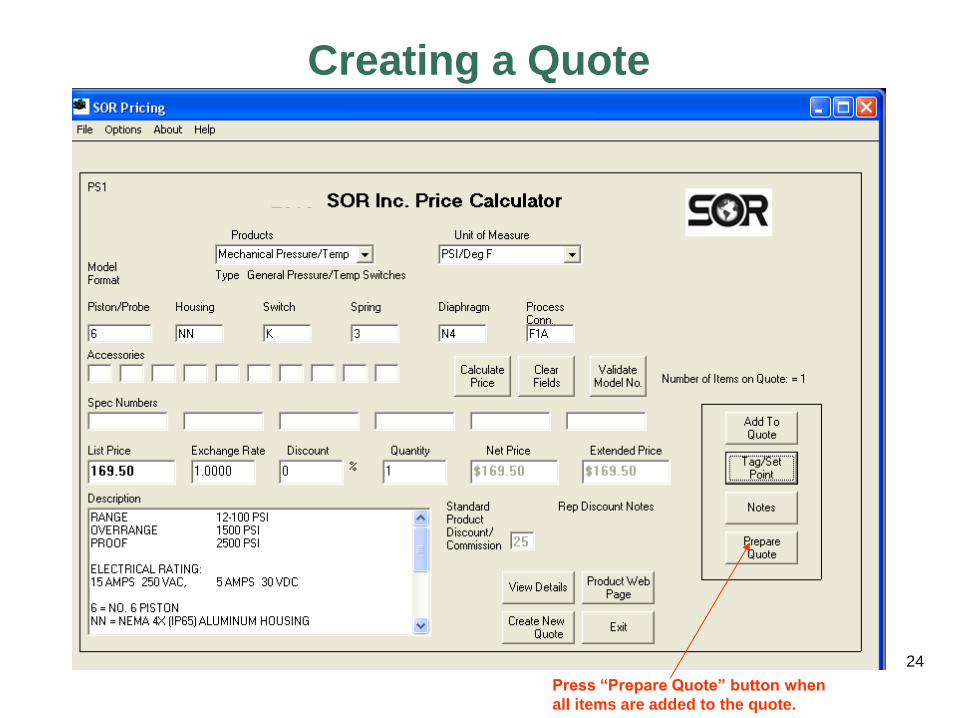
Creating a Quote
Press “Prepare Quote” button when
all items are added to the quote.

25
Creating a Quote
Click on the “Options” drop down.
26
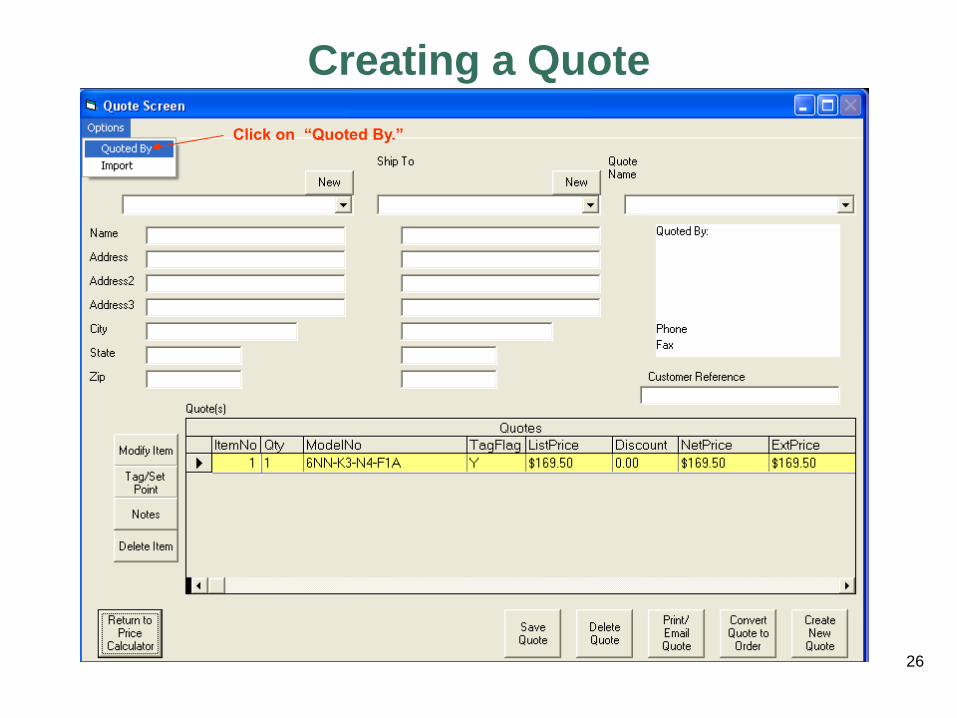
Creating a Quote
Click on “Quoted By.”
27
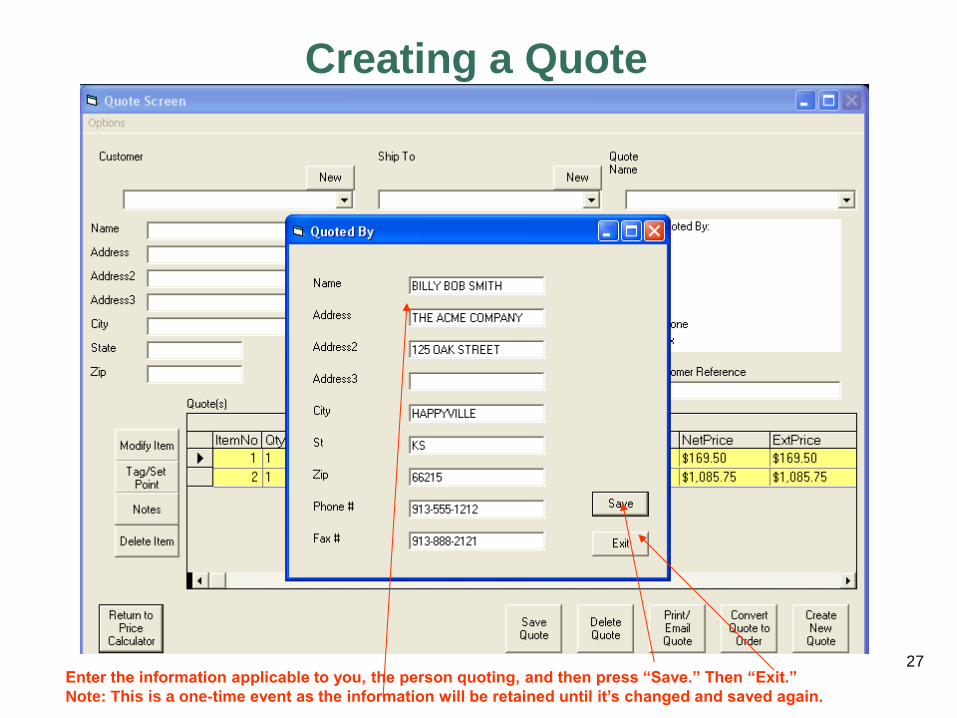
Creating a Quote
Enter the information applicable to you, the person quoting, and then press “Save.” Then “Exit.”
Note: This is a one-time event as the information will be retained until it’s changed and saved again.

28
If the desired customer record is not listed, you can enter the applicable
information by pressing the “New” button above the combo box.
Select the “Customer.”
Creating a Quote
• Type in the first few letters of the customer’s name in the combo box, and use
your keyboard’s up and down keys to scroll through the name and address;
or
• Press the drop down arrow on the combo box and select the desired name.

29 •Enter new information by pressing the “New” button above the combo box.
•Select an existing address from the dropdown menu that is very close to
what is required and modify it in the appropriate fields.
Optionally select a
“Ship To” customer.
Creating a Quote
The “Ship To” information doesn’t print on the quote but will be required for a sales
order. Only historical ship to information associated to the selected sold-to
customer will appear on the list. If the exact ship-to information is not listed, you
have two options:
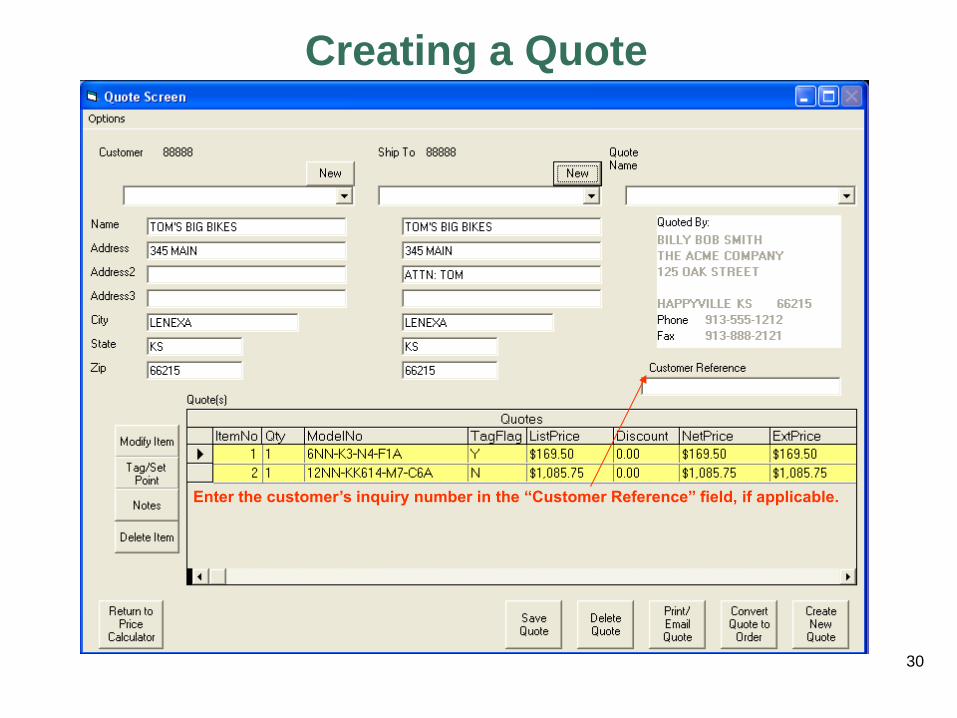
30
Enter the customer’s inquiry number in the “Customer Reference” field, if applicable.
Creating a Quote
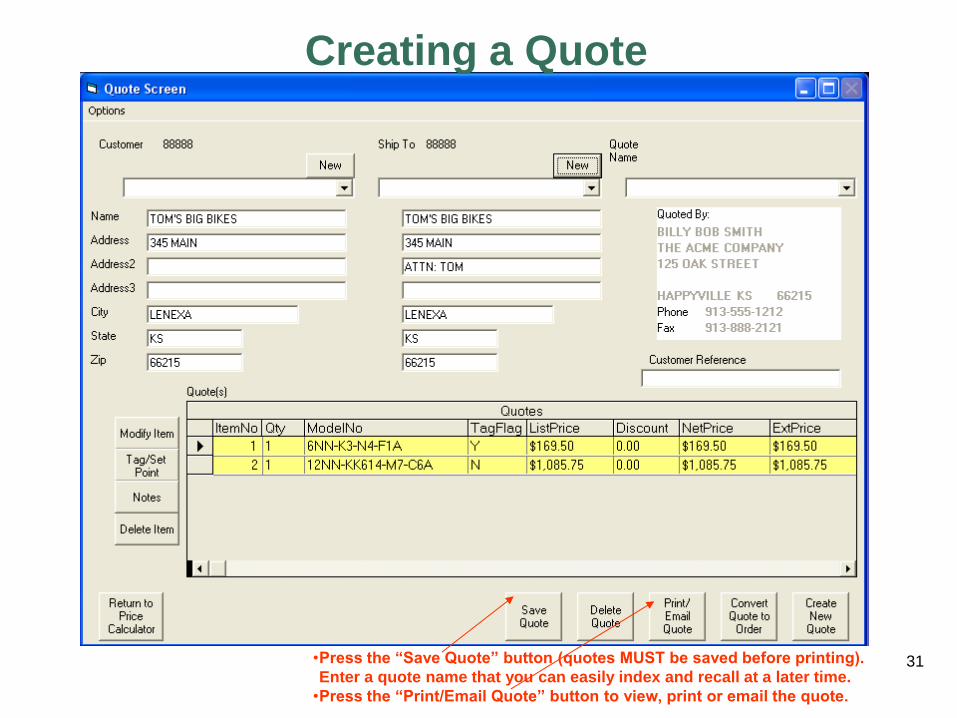
31 •Press the “Save Quote” button (quotes MUST be saved before printing).
Enter a quote name that you can easily index and recall at a later time.
•Press the “Print/Email Quote” button to view, print or email the quote.
Creating a Quote

32
Creating a Quote
Press the “Print” button to print a paper copy. Press the “Email” button to email the quote.
(quote date here)

33
Enter the subject information in the “Subject” field of your email. Enter
the “Body” information that you want in your email (i.e. delivery
information, terms and conditions, your name and title, etc.). Note: This
information will be retained until changed again. Press the “Email Quote”
button.
Creating a Quote

34
Select or enter the email recipient and proceed accordingly.
Creating a Quote

35
SOR Pricing Program
Thank you for viewing this tutorial.
If you have questions, please call
(913) 888-2630
or your inside sale representative.


