SPECIMEN COLLECTION INSTRUCTIONS Incyte Swab Specimens Specimen Collection: 13103 E. Mansfield Avenue Spokane Valley, WA 99216 PH 509-892-2700 FX 509-892-2740 Toll Free 1-888-814-6277 www.incytediagnostics.com • Aseptically remove sterile swab from package. • Collect specimen by vigorously swabbing site for 30 seconds. • Aseptically remove cap from vial. • Place swab in transport medium and break off swab against rim of the tube. • Replace cap to vial, close tightly. • Fill out vial label with full patient name and one other identifier. Infectious Disease Testing Incyte Diagnostics offers infectious disease testing using the Incyte swab. These gynecologic tests aid in the detection, diagnosis, and treatment of viral, fungal, and bacterial infections. Nucleic acid testing using Polymerase Chain Reaction (PCR) methodology is employed to provide high levels of sensitivity and specificity in testing for the presence of these organisms. Consult your Incyte Diagnostics representatives or website for the most up-to-date information on available tests. HSV Specimens: • For crusted lesions, pre-moisten the swab with either saline or sterile water. • De-roof the crust, and swab the lesion firmly working from outer base of lesion to the interior. • Place swab into transport media, break off handle and recap transport vial. • No other testing may be ordered off an HSV collection. Please use Incyte swab for all HSV specimen collection For patients with suspected Vaginosis/Vaginitis: Please use Incyte swab for specimen collection • A thorough collection of the vaginal walls is required. For patients with Cervicitis: Please use Incyte swab for specimen collection • Begin with an initial thorough collection from the cervix. A subsequent vaginal collection may be made with the same swab if vaginal organism testing is also desired.
Transcript
SPECIMEN COLLECTION INSTRUCTIONS
Incyte Swab Specimens
Specimen Collection:
13103 E. Mansfield Avenue Spokane Valley, WA 99216PH 509-892-2700 FX 509-892-2740 Toll Free 1-888-814-6277www.incytediagnostics.com
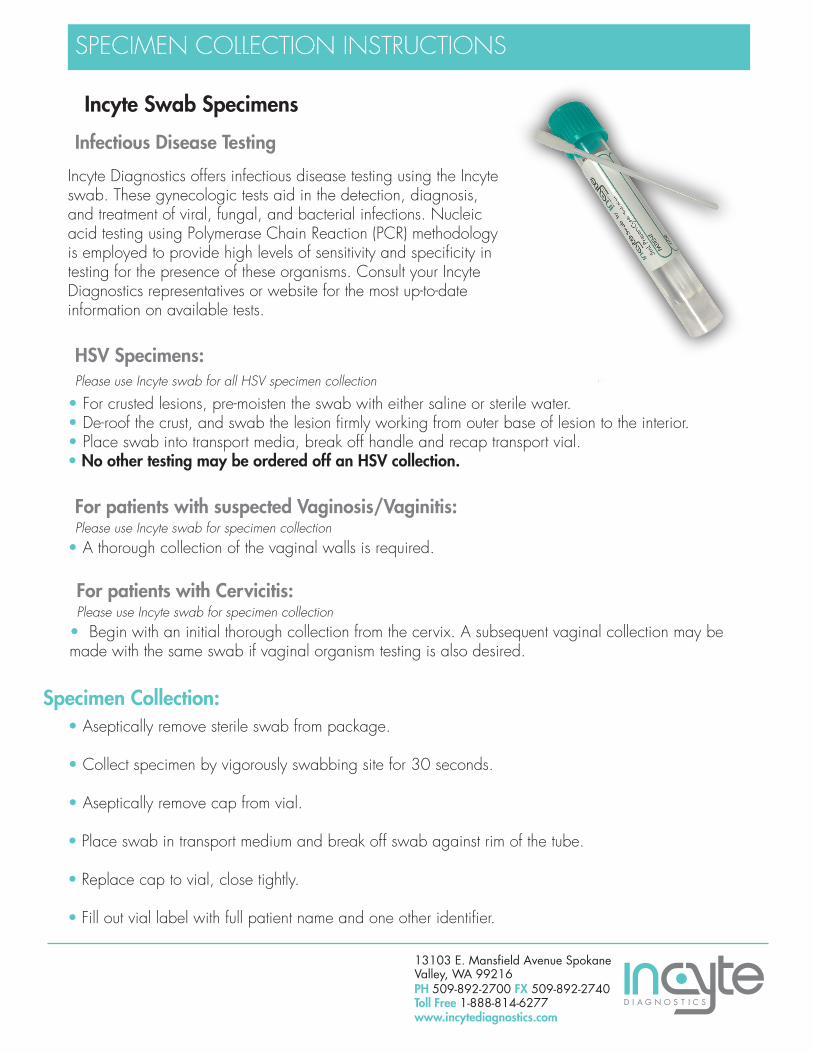
• Aseptically remove sterile swab from package.
• Collect specimen by vigorously swabbing site for 30 seconds.
• Aseptically remove cap from vial.
• Place swab in transport medium and break off swab against rim of the tube.
• Replace cap to vial, close tightly.
• Fill out vial label with full patient name and one other identifier.
Infectious Disease Testing
Incyte Diagnostics offers infectious disease testing using the Incyte swab. These gynecologic tests aid in the detection, diagnosis, and treatment of viral, fungal, and bacterial infections. Nucleic acid testing using Polymerase Chain Reaction (PCR) methodology is employed to provide high levels of sensitivity and specificity in testing for the presence of these organisms. Consult your Incyte Diagnostics representatives or website for the most up-to-date information on available tests.
HSV Specimens:
• For crusted lesions, pre-moisten the swab with either saline or sterile water.• De-roof the crust, and swab the lesion firmly working from outer base of lesion to the interior.• Place swab into transport media, break off handle and recap transport vial.• No other testing may be ordered off an HSV collection.
Please use Incyte swab for all HSV specimen collection
For patients with suspected Vaginosis/Vaginitis:Please use Incyte swab for specimen collection
• A thorough collection of the vaginal walls is required.
For patients with Cervicitis:Please use Incyte swab for specimen collection
• Begin with an initial thorough collection from the cervix. A subsequent vaginal collection may bemade with the same swab if vaginal organism testing is also desired.
SPECIMEN COLLECTION INSTRUCTIONS
ThinPrep® Pap Specimen
Option 1
13103 E. Mansfield Avenue Spokane Valley, WA 99216PH 509-892-2700 FX 509-892-2740 Toll Free 1-888-814-6277www.incytediagnostics.com
1. Record the patient’s name and IDnumber on the vial, and the patientinformation and medical history on the
cytology requisition form.
1. Record the patient’s name and ID number onthe vial, and the patient information and
medical history on the cytology requisition form.
2. Obtain an adequate sample from the ectocer-vix using a plastic spatula. Select the contouredend of the plastic spatula and rotate it 360° in aclockwise direction around the entire ectocervix,while maintaining tight contact with the
ectocervical surface.
3. Rinse the spatula as quickly as possible intothe vial by swirling the spatula vigorously in thevial10 times. Discard the plastic spatula.
4. Obtain an adequate sampling from theendocervix using an endocervical brush device.Insert the Cytobrush into the endocervical canaluntil only the bottom-most bristles are exposed.Slowly rotate 1/4 or 1/2 turn in one direction.Do not over rotate the brush.
5. Rinse the endocervical brush immediatelyin the same vial by rotating the device in thesolution 10 times while pushing it against the vialwall. As a final step, swirl the brush vigorously tofurther release material. Discard the brush.
6. Tighten the cap so that the torque line onthe cap passes the torque line on the vial. Do notover-tighten. Place the vial and pathologyrequest form in a specimen bag for transport tothe laboratory.
2. Obtain an adequate sample fromthe transformation zone of the cervixusing a cervical sampler (broom-likedevice). Insert the central bristles of thebroom into the endocervical canaldeep enough to allow the shorter bris-tles to fully contact the ectocervix. Pushgently, and rotate the brush 360° in aclockwise direction 3-5 times.
3. Rinse the cervical sampler immedi-ately into the vial by pushing it into thebottom of the vial 10 times, forcing thebristles apart. As a final step, swirl thebrush vigorously to further releasematerial. Visually inspect the cervicalsampler to ensure that no material re-mains attached. Discard the collectiondevice. Do not leave the head of thecervical sampler in the vial.
4. Tighten the cap so that the blacktorque line on the cap passes the blacktorque line on the vial. Donot over-tighten. Place the vial andpathology request form in a specimenbag for transportation to the laboratory.
Option 1BD SurePath™ Test sample collection with Rovers® Cervex® brush.*
Option 2BD SurePath™ Test sample collection with spatula and/or endocervical brush with detachable heads.**
1. Collect:Collect the cytology sample using a broom-like device with detachable head. Follow manufacturer’s collection instructions for detachable-head device(s).
2. Drop:Use the interior rim of the new BD SurePath™ Collection Vial to pull off the head of the broom-like device into the large opening in the collection vial.
3. Send:Place the cap on the vial and tighten. Send the BD SurePath™ Collection Vial to the lab for processing.
1A. Collect:Insert the contoured end of the Pap Perfect® plastic spatula and rotate 360°around the entire exocervix.
2A. Drop:Snap the device handle at the red scoring line and drop the detachable head of the device into the BD SurePath vial.
3A. Next:Place cap on vial; do not tighten cap until “Step 3B Send.” Go to Cytobrush® Plus GT “Step 1B. Collect.”
1B. Collect:Insert Cytobrush® Plus GT into the endocervix until only the bottom-most bristles are exposed at the os. Slowly rotate 1/4 to 1/2 turn in one direction. To reduce unnecessary bleeding, do not over-rotate brush.
2B. Drop:Snap the device handle at the red scoring line and drop the detachable head of both devices into the larger opening of the BD SurePath vial.
3B. Send:Place the cap on the vial and tighten. Send the BD SurePath vial to the lab for processing.
*See Rovers Cervex-Brush product insert for complete directions for use.**See SurePath Sample Collection Kit product insert for completeDirections for Use.
SPECIMEN COLLECTION INSTRUCTIONS
13103 E. Mansfield Avenue Spokane Valley, WA 99216PH 509-892-2700 FX 509-892-2740 Toll Free 1-888-814-6277www.incytediagnostics.com
Partially open the swab package and remove the swab. Do not touch the soft tip or lay the swab down. If the soft tip is touched, laid down, or dropped, discard and get a new Aptima Multitest Swab Specimen Collection Kit. Hold the swab, placing thumb and forefinger in the middle of the shaft covering the black score line. Do not hold the shaft below the score line.
Carefully insert the swab into the vagina about 2 inches (5 cm) past the introitus and gently rotate the swab for 10 to 30 seconds. Make sure the swab touches the vaginal walls so that moisture is absorbed by the swab. Withdraw the swab without touching the skin.
While holding the swab in hand, unscrew the tube cap. Do not spill the tube contents. If the tube contents are spilled, discard and replace with a new Aptima Multitest Swab Specimen Collection Kit. Immediately place the swab into the transport tube so the black score line is at the top of the tube. Align the score line with the top edge of the tube and carefully break the shaft. The swab will drop to the bottom of the vial. Discard the top portion of the shaft.
Break at score line
Tightly screw the cap onto the tube. When collecting multiple specimens from the same patient, the tube label provides a specimen source field for unique identification for the specimen location.
Hologic provides this collection procedure guide as a general informational tool only; it is not an affirmative instruction or guarantee of performance. It is the sole responsibility of the clinician to read and understand the appropriate package insert and comply with applicable local, state and federal rules and regulations.
Use cleaning swab (white shaft swab with red printing) to remove excess mucus from cervical os and surrounding mucosa. Discard this swab.
Insert collection swab (blue shaft swab with green printing) into endocervical canal. Gently rotate swab clockwise for 10 to 30 seconds to help ensure adequate sampling. Withdraw swab carefully; avoid any contact with vaginal mucosa.
While holding swab in hand, unscrew the tube cap. Do not spill tube contents. If the tube contents are spilled, discard and replace with a new Aptima unisex swab transport tube. Carefully break the swab shaft at the score line against the side of the tube. Discard top portion of swab shaft.
Re-cap swab specimen transport tube tightly.
Specimen Transport and Storage• After collection, transport and store swab in unisex specimen transport tube
between 2˚C to 30˚C until tested.
• Specimens must be assayed with the Aptima assay for CT, GC and /or TV within 60 days of collection.
• If longer storage is needed, freeze between -20˚C to -70˚C for up to 12 months after collection in the Aptima assay for CT and/or GC. For the Aptima assay for TV, freeze at < -20˚C for up to 12 months.
Discard cleaning swab (white shaft with red print on label). The cleaning swab is NOT needed for male specimen collection.
Insert specimen collection swab (blue shaft swab with green printing) 2 cm to 4 cm into urethra. Gently rotate swab clockwise for 2 to 3 seconds in urethra to help ensure adequate sampling. Withdraw swab carefully.
Hologic provides this collection procedure guide as a general informational tool only; it is not an affirmative instruction or guarantee of performance. It is the sole responsibility of the laboratory to read and understand the appropriate package insert and comply with applicable local, state and federal rules and regulations.
While holding swab in hand, unscrew tube cap. Do not spill tube contents. If tube contents are spilled, discard and replace with a new Aptima unisex swab transport tube. Carefully break the swab shaft at the score line against the side of the tube. Discard top portion of swab shaft.
• After collection, transport and store swab in unisex specimen transport tube between 2˚C to 30˚C until tested.
• Specimens must be assayed with the Aptima assay for CT and/or GC within 60 days of collection.
• If longer storage is needed, freeze between -20˚C to -70˚C for up to 12 months after collection.
Specimen Transport and Storage
DIAGNOSTIC SOLUTIONS
Aptima® unisex swab device Male collection procedure guideCollection for male urethral swab specimens
Patient should not have urinated for at least 1 hour prior to specimen collection. Swab specimen
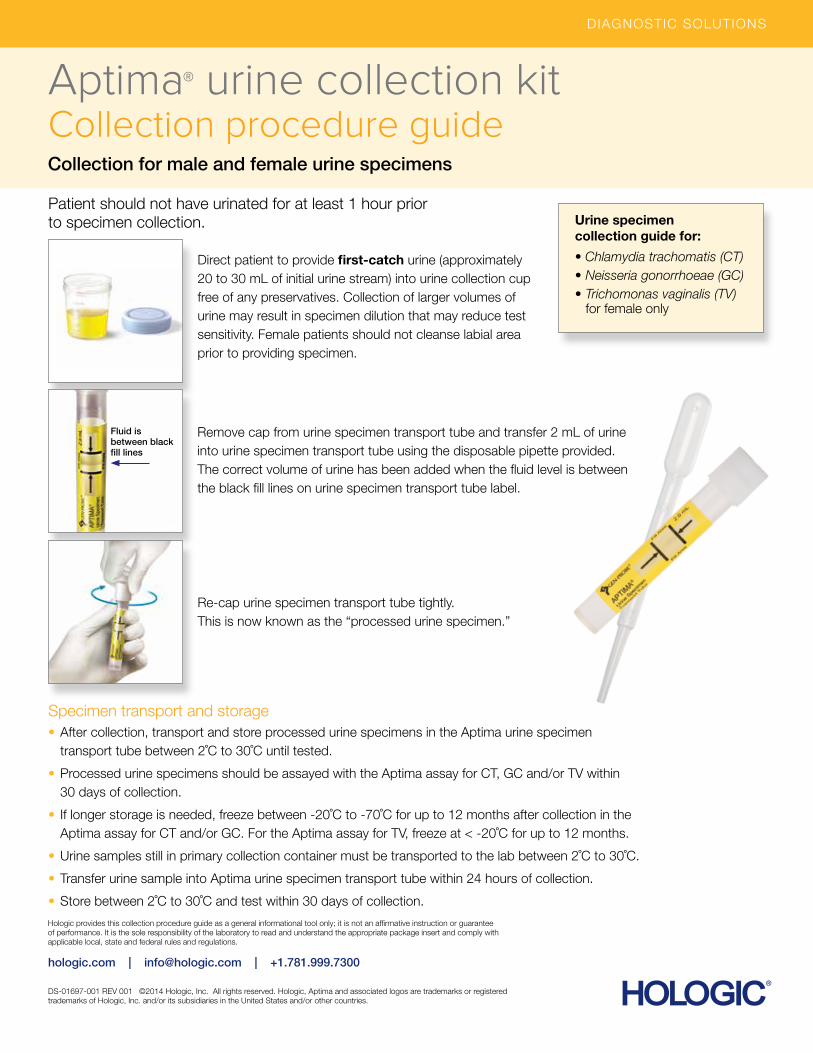
Direct patient to provide first-catch urine (approximately 20 to 30 mL of initial urine stream) into urine collection cup free of any preservatives. Collection of larger volumes of urine may result in specimen dilution that may reduce test sensitivity. Female patients should not cleanse labial area prior to providing specimen.
Remove cap from urine specimen transport tube and transfer 2 mL of urine into urine specimen transport tube using the disposable pipette provided. The correct volume of urine has been added when the fluid level is between the black fill lines on urine specimen transport tube label.
Re-cap urine specimen transport tube tightly. This is now known as the “processed urine specimen.”
Patient should not have urinated for at least 1 hour prior to specimen collection.
• After collection, transport and store processed urine specimens in the Aptima urine specimen transport tube between 2˚C to 30˚C until tested.
• Processed urine specimens should be assayed with the Aptima assay for CT, GC and/or TV within 30 days of collection.
• If longer storage is needed, freeze between -20˚C to -70˚C for up to 12 months after collection in the Aptima assay for CT and/or GC. For the Aptima assay for TV, freeze at < -20˚C for up to 12 months.
• Urine samples still in primary collection container must be transported to the lab between 2˚C to 30˚C.
• Transfer urine sample into Aptima urine specimen transport tube within 24 hours of collection.
• Store between 2˚C to 30˚C and test within 30 days of collection.
Hologic provides this collection procedure guide as a general informational tool only; it is not an affirmative instruction or guarantee of performance. It is the sole responsibility of the laboratory to read and understand the appropriate package insert and comply with applicable local, state and federal rules and regulations.