16
Spirit™ SD Multimedia Player/Recorder 1886 User Manual

Spirit™ SDMultimedia Player/Recorder
1886 User Manual
califone.com
3
Model 1886 Multimedia Player/Recorder
Thank you for purchasing the Califone® Model 1886 Multimedia Player/Recorder
We encourage you to visit our website www.califone.com to register your product for its warranty coverage, to sign up to receive our newsletter, download our catalog, and learn more about the complete line of Califone® audio visual products, including portable and installed wireless PA systems, multimedia players and recorders, headphones and headsets, computer peripheral equipment, visual presentation products and language learning materials.
Table of Contents1. IMPORTANT SAFETY INSTRUCTIONS 32. PACKAGE CONTENTS 53. PART NAMES AND FUNCTIONS 54. SETUP AND INSTALLATION 6
4.1 AC OPERATION 64.2 BATTERY OPERATION 64.3 CONNECTING HEADPHONES 6
5. BASIC OPERATION 777101112
5.1 RADIO OPERATION 5.2 CASSETTE OPERATION 5.3 CD OPERATION 5.4 PLAYING FROM USB / SD STORAGE MEDIA 5.5 MISC FUNCTIONS
1414
6. SPECIFICATIONS & FEATURES7. WARRANTY8. TROUBLE SHOOTING
1886 Manual - JH 2009.11.09.indd 2-3 11/11/2009 1:20:04 PM
15
2
3
califone.com
4califone.com
5
1. IMPORTANT SAFETY INSTRUCTIONS Before using this product, read the instruction manual for important safety information. Please retain this manual for future reference and warranty information.
Troubleshooting & Servicing Do not attempt to service or repair the device yourself. Refer all servicing to qualified service personnel. Do not attempt to modify the device in any way. Doing so could invalidate your warranty.
Moisture and heat sourcesDo not use this apparatus near water (for example, sinks, baths, pools) or expose it to rain, moisture, dripping or splashing liquids. Do not expose the unit to high temperatures, high humidity or direct sunlight.
Cleaning When cleaning the device, please use a soft, dry cloth. Never use benzene, paint-thinner, or other chemicals on the device.
LocationPlace the device in stable location, so it will not fall causing damage to the device or bodily harm.
Intended useThe product may only be used with the original parts intended for it. The product may only be used in closed and dry rooms. The intended use includes adherence to the specified installation instructions. The manufacturer accepts no liability for damage arising due to improper use.
WARNING: Changes or modifications to this unit not expressly approved by the party responsible for compliance could void the user’s authority to operate the equipment.
IMPORTANTThis device complies with Part 15 of the FCC Rules. Operation is subject to the following two conditions:(1) This device may not cause harmful interference, and (2) this devicemust accept any interference received, including interference that maycause undesired operation.The unit’s circuitry may cause interference to nearby radios. To preventinterference, either switch the unit off or move away from the affectedradio.NOTE: This equipment has been tested and found to comply within thelimits for a class B digital device, pursuant to Part 15 of the FCC Rules.These limits are designed to provide reasonable protection againstharmful interference in a residential installation. This equipmentgenerates, uses and can radiate radio frequency energy and, if notinstalled and used in accordance with the instructions, may causeharmful interference to radio communications. However, there is noguarantee that interference will not occur in a particular installation. If thisequipment does cause harmful interference to radio or televisionreception, which can be determined by turning the equipment off and on,the user is encouraged to try to correct the interference by one or more ofthe following measures:
• Reorient or relocate the receiving antenna.• Increase the separation between the equipment and receiver.• Connect the equipment into an outlet on a circuit different from
that to which the receiver is connected.• Consult the dealer or an experienced radio / TV technician for
help.
NOTE: Shielded cables may be required to be used with this unit to en-sure compliance with the Class B FCC limits.
SAFETY CERTIFICATIONThis device is made and tested to meet safety standards of the U.S. Department of Health and Human Services, and also with FDA Radiation Performance Standards 21 CFR Subchapter J.
LASER SAFETYThis unit employs an optical laser beam system in the CD mechanism, designed with built-in safeguards. Do not attempt to disassemble; refer to qualified service personnel. Exposure to this invisible laser light beam may be harmful to the human eye.
THIS IS A CLASS-1 LASER PRODUCT. USE OF CONTROLS, OR ADJUST-MENTS OR PROCEDURES OTHER THAN THOSE SPECIFIED HEREIN, MAY RESULT IN HAZARDOUS LASER LIGHT BEAM EXPOSURE.
INVISIBLE LASER RADIATION WHEN OPEN AND INTERLOCK FAILED OR DEFEATED. AVOID DIRECT EXPO-SURE TO LASER BEAM.
1886 Manual - JH 2009.11.09.indd 4-5 11/11/2009 1:20:04 PM
4
califone.com
4califone.com
5
1. IMPORTANT SAFETY INSTRUCTIONS Before using this product, read the instruction manual for important safety information. Please retain this manual for future reference and warranty information.
Troubleshooting & Servicing Do not attempt to service or repair the device yourself. Refer all servicing to qualified service personnel. Do not attempt to modify the device in any way. Doing so could invalidate your warranty.
Moisture and heat sourcesDo not use this apparatus near water (for example, sinks, baths, pools) or expose it to rain, moisture, dripping or splashing liquids. Do not expose the unit to high temperatures, high humidity or direct sunlight.
Cleaning When cleaning the device, please use a soft, dry cloth. Never use benzene, paint-thinner, or other chemicals on the device.
LocationPlace the device in stable location, so it will not fall causing damage to the device or bodily harm.
Intended useThe product may only be used with the original parts intended for it. The product may only be used in closed and dry rooms. The intended use includes adherence to the specified installation instructions. The manufacturer accepts no liability for damage arising due to improper use.
WARNING: Changes or modifications to this unit not expressly approved by the party responsible for compliance could void the user’s authority to operate the equipment.
IMPORTANTThis device complies with Part 15 of the FCC Rules. Operation is subject to the following two conditions:(1) This device may not cause harmful interference, and (2) this devicemust accept any interference received, including interference that maycause undesired operation.The unit’s circuitry may cause interference to nearby radios. To preventinterference, either switch the unit off or move away from the affectedradio.NOTE: This equipment has been tested and found to comply within thelimits for a class B digital device, pursuant to Part 15 of the FCC Rules.These limits are designed to provide reasonable protection againstharmful interference in a residential installation. This equipmentgenerates, uses and can radiate radio frequency energy and, if notinstalled and used in accordance with the instructions, may causeharmful interference to radio communications. However, there is noguarantee that interference will not occur in a particular installation. If thisequipment does cause harmful interference to radio or televisionreception, which can be determined by turning the equipment off and on,the user is encouraged to try to correct the interference by one or more ofthe following measures:
• Reorient or relocate the receiving antenna.• Increase the separation between the equipment and receiver.• Connect the equipment into an outlet on a circuit different from
that to which the receiver is connected.• Consult the dealer or an experienced radio / TV technician for
help.
NOTE: Shielded cables may be required to be used with this unit to en-sure compliance with the Class B FCC limits.
SAFETY CERTIFICATIONThis device is made and tested to meet safety standards of the U.S. Department of Health and Human Services, and also with FDA Radiation Performance Standards 21 CFR Subchapter J.
LASER SAFETYThis unit employs an optical laser beam system in the CD mechanism, designed with built-in safeguards. Do not attempt to disassemble; refer to qualified service personnel. Exposure to this invisible laser light beam may be harmful to the human eye.
THIS IS A CLASS-1 LASER PRODUCT. USE OF CONTROLS, OR ADJUST-MENTS OR PROCEDURES OTHER THAN THOSE SPECIFIED HEREIN, MAY RESULT IN HAZARDOUS LASER LIGHT BEAM EXPOSURE.
INVISIBLE LASER RADIATION WHEN OPEN AND INTERLOCK FAILED OR DEFEATED. AVOID DIRECT EXPO-SURE TO LASER BEAM.
1886 Manual - JH 2009.11.09.indd 4-5 11/11/2009 1:20:04 PM

5califone.com
6califone.com
7
2. PACKAGE CONTENTS• 1886 Multimedia Player/Recorder with external power adapter (at-
tached)• User Manual
3. PART NAMES AND FUNCTIONS
CD Boombox
Instruction Manual- P.1 -
- P.2 - - P.3 -
CONTROL LOCATION
1. Function Selector Switch 2. Condenser Microphone 3. Headphone Socket 4. CD Compartment 5. CD Door Open Button 6. FM Antenna 7. Tuning Dial Scale 8. Band Switch 9. Tuning Control10. CD DN/Rew Button11. Volume Control12. Folder+ Button13. Prog/Repeat Button14. CD Stop Button15. CD Play / Pause Button16. CD Up/F.F. Button17. CD/USB/SD Button18. Pause Button19. Stop / Eject Button20. Fast Forward Button21. Rewind Button22. Play Button23. Record Button24. Cassette Compartment25. CD Display26. Left Speaker27. Right Speaker28. USB Connector29. SD/MMC Card Slot30. Encode Button
CAUTION
RISK OF ELECTRIC SHOCK
DO NOT OPEN
DANGER: Invisible laser radiation when
open and inter-lock
failed or defeated. Avoid direct posure to
beam.
CAUTION: Hazardous laser radiation when
open and interlock defeated.
AC OPERATIONBefore operation please be sure that the VOLTAGE on the set corresponds to the VOLTAGE of your local area. Unravel the AC Line Cord, insert one end into the AC jack on the set, and the other end into a standard AC outlet.
BATTERY OPERATIONDisconnect the AC Cord Set completely. Open the BATTERY COMPARTMENT DOOR and insert UM-2size x 8 batteries (not supplied) making sure that theindicated battery polarity is observed.
TURN OFF UNITTo turn off the unit, slide the FUNCTION SELECTOR SWITCH(1) to the "OFF" position.
RADIO OPERATION SELECTORSlide the FUNCTION SELECTOR SWITCH(1) to the "RADIO" position. Slide the BAND switch to the desired waveband. Turn the TUNING KNOB to your desired radio station. Adjust the sound level by rotating the VOLUME CONTROL KNOB(11). To turn off the radio, simply slide the FUNCTION SELECTOR SWITCH(1) to "OFF" position.
FM STEREO RECEPTIONSlide the BAND Switch(8) to the FM position. The FM STEREO indicator will light when listening to a strong station that is broadcasting in stereo.
ANTENNA
turn the aerial, reduce its length if the FM-signal is toostrong (very close to a transmitter).
no need to use the telescopic aerial, the aerial can be directed by turning the whole set.
CASSETTE OPERATION
TAPE PLAYBACKDepress the STOP/EJECT (19) button to open the cassette door. Insert a cassette tape into the CASSETTE COMPARTMENT and push the cassette door to close. Slide the FUNCTION SELECTOR SWITCH(1) to TAPE position. Depress the PLAY (22) button. Adjust the VOLUME CONTROL KNOB(11) to your desired listening level. To stop the tape, depress the STOP/EJECT (19) button.
- P.4 - - P.5 -
FAST FORWARD AND REWINDThe tape can be fast FORWARDED or REWOUND by depressing the FAST FORWARD (20) button or REWIND (21) button respectively.
PAUSE FUNCTIONDuring playback or recording, the tape can be stopped temporarily by depressing the PAUSE (18) button. To continue playback or recording, press the PAUSE (18) button once again.
AUTO STOP SYSTEMWhen the tape runs to its end during playback or recording, the cassette operation will be stopped automatically.
CAUTIONTo avoid damage to the cassette mechanism or to the cassette tapes, always depress the STOP/EJECT(19) Button between each operation.
RECORDING FROM THE RADIO1. Tune to a desired radio program as described in the "RADIO
OPERATION" section.
2. Insert a blank cassette tape into the CASSETTE COMPARTMENT.
3. Press the PAUSE (18) button.
4. Press the RECORD (23) button. The PLAY (22) button is engaged simultaneously to start recording. With the built-in Automatic Level Control (ALC), the best recording quality is automatically adjusted. Changing the volume level will not affect the recording.
5. To activate recording, release the PAUSE (18) button.
6. To stop recording temporarily, press the PAUSE (18) button. To continue the recording, press the PAUSE (18) button once again.
7. Press the STOP/EJECT (19) button to stop recording.
8. When the tape runs to its end, the cassette operation will be stopped automatically.
RECORDING FROM BUILT-IN CONDENSER MICROPHONE
(19) button and insert a blank tape into the cassette compartment. Close the door gently.
- P.6 -
- P.8 -
- P.7 -
- P.9 -
2. For interruption while the CD/USB/SD is playing, press the PLAY/PAUSE (15) button once. In the CD mode, though the sound stops, the disc will continue to spin. To re-start playing, press the PLAY/PAUSE (15) button once again. The music will start from the exact position where it was interrupted.
3. To stop the CD/USB/SD, press the STOP (14) button once whether the CD/USB/SD is in Play or Pause mode.
SKIP AND SEARCH MODE
once to go to next track or previous track.
(10) button to search within a track and the elapsed time will be shown on the Display.
reached.
PROGRAMIT IS NOT POSSIBLE TO ENTER PROGRAMS DURING DISC/USB/SD/MMC CARD PLAY. PRESS STOP (14) BUTTON FIRST, AND FOLLOWS THE FOLLOWING PROCEDURE:
flashing. “P01” for the program location, and “000” for your desire songs.
stored.
(up to a limit of 20 track).
programmed track.
LCD display will remain lighted.
CLEAR PROGRAMMED DISC PLAY
ENCODE (RECORD) MODE
IT IS NOT POSSIBLE TO ENCODE (RECORD) DURING STOP MODE OR NO STORAGE MEDIA (USB or SD/MMC) CONNECT WITH THE UNIT.
To Start Encode (Record) from CD Disc to USB or SD/MMC card, make sure the USB Flash player is TURN ON and also NOT in HOLD mode. While for the SD/MMC card, make sure the write protect tab is NOT in LOCK positiion.
REPEAT ALL TRACK IN FOLDER
(12) button during play mode. You can select the desire FOLDER by pressing FOLDER+ (12) button, the FOLDER indicator will flashing on the LCD display. Then press REPEAT (13) button twice to play all tracks within current FOLDER continuously, both FOLDER and REP ALL indicators will remain lighted.
once more and the REP ALL indicator will go off.
FOLDER MODEPress FOLDER+ (12) button to select the desired song. The Folder number will be flashing by 3 sec.
STEREO HEADPHONE JACKFor private listening, insert the headphone plug into the STEREO HEADPHONE JACK(3) and adjust the VOLUME CONTROL KNOB(11) accordingly. During the use of a headphone, the Speakers are automatically disconnected.
GENERAL INFORMATIONCARE AND MAINTENANCEHandle your compact discs, cassette tapes, and tape deck carefully, and they can last a long time.Handle your compact discs carefully, and they can last a long time.
exterior of the unit.
cleaners since these could damage the unit's finish.
objects filled with liquids, such as vases, shall be placed on the apparatus.
ventilation.
openings with items, such as newspapers, table-cloths, curtains, etc.
the product.
With USB CONNECTOR & SD SLOT
ENCODING (FOR CD PLAYBACK)1. Select and Play the CD song.2. When the CD song is being played, press and hold the ENCODE (30)
button till the display showing “ENC”.(It will take about 3 sec)3. To have the CD song successfully Encode (Record) to the Storage Media,
do not interfere the unit until the completion of song playback.NOTE: The Play/Pause function is allow to carry on during Encoding (Recording). There will be no elapse of time stored into the Storage Media even PAUSE carried out.
4. In case the STOP (14) button is pressed during the Encode (Record) process, the song being Encoded (Recorded) to the Storage Media will also stop at the same time.
5. Please note the songs Encode (Record) into the Storage Media will stored inside folder name “TRACK” and each song will name from 1st song “TRACK0001”, 2nd song “TRACK0002”,…….…..
6. Press STOP (14) button to stop the encode function.
RIPPING: (FOR MP3 PLAYBACK)1. Select and Play the desired song.2. When the MP3 song is being played, press and hold the ENCODE (30)
button till the display showing “ENC”.(It will take about 3 sec)3. To have the MP3 song successfully ripping to the Storage Media, do not
interfere the unit until the completion of copying.4. The ripping will automatically stop when complete.
REPEAT MODE (FOR MP3 PLAYBACK AND USB STORAGE
MEDIA PLAYBACK)
REPEAT 1 ON SINGLE TRACK
storage media), press REPEAT (13) button once to play single track continuously. The REP indicator will remain lighted on the LCD display.
REPEAT ALL ON ALL TRACKS
CD/MP3/USB/SD/MMC storage media), press REPEAT (13) button three times to play whole Disc/USB/SD/MMC storage media continuously. The REP ALL indicator will remain lighted on the LCD display.
PAUSE STOP/EJ. F.FWD REWIND PLAY RECORD
POWER FM.ST
D I G I T A L
OPEN 530 6
00
700
9
00
120
0
1600
kH
z
88
92
96
10
2
106
108
AM
FM
UP/F.F.
DN/REW
FOLDER
PORTABLE RADIO COMPACT DISC PLAYER
6 7 94 5
82
1 3
26 27
18 19 20 21 22 23
25 24
12
10
14
16
13
11
15
TUNIN
G
- P.12 -
- P.10 - - P.11 -
becomes smudged or dirty, clean it with a soft, slightly dampened cloth.Never allow water or any liquid to get inside the cabinet. Never use any abrasive cleaners or cleaning pads as these will damage the finish of your radio.
device, the disconnect device shall remain readily operable.
COMPACT DISCSRemove the CD from the case by holding it at the edges while pressing the center hole lightly. Do not touch the shiny surface of the CD, or bend the CD. Place the CD into the open tray positions with label facing up. A dirty CD may not play correctly. If a CD becomes dirty, wipe it with a soft cloth in a straight line from center to edge.
CASSETTE TAPESIf the tape is loose in its cassette, take up the slack by inserting a pencil in one of the reels and rotating if the tape is loose it may get stretched, cut, or caught in the cassette.Do not touch the tape surface.To prevent recording from being erased accidentally, remove the tab(s) A and B.To record after the tabs have been broken off. Reseal the slots A and B with a piece of adhesive tape.
CLEANING THE TAPE HEADS AND TAPE PATHFor continued high performance from your cassette deck, periodically clean the head, pinch roller, and capstan. We recommend cleaning after every 20-30 hours of operation. To clean the tape deck, press the Stop/Eject key to open the deck door. Remove any cassette in the deck. Make sure that the power to the unit is Off.
"The apparatus shall not be exposed to dripping or splashing and that no objects filled with liquids, such as vases, shall be placed on the apparatus."
TIPS AND TROUBLESHOOTING
SYMPTOM CAUSE / SOLUTION
Freezing / Problem occur during unit operation.
No Playback via USB Flash Player / USB / SD Card.
No Playback via USB Flash Player / USB / SD Card.
Should the unit Freeze or exhibit problem during operation, turn off the unit and disconnect the power supply and then restart again.
However due to the variance in the use of USB Flash Players software and capacity of the USB / SD Card, not all USB MP3 Players / USB / SD Card are compatible in the unit.
Due to the variance in MP3 or WMA transferring, some files may not be support.
Problem occur during playback of songs via USB / SD Card.
Should the unit exhibit problem via USB / SD Media, turn off the unit and disconnect the power supply and then restart again.
Not able to Encode (Record) to USB / SD Card
Should the memory in the USB / SD Media being used up, delete files and free up memory from Computer and do the Encoding (Recording) again.
Make sure the write protect tab of SD Card is NOT in LOCK position.
Make sure the USB Flash Player in TURN ON and NOT in HOLD position.
SPECIFICATION
Power Source AC: 230V ~ 50HzDC: 12V "UM-2" x 8pcs
Radio Frequency
Output Power
CD Playback
USB 2.0 and SD / MMC Card
iPod (Thru iPod Dock Connector to USB 2.0 Cable)
AM: 530 - 1600 kHzFM: 88 - 108 MHz
1.8W x 2
MP3 / CD-RW / CD-R / CD compatibleThis unit can read CD-RW discs, however not all types of CD-RW discs are compatible. Thus the full playability with all CD-RW disc is not guaranteed.
Capacity: 16MB / 32MB / 64MB / 128MB / 256MB / 512MB / 1GB / 2GBPlayback: In MP3 and WMA version.Make sure the file extension is in appropriate .mp3 or .wma.
The ipod initial setting must be use with a Window PC for MP3 playback.However not all ipod models is guaranteed to play on this unit.
HDD This unit cannot guarantee HDD playback through USB Connector.
Encoding (Recording) Speed CD to USB/SD: 128 kbps
PLAYING COMPACT DISCS WITH MP3 - GETTING STARTEDNOTE: Should skipping of tracks occur during CD playing, try turning the volume down. When CD is playing, do not open the CD Door.
1. Select FUNCTION SELECTOR SWITCH (1) to MODE.
2. Press the CD door open (5) button to open the CD DOOR. Put a MP3 Disc into the CD COMPARTMENT and close the CD DOOR.
3. When the CD DOOR is closed with a MP3 Disc inside, the disc will be played automatically.
4. If the CD DOOR is not closed or there is no disc inside, the DISPLAY will show "OPN" or "NOd" and go to "STOP" mode.
PLAYING USB / SD - GETTING STARTEDNOTE: It is not possible to operate the USB/SD functions when the CD door is open. Make sure the CD door is closed during USB/SD Playback.
PLAYBACK OF MP3 SONG VIA USB STORAGE MEDIAThis system is able to decode and playback all MP3 files which stored in the memory media with USB connector and SD Card.
1. Select FUNCTION SELECTOR SWITCH (1) to MODE.
2. Remove the rubber cover of the USB Connector
3. Before connecting the USB/SD media to the unit, make sure the port is in correct direction and will connect.
4. The system will automatically start reading the MP3 files in the USB /SD Storage Media.
Wrongly connect the USB Storage Media or SD/MMC Card upside down could damage the unit or the USB Storage Media or SD/MMC Card.
SWITCH FUNCTION BETWEEN CD/USBPress CD/USB/SD (17) button to switch function between CD/USB/SD.
PLAY/PAUSE MODE1. When the PLAY/PAUSE (15) button is pressed during "STOP" mode, the
first track will be played. The LCD DISPLAY will show the specific number of track being played.
Model no. : CDR-692 USB
BRAND
start the recording process. This process will record the signals that are received by the built-in CONDENSER MICROPHONE (2).
NOTE: Monitoring during MICROPHONE recording is not possible.
RECORDING FROM CD PLAYER1. Slide the FUNCTION SELECTOR SWITCH(1) to "CD" position.
2. Put a CD into the CD compartment with the label side upward.
3. Insert a blank cassette into the CASSETTE COMPARTMENT and press PAUSE (18) button of the cassette deck.
4. Press RECORD (23) button and PLAY (22) button simultaneously for recording stand-by. With the built-in ALC, the best recording quality is adjusted automatically.
5. Activate the CD players, playing in a desired TRACK as described in the COMPACT DISC PLATER OPERATION section. Release the PAUSE (18) button of the cassette deck to start recording.
6. To stop recording temporarily, press the PAUSE (18) button. To continue recording, press the PAUSE (18) button again.
7. Press STOP/EJECT (19) button of the cassette deck to stop recording.Then stop CD playback by pressing the CD STOP (14) button of the CD player.
OPERATION - USB, MP3, CD, CD-R, CD-RWPLAYING COMPACT DISCS - GETTING STARTEDNOTE: Should skipping of tracks occur during CD playing, try turning the volume down. When CD is playing, do not open the CD Door.
1. Select FUNCTION SELECTOR SWITCH (1) to MODE.
2. Press the CD door open (5) button to open the CD DOOR. Put a CD into the CD COMPARTMENT and close the CD DOOR.
3. When the CD DOOR is closed with a CD inside, the total number of tracks of the disc will be shown on the LCD DISPLAY.
4. If the CD DOOR is not closed or there is no disc inside the CD compartment, the DISPLAY will show "OPN" or "NOd" and go to "STOP"
CD/USB/SD
ENCODE
SD / MMC C
ARD 28
17
30
(The marking plate is placed at the bottom of the apparatus.)
29
1. Function Selector Switch2. Condenser Microphone3. Headphone Jack4. CD Compartment5. CD Door Open Button6. FM Antenna7. Tuning Dial Scale8. Band Switch9. Tuning Control10. CD DN/REW Button11. Volume Control12. Folder+ Button13. Prog/Repeat Button14. CD Stop Button15. CD Play / Pause Button
16. CD Up/F.F. Button17. CD/USB/SD Button18. Pause Button19. Stop / Eject Button20. Fast Forward Button21. Rewind Button22. Play Button23. Record Button24. Cassette Compartment25. CD Display26. Left Speaker27. Right Speaker28. USB Connector29. SD/MMC Card Slot30. Encode Button
4. SETUP AND INSTALLATION4.1 AC OPERATION1. Ensure the unit is off. To turn off the unit, slide the FUNCTION
SELECTOR SWITCH to the "OFF" position.2. Before operation please be sure that the voltage on the power
adapter corresponds to the AC voltage of your local area. Unravelthe AC Line Cord, insert one end into the AC jack on the set, and theother end into a standard AC outlet.
4.2 BATTERY OPERATION1. Ensure the unit is off. To turn off the unit, slide the FUNCTION
SELECTOR SWITCH to the "OFF" position.2. IMPORTANT:DisconnectthepoweradapterfromtheACmain
power.3. Open the BATTERY COMPARTMENT DOOR and insert C (UM-2)
size x 8 batteries (not included) making sure that the indicatedbattery polarity is observed.
4.3 CONNECTING HEADPHONES1. Decrease the volume to minimum.2. Connect the headphones to the PHONE jack.3. Increase the volume to the desired listening level.CAUTION: Avoid excessive volume for long periods of time as this canresult in hearing damage.
1886 Manual - JH 2009.11.09.indd 6-7 11/11/2009 1:20:06 PM

6
califone.com
6califone.com
7
2. PACKAGE CONTENTS• 1886 Multimedia Player/Recorder with external power adapter (at-
tached)• User Manual
3. PART NAMES AND FUNCTIONS
CD Boombox
Instruction Manual- P.1 -
- P.2 - - P.3 -
CONTROL LOCATION
1. Function Selector Switch 2. Condenser Microphone 3. Headphone Socket 4. CD Compartment 5. CD Door Open Button 6. FM Antenna 7. Tuning Dial Scale 8. Band Switch 9. Tuning Control10. CD DN/Rew Button11. Volume Control12. Folder+ Button13. Prog/Repeat Button14. CD Stop Button15. CD Play / Pause Button16. CD Up/F.F. Button17. CD/USB/SD Button18. Pause Button19. Stop / Eject Button20. Fast Forward Button21. Rewind Button22. Play Button23. Record Button24. Cassette Compartment25. CD Display26. Left Speaker27. Right Speaker28. USB Connector29. SD/MMC Card Slot30. Encode Button
CAUTION
RISK OF ELECTRIC SHOCK
DO NOT OPEN
DANGER: Invisible laser radiation when
open and inter-lock
failed or defeated. Avoid direct posure to
beam.
CAUTION: Hazardous laser radiation when
open and interlock defeated.
AC OPERATIONBefore operation please be sure that the VOLTAGE on the set corresponds to the VOLTAGE of your local area. Unravel the AC Line Cord, insert one end into the AC jack on the set, and the other end into a standard AC outlet.
BATTERY OPERATIONDisconnect the AC Cord Set completely. Open the BATTERY COMPARTMENT DOOR and insert UM-2size x 8 batteries (not supplied) making sure that theindicated battery polarity is observed.
TURN OFF UNITTo turn off the unit, slide the FUNCTION SELECTOR SWITCH(1) to the "OFF" position.
RADIO OPERATION SELECTORSlide the FUNCTION SELECTOR SWITCH(1) to the "RADIO" position. Slide the BAND switch to the desired waveband. Turn the TUNING KNOB to your desired radio station. Adjust the sound level by rotating the VOLUME CONTROL KNOB(11). To turn off the radio, simply slide the FUNCTION SELECTOR SWITCH(1) to "OFF" position.
FM STEREO RECEPTIONSlide the BAND Switch(8) to the FM position. The FM STEREO indicator will light when listening to a strong station that is broadcasting in stereo.
ANTENNA
turn the aerial, reduce its length if the FM-signal is toostrong (very close to a transmitter).
no need to use the telescopic aerial, the aerial can be directed by turning the whole set.
CASSETTE OPERATION
TAPE PLAYBACKDepress the STOP/EJECT (19) button to open the cassette door. Insert a cassette tape into the CASSETTE COMPARTMENT and push the cassette door to close. Slide the FUNCTION SELECTOR SWITCH(1) to TAPE position. Depress the PLAY (22) button. Adjust the VOLUME CONTROL KNOB(11) to your desired listening level. To stop the tape, depress the STOP/EJECT (19) button.
- P.4 - - P.5 -
FAST FORWARD AND REWINDThe tape can be fast FORWARDED or REWOUND by depressing the FAST FORWARD (20) button or REWIND (21) button respectively.
PAUSE FUNCTIONDuring playback or recording, the tape can be stopped temporarily by depressing the PAUSE (18) button. To continue playback or recording, press the PAUSE (18) button once again.
AUTO STOP SYSTEMWhen the tape runs to its end during playback or recording, the cassette operation will be stopped automatically.
CAUTIONTo avoid damage to the cassette mechanism or to the cassette tapes, always depress the STOP/EJECT(19) Button between each operation.
RECORDING FROM THE RADIO1. Tune to a desired radio program as described in the "RADIO
OPERATION" section.
2. Insert a blank cassette tape into the CASSETTE COMPARTMENT.
3. Press the PAUSE (18) button.
4. Press the RECORD (23) button. The PLAY (22) button is engaged simultaneously to start recording. With the built-in Automatic Level Control (ALC), the best recording quality is automatically adjusted. Changing the volume level will not affect the recording.
5. To activate recording, release the PAUSE (18) button.
6. To stop recording temporarily, press the PAUSE (18) button. To continue the recording, press the PAUSE (18) button once again.
7. Press the STOP/EJECT (19) button to stop recording.
8. When the tape runs to its end, the cassette operation will be stopped automatically.
RECORDING FROM BUILT-IN CONDENSER MICROPHONE
(19) button and insert a blank tape into the cassette compartment. Close the door gently.
- P.6 -
- P.8 -
- P.7 -
- P.9 -
2. For interruption while the CD/USB/SD is playing, press the PLAY/PAUSE (15) button once. In the CD mode, though the sound stops, the disc will continue to spin. To re-start playing, press the PLAY/PAUSE (15) button once again. The music will start from the exact position where it was interrupted.
3. To stop the CD/USB/SD, press the STOP (14) button once whether the CD/USB/SD is in Play or Pause mode.
SKIP AND SEARCH MODE
once to go to next track or previous track.
(10) button to search within a track and the elapsed time will be shown on the Display.
reached.
PROGRAMIT IS NOT POSSIBLE TO ENTER PROGRAMS DURING DISC/USB/SD/MMC CARD PLAY. PRESS STOP (14) BUTTON FIRST, AND FOLLOWS THE FOLLOWING PROCEDURE:
flashing. “P01” for the program location, and “000” for your desire songs.
stored.
(up to a limit of 20 track).
programmed track.
LCD display will remain lighted.
CLEAR PROGRAMMED DISC PLAY
ENCODE (RECORD) MODE
IT IS NOT POSSIBLE TO ENCODE (RECORD) DURING STOP MODE OR NO STORAGE MEDIA (USB or SD/MMC) CONNECT WITH THE UNIT.
To Start Encode (Record) from CD Disc to USB or SD/MMC card, make sure the USB Flash player is TURN ON and also NOT in HOLD mode. While for the SD/MMC card, make sure the write protect tab is NOT in LOCK positiion.
REPEAT ALL TRACK IN FOLDER
(12) button during play mode. You can select the desire FOLDER by pressing FOLDER+ (12) button, the FOLDER indicator will flashing on the LCD display. Then press REPEAT (13) button twice to play all tracks within current FOLDER continuously, both FOLDER and REP ALL indicators will remain lighted.
once more and the REP ALL indicator will go off.
FOLDER MODEPress FOLDER+ (12) button to select the desired song. The Folder number will be flashing by 3 sec.
STEREO HEADPHONE JACKFor private listening, insert the headphone plug into the STEREO HEADPHONE JACK(3) and adjust the VOLUME CONTROL KNOB(11) accordingly. During the use of a headphone, the Speakers are automatically disconnected.
GENERAL INFORMATIONCARE AND MAINTENANCEHandle your compact discs, cassette tapes, and tape deck carefully, and they can last a long time.Handle your compact discs carefully, and they can last a long time.
exterior of the unit.
cleaners since these could damage the unit's finish.
objects filled with liquids, such as vases, shall be placed on the apparatus.
ventilation.
openings with items, such as newspapers, table-cloths, curtains, etc.
the product.
With USB CONNECTOR & SD SLOT
ENCODING (FOR CD PLAYBACK)1. Select and Play the CD song.2. When the CD song is being played, press and hold the ENCODE (30)
button till the display showing “ENC”.(It will take about 3 sec)3. To have the CD song successfully Encode (Record) to the Storage Media,
do not interfere the unit until the completion of song playback.NOTE: The Play/Pause function is allow to carry on during Encoding (Recording). There will be no elapse of time stored into the Storage Media even PAUSE carried out.
4. In case the STOP (14) button is pressed during the Encode (Record) process, the song being Encoded (Recorded) to the Storage Media will also stop at the same time.
5. Please note the songs Encode (Record) into the Storage Media will stored inside folder name “TRACK” and each song will name from 1st song “TRACK0001”, 2nd song “TRACK0002”,…….…..
6. Press STOP (14) button to stop the encode function.
RIPPING: (FOR MP3 PLAYBACK)1. Select and Play the desired song.2. When the MP3 song is being played, press and hold the ENCODE (30)
button till the display showing “ENC”.(It will take about 3 sec)3. To have the MP3 song successfully ripping to the Storage Media, do not
interfere the unit until the completion of copying.4. The ripping will automatically stop when complete.
REPEAT MODE (FOR MP3 PLAYBACK AND USB STORAGE
MEDIA PLAYBACK)
REPEAT 1 ON SINGLE TRACK
storage media), press REPEAT (13) button once to play single track continuously. The REP indicator will remain lighted on the LCD display.
REPEAT ALL ON ALL TRACKS
CD/MP3/USB/SD/MMC storage media), press REPEAT (13) button three times to play whole Disc/USB/SD/MMC storage media continuously. The REP ALL indicator will remain lighted on the LCD display.
PAUSE STOP/EJ. F.FWD REWIND PLAY RECORD
POWER FM.ST
D I G I T A L
OPEN 530 6
00
700
9
00
120
0
1600
kH
z
88
92
96
10
2
106
108
AM
FM
UP/F.F.
DN/REW
FOLDER
PORTABLE RADIO COMPACT DISC PLAYER
6 7 94 5
82
1 3
26 27
18 19 20 21 22 23
25 24
12
10
14
16
13
11
15
TUNIN
G
- P.12 -
- P.10 - - P.11 -
becomes smudged or dirty, clean it with a soft, slightly dampened cloth.Never allow water or any liquid to get inside the cabinet. Never use any abrasive cleaners or cleaning pads as these will damage the finish of your radio.
device, the disconnect device shall remain readily operable.
COMPACT DISCSRemove the CD from the case by holding it at the edges while pressing the center hole lightly. Do not touch the shiny surface of the CD, or bend the CD. Place the CD into the open tray positions with label facing up. A dirty CD may not play correctly. If a CD becomes dirty, wipe it with a soft cloth in a straight line from center to edge.
CASSETTE TAPESIf the tape is loose in its cassette, take up the slack by inserting a pencil in one of the reels and rotating if the tape is loose it may get stretched, cut, or caught in the cassette.Do not touch the tape surface.To prevent recording from being erased accidentally, remove the tab(s) A and B.To record after the tabs have been broken off. Reseal the slots A and B with a piece of adhesive tape.
CLEANING THE TAPE HEADS AND TAPE PATHFor continued high performance from your cassette deck, periodically clean the head, pinch roller, and capstan. We recommend cleaning after every 20-30 hours of operation. To clean the tape deck, press the Stop/Eject key to open the deck door. Remove any cassette in the deck. Make sure that the power to the unit is Off.
"The apparatus shall not be exposed to dripping or splashing and that no objects filled with liquids, such as vases, shall be placed on the apparatus."
TIPS AND TROUBLESHOOTING
SYMPTOM CAUSE / SOLUTION
Freezing / Problem occur during unit operation.
No Playback via USB Flash Player / USB / SD Card.
No Playback via USB Flash Player / USB / SD Card.
Should the unit Freeze or exhibit problem during operation, turn off the unit and disconnect the power supply and then restart again.
However due to the variance in the use of USB Flash Players software and capacity of the USB / SD Card, not all USB MP3 Players / USB / SD Card are compatible in the unit.
Due to the variance in MP3 or WMA transferring, some files may not be support.
Problem occur during playback of songs via USB / SD Card.
Should the unit exhibit problem via USB / SD Media, turn off the unit and disconnect the power supply and then restart again.
Not able to Encode (Record) to USB / SD Card
Should the memory in the USB / SD Media being used up, delete files and free up memory from Computer and do the Encoding (Recording) again.
Make sure the write protect tab of SD Card is NOT in LOCK position.
Make sure the USB Flash Player in TURN ON and NOT in HOLD position.
SPECIFICATION
Power Source AC: 230V ~ 50HzDC: 12V "UM-2" x 8pcs
Radio Frequency
Output Power
CD Playback
USB 2.0 and SD / MMC Card
iPod (Thru iPod Dock Connector to USB 2.0 Cable)
AM: 530 - 1600 kHzFM: 88 - 108 MHz
1.8W x 2
MP3 / CD-RW / CD-R / CD compatibleThis unit can read CD-RW discs, however not all types of CD-RW discs are compatible. Thus the full playability with all CD-RW disc is not guaranteed.
Capacity: 16MB / 32MB / 64MB / 128MB / 256MB / 512MB / 1GB / 2GBPlayback: In MP3 and WMA version.Make sure the file extension is in appropriate .mp3 or .wma.
The ipod initial setting must be use with a Window PC for MP3 playback.However not all ipod models is guaranteed to play on this unit.
HDD This unit cannot guarantee HDD playback through USB Connector.
Encoding (Recording) Speed CD to USB/SD: 128 kbps
PLAYING COMPACT DISCS WITH MP3 - GETTING STARTEDNOTE: Should skipping of tracks occur during CD playing, try turning the volume down. When CD is playing, do not open the CD Door.
1. Select FUNCTION SELECTOR SWITCH (1) to MODE.
2. Press the CD door open (5) button to open the CD DOOR. Put a MP3 Disc into the CD COMPARTMENT and close the CD DOOR.
3. When the CD DOOR is closed with a MP3 Disc inside, the disc will be played automatically.
4. If the CD DOOR is not closed or there is no disc inside, the DISPLAY will show "OPN" or "NOd" and go to "STOP" mode.
PLAYING USB / SD - GETTING STARTEDNOTE: It is not possible to operate the USB/SD functions when the CD door is open. Make sure the CD door is closed during USB/SD Playback.
PLAYBACK OF MP3 SONG VIA USB STORAGE MEDIAThis system is able to decode and playback all MP3 files which stored in the memory media with USB connector and SD Card.
1. Select FUNCTION SELECTOR SWITCH (1) to MODE.
2. Remove the rubber cover of the USB Connector
3. Before connecting the USB/SD media to the unit, make sure the port is in correct direction and will connect.
4. The system will automatically start reading the MP3 files in the USB /SD Storage Media.
Wrongly connect the USB Storage Media or SD/MMC Card upside down could damage the unit or the USB Storage Media or SD/MMC Card.
SWITCH FUNCTION BETWEEN CD/USBPress CD/USB/SD (17) button to switch function between CD/USB/SD.
PLAY/PAUSE MODE1. When the PLAY/PAUSE (15) button is pressed during "STOP" mode, the
first track will be played. The LCD DISPLAY will show the specific number of track being played.
Model no. : CDR-692 USB
BRAND
start the recording process. This process will record the signals that are received by the built-in CONDENSER MICROPHONE (2).
NOTE: Monitoring during MICROPHONE recording is not possible.
RECORDING FROM CD PLAYER1. Slide the FUNCTION SELECTOR SWITCH(1) to "CD" position.
2. Put a CD into the CD compartment with the label side upward.
3. Insert a blank cassette into the CASSETTE COMPARTMENT and press PAUSE (18) button of the cassette deck.
4. Press RECORD (23) button and PLAY (22) button simultaneously for recording stand-by. With the built-in ALC, the best recording quality is adjusted automatically.
5. Activate the CD players, playing in a desired TRACK as described in the COMPACT DISC PLATER OPERATION section. Release the PAUSE (18) button of the cassette deck to start recording.
6. To stop recording temporarily, press the PAUSE (18) button. To continue recording, press the PAUSE (18) button again.
7. Press STOP/EJECT (19) button of the cassette deck to stop recording.Then stop CD playback by pressing the CD STOP (14) button of the CD player.
OPERATION - USB, MP3, CD, CD-R, CD-RWPLAYING COMPACT DISCS - GETTING STARTEDNOTE: Should skipping of tracks occur during CD playing, try turning the volume down. When CD is playing, do not open the CD Door.
1. Select FUNCTION SELECTOR SWITCH (1) to MODE.
2. Press the CD door open (5) button to open the CD DOOR. Put a CD into the CD COMPARTMENT and close the CD DOOR.
3. When the CD DOOR is closed with a CD inside, the total number of tracks of the disc will be shown on the LCD DISPLAY.
4. If the CD DOOR is not closed or there is no disc inside the CD compartment, the DISPLAY will show "OPN" or "NOd" and go to "STOP"
CD/USB/SD
ENCODE
SD / MMC C
ARD 28
17
30
(The marking plate is placed at the bottom of the apparatus.)
29
1. Function Selector Switch2. Condenser Microphone3. Headphone Jack4. CD Compartment5. CD Door Open Button6. FM Antenna7. Tuning Dial Scale8. Band Switch9. Tuning Control10. CD DN/REW Button11. Volume Control12. Folder+ Button13. Prog/Repeat Button14. CD Stop Button15. CD Play / Pause Button
16. CD Up/F.F. Button17. CD/USB/SD Button18. Pause Button19. Stop / Eject Button20. Fast Forward Button21. Rewind Button22. Play Button23. Record Button24. Cassette Compartment25. CD Display26. Left Speaker27. Right Speaker28. USB Connector29. SD/MMC Card Slot30. Encode Button
4. SETUP AND INSTALLATION4.1 AC OPERATION1. Ensure the unit is off. To turn off the unit, slide the FUNCTION
SELECTOR SWITCH to the "OFF" position.2. Before operation please be sure that the voltage on the power
adapter corresponds to the AC voltage of your local area. Unravelthe AC Line Cord, insert one end into the AC jack on the set, and theother end into a standard AC outlet.
4.2 BATTERY OPERATION1. Ensure the unit is off. To turn off the unit, slide the FUNCTION
SELECTOR SWITCH to the "OFF" position.2. IMPORTANT:DisconnectthepoweradapterfromtheACmain
power.3. Open the BATTERY COMPARTMENT DOOR and insert C (UM-2)
size x 8 batteries (not included) making sure that the indicatedbattery polarity is observed.
4.3 CONNECTING HEADPHONES1. Decrease the volume to minimum.2. Connect the headphones to the PHONE jack.3. Increase the volume to the desired listening level.CAUTION: Avoid excessive volume for long periods of time as this canresult in hearing damage.
1886 Manual - JH 2009.11.09.indd 6-7 11/11/2009 1:20:06 PM
7
califone.com
8califone.com
9
5. BASIC OPERATION5.1 RADIO OPERATION
1. Slide the FUNCTION SELECTOR SWITCH to the RADIOposition.
2. Slide the BAND switch to the desired waveband. Turn theTUNING KNOB to your desired radio station.
3. Adjust the sound level by rotating the VOLUME CONTROLKNOB.
4. To turn off the radio, slide the FUNCTION SELECTOR SWITCHto OFF position.
5. For Stereo FM reception, slide the BAND Switch to the FMposition. The FM STEREO indicator will light when listening to astrong station that is broadcasting in stereo.
NOTES:• For FM, pull out the telescopic antenna. To improve FM reception
extend and reposition the antenna, reduce its length if the FM-signalis too strong (very close to a transmitter).
• For AM, SW1 & SW2, the set is provided with a built-in aerial, sothere is no need to use the telescopic aerial, the aerial can bedirected by turning the whole set.
5.2 CASSETTE OPERATION1. Press the STOP/EJECT button to open the cassette door.2. Insert a cassette tape into the CASSETTE COMPARTMENT and
push the cassette door to close.3. Slide the FUNCTION SELECTOR SWITCH to TAPE position.4. Press the PLAY button. Adjust the VOLUME CONTROL KNOB
to your desired listening level.5. To stop the tape, press the STOP/EJECT button.
FAST FORWARD AND REWIND• The tape can be fast FORWARDED or REWOUND by pressing the
FAST FORWARD button or REWIND button respectively.PAUSE FUNCTION• During playback or recording, the tape can be stopped temporarily
by pressing the PAUSE button. To continue playback or recording,press the PAUSE button once again.
AUTO STOP SYSTEM• When the tape runs to its end during playback or recording, the
cassette operation will be stopped automatically.CAUTION: To avoid damage to the cassette mechanism or to the cassette tapes, always press the STOP/EJECT button between each operation.
HANDLING CASSETTE TAPES • If the tape is loose in its cassette, take up the slack by inserting a
pencil in one of the reels and rotating if the tape is loose it may getstretched, cut, or caught in the cassette.
• Do not touch the tape surface.• To prevent recording from being erased accidentally, remove the
tab(s) A and B.• To record after the tabs have been broken off reseal the slots A and
B with a piece of adhesive tape.
CASSETTE DECK MAINTENANCEThe heads, capstan and pinch roller should be cleaned from time to time to prevent buildup of tape oxide, which degrades performance. We recommend cleaning after every 20-30 hours of operation.1. Press the Stop/Eject key to open the deck door.2. Remove cassette tape before cleaning.3. Clean the head of all visible, reddish-brown oxide with a cotton-
tipped swab moistened with a methyl alcohol or any solution specifi-cally manufactured for this purpose.
CAUTION: DO NOT scrape the head surface with hard, sharp or abra-sive objects. This will permanently damage the heads.4. Clean the pinch roller by scrubbing the surface of the roller with the
moistened swab. Rotate the roller by hand until the entire surface isclean.
5. Clean external case surfaces with a moist, soft cloth. Use only a milddetergent water solution.
HEAD DEMAGNETIZATIONIt is recommended that the tape heads be demagnetized from time to time. This eliminates residual magnetism which degrades sound reproduction and the recording function.1. After cleaning the heads and capstan, place the demagnetizer sev-
eral feet away from the cassette unit and plug it into an AC outlet.2. Follow the manufacturer’s operating instructions supplied with the
demagnetizer.
RECORDING FROM THE RADIO TO CASSETTE DECK1. Tune to a desired radio program as described in the "RADIO
OPERATION" section.2. Insert a blank cassette tape into the CASSETTE COMPARTMENT.3. Press the PAUSE button.4. Press the RECORD button. The PLAY button is engaged
simultaneously to start recording. With the built-in Automatic LevelControl (ALC), the best recording quality is automatically adjusted.Changing the volume level will not affect the recording.
1886 Manual - JH 2009.11.09.indd 8-9 11/11/2009 1:20:06 PM
8
califone.com
8califone.com
9
5. BASIC OPERATION5.1 RADIO OPERATION
1. Slide the FUNCTION SELECTOR SWITCH to the RADIOposition.
2. Slide the BAND switch to the desired waveband. Turn theTUNING KNOB to your desired radio station.
3. Adjust the sound level by rotating the VOLUME CONTROLKNOB.
4. To turn off the radio, slide the FUNCTION SELECTOR SWITCHto OFF position.
5. For Stereo FM reception, slide the BAND Switch to the FMposition. The FM STEREO indicator will light when listening to astrong station that is broadcasting in stereo.
NOTES:• For FM, pull out the telescopic antenna. To improve FM reception
extend and reposition the antenna, reduce its length if the FM-signalis too strong (very close to a transmitter).
• For AM, SW1 & SW2, the set is provided with a built-in aerial, sothere is no need to use the telescopic aerial, the aerial can bedirected by turning the whole set.
5.2 CASSETTE OPERATION1. Press the STOP/EJECT button to open the cassette door.2. Insert a cassette tape into the CASSETTE COMPARTMENT and
push the cassette door to close.3. Slide the FUNCTION SELECTOR SWITCH to TAPE position.4. Press the PLAY button. Adjust the VOLUME CONTROL KNOB
to your desired listening level.5. To stop the tape, press the STOP/EJECT button.
FAST FORWARD AND REWIND• The tape can be fast FORWARDED or REWOUND by pressing the
FAST FORWARD button or REWIND button respectively.PAUSE FUNCTION• During playback or recording, the tape can be stopped temporarily
by pressing the PAUSE button. To continue playback or recording,press the PAUSE button once again.
AUTO STOP SYSTEM• When the tape runs to its end during playback or recording, the
cassette operation will be stopped automatically.CAUTION: To avoid damage to the cassette mechanism or to the cassette tapes, always press the STOP/EJECT button between each operation.
HANDLING CASSETTE TAPES • If the tape is loose in its cassette, take up the slack by inserting a
pencil in one of the reels and rotating if the tape is loose it may getstretched, cut, or caught in the cassette.
• Do not touch the tape surface.• To prevent recording from being erased accidentally, remove the
tab(s) A and B.• To record after the tabs have been broken off reseal the slots A and
B with a piece of adhesive tape.
CASSETTE DECK MAINTENANCEThe heads, capstan and pinch roller should be cleaned from time to time to prevent buildup of tape oxide, which degrades performance. We recommend cleaning after every 20-30 hours of operation.1. Press the Stop/Eject key to open the deck door.2. Remove cassette tape before cleaning.3. Clean the head of all visible, reddish-brown oxide with a cotton-
tipped swab moistened with a methyl alcohol or any solution specifi-cally manufactured for this purpose.
CAUTION: DO NOT scrape the head surface with hard, sharp or abra-sive objects. This will permanently damage the heads.4. Clean the pinch roller by scrubbing the surface of the roller with the
moistened swab. Rotate the roller by hand until the entire surface isclean.
5. Clean external case surfaces with a moist, soft cloth. Use only a milddetergent water solution.
HEAD DEMAGNETIZATIONIt is recommended that the tape heads be demagnetized from time to time. This eliminates residual magnetism which degrades sound reproduction and the recording function.1. After cleaning the heads and capstan, place the demagnetizer sev-
eral feet away from the cassette unit and plug it into an AC outlet.2. Follow the manufacturer’s operating instructions supplied with the
demagnetizer.
RECORDING FROM THE RADIO TO CASSETTE DECK1. Tune to a desired radio program as described in the "RADIO
OPERATION" section.2. Insert a blank cassette tape into the CASSETTE COMPARTMENT.3. Press the PAUSE button.4. Press the RECORD button. The PLAY button is engaged
simultaneously to start recording. With the built-in Automatic LevelControl (ALC), the best recording quality is automatically adjusted.Changing the volume level will not affect the recording.
1886 Manual - JH 2009.11.09.indd 8-9 11/11/2009 1:20:06 PM
9califone.com
10califone.com
11
5. To activate recording, release the PAUSE button.6. To stop recording temporarily, press the PAUSE button. To continue
the recording, press the PAUSE button once again.7. Press the STOP/EJECT button to stop recording.8. When the tape runs to its end, the cassette operation will be stopped
automatically.
RECORDING FROM THE BUILT-IN CONDENSER MICROPHONE TO CASSETTE DECK1. Set the FUNCTION SELECTOR SWITCH to the TAPE position.2. Open the CASSETTE COMPARTMENT by pressing the STOP/
EJECT button and insert a blank tape into the CASSETTECOMPARTMENT. Close the door gently.
3. Press the RECORD button and PLAY button simultaneously to startthe recording process. This process will record the signals that arereceived by the built-in CONDENSER MICROPHONE.
4. Press the STOP/EJECT button when finished.NOTE: Monitoring during MICROPHONE recording is not possible.
RECORDING FROM THE CD PLAYER TO CASSETTE DECK1. Slide the FUNCTION SELECTOR SWITCH to "CD" position.2. Put a CD into the CD COMPARTMENT with the label side upward.3. Insert a blank cassette into the CASSETTE COMPARTMENT and
press PAUSE button of the cassette deck.4. Press RECORD button and PLAY button simultaneously for
recording stand-by. With the built-in ALC, the best recording quality isadjusted automatically.
5. Activate the CD players, playing in a desired TRACK as describedin the COMPACT DISC PLATER OPERATION section. Release thePAUSE button of the cassette deck to start recording.
6. To stop recording temporarily, press the PAUSE button. To continuerecording, press the PAUSE button again.
7. Press STOP/EJECT button of the cassette deck to stoprecording. Then stop CD playback by pressing the STOP button ofthe CD player.
5.3 CD OPERATION
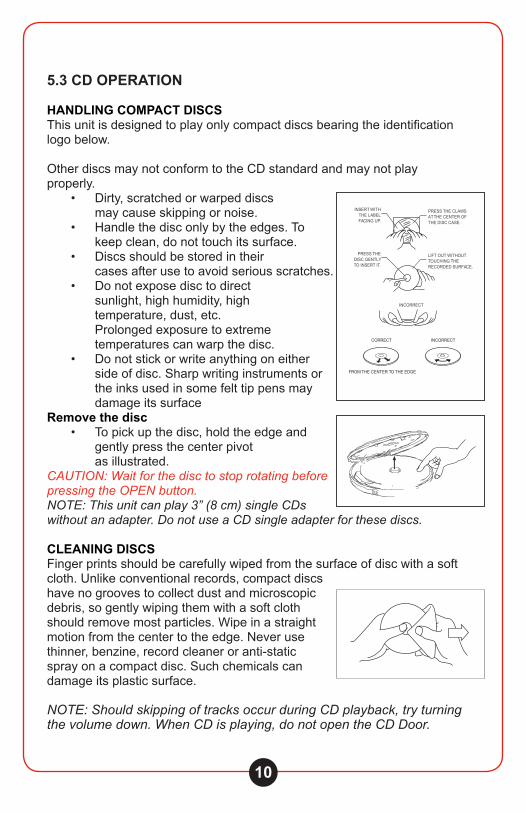
HANDLING COMPACT DISCSThis unit is designed to play only compact discs bearing the identification logo below.
Other discs may not conform to the CD standard and may not play properly.
• Dirty, scratched or warped discsmay cause skipping or noise.
• Handle the disc only by the edges. Tokeep clean, do not touch its surface.
• Discs should be stored in theircases after use to avoid serious scratches.
• Do not expose disc to directsunlight, high humidity, hightemperature, dust, etc.Prolonged exposure to extremetemperatures can warp the disc.
• Do not stick or write anything on eitherside of disc. Sharp writing instruments orthe inks used in some felt tip pens maydamage its surface
Remove the disc• To pick up the disc, hold the edge and
gently press the center pivotas illustrated.
CAUTION: Wait for the disc to stop rotating before pressing the OPEN button.NOTE: This unit can play 3” (8 cm) single CDs without an adapter. Do not use a CD single adapter for these discs.
CLEANING DISCSFinger prints should be carefully wiped from the surface of disc with a soft cloth. Unlike conventional records, compact discs have no grooves to collect dust and microscopic debris, so gently wiping them with a soft cloth should remove most particles. Wipe in a straight motion from the center to the edge. Never use thinner, benzine, record cleaner or anti-static spray on a compact disc. Such chemicals can damage its plastic surface.
NOTE: Should skipping of tracks occur during CD playback, try turning the volume down. When CD is playing, do not open the CD Door.
INSERT WITHTHE LABELFACING UP.
PRESS THE CLAWSAT THE CENTER OFTHE DISC CASE.
PRESS THEDISC GENTLYTO INSERT IT.
LIFT OUT WITHOUTTOUCHING THE RECORDED SURFACE.
INCORRECT
CORRECT
FROM THE CENTER TO THE EDGE
INCORRECT
1886 Manual - JH 2009.11.09.indd 10-11 11/11/2009 1:20:06 PM
10califone.com
10califone.com
11
5. To activate recording, release the PAUSE button.6. To stop recording temporarily, press the PAUSE button. To continue
the recording, press the PAUSE button once again.7. Press the STOP/EJECT button to stop recording.8. When the tape runs to its end, the cassette operation will be stopped
automatically.
RECORDING FROM THE BUILT-IN CONDENSER MICROPHONE TO CASSETTE DECK1. Set the FUNCTION SELECTOR SWITCH to the TAPE position.2. Open the CASSETTE COMPARTMENT by pressing the STOP/
EJECT button and insert a blank tape into the CASSETTECOMPARTMENT. Close the door gently.
3. Press the RECORD button and PLAY button simultaneously to startthe recording process. This process will record the signals that arereceived by the built-in CONDENSER MICROPHONE.
4. Press the STOP/EJECT button when finished.NOTE: Monitoring during MICROPHONE recording is not possible.
RECORDING FROM THE CD PLAYER TO CASSETTE DECK1. Slide the FUNCTION SELECTOR SWITCH to "CD" position.2. Put a CD into the CD COMPARTMENT with the label side upward.3. Insert a blank cassette into the CASSETTE COMPARTMENT and
press PAUSE button of the cassette deck.4. Press RECORD button and PLAY button simultaneously for
recording stand-by. With the built-in ALC, the best recording quality isadjusted automatically.
5. Activate the CD players, playing in a desired TRACK as describedin the COMPACT DISC PLATER OPERATION section. Release thePAUSE button of the cassette deck to start recording.
6. To stop recording temporarily, press the PAUSE button. To continuerecording, press the PAUSE button again.
7. Press STOP/EJECT button of the cassette deck to stoprecording. Then stop CD playback by pressing the STOP button ofthe CD player.
5.3 CD OPERATION
HANDLING COMPACT DISCSThis unit is designed to play only compact discs bearing the identification logo below.
Other discs may not conform to the CD standard and may not play properly.
• Dirty, scratched or warped discsmay cause skipping or noise.
• Handle the disc only by the edges. Tokeep clean, do not touch its surface.
• Discs should be stored in theircases after use to avoid serious scratches.
• Do not expose disc to directsunlight, high humidity, hightemperature, dust, etc.Prolonged exposure to extremetemperatures can warp the disc.
• Do not stick or write anything on eitherside of disc. Sharp writing instruments orthe inks used in some felt tip pens maydamage its surface
Remove the disc• To pick up the disc, hold the edge and
gently press the center pivotas illustrated.
CAUTION: Wait for the disc to stop rotating before pressing the OPEN button.NOTE: This unit can play 3” (8 cm) single CDs without an adapter. Do not use a CD single adapter for these discs.
CLEANING DISCSFinger prints should be carefully wiped from the surface of disc with a soft cloth. Unlike conventional records, compact discs have no grooves to collect dust and microscopic debris, so gently wiping them with a soft cloth should remove most particles. Wipe in a straight motion from the center to the edge. Never use thinner, benzine, record cleaner or anti-static spray on a compact disc. Such chemicals can damage its plastic surface.
NOTE: Should skipping of tracks occur during CD playback, try turning the volume down. When CD is playing, do not open the CD Door.
INSERT WITHTHE LABELFACING UP.
PRESS THE CLAWSAT THE CENTER OFTHE DISC CASE.
PRESS THEDISC GENTLYTO INSERT IT.
LIFT OUT WITHOUTTOUCHING THE RECORDED SURFACE.
INCORRECT
CORRECT
FROM THE CENTER TO THE EDGE
INCORRECT
1886 Manual - JH 2009.11.09.indd 10-11 11/11/2009 1:20:06 PM
11
PLAYING COMPACT DISCS1. Select FUNCTION SELECTOR SWITCH to MODE.2. Press the CD door open button to open the CD DOOR. Put a CD into
the CD COMPARTMENT and close the CD DOOR.3. When the CD DOOR is closed, the disc will automatically begin
playback.4. If the CD DOOR is not closed or there is no disc inside, the DISPLAY
will show "OPN" or "NOd".NOTE: This unit can read CD-RW discs, however not all types of CD-RW discs are compatible.
PLAYING COMPACT DISCS WITH MP3/WMA FILES1. Select FUNCTION SELECTOR SWITCH to MODE.2. Press the CD door open button to open the CD DOOR. Put an MP3
disc into the CD COMPARTMENT and close the CD DOOR.3. When the CD DOOR is closed, the disc will automatically begin
playback.4. Use the REW and F.F. buttons to skip between tracks. If some files
are within folders on the disc, use the FOLDER+ button to enter eachfolder and play the files.
5. If the CD DOOR is not closed or there is no disc inside, the DISPLAYwill show "OPN" or "NOd".
NOTE: This unit can read and play compact discs with MP3 and WMA files on them, however not all such discs and filetypes are compatible.
5.4 PLAYING FROM USB / SD STORAGE MEDIA
To play files from USB/SD storage media, follow these steps:1. Slide the FUNCTION SELECTOR SWITCH to the MODE position.2. Remove the rubber cover of the USB Connector3. Before connecting the USB/SD media to the unit, make sure the port
is in the correct direction and will connect. Then connect the USBStorage Media or SD card.
4. Press CD/USB/SD button to switch function between operation of theCD, USB, and SD card. The LCD will indicate with text and an icon,which mode it is in.
5. The system will automatically start playing the files on the USB / SDcard.
6. Use the REW and F.F. buttons to skip between tracks. If some filesare within folders on the disc, use the FOLDER+ button to enter eachfolder and play the files. The folder number will flash for 3 seconds.
NOTES:
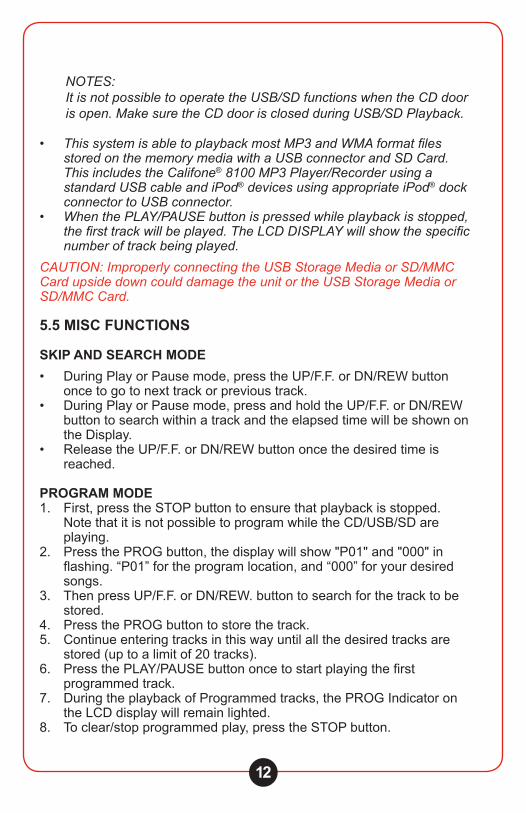
NOTES:It is not possible to operate the USB/SD functions when the CD dooris open. Make sure the CD door is closed during USB/SD Playback.
• This system is able to playback most MP3 and WMA format filesstored on the memory media with a USB connector and SD Card.This includes the Califone® 8100 MP3 Player/Recorder using astandard USB cable and iPod® devices using appropriate iPod® dockconnector to USB connector.
• When the PLAY/PAUSE button is pressed while playback is stopped,the first track will be played. The LCD DISPLAY will show the specificnumber of track being played.
CAUTION: Improperly connecting the USB Storage Media or SD/MMC Card upside down could damage the unit or the USB Storage Media or SD/MMC Card.
5.5 MISC FUNCTIONS
SKIP AND SEARCH MODE• During Play or Pause mode, press the UP/F.F. or DN/REW button
once to go to next track or previous track.• During Play or Pause mode, press and hold the UP/F.F. or DN/REW
button to search within a track and the elapsed time will be shown onthe Display.
• Release the UP/F.F. or DN/REW button once the desired time isreached.
PROGRAM MODE1. First, press the STOP button to ensure that playback is stopped.
Note that it is not possible to program while the CD/USB/SD areplaying.
2. Press the PROG button, the display will show "P01" and "000" inflashing. “P01” for the program location, and “000” for your desiredsongs.
3. Then press UP/F.F. or DN/REW. button to search for the track to bestored.
4. Press the PROG button to store the track.5. Continue entering tracks in this way until all the desired tracks are
stored (up to a limit of 20 tracks).6. Press the PLAY/PAUSE button once to start playing the first
programmed track.7. During the playback of Programmed tracks, the PROG Indicator on
the LCD display will remain lighted.8. To clear/stop programmed play, press the STOP button.
1886 Manual - JH 2009.11.09.indd 12-13 11/11/2009 1:20:06 PM
12
PLAYING COMPACT DISCS1. Select FUNCTION SELECTOR SWITCH to MODE.2. Press the CD door open button to open the CD DOOR. Put a CD into
the CD COMPARTMENT and close the CD DOOR.3. When the CD DOOR is closed, the disc will automatically begin
playback.4. If the CD DOOR is not closed or there is no disc inside, the DISPLAY
will show "OPN" or "NOd".NOTE: This unit can read CD-RW discs, however not all types of CD-RW discs are compatible.
PLAYING COMPACT DISCS WITH MP3/WMA FILES1. Select FUNCTION SELECTOR SWITCH to MODE.2. Press the CD door open button to open the CD DOOR. Put an MP3
disc into the CD COMPARTMENT and close the CD DOOR.3. When the CD DOOR is closed, the disc will automatically begin
playback.4. Use the REW and F.F. buttons to skip between tracks. If some files
are within folders on the disc, use the FOLDER+ button to enter eachfolder and play the files.
5. If the CD DOOR is not closed or there is no disc inside, the DISPLAYwill show "OPN" or "NOd".
NOTE: This unit can read and play compact discs with MP3 and WMA files on them, however not all such discs and filetypes are compatible.
5.4 PLAYING FROM USB / SD STORAGE MEDIA
To play files from USB/SD storage media, follow these steps:1. Slide the FUNCTION SELECTOR SWITCH to the MODE position.2. Remove the rubber cover of the USB Connector3. Before connecting the USB/SD media to the unit, make sure the port
is in the correct direction and will connect. Then connect the USBStorage Media or SD card.
4. Press CD/USB/SD button to switch function between operation of theCD, USB, and SD card. The LCD will indicate with text and an icon,which mode it is in.
5. The system will automatically start playing the files on the USB / SDcard.
6. Use the REW and F.F. buttons to skip between tracks. If some filesare within folders on the disc, use the FOLDER+ button to enter eachfolder and play the files. The folder number will flash for 3 seconds.
NOTES:
NOTES:It is not possible to operate the USB/SD functions when the CD dooris open. Make sure the CD door is closed during USB/SD Playback.
• This system is able to playback most MP3 and WMA format filesstored on the memory media with a USB connector and SD Card.This includes the Califone® 8100 MP3 Player/Recorder using astandard USB cable and iPod® devices using appropriate iPod® dockconnector to USB connector.
• When the PLAY/PAUSE button is pressed while playback is stopped,the first track will be played. The LCD DISPLAY will show the specificnumber of track being played.
CAUTION: Improperly connecting the USB Storage Media or SD/MMC Card upside down could damage the unit or the USB Storage Media or SD/MMC Card.
5.5 MISC FUNCTIONS
SKIP AND SEARCH MODE• During Play or Pause mode, press the UP/F.F. or DN/REW button
once to go to next track or previous track.• During Play or Pause mode, press and hold the UP/F.F. or DN/REW
button to search within a track and the elapsed time will be shown onthe Display.
• Release the UP/F.F. or DN/REW button once the desired time isreached.
PROGRAM MODE1. First, press the STOP button to ensure that playback is stopped.
Note that it is not possible to program while the CD/USB/SD areplaying.
2. Press the PROG button, the display will show "P01" and "000" inflashing. “P01” for the program location, and “000” for your desiredsongs.
3. Then press UP/F.F. or DN/REW. button to search for the track to bestored.
4. Press the PROG button to store the track.5. Continue entering tracks in this way until all the desired tracks are
stored (up to a limit of 20 tracks).6. Press the PLAY/PAUSE button once to start playing the first
programmed track.7. During the playback of Programmed tracks, the PROG Indicator on
the LCD display will remain lighted.8. To clear/stop programmed play, press the STOP button.
1886 Manual - JH 2009.11.09.indd 12-13 11/11/2009 1:20:06 PM
13
califone.com
15califone.com
14
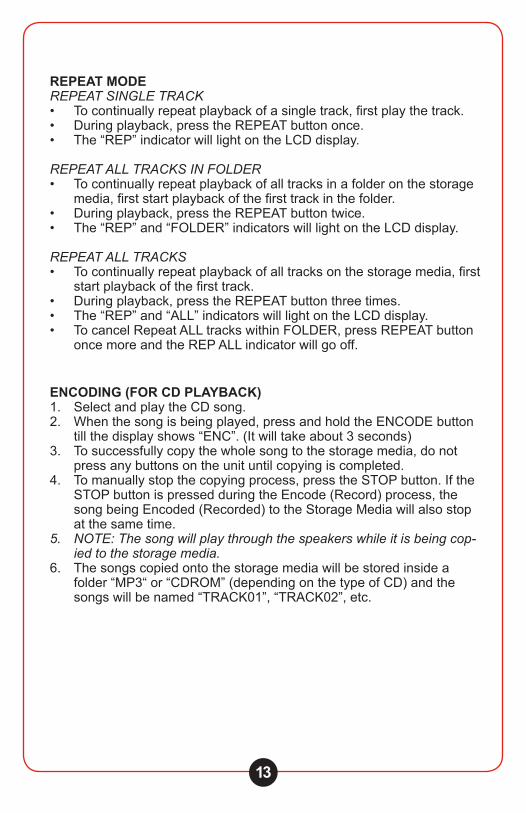
REPEAT MODEREPEAT SINGLE TRACK• To continually repeat playback of a single track, first play the track.• During playback, press the REPEAT button once.• The “REP” indicator will light on the LCD display.
REPEAT ALL TRACKS IN FOLDER• To continually repeat playback of all tracks in a folder on the storage
media, first start playback of the first track in the folder.• During playback, press the REPEAT button twice.• The “REP” and “FOLDER” indicators will light on the LCD display.
REPEAT ALL TRACKS• To continually repeat playback of all tracks on the storage media, first
start playback of the first track.• During playback, press the REPEAT button three times.• The “REP” and “ALL” indicators will light on the LCD display.• To cancel Repeat ALL tracks within FOLDER, press REPEAT button
once more and the REP ALL indicator will go off.
ENCODING (FOR CD PLAYBACK)1. Select and play the CD song.2. When the song is being played, press and hold the ENCODE button
till the display shows “ENC”. (It will take about 3 seconds)3. To successfully copy the whole song to the storage media, do not
press any buttons on the unit until copying is completed.4. To manually stop the copying process, press the STOP button. If the
STOP button is pressed during the Encode (Record) process, thesong being Encoded (Recorded) to the Storage Media will also stopat the same time.
5. NOTE: The song will play through the speakers while it is being cop-ied to the storage media.
6. The songs copied onto the storage media will be stored inside afolder “MP3“ or “CDROM” (depending on the type of CD) and thesongs will be named “TRACK01”, “TRACK02”, etc.
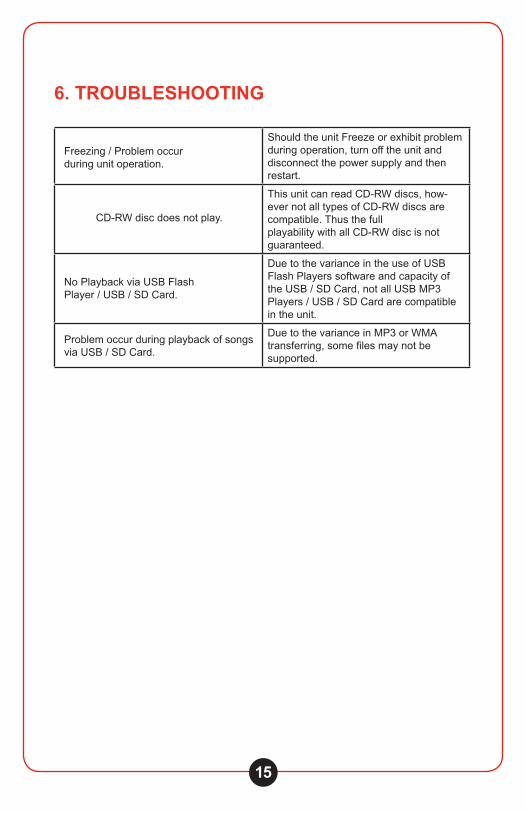
6. TROUBLESHOOTING
Freezing / Problem occur during unit operation.
Should the unit Freeze or exhibit problem during operation, turn off the unit and disconnect the power supply and then restart.
CD-RW disc does not play.
This unit can read CD-RW discs, how-ever not all types of CD-RW discs are compatible. Thus the full playability with all CD-RW disc is not guaranteed.
No Playback via USB Flash Player / USB / SD Card.
Due to the variance in the use of USB Flash Players software and capacity of the USB / SD Card, not all USB MP3 Players / USB / SD Card are compatible in the unit.
Problem occur during playback of songs via USB / SD Card.
Due to the variance in MP3 or WMA transferring, some files may not be supported.
1886 Manual - JH 2009.11.09.indd 14-15 11/11/2009 1:20:06 PM
14califone.comcalifone.com
17
8. WARRANTYCalifone warrants this product to be free from defective material and workmanship for one year from the purchase date. Our “Project Inter-cept” Customer Satisfaction program will replace defective parts and repair malfunctioning equipment under this warranty when the defect occurs under normal use.
All Damage Claims Must Be Made With the Freight Carrier
Notify the freight carrier immediately if you observe any damage to the shipping carton or product. Repack the unit in the carton and await inspection by the carrier’s claim agent. Notify your dealer of the pending freight claim.
Returning Your Unit for Service or Repairs
Should your unit require service, contact our Customer Service Depart-ment online at califone.com/techsupport or via email [email protected] or by phone at 800-722-0500 / 818-407-2400 to first obtain an RA (Return Authorization) number before returning it to Califone. The unit must be returned to our factory via prepaid transportation only after the factory issues an RA number, which must be clearly written on the out-side of the box.
califone.com
16
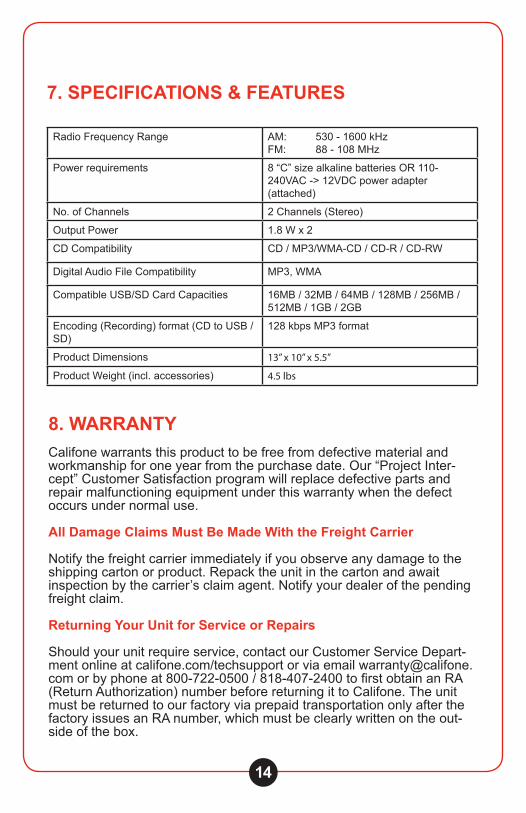
7. SPECIFICATIONS & FEATURES
Radio Frequency Range AM: 530 - 1600 kHzFM: 88 - 108 MHz
Power requirements 8 “C” size alkaline batteries OR 110-240VAC -> 12VDC power adapter (attached)
No. of Channels 2 Channels (Stereo)
Output Power 1.8 W x 2
CD Compatibility CD / MP3/WMA-CD / CD-R / CD-RW
Digital Audio File Compatibility MP3, WMA
Compatible USB/SD Card Capacities 16MB / 32MB / 64MB / 128MB / 256MB / 512MB / 1GB / 2GB
Encoding (Recording) format (CD to USB /SD)
128 kbps MP3 format
Product Dimensions 13” x 10” x 5.5”
Product Weight (incl. accessories) 4.5 lbs
1886 Manual - JH 2009.11.09.indd 16-17 11/11/2009 1:20:06 PM
califone.comcalifone.com
17
8. WARRANTYCalifone warrants this product to be free from defective material and workmanship for one year from the purchase date. Our “Project Inter-cept” Customer Satisfaction program will replace defective parts and repair malfunctioning equipment under this warranty when the defect occurs under normal use.
All Damage Claims Must Be Made With the Freight Carrier
Notify the freight carrier immediately if you observe any damage to the shipping carton or product. Repack the unit in the carton and await inspection by the carrier’s claim agent. Notify your dealer of the pending freight claim.
Returning Your Unit for Service or Repairs
Should your unit require service, contact our Customer Service Depart-ment online at califone.com/techsupport or via email [email protected] or by phone at 800-722-0500 / 818-407-2400 to first obtain an RA (Return Authorization) number before returning it to Califone. The unit must be returned to our factory via prepaid transportation only after the factory issues an RA number, which must be clearly written on the out-side of the box.
califone.com
16
7. SPECIFICATIONS & FEATURES
Radio Frequency Range AM: 530 - 1600 kHzFM: 88 - 108 MHz
Power requirements 8 “C” size alkaline batteries OR 110-240VAC -> 12VDC power adapter (attached)
No. of Channels 2 Channels (Stereo)
Output Power 1.8 W x 2
CD Compatibility CD / MP3/WMA-CD / CD-R / CD-RW
Digital Audio File Compatibility MP3, WMA
Compatible USB/SD Card Capacities 16MB / 32MB / 64MB / 128MB / 256MB / 512MB / 1GB / 2GB
Encoding (Recording) format (CD to USB /SD)
128 kbps MP3 format
Product Dimensions 13” x 10” x 5.5”
Product Weight (incl. accessories) 4.5 lbs
1886 Manual - JH 2009.11.09.indd 16-17 11/11/2009 1:20:06 PM
15califone.com
15califone.com
14
REPEAT MODEREPEAT SINGLE TRACK• To continually repeat playback of a single track, first play the track.• During playback, press the REPEAT button once.• The “REP” indicator will light on the LCD display.
REPEAT ALL TRACKS IN FOLDER• To continually repeat playback of all tracks in a folder on the storage
media, first start playback of the first track in the folder.• During playback, press the REPEAT button twice.• The “REP” and “FOLDER” indicators will light on the LCD display.
REPEAT ALL TRACKS• To continually repeat playback of all tracks on the storage media, first
start playback of the first track.• During playback, press the REPEAT button three times.• The “REP” and “ALL” indicators will light on the LCD display.• To cancel Repeat ALL tracks within FOLDER, press REPEAT button
once more and the REP ALL indicator will go off.
ENCODING (FOR CD PLAYBACK)1. Select and play the CD song.2. When the song is being played, press and hold the ENCODE button
till the display shows “ENC”. (It will take about 3 seconds)3. To successfully copy the whole song to the storage media, do not
press any buttons on the unit until copying is completed.4. To manually stop the copying process, press the STOP button. If the
STOP button is pressed during the Encode (Record) process, thesong being Encoded (Recorded) to the Storage Media will also stopat the same time.
5. NOTE: The song will play through the speakers while it is being cop-ied to the storage media.
6. The songs copied onto the storage media will be stored inside afolder “MP3“ or “CDROM” (depending on the type of CD) and thesongs will be named “TRACK01”, “TRACK02”, etc.
6. TROUBLESHOOTING
Freezing / Problem occur during unit operation.
Should the unit Freeze or exhibit problem during operation, turn off the unit and disconnect the power supply and then restart.
CD-RW disc does not play.
This unit can read CD-RW discs, how-ever not all types of CD-RW discs are compatible. Thus the full playability with all CD-RW disc is not guaranteed.
No Playback via USB Flash Player / USB / SD Card.
Due to the variance in the use of USB Flash Players software and capacity of the USB / SD Card, not all USB MP3 Players / USB / SD Card are compatible in the unit.
Problem occur during playback of songs via USB / SD Card.
Due to the variance in MP3 or WMA transferring, some files may not be supported.
1886 Manual - JH 2009.11.09.indd 14-15 11/11/2009 1:20:06 PM
Califone 1886 Rev 03 0316
We invite you to follow us.
Califone® International, LLC9135 Alabama Avenue, #B, Chatsworth, CA 91311
Tel (818)407-2400 | (800)722-0500Fax (818)407-2405 | (877)402-2248
Visit us online at califone.com


![Paperless Recorder GX10 - Yokogawa Paperless Recorder GX10 Unit: mm (approx. inch) SD 04L51B01-01EN [ Main Unit ] External Dimensions *1: with modules *2: without moduels Unless otherwise](https://static.documents.pub/doc/80x56/5b276dbd7f8b9a34208b6391/paperless-recorder-gx10-yokogawa-paperless-recorder-gx10-unit-mm-approx-inch.jpg)


