SSL VPN Service Note: This guide was written using Windows 7 ® with Internet Explorer® 8. The same principles and techniques are applicable to new versions of Internet Explorer® as well as Firefox®. Any significant differences will be outlined in this document if possible. Also note that other browsers or operating systems will present slightly different verbiage/dialogue boxes but the answers/options should follow the same principles. Based on your configuration, your browser, and other settings, the prompts that you receive and the order in which they are received are likely to be different than outlined below. Please “Allow” changes, click “Yes”, and allow the program to “Run” when prompted. To get started using the NASA IV&V/WVU SSL VPN service, you must verify that you meet all required criteria specified here: http://www.nasa.gov/centers/ivv/foremployees/employees_ra_requirements.html After you have verified the requirements, open the browser of your choice and enter the following in the address bar: https://remote.ivv.nasa.gov. Upon opening the page you will be presented with a window similar to the one below. Enter your Agency UserID and PIN+Token to sign in
Transcript
SSL VPN Service
Note: This guide was written using Windows 7 ® with Internet Explorer® 8. The same principles and techniques are applicable to new versions of Internet Explorer® as well as
Firefox®. Any significant differences will be outlined in this document if possible. Also note that other browsers or operating systems will present slightly different verbiage/dialogue boxes but the
answers/options should follow the same principles.
Based on your configuration, your browser, and other settings, the prompts that you receive and the order in which they are received are likely to be different than outlined below. Please “Allow”
changes, click “Yes”, and allow the program to “Run” when prompted.
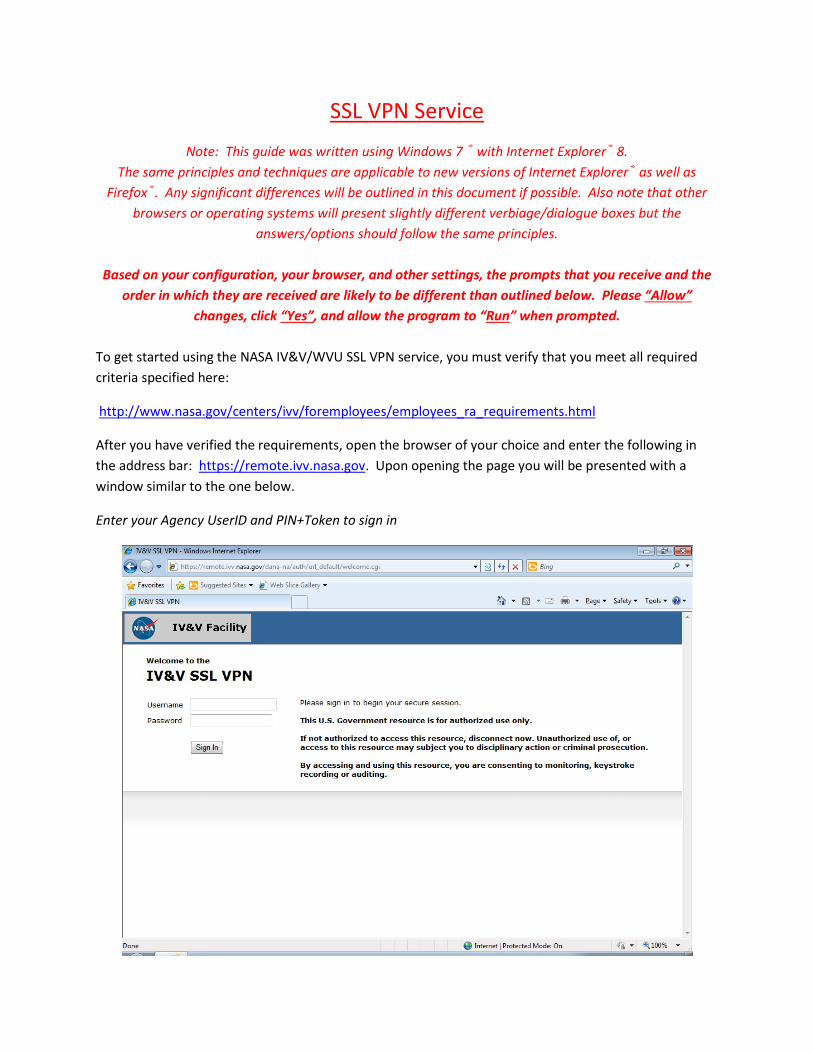
To get started using the NASA IV&V/WVU SSL VPN service, you must verify that you meet all required criteria specified here:
After you have verified the requirements, open the browser of your choice and enter the following in the address bar: https://remote.ivv.nasa.gov. Upon opening the page you will be presented with a window similar to the one below.
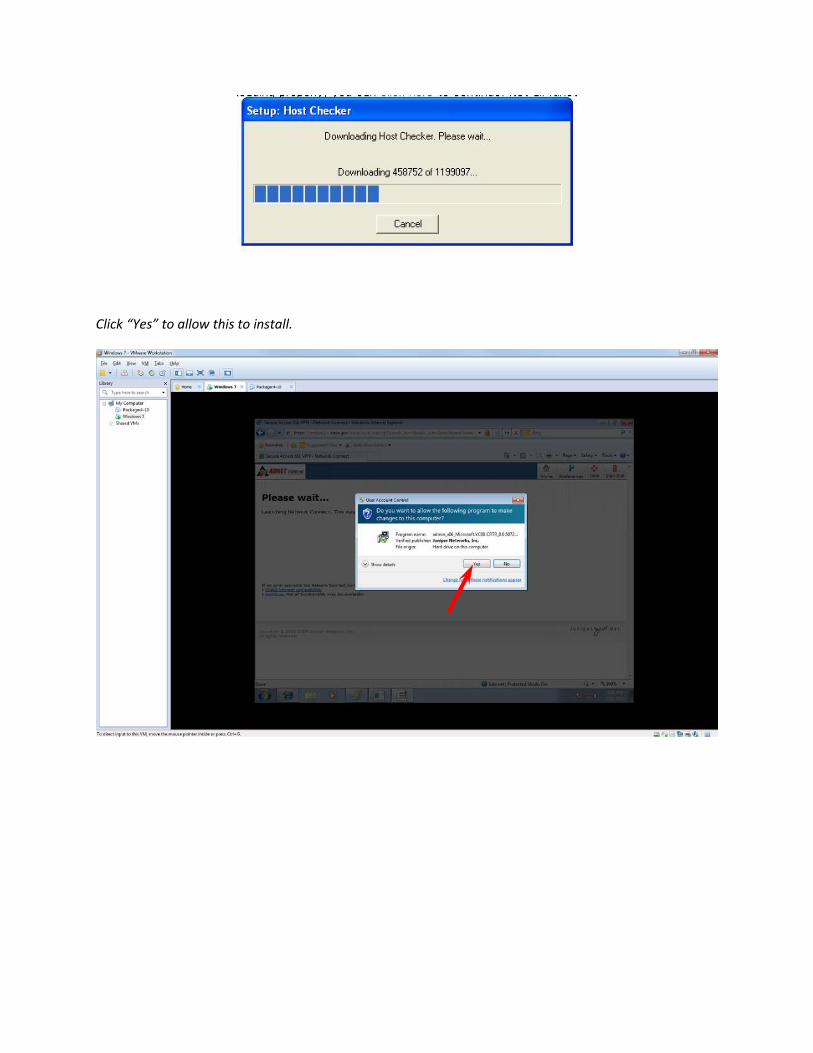
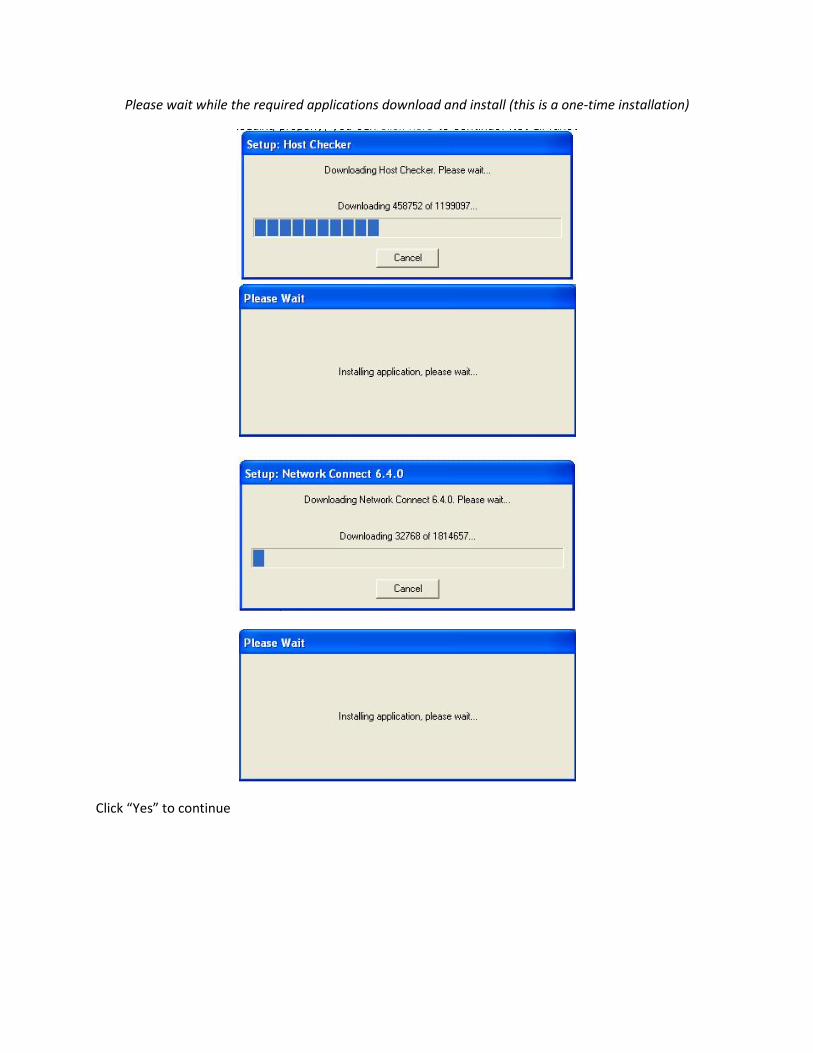
Please wait while the required applications download and install (this is a one-time installation)
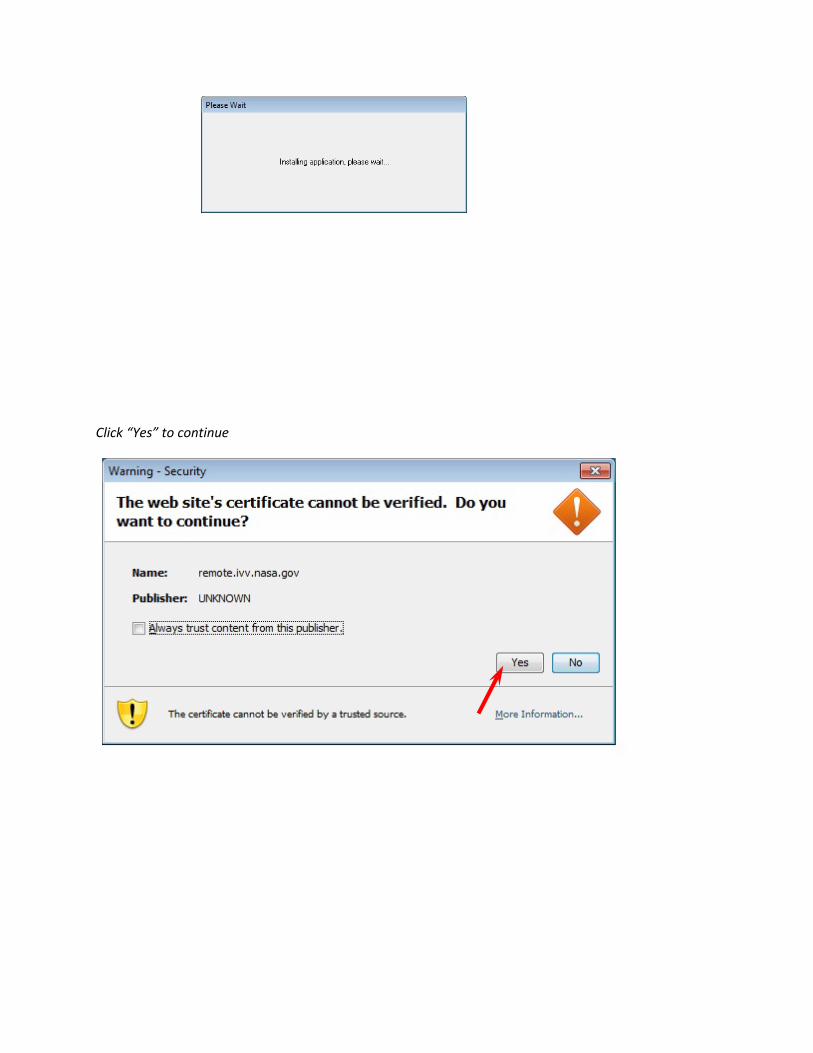
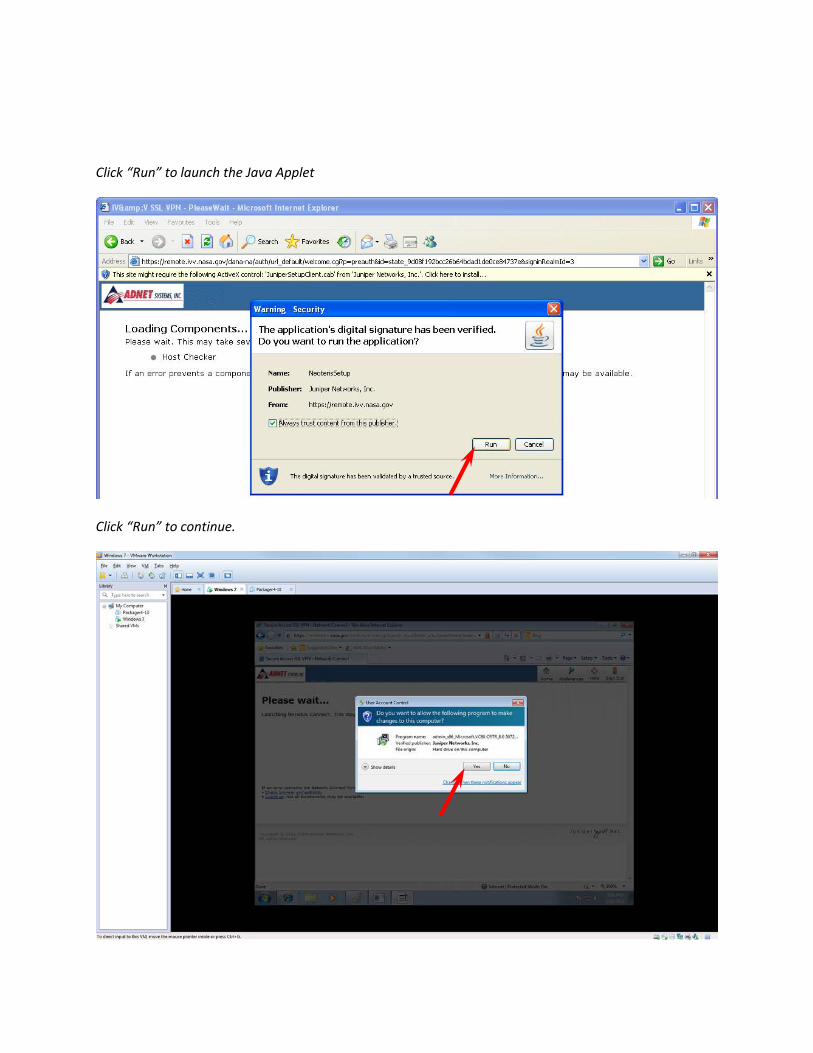
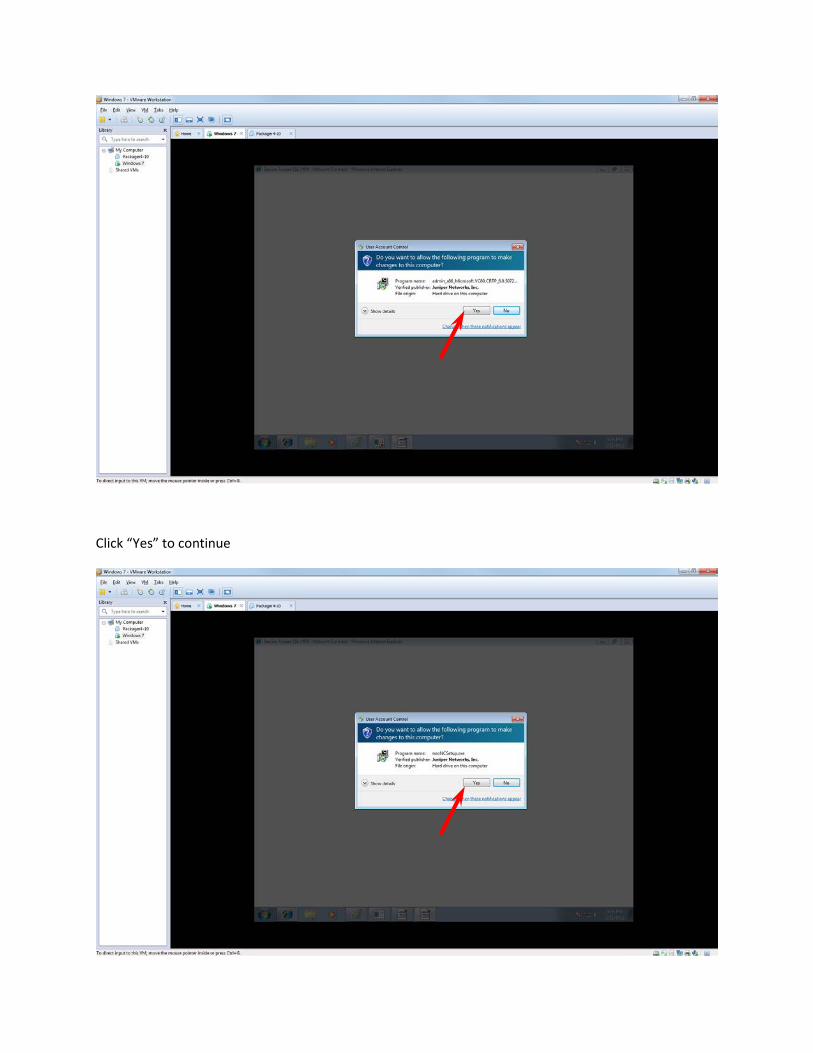
Click “Yes” to continue
Click “Yes” to continue
After installation completes, the modules will be loaded. If you pass the host integrity check, the Network Connect application will download and install (this is also a one-time installation). Should you fail the Host Integrity check sometime in the future, the Network Connect client will simply disconnect.
Host Checker loads and then verifies integrity of your system
The image above is typical for systems that do not meet the Host Integrity requirements. Please resolve the Reason(s) listed in the message and try again.
If your system meets all the requirements, the Network Connect software will begin installation
If your system meets the Host Integrity Requirements, you will receive this message. Click “Allow” to proceed.
Wait for connection.
After successfully connecting, your home page will load.
You should see the Network Connect icon in your system tray, pointed to above.
Clicking this icon displays several options including “Basic View,” which is displayed on the next page
This window will be displayed upon successfully establishing a connection.
Click the “Hide” button to hide this window, or click “Sign Out” to disconnect from the VPN.
Going back to the home page shows several available options as well as some default shortcuts provided automatically. The Web Based Email link will take supported users to the Outlook Web Access portal, allowing them to send and receive Email using their Exchange accounts. Clicking the “Web Based Email” link will generate a security certificate warning as seen on the next page.
Click “Continue” to access the Outlook Web Portal. You may also want to mark the option “Don’t warn me about problems with this server’s certificate.”
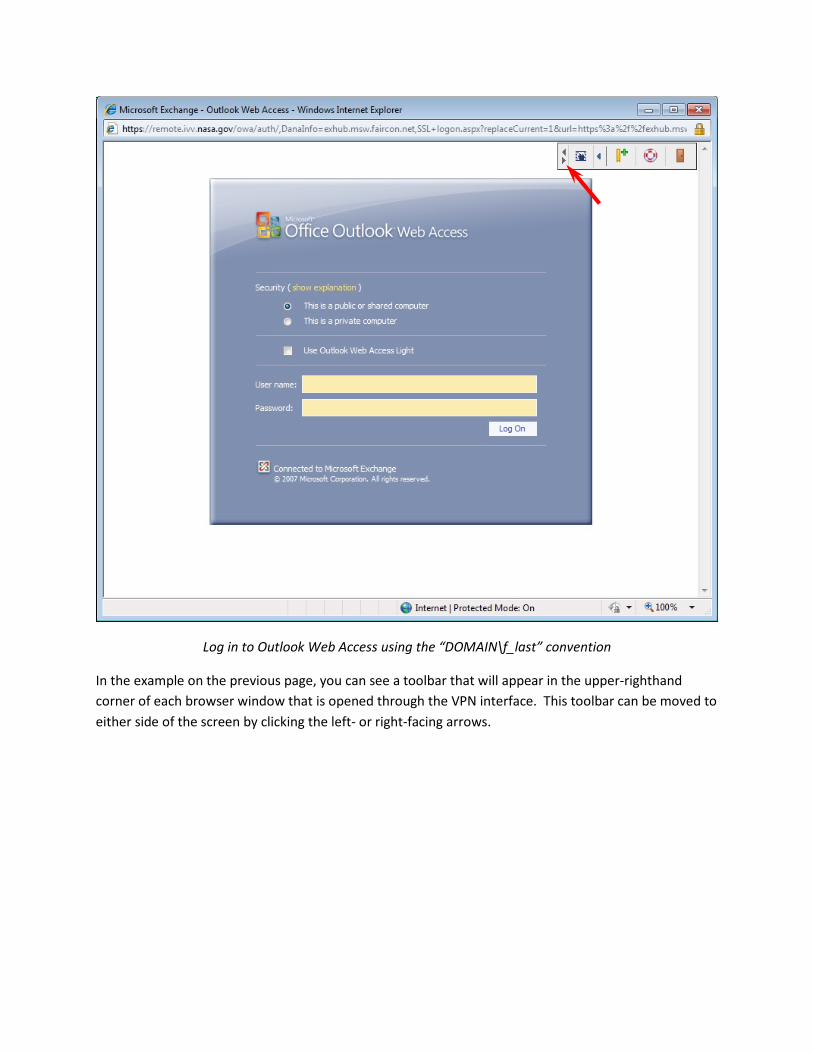
Log in to Outlook Web Access using the “DOMAIN\f_last” convention
In the example on the previous page, you can see a toolbar that will appear in the upper-righthand corner of each browser window that is opened through the VPN interface. This toolbar can be moved to either side of the screen by clicking the left- or right-facing arrows.
Other toolbar options (from left to right) include “Home,” “Expand/Collapse,” “Bookmark this Page,” “Help,” and “Sign Out”
One last item to cover is the ability to add other Web links to your VPN home page. This is done by clicking the “+” icon as seen in the image below:
The desired URL is the only information required to create a web link; however, you may wish to enter additional information such as name and description.
Click “Add Bookmark” to add the link to your home page.
In addition to the features explained here, users can utilize Microsoft’s Remote Desktop Client to access their ADNET-supported PCs or the Terminal Server located in the NASA IV&V Facility. All features previously available through VPN still function as normal.
For a list of compatible Anti-Virus clients, please visit:
http://www.nasa.gov/centers/ivv/foremployees/employees_ra_requirements.html Should you encounter difficulty, please contact: