1 Inventory: Using CounterPoint Standard Inventory Reports Overview NOTE: This section briefly describes each report on the Inventory / Reports / Standard menu. Some of these reports are described in other documents. If the detailed information on how to print a report can be found in another document, a reference tells you where to find these instructions. Otherwise, the report is described later in this document. Barcode List Prints a list of item and/or cell barcodes. (See the Barcode List section on page 3 for more information.) This report also allows you to print a list of items that don’t have barcodes to help you identify missing barcodes. Inventory Aging Report Lets you see “how old” your inventory is. (See Inventory Aging Report on page 4 for more information.) Inventory Analysis Report Shows the rates of movements for items, based on past performance. (See the Inventory Analysis Report section on page 6 for more information.) This report allows you to focus on fast or slow moving items, and on potentially understocked or overstocked items, in order to make merchandising and purchasing decisions. For example, you could print the report for the top 30% of your items, based on year-to- date sales , that will run out of stock in the next month. Inventory History Report Shows all transactions that have been posted for your inventory items. This report is available only if you specified in Setup / Inventory / Control to keep inventory history. Printing the Inventory History Report: See “Printing the Inventory History Report” in Working with Inventory History for more information). Inventory Status Report Shows current inventory levels for your inventory items. (See the Inventory Status Report section on page 11 for more information.) This report can contain all of the information stored in each item’s inventory record(s).
Transcript
1
Inventory: Using CounterPoint
Standard Inventory Reports Overview
NOTE: This section briefly describes each report on the Inventory / Reports / Standard menu. Some of these reports are described in other documents. If the detailed information on how to print a report can be found in another document, a reference tells you where to find these instructions. Otherwise, the report is described later in this document.
Barcode List Prints a list of item and/or cell barcodes. (See the Barcode List section on page 3 for more information.)
This report also allows you to print a list of items that don’t have barcodes to help you identify missing barcodes.
Inventory Aging Report Lets you see “how old” your inventory is. (See Inventory Aging Report on page 4 for more information.)
Inventory Analysis Report Shows the rates of movements for items, based on past performance. (See the Inventory Analysis Report section on page 6 for more information.)
This report allows you to focus on fast or slow moving items, and on potentially understocked or overstocked items, in order to make merchandising and purchasing decisions.
For example, you could print the report for the top 30% of your items, based on year-to-date sales , that will run out of stock in the next month.
Inventory History Report Shows all transactions that have been posted for your inventory items.
This report is available only if you specified in Setup / Inventory / Control to keep inventory history.
Printing the Inventory History Report: See “Printing the Inventory History Report” in Working with Inventory History for more information).
Inventory Status Report Shows current inventory levels for your inventory items. (See the Inventory Status Report section on page 11 for more information.)
This report can contain all of the information stored in each item’s inventory record(s).
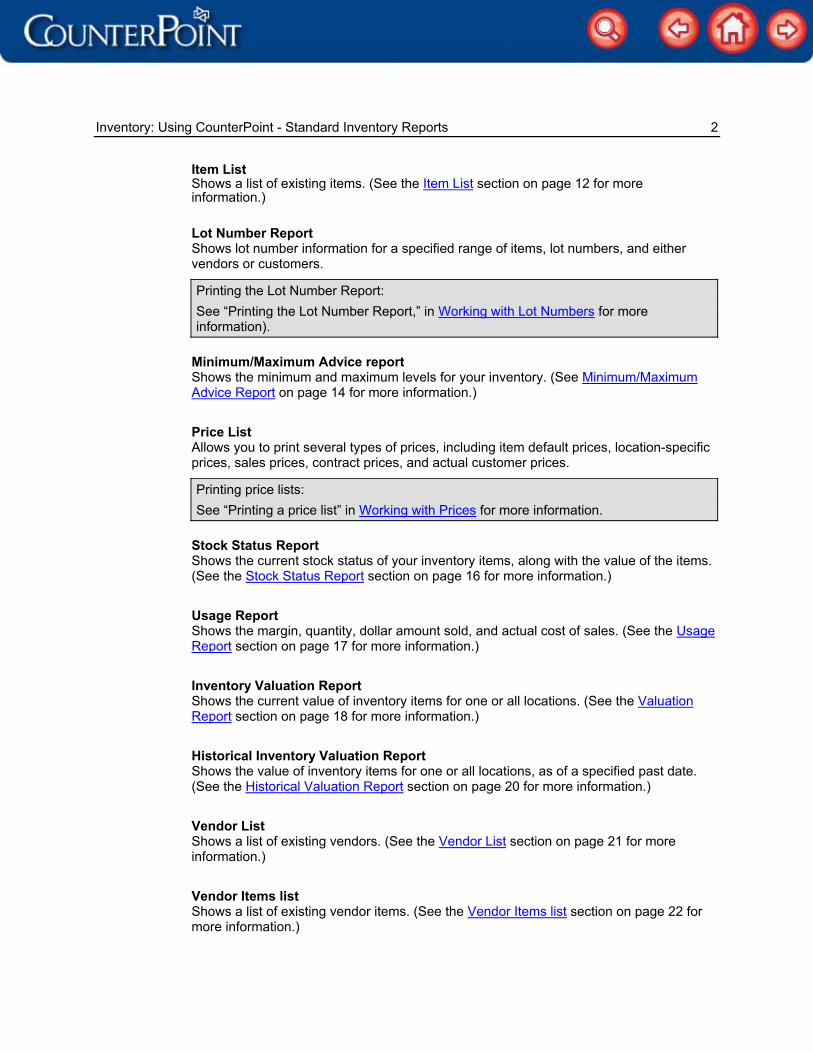
Inventory: Using CounterPoint - Standard Inventory Reports 2
Item List Shows a list of existing items. (See the Item List section on page 12 for more information.)
Lot Number Report Shows lot number information for a specified range of items, lot numbers, and either vendors or customers.
Printing the Lot Number Report: See “Printing the Lot Number Report,” in Working with Lot Numbers for more information).
Minimum/Maximum Advice report Shows the minimum and maximum levels for your inventory. (See Minimum/Maximum Advice Report on page 14 for more information.)
Price List Allows you to print several types of prices, including item default prices, location-specific prices, sales prices, contract prices, and actual customer prices.
Printing price lists: See “Printing a price list” in Working with Prices for more information.
Stock Status Report Shows the current stock status of your inventory items, along with the value of the items. (See the Stock Status Report section on page 16 for more information.)
Usage Report Shows the margin, quantity, dollar amount sold, and actual cost of sales. (See the Usage Report section on page 17 for more information.)
Inventory Valuation Report Shows the current value of inventory items for one or all locations. (See the Valuation Report section on page 18 for more information.)
Historical Inventory Valuation Report Shows the value of inventory items for one or all locations, as of a specified past date. (See the Historical Valuation Report section on page 20 for more information.)
Vendor List Shows a list of existing vendors. (See the Vendor List section on page 21 for more information.)
Vendor Items list Shows a list of existing vendor items. (See the Vendor Items list section on page 22 for more information.)
Inventory: Using CounterPoint - Standard Inventory Reports 3
Barcode List Select Inventory / Reports / Standard / Vendor items.
Shows a list of existing vendor items. (See the Vendor Items list section on page 22 for more information.)
6. Items to print Select: Gridded To include only gridded items. Non-gridded To include only non-gridded items.
Press F1 for All, to include both gridded and non-gridded items.
7. Include items if Select: Barcodes exist To include only items with barcodes. No barcodes exist To include only items without barcodes.
Press F1 for All, to include items regardless of whether they have barcodes.
Inventory: Using CounterPoint - Standard Inventory Reports 4
This report allows you see, for example, “just categories where I have more than $500 that is more than 60 days old”, or “items that have been sitting here since last year.”
Aging can be performed at an item level, or summarized by category or by vendor. Flexible aging periods let you see inventory that is, for example, “current”, “over 30”, “over 60”, etc. The “age” of an item is based on when the goods were received (or transferred in or adjusted up). By way of example, if you have two of an item, and one was received yesterday, and the previous receiving was 40 days ago, then one of those is “current.” If you have previously saved parameters for this report, these parameters display automatically.
Press: F1 To clear the default screen to enter new report parameters. F2 To change the aging periods. (See Aging periods on page 5 for more
information.)
2. Location If you aren’t using multi-location (as specified in Setup / Inventory / Control), this field defaults to the location specified as the Main location in Setup / Inventory / Control, and cannot be changed.
To print the report for a single location, enter the location.
Press: F1 For All locations. F2 To enter a location group instead of a location.
Inventory: Using CounterPoint - Standard Inventory Reports 5
2. Location group Field 2 appears as Location group if you press F2 at Location.
To print the report for a location group, enter the location group. If a location group is selected, all locations in the group are summarized on the report.
Press F2 to enter a single location instead of a location group.
7. Print in order by Select: Item To print the report in order by item. Category To print the report in order by category. Vendor To print the report in order by vendor. Accont code To print the report in order by account code.
8. Show cost or qty ? Select whether to show the Cost, Quantity, or Both on this report.
9. Show percentages ? Specify whether to print percentage breakouts for each aged period.
10. Show item detail ? When printing the report in order by Category, Vendor, or Account code, specify whether to print the individual items in that group. When printing the report in order by Item, this field defaults to Yes and cannot be changed.
11. Include [items/categories/vendors/account codes] that meet or exceed: Select the items (or group of items) to include on the report based on their Cost on hand of or Quantity on hand of during or before a particular aging period.
If you specified to print the report in Detail, the items that meet the criteria will be included on the report. If you are NOT printing the report in Detail, the groups (of categories, vendors, or account codes) that meet the criteria will be included on the report.
NOTE: Because one or more items in a group may meet the criteria, all items are included in the group and then the group as a whole is evaluated to see if it meets your criteria. This means it is possible to get different totals depending on whether you are reporting at the item level or at the group level.
Aging periods Press F2 to change the aging periods.
Inventory: Using CounterPoint - Standard Inventory Reports 6
Prd 1 Days Enter the number of days to include in the first aging period, or press F1 to default to 30. The label defaults to Current and cannot be changed.
Prd 2 Days Enter the number of days to include in the second aging period, or press F1 to default to 60. The label reflects the day range you specified for this aging period.
Prd 3 Days Enter the number of days to include in the third aging period, or press F1 to default to 90. The label reflects the day range you specified for this aging period.
Prd 4 Days Enter the number of days to include in the fourth aging period, or press F1 to default to 120. Press F2 in you only want to use four aging periods (if you only use four aging periods, the number of days defaults to 999). The label reflects the day range you specified for this aging period.
Prd 5 Days Entry in this field is not allowed. If you are only using four aging periods, this field displays as a blank number of days. Otherwise, the number of days defaults to 999 and cannot be changed. The label reflects the day range you specified for this aging period.
If you have previously saved parameters for this report, these parameters display automatically.
Inventory: Using CounterPoint - Standard Inventory Reports 7
Press F1 to clear the default screen to enter new report parameters.
2. Location If you aren’t using multi-location (as specified in Setup / Inventory / Control), this field defaults to the location specified as the Main location in Setup / Inventory / Control, and cannot be changed.
To print the report for a single location, enter the location.
Press: F1 For All locations. F2 To enter a location group instead of a location.
2. Location group Field 2 appears as Location group if you press F2 at Location.
To print the report for a location group, enter the location group.
Press F2 to enter a single location instead of a location group.
Categ summary only ? Specify whether to print only subtotals for the specified categories, with no item detail.
7. Reporting period The current system date displays as the default for the ending date.
Enter the beginning and ending dates of the period to include.
At the first field, press: F1 To use the beginning date of the current year. F2 To use the beginning date of the current month. 8. Print in order by Select: Category To print the report in order by category. Vendor To print the report in order by vendor. Category rank To print the report in order by descending category rank (based on
the method specified in the next field). Vendor rank To print the report in order by descending vendor rank (based on the
method specified in the next field).
9. Ranking method Select: Quantity To rank the items in order by Quantity. Sales To rank the items in order by Sales. Cost To rank the items in order by Cost. Profit To rank the items in order by Profit.
If you specified to print in order by Category or Vendor, leave <blank> for None, if you don’t want to rank the items.
Inventory: Using CounterPoint - Standard Inventory Reports 8
Ranking basis This field doesn’t appear if you specified a ranking method of None in field 9. If you specified a ranking method of Sales or Profit, this field defaults to Reporting period, and cannot be changed.
Select: On-hand To rank secondarily by amount On-hand. Reporting period To rank secondarily by the Reporting period.
10. Report format Select a Full or Brief report format:
Format Description Full Shows complete analysis figures for the reporting period. Brief Shows only one line per item, and provides only limited figures, without
pennies or fractional quantities.
11. Print top or bottom rankings ? (Not applicable) displays if you specified a ranking method of None in field 9. Select: Top To print only top-ranked items. Bottom To print only bottom-ranked items.
Press F1 for All items.
Top/Bottom … percent This field appears only if you specify to print top or bottom rankings.
Enter the top or bottom percent of items to include.
12. Print under or overstocked items ? Select: Understocked To print only Understocked items. Overstocked To print only Overstocked items. Press F1 for All items.
Print if qty-on-hand will [not] last This field appears only if you selected to print only understocked or overstocked items.
Enter the number of weeks to use in evaluating your stock position.
If you selected to print only understocked items, an item will print if its movement rate (based on the quantity sold during the reporting period) is such that its current quantity on-hand won’t last longer than the length of time you enter here.
If you selected to print only overstocked items, an item will print if its current quantity on-hand will last longer than the length of time you enter here.
Inventory: Using CounterPoint - Standard Inventory Reports 9
13. Print fast or slow turning items ? Select: Fast To print only Fast turning items. Slow To print only Slow turning items.
Press F1 for All items.
Print annual turn rates more/less than This field appears only if you specified to print either Fast or Slow turning items in the preceding field.
Enter the cutoff turn rate for this report.
The turn rate is the number of times per year that an item’s average quantity on-hand is sold.
If you selected to print fast turning items, an item will print if its turn rate is greater than the value entered here.
If you selected to print slow turning items, an item will print if its turn rate is less than the value entered here.
Save as/Replace default report parameters ? This question appears if you entered new parameters or changed existing parameters for this report.
Specify whether to save these report parameters for future use.
Inventory Analysis Report headings This section describes the headings and information that print on the Inventory Analysis Report.
Categ, Sub-cat, Item-#, Description Item information found in the Item file.
(These fields print first if you specified to print the report in category/item order.)
Rank The assigned rank (1 is the highest) of this item with respect to all other items included on the report.
(Rank prints first, instead of category and item number, if you print the report in rank order.)
Value The value on which the ranking is based.
For example, if Quantity is the ranking method chosen, that amount prints here.
Qty-On-Hand, Qty-Commit, Qty-On-Order The current totals of this item for all applicable locations.
Inventory: Using CounterPoint - Standard Inventory Reports 10
Retail-Val The potential sale amount to be realized if all on-hand inventory is sold at list price.
(This field is computed by multiplying the current quantity on-hand by the list price (Price-1).)
Profit-Val The potential profit to be realized if all on-hand inventory is sold at list price.
(This field is computed by subtracting the cost of the current on-hand inventory from the retail value.)
Pft-% The potential gross profit margin based on Retail Value and Profit Value.
Qty-Sold The quantity sold during the reporting period of this item based on the totals for all applicable locations
Disc-Amt The difference between the potential retail sales and actual sales during the reporting period.
(Potential retail sales is the sale amount that would have been realized if the entire quantity had been sold at list price.)
Disc-% The percentage of discount based on retail sales during the reporting period and the discount amount.
Sales The sales during the reporting period for this item, based on the totals for all applicable locations.
Profit/Pft-% The difference between sales and cost for this item during the reporting period, based on the totals for all applicable locations.
Months Supply The amount of time that the current quantity on-hand will last, assuming an inventory movement rate based on quantity sold during the reporting period.
Turn Rate The number of times per year that the average quantity on-hand will be sold, assuming an inventory movement rate based on quantity sold during the reporting period.
Inventory: Using CounterPoint - Standard Inventory Reports 11
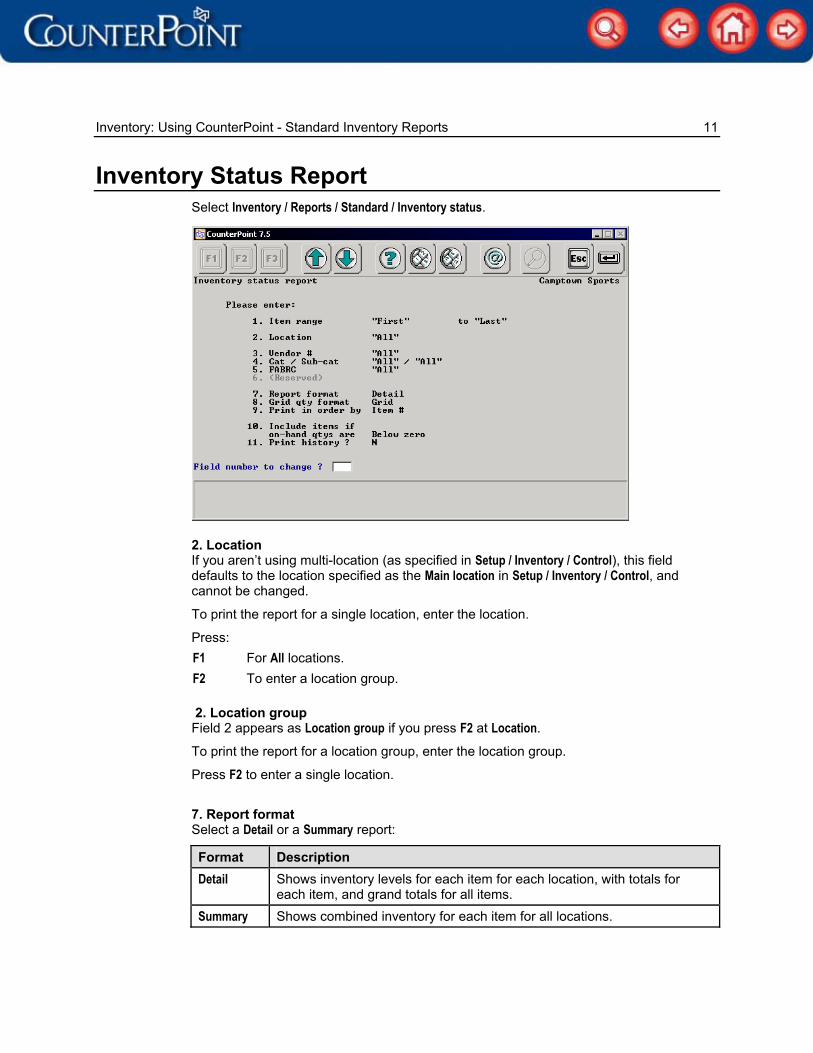
Inventory Status Report Select Inventory / Reports / Standard / Inventory status.
2. Location If you aren’t using multi-location (as specified in Setup / Inventory / Control), this field defaults to the location specified as the Main location in Setup / Inventory / Control, and cannot be changed.
To print the report for a single location, enter the location.
Press: F1 For All locations. F2 To enter a location group.
2. Location group Field 2 appears as Location group if you press F2 at Location.
To print the report for a location group, enter the location group.
Press F2 to enter a single location.
7. Report format Select a Detail or a Summary report:
Format Description Detail Shows inventory levels for each item for each location, with totals for
each item, and grand totals for all items. Summary Shows combined inventory for each item for all locations.
Inventory: Using CounterPoint - Standard Inventory Reports 12
9. Print in order by Select:
Item # To print the report in order by Item #. Category To print the report in order by Category. Vendor To print the report in order by Vendor.
11. Print history ? Specify whether to print monthly history figures for each item.
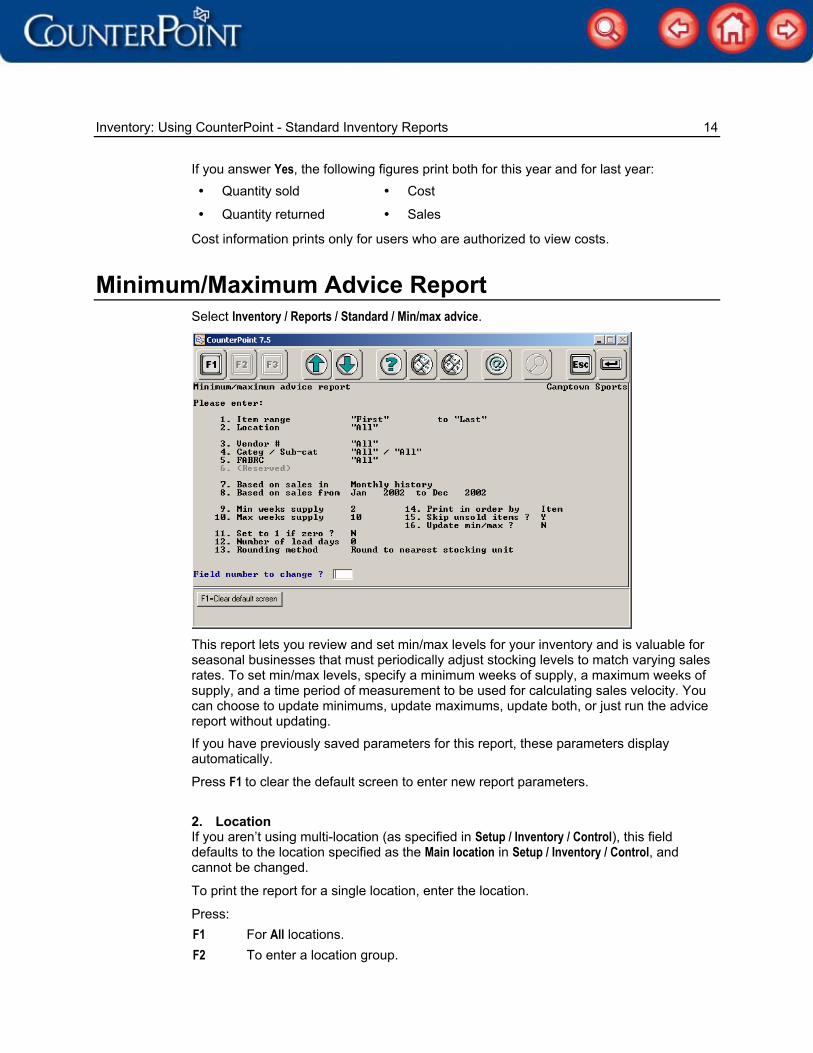
If you answer Yes, the following figures print both for this year and for last year:
Quantity sold
Quantity returned
Cost
Sales Cost information prints only for users who are authorized to view costs.
Item List Select Inventory / Reports / Standard / Items.
1. Print in order by Select: Item number To print the list in order by Item #. Description To print the list in order by Description.
2. Starting/Ending desc This field appears as Starting desc and Ending desc if you specified to print in order by Description. Otherwise, this field appears as Item range. Enter the starting and ending descriptions to include. Press F1 for the First (or Last) existing description.
Inventory: Using CounterPoint - Standard Inventory Reports 13
3. Item type Select: Inventory To include only Inventory item types. Non-inventory To include only Non-inventory item types. Service To include only Service item types. Text To include only Text item types. Consignment To include only Consignment item types. Discount To include only Discount item types. Gift certificate To include only Gift certificate item types. Rental To include only Rental item types.
Press F1 to include All item types.
8. Report format Select a Full or Brief report format:
Format Description Full Shows full item information.
Can include item history.
Brief For each item, shows only stocking unit, category, sub-category, vendor, Price-1, regular price, total quantity on-hand, and total quantity on order.
Can include discontinued items.
9. Print discontinued items ? Specify whether to include discontinued items on the list.
10. Print substitute items ? (Not applicable) displays if this is a Brief format report.
Specify whether to include substitute items on the list.
11. Print alternate units ? (Not applicable) displays if this is a Brief format report.
Specify whether to include alternate units on the list.
12. Print notes ? (Not applicable) displays if this is a Brief format report. Specify whether to include item notes on the list.
13. Print history ? (Not applicable) displays if this is a Brief format report.
Specify whether to include item monthly history on the list.
Inventory: Using CounterPoint - Standard Inventory Reports 14
If you answer Yes, the following figures print both for this year and for last year: Quantity sold
Quantity returned
Cost
Sales
Cost information prints only for users who are authorized to view costs.
This report lets you review and set min/max levels for your inventory and is valuable for seasonal businesses that must periodically adjust stocking levels to match varying sales rates. To set min/max levels, specify a minimum weeks of supply, a maximum weeks of supply, and a time period of measurement to be used for calculating sales velocity. You can choose to update minimums, update maximums, update both, or just run the advice report without updating.
If you have previously saved parameters for this report, these parameters display automatically.
Press F1 to clear the default screen to enter new report parameters.
2. Location If you aren’t using multi-location (as specified in Setup / Inventory / Control), this field defaults to the location specified as the Main location in Setup / Inventory / Control, and cannot be changed.
To print the report for a single location, enter the location.
Press: F1 For All locations. F2 To enter a location group.
Inventory: Using CounterPoint - Standard Inventory Reports 15
2. Location group Field 2 appears as Location group if you press F2 at Location.
To print the report for a location group, enter the location group.
Press F2 to enter a single location.
7. Based on sales in Specify whether your report is based on Inventory history or Monthly history.
8. Based on sales from / to Specify the date range for which historical sales will be analyzed.
If sales are based on Inventory history, enter the dates in MMDDYY format. If sales are based on Monthly history, enter a year/month combination.
9. Min weeks supply Enter the minimum number of weeks’ supply that you need, or press Enter for 0.
10. Max weeks supply Enter the maximum number of weeks’ supply that you need.
11. Set to 1 if zero ? Specify whether you want CounterPoint to assume a minimum or maximum quantity of 1 if the report results in zero quantities needed.
12. Number of lead days Enter the number of days you need in order for the shipment to arrive on time.
If you enter a number of lead days, this number will be used for all items in the specified range. Alternatively, you can press F1 to use the number of lead days specified in the primary vendor's vendor item record.
For example, suppose you specified a minimum supply to last 1 week, and a maximum supply to last 4 weeks. If you specify a lead time of 7 days, CounterPoint will calculate the minimum quantity to actually last 2 weeks (not 1) and the maximum quantity to last 5 weeks (not 4).
13. Rounding method Select how CounterPoint should handle fractional quantities, and whether to adjust for the prime vendor's purchase unit:
Round to nearest stock unit Round to nearest vendor multiple Increase to next stock unit Increase to next vendor multiple Truncate
NOTE: Inventory min/max quantities are based on stocking units. Rounding or increasing to a vendor multiple will result in values similar to 12 EACH's, not 1 CASE.
Inventory: Using CounterPoint - Standard Inventory Reports 16
14. Print in order by Select how you want the items on the report to be printed: by Item, Category, or Vendor. Your selection here does not affect the actual layout of the report.
15. Skip unsold items ? Specify whether or not to skip items (or colors/sizes) that were not sold during the specified time period.
NOTE: If an item (or color/size) is skipped, any existing minimum or maximum values will not be re-calculated or updated, even if that item (or color/size) is not zero.
16. Update min/max ? Select: No If you don’t want to update any minimum or maximum values. Yes To update the minimum or maximum values. Minimum only To update only the minimum values. Maximum only To update only the maximum values.
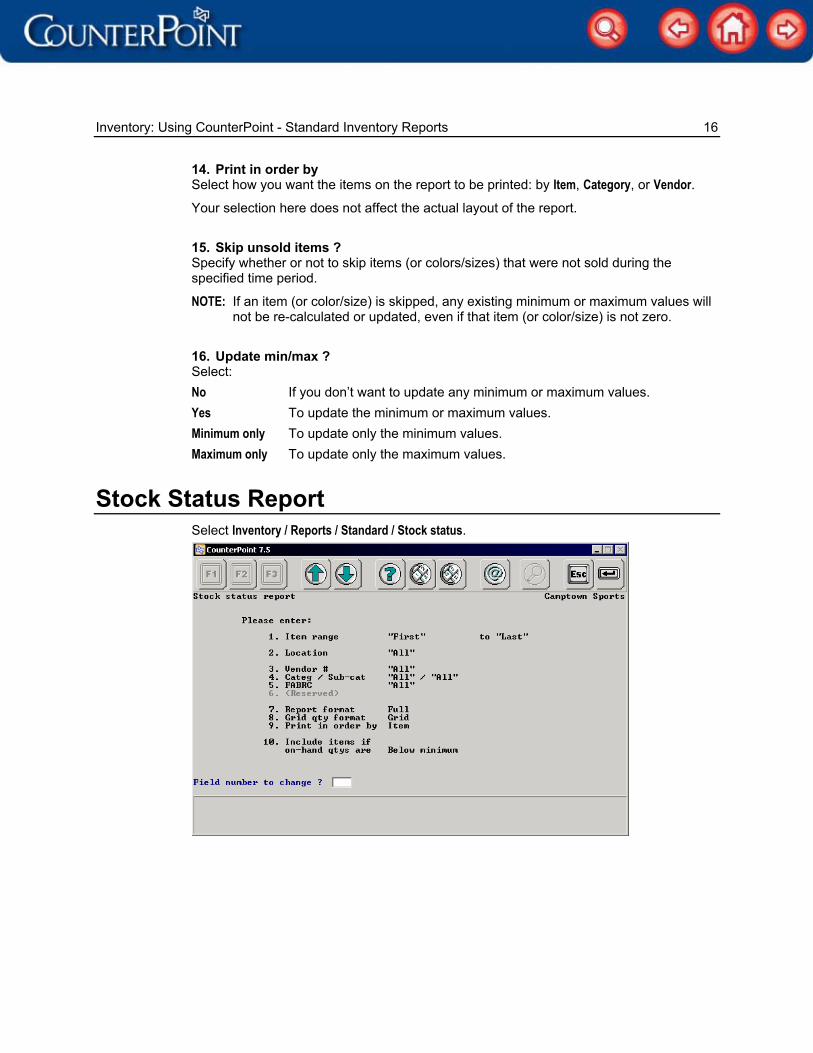
Stock Status Report Select Inventory / Reports / Standard / Stock status.
Inventory: Using CounterPoint - Standard Inventory Reports 17
7. Report format Select a Full or Brief report format:
Format Description Brief Includes for each item:
Category, vendor, average cost, quantity on-hand, net quantity, minimum quantity, value, and stock status.
Full In addition to information on Brief report, includes for each item: Bin locations, quantity backordered, quantity available, quantity on order, and maximum quantity.
Cost information prints only for users who are authorized to view costs.
9. Print in order by Select: Item To print the report in order by Item. Vendor To print the report in order by Vendor. Category To print the report in order by Category.
2. Location If you aren’t using multi-location (as specified in Setup / Inventory / Control), this field defaults to the location specified as the Main location in Setup / Inventory / Control, and cannot be changed.
To print the report for a single location, enter the location.
Inventory: Using CounterPoint - Standard Inventory Reports 18
Press: F1 For All locations. F2 To enter a location group instead of a location.
2. Location group Field 2 appears as Location group if you press F2 at Location.
To print the report for a location group, enter the location group
Press F2 to enter a single location instead of a location group.
8. Print in order by Select: Item # To print the report in order by Item. Vendor To print the report in order by Vendor. Category To print the report in order by Category. Account code To print the report in order by Account code.
9. Include items not used ? Specify whether to include items that have not sold during the reporting period.
10. Print loc detail ? Specify whether to print figures for each location where the item is stocked.
If you answer No, the report shows only total figures for all locations where the item is stocked.
Inventory: Using CounterPoint - Standard Inventory Reports 19
2. Location If you aren’t using multi-location (as specified in Setup / Inventory / Control), this field defaults to the location specified as the Main location in Setup / Inventory / Control, and cannot be changed.
To print the report for a single location, enter the location.
Press: F1 For All locations. F2 To enter a location group instead of a location.
2. Location group Field 2 appears as Location group if you press F2 at Location. To print the report for a location group, enter the location group. Press F2 to enter a single location instead of a location group.
8. Print in order by Select: Item # To print the report in order by Item. Vendor To print the report in order by Vendor. Category To print the report in order by Category. Account code To print the report in order by Account code.
9. Report format If you specified to print in order by Item, this field defaults to Detail and cannot be changed.
Select a Detail or a Summary report:
Format Description Summary Shows totals for whatever print order is selected.
Includes a location recap showing totals for all items at each location.
Detail In addition to information on Summary report, shows inventory quantity, cost, and value information for each item for all locations.
Cost information prints only for users who are authorized to view costs.
11. Print loc detail ? (Not applicable) displays if you entered a location for this report rather than a location group.
Specify whether to include detail for each location on the report.
12. Print layers ? (Not applicable) displays if (1) the Cost Pack Option is not registered, (2) if you are using average or standard costing, or (3) if you are printing a Detail report.
Specify whether to include inventory cost layers of the items printed.
Inventory: Using CounterPoint - Standard Inventory Reports 20
[Fields 1 - 11] Enter the information for these fields just as you would for the VALUATION Report. (See the Valuation Report section on page 18 for more information.)
12. Valuation date The current system date displays as the default.
Enter the “as of” date for which to print the report.
NOTE: This report is not an audit report, as it lists presumed on-hand quantities and estimated costs.
To produce a reliable valuation of inventory, use the INVENTORY VALUATION report (Inventory / Reports / Standard / Valuation report). This report can be reconciled against your DISTRIBUTION report (Accounting / General Ledger / Reports / Distribution report) or your General Ledger at the end of an accounting period to prove your numbers.
Inventory: Using CounterPoint - Standard Inventory Reports 21
Vendor List Select Inventory / Reports / Standard / Vendors.
1. Print in order by Select: Vendor # To print the list in order by Vendor #. Vendor name To print the list in order by Vendor name.
4. Print notes ? Specify whether to include vendor notes on the list.
5. Print history ? Specify whether to include vendor monthly history on the list.
If you answer Yes, the following quantities print both for the current year and for last year:
Ordered
Received
Canceled
Returned
Vouchered
Inventory: Using CounterPoint - Standard Inventory Reports 22
Vendor Items list Select Inventory / Reports / Standard / Vendor items.
6. Print in order by Select: Vendor/item To print the list in Vendor/item order. Item/vendor To print the list in Item/vendor order.
7. Report format Select a Full or Brief report format:
Format Description Brief For each vendor item, includes:
Item number, item description, vendor number, vendor name, vendor product number, category/sub-category, stocking unit, purchase unit, minimum order quantity, and current cost.
Full In addition to information on Brief report for each vendor item, includes: Vendor product description and last purchase order information.
Cost information prints only for users who are authorized to view costs.
8. Print 2nd line of item description Specify whether to include item second description lines.
9. Print comments ? This field appears only if you specified to print a Full report.
Specify whether to print vendor item comments on the list.