58
Standford 2015 iOS讀書會 week7 1. Unwind Segues, Alerts, Timers, View Animation 2. Dynamic Animation 彼得潘

Standford 2015 iOS讀書會 week7
1. Unwind Segues, Alerts, Timers, View Animation 2. Dynamic Animation
彼得潘

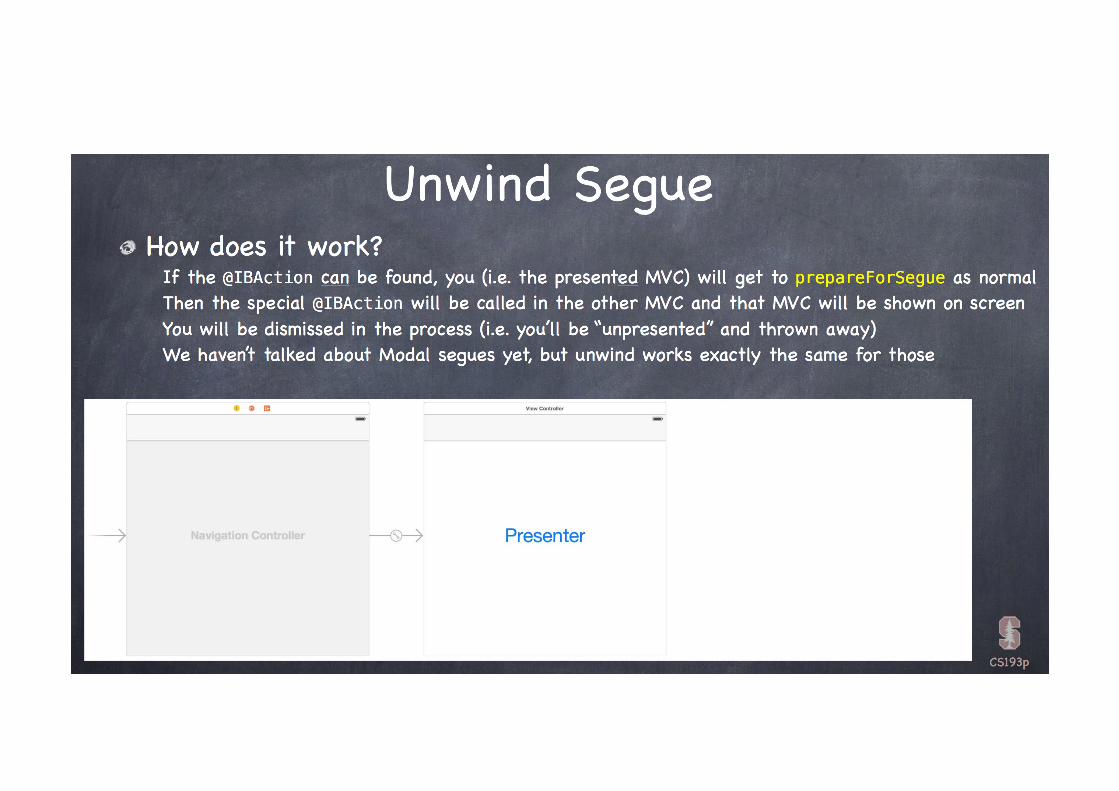
返回之前的controller, ⽽而⾮非建⽴立新的controller

連到Exit button

storyboard會尋找controller裡以@IBAction定義,參數為UIStoryboardSegue型別的function
第⼀一個被找到實作此method的controller,其method將被呼叫
A以model呈現 B,B以model呈現C,若C裡button連結的unwind segue method定義在A, 則將直接返回A

當從controller B回到controller A時, controller B的prepareForSegue會先被呼叫, 接著是controller A裡unwind segue對應的method被呼叫
controller B可以在這兩個地⽅方將資料回傳給A


button由上⽽而下,依addAction的順序cancel button⼀一定在最下⾯面,不管加⼊入的順序可加無限多的action,action很多時可scroll
⽑毛玻璃效果隨⼿手機晃動微微移動

alert⽂文字顏⾊色
destructive style is red
其它style預設blue
設定其它style顏⾊色: alertController.view.tintColor = [UIColor grayColor];


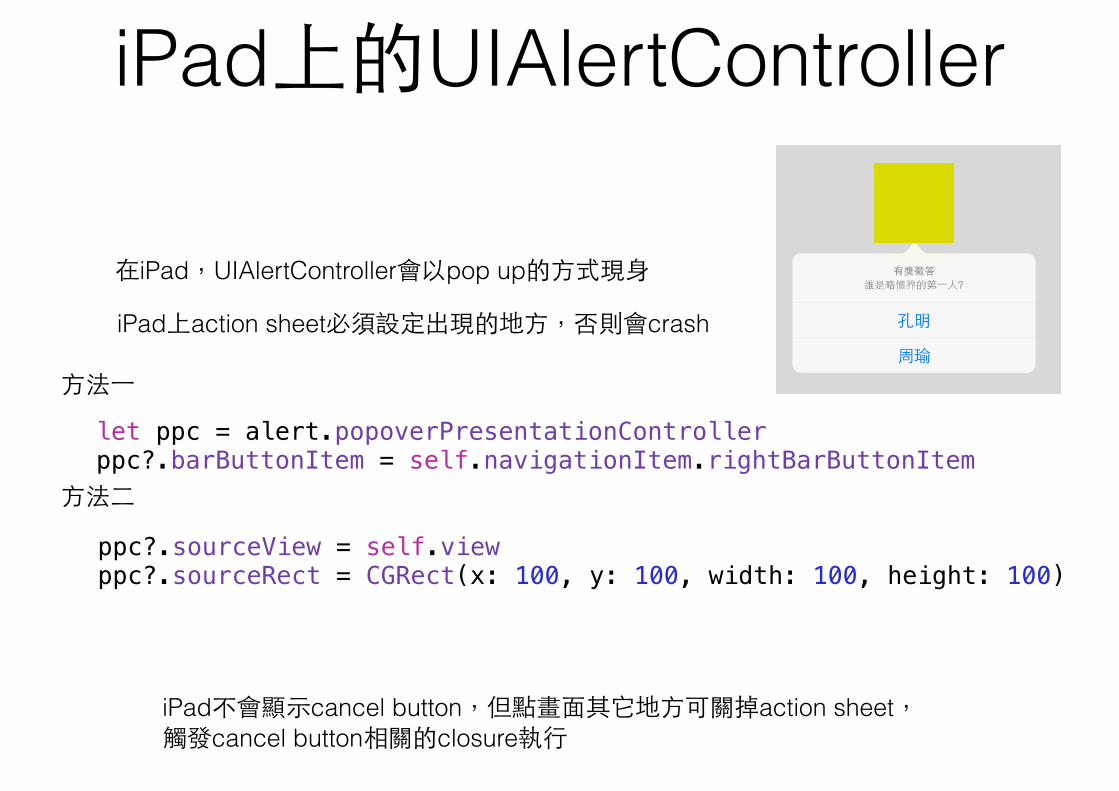
iPad不會顯⽰示cancel button,但點畫⾯面其它地⽅方可關掉action sheet, 觸發cancel button相關的closure執⾏行
let ppc = alert.popoverPresentationController ppc?.barButtonItem = self.navigationItem.rightBarButtonItem
iPad上的UIAlertController
iPad上action sheet必須設定出現的地⽅方,否則會crash
在iPad,UIAlertController會以pop up的⽅方式現⾝身
⽅方法⼀一
⽅方法⼆二
ppc?.sourceView = self.view ppc?.sourceRect = CGRect(x: 100, y: 100, width: 100, height: 100)

可加⼊入button或text field
Alert

2個button的alert
cancel style button在左邊
若都是default style,依add順序由左⽽而右
由左⽽而右畫⾯面中間
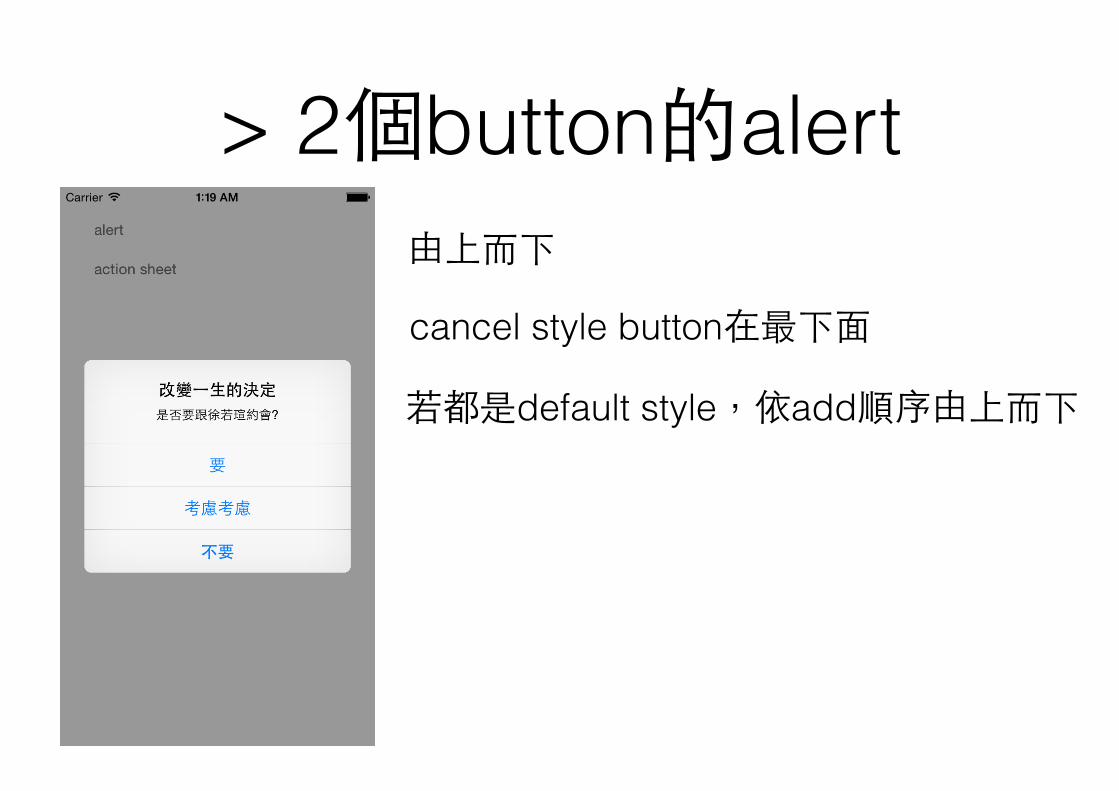
> 2個button的alert
cancel style button在最下⾯面
若都是default style,依add順序由上⽽而下
由上⽽而下

無上限的button個數
scroll

timer設定的method在main thread執⾏行


在背景啟動timer
let priority = DISPATCH_QUEUE_PRIORITY_DEFAULT dispatch_async(dispatch_get_global_queue(DISPATCH_QUEUE_PRIORITY_DEFAULT, 0), { () -> Void in NSTimer.scheduledTimerWithTimeInterval(1, target: self, selector: "fire:", userInfo: nil, repeats: true) })
失效

不會完全準時觸發,會有誤差
ex: 每秒⼀一次,1s觸發,2s觸發,若3s沒觸發到則會跳過, 下⼀一次觸發時間是4s


在viewDidAppear觸發動畫override func viewDidAppear(animated: Bool) { super.viewDidAppear(animated)
UIView.animateWithDuration(3, animations: { () -> Void in self.yellowView.frame = CGRect(x: 300, y: 300, width: 100, height: 100) }) }
在viewDidLoad觸發會出問題

顏⾊色也可以動畫
UIView.animateWithDuration(10, animations: { () -> Void in self.yellowView.backgroundColor = UIColor.blueColor() })
在storyboard以auto layout 排版的UI元件
在viewDidAppear之後, 可以改變frame,
因此也可以設定frame做動畫

在storyboard以auto layout 排版的UI元件
override func viewDidAppear(animated: Bool) { super.viewDidAppear(animated)
self.hConstraint.constant = 200
UIView.animateWithDuration(3, animations: { () -> Void in self.view.layoutIfNeeded() }) }
修改constraint做動畫
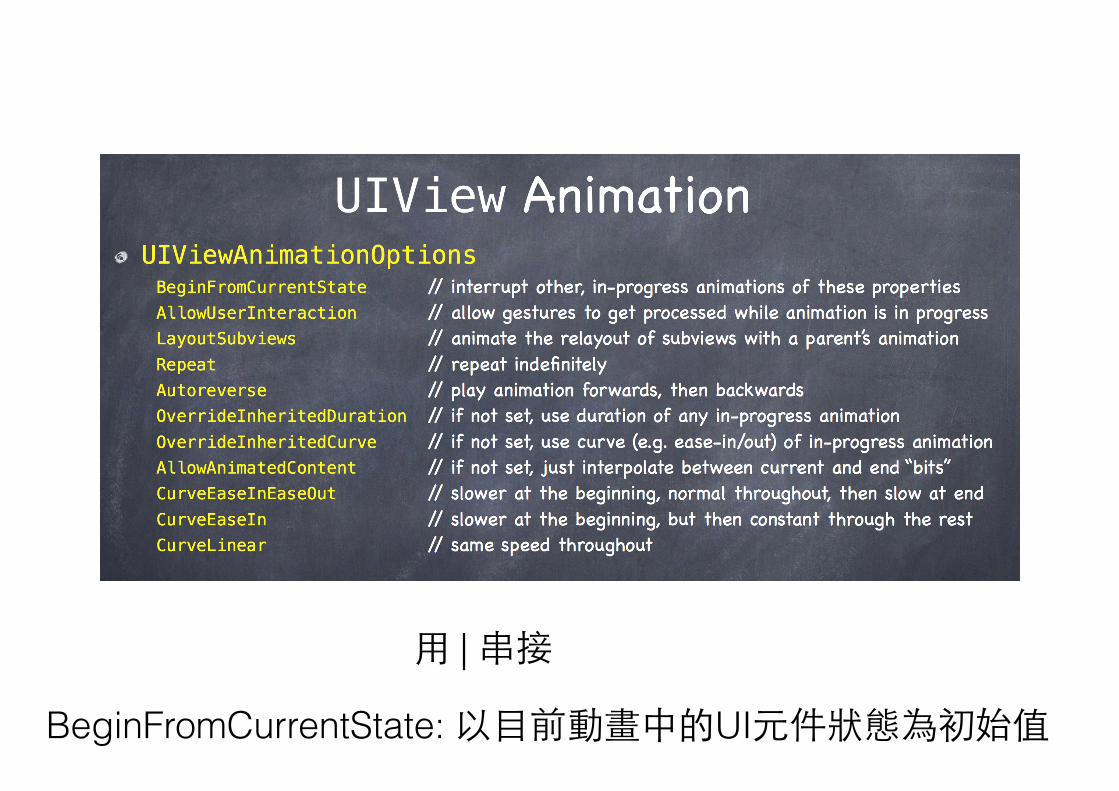
⽤用 | 串接
BeginFromCurrentState: 以⺫⽬目前動畫中的UI元件狀態為初始值


UIView.transitionWithView(self.imageView, duration: 10, options: UIViewAnimationOptions.TransitionFlipFromLeft, animations: { () -> Void in self.imageView.image = UIImage(named: "tony.png") }, completion: nil)


override func viewDidAppear(animated: Bool) { super.viewDidAppear(animated)
let imageView2 = UIImageView(frame: self.imageView.frame) imageView2.image = UIImage(named: "tony.png")
UIView.transitionFromView(self.imageView, toView: imageView2, duration: 10, options: UIViewAnimationOptions.TransitionCrossDissolve, completion: nil) }

設定連續多組動畫
UIView.animateWithDuration(2, animations: { () -> Void in self.yellowView.frame = CGRectOffset(self.yellowView.frame, 100, 0) }) { (result:Bool) -> Void in UIView.animateWithDuration(2, animations: { () -> Void in self.yellowView.frame = CGRectOffset(self.yellowView.frame, 0, 100) }) { (result:Bool) -> Void in } }

設定連續多組動畫 UIView.animateKeyframesWithDuration(4, delay: 0, options: UIViewKeyframeAnimationOptions.CalculationModeLinear, animations: { () -> Void in UIView.addKeyframeWithRelativeStartTime(0, relativeDuration: 0.5, animations: { () -> Void in self.yellowView.frame = CGRectOffset(self.yellowView.frame, 100, 0) }) UIView.addKeyframeWithRelativeStartTime(0.5, relativeDuration: 0.5, animations: { () -> Void in self.yellowView.frame = CGRectOffset(self.yellowView.frame, 0, 100) }) }, completion: nil )
startTime & relativeDuration的單位都是 整個動畫時間裡佔的⽐比例

View Controller Transitionlet controller = self.storyboard?.instantiateViewControllerWithIdentifier("CustomController") as? UIViewController
controller?.modalPresentationStyle = UIModalPresentationStyle.Custom controller?.modalTransitionStyle = UIModalTransitionStyle.CrossDissolve self.presentViewController(controller!, animated: true, completion: nil)
可看到前⼀一⾴頁畫⾯面

View Controller Transition進階技巧: 客製model或push的動畫效果
implement UIViewControllerTransitioningDelegate & UIViewControllerAnimatedTransitioning
http://shrikar.com/ios-8-custom-transitions-in-swift/
http://www.raywenderlich.com/96062/custom-view-controller-presentation-transitions-swift

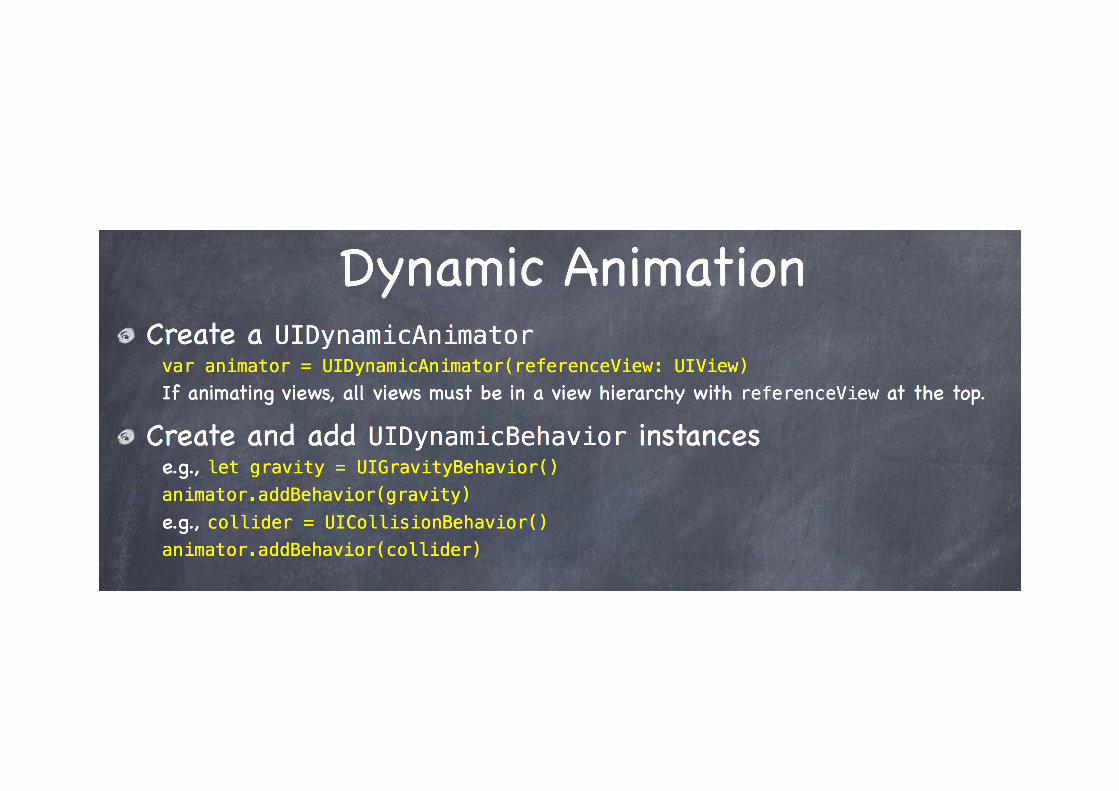
Dynamic Animation


⼀一呼叫addItem,動畫就開始作⽤用於item

animator可以改變位置,可以rotate,不能改變size


demolazy var animator: UIDynamicAnimator = UIDynamicAnimator(referenceView: self.view) let gravity = UIGravityBehavior() @IBOutlet weak var yellowView: UIView! @IBAction func start(sender: AnyObject) { self.gravity.addItem(self.yellowView) } @IBAction func stop(sender: AnyObject) { self.gravity.removeItem(self.yellowView) } override func viewDidLoad() { super.viewDidLoad() // Do any additional setup after loading the view, typically from a nib. animator.addBehavior(self.gravity) }

⾃自訂組合各種效果的behavior

動畫過程中,action會⼀一直被呼叫


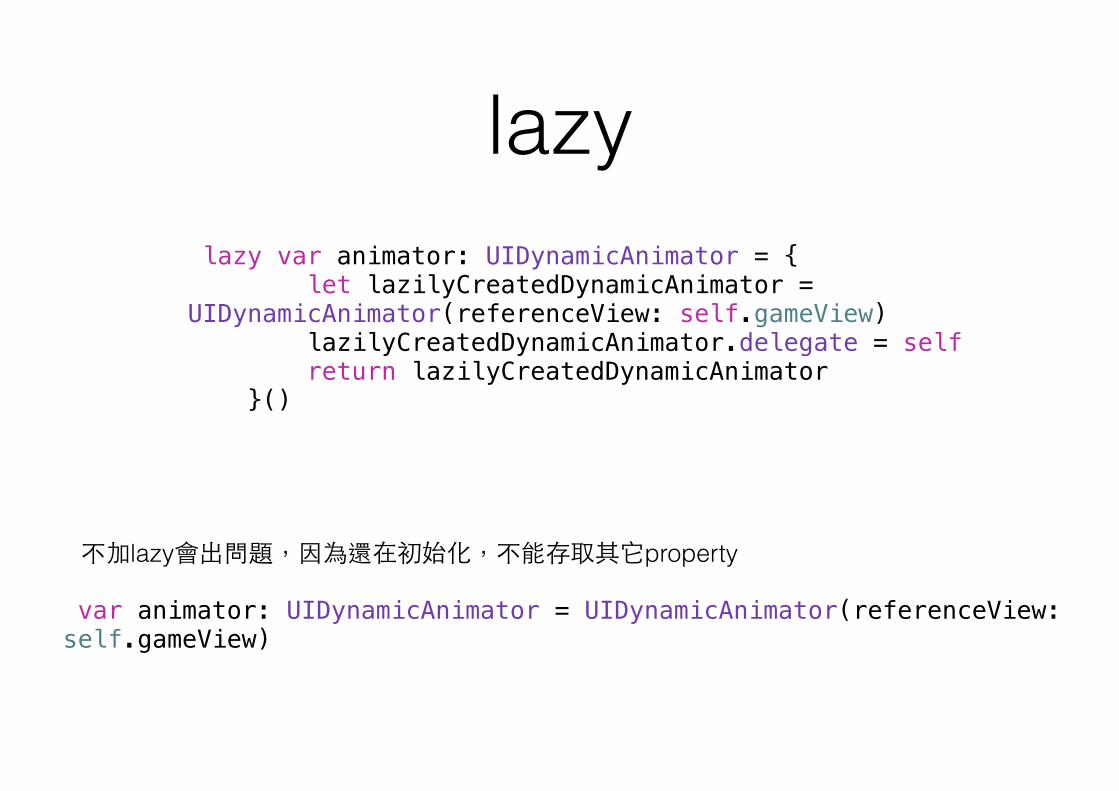
lazy lazy var animator: UIDynamicAnimator = { let lazilyCreatedDynamicAnimator = UIDynamicAnimator(referenceView: self.gameView) lazilyCreatedDynamicAnimator.delegate = self return lazilyCreatedDynamicAnimator }()
var animator: UIDynamicAnimator = UIDynamicAnimator(referenceView: self.gameView)
不加lazy會出問題,因為還在初始化,不能存取其它property
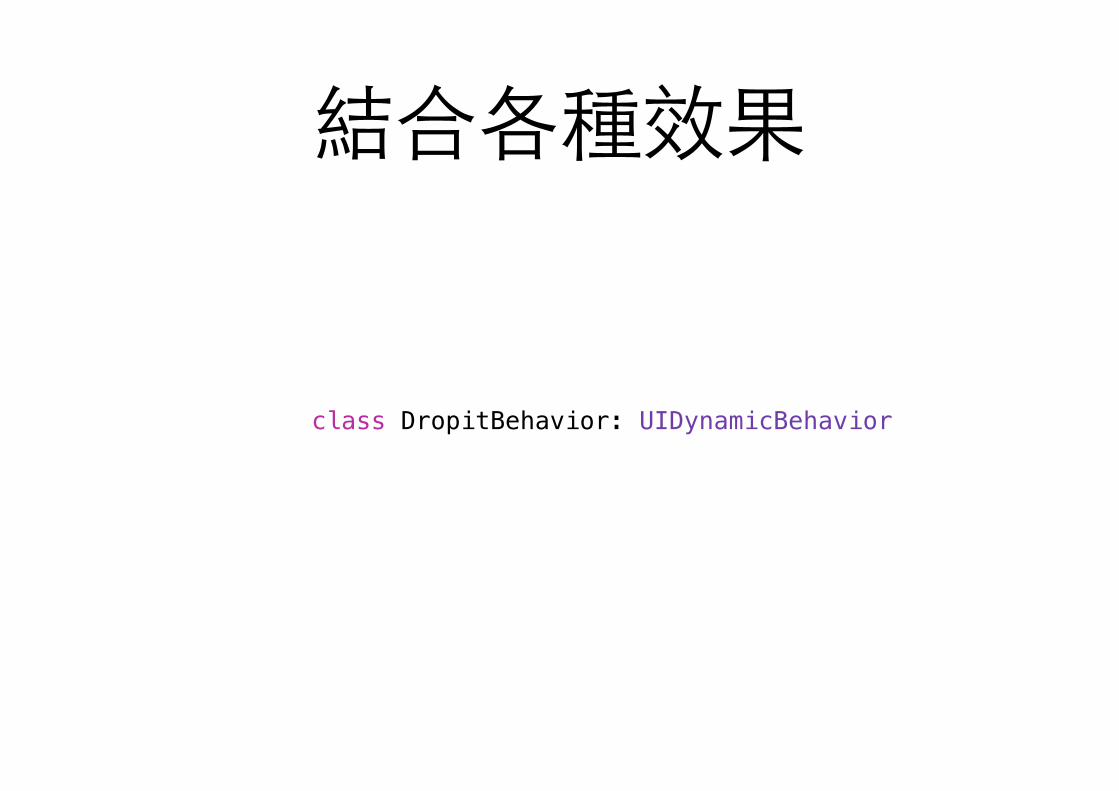
結合各種效果
class DropitBehavior: UIDynamicBehavior

hitTest
if let hitView = gameView.hitTest(CGPoint(x: dropFrame.midX, y: dropFrame.midY), withEvent: nil) { if hitView.superview == gameView { dropsFound.append(hitView) } else { rowIsComplete = false } }
回傳包含point的最遠subView
func hitTest(point: CGPoint, withEvent event: UIEvent?) -> UIView?

hitTest
let targetView = self.view.hitTest(CGPoint(x: 110, y: 150), withEvent: nil) println("targetView \(targetView)")

extension CGRect
var width: CGFloat { get } var height: CGFloat { get } var minX: CGFloat { get } var midX: CGFloat { get } var maxX: CGFloat { get } var minY: CGFloat { get } var midY: CGFloat { get } var maxY: CGFloat { get }
在superView上的座標位置

加barrier
override func viewDidLayoutSubviews() { super.viewDidLayoutSubviews() let barrierSize = dropSize let barrierOrigin = CGPoint(x: gameView.bounds.midX-barrierSize.width/2, y: gameView.bounds.midY-barrierSize.height/2) let path = UIBezierPath(ovalInRect: CGRect(origin: barrierOrigin, size: barrierSize)) dropitBehavior.addBarrier(path, named: PathNames.MiddleBarrier) gameView.setPath(path, named: PathNames.MiddleBarrier) }

attachment @IBAction func grabDrop(sender: UIPanGestureRecognizer) { let gesturePoint = sender.locationInView(gameView) switch sender.state { case .Began: if let viewToAttachTo = lastDroppedView { attachment = UIAttachmentBehavior(item: viewToAttachTo, attachedToAnchor: gesturePoint) lastDroppedView = nil } case .Changed: attachment?.anchorPoint = gesturePoint case .Ended: attachment = nil default: break } }


