15
Step 1: Create Project Dashboard Site from Template Step 2: Create Project Dashboard Item Step 3: Change PKID & Edit Project Title

Step 1: Create Project Dashboard Site from
Template
Step 2: Create Project Dashboard Item
Step 3: Change PKID & Edit Project Title
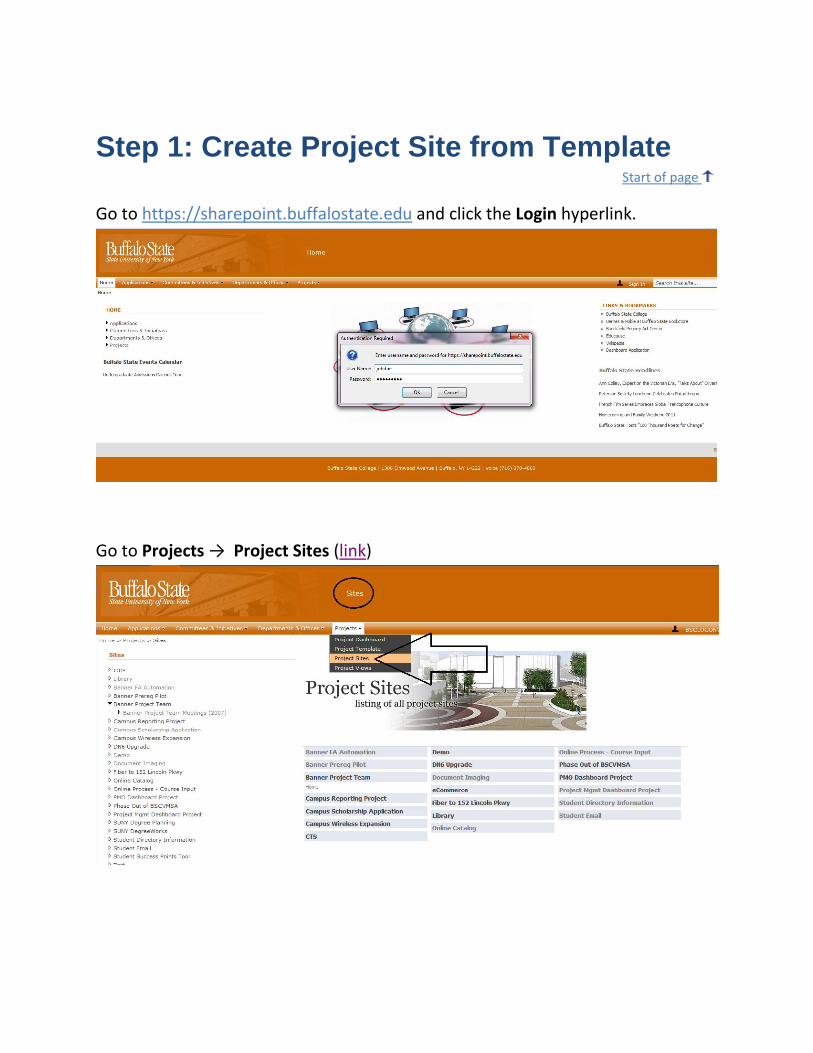
Step 1: Create Project Site from Template Start of page
Go to https://sharepoint.buffalostate.edu and click the Login hyperlink.
Go to Projects → Project Sites (link)
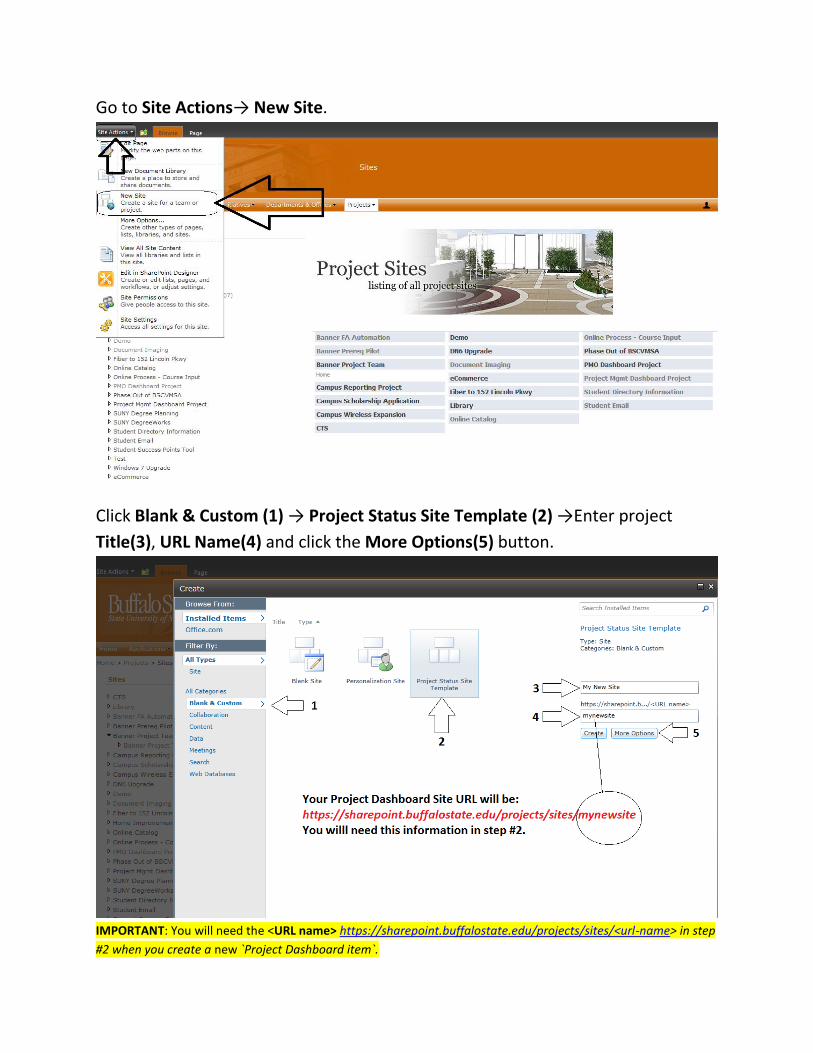
Go to Site Actions→ New Site.
Click Blank & Custom (1) → Project Status Site Template (2) →Enter project
Title(3), URL Name(4) and click the More Options(5) button.
IMPORTANT: You will need the <URL name> https://sharepoint.buffalostate.edu/projects/sites/<url-name> in step
#2 when you create a new `Project Dashboard item`.
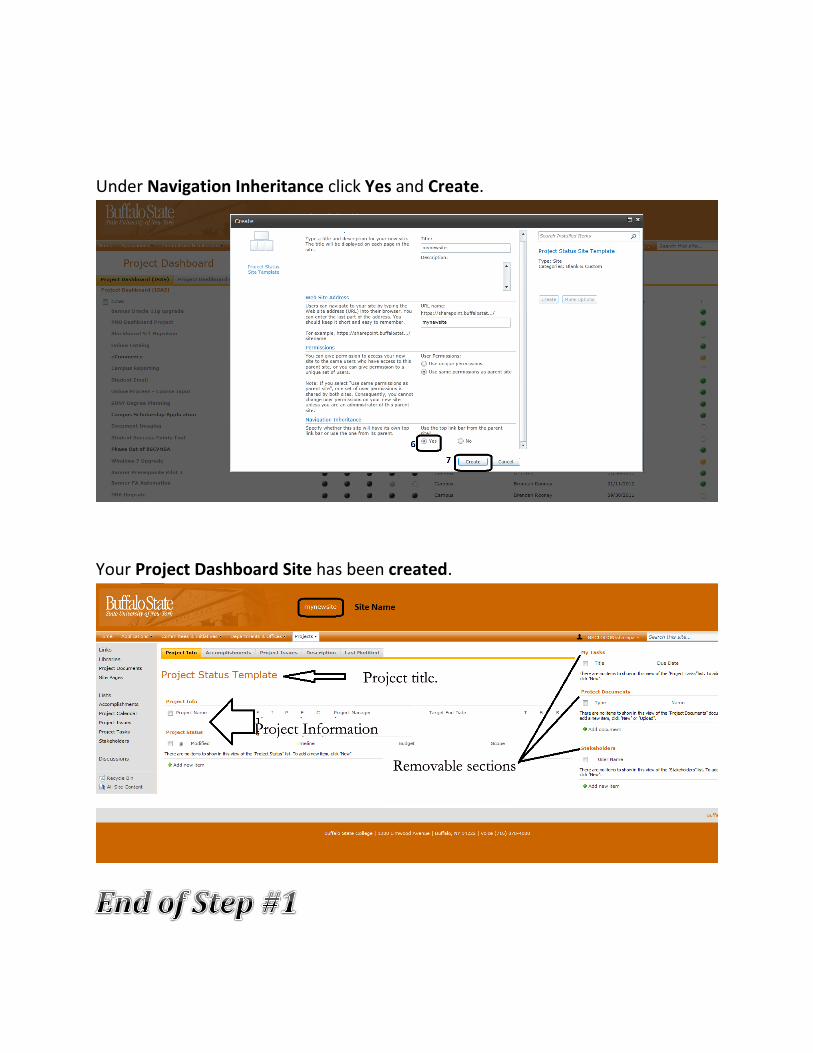
Under Navigation Inheritance click Yes and Create.
Your Project Dashboard Site has been created.
Step 2: Create Project Dashboard Item
Start of page
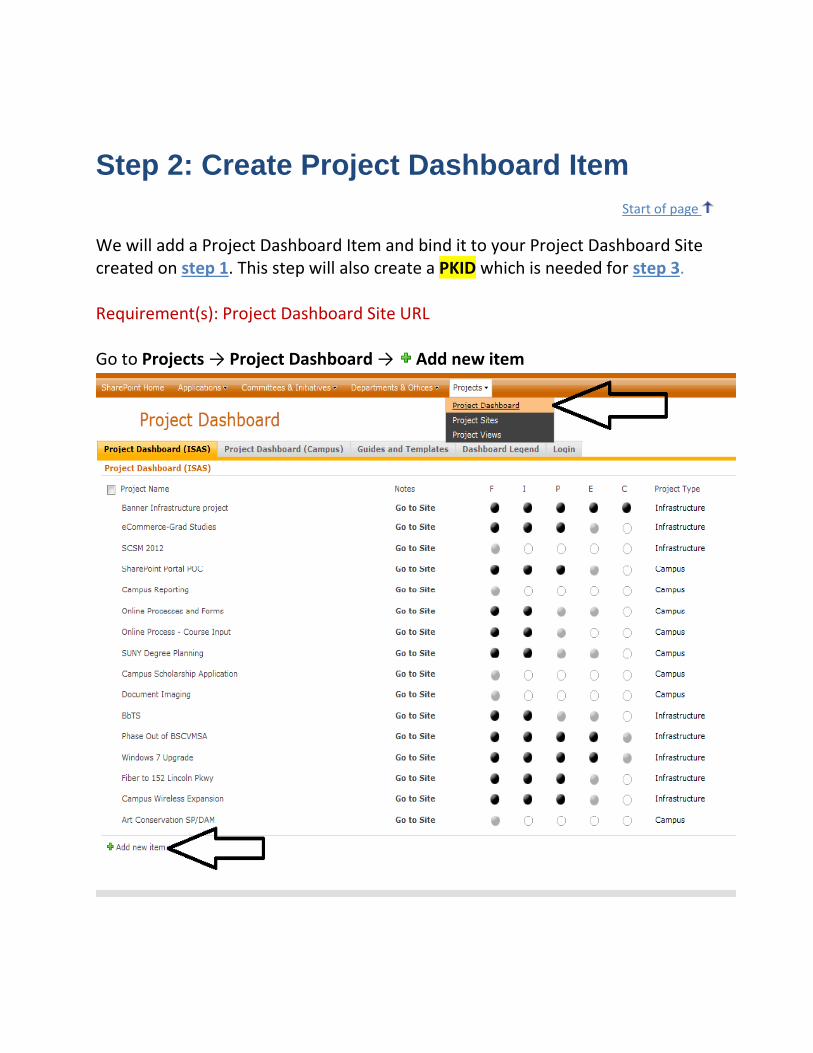
We will add a Project Dashboard Item and bind it to your Project Dashboard Site created on step 1. This step will also create a PKID which is needed for step 3. Requirement(s): Project Dashboard Site URL Go to Projects → Project Dashboard → Add new item
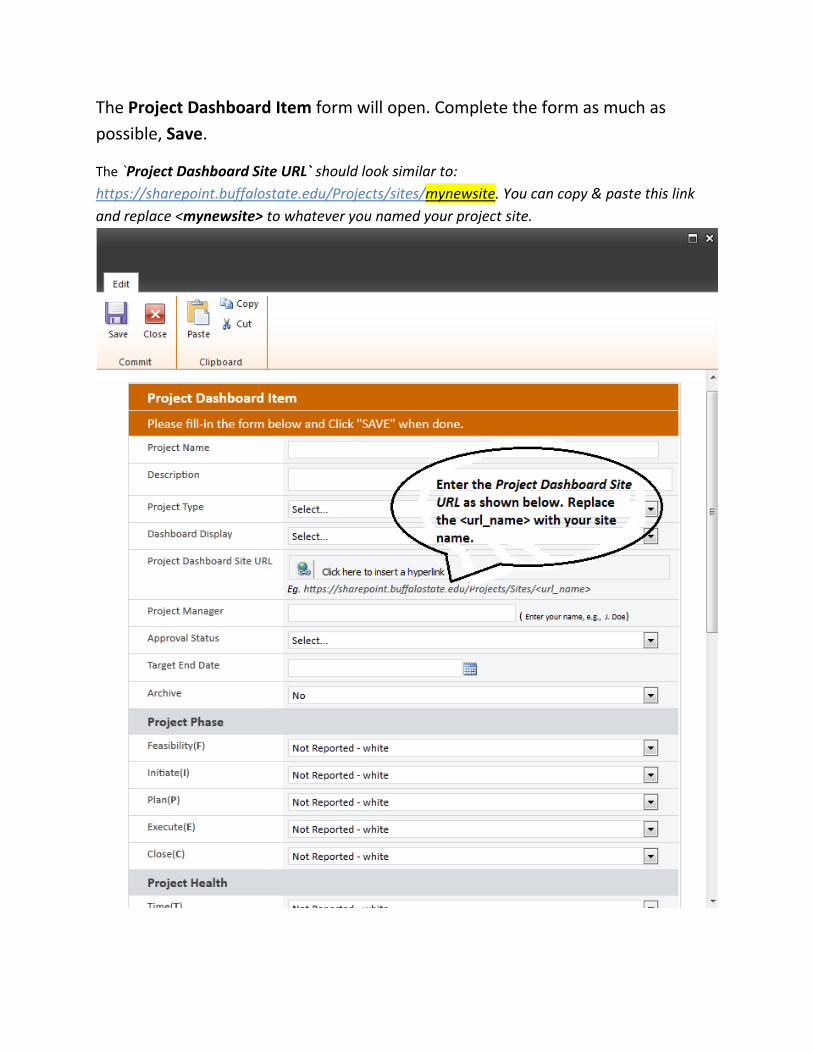
The Project Dashboard Item form will open. Complete the form as much as
possible, Save.
The `Project Dashboard Site URL` should look similar to:
https://sharepoint.buffalostate.edu/Projects/sites/mynewsite. You can copy & paste this link
and replace <mynewsite> to whatever you named your project site.
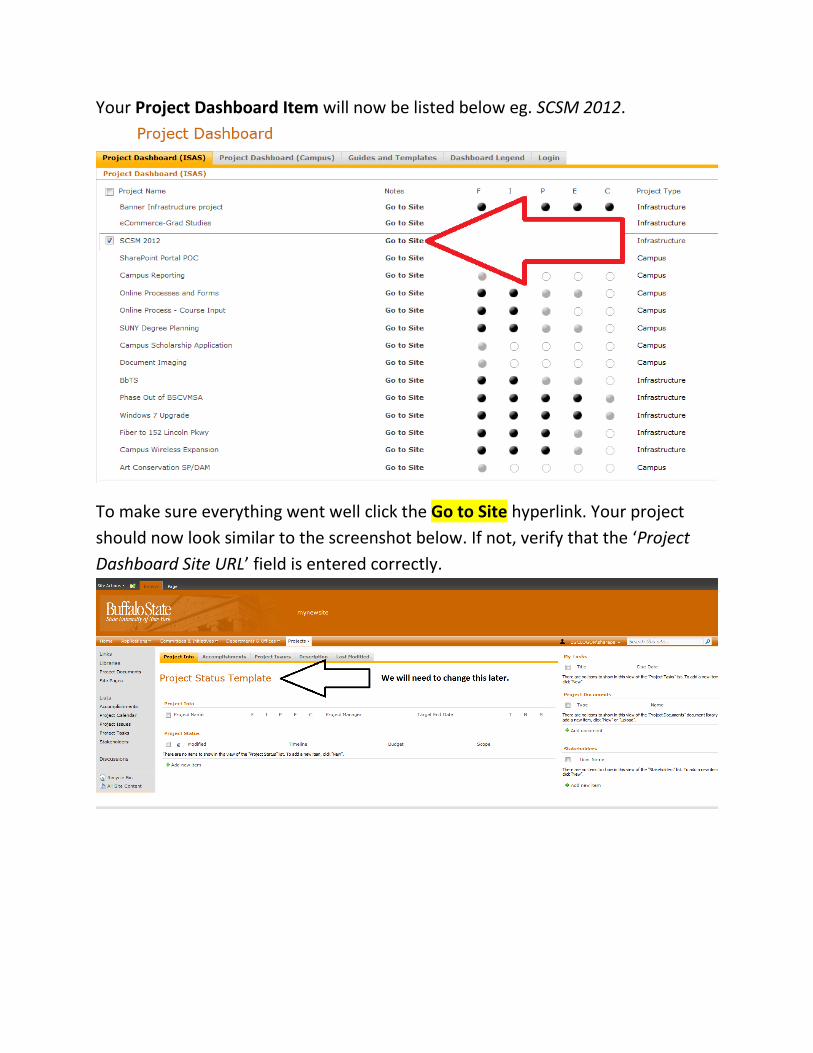
Your Project Dashboard Item will now be listed below eg. SCSM 2012.
To make sure everything went well click the Go to Site hyperlink. Your project
should now look similar to the screenshot below. If not, verify that the ‘Project
Dashboard Site URL’ field is entered correctly.
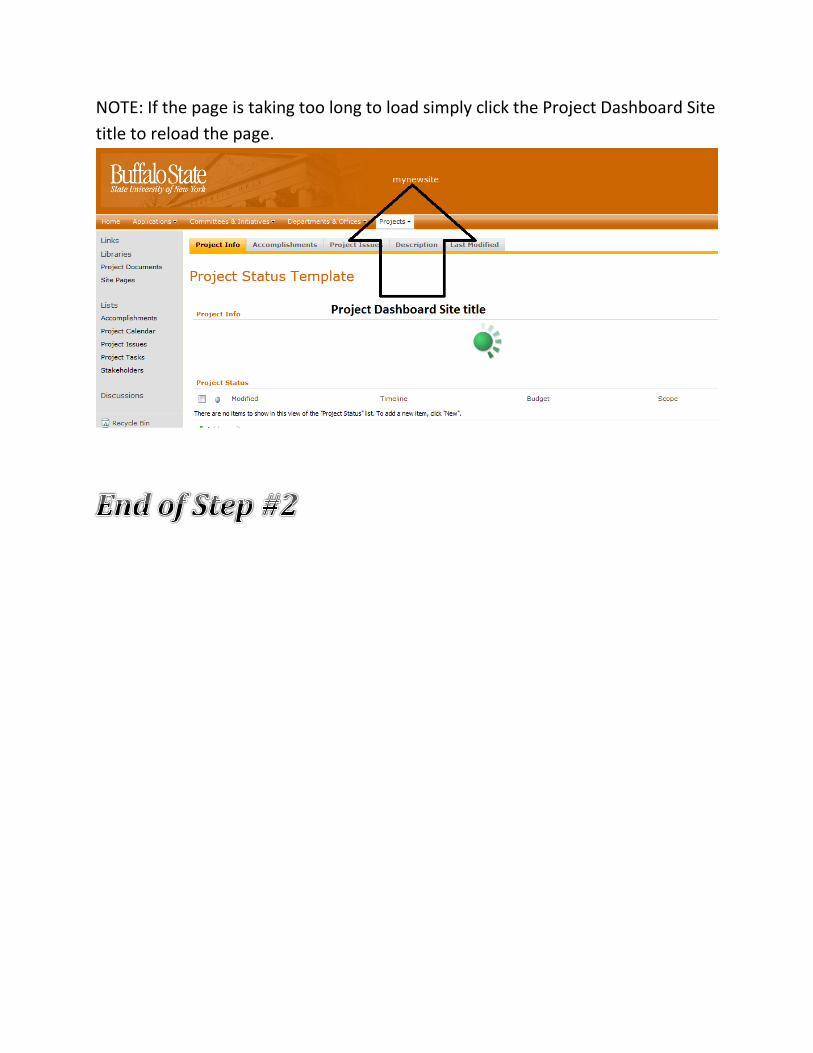
NOTE: If the page is taking too long to load simply click the Project Dashboard Site
title to reload the page.
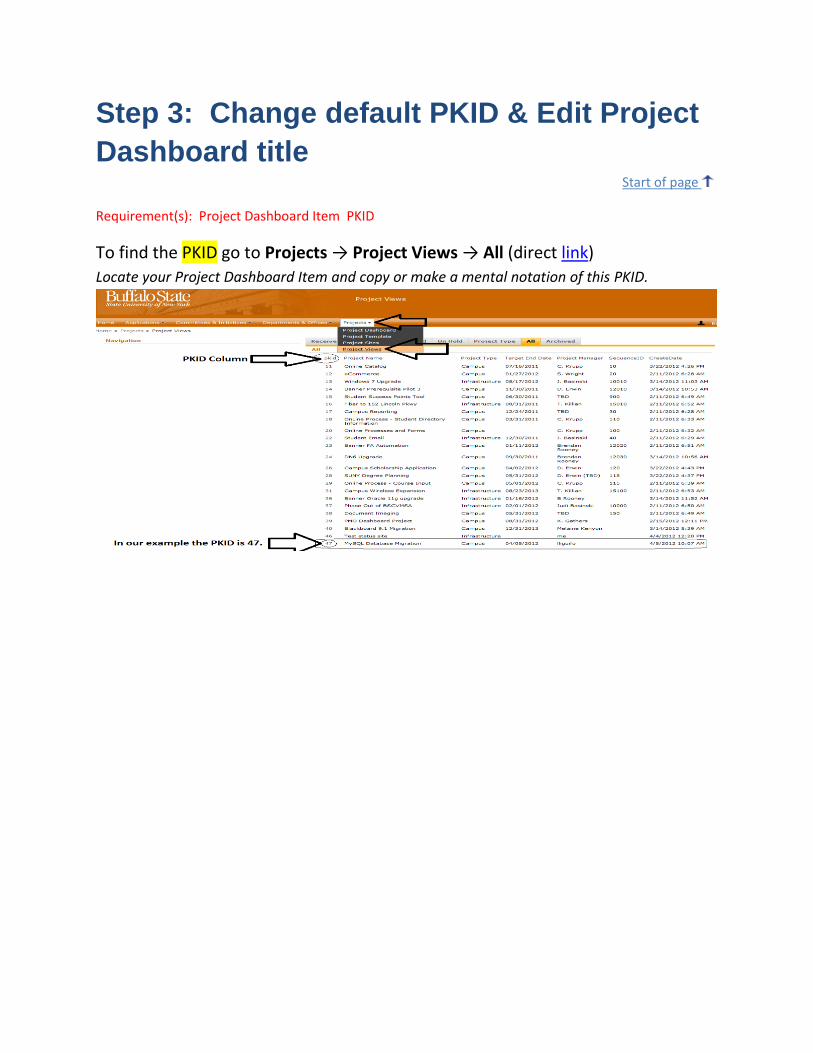
Step 3: Change default PKID & Edit Project
Dashboard title Start of page Requirement(s): Project Dashboard Item PKID
To find the PKID go to Projects → Project Views → All (direct link)
Locate your Project Dashboard Item and copy or make a mental notation of this PKID.
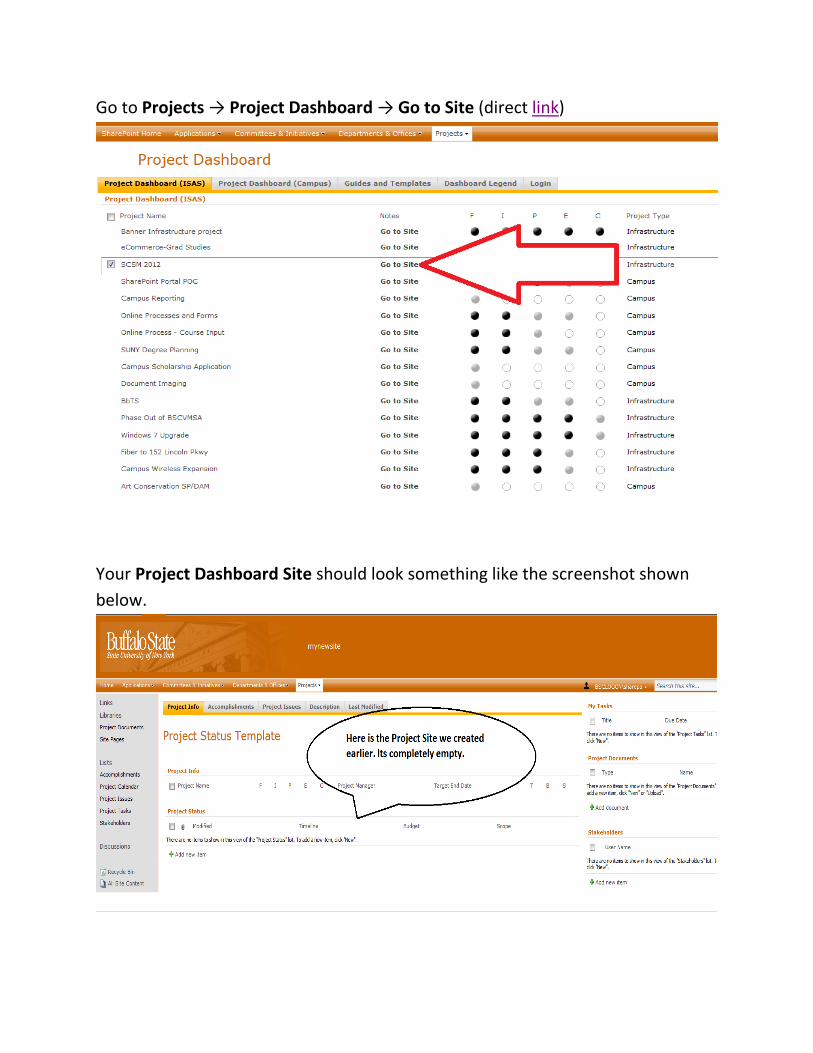
Go to Projects → Project Dashboard → Go to Site (direct link)
Your Project Dashboard Site should look something like the screenshot shown
below.
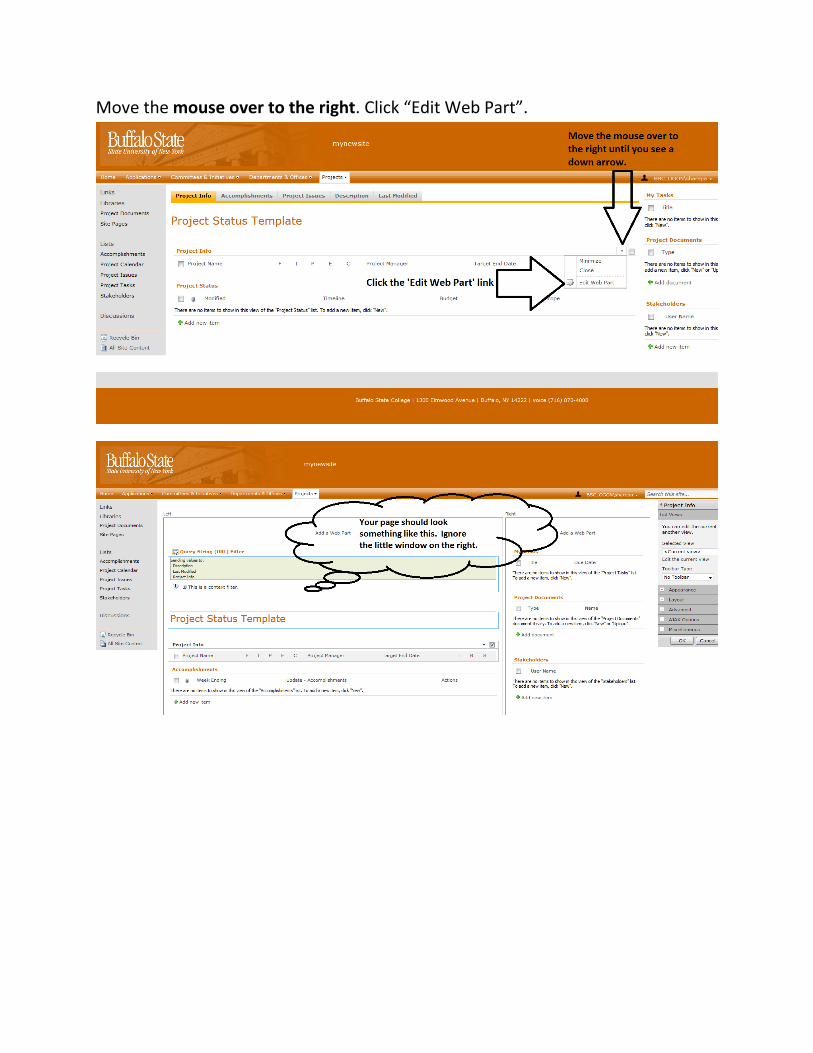
Move the mouse over to the right. Click “Edit Web Part”.
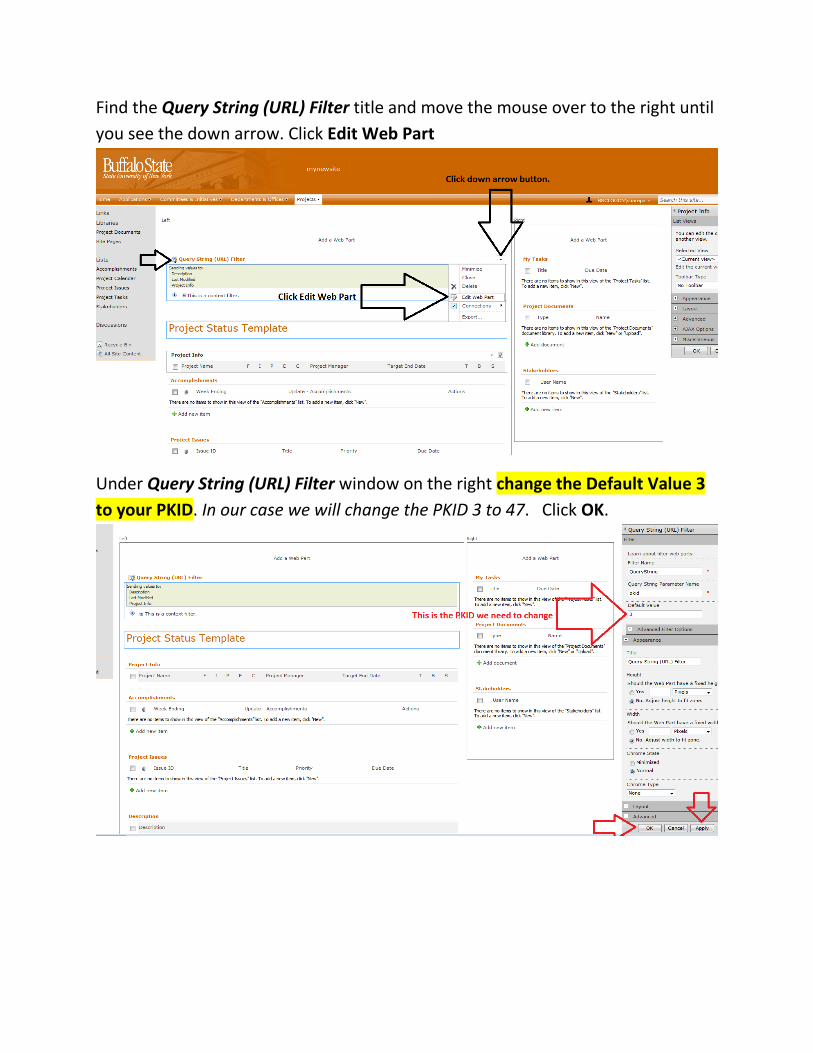
Find the Query String (URL) Filter title and move the mouse over to the right until
you see the down arrow. Click Edit Web Part
Under Query String (URL) Filter window on the right change the Default Value 3
to your PKID. In our case we will change the PKID 3 to 47. Click OK.
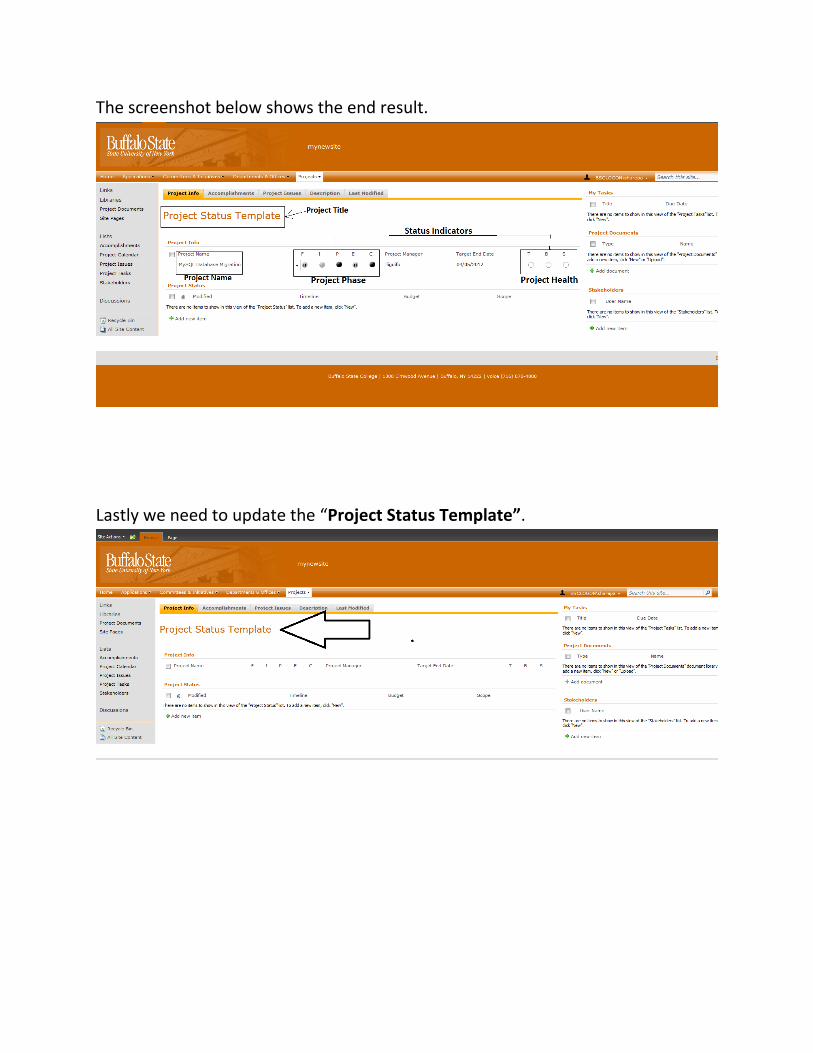
The screenshot below shows the end result.
Lastly we need to update the “Project Status Template”.
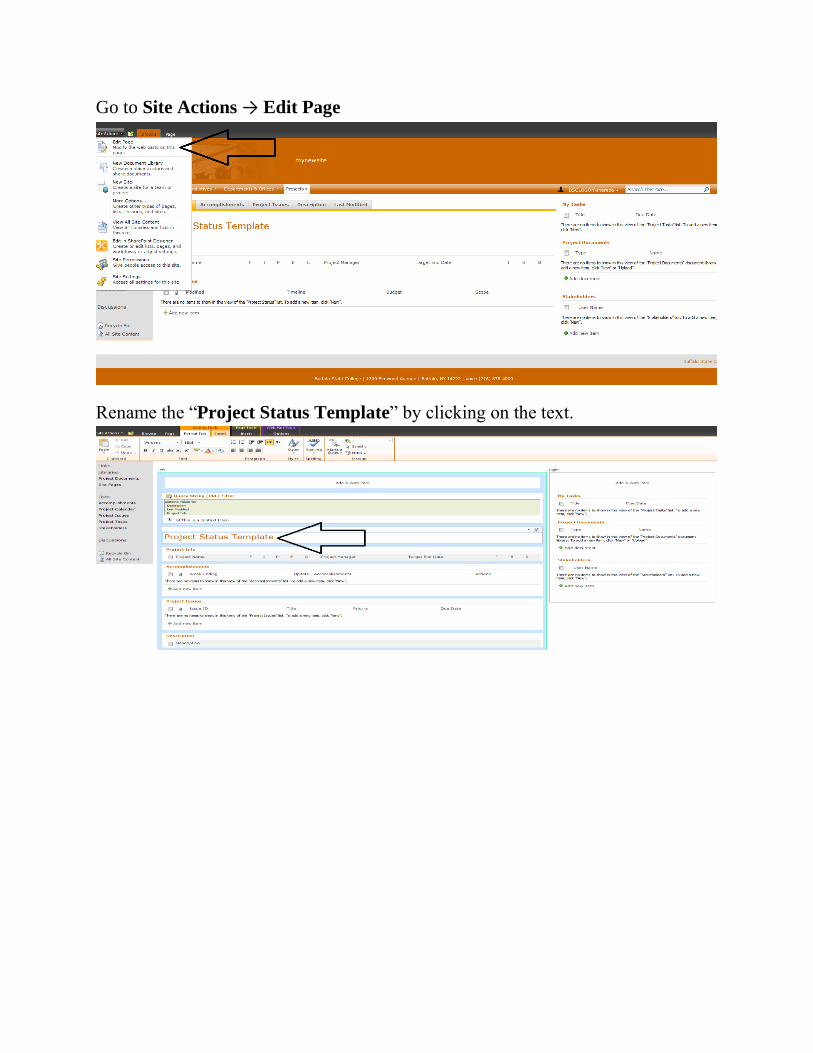
Go to Site Actions → Edit Page
Rename the “Project Status Template” by clicking on the text.

To save changes click the Page tab and ‘Stop Editing’
The Project Site should have a new title.
Start of page


