Sync-E Configuration Guide 1. Connect to STC chassis, reserve ports and connect them back-to-back. 2. Enable Sync-E technology on STC ports. Click on Technologies tab in STC application to launch Technology Selector. Go to Technology Carrier Ethernet SyncE 3. Activate Sync-E feature on port. Click on Port //x/y and go to SyncE tab. Check “Active” and select “Option 1”. SyncE Option Type: Option 1 for SDH networks (used in European countries). Option 2 for SONET networks (used in Americas).
Transcript
Sync-E Configuration Guide
1. Connect to STC chassis, reserve ports and connect them back-to-back.
2. Enable Sync-E technology on STC ports.
Click on Technologies tab in STC application to launch Technology Selector.
Go to Technology ���� Carrier Ethernet ���� SyncE
3. Activate Sync-E feature on port.
Click on Port //x/y and go to SyncE tab. Check “Active” and select “Option 1”.
SyncE Option Type: Option 1 for SDH networks (used in European countries).
Option 2 for SONET networks (used in Americas).
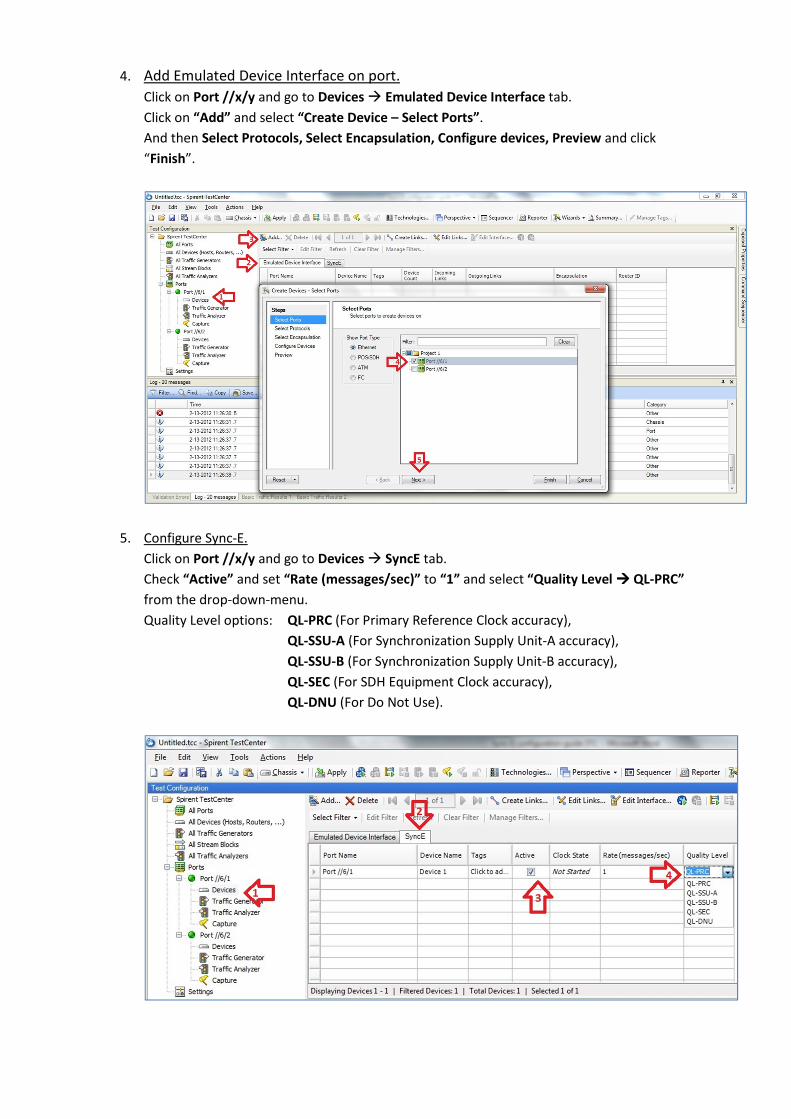
4. Add Emulated Device Interface on port.
Click on Port //x/y and go to Devices � Emulated Device Interface tab.
Click on “Add” and select “Create Device – Select Ports”.
And then Select Protocols, Select Encapsulation, Configure devices, Preview and click
“Finish”.
5. Configure Sync-E.
Click on Port //x/y and go to Devices � SyncE tab.
Check “Active” and set “Rate (messages/sec)” to “1” and select “Quality Level ���� QL-PRC”


![[MS-FILESYNC]: File Synchronization Protocol · 2019-03-19 · sync with the service. Sections 1.5, 1.8, 1.9, 2, and 3 of this specification are normative. All other sections and](https://static.documents.pub/doc/80x56/5e9fa023bd1ac76bf83760ec/ms-filesync-file-synchronization-protocol-2019-03-19-sync-with-the-service.jpg)


