24
For the TD Luxe 6200m: • Wired Standalone • Wired Semi-Integrated TD Luxe 6200m Quick Start Guide

For the TD Luxe 6200m:• Wired Standalone• Wired Semi-Integrated
TD Luxe 6200mQuick Start Guide

COPYRIGHT © 2021 by The Toronto-Dominion Bank
This publication is confidential and proprietary to The Toronto-Dominion Bank and is intended solely for the use of Merchant customers of TD Merchant Solutions. This publication may not be reproduced or distributed, in whole or in part, for any other purpose without the written permission of an authorized representative of The Toronto-Dominion Bank.
NOTICE
The Toronto-Dominion Bank reserves the right to make changes to specifications at any time and without notice. The Toronto-Dominion Bank assumes no responsibility for the use by the Merchant customers of the information furnished in this publication, including without limitation for infringements of intellectual property rights or other rights of third parties resulting from its use.
MERCHANT INFORMATION
Merchant Name . . . . . . . . . . . . . . . . . . . . . . . . . . . . . . . . . . . . . . . . . . . . .
Merchant Number . . . . . . . . . . . . . . . . . . . . . . . . . . . . . . . . . . . . . . . . . . .

i
ContentsAbout this Guide . . . . . . . . . . . . . . . . . . . . . . . . . . . . . . . . . . . . . . . . . . . . . . . . . . . . . . . . . . . . . . . . . . . . . .1
Welcome kit contents . . . . . . . . . . . . . . . . . . . . . . . . . . . . . . . . . . . . . . . . . . . . . . . . . . . . . . . . . . . . . . . . . . . . . . . . . . . . . 1
The TD Luxe 6200m Terminal . . . . . . . . . . . . . . . . . . . . . . . . . . . . . . . . . . . . . . . . . . . . . . . . . .1The terminal . . . . . . . . . . . . . . . . . . . . . . . . . . . . . . . . . . . . . . . . . . . . . . . . . . . . . . . . . . . . . . . . . . . . . . . . . . . . . . . . . . . . . . . . . . . . 1
Accessibility features ......................................................................................2Idle screen .........................................................................................................2Desktop screen.................................................................................................2The TD Hub .......................................................................................................3Changing terminal modes (semi-integrated only) ....................................3
Cardholder Privacy and Security . . . . . . . . . . . . . . . . . . . . . . . . . . . . . . . . . . . . . . . . . . .3Terminal security . . . . . . . . . . . . . . . . . . . . . . . . . . . . . . . . . . . . . . . . . . . . . . . . . . . . . . . . . . . . . . . . . . . . . . . . . . . . . . . . . . . . .3
Protecting terminal functionality ..................................................................3User management ...........................................................................................5
Fraud prevention . . . . . . . . . . . . . . . . . . . . . . . . . . . . . . . . . . . . . . . . . . . . . . . . . . . . . . . . . . . . . . . . . . . . . . . . . . . . . . . . . . . . .5Manually entered credit card transactions .................................................5Force post transactions are disabled by default ........................................5Call for authorization ......................................................................................5Storing cardholder receipts ...........................................................................6
Financial Transactions . . . . . . . . . . . . . . . . . . . . . . . . . . . . . . . . . . . . . . . . . . . . . . . . . . . . . . . . . . . .6Accepted card types . . . . . . . . . . . . . . . . . . . . . . . . . . . . . . . . . . . . . . . . . . . . . . . . . . . . . . . . . . . . . . . . . . . . . . . . . . . . . . .7Purchase . . . . . . . . . . . . . . . . . . . . . . . . . . . . . . . . . . . . . . . . . . . . . . . . . . . . . . . . . . . . . . . . . . . . . . . . . . . . . . . . . . . . . . . . . . . . . . . . . .7Phone or Mail purchase . . . . . . . . . . . . . . . . . . . . . . . . . . . . . . . . . . . . . . . . . . . . . . . . . . . . . . . . . . . . . . . . . . . . . . . . . .9Void . . . . . . . . . . . . . . . . . . . . . . . . . . . . . . . . . . . . . . . . . . . . . . . . . . . . . . . . . . . . . . . . . . . . . . . . . . . . . . . . . . . . . . . . . . . . . . . . . . . . . . . . . .9Refund . . . . . . . . . . . . . . . . . . . . . . . . . . . . . . . . . . . . . . . . . . . . . . . . . . . . . . . . . . . . . . . . . . . . . . . . . . . . . . . . . . . . . . . . . . . . . . . . . . . 10Transaction recall . . . . . . . . . . . . . . . . . . . . . . . . . . . . . . . . . . . . . . . . . . . . . . . . . . . . . . . . . . . . . . . . . . . . . . . . . . . . . . . . . 10Force post purchase . . . . . . . . . . . . . . . . . . . . . . . . . . . . . . . . . . . . . . . . . . . . . . . . . . . . . . . . . . . . . . . . . . . . . . . . . . . . . . 11Force post phone / mail purchase . . . . . . . . . . . . . . . . . . . . . . . . . . . . . . . . . . . . . . . . . . . . . . . . . . . . . . . 12Receipts . . . . . . . . . . . . . . . . . . . . . . . . . . . . . . . . . . . . . . . . . . . . . . . . . . . . . . . . . . . . . . . . . . . . . . . . . . . . . . . . . . . . . . . . . . . . . . . . . 12
Receipt example ............................................................................................ 12Receipt print options ..................................................................................... 13Reprinting receipts ........................................................................................ 14
Business Day Functions . . . . . . . . . . . . . . . . . . . . . . . . . . . . . . . . . . . . . . . . . . . . . . . . . . . . . . . . 14Performing the day close . . . . . . . . . . . . . . . . . . . . . . . . . . . . . . . . . . . . . . . . . . . . . . . . . . . . . . . . . . . . . . . . . . . . . . 14Reprinting the day close report . . . . . . . . . . . . . . . . . . . . . . . . . . . . . . . . . . . . . . . . . . . . . . . . . . . . . . . . . . . . 15
Reporting . . . . . . . . . . . . . . . . . . . . . . . . . . . . . . . . . . . . . . . . . . . . . . . . . . . . . . . . . . . . . . . . . . . . . . . . . . . . . . . 15

ii
Configuration . . . . . . . . . . . . . . . . . . . . . . . . . . . . . . . . . . . . . . . . . . . . . . . . . . . . . . . . . . . . . . . . . . . . . . . . 15Adjusting the brightness and volume . . . . . . . . . . . . . . . . . . . . . . . . . . . . . . . . . . . . . . . . . . . . . . . . . . 15Other functionality . . . . . . . . . . . . . . . . . . . . . . . . . . . . . . . . . . . . . . . . . . . . . . . . . . . . . . . . . . . . . . . . . . . . . . . . . . . . . . . . 15
Troubleshooting . . . . . . . . . . . . . . . . . . . . . . . . . . . . . . . . . . . . . . . . . . . . . . . . . . . . . . . . . . . . . . . . . . . . 15Error codes . . . . . . . . . . . . . . . . . . . . . . . . . . . . . . . . . . . . . . . . . . . . . . . . . . . . . . . . . . . . . . . . . . . . . . . . . . . . . . . . . . . . . . . . . . . . 15What do I do if the terminal displays a security alert? . . . . . . . . . . . . . . . . . . . . . . . 16What problems can I easily resolve? . . . . . . . . . . . . . . . . . . . . . . . . . . . . . . . . . . . . . . . . . . . . . . . . . . . . 16Why isn’t my terminal powering on? . . . . . . . . . . . . . . . . . . . . . . . . . . . . . . . . . . . . . . . . . . . . . . . . . . . . 16
Reference . . . . . . . . . . . . . . . . . . . . . . . . . . . . . . . . . . . . . . . . . . . . . . . . . . . . . . . . . . . . . . . . . . . . . . . . . . . . . . . 16Storing the terminal . . . . . . . . . . . . . . . . . . . . . . . . . . . . . . . . . . . . . . . . . . . . . . . . . . . . . . . . . . . . . . . . . . . . . . . . . . . . . . 16Maintaining the terminal . . . . . . . . . . . . . . . . . . . . . . . . . . . . . . . . . . . . . . . . . . . . . . . . . . . . . . . . . . . . . . . . . . . . . . .17Changing the paper . . . . . . . . . . . . . . . . . . . . . . . . . . . . . . . . . . . . . . . . . . . . . . . . . . . . . . . . . . . . . . . . . . . . . . . . . . . . . . .17

1
About this GuideThis guide introduces to the TD Luxe 6200m solution. It includes hardware functionality, performing financial transactions, and basic configuration / troubleshooting. For further information regarding its use and available features, please review our online documentation at www.tdmerchantsolutions.com/posresources.
Welcome kit contentsWe are pleased to provide Merchants new to TD Merchant Solutions with the included Welcome Kit. The enclosed information was prepared with you in mind, and includes the following:
• Paper rolls for the terminal• Cleaning card and instructions• Card acceptance decals (Visa®, MasterCard®, Discover®, American Express®,
Interac® Direct Payment, etc.)• Information to help you protect your business and customers from fraud
The TD Luxe 6200m TerminalThe terminal allows you (and sometimes the customer) to enter financial transaction information. Refer to the diagram below to familiarize yourself with the terminal layout.
The terminal1. Paper chamber2. Power key
Press to power the terminal on.
Press and hold for 3 seconds to power the terminal off.
3. Command keys In order left to right, Cancel, Correction, and OK / Enter.
4. Card readersa) Swipe cards
b) Insert chipped cards
c) Contactless cards
0
WXY9TUV8PRS7
MNO6JKL5GHI4DEF3ABC2QZ1
4. Phone / Mail
16:20:36 Sept 21 Mon
2. Void 3. Day Close
5. Pre-Auth 6. P. Completion
1. Purchase
EQUINOX
1
234a
4b
4c

2
Accessibility featuresThe terminal has numerous accessibility features which reflect TD’s commitment to our customers. It has such features as:
• Backlit keypad and adjustable screen brightness to create visual contrast• Adjustable key stroke sound when a key is pressed• Voice prompts throughout the transaction• A raised identifier on the:
• 5 key,
• Cancel key,
• Correction key, and
• OK key
Idle screenThis is the first screen that you will see when the terminal finishes powering on.
Tap the icon to access the Desktop screen. See below for more information.
The ? icon accesses the Help screen. This menu contains features used by the TD technician or information that could be requested by the TD Merchant Solutions Help Desk.
Desktop screenThis screen always displays the following three icons: Purchase, Void and Day Close.
You can add any other icons to this screen up to the maximum of six. Any icons beyond this will appear on other screens. You will know if there is another screen if there is a navigation arrow in the bottom right corner.
Screen navigationTap the navigation arrows along the bottom of the screen.
?
11:20:36 Sept 21 Mon
Phone / Mail
Void Day Close
Pre-Auth P. Completion
Purchase
11:20:36 Sept 21 Mon

3
The TD HubThe terminal comes with a hub to allow for easy power and Internet connection. It includes:
• A power cable• A power port• An Ethernet comm port
Changing terminal modes (semi-integrated only) You can change modes on your terminal between semi-integrated and standalone. You would only do this if you are experiencing issues with your POS software solution provider that prevents you from processing transactions. To change to standalone mode please contact the TD Merchant Solutions Help Desk.
Cardholder Privacy and Security
Terminal securityIt is the Merchant’s responsibility to secure the terminal, any user IDs or passwords to prevent unauthorized use. In any event the Merchant will be liable for any unauthorized use of the terminal or any user IDs or passwords. There are two user security settings:
No security (Default)This setting does not use user IDs and passwords. Merchants that choose to use no security still have the option to setup a store/manager override ID and password to access areas of the terminal that have a mandatory requirement for supervisor password.
SecurityThis option allows the user to setup supervisors and operators with an ID login. The supervisor setup requires you to create a password.
Protecting terminal functionalityYou can secure various terminal functions by enabling/disabling them or protecting them with a Supervisor ID or an Override Passcode. Override Passcode allows the business owner to setup a passcode to access protected functionality.
Please contact TD Merchant Solutions Help Desk to enable/disable any of the following security options on your terminal.

4
Functionality Disable Function Supervisor ID Override Passcode
G eneric settings
Voice prompts Yes
Financial Transactions
Call for authorization
Cash transaction
Force post (disabled)
Manual entry (credit card)
Manual entry (gift card)
Yes Yes Yes
Cashback prompt
Purchase with tip
Split bill
Transaction recall
Void
Yes
Re ceipt settings
Cash transaction receipts
Print operator name
Yes
D ay close
Close batch with open pre-authorizations
Terminal auto-close
Yes
Access day close Yes
Repor ting
All reports Yes
End of day repor ts
All reports Yes

5
User managementBy utilizing the user types, you can help secure your terminal by limiting access to certain terminal functionality. Listed below are the user types and their functionality.
Note: There is a user hierarchy that determines who can access certain functionality:
• Administrator (TD Technician only),• Supervisor, and• Operator.
For more information on user management, please review the Configuration and Troubleshooting Guide at www.tdmerchantsolutions.com/posresources.
Fraud preventionThe following information will help you protect your business from fraudulent transactions.
Manually entered credit card transactionsThere is an inherent risk associated with these transactions as they have an increased rate of fraud. If you do manually enter a credit card transaction which is deemed fraudulent, you will be held responsible for any chargebacks associated with it. Manually entered credit card transactions include mail order and telephone order transactions.
Force post transactions are disabled by defaultThe force post function allows prior authorization numbers to be manually keyed in. For your protection, this capability is disabled by default on your terminal. If you need to process a force post transaction, please call the TD Merchant Solutions Help Desk at 1-800-363-1163 to enable the capability after being authenticated.
Call for authorizationSometimes, due to a communication or security issue, a transaction cannot or should not be completed. See the list of messages and events below that will require you to call for authorization.
If you are uncomfortable manually entering credit card information, as a business owner, you can request another form of payment (another credit card, debit card, cash, etc.).
We strongly recommended that you protect the Force Post function with a password or override passcode.
You must call for authorization for every force post transaction performed on your terminal.
6
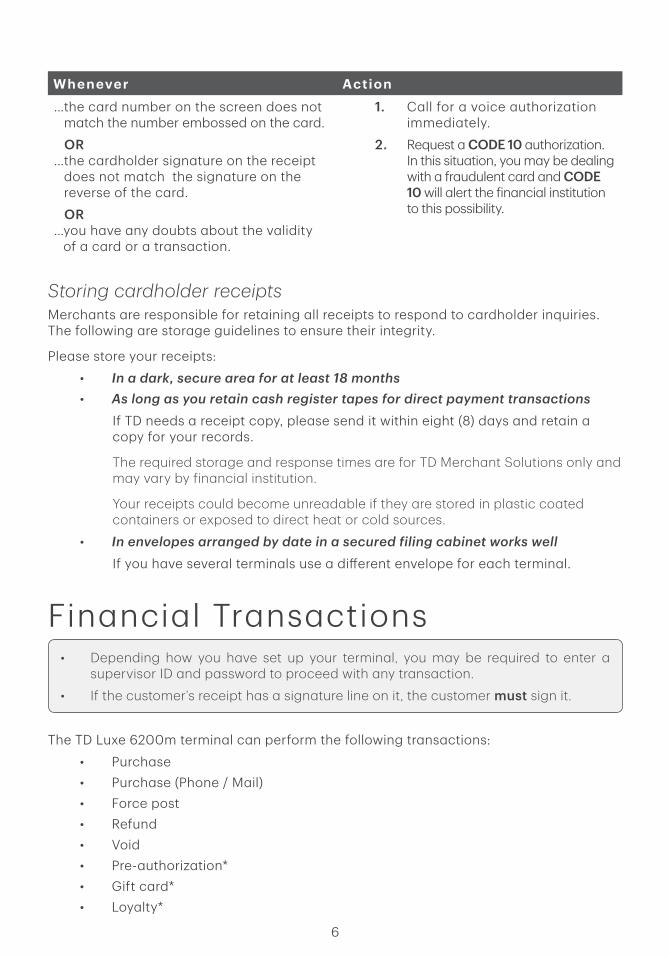
Whenever Action… the card number on the screen does not
match the number embossed on the card.
OR … the cardholder signature on the receipt
does not match the signature on the reverse of the card.
OR … you have any doubts about the validity
of a card or a transaction.
1. Call for a voice authorization immediately.
2. Request a CODE 10 authorization. In this situation, you may be dealing with a fraudulent card and CODE 10 will alert the financial institution to this possibility.
Storing cardholder receiptsMerchants are responsible for retaining all receipts to respond to cardholder inquiries. The following are storage guidelines to ensure their integrity.
Please store your receipts:
• In a dark, secure area for at least 18 months• As long as you retain cash register tapes for direct payment transactions
If TD needs a receipt copy, please send it within eight (8) days and retain a copy for your records.
The required storage and response times are for TD Merchant Solutions only and may vary by financial institution.
Your receipts could become unreadable if they are stored in plastic coated containers or exposed to direct heat or cold sources.
• In envelopes arranged by date in a secured filing cabinet works wellIf you have several terminals use a different envelope for each terminal.
Financial Transactions
The TD Luxe 6200m terminal can perform the following transactions:
• Purchase• Purchase (Phone / Mail)• Force post• Refund• Void• Pre-authorization*• Gift card*• Loyalty*
• Depending how you have set up your terminal, you may be required to enter a supervisor ID and password to proceed with any transaction.
• If the customer’s receipt has a signature line on it, the customer must sign it.

7
* These optional transactions and others are covered in our online documentation at www.tdmerchantsolutions.com/posresources.
Accepted card typesThe terminal will accept whatever cards you indicated when you signed up. If you wish to adjust your accepted card list, please contact the TD Merchant Solutions Help Desk at 1-800-363-1163.
Purchase
1. From the Desktop screen Purchase icon.
2. Enter the dollar amount on the terminal.
3. Split Payment This option will only appear if split payment is enabled on your terminal.
Select SPLIT or PAY. If the customer is paying the entire amount with one payment select PAY and go to Full payment below. Otherwise, select SPLIT and proceed to Split payment.
a) Full payment - Select the payment method.
If you accept gift cards, then the option will appear here as well. Otherwise it will only be cash or credit / debit. Go to step 4.
ORa) Split payment - Enter the payment amount.b) Correct or confirm the amount: back arrow or OK.
c) Select the payment method.
If you accept gift cards, then the option will appear here as well. Otherwise it will only be cash or credit / debit. Go to step 4.
4. Correct or confirm the payment type and amount: back arrow or OK.
5. The customer confirms the amount: back arrow or OK.
6. Tip (optional)This option will only appear if tips are enabled on your terminal.
a) The customer selects / enters one of the tip options offered on screen.
b) The customer confirms the amount.
7. Cashback (optional - debit only)This option will only appear if cashback is enabled on your terminal.
a) The customer indicates whether they want cashback.
• This transaction is used for purchases where the credit card is present. If the purchase is via phone or mail, see Telephone order or Mail order. If you use the incorrect purchase transaction you could incur extra charges.
• If you accept UnionPay cards, please review the UnionPay Guide at www.tdmerchantsolutions.com/posresources.

8
b) The customer enters or selects the cashback amount.
8. The customer confirms that the amount is correct.
9. Perform one of the following payment methods: Insert, Swipe, Contactless or Manual Entry.
Insert
a) The customer inserts their card, enters their PIN.
If a debit card is used the customer must select the account to use. Go to step 8.
Swipe (credit only)
a) The customer swipes their card.
b) You verify the card info with what is on the screen. Go to step 8.
Contactless
a) The customer taps their card on the contactless card reader.
In some cases, the customer may be required to swipe or insert their card. Go to step 8.
Manual entry (credit only)
a) Enter the account number.b) Enter the expiry date.
c) Enter the CVD number. This number is generally located on the back of the credit card. Go to step 8.
10. The screen shows that the transaction is completed with an authorization number or approved message. The receipts will print.
If the customer's copy has a signature line on it, the customer must sign the receipt. You can REPRINT the receipt or FINISH the transaction.
11. If split payment is enabled, and there is a balance left owing, go to the Split Payment instructions in step 3.
The amount paid by the customer may only be partially authorized depending on the card company. If a partial authorization occurs, the screen will display the amount still outstanding. The transaction will then request another payment method for the balance.

9
Phone or Mail purchase
These instructions are used for purchases where the card is not present. If the card is present at purchase, see Credit card purchase. If you use the incorrect purchase transaction you could incur extra charges.
1. From the Desktop screen Phone / Mail Purchase icon. If you have both Phone Orders and Mail Orders enabled, you will have the option to select which one you want to use: PHONE or MAIL.
2. Enter the invoice number (if enabled).
3. Enter the dollar amount.
4. Enter the account number.5. Enter the expiry date.
6. If this is a phone order, enter the CVD.
7. Enter customer's house number (if enabled).
8. Enter the customer's postal code (if enabled).
9. The screen shows that the transaction is completed with an authorization number and the receipts print.
10. You can REPRINT the receipt or FINISH the transaction.
Void This option recalls a transaction so that you can void it. The following instructions can access any transactions that were performed in the current open batch. If a day close has been completed, you cannot recall transactions prior to the day close. If a day close has been performed you must do a refund, not a void.
1. From the Desktop screen Void icon.
2. Enter the trace # from the receipt of the transaction to be voided.
3. Confirm that the transaction is to be cancelled.
4. If this is a debit card, the customer inserts their card and enters their PIN.
5. The screen shows that the transaction is completed with an approved message and the receipts print.
6. You can REPRINT the receipt or FINISH the transaction.
• There are risks performing transactions when the credit card is not present. Ensure that you perform all of the available security checks for phone / mail purchases.
• These transactions can be password protected.

10
Refund You can only perform a refund on a transaction that has already been submitted for reimbursement.
1. From the Desktop screen Debit / Credit icon Refund.
2. If refunds have been password protected on your terminal, or this is a debit card refund, you must:
a) Enter a Supervisor ID.
b) Enter the Supervisor Password.
3. Enter the dollar amount.
4. Select one of the following payment methods: Insert, Swipe, Contactless or Manual Entry.
Insert credit or debit card / swipe credit card
a) The customer enters their PIN. Go to step 5.
Contactless credit or debit card
a) The customer taps their contactless-enabled card on the screen. Go to step 5.
Manual credit card
a) Enter the account number.b) Enter the expiry date. This is four digits in length.
c) Enter the CVD number. This can be up to four digits in length. Go to step 5.
5. Press Continue.
6. You can REPRINT the receipt or FINISH to complete the refund and the receipts print.
Transaction recall The following instructions access any transactions that were performed in the current open batch. This option recalls a transaction so that you can view or void an existing transaction. If a day close has been completed, you cannot recall transactions prior to the day close.
1. From the Desktop screen Transaction Recall icon.
2. Select one of the following:
Recall by trace #
a) Enter the trace number that you want to recall. Go to step 3.
Debit refunds are disabled by default. If you wish to activate debit refunds on your terminal, please call the TD Merchant Solutions Help Desk at 1-800-363-1163.
This option can also be used to complete an open pre-authorization. You must have pre-authorizations enabled on your terminal to have this functionality. Pre-authorization transactions are covered in our Pre-authorization Guide at www.tdmerchantsolu-tions.com/posresources.

11
Recall all
a) A list of all transactions currently available on the terminal appear. Go to step 3.
Recall by amount
a) Enter the dollar amount. Go to step 3.
Recall by account #
a) Swipe or Manually enter the card. Go to step 3.
Recall by invoice #
a) Enter the invoice number that you want to recall. Go to step 3.
3. If there are multiple transactions, scroll to the desired one.
4. Select Void to cancel the transaction or select Completion to close a pre- authorization. Press Cancel to leave this screen without making a selection.
Force post purchase
This option is only used when you can’t process a credit card purchase normally through the network whether due to communication problem or that the force post is requested via the terminal.
1. From the Desktop screen Debit / Credit icon Force Post Purchase.
2. Enter the dollar amount.
3. Enter the authorization number.
4. Confirm the authorization number.
Insert or swipe credit card
a) Insert or swipe the credit card. Go to step 5.
Manual credit card
a) Press OK.
b) Enter the account number.c) You may be requested to confirm your card type (Visa, Mastercard,
UnionPay, etc.) by tapping the icon on the screen.
d) Enter the expiry date. This is four digits in length.
e) Enter the CVD number. This can be up to four digits in length. Go to step 5.
5. You can REPRINT the receipt or FINISH the transaction.
Before you perform this transaction, you must call the TD Merchant Solutions Help Desk at 1-800-363-1163 and receive an authorization number.

12
Force post phone / mail purchase
This option is only used when you can’t process a credit card purchase normally through the network whether due to communication problem or that the force post is requested via the terminal.
1. From the Desktop screen Debit / Credit icon Force Post Phone/Mail Purchase.
2. Confirm if this is a phone order or mail order: PHONE or MAIL.
3. Enter the dollar amount.
a) Enter the account number.b) Enter the expiry date.
c) If this is a phone order, enter the CVD. This can be up to four digits in length.
4. Enter the authorization number.5. Confirm the authorization number.6. You can REPRINT the receipt or FINISH the transaction.
ReceiptsEach transaction has a different receipt and most of the information is purely for record keeping. There are some points of important information you need to be aware of to ensure that your transactions have completed correctly.
Receipt exampleThe information that you will use the most is noted and explained below.
C ard entr y methodC Chip card transaction
CN Chip card NSR transactions
CO Off-line chip card transaction
M Manually entered transaction and the card was present.
MC Manually entered fallback of a chip card transaction
RF Contactless transaction
S Swiped mag card transaction
SC Swiped chip card fall back transaction
SN Swiped NSR transaction
Before you perform this transaction, you must call the TD Merchant Solutions Help Desk at 1-800-363-1163 and receive an authorization number.
Merchant NameAddress, Postal Code
City, Province########
LUXTD#######
**** PURCHASE ****
03-21-2020Acct # ************5097Card Type VIA00000000003101001
Trace # 6 Inv. # 5 Auth # 75612 RRN 001003001 TVR8000000000 TSI 7800TC 0E19785C8DAA97AC
Purchase $40.00 CADTip $10.00 CAD
Total $50.00 CAD
(001) APPROVED THANK YOU(PIN VERIFIED)
Retain this copy for your
recordsMerchant Copy
16:19:59C
VISA CREDIT

13
C ard Typ eAM American Express DP Debit
DS Discover / Diners JC JCB
MC MasterCard MD MasterCard Debit
PV Visa Debit RC RCS
UP UnionPay VI Visa
Impor tant InformationTransaction Type This shows what type of transaction was done (Purchase, Void, etc.)
and whether it is a duplicate receipt.
Card Type This shows what kind of card was used for the transaction.
Trace # The trace number associated with the transaction.
Inv # The invoice number associated with the transaction.
Auth # The authorization number associated with the transaction.
Signature The card issuer determines when a signature is required for a transaction.
Approved Always ensure that the transaction was approved as it could be DECLINED.
Receipt print optionsYou can select which receipts print and when by calling the TD Merchant Solutions Help Desk. The options available to you are:
Customer receipts:
• Print for every transaction (default)• Individual receipts can be
declined by the Merchant• Do not print any customer receipts
Merchant receipts:
• Print for every transaction (default)• Print for every approved transaction• Print for transactions over a set
amount• Print only for a transaction that
requires a signature
Force post phone / mail purchase
This option is only used when you can’t process a credit card purchase normally through the network whether due to communication problem or that the force post is requested via the terminal.
1. From the Desktop screen Debit / Credit icon Force Post Phone/Mail Purchase.
2. Confirm if this is a phone order or mail order: PHONE or MAIL.
3. Enter the dollar amount.
a) Enter the account number.b) Enter the expiry date.
c) If this is a phone order, enter the CVD. This can be up to four digits in length.
4. Enter the authorization number.5. Confirm the authorization number.6. You can REPRINT the receipt or FINISH the transaction.
ReceiptsEach transaction has a different receipt and most of the information is purely for record keeping. There are some points of important information you need to be aware of to ensure that your transactions have completed correctly.
Receipt exampleThe information that you will use the most is noted and explained below.
C ard entr y methodC Chip card transaction
CN Chip card NSR transactions
CO Off-line chip card transaction
M Manually entered transaction and the card was present.
MC Manually entered fallback of a chip card transaction
RF Contactless transaction
S Swiped mag card transaction
SC Swiped chip card fall back transaction
SN Swiped NSR transaction
Before you perform this transaction, you must call the TD Merchant Solutions Help Desk at 1-800-363-1163 and receive an authorization number.
Merchant NameAddress, Postal Code
City, Province########
LUXTD#######
**** PURCHASE ****
03-21-2020Acct # ************5097Card Type VIA00000000003101001
Trace # 6 Inv. # 5 Auth # 75612 RRN 001003001 TVR8000000000 TSI 7800TC 0E19785C8DAA97AC
Purchase $40.00 CADTip $10.00 CAD
Total $50.00 CAD
(001) APPROVED THANK YOU(PIN VERIFIED)
Retain this copy for your
recordsMerchant Copy
16:19:59C
VISA CREDIT

14
Reprinting receipts 1. From the Desktop screen Reprint icon and select one of the following:
Last Receipt
a) Confirm that this is correct: NO or YES. The most recent receipt will reprint.
Past Receipt
a) Swipe the card that the transaction was performed on. Any transactions that were done on the terminal by the swiped card will appear on the screen.
b) Select the transaction that you want to reprint the receipt for.
c) Select PRINT if this is the correct transaction.
Business Day FunctionsTo start a business day, log onto a terminal that has had the day close function performed on it. Depending on the logon method, it may be as simple as a user performing transactions to entering a logon ID and password.
Performing the day close You have a deadline to perform the day close. This is called your balancing window and it is set on the system. If your day close is done before your balancing window ends, you’ll receive same or next business day deposit for credit and debit card totals. Otherwise, they will be forwarded to the next business day.
You must close your business day on each terminal in order to maintain accurate records and balance your accounts. Closing the business day is important as it:
• Sends any stored transactions (SAFs)• Closes all open batches• Prints selected reports• Checks for mail, and downloads available updates• Starts a new business day on the terminal by opening a new batch
1. From the Desktop screen Day Close icon.
2. Confirm that you want to Continue. Once the process is started ensure that the terminal is not used until the day close is completed.
3. Select your report delivery method (DISPLAY or PRINT). Depending on how you have set up your day close process, certain reports will print.
4. When it is completed you will see the Business Day Closed message and the terminal will restart.
A day close is automatically performed on your terminal every three to five business days if one isn’t performed sooner by you.

15
Reprinting the day close report 1. From the Desktop screen Reprint icon.
2. Select Day Close Report.
3. Confirm that this is correct.
ReportingPlease refer to the online Configuration and Troubleshooting Guide.
Configuration
Adjusting the brightness and volume 1. From the Desktop screen Settings icon Backlight or Speaker Volume.
2. Press the plus or minus icon to increase or decrease the brightness / volume.
Other functionalityFor more information regarding your terminal's use and available features, please review our online Configuration and Troubleshooting Guide at www.tdmerchantsolutions.com/posresources.
TroubleshootingIf you’re unable to resolve the problem after performing the following steps, please contact the TD Merchant Solutions Help Desk at 1-800-363-1163.
Error codesError codes are explained in the online Configuration and Troubleshooting Guide at www.tdmerchantsolutions.com/posresources.
What do I do if the terminal displays a security alert?If your terminal displays the message Security Alert, it means that your terminal has been damaged and must be replaced. Contact the TD Merchant Solutions Help Desk immediately at 1-800-363-1163.

16
What problems can I easily resolve?Problem Action Re quire d
Bad Communication Press CANC key And Try Again
1. There was a communication failure after the transaction was initiated.
2. Press Cancel and try again.
Chip cards cannot be processed
1. Try inserting a different card. If this card can be read, the problem is with the first card.
2. Use a cleaning card to clean the card reader.
Display is too bright or too dark
1. Adjust the brightness setting to work with the lighting at the terminal location.
Magnetic stripe card reader won’t read cards
1. Try swiping the card more quickly or more slowly or from the top of the reader towards you.
2. Request another form of payment. If this card can be read, the problem is with the first card.
3. Use a cleaning card to clean the problem card reader.
Printer does not print 1. Is there is paper in the device? If there is, ensure that the paper is loaded correctly.
Printer jam 1. Ensure that the paper feed is clear and that the paper roll is loaded correctly.
2. Ensure the printer lid is closed completely.
Why isn’t my terminal powering on?1. Press any button on the terminal to see if it is in power saving mode.
2. Ensure that the electrical outlet has power.
3. Ensure that the power cord is properly inserted into the outlet.
4. Re-insert the power cable into the hub’s power port. Ensure that the power cable plug is aligned with, and fully inserted into the power port on the hub.
5. Power on the terminal.
Reference
Storing the terminal• They must be stored in temperatures between 0° and 50° Celsius.• Do not leave them outdoors overnight, especially in the winter.

17
Maintaining the terminal• Don’t place the terminal on a magnetized pad — this will cause them to malfunction.• Routinely clean it with a damp cloth so that any spills don’t get into the inner workings.• Use TD-approved cleaning cards for the chip and magnetic card readers.
Changing the paper1. Gently pull up on the paper chamber panel along the top of terminal and
remove the old paper roll.
2. Unwrap a new paper roll and place it in the paper chamber so that the loose end of the paper feeds up from under the paper roll towards you.
3. Press down on the panel until it clicks shut and ensure there is a enough paper sticking out from the chamber that it touches the top of the TD logo.

18

Contact InformationPlease call the TD Merchant Solutions Help Desk at 1-800-363-1163. We would be happy to answer any questions you may have.
Authorization:24 hours a day, seven days a week
Terminal Inquiries:24 hours a day, seven days a week
General Merchant Inquiries:Monday – Friday, 8 a.m. – 8 p.m. ET
Printer / Stationery Supplies:Monday – Friday, 8 a.m. – 5 p.m. ET
Documentation PortalThis guide covers the most commonly used information in order to get you started. Your terminal has more features and functionality to explore on our documentation portal which you can find at www.tdmerchantsolutions.com/posresources.
Below is a list of the available Luxe 6200m documentation:
• Quick Start Guide• Configuration and Troubleshooting Guide• Pre-authorization Guide• Givex Gift Card Guide• More Rewards Guide• UnionPay Guide• and more

529126 (0321)


