45
Installing HP Device Manager 4.5 Creating a standard for installing HP Device Manager 4.5 and configuring HP Device Manager 4.5 tools Technical white paper

Installing HP Device Manager 4.5 Creating a standard for installing HP Device Manager 4.5 and configuring HP Device Manager 4.5 tools
Technical white paper

2
© Copyright 2013 Hewlett-Packard Development Company, L.P.
Microsoft and Windows are U.S. registered trademarks of Microsoft Corporation.
Confidential computer software. Valid license from HP required for possession, use or copying. Consistent with FAR 12.211 and 12.212, Commercial Computer Software, Computer Software Documentation, and Technical Data for Commercial Items are licensed to the U.S. Government under vendor's standard commercial license.
The information contained herein is subject to change without notice. The only warranties for HP products and services are set forth in the express warranty statements accompanying such products and services. Nothing herein should be construed as constituting an additional warranty. HP shall not be liable for technical or editorial errors or omissions contained herein.
First Edition: January 2013
Document Part Number: 721722-001

3
Table of contents Overview ............................................................................................................................................ 4
Server preparation ............................................................................................................................... 5 FTP server configuration .................................................................................................................... 5 Windows Firewall settings ................................................................................................................. 5
Firewall settings for FTP ................................................................................................................. 5 Firewall settings for HP Device Manager ......................................................................................... 6
Installing HP Device Manager 4.5 ......................................................................................................... 7 Running the installation file ................................................................................................................ 7 HPDM configuration ....................................................................................................................... 11 Creating a new database ................................................................................................................ 15
Upgrading to HP Device Manager 4.5 ................................................................................................. 20 Running the installation file to upgrade HPDM ................................................................................... 20 HPDM configuration during an upgrade ........................................................................................... 25 Using an existing database ............................................................................................................. 29
HP Device Manager tools ................................................................................................................... 35 Configuring HPDM Server ............................................................................................................... 35
Accessing the Server configuration file .......................................................................................... 35 Thread settings ........................................................................................................................... 35 Port settings ............................................................................................................................... 36 Poll settings ................................................................................................................................ 36 Task settings ............................................................................................................................... 36 Log settings ................................................................................................................................ 37 Cache settings ............................................................................................................................ 37
Configuring HPDM Gateway ........................................................................................................... 38 HPDM Gateway configurations .................................................................................................... 39 HPDM Gateway tray icon colors .................................................................................................. 40 HPDM Gateway tray icon menu ................................................................................................... 40
Configuring DHCP tags ................................................................................................................... 41 Configuring HPDM Agent................................................................................................................ 41
Configuring HP WES/XPe/CE clients ............................................................................................ 41 Configuring HP ThinPro/Debian clients ......................................................................................... 42 Agent parameters ....................................................................................................................... 44
Appendix A—Port usage in HP Device Manager ................................................................................... 45

4
Overview This document discusses the installation of HP Device Manager 4.5 and the usage of HP Device Manager 4.5 tools in a Proof of Concept. Production installation may differ based on a number of parameters, including, but not limited to, the number of remote sites, the number of thin clients, LAN and WAN links, network configuration, etc... Please contact your thin client technical consultant for more details. HP Device Manager consists of five modules: • Management Console—The graphical application used by administrators to access the management
system.
• Management Server—The central server, which consolidates and controls all management activities.
• Management Gateway—Serves as the link between Agents and the Management Server.
• Management Master Repository Controller—Manages the content in the Master Repository and synchronizes that content to other repositories as requested by the HPDM Server.
• Management Agent—Software installed on the client to enable device management. The Management Console, Management Server, Management Gateway, and Master Repository Controller modules may be installed on the same machine or on separate machines.
5
Server preparation For this setup, you will need Windows Server 2003 or Windows Server 2008 running on either a physical or virtual machine. Please allocate at least 10 GB for the operating system and the HPDM files. Full server recommendations are in the HP Device Manager User Guide. Assumption—The server will be a standard installation without any additional services running. The purpose of this chapter is to assist those installing HP Device Manager onto Windows Server 2008 R2 with the post-installation steps of configuring the FTP repository on the FTP server and configuring the local Microsoft Advanced Firewall to allow basic HPDM traffic. The example assumes a complete HP Device Manager installation has already been performed on the server and that a user account for the FTP transactions has already been created.
FTP server configuration For details about FTP server configuration, please refer to the Configuring an IIS FTP Server technical white paper.
Windows Firewall settings In Windows Server 2008 R2, the built-in firewall service is provided to help secure your server from network threats and is enabled by default. If you choose to use the built-in Windows Firewall, you will need to configure your settings so that the HPDM and FTP traffic can pass through the firewall. This section will not only cover how to configure the FTP ports but also the basic ports used by HPDM. Please note that you will need to be logged in as Administrator or as a user that has administrator privileges. If you are only logged in using an account that has administrator privileges (and not as the Administrator account), then you will need to ensure that you open the command prompt by right-clicking the Command Prompt menu item that is located in the Accessories menu for Windows and selecting Run as administrator. This is required because the User Account Control (UAC) security component in the Windows Server 2008 R2 operating system prevents non-Administrator account access to the firewall settings. Firewall settings for FTP An exception is needed for both the control channel (port 21) and the port range for the passive data channel. Though this can be done in the GUI for the Windows Firewall, it is easier to add these rules from the command line. Use the following steps to add the rules:
1. Click Start > All Programs > Accessories > Command Prompt. If not logged on as Administrator, be sure to right-click on Command Prompt and select Run as Administrator.
2. To add an inbound rule for the command channel and allow connections to port 21, enter the following command and then hit Enter:
netsh advfirewall firewall add rule name="FTP (non-SSL)" action=allow protocol=TCP dir=in localport=21

6
3. To disable stateful FTP filtering so that Windows Firewall will not block FTP traffic to the passive port range, enter the following command and then hit Enter:
netsh advfirewall set global StatefulFtp disable
Firewall settings for HP Device Manager The basic ports used by HPDM for management traffic between the Server, Gateway, and Agent fall in the range of 40000-40009 and 40012. Use the following steps to configure the necessary exceptions:
1. Click Start > All Programs > Accessories > Command Prompt. If not logged on as Administrator, be sure to right-click on Command Prompt and select Run as Administrator.
2. To add an inbound rule to allow UDP traffic on port 40000, enter the following command and then hit Enter:
netsh advfirewall firewall add rule name="HP Device Manager UDP IN" action=allow protocol=UDP dir=in localport=40000
3. To add an outbound rule to allow UDP traffic on port 40000, enter the following command and then hit Enter:
netsh advfirewall firewall add rule name="HP Device Manager UDP OUT" action=allow protocol=UDP dir=out localport=40000
4. To add an inbound rule to allow TCP traffic on ports 40001-40009 and 40012, enter the following command and then hit Enter:
netsh advfirewall firewall add rule name="HP Device Manager TCP IN" action=allow protocol=TCP dir=in localport=40001-40009,40012
5. To add an outbound rule to allow TCP traffic on ports 40001-40009 and 40012, enter the following command and then hit Enter:
netsh advfirewall firewall add rule name="HP Device Manager TCP OUT" action=allow protocol=TCP dir=out localport=40001-40009,40012
After following the steps described in this white paper, the HP Device Management Server and Agents should have no problem connecting to and transferring files to and from the FTP site created for the repository. Also, the ports used for basic HP Device Management traffic should be opened up on the Windows Firewall. Other ports may be needed for other specific tasks that were not covered here. Please refer to the HP Device Manager User Guide or Release Notes for a complete list of ports used by HP Device Manager.

7
Installing HP Device Manager 4.5 Before installing HP Device Manager, copy the installation files to the server and see the chapter Server preparation.
Running the installation file 1. Open the HP Device Manager folder and double-click the HPDM setup file. If it asks to Extract or Run,
pick Run.
2. Click Next.

8
3. Accept the license agreement and click Next.
4. Click Yes.

9
5. This step allows you to select a setup type: o Complete—All components will be installed with their default configurations.
o Custom—Select the components to install and specify the configuration of each one.
Select the desired setup type, change the Destination Folder if you want, then click Next.
NOTE: In this example, we are using the Custom setup.
6. Make sure all the components are checked. For a detail description of each component, please refer to the HP Device Manager User Guide. Click Next.

10
7. Accept the default root path where the Master Repository will be stored or click Browse and navigate to a specific location. Click Next.
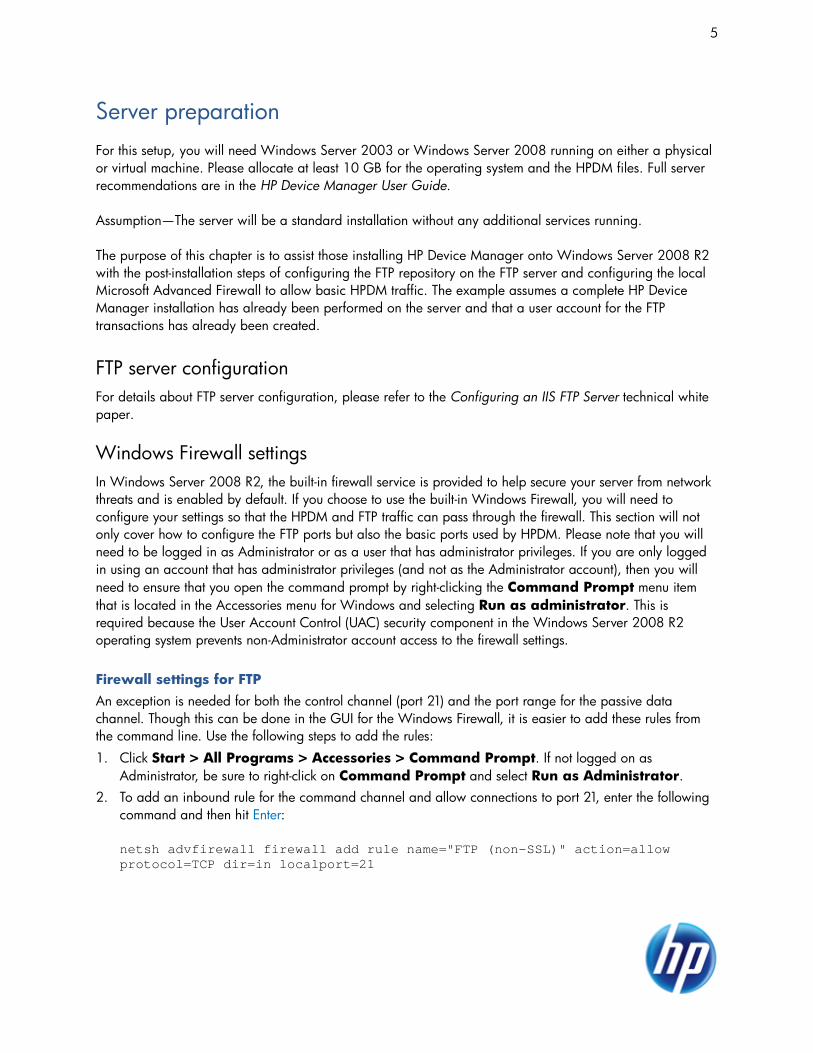
8. Click Install.

11
9. HPDM is installing…
HPDM configuration 1. Next, an HPDM Configuration Wizard appears. Set the preferred language and click Next.

12
2. Click Check… to check ports, then click Next.
3. Be sure that DHCP server not located on this machine is selected and click Next.

13
4. Change Start PXE service when gateway is started to No and click Next.
5. Click Execute.

14
6. Click Finish.

15
Creating a new database 1. Next, an HP Device Manager Database Setup dialog appears. Select Create New Database, then
click Next.
NOTE: Since it’s the first time installing HP Device Manager, you have to create a new database.
2. HP Device Manager supports two database types: o PostgreSQL—HP Device Manager’s embedded database. There is no need to do any
other database configurations if you choose it.
o MS SQL Server—If you choose it, you should have already created an MS SQL Server database for you to connect to (please refer to MS SQL Server documentation).
In this example, we will be choosing PostgreSQL.

16
NOTES: If you choose MS SQL Server as your HP Device Manager database, the authentication type in the HP Device Manager Database Setup dialog should correspond to the MS SQL Server configuration, and you have to be authorized to create the database. For example: a. If you choose Windows authentication mode when doing Database Engine Configuration, you should choose Window Authentication when configuring HP Device Manager Database Setup. b. If you choose Mixed Mode when doing Database Engine Configuration, you can choose either Window Authentication or SQL Server Authentication when configuring HP Device Manager Database Setup.

17
3. Choose PostgreSQL, then click Next.
4. There will be a processing dialog while it is creating a new database.

18
5. After the database creation is done, enter and confirm the password for the root account, and then click Finish.
NOTE: This account is the Administrator account.
6. Click OK. The database was created successfully.

19
7. After the database installation is finished, a completion dialog will appear. Click Finish.
You have completed the installation of HP Device Manager.

20
Upgrading to HP Device Manager 4.5 If you’ve installed an older version of HP Device Manager, you can use the HPDM 4.5 installation file to upgrade it. Before upgrading HP Device Manager, copy the installation files to the server and see the chapter Server preparation.
Running the installation file to upgrade HPDM 1. Open the HP Device Manager folder and double-click the HPDM setup file. If it asks to Extract or Run,
pick Run.
2. A dialog will appear to prompt you to upgrade HP Device Manager. Click Next.

21
3. If you want to continue, click Yes. Otherwise, click No to exit this upgrade.
4. Click Next.
5. Accept the license agreement and click Next.

22
6. Click Yes.
7. Select the Custom setup, change the destination folder if you want, and then click Next.
NOTE: You can overwrite the old version’s HP Device Manager directory, or you can create a new destination folder.

23
8. Make sure all the components are checked. For a detailed description of each component, please refer to the HP Device Manager User Guide. Click Next.
9. Accept the default root path where the Master Repository will be stored or click Browse and navigate to a specific location. Click Next.
24
10. Click Install.
11. Preparing for upgrade…

25
12. HPDM is installing…
HPDM configuration during an upgrade 1. Next, an HPDM Configuration Wizard appears. Set the preferred language and click Next.

26
2. Click Check to check ports, then click Next.
3. Be sure that DHCP server not located on this machine is selected and click Next.

27
4. Change Start PXE service when gateway is started to No and click Next.
5. Click Execute.

28
6. Click Finish.

29
Using an existing database 1. Next, an HP Device Manager Database Setup dialog will appear. Select Use HP Device Manager
database at existing location, then click Next.
NOTES: Use HP Device Manager database at existing location means to use the existing database instead of creating a new one. For example, if you have HP Device Manager 4.4 and you want to upgrade to 4.5, you can use the existing version 4.4 database.
If you want a completely new database, you can choose Create New Database (see the chapter Creating a new database).

30
2. A processing dialog will appear. Database Setup is connecting to the existing database.
3. A dialog will appear notifying you that the existing database was used successfully.
You have completed the upgrade of HP Device Manager. If Database Setup has a problem connecting to the existing database:
1. A dialog will appear. Click OK. You can specify the database manually.

31
2. There are two configuration modes:
a. Import—You can import an existing database configuration file: hibernate.cfg.
b. Setting Database—You do the configuration manually.
For this example, use the Import option, then click Browse.

32
3. Look in the existing HP Device Manager directory …/Server/conf, select the hibernate.properties file, then click Open.
4. You will see the Database Settings is configured.

33
5. Click Browse to set the last installed HP Device Manager directory, then click Next.
6. After the process is done, enter and confirm the password for the root account, then click Finish.
NOTE: This account is the Administrator account.

34
7. Click OK. The existing database was used successfully.
8. After the database installation is finished, a completion dialog will appear. Click Finish.
You have completed the upgrade of HP Device Manager.

35
HP Device Manager tools
Configuring HPDM Server Here, we explain each parameter in the Server configuration file. Accessing the Server configuration file 1. Open the Explorer and find the installation folder for HP Device Manager.
2. Right-click on the file server.conf, and choose Open With and then Notepad. Now you have a notepad displaying the content of server.conf, and you can modify some of the parameters in it. The following are explanations for each parameter. Thread settings HPDM Server creates a thread pool to contain all services.
Parameter Description
hpdm.thread.poolSize=400 This parameter indicates the maximum amount of thread used by the Server. The default value is 400.
hpdm.thread.maxNum.task=100 This parameter indicates the maximum amount of thread for tasks.
hpdm.thread.maxNum.report=200 This parameter indicates the maximum amount of thread for processing reports.
hpdm.thread.maxNum.gatewayWalker=20 This parameter indicates the maximum amount of thread for walking Gateways.

36
Port settings The following ports are used to communicate with HPDM Gateway.
Parameter Description
hpdm.poll.port=40000 This parameter indicates the port that the Server uses to poll a Gateway.
hpdm.task.port=40003 This parameter indicates the port that the Server uses to send tasks to a Gateway.
hpdm.report.port=40005 This parameter indicates the port that the Server uses to receive reports from a Gateway.
Poll settings HPDM Server can be set to poll Gateways periodically and refresh their status with polling results.
Parameter Description
hpdm.poll.enabled=false This parameter indicates whether the Server needs to poll Gateways periodically.
hpdm.poll.batchNumber=10 This parameter indicates how many Gateways to poll at a time. This takes effect only if poll.enabled is set to true.
hpdm.poll.batchInterval=60 This parameter indicates how long in seconds the Server should wait before polling another batch of Gateways. This takes effect only if poll.enabled is set to true and the total Gateway amount is larger than poll.batchNumber.
hpdm.poll.roundInterval=600 This parameter indicates how long in seconds the Server should wait before starting a new round of Gateway polling. This takes effect only if poll.enabled is set to true.
hpdm.poll.retryTimes=5 This parameter indicates how many times the Server should retry when failing to connect to a Gateway when polling it. This takes effect only if poll.enabled is set to true.
hpdm.poll.retryInterval=180 This parameter indicates how long in seconds the Server should wait before retrying polling a Gateway when the last connection failed. This takes effect only if poll.enabled is set to true.
Task settings
Parameter Description
hpdm.task.SSL.enabled=true This parameter indicates whether the Server sends a task to HPDM Gateway with SSL-encrypted communication. Available values are “true” and “false”.
hpdm.task.retry=true This parameter indicates whether the Server retries when failing to send a task to HPDM Gateway. If set to false, the Server will drop the task and mark it as a failure.
hpdm.task.retryInterval=60 This parameter indicates how long in seconds the Server retries sending tasks. It only takes effect when hpdm.task.retry is set to true.

37
Log settings HPDM Server outputs logs to a rolling file named hpdm-server.log.
Parameter Description
hpdm.log.level=WARN This parameter indicates log levels to write into the log file. The log levels in the Server are:
DEBUG = 1: Logs for developer debugging.
INFO = 2: Logs of running information, contain no errors.
WARN = 3: Logs with warning, something unexpected happened.
FATAL = 4: Logs of fatal errors or what must be logged, such as server start.
Setting log levels to XXX will make the Server write specified logs of no lower than XXX to the log file. For example, when setting the log level to INFO, the Server will write INFO, WARN, and FATAL logs since the next start.
hpdm.log.dailyRolling=false This parameter specifies whether the log will be appended with a daily rolling. If set to true, the following two configurations (hpdm.log.maxBackupIndex and hpdm.log.maxFileSize) are ignored.
hpdm.log.maxBackupIndex=10 This parameter indicates the maximum number of log files the Server will keep.
hpdm.log.maxFileSize=5MB This parameter indicates the maximum size of each log file.
hpdm.log.gateway=false This parameter indicates whether the Server should write logs about communicating with HPDM Gateway.
hpdm.log.console=false This parameter indicates whether the Server should write logs about communicating with HPDM Console.
hpdm.log.task=false This parameter indicates whether the Server should write logs about tasks.
hpdm.log.db=false This parameter indicates whether the Server should write logs about database operations.
Cache settings
Parameter Description
hpdm.cache.enabled=true This parameter indicates whether the Server should keep a cache in memory to speed up reaction to Consoles.

38
Configuring HPDM Gateway
1. After HPDM Gateway is installed, its tray icon will be displayed on the right side of the taskbar. Right-click the icon, and the following menu will appear.
2. Click Configure Device Management Gateway, and the HPDM Gateway Configuration window will appear.
39
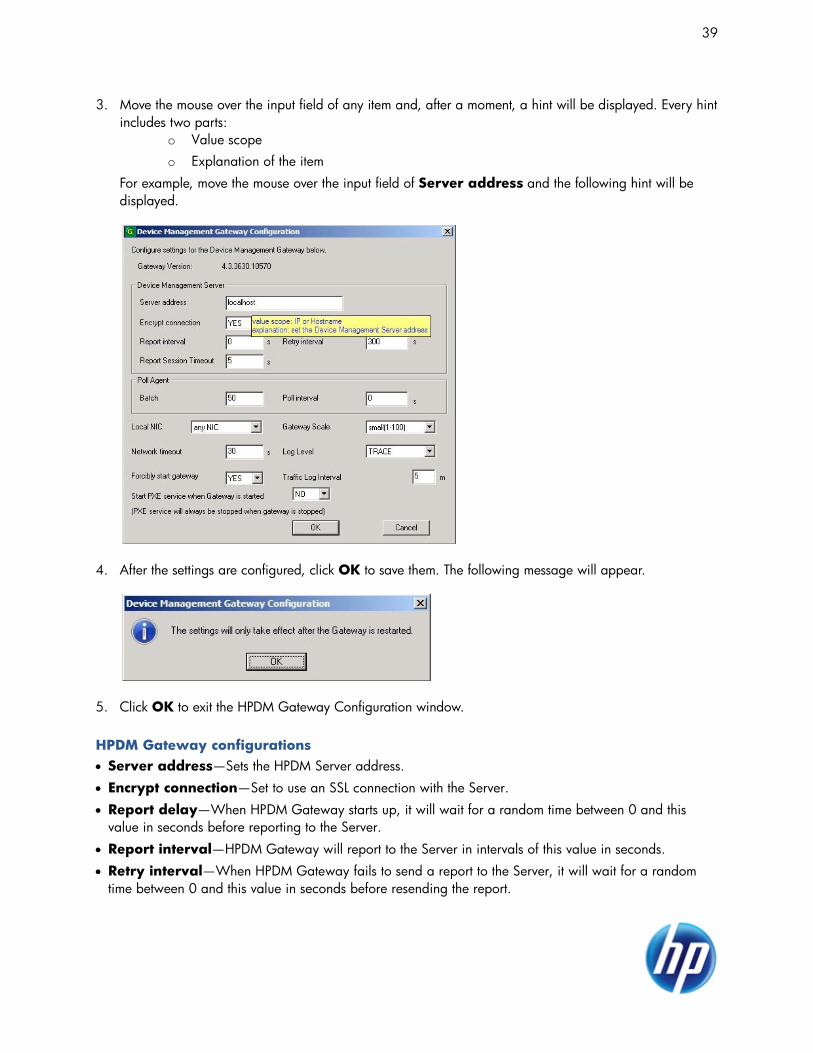
3. Move the mouse over the input field of any item and, after a moment, a hint will be displayed. Every hint includes two parts:
o Value scope o Explanation of the item
For example, move the mouse over the input field of Server address and the following hint will be displayed.
4. After the settings are configured, click OK to save them. The following message will appear.
5. Click OK to exit the HPDM Gateway Configuration window. HPDM Gateway configurations • Server address—Sets the HPDM Server address.
• Encrypt connection—Set to use an SSL connection with the Server.
• Report delay—When HPDM Gateway starts up, it will wait for a random time between 0 and this value in seconds before reporting to the Server.
• Report interval—HPDM Gateway will report to the Server in intervals of this value in seconds.
• Retry interval—When HPDM Gateway fails to send a report to the Server, it will wait for a random time between 0 and this value in seconds before resending the report.
40
• Report Session Timeout—After a report connection is established with the Server, it will be maintained for a period of time equal to this value in seconds to reduce the cost of connection establishment and cleaning up.
• Batch—The number of HPDM Agents that will be polled by HPDM Gateway in a batch.
• Poll interval—The interval in seconds between polling HPDM Agents.
• Local NIC—Select a network card for HPDM Gateway to send/receive tasks and reports.
• Gateway Scale—The number of HPDM Agents that will be managed by HPDM Gateway.
• Network timeout—Timeout in seconds for network input/output.
• Log Level—Sets the log level for the HPDM Gateway log file.
• Forcibly start gateway—Set to forcibly start HPDM Gateway even if another HPDM Gateway is detected on the same subnet.
• Traffic Log Interval—The interval in minutes for logging traffic.
• Start PXE service when Gateway is started—If you want to capture/deploy images with PXE mode, set this option to “Yes”.
HPDM Gateway tray icon colors • Green—HPDM Gateway is running.
• Yellow—HPDM Gateway is stopping or starting.
• Red—HPDM Gateway is stopped.
• Red & Yellow—HPDM Gateway has found another HPDM Gateway running on the same subnet.
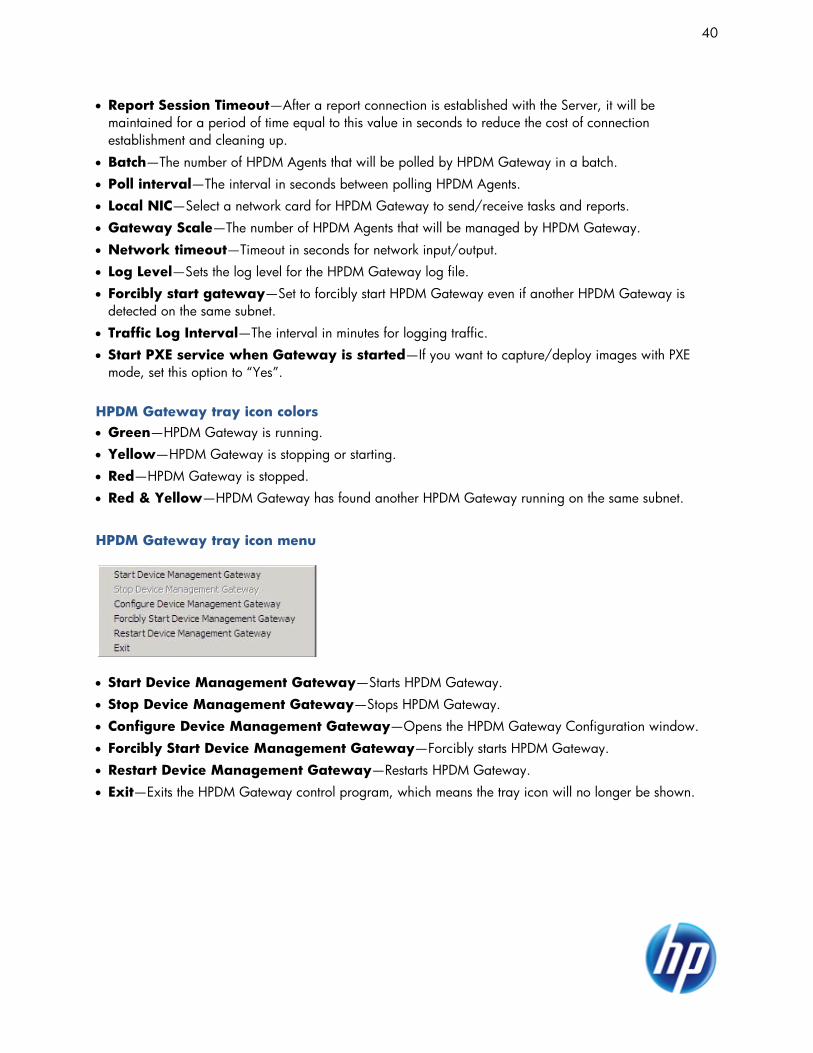
HPDM Gateway tray icon menu
• Start Device Management Gateway—Starts HPDM Gateway.
• Stop Device Management Gateway—Stops HPDM Gateway.
• Configure Device Management Gateway—Opens the HPDM Gateway Configuration window.
• Forcibly Start Device Management Gateway—Forcibly starts HPDM Gateway.
• Restart Device Management Gateway—Restarts HPDM Gateway.
• Exit—Exits the HPDM Gateway control program, which means the tray icon will no longer be shown.

41
Configuring DHCP tags For information about configuring DHCP tags, please refer to the Configuring DHCP Tags for HP Device Manager white paper.
Configuring HPDM Agent Configuring HP WES/XPe/CE clients 1. Log onto the client device as Administrator.
2. Open the Windows Control Panel and double-click HPDM Agent. You will see the following dialog.
There are two tabs in this dialog. The General tab contains all parameters for Agent settings. The Groups tab is an entry to set special grouping information for HPDM Console/Server use.

42
There are two radio options in the Groups tab. Selecting Get Pre-Assign Groups from DHCP Tag will make the Agent report in with grouping values to get from the DHCP server. Selecting Use Static Custom Groups allows you to set custom grouping values for this device manually.
When you choose Use Static Custom Groups and click Add, a dialog will appear and let you input the grouping value. You can choose the Group Name from a drop-down list and input a value for it. Configuring HP ThinPro/Debian clients 1. Log onto the client device as Administrator.
2. Open the Control Panel, go to the Management tab, and double-click HPDM Agent. You will see the following dialog.

43
There are two tabs in this dialog. The General tab contains all parameters for Agent settings. The Groups tab is an entry to set special grouping information for HPDM Console/Server use.
There are two radio options in the Groups tab. Selecting Get Pre-Assign Groups from DHCP Tag will make the Agent report in with grouping values to get from the DHCP server. Selecting Use Static Custom Groups allows you to set custom grouping values for this device manually.

44
When you choose Use Static Custom Groups and click Add, a dialog will appear and let you input the grouping value. You can choose the Group Name from a drop-down list and input a value for it. Agent parameters Although the GUIs differ a little between Windows and Linux, their parameters are the same. Here, we give explanations for each parameter. • Agent Version—The current version of HPDM Agent.
• Current Gateway—The IP address of the HPDM Gateway that is currently managing this Agent. You can change this value to make the Agent report in to another Gateway with either an IP address or a hostname. The Agent will refresh this value into a valid IP address every time it receives a task from an active Gateway.
• Backup Gateway—The IP address of a backup Gateway. The Agent tries to find a Gateway to work with on startup. If the Current Gateway is not available, the Agent will try to connect to the Backup Gateway.
• Pull Interval—Indicates the time interval that the Agent connects to the Gateway and asks for a task. Normally, tasks are pushed from the Gateway to the Agent when the Gateway gets a task. Sometimes the Agent is running on a device behind NAT, which means the Gateway has no approach to connect to the Agent. Tasks for devices behind NAT can only be executed after the Agent establishes a connection to the Gateway and pulls tasks from the Gateway.
• Log Level—Indicates which levels of logs should be written into the log file. When set at a particular level, errors of that level and higher are logged. There are three levels for HPDM Agent: INFORMATION, WARNING, and ERROR (from low to high). You can refer to the HP Device Manager User Guide for more details about logging.
• Delay Scope—Indicates a time range during which the Agent sends a startup report to the Gateway after startup. The Agent will randomly select a time in that range and send a startup report. This avoids net traffic peak. For example, consider that there are 100 devices. All of them have Delay Scope set to 10 minutes, and we send a reboot task to them all. The 100 devices all reboot, and then their Agents start on them. They will not report in at the 10th minute after that. Each of them uses a random time between 0–10 minutes. So, all 100 devices will report in within 10 minutes, avoiding net traffic peak.
• Get Pre-Assign Groups from DHCP Tag—Selecting this option will make the Agent report in with grouping values to get from the DHCP server. Refer to Configuring DHCP tags for information on how to set grouping values on a DHCP server for HP Device Manager.
• Use Static Custom Groups—Allows you to set custom grouping values for this device manually. The Agent will ignore values from the DHCP server and report in what you set.
• Group Name—Indicates the group. There are seven fields to choose from. You can set some or all of them.
• Value—Indicates the grouping value for the specified file.

45
Appendix A—Port usage in HP Device Manager The following standard and custom ports are used by HP Device Manager:
Standard ports
Port Protocol Purpose
67 and 68
UDP PXE - Bootstrap
69 UDP TFTP (Trivial File Transfer Protocol)
4011 UDP DHCP Proxy Service (this is an alternative to ports 67 and 68 if those ports are not available)
20 and 21
TCP FTP (Used for Repository)
22 TCP SSH Tunnel
5900 TCP VNC Server
5500 TCP VNC Viewer in Listen Mode
HPDM custom ports
Receiver Port
Sender Receiver Protocol Purpose
1099 Console Server TCP Console queries the RMI Registry.
40000 Server/ Agent
Gateway UDP Server/Agent polls gateway.
40001 Gateway Agent TCP Gateway sends task to Agent.
40002 Console Server TCP Console calls the remote objects on Server by RMI.
40003 Server/ Agent
Gateway TCP Server sends task to Gateway; Agent sends report to Gateway.
40005 Gateway Server TCP Gateway sends report to Server.
40006 Server PostgreSQL TCP The default database PostgreSQL listening port.
40008 Gateway Gateway Controller
TCP Gateway notifies Gateway Controller there are other gateways running in the same subnet.
40009 Agent Server TCP Agent sends resource information (CPU, RAM, Disk IO, Network IO, Processes, etc.) to Server, and Server sends stop process command to Agent.
40012 Server Master Repository Controller
TCP Server talks to Master Repository Controller
to manage Master Repository.


