January 2013 ISSUE No. 20 Carl Stone Jupiter Please send BAS Journal articles & contributions to the Editor Len Adam. [email protected]MEETINGS: Ladybridge Community Centre Beaumont Drive Bolton BL3 4RZ Non-members invited to drop in to meetings which are held every other Tuesday evening at 7.30 p.m. £2 charge per meeting or £20 annual membership. Go to http:www.boltonastro.co.uk/calendar to find the next meeting. There are plenty of parking spaces at the centre. In this Issue THE BOLTON ASTRONOMER The monthly journal of the Bolton Astronomical Society Have you spotted it yet? January Objects of Interest Hubblesite January Objects Video and transcript Len Adam Keep the content coming. Email the editor with articles and images [email protected]Image Processing Secrets Part 10 David Ratledge Next Meeting TELESCOPE ACTIVITY NIGHT Find out how to use that telescope you got for Christmas 18th January 2013 SHOOTNG THE MOON IN FULL COLOUR STARLESS PROCESSING Images from BAS Members Autoguiding 1 Ross Wilkinson and Dean Kos BAS Calendar Peter Miskiw and Len Adam LOAN EQUIPMENT 2 STARWAVE 80 REFRACTOR LATEST HISTORICAL DISCOVERIES THE OPENING OF THE MARKLAND HILL OBSERVATORY IN 1913 AND A 1927 VIEW INSIDE THE DOME Making a Time Lapse Movie of Jupiter Observing Log extract Leyland Observatory December 2012 Len Adam
Transcript
January 2013 ISSUE No. 20
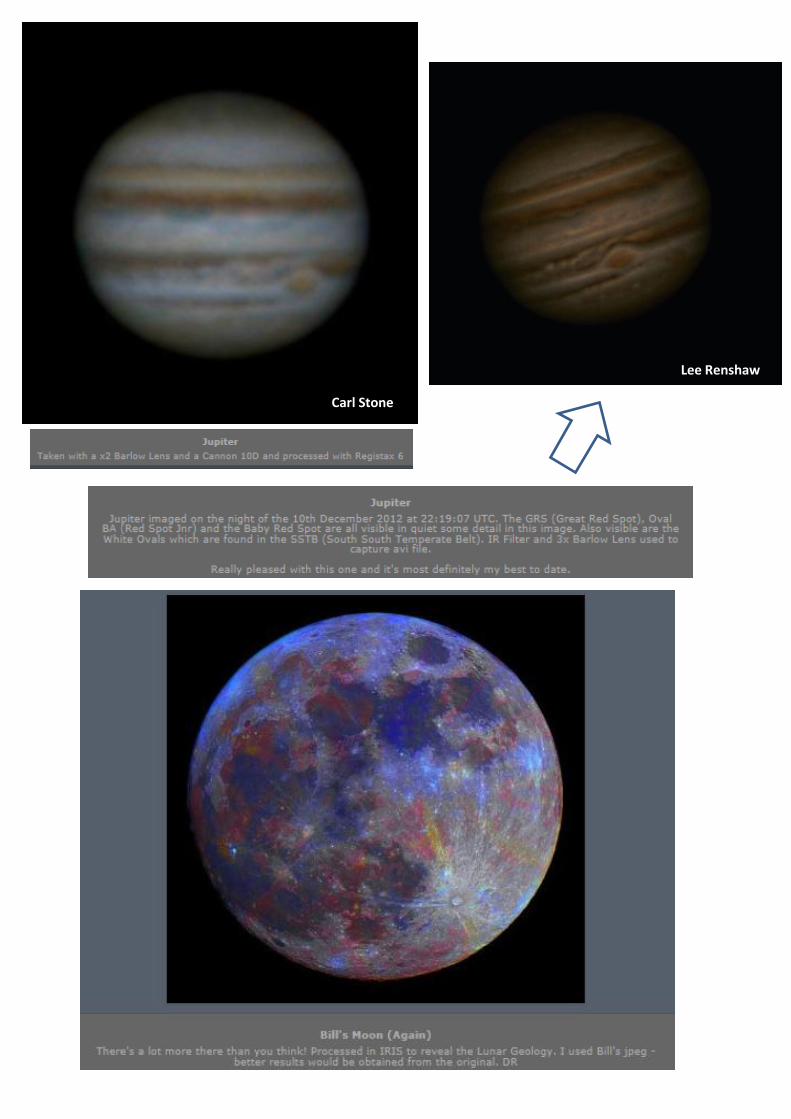
Carl Stone Jupiter
Please send BAS Journal articles & contributions to the Editor Len Adam.
MEETINGS: Ladybridge Community Centre Beaumont Drive Bolton BL3 4RZ Non-members invited to drop in to meetings which are held every other Tuesday evening at 7.30 p.m. £2 charge per meeting or £20 annual membership. Go to http:www.boltonastro.co.uk/calendar to find the next meeting. There are plenty of parking spaces at the centre.
In this Issue
THE BOLTON ASTRONOMER
The monthly journal of the Bolton Astronomical Society
Have you spotted it yet?
January Objects of Interest Hubblesite January Objects Video
and transcript Len Adam
Keep the content coming. Email the editor with articles
Find out how to use that telescope you got for Christmas
18th January 2013
SHOOTNG THE MOON
IN FULL COLOUR
STARLESS PROCESSING
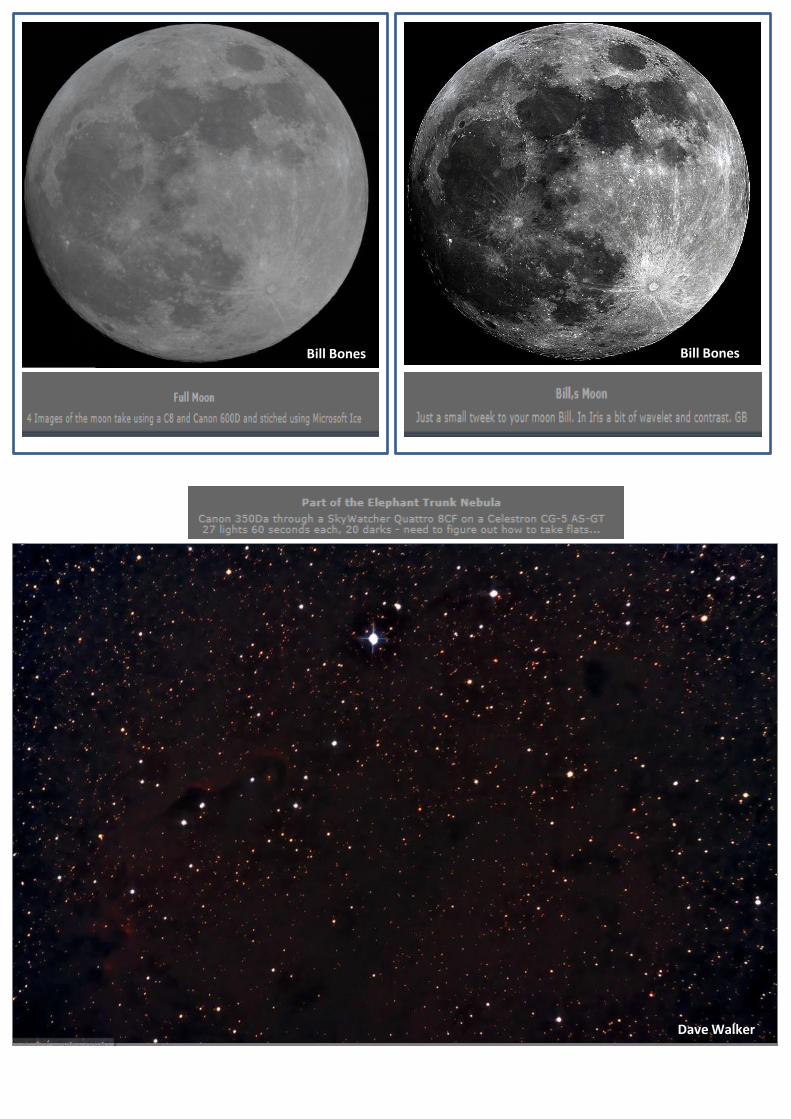
Images from BAS Members
Autoguiding 1 Ross Wilkinson and Dean Kos
BAS Calendar
Peter Miskiw and Len Adam
LOAN EQUIPMENT 2 STARWAVE 80 REFRACTOR
LATEST HISTORICAL DISCOVERIES THE OPENING OF THE
MARKLAND HILL OBSERVATORY IN 1913 AND A 1927 VIEW INSIDE
THE DOME
Making a Time Lapse Movie of Jupiter
Observing Log extract
Leyland Observatory
December 2012 Len Adam
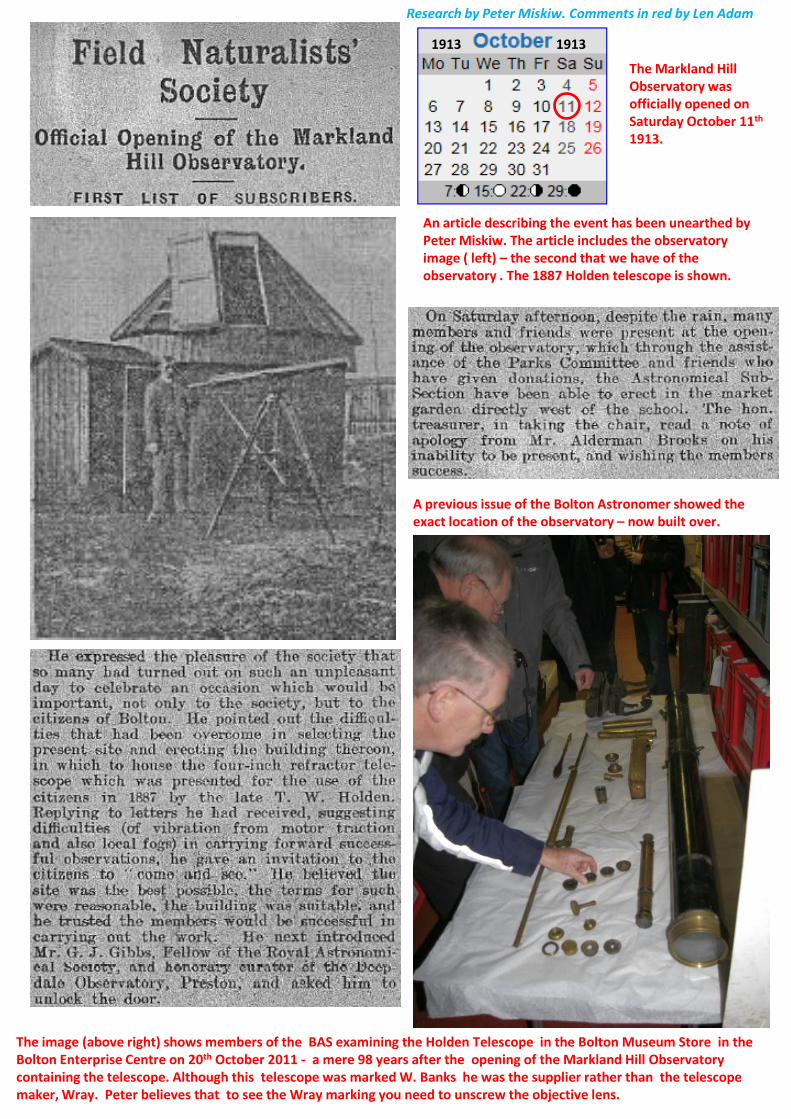
The Markland Hill Observatory was officially opened on Saturday October 11th 1913.
An article describing the event has been unearthed by Peter Miskiw. The article includes the observatory image ( left) – the second that we have of the observatory . The 1887 Holden telescope is shown.
A previous issue of the Bolton Astronomer showed the exact location of the observatory – now built over.
The image (above right) shows members of the BAS examining the Holden Telescope in the Bolton Museum Store in the Bolton Enterprise Centre on 20th October 2011 - a mere 98 years after the opening of the Markland Hill Observatory containing the telescope. Although this telescope was marked W. Banks he was the supplier rather than the telescope maker, Wray. Peter believes that to see the Wray marking you need to unscrew the objective lens.
Research by Peter Miskiw. Comments in red by Len Adam
1913 1913
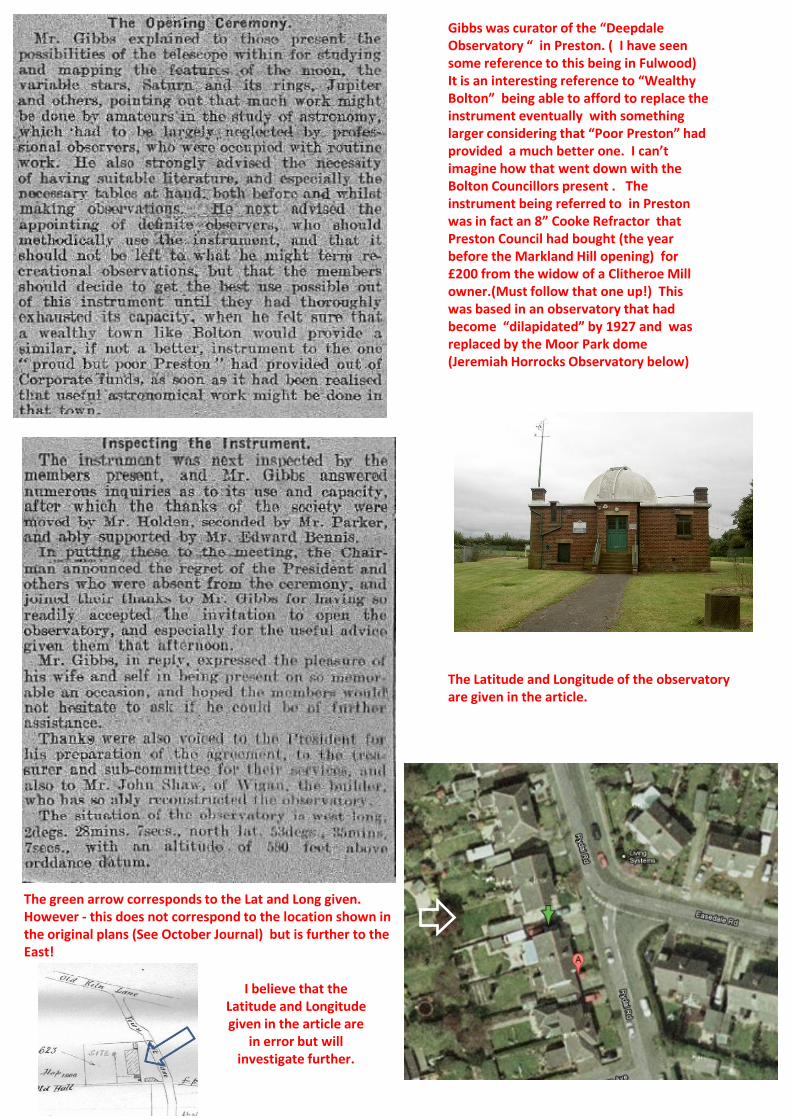
Gibbs was curator of the “Deepdale Observatory “ in Preston. ( I have seen some reference to this being in Fulwood) It is an interesting reference to “Wealthy Bolton” being able to afford to replace the instrument eventually with something larger considering that “Poor Preston” had provided a much better one. I can’t imagine how that went down with the Bolton Councillors present . The instrument being referred to in Preston was in fact an 8” Cooke Refractor that Preston Council had bought (the year before the Markland Hill opening) for £200 from the widow of a Clitheroe Mill owner.(Must follow that one up!) This was based in an observatory that had become “dilapidated” by 1927 and was replaced by the Moor Park dome (Jeremiah Horrocks Observatory below)
The Latitude and Longitude of the observatory are given in the article.
The green arrow corresponds to the Lat and Long given. However - this does not correspond to the location shown in the original plans (See October Journal) but is further to the East!
I believe that the Latitude and Longitude given in the article are
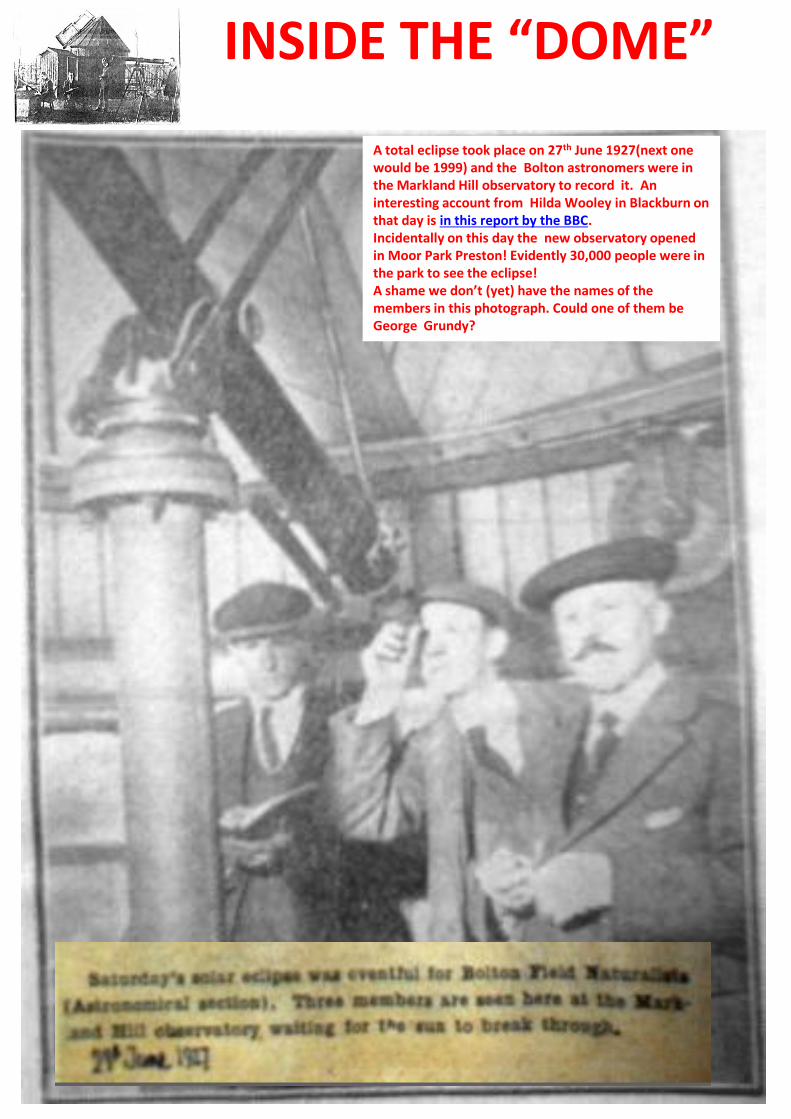
A total eclipse took place on 27th June 1927(next one would be 1999) and the Bolton astronomers were in the Markland Hill observatory to record it. An interesting account from Hilda Wooley in Blackburn on that day is in this report by the BBC. Incidentally on this day the new observatory opened in Moor Park Preston! Evidently 30,000 people were in the park to see the eclipse! A shame we don’t (yet) have the names of the members in this photograph. Could one of them be George Grundy?
If you’ve ever tried long-exposure astro-photography, you’ll have seen the effects of tracking errors on your pictures: even with a driven equatorial mount, the stars soon develop small trails. This effect gets worse the longer the focal length of your imaging system, but even with a telescope of modest focal length (e.g. a C8 with a focal reducer), exposures longer than 30 seconds can still suffer from trailing stars. Now although sharp images may still be obtained by stacking many short exposures, the results would be much better with 12x 5-min images than with 120x 30-sec.
Imperfect polar alignment (particularly with a portable tripod-mounted system) is the main cause of trailing, but with a permanent pier-mount the declination drift method could be used to eliminate this. However even with perfect polar alignment, the stars would still make tiny oscillations back and forth across the images – this is due to periodic errors caused by mechanical inaccuracies in the gears. You can easily measure these effects by deliberately mis-aligning your polar axis (e.g. point it East instead of North) and making a time-exposure: any deviation of your star-trails from smooth arcs shows up the periodic errors. The adjacent picture illustrates a bad example (from an early prototype barn-door mount).
So how can we get around this, and achieve un-trailed exposures of 5-10 minutes? The solution is guiding: continuously monitoring the position of one star viewed through the telescope and making tiny corrections to the drive-motors in the mount to keep it stationary in the field. In times past, this required manual control from a long-suffering observer looking through a cross-hair eyepiece (ask Gerald about his experiences), but happily we now have low-cost CCD-based auto-
guiding systems. Here a CCD guide-camera and computer can be used to do all the donkey-work.
The camera may be attached to a dedicated guide-scope piggy-backed on the main tube, but any differential flexure (i.e. “whackeriness”) between that and the
main imaging system will translate into guiding errors in your images! An alternative is to use an off-axis imaging system, where the guide-camera uses a small mirror assembly within the main optical path to divert the light from a star just outside the view of the main camera.
In either case, the guide-camera is connected to a computer running a program which continuously monitors the position of a single star and derives a pair of error signals from its drift along the RA and declination axes. From these it generates a pair of control signals which are fed back to the two motors in the telescope mount.
The declination guiding signal activates the motor in whichever direction is required to correct the error, but as the RA motor is already running continuously, its guiding signal either speeds up or slows down the motor in order to correct the error in that axis.
Now if you already have a Go-To mount which is controlled by your computer (via a serial lead to the handset, or by an EQMod2 connection) the guiding signals may also be routed this way. If you don’t have an existing PC-to-mount connection, then many mounts provide a Guide Port as an interface to the two-axis motors. But even a simple dual-axis hand-control (e.g. EQ3) can soon be modified to provide this Guide Port facility.
1 Apollo Launch Control, July 1969, see http://www.nasa.gov/62282main_countdown_launch.wav
Specialist guide-cameras (such as the QHY53 pictured) are available, which use a single USB connection for both the video from the camera and the control signals back to the mount. Here the guiding signal is connected between the back of the guide-camera and the mount’s Guide-Port (rather than trailing all the way back to the computer).
But we’ve recently devised our own CBE (Cheap, But Effective) system for any mount with a simple dual-axis handset (in the first case, a Vixen SP). The existing hand-control has been fitted with a new socket (wired up to its four push-buttons) which connects via an opto-isolated interface to the parallel (LPT) port on an old laptop. Then with an LE-modified webcam (connected via COM and USB ports) looking through a piggy-backed guide-scope, the PHD Guiding4 program will perform the continuous auto-guiding whilst
pictures are taken through the main telescope.
Trying it out in practice
Recently we’ve both been experimenting with the (free) PHD Guiding program, initially just using our Philips LE webcams looking through short refractors (f ~ 400mm), without trying to image anything. The adjacent picture shows Ross’s indoor test-bed with an 80mm f/5 refractor on a Celestron CG5-GT mount (in this case controlling the camera with the LPT port and the mount via the COM port). The mount wasn’t properly polar-aligned (Polaris wasn’t visible through the window anyway!), so there was plenty of error to track out.
The first obstacle was to get the camera running in LE mode with the PHD program. We had to overcome a few issues with webcam drivers and USB/COM port adaptors, but it all worked in the end. Then a bright target (Algol or even Jupiter) was used for the initial tests: on pressing the Push Here, Dummy button the program first performs an auto-calibration/training routine, where the mount nudges W, E, N & S in turn whilst measuring the displacement of the target star. This can take a few minutes, after which the auto-guiding starts.
As soon as we’d mastered this, Dean fitted his webcam to an old 300mm telephoto lens and used this as a guiding system on his Vixen SP mount, whilst his Canon DSLR imaged through the short refractor. And whereas he could previously only manage one-minute exposures without trailing, he was soon capturing 4.5-minute images with pin-sharp stars – and without even doing a proper polar alignment! As he said, “It blew me away and has given me some hope of now being able to take some decent images at long last. To be honest this has rekindled my interest a great deal, as I was constantly getting disheartened by the lack of precise polar alignment and only imaging sausage-shaped stars. The difference is considerable: I have never taken an image with round stars before, and certainly never even attempted to take a 4-min exposure of anything except Polaris, for the star-trail effect.”
Until recently, we’d believed that an auto-guiding system would be far too complex and time-consuming to set up just for a couple of hours’ imaging with a portable tripod-mounted system. But having already set up a webcam & PC for imaging, we were only adding a new imaging camera (DSLR) to the existing equipment.
Over the next few months we’ll see how well it works, how fiddly it is to set up, and report on our progress …
Starless Nights David Ratledge Introduction Narrowband filters are brilliant at overcoming light pollution and recording extremely faint nebulae but star colours are non existent or worse, all messed up. Is there a way to combine the colourful stars of a broadband image with the nebula detail of a narrowband image? Enter starless processing – getting rid of those pesky stars. Software It is not clear who first hit upon this technique but J-P Metsavainio in Finland seems to have been one of the first. His Astro Anarchy website is well worth a visit and he has made available for free a download of his star removal tool. This is an add-in for Photoshop and unfortunately does not function on its own. Annies’ Astro Actions, again an add-in for Photoshop, also includes star removal amongst its processing actions. This comes at a small cost – currently $15.
• Astro Anarchy (free). Available from: http://astroanarchy.blogspot.co.uk/
• Annie’s Astro Actions (small cost), Available
from: http://www.eprisephoto.com/astro-actions
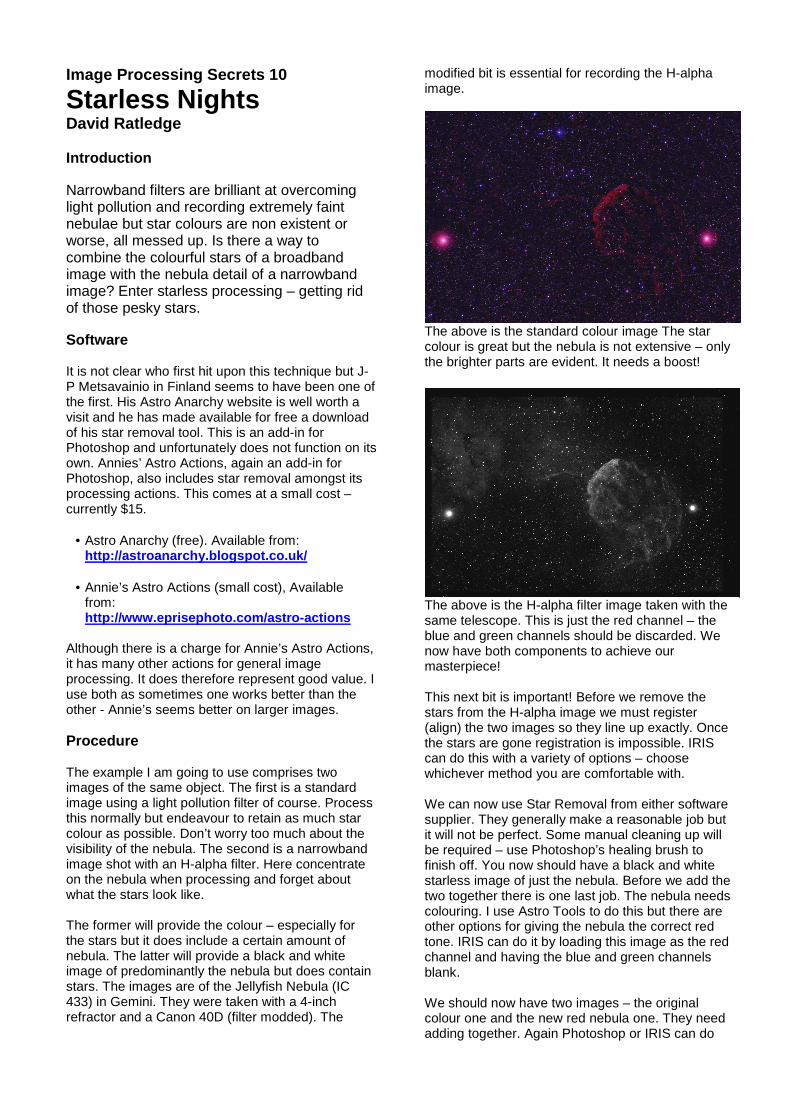
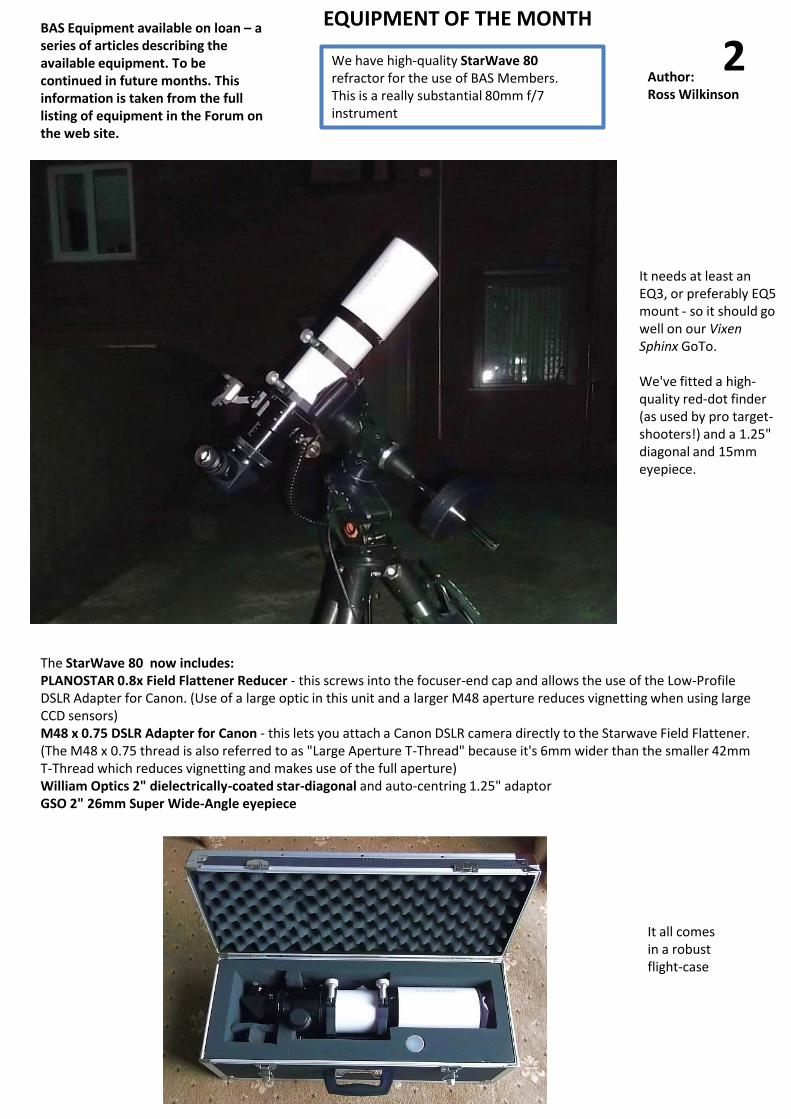
Although there is a charge for Annie’s Astro Actions, it has many other actions for general image processing. It does therefore represent good value. I use both as sometimes one works better than the other - Annie’s seems better on larger images. Procedure The example I am going to use comprises two images of the same object. The first is a standard image using a light pollution filter of course. Process this normally but endeavour to retain as much star colour as possible. Don’t worry too much about the visibility of the nebula. The second is a narrowband image shot with an H-alpha filter. Here concentrate on the nebula when processing and forget about what the stars look like. The former will provide the colour – especially for the stars but it does include a certain amount of nebula. The latter will provide a black and white image of predominantly the nebula but does contain stars. The images are of the Jellyfish Nebula (IC 433) in Gemini. They were taken with a 4-inch refractor and a Canon 40D (filter modded). The
modified bit is essential for recording the H-alpha image.
The above is the standard colour image The star colour is great but the nebula is not extensive – only the brighter parts are evident. It needs a boost!
The above is the H-alpha filter image taken with the same telescope. This is just the red channel – the blue and green channels should be discarded. We now have both components to achieve our masterpiece! This next bit is important! Before we remove the stars from the H-alpha image we must register (align) the two images so they line up exactly. Once the stars are gone registration is impossible. IRIS can do this with a variety of options – choose whichever method you are comfortable with. We can now use Star Removal from either software supplier. They generally make a reasonable job but it will not be perfect. Some manual cleaning up will be required – use Photoshop’s healing brush to finish off. You now should have a black and white starless image of just the nebula. Before we add the two together there is one last job. The nebula needs colouring. I use Astro Tools to do this but there are other options for giving the nebula the correct red tone. IRIS can do it by loading this image as the red channel and having the blue and green channels blank. We should now have two images – the original colour one and the new red nebula one. They need adding together. Again Photoshop or IRIS can do
this. In Photoshop paste the nebula image over the colour image and select “screen” as the blending mode. IRIS on the other hand has a command for adding a file to an already loaded file.
Starless H-alpha image coloured red You should now have the best of both worlds – colourful stars and a nebula revealed in all its glory. The procedure outlined here only works for red nebulae. If both blue and red nebulae are present then life is more complicated! The same procedure would need to be used for a starless blue & green channels and that too added to the final image.
Example of a multi-coloured starless image. Just add the stars back and voila! Conclusion This was just the barebones of starless processing. It can do much more but I would suggest mastering this basic example before attempting the more exotic like multi-coloured nebulae. What have you got to lose? Only stars!
Finished image – the best of both worlds. Not only a Jellyfish Nebula now but a seahorse too (top left).
Making a time-lapse movie of Jupiter Ross Wilkinson
With Jupiter being well-placed for imaging at the moment, I’ve been asked how I went about making my animation of a series of still-frames into a movie showing the planet (and its moons) rotating. Well, I was actually going to cover this process in a show & tell presentation at our recent meeting, but there were so many other good talks that we ran out of time!
The first stage is to capture a whole series of .AVI videos with your webcam (or DSLR in video mode), taken at 10-15 minute intervals over the course of a few hours. Keep each video down to a couple of minutes at most, so that the planet’s rapid rotation doesn’t start to blur the detail.
In order to get the best results over such a long period, you’ll need to have cooled down the telescope tube first (to reduce circulating convection-currents) and fitted a heater-tape to prevent dewing on its optics. And try to image the planet when it is highest in the sky (i.e. a couple of hours on either side of culmination). It’s also worth periodically re-optimising the focus, since when operating at such high magnification even miniscule thermal contractions in the ‘scope can have a noticeable effect.
After completing the capture sequence I’d suggest going to bed: the subsequent processing is quite time-consuming and so best left until the next day at the earliest! Then use RegiStax (or IRIS) to process each video sequence in turn to get a series of time-lapse stills, saving each one as an uncompressed (.BMP) file as you go.
Now unless your telescope mount’s tracking is precisely spot-on (or you were using an auto-guider), the positon of the planetary disc will shift from frame to frame in your time-lapse sequence, which would cause “jumps” in the video. So the sequence must be re-registered - I use IRIS to do this, but it may be possible in RegiStax too?
First load all the stills and select Planetary registration
(1) from the Processing menu (I’m not sure of the effects of the sub-image size or Spline resampling, but I just used the defaults). You also need to draw a box to enclose the planetary disk before hitting OK.
In this example I’m starting with the “jumpy” sequence jup1.bmp..jup9.bmp and then creating a new aligned sequence reg1.fit..reg9.fit.
Note that the output images are in the .FIT format, but subsequently running IRIS’s PIC2BMP command will convert them into a set of .BMP files - in this case, typing “PIC2BMP reg jupiter 9” will produce the sequence jupiter1.bmp..jupiter9.bmp in my /IRIS working/ folder.
Next we must convert all these .BMPs into .GIF images: there’s a handy batch-conversion function in the (free) IrfanView1 program, but maybe PhotoShop can do the same? In any event, we need to end up with the final sequence of jupiter1.gif..jupiter9.gif.
The last stage is to use the UnFREEz2 program to make the animation - the animated GIF files created by this process may then be viewed in any web-browser, so they are ideal for posting in the BAS Gallery (which won't handle .AVIs or .MPEGs).
When you drag & drop the files into UnFREEz, make sure that you've first got them into the right chronological order, and then select the whole group and pick them up by the first file before you drag them into the Frames box in UnFREEz.
The Frame delay in the animation is measured in "centiseconds" - so "50" = half a second. And when you click on Make Animated GIF you can choose the name for the movie – in this case jupiter13nov11.gif.
My animation may be viewed in the Gallery: http://www.boltonastro.co.uk/gallery/displayimage.php?pid=676&fullsize=1
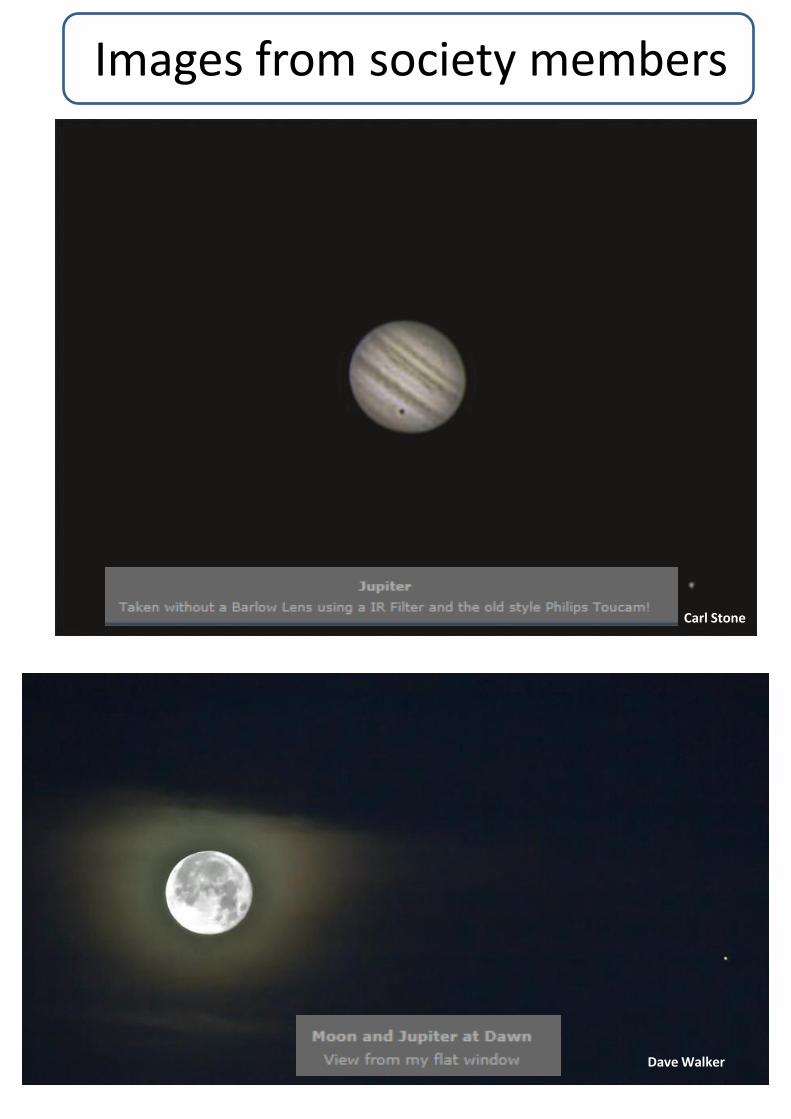
BAS Equipment available on loan – a series of articles describing the available equipment. To be continued in future months. This information is taken from the full listing of equipment in the Forum on the web site.
2 We have high-quality StarWave 80 refractor for the use of BAS Members. This is a really substantial 80mm f/7 instrument
It needs at least an EQ3, or preferably EQ5 mount - so it should go well on our Vixen Sphinx GoTo. We've fitted a high-quality red-dot finder (as used by pro target-shooters!) and a 1.25" diagonal and 15mm eyepiece.
Author: Ross Wilkinson
EQUIPMENT OF THE MONTH
It all comes in a robust flight-case
The StarWave 80 now includes: PLANOSTAR 0.8x Field Flattener Reducer - this screws into the focuser-end cap and allows the use of the Low-Profile DSLR Adapter for Canon. (Use of a large optic in this unit and a larger M48 aperture reduces vignetting when using large CCD sensors) M48 x 0.75 DSLR Adapter for Canon - this lets you attach a Canon DSLR camera directly to the Starwave Field Flattener. (The M48 x 0.75 thread is also referred to as "Large Aperture T-Thread" because it's 6mm wider than the smaller 42mm T-Thread which reduces vignetting and makes use of the full aperture) William Optics 2" dielectrically-coated star-diagonal and auto-centring 1.25" adaptor GSO 2" 26mm Super Wide-Angle eyepiece
Images from society members
David Ratledge
Ross Wilkinson
David Ratledge
Ross Wilkinson
Dave Walker
Carl Stone
Dave Walker
Dave Walker
Andy Martin
Bill Bones Bill Bones
Dave Walker
Carl Stone
Lee Renshaw
Dave Walker
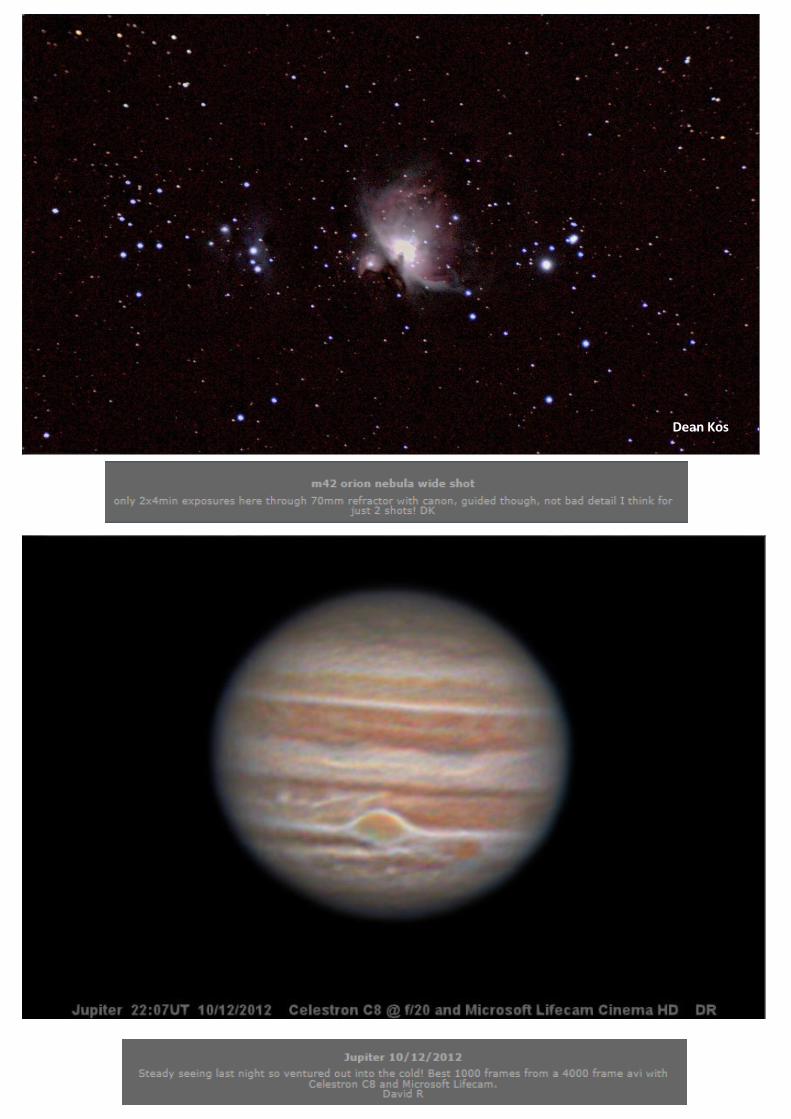
Dean Kos
Dean Kos
Dean Kos
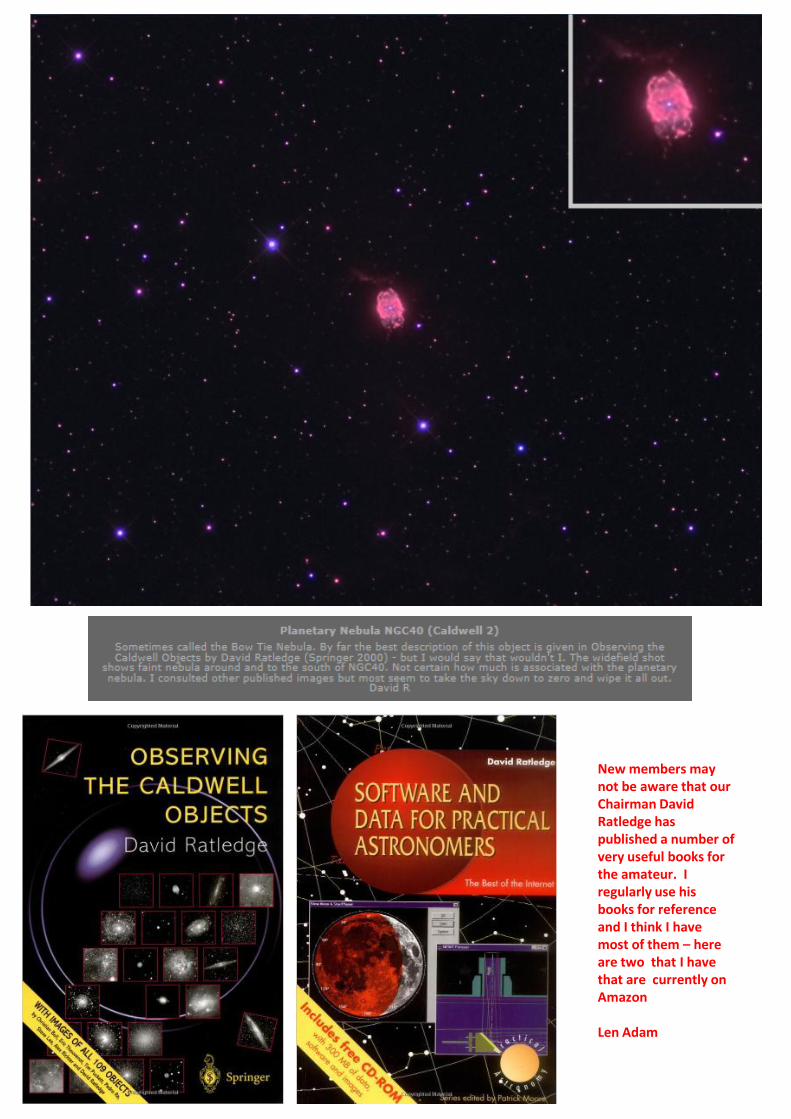
New members may not be aware that our Chairman David Ratledge has published a number of very useful books for the amateur. I regularly use his books for reference and I think I have most of them – here are two that I have that are currently on Amazon Len Adam
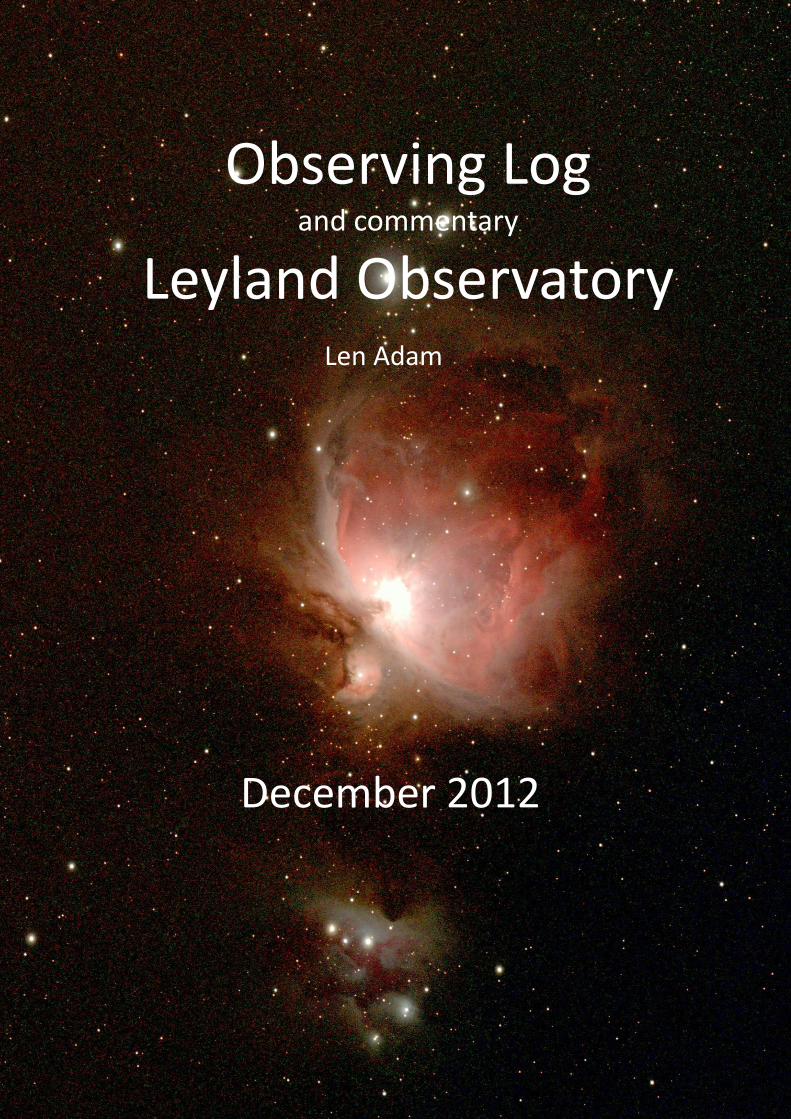
Observing Log and commentary
Leyland Observatory
December 2012
Len Adam
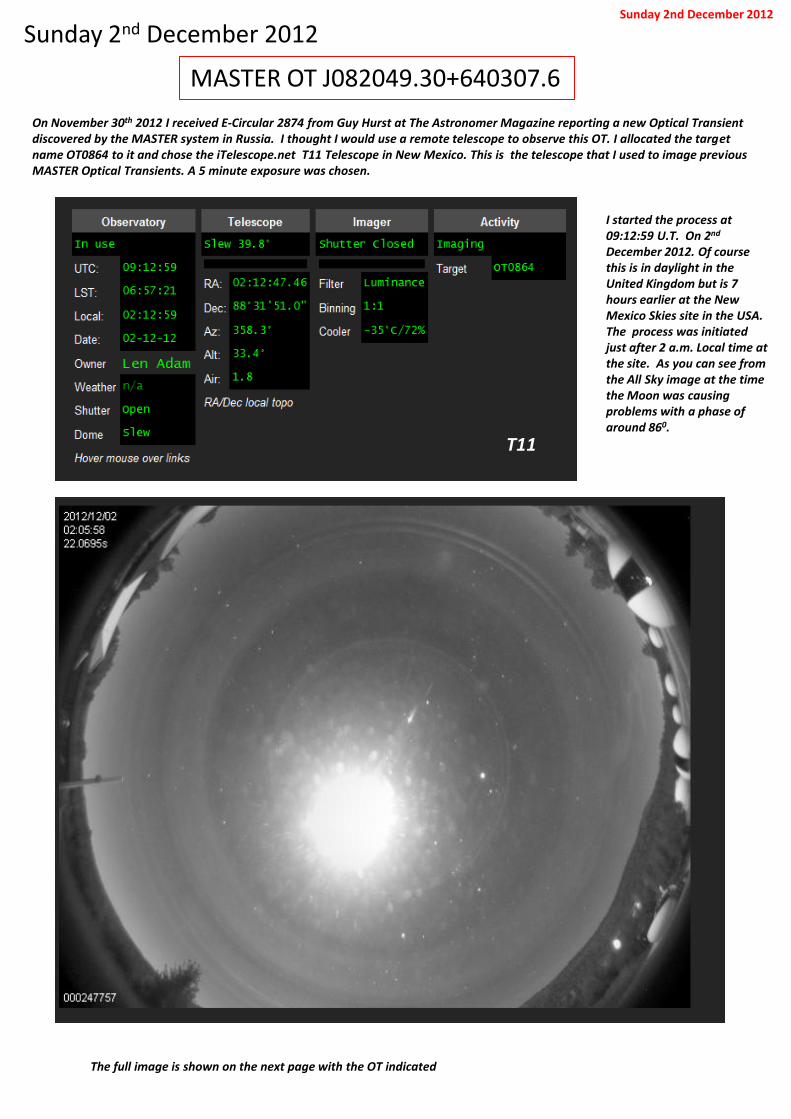
Sunday 2nd December 2012
MASTER OT J082049.30+640307.6
Sunday 2nd December 2012
On November 30th 2012 I received E-Circular 2874 from Guy Hurst at The Astronomer Magazine reporting a new Optical Transient discovered by the MASTER system in Russia. I thought I would use a remote telescope to observe this OT. I allocated the target name OT0864 to it and chose the iTelescope.net T11 Telescope in New Mexico. This is the telescope that I used to image previous MASTER Optical Transients. A 5 minute exposure was chosen.
I started the process at 09:12:59 U.T. On 2nd December 2012. Of course this is in daylight in the United Kingdom but is 7 hours earlier at the New Mexico Skies site in the USA. The process was initiated just after 2 a.m. Local time at the site. As you can see from the All Sky image at the time the Moon was causing problems with a phase of around 860.
T11
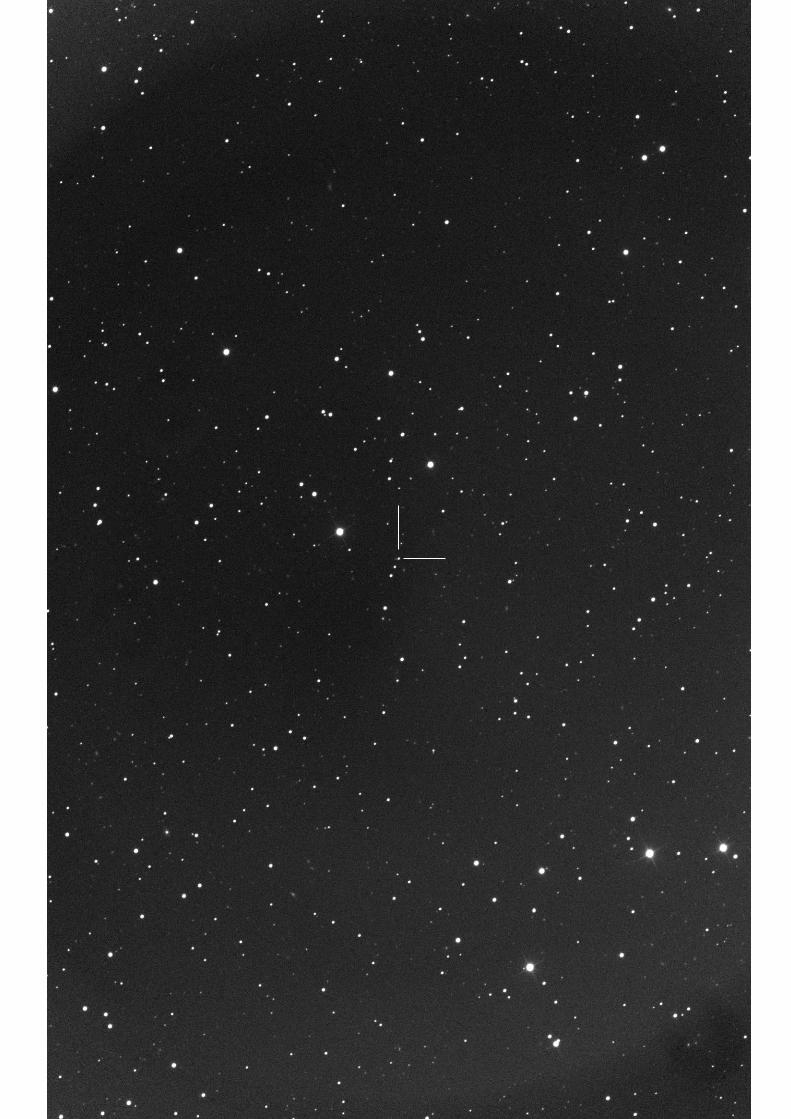
The full image is shown on the next page with the OT indicated
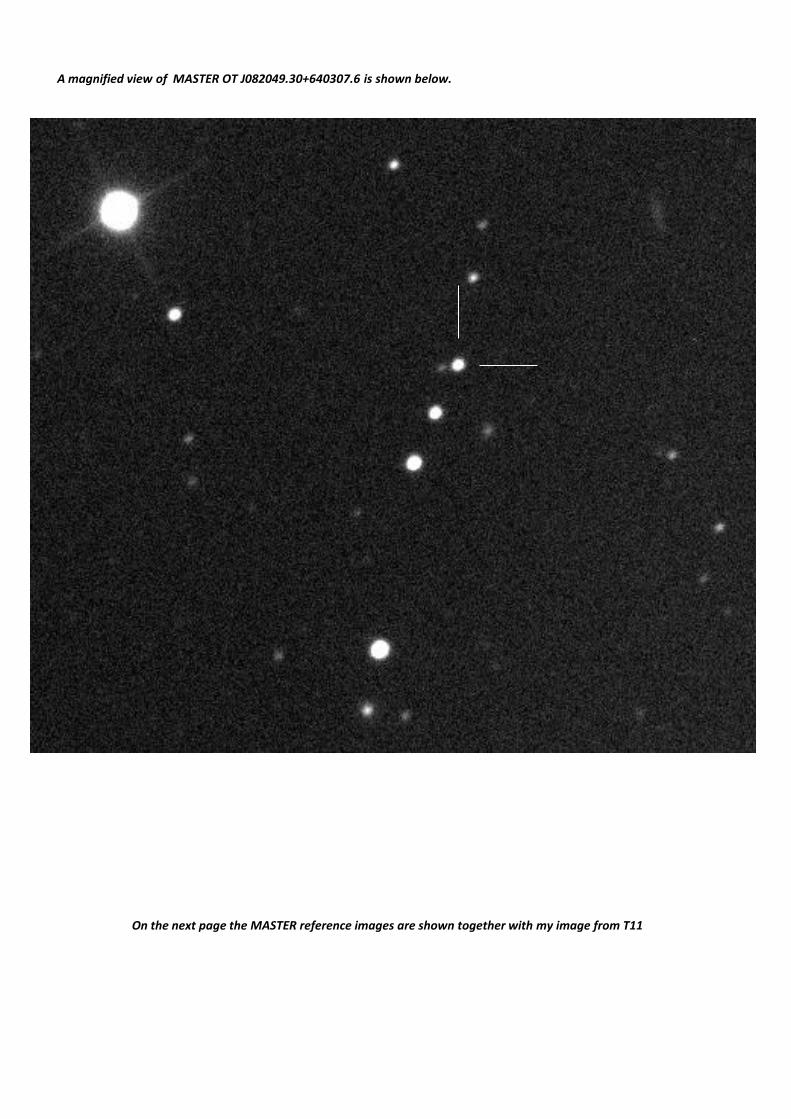
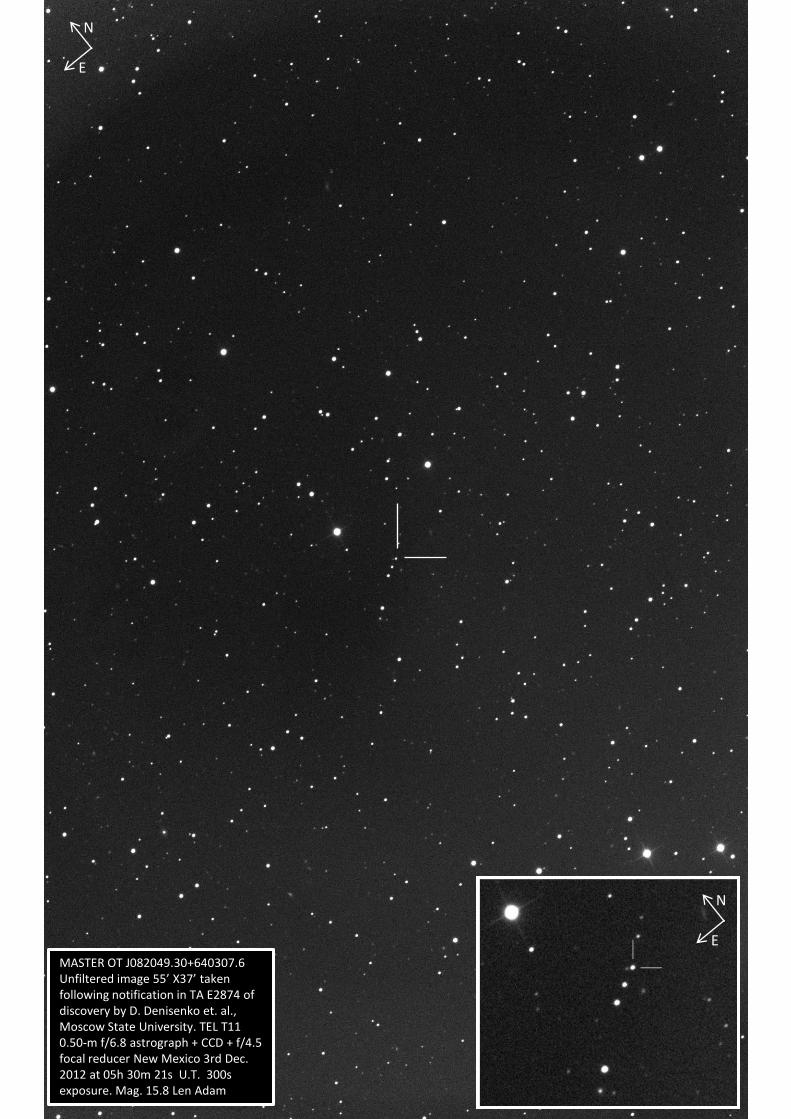
A magnified view of MASTER OT J082049.30+640307.6 is shown below.
On the next page the MASTER reference images are shown together with my image from T11
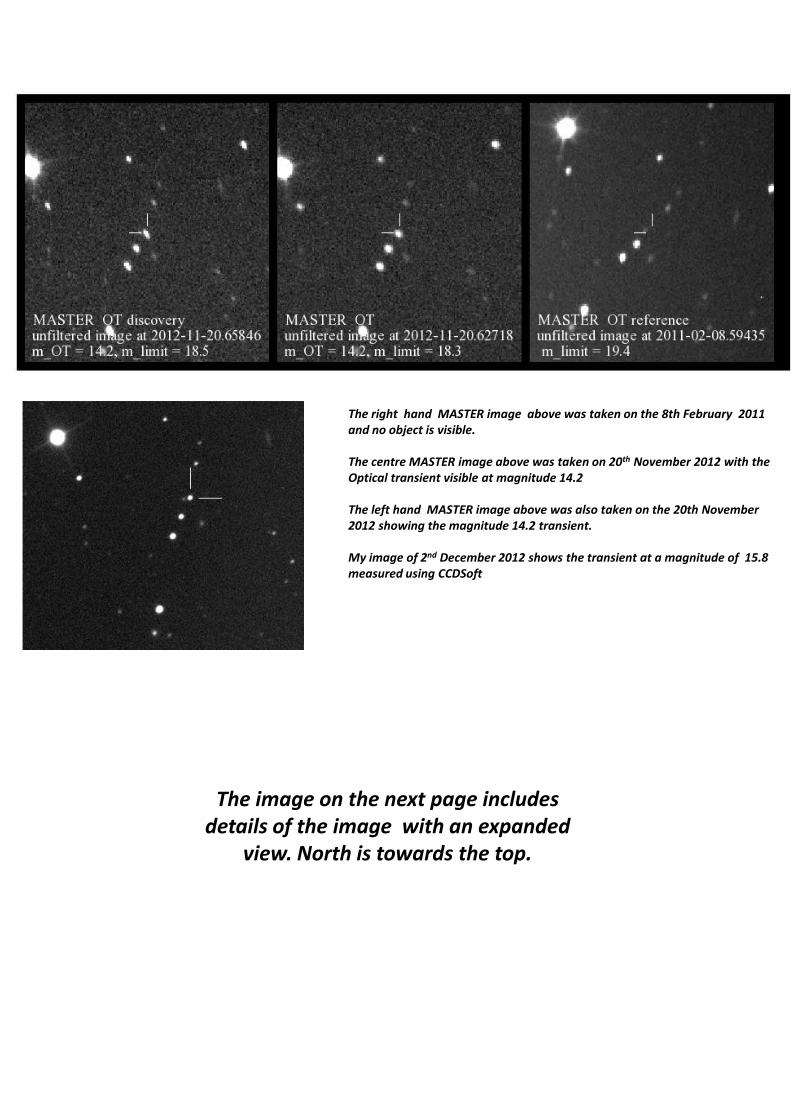
The right hand MASTER image above was taken on the 8th February 2011 and no object is visible. The centre MASTER image above was taken on 20th November 2012 with the Optical transient visible at magnitude 14.2 The left hand MASTER image above was also taken on the 20th November 2012 showing the magnitude 14.2 transient. My image of 2nd December 2012 shows the transient at a magnitude of 15.8 measured using CCDSoft
The image on the next page includes details of the image with an expanded
view. North is towards the top.
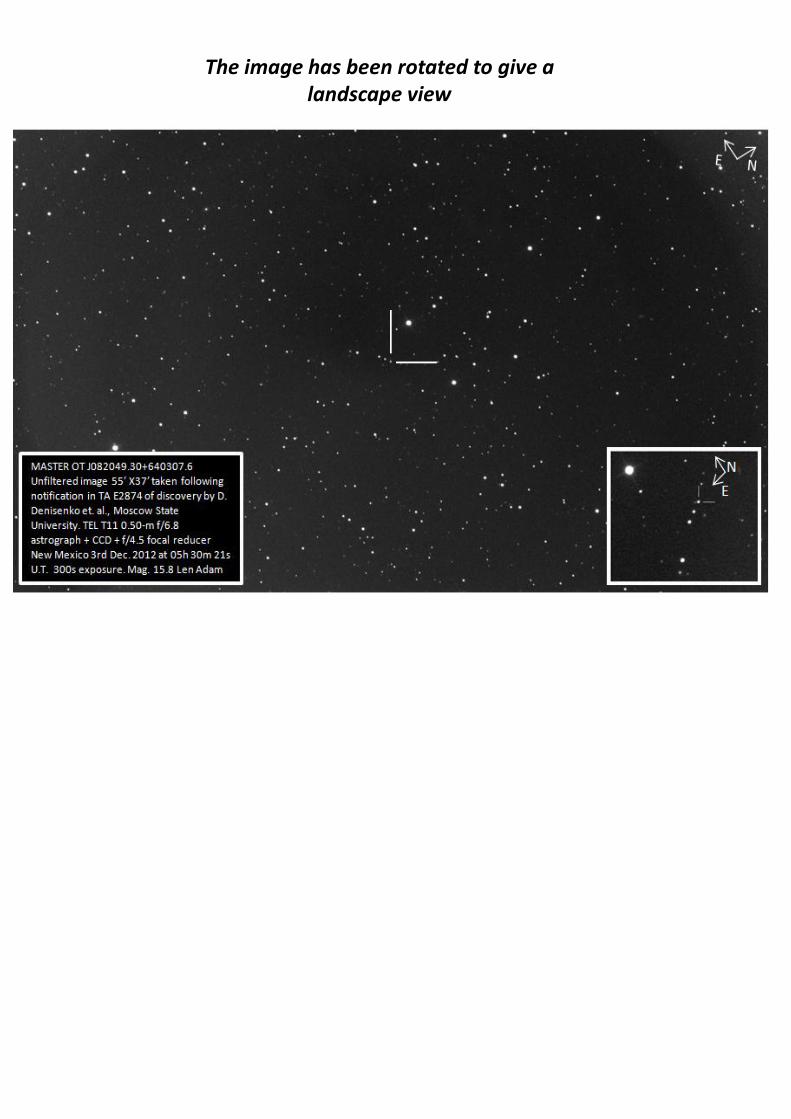
MASTER OT J082049.30+640307.6 Unfiltered image 55’ X37’ taken following notification in TA E2874 of discovery by D. Denisenko et. al., Moscow State University. TEL T11 0.50-m f/6.8 astrograph + CCD + f/4.5 focal reducer New Mexico 3rd Dec. 2012 at 05h 30m 21s U.T. 300s exposure. Mag. 15.8 Len Adam
N
E
N
E
The image has been rotated to give a landscape view
January Objects of Interest 2013
Len Adam Len Adam
Len Adam
Len Adam
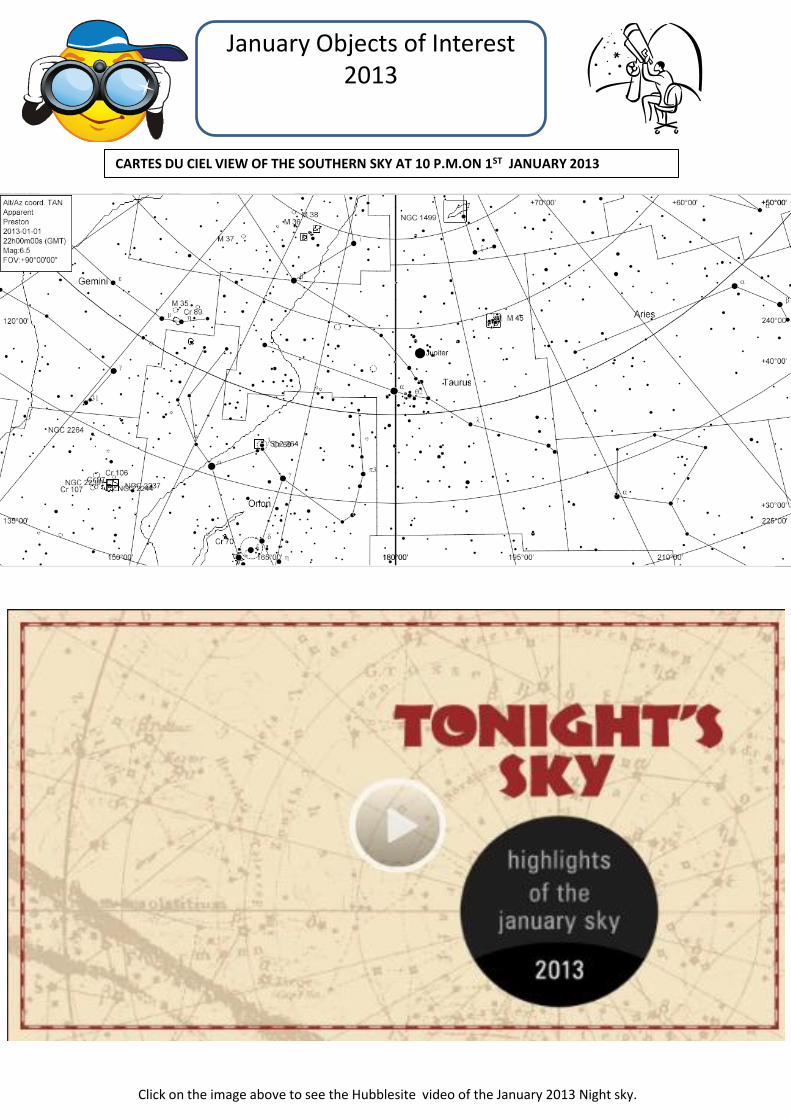
Len Adam On 25th February 2012 the Moon is close to Venus – shown at 7pm . Jupiter is higher up the ecliptic between Cetus and Aries Click on the image above to see the Hubblesite video of the January 2013 Night sky.
T Brandwood D Ratledge CARTES DU CIEL VIEW OF THE SOUTHERN SKY AT 10 P.M.ON 1ST JANUARY 2013
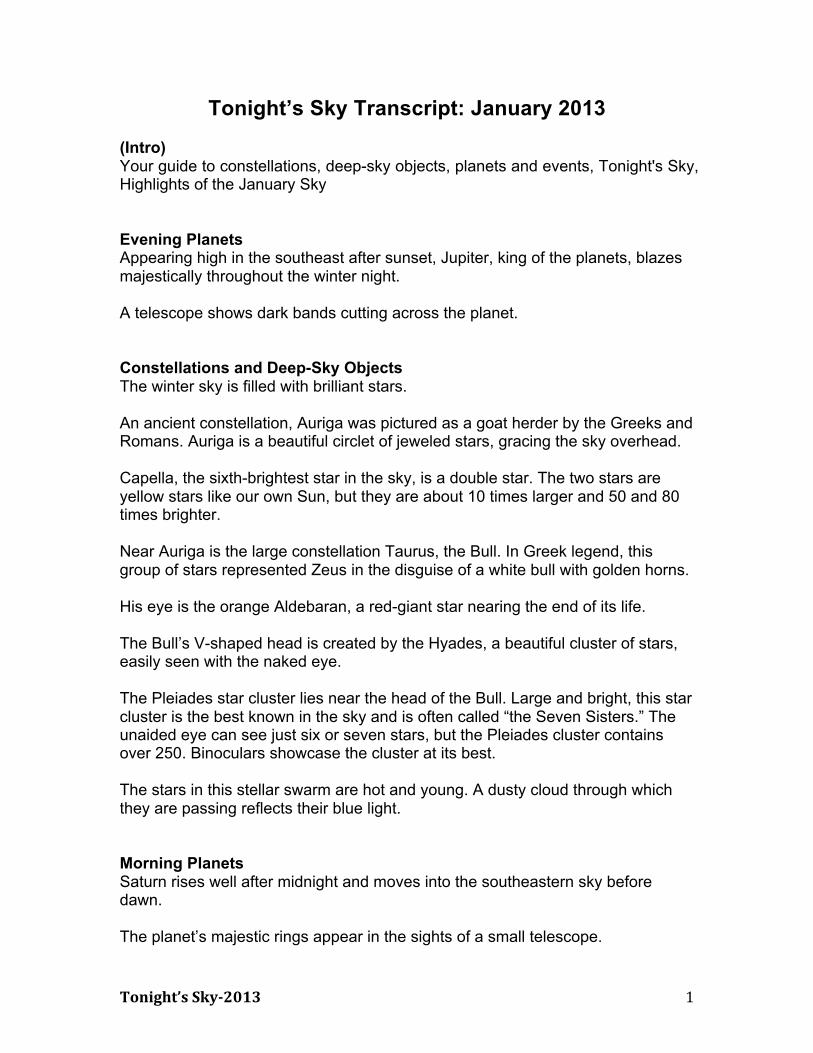
Tonight’s Sky Transcript: January 2013 (Intro) Your guide to constellations, deep-sky objects, planets and events, Tonight's Sky, Highlights of the January Sky Evening Planets Appearing high in the southeast after sunset, Jupiter, king of the planets, blazes majestically throughout the winter night. A telescope shows dark bands cutting across the planet. Constellations and Deep-Sky Objects The winter sky is filled with brilliant stars. An ancient constellation, Auriga was pictured as a goat herder by the Greeks and Romans. Auriga is a beautiful circlet of jeweled stars, gracing the sky overhead. Capella, the sixth-brightest star in the sky, is a double star. The two stars are yellow stars like our own Sun, but they are about 10 times larger and 50 and 80 times brighter. Near Auriga is the large constellation Taurus, the Bull. In Greek legend, this group of stars represented Zeus in the disguise of a white bull with golden horns. His eye is the orange Aldebaran, a red-giant star nearing the end of its life. The Bull’s V-shaped head is created by the Hyades, a beautiful cluster of stars, easily seen with the naked eye. The Pleiades star cluster lies near the head of the Bull. Large and bright, this star cluster is the best known in the sky and is often called “the Seven Sisters.” The unaided eye can see just six or seven stars, but the Pleiades cluster contains over 250. Binoculars showcase the cluster at its best. The stars in this stellar swarm are hot and young. A dusty cloud through which they are passing reflects their blue light. Morning Planets Saturn rises well after midnight and moves into the southeastern sky before dawn. The planet’s majestic rings appear in the sights of a small telescope.
Tonight’s Sky-‐2013 2
Events The Quadrantid meteor shower peaks on the night spanning January 3rd and 4th. Those who brave the cold might see up to 40 meteors per hour, although moonlight will make faint meteors harder to spot. (Ending) The night sky is always a celestial showcase. Explore its wonders from your own backyard. Credits Produced by the Space Telescope Science Institute, Office of Public Outreach Starfield images created with Stellarium Mythological constellation forms from Firmamentum Sobiescianum sive Uranographia by Johannes Hevelius, courtesy of the United States Naval Observatory Jupiter image courtesy of Todd Gross Pleiades Star Cluster image courtesy of Daniel Mahoney Saturn image courtesy of John Endreson Narrated by Nancy Calo Music written by Jonn Serrie Production: Lucy Albert, Greg Bacon, John Bintz, John Godfrey, Vanessa Thomas
Meetings Schedule January 2013 to May 2013
Meetings are held each month on Tuesday evenings, commencing at 7:30pm and concluding around 9pm. Our main meeting programme runs from September to May, and features a mixture of formal lectures and informal "Activity Nights" . Activity nights will be posted on the website so keep an eye on that for details. Admission is free to members, and visitors are welcome at £2 per visit. Over the summer we also get together on the first Tuesdays of June, July and August. The programme of our future meetings is shown below, but may occasionally be subject to late changes, so if you're travelling from some distance, please contact the BAS Committee by email to [email protected] to confirm before making your journey.
There are 9 issues of the Society Newsletter per annum with a summer break in June , July and August
The Newsletter is an online PDF that can be downloaded and printed if required.
Len Adam Sierra Stars 0.61m Cass 180s exposure 02h 38m PST 30 Sep 2011 (10h 38m GMT)